
Self-Hosting Model

Brief Overview
Self-hosting is a deployment option WalkMe offers in order to enhance the security of WalkMe on your site. Self-hosting allows you to keep all of your WalkMe content files on your servers to disconnect dependency on outside servers.
The Short Version
WalkMe customers include SaaS vendors and financial institutions that all value highly secure networks and services. In response to the need for this highly secure architecture, WalkMe offers a self-hosting feature. In this model, WalkMe items are initially created on WalkMe servers and then downloaded and uploaded onto your server.
A self-hosted deployment is commonly used when:
- WalkMe cannot have access to your site's information
- You are unable to add WalkMe to allow list due to security reasons
- Your devices operate on an intranet
How It Works
In the self-hosted model, the WalkMe content creation process is done on WalkMe servers. Once the items have been created, they are downloaded as a zipped file (compressed file). This file can then be uploaded to your servers. When an end-user accesses your site, WalkMe places a call to your servers directly and not to WalkMe servers.
In order for WalkMe to point to your servers, your Account Manager must configure your snippet. Every time a change is made to your WalkMe content, it must be re-published and the WalkMe files re-downloaded.
Downloading Your WalkMe Items
Create WalkMe items in the Editor as you normally would. Before you are able to download these items, your Account Manager must enable the feature. Once enabled, you will be able to download a zipped file of your WalkMe items from WalkMe's Admin Center and unzip it in the self-hosted location. To do so, follow these steps:
- Set up a location on a local server for the self-hosted files. Read more about how to set up server storage for WalkMe self-hosted deployment;
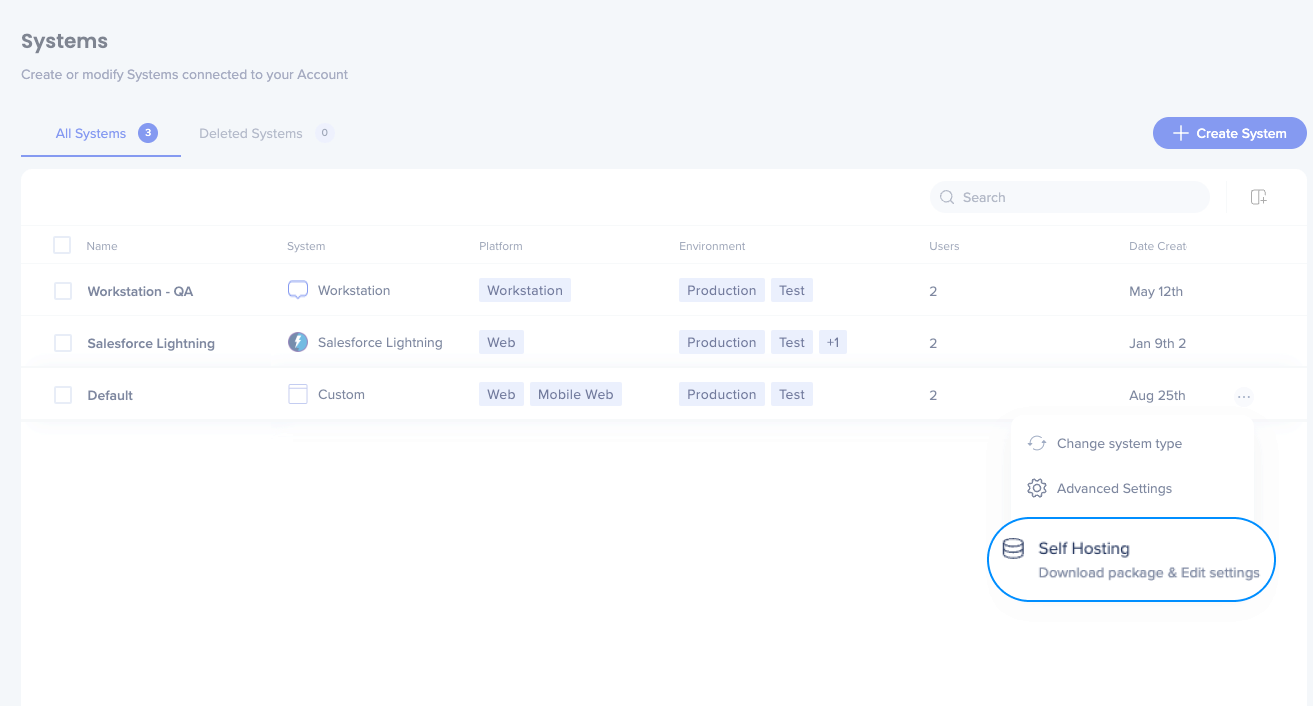
- Go to the Admin Center and access the Systems page
- Hover over the system that you need the file for and click the 3 dots menu. Select Self Hosting
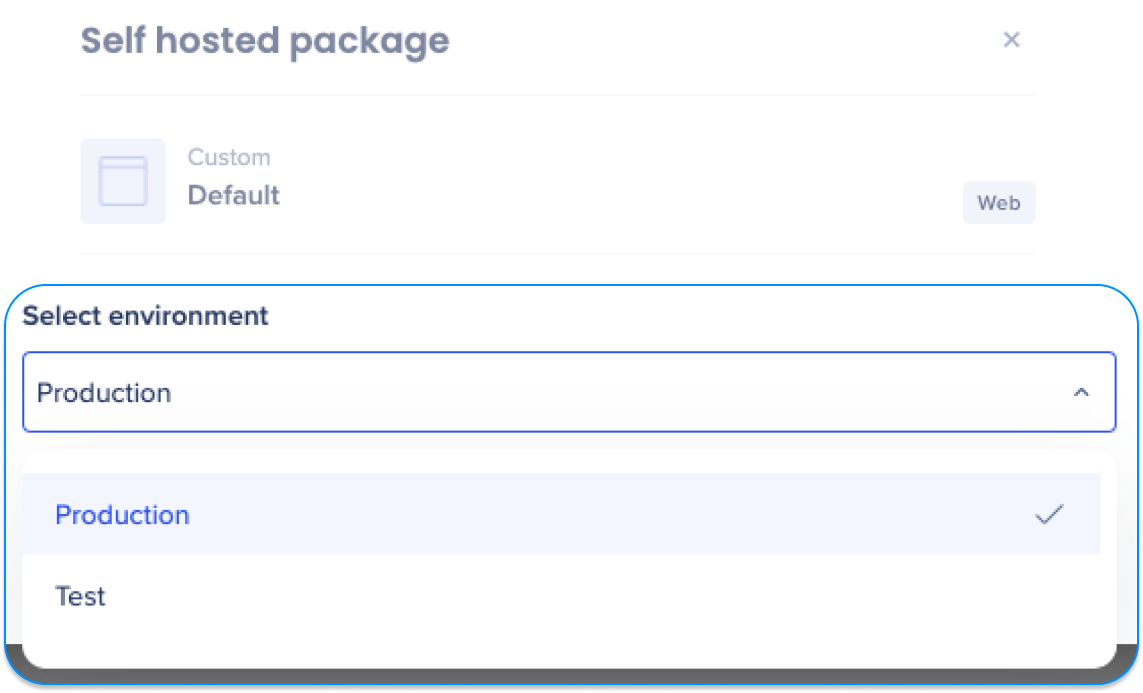
- Select the environment from the drop-down
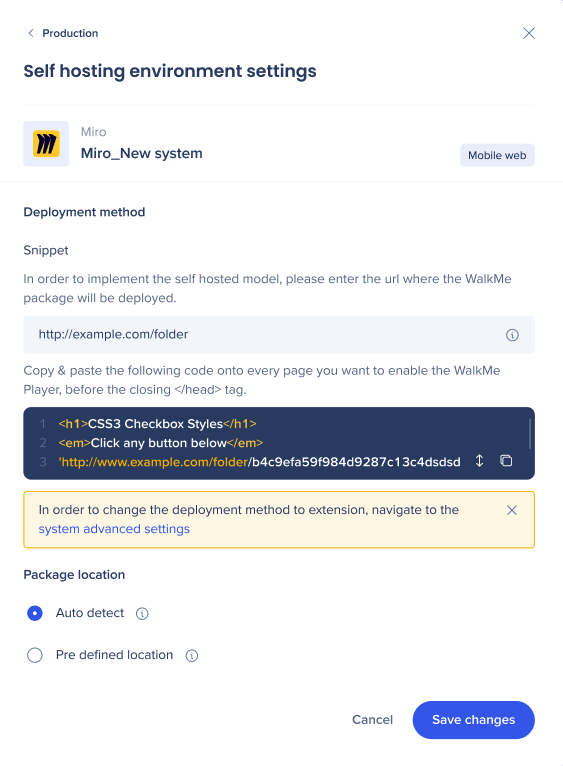
Note: WalkMe content needs to be published to the desired environment before completing the following steps. Read more about publishing WalkMe Items; - If you need to update or change anything, Click self hosting settings
- Make any edits as needed, like changing the URL where the WalkMe package will be deployed
- Click Save Changes
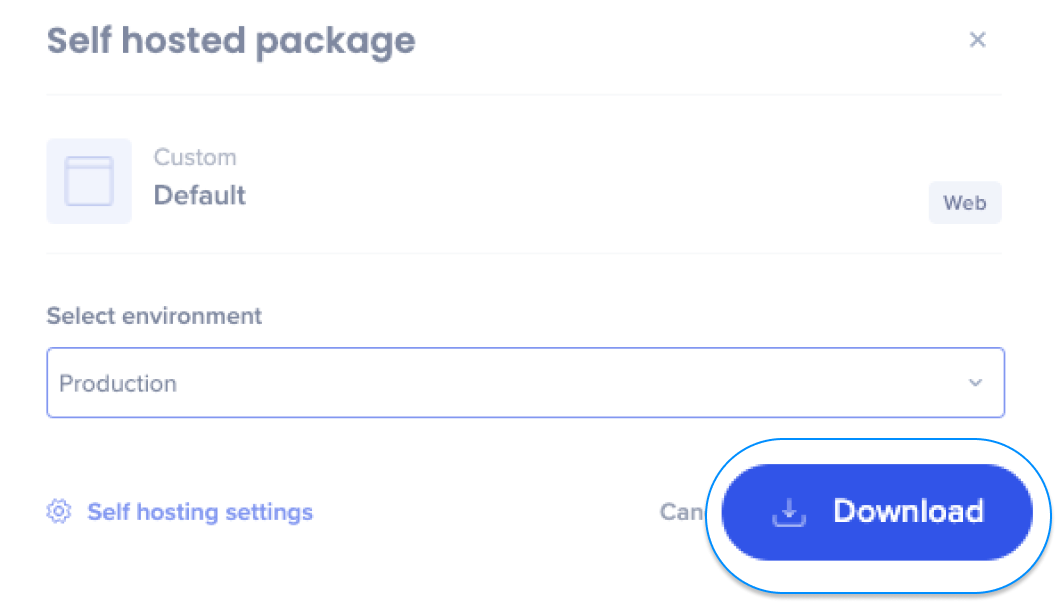
- Click Download to download the zip file containing the WalkMe files
- Unzip the WalkMe files in your destination folder on your local server
- Test your self-hosted deployment