
Smart Walk-Thrus

Brief Overview
Smart Walk-Thrus simplify the user experience by providing on-screen guidance at the moment of need so that your customers can complete any task successfully.
The Smart Walk-Thrus feature allows you to create tip balloons on your site to help guide users through any online process. Just like a GPS takes you from start to finish where you want to go, a Smart Walk-Thru will take your user through an online process with interactive step-by-step guidance.
Use Cases
Here are a few more examples of how Smart Walk-Thrus can be used:
- Feature Adoption: Shorten the time it takes customers to adopt new software, boosting customer experience and loyalty.
- Onboarding and Training: Onboard and train employees faster by providing immediate and relevant guidance on screen. Smart Walk-Thrus allow users to learn as they work so no time is wasted.
- Support: Provide self-service support to customers with engaging and simple guidance for an effortless and personalized online experience.
Depending on your user's needs, configure the Smart Walk-Thru to start when the user clicks a Launcher, searches in the Player Menu, clicks a Task in the tasklist, opens a Permalink, clicks the action button in a ShoutOut or configure it to start automatically.
Smart Walk-Thru Components
In the WalkMe Editor, the Smart Walk-Thru is displayed in a clear and intuitive Map. The Map uses icons and symbols to represent different types of steps and logic.
Smart Walk-Thrus are made of Steps, Flow Steps, and Popups:
- Steps appear as tip balloons on the screen giving users directions through a process. In the Smart Walk-Thru map, steps appear as blue balloons. Steps point to an element on the screen and give instruction; for example, “Enter text in this field” or “Click this button.” Each step also has a trigger - the action which will cause the step to proceed to the next step; for example, when the user enters text into the associated element or clicks a button.
- Flow Steps function behind-the-scenes to alter the flow of the Smart Walk-Thru; for example, they can split the Smart Walk-Thru into different paths, wait for a certain condition before continuing, or handle errors. Flow Steps appear as orange icons in the Smart Walk-Thru map. Read more
- Popups are used to draw your user's attention to the featured text. Unlike regular step balloons, Popups are not attached to an element but appear in the center of the page. Popups can be placed anywhere within a Smart Walk-Thru. Read more
Smart Walk-Thru Map in the Editor
Create a Smart Walk-Thru
-
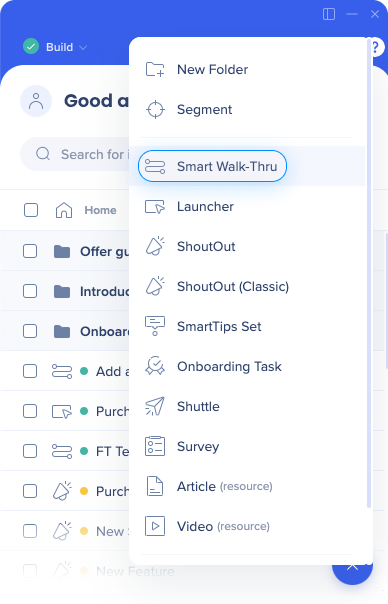
- Click on the Add new icon and select Smart Walk-Thru
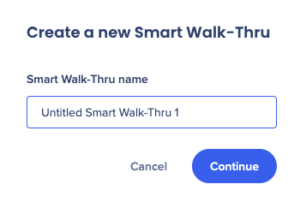
- Give your Smart Walk-Thru a name and click Continue
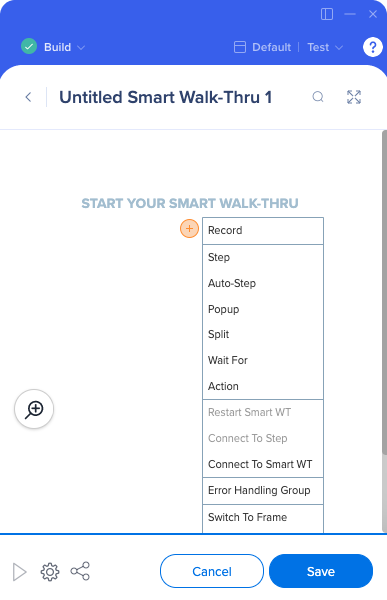
- Hover over the + icon and click Step: A Step is represented visually on the page with a tip balloon overlaid on the screen
- Capture the step: After clicking Add Step, the WalkMe Editor will minimize and you will be in Capture Mode. Capture Mode allows you to select an element for your step. Click on the element highlighted by a blue box to select it. Read more.
- Configure the Step Balloon: Once the element has been selected, WalkMe will autocomplete details such as title and trigger based on the element. If you rather manually configure these, click the advanced tab at the bottom of the element capture balloon.
- Step Name: This appears inside the balloon and provides the user with instructions.
- Step Note: This note will appear in the Editor and will only be visible by other WalkMe Builders (not your end-user).
- Triggers: Triggers are the actions that activate the next step.
- Step Position: Move the position of the balloon.
- Element Grade: The element grade tells you the strength of the element.
- Continue adding steps: Once the first step has been configured, click Next Step to return to Capture Mode and capture additional steps.
- To navigate to a different page, use the toggle in the Editor (or the Ctrl key on your keyboard) to switch in Navigate Mode. This will allow you to move around to different pages and click buttons on-screen without capturing them as elements.
- Once you've found the element you wish to anchor your Step to, use the toggle or the Ctrl key to switch the Editor back to Capture Mode. Then, configure your next step as described above.
- When you've captured all your desired Steps, click Done!
- The WalkMe Editor will now reopen and you will see all the Steps you just created.
- Steps will appear as blue balloon icons in the step list. When you hover over a balloon, you will be able to play the Smart Walk-Thru starting from that step, view a screenshot, duplicate delete or delete the Step, or add a Start Point or Peer Step.
- Click on the Add new icon and select Smart Walk-Thru
Modify a Step
To modify a Step or Popup Step after creating it, click on it to open the Step Options Menu. Here, you can change the balloon position, title, text, and triggers in the Interaction tab. In the other tabs, you can further modify Appearance, Precision, or add a Note.
Step Interaction
In the Interaction tab, you can modify the text, balloon position, and triggers.
You can use the "Edit on Page" button to edit directly on the page.

Design Options
There are two ways to change the design of your balloon.
- The first is to select a pre-made design from our Design Gallery.
- The second is to take complete control of the design of your balloon by using CSS.
Clicking Change Design in the top right of the Interaction tab opens the Design Gallery. The Design Gallery lets you select a design for your specific balloon. You can also set it at the global level from the Walk-Thru's Settings page.
Edit advanced templates and make then your own by using our HTML/CSS Customization console.
WYSIWYG Editor:
The What-you-see-is-what-you-get Editor (WYSIWYG) allows you to easily change the look and content of your balloon and see the results instantly.
Tools in WYSIWYG Editor:

- Font Size
- Bold
- Italic
- Underline
- Font Color
- Text Alignment
- Add Link: Add a URL hyperlink
- Add Bulleted List: Add bullet points to a list of items in the text of the balloon
- Add Smart Walk-Thru Link: Creates a link that launches another Smart Walk-Thru
- This link will stop the current Smart Walk-Thru and launch the linked one. In order to link to a Smart Walk-Thru, the linked-to Smart Walk-Thru must have already been created and have a Walk-Thru ID
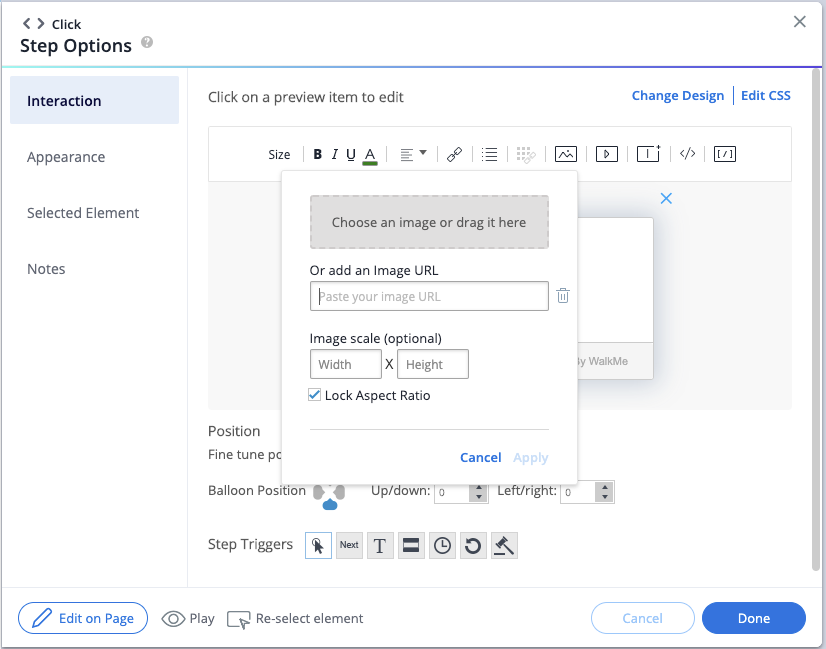
- Add Image:
- Adding a new image can be done by uploading an image from your computer, or inserting its URL (in which case, the image must be hosted online before it can be inserted);
- Supported file types include JPG, JPEG, PNG, GIF;
- The maximum file size is 500KB;
- Uploaded images are hosted on a dedicated bucket in Amazon S3;
- Image width and height from URL are adjusted automatically to the Balloon or ShoutOut size automatically, keeping the original image aspect ratio;
- You can adjust the image's width and height if needed by double-clicking on the image to edit;
- You can use "Lock Aspect Ratio" to lock the aspect ratio so that it remains in the same ratio when resized;
- You can remove the image by clicking on the trashcan icon next to the image URL, or by deleting it using backspace or delete while editing the text in the text editor;
- BBCode format: [img]img_URL[/img];
- BBCode format with width and height: [img=widthxheight]img_URL[/img] (e.g., [img=40x24]img_URL[/img].
- Add Video: Enter a video URL into the corresponding video platform
- Videos can be played from any platform as long as they are in MP4 format using an iFrame (see BBCode in the table below). Enter width and height if needed
- Add iFrame: Load a webpage in a frame
- Add Dynamic Text: Add dynamic text, such as a user's actual name, in a balloon
- BBCode: Format the text using BBcode. See Examples below:
Feature BBCode Align text in the center [div style="text-align:center"]text[/div] Strike through [s]text[/s] Tables [table]{rows}[/table] Table rows [tr]{cells}[/tr] Table content cells Heading cell: [th]{content}[/th] Content cell [td]{content}[/td] Link to email [url=mailto:name@company.com]name@company.com[/url] - From the preview balloon, you can edit the following:
- Title: Edit the main instruction for the user
- Text: Include additional instructions or details for the step if desired
Position:
Change where the step balloon appears in relation to the element selected (further customize position in the Appearance tab). Modify the position further by changing the pixel placement up/down and left/right.
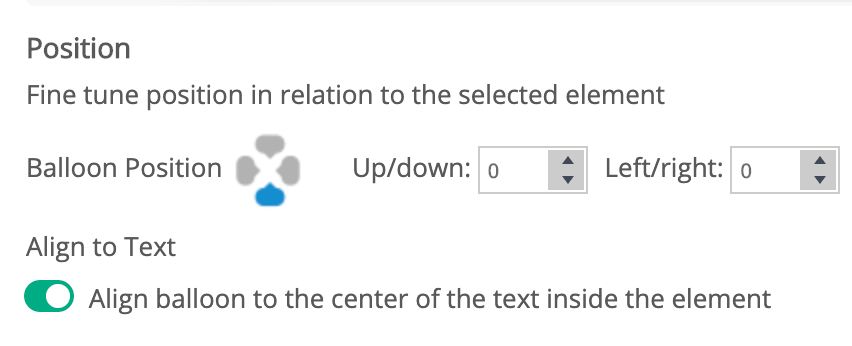
Align to text
By enabling this feature, the Smart Walk-Thru balloon will point to the center of the text inside the element, even if the text inside the element is not aligned to both sides.
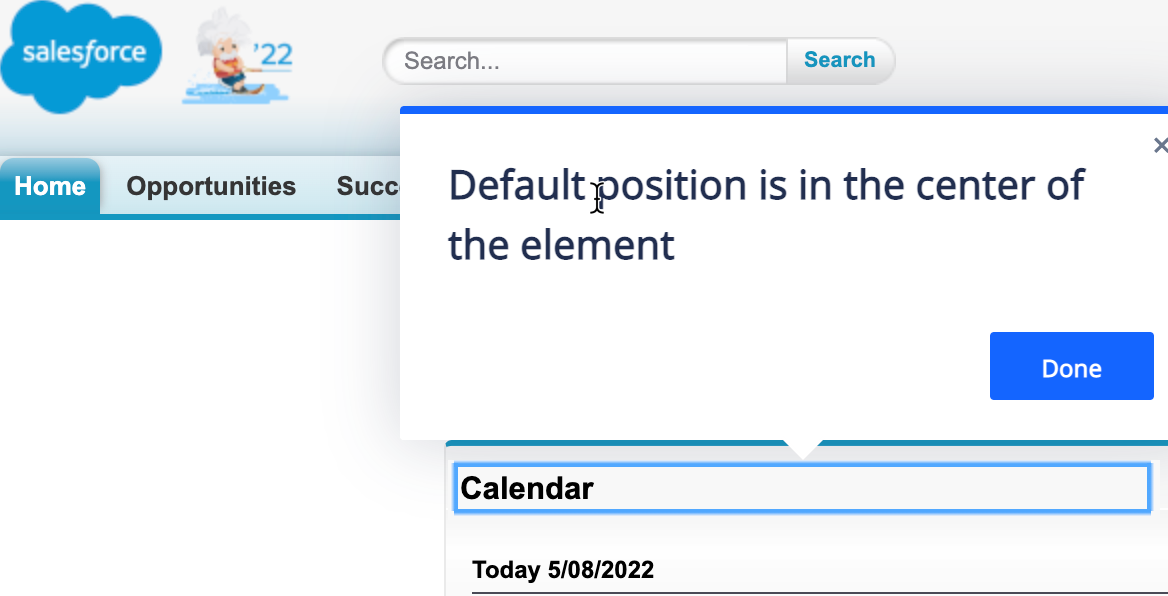
When align to text NOT enabled (default), the balloon aligns to the middle of the selected element:
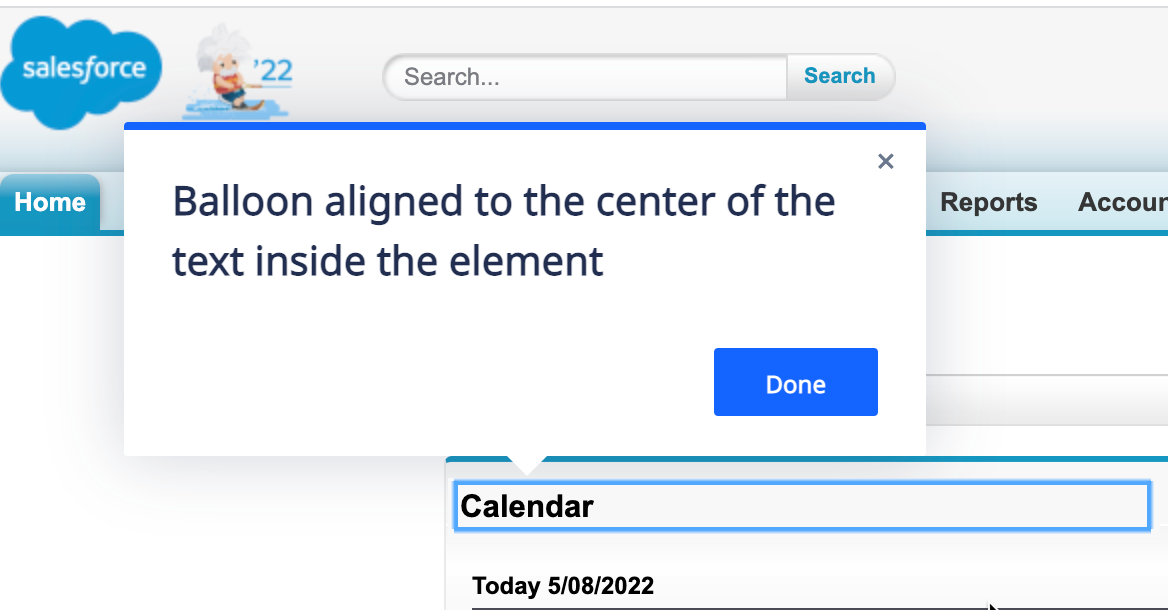
When align to text is enabled, the balloon will align to the center of the text within the element
Step Triggers:
Determine what action will move the Smart Walk-Thru onto the next step. Triggers drive the guidance forward and make it interactive.
- Click: The next step will play once the user clicks the element
- Next: The next step will play once the user clicks the Next button on the balloon
- Pro-Tip: Other triggers can be combined with Next by pressing Ctrl on a PC keyboard (or Command on a Mac keyboard) and selecting the second trigger
- Type: The next step will play once the user enters text into the selected text field
- Hover: The next step will play once the user hovers over the element
- Delay: The next step will play automatically after a set number of seconds
- Refresh: The next step will play upon page refresh
- Custom Trigger: Create a rule that will tell WalkMe when to move to the next Step
- Pro-Tip: You can use this trigger type in order to add additional elements on the screen that can trigger the Step
- Drop-Down Menu Triggers: The following triggers only appear as options when a drop down menu element is selected:
- Select Any: The next step will play once any item in a drop down menu is selected
- Select Specific: The next step will play once a specific drop down item is selected
Export a Smart Walk-Thru as a PDF
If you would like to show a Smart Walk-Thru's flow from a bird's eye view or train employees on your Smart Walk-Thru building technique, you can export your Smart Walk-Thru step list as a PDF.
To export your step list, follow these steps:
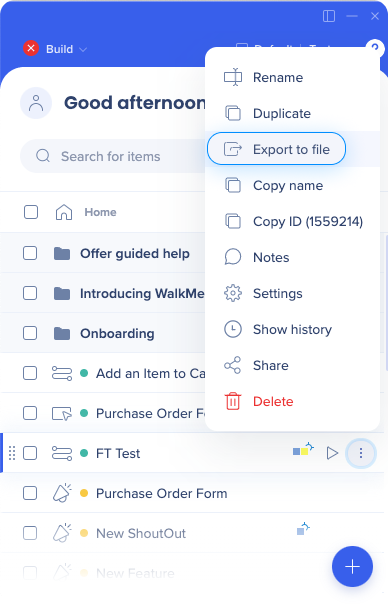
- Hover over the menu icon on a Smart Walk-Thru or Walk-Thru item
- Select Export to File:
- If you build in more than one language, you will be asked to select the language you would like to export in:
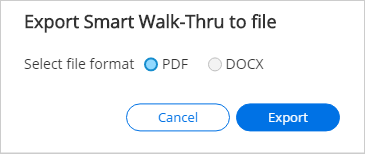
- After clicking Export, you will see a progress bar charting the completion of your PDF's compilation
- Once the compilation is complete, you will be prompted to select where the file should be stored on your machine
- Select a location on your machine and download the file to that location
The Structure of the File
Each page of the file shows a Smart Walk-Thru step over a screenshot of the app page on which the step was captured. Each step is situated next to its selected element.
Additional features of the page structure include the following:
- The step's chronological number
- The step's label
- The step's creation date and time
- The URL location where the screenshot was captured