
Custom Triggers

Brief Overview
Custom Triggers give users the flexibility to complete a step in more ways than one. With custom triggers you can select additional elements on the screen that will trigger the next step.
Here's a quick reminder: Your Smart Walk-Thru is made of steps and each step is triggered by user action. WalkMe has default trigger types already built for you, or you can create your own custom triggers!

Custom Triggers help you streamline a process within a Smart Walk-Thru if there is more than one way for a user to get to the next step. It can also reduce clicks for the user!
To learn more about the different Step Trigger types, check out our our Smart Walk-Thru introduction article.
How It Works
A Custom Trigger is created using the Rule Engine and can be added to any Step. WalkMe will play the next step in the process if the Custom Trigger's rules are true.
A Step can have up to 20 Custom Triggers.
Add a Custom Trigger
Follow the steps below to create a Custom Trigger:
- Click on the step to open up the Step Options Menu.

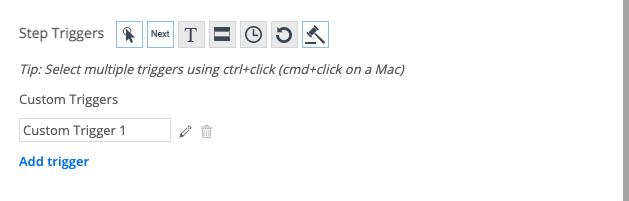
- In the Interaction tab, select Custom Trigger from Select Triggers section:

- The Rule Engine will open:

- Add rules that determine when the next step should play.
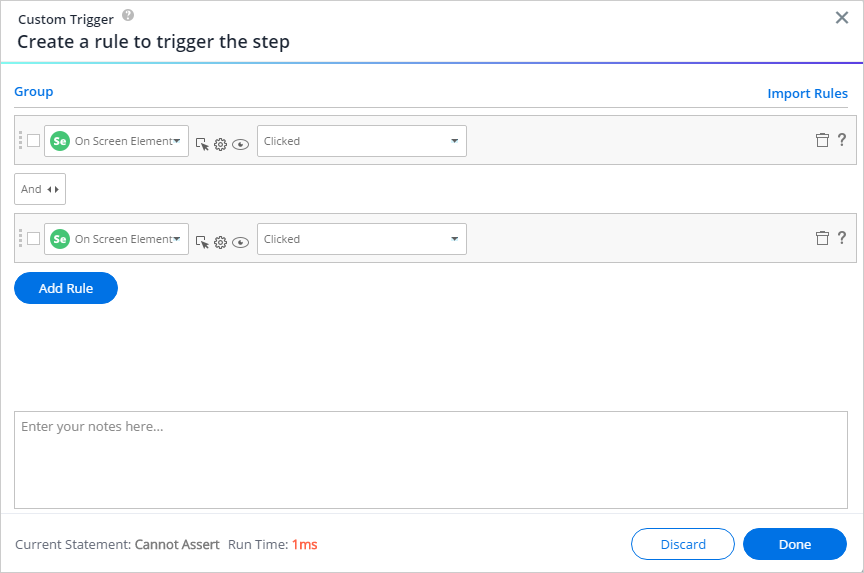
- In the example below, the Step will play only when two on screen elements have been clicked:
- Learn more about the Rule Engine
- In the example below, the Step will play only when two on screen elements have been clicked:
- Click Done.
- Name your Custom Trigger:
- Click Done.
- Repeat steps 1-7 as necessary up to 20 times per step.
- Your Custom Triggers will be reflected in the SWT map, alongside other configured triggers:
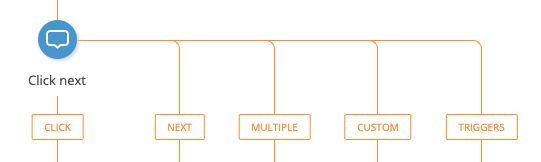
- Your Custom Triggers will be reflected in the SWT map, alongside other configured triggers: