Brief Overview
Portals are branded destinations where learners access the courses, microlearning, and learning journeys you publish. WalkMe Learning Arc supports multiple portals per account, so you can organize content for different learner audiences — for example, by team, region, or customer.
Every account gets a main portal, created automatically at sign-up and branded for your organization. You can't delete the main portal, but you can create as many additional portals as you need. There's no limit on how many portals you can create during the trial.
Access
To manage portals, go to the left sidebar and select Portals.
You can also view your portals as a list, with columns for published content and members: go to Account settings and open the Portals tab. To learn more, refer to the following article: Manage Your Account Settings
Create a Portal
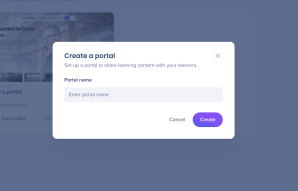
After account setup is complete, WalkMe Learning Arc creates a branded portal for your account. You can also create more portals:
- On the Portals page, select the Create a portal ⨁ icon
- In the Create a portal popup, type a name in the Portal name field
- Select Create
Portals Page
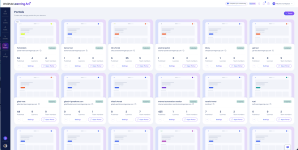
The Portals page shows every portal in your account as a card. Each card shows:
- The portal name
- The number of published items
- The portal's assigned admin
- The last modified date
Portals are listed in this order: the main portal first, then the portals you can access A–Z, then the portals you can't access A–Z. Portals you can't access are view-only, and their cards show Request Access.
To share a portal, select the Options menu on its card. To open a portal's settings, select Settings.
Portal Settings
Each portal has its own settings, organized into tabs:
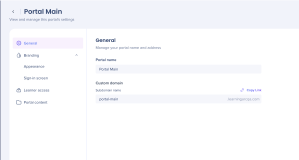
General
- Update the portal name
- Edit the portal's subdomain and copy its link. Your organization's prefix is fixed — for example, acme-sales.learningarc.com — and you can change only the part after it
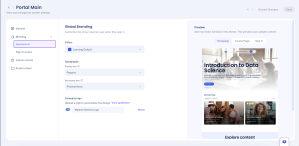
Branding
- Appearance: Customize the look and feel of the portal
- Sign-in screen: Customize the screen learners see when they sign in, and find the custom domain generated for your account
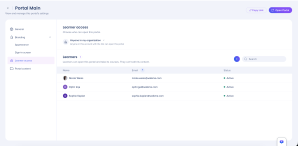
Learner access
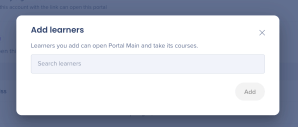
- Manage which learners can access a portal and its courses. You can also add new learners on this tab
Portal content
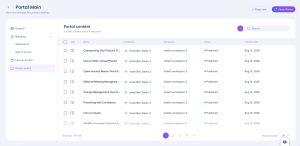
- Choose which workspace content appears in each portal. The same content can appear in more than one portal
Invite Team Members
You can give team members full access to your portal, including its branding and settings. There are two ways to do this.
From Account settings
- In the left sidebar, select Account settings
- Open the Portals tab
- Select the portal you want to invite members to
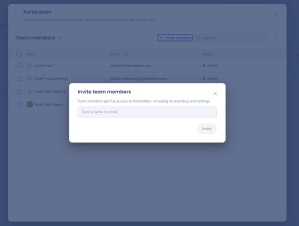
- Select + Invite members
- Type a name or email address
- Select Invite
To learn more, refer to the following article: Manage Your Account Settings
From an account-level invite
An account-level invite lets you invite someone to a workspace and a portal at the same time. This option is available to contributors and admins.
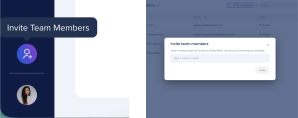
- In the left sidebar, select Invite Team Members
- Type the name, email address, or system group of the person you want to invite
- Choose a workspace and a portal. If you don't have access to any portal, you'll see only the workspace option
- Choose their workspace role, then select Invite
Share a Portal
To get a link you can send to portal members or learners:
- Open the Portals page
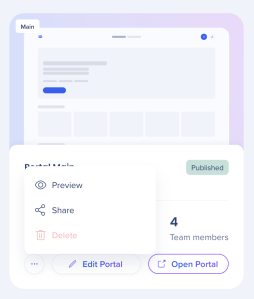
- Select the Options menu on the portal's card
- Select Share
- Select Copy Link
Note
A portal link doesn't grant access on its own. Under General access, you have three options:
- Restricted: Only the people you invite by email can open the portal. There's no limit on how many people you can invite
- Whole organization: Everyone in your organization can open the portal
- Public link: Anyone with the link can sign up and access the published courses
Request Access to a Portal
Anyone without access to a portal can request it. The portal's admins get the request and can approve or deny it. The requester gets a notification after the request is approved or denied.
Assign Content to a Portal
Learning content is visible to learners only after it's added to a portal. On the Learning Content page, each item shows the portals it's assigned to. If you publish an item without adding it to a portal, a prompt lets you know that the content isn't available to learners yet and gives you the option to share it or add it to a portal.
Learner Experience
You can add learners from a portal's Learner access tab, or learners can sign up themselves through a portal-specific link. Either way, learners need to sign up before they can reach a portal.
A learner's portal access isn't tied to the trial status of the account's contributors and admins.


