Brief Overview
Integrate Webhooks connections with WalkMe to send real-time data to external systems like CRMs, analytics tools, or custom endpoints. Follow these steps to connect your Webhooks.
How It Works
Webhooks connections page overview
The Webhooks Connections page is a central hub for viewing and managing all of your configured Webhooks connections.
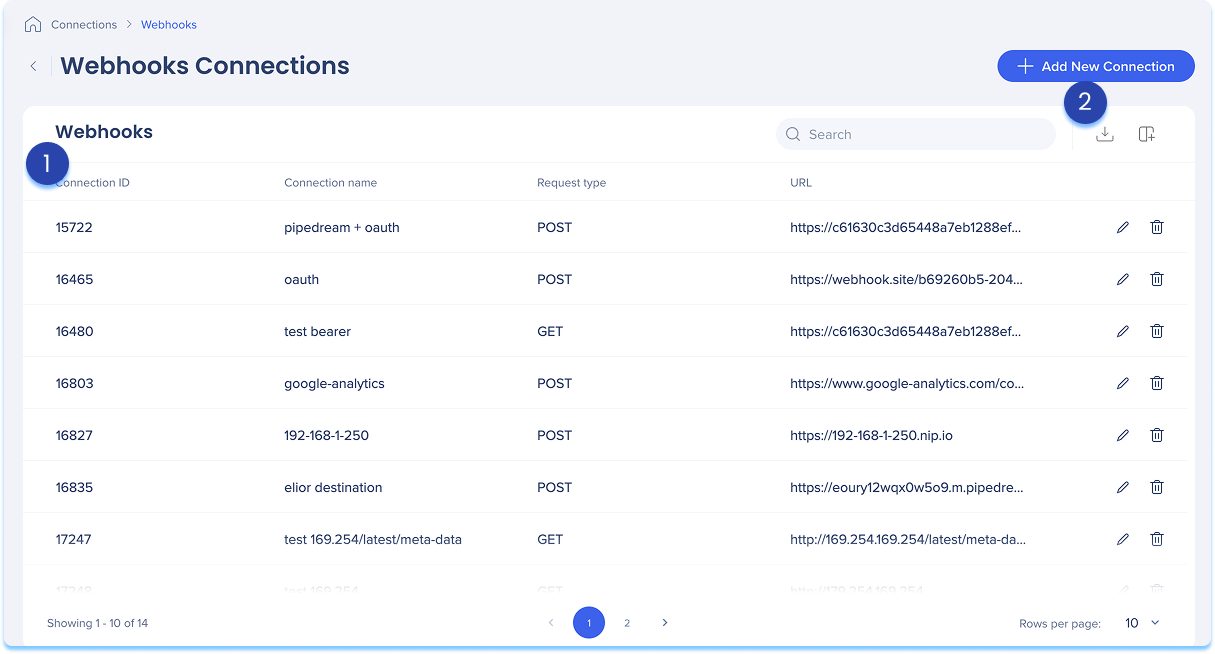
1. Webhooks S3 table
The Webhooks connections table lists all configured connections.
Table columns:
-
Connection ID: Unique identifier for the connection
-
Connection name: Custom name given to the connection
-
Request type: The HTTP method used to send data (GET, POST, PUT, DELETE)
-
URL: The destination endpoint that receives the Webhooks request
2. Table icons
Manage columns
Remove or add columns from the table
-
Click the Manage columns icon
-
Select which columns you'd like to have in the table
-
Click Apply
Add new connection
-
Click the + Add New Connection button to add a new Webhooks connection
Learn more in the section below.
Export connections
-
Click the Export Connections icon to download a csv or xlsx file containing all configured connection details
Search
-
Use the Search bar to quickly find specific connections
Item options
Available actions:
-
Click the Edit icon to update the connection
-
Click the Delete icon to remove the connection
How to setup a Webhooks connection
You can add a new connection whether it's your first or you're adding to existing ones.
-
Choose how to start:
-
If this is your first connection:
-
Go to the Available connections tab
-
Hover over the Webhooks tile
-
Click Setup
-
If you already have connections:
-
Go to the Active connections tab
-
Hover over the Webhooks tile
-
Click Manage Connections
-
A table will open showing all configured connections for that integration
-
Click Add new connection

-
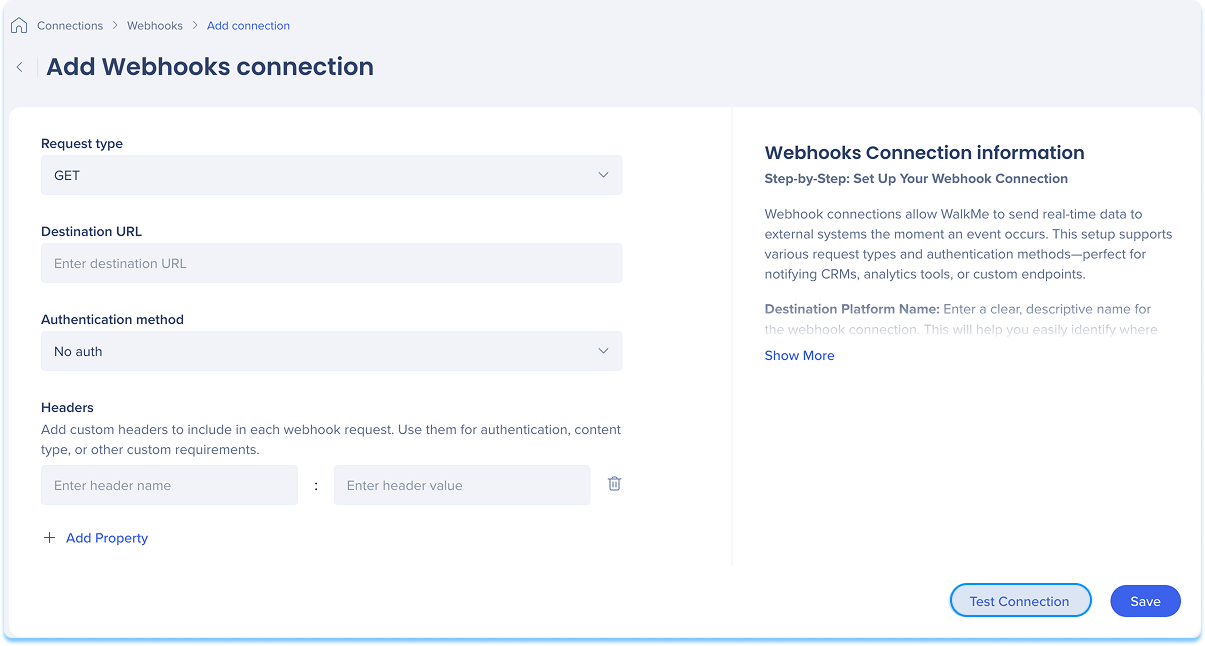
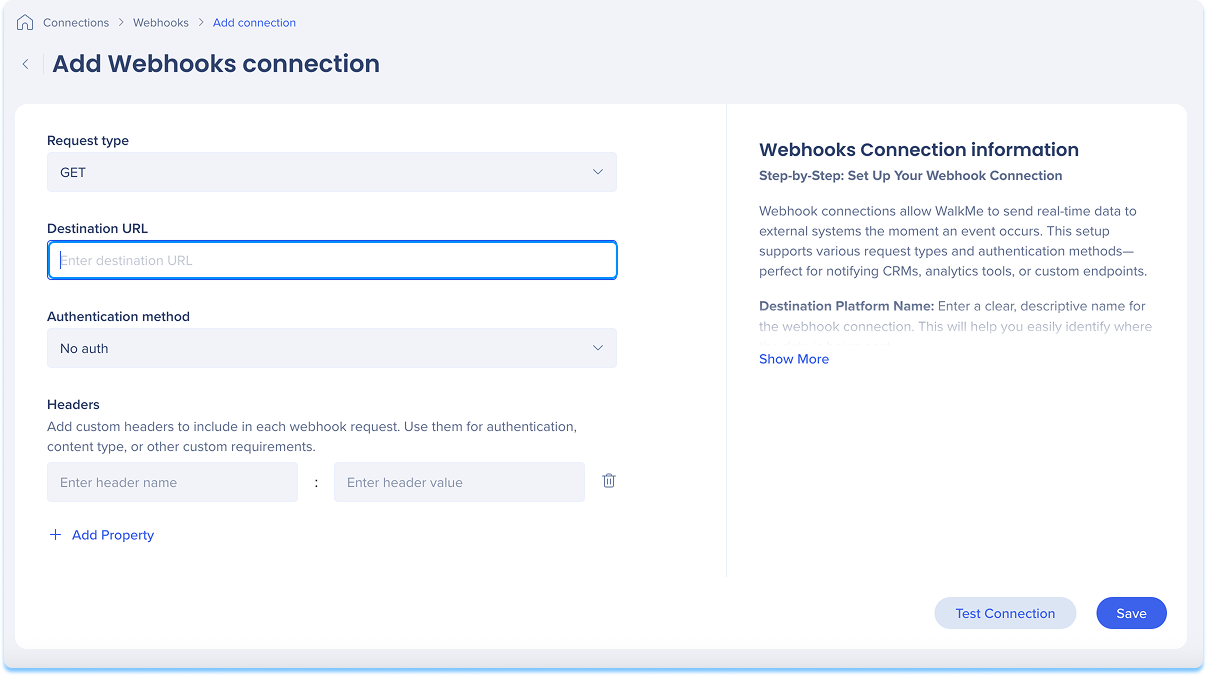
You'll be taken to the Add Webhooks Connection page
-
Select the HTTP method used to send data under the Request Type dropdown:
-
GET: Retrieve data
-
POST: Send new data
-
PUT: Update existing data
-
DELETE: Remove data
-
Enter the destination URL
-
This is the full URL of the external system or endpoint receiving the webhook request
-
For example: https://api.example.com/receive-webhook
Make sure this URL is reachable from WalkMe and supports the selected request type.
-
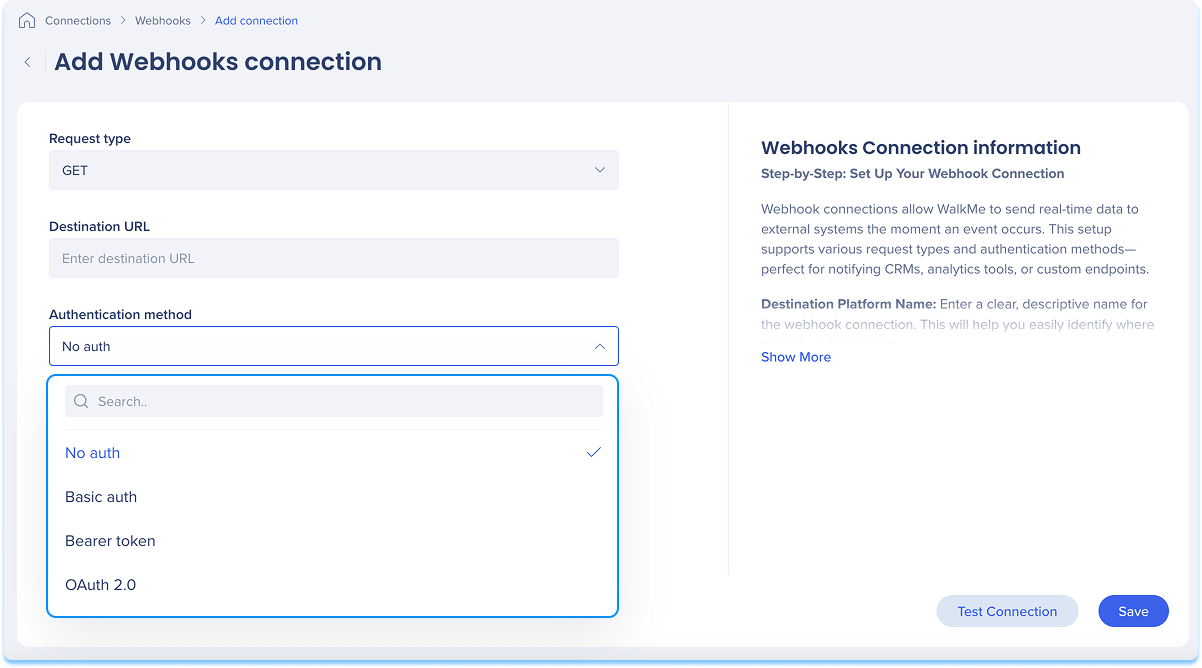
Choose the authentication type required by the destination system:
-
No Auth: No authentication header is sent
-
Bearer Token: Adds the Authorization Bearer <token> string
-
Basic Auth: Uses base64-encoded username:password string
-
OAuth 2.0: Uses access tokens obtained from an authorization flow
When selected, each method will display the relevant fields
-
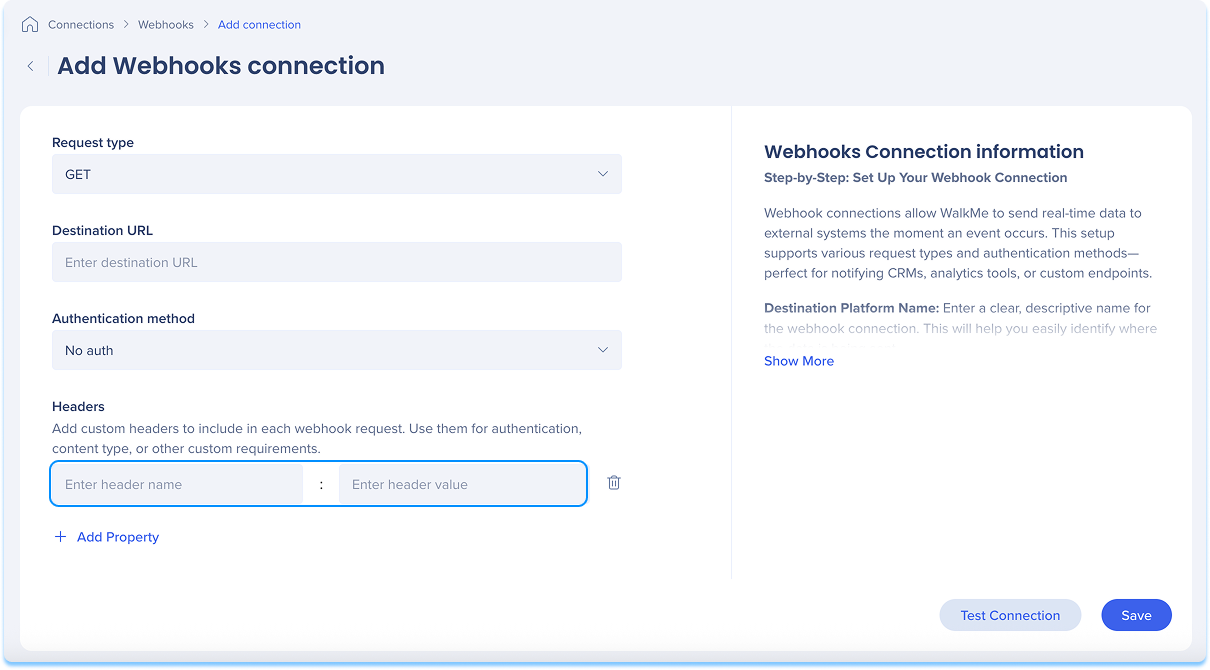
Optional: Click + Add Property to include up to five custom headers in your webhook request
-
Header configuration details:
-
Each header key is selected from a dropdown
-
Selected keys are removed from remaining drop downs to prevent duplicates
-
Header values support autocomplete and can be edited manually
-
Click Test Connection to validate that your connection works
-
If the test is successful, you'll see a confirmation message
-
If there's an issue, you'll get an error message with steps to fix it
-
Click Save
Your new Webhooks connection will now be available when setting up Data In or Data Out integrations.