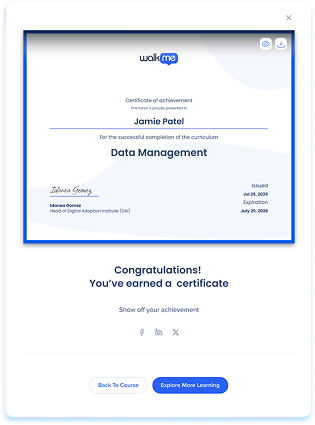
Brief Overview
Certificates let you recognize learner achievement by associating a certificate with completed learning content. They provide a formal outcome for courses, learning journeys, and microlearning, helping reinforce progress and completion across learning programs. Certificates are managed at the content level and are issued automatically when learners meet the defined completion criteria.
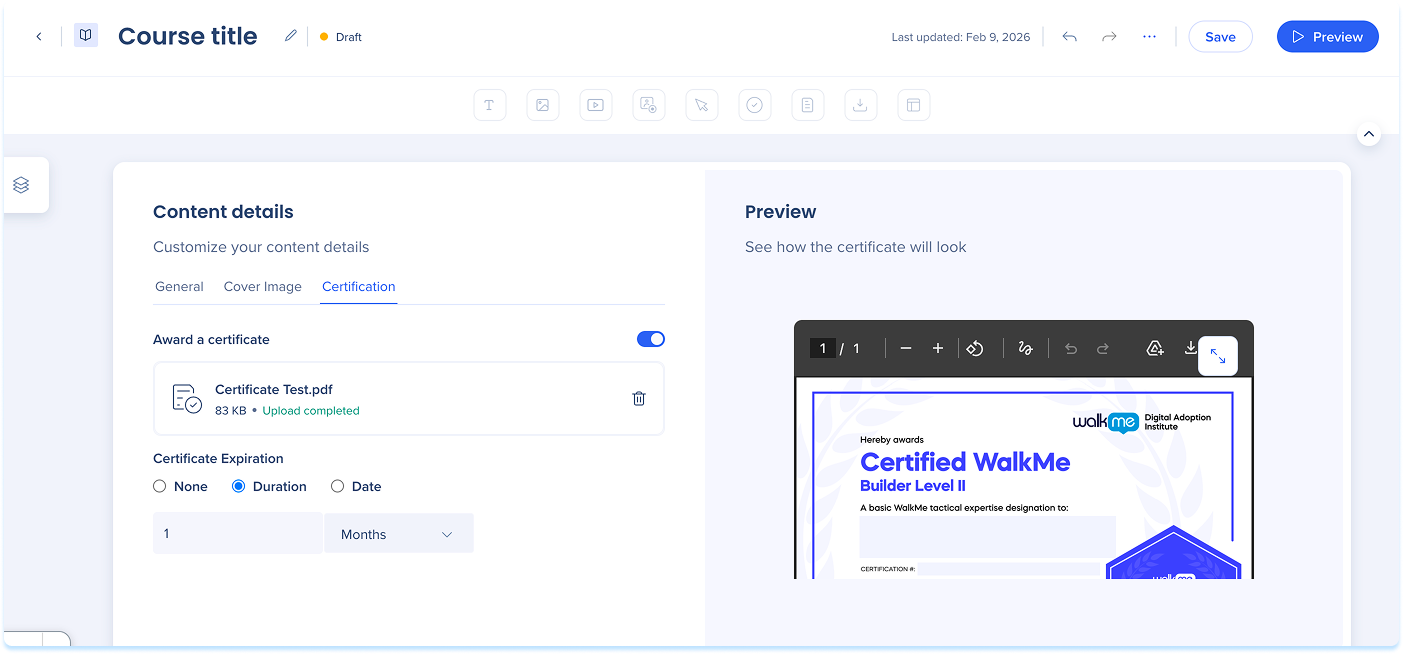
How It Works
Certificates are added and managed from the content details of a learning item.
Awarding a certificate
- From the Learning Content page, select the learning content you want to certify
- Open Content details
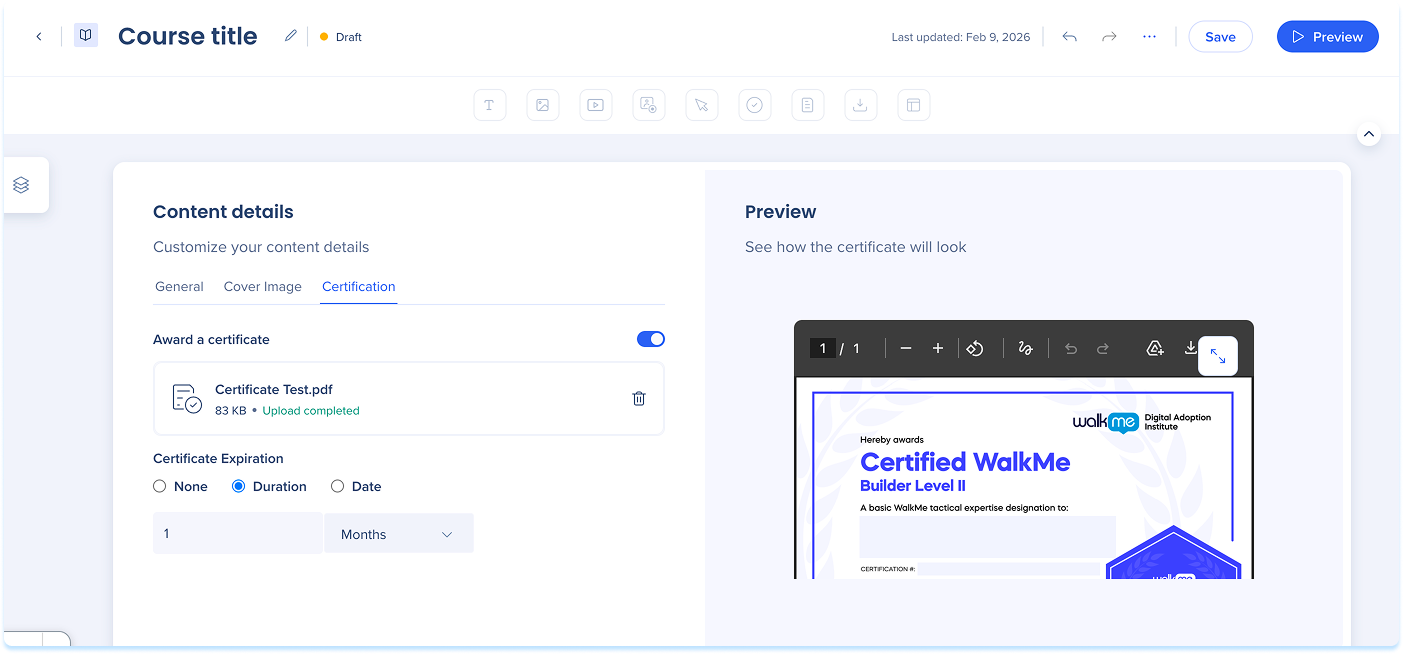
- Select the Certification tab
- Turn on Award a certificate
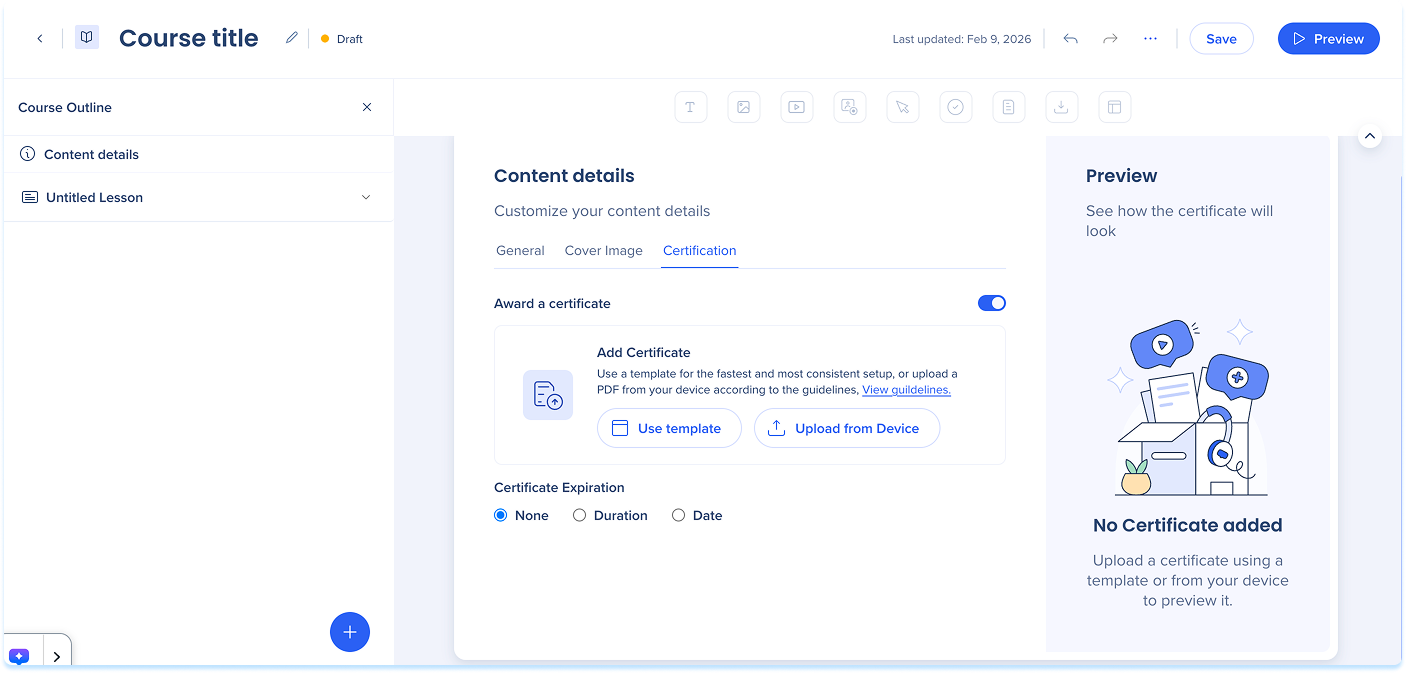
- Choose how to add a certificate:
- Select Use template to choose an existing certificate or create a new one
- Select Upload from Device to upload a PDF from your device
Certificate file guidelines
The certificate PDF must include the following fields:
- learnerName
- courseName
- issueDate
- expirationDate
Use template
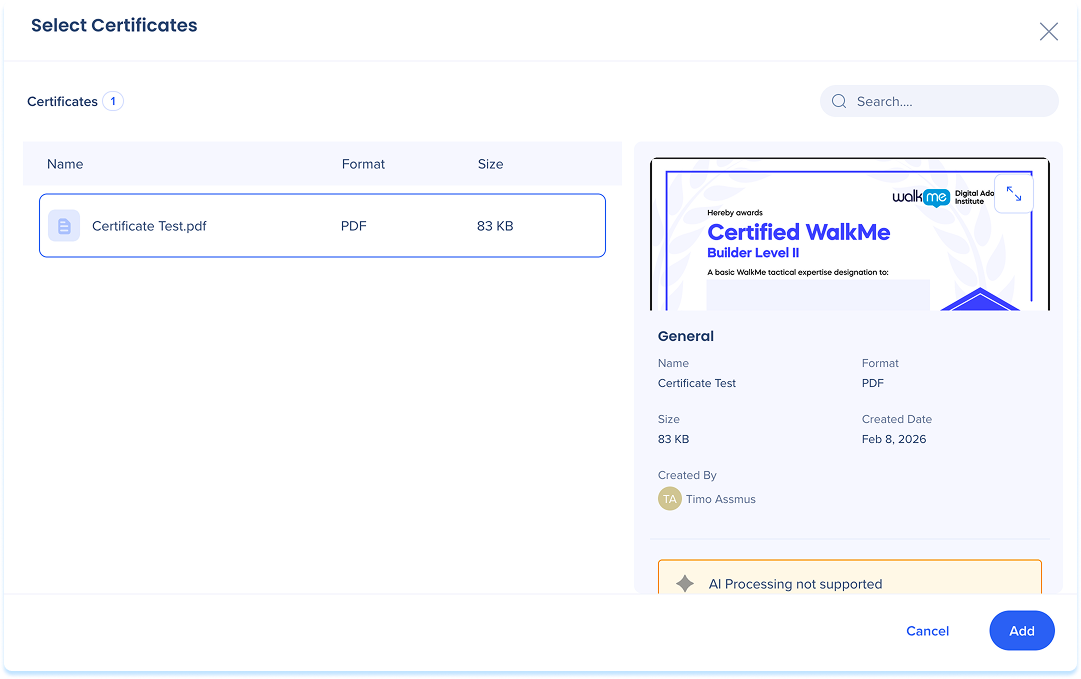
If you select Use template, the Select certificate popup opens. From this popup, you can reuse an existing certificate.
To attach an existing certificate:
- Select a certificate from the list, or use search to find a certificate
- Select Add to attach the certificate to the content
Note
The default certificate template uses your Portal Branding settings and updates when those settings change. Certificates that have already been issued keep their original branding.
Certificate expiration
After a certificate is added, define when it expires:
- None: The certificate does not expire
- Duration: The certificate expires after a set period
- Date: The certificate expires on a specific date
Certificate access and delivery
After a certificate is issued:
- Certificate links are sent to the learner's email
- Selecting the link opens the portal
- Learners can download the certificate or share it directly to social media