Brief Overview
The WalkMe Partner Portal gives the flexibility to manage and share content with multiple accounts, while still allowing each account to create and customize content to meet their individual needs. The portal provides central access to the main configurations needed by Partners.
There you are able to:
- Create and manage clients
- Provide a snippet out-of-the-box without additional efforts from clients (via tag manager)
- View an overview of client's usage data
There Partner's Gallery complements the Partner Portal. Any partner content created in the editor will be uploaded to the Solutions Gallery and will then be available for download by their clients.
The client will be able to download that content to their Editor account, customize it, and then publish the newly created content that will replace the standard partner content.
When the customer's user will access the partner app, WalkMe will identify it and dynamically load the correct snippet and its unique WalkMe content.
Note
Once content is downloaded and moved into an editor account it will no longer be linked to the original content and any updates will need to be managed individually.
How It Works
General settings
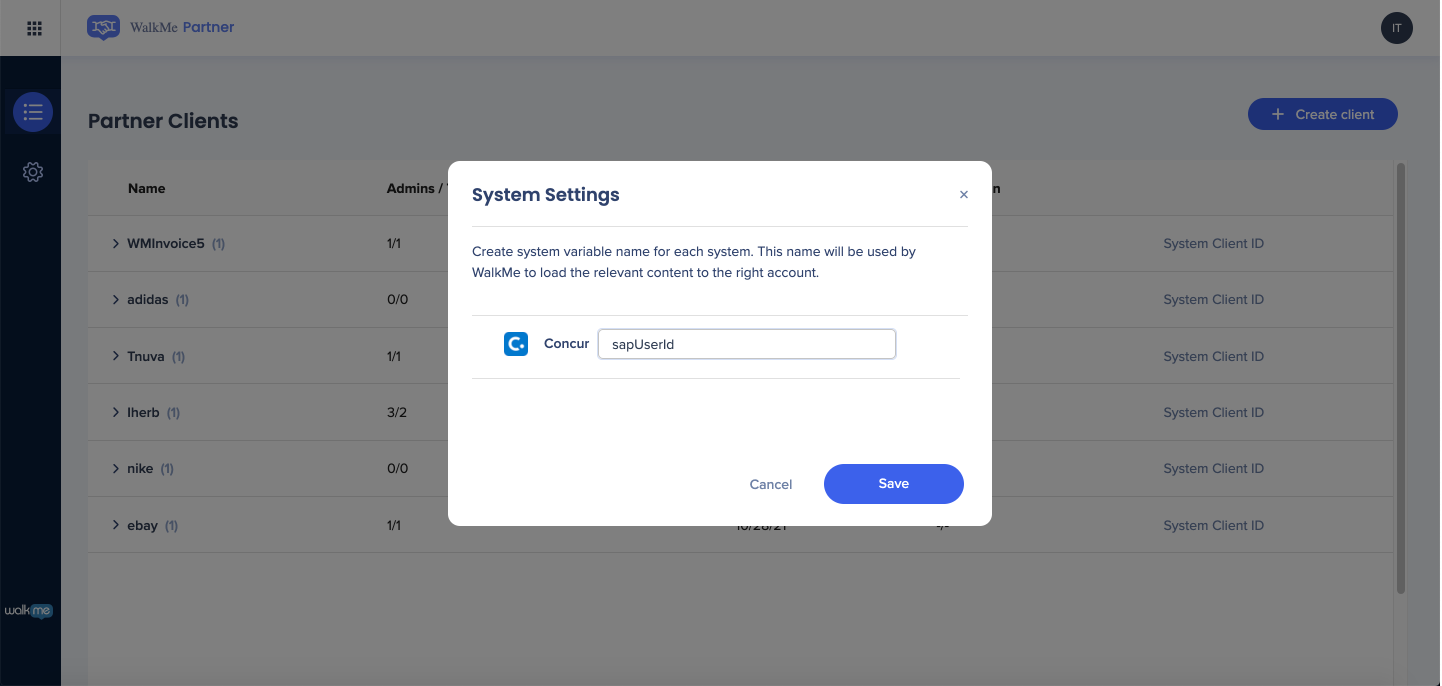
- Login to the Partner Portal at partner.walkme.com
- Open the settings
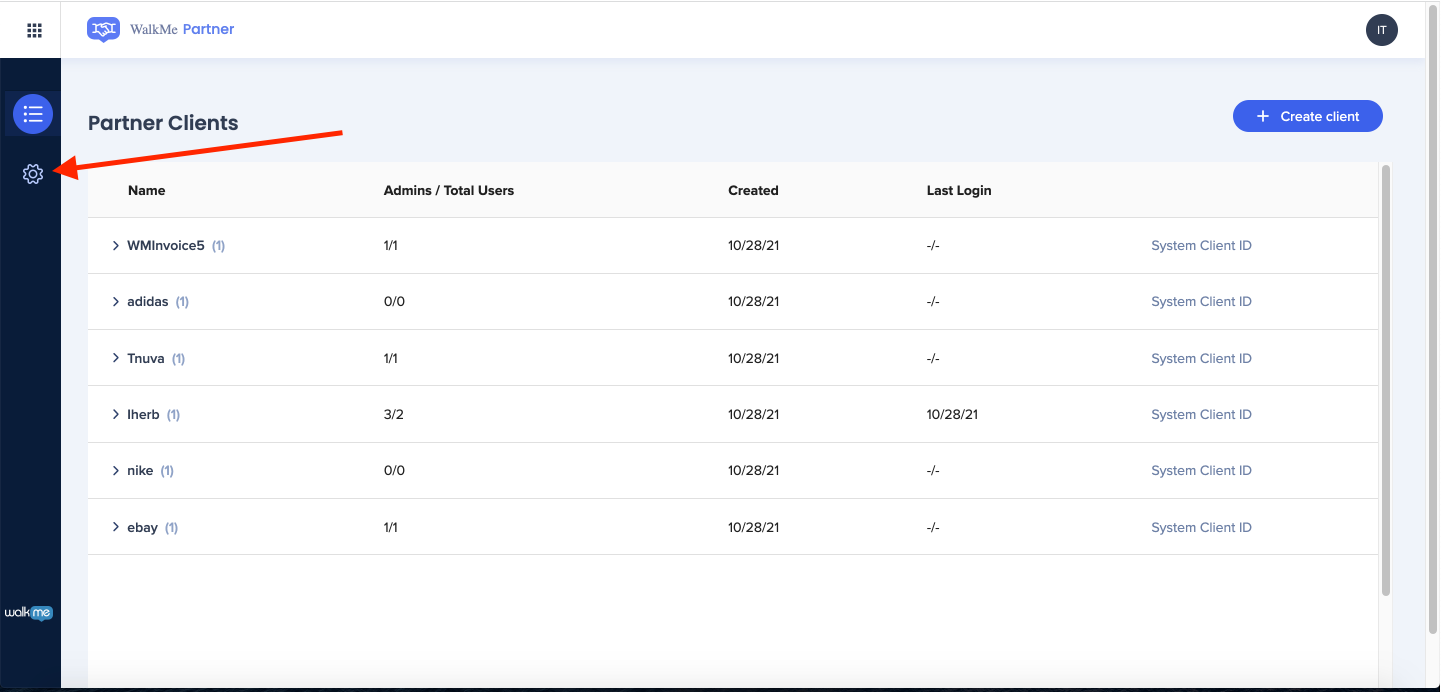
- Add a system variable name
- Click Save
Create new client
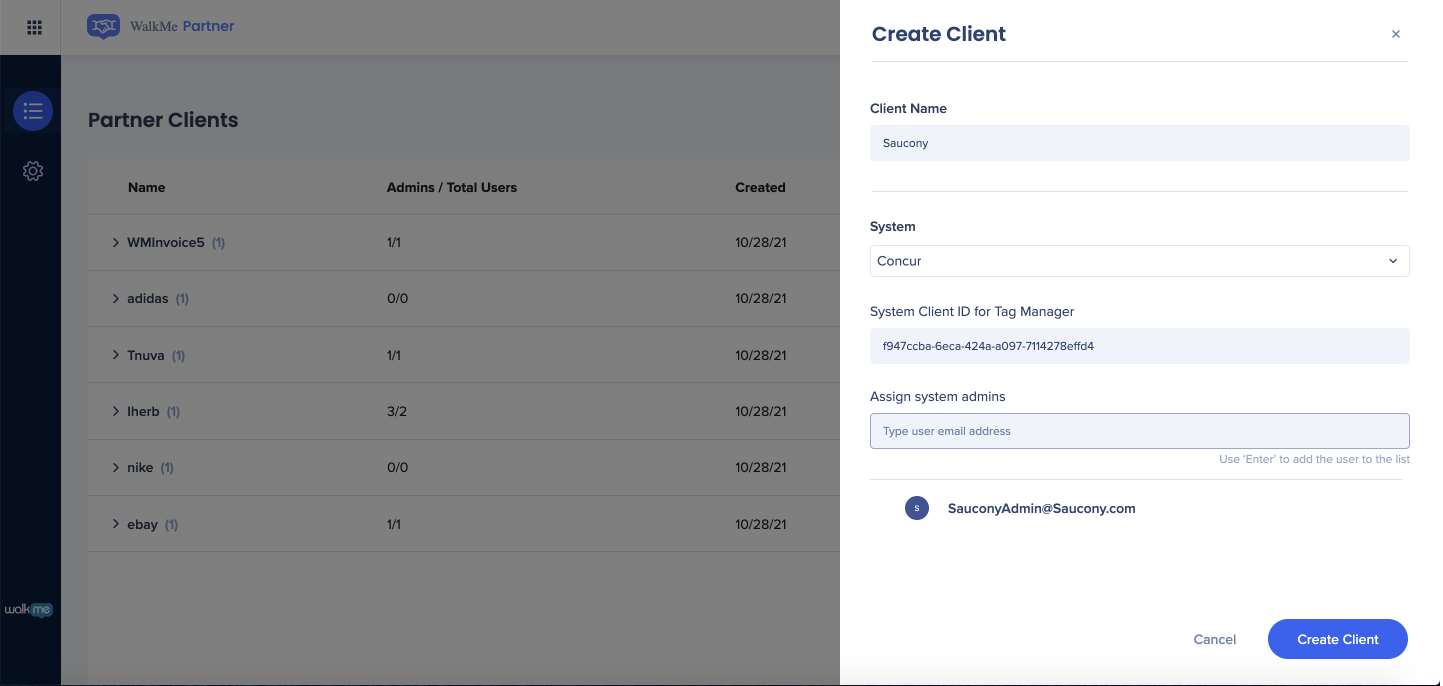
- Click + Create Client
- Enter the client name
- Select a system from the dropdown options
- Enter the System Client ID for Tag Manager
- Example: f947ccba-6eca-424a-a097-7114278effd4
- Assign system admins
- Click Create Client
Note
- Currently only SAP Concur systems are supported
- At least one admin must be assigned
Activate client
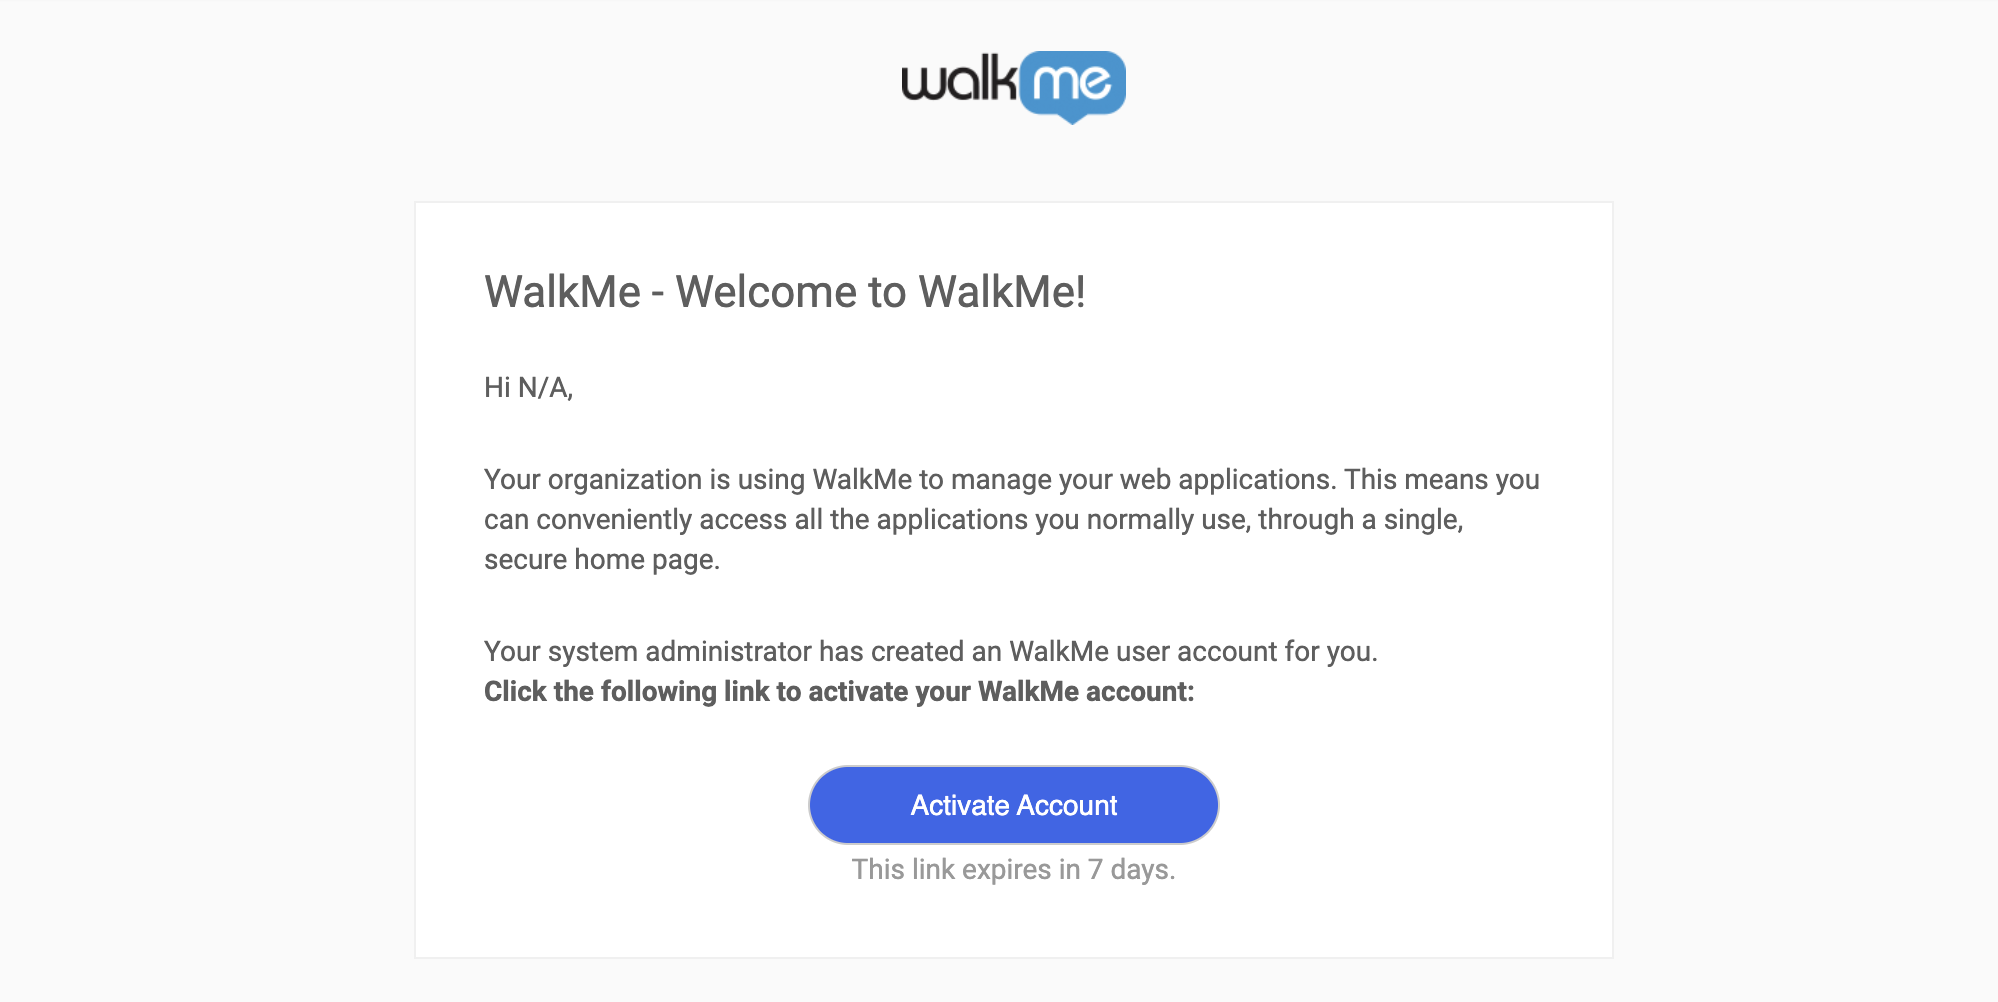
After creating a new client an activation email will be sent to the admin email address provided.
The client should follow the steps below to activate their WalkMe account.
- From the activation email, click on Activate Account
- Enter first name, last name, and set a password for the account
- Click Sign Up
Edit client
- Click on the client line you would like to edit
- Click Edit
- Edit the desired fields
- Click Save
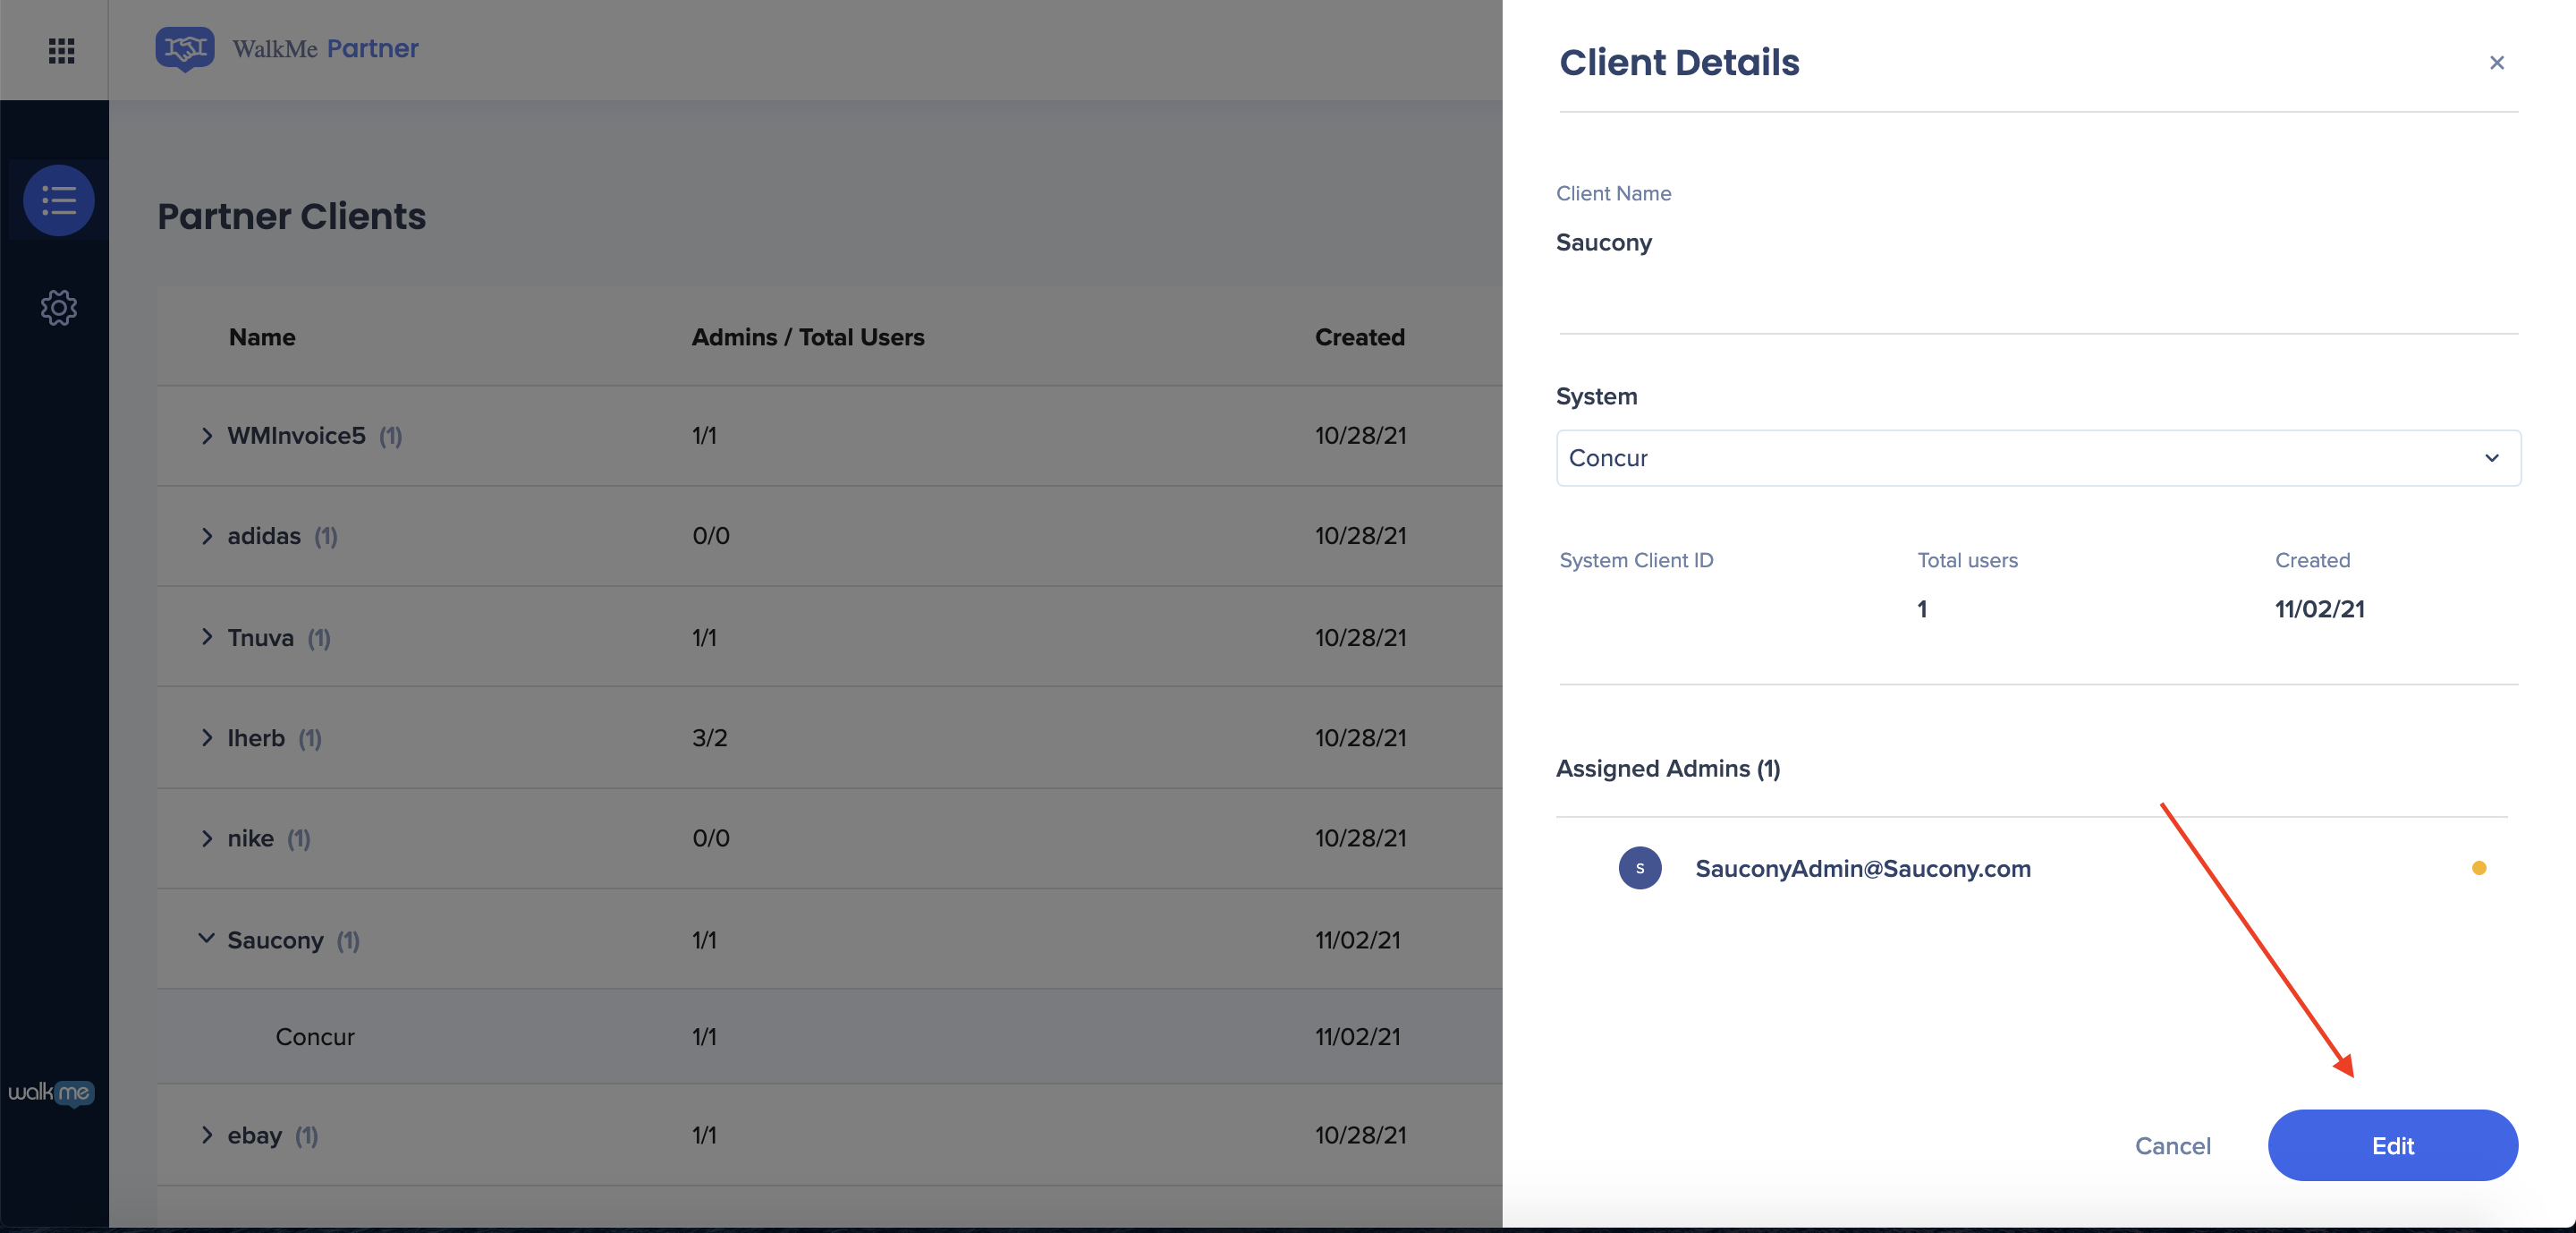
Note
- All fields except “Client Name” can be edited
- There is also an option to remove a client that has not activated their account yet and to resend the activation email