Brief Overview
Use the Data Integration Center in the Console to send real-time WalkMe event data to external systems using webhooks. Once triggered, the data can be used to alert teams, sync information, or power workflows in tools like CRMs, analytics platforms, or messaging apps. This integration supports any system that can receive HTTP requests, making it easy to connect WalkMe with the rest of your tech stack.

How It Works
How to set up a Webooks incoming integration
-
Navigate to the Data Integrations page in the console
-
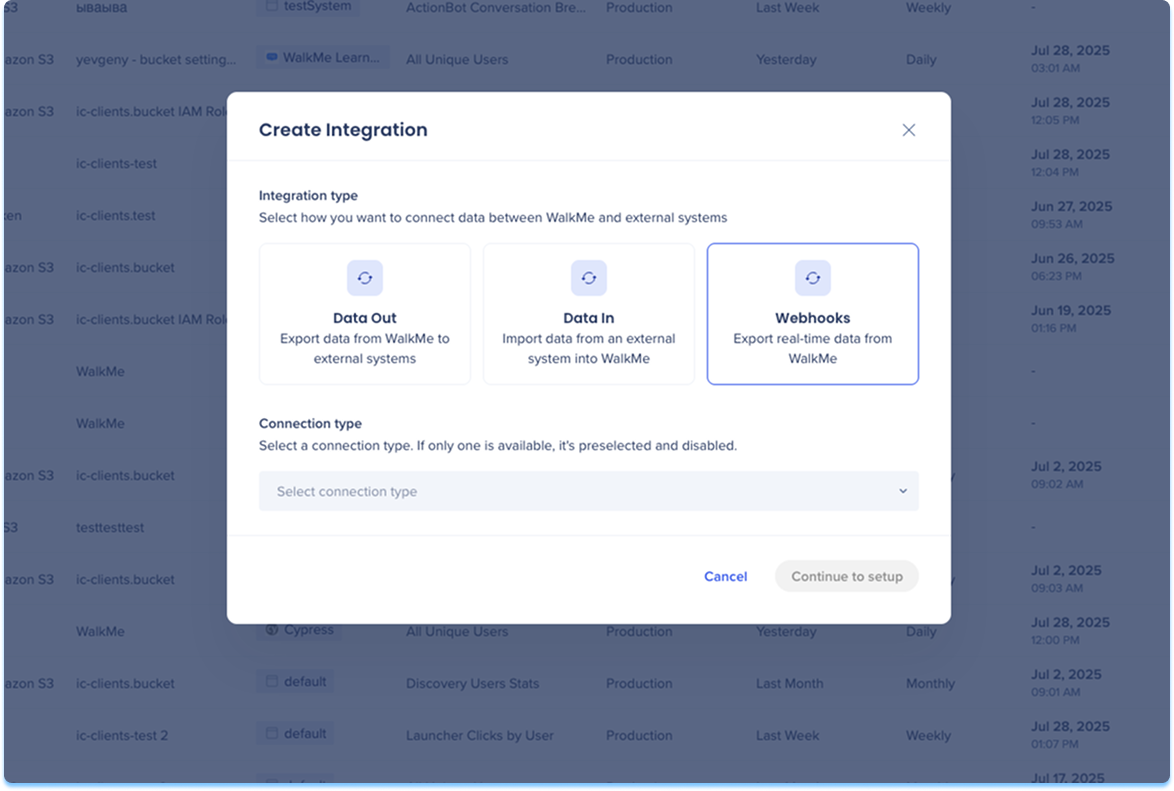
Click Create Integration in the top-right corner
-
A modal will open with the option to choose the integration type
-
Click the Webhooks tile
-
Select End User from the Connection type from the dropdown menu
-
Click Continue to Setup
-
You'll be taken to the Create Incoming Webhooks Integration page, which includes three steps:
-
Destination & Name
-
Select Event
-
Event properties
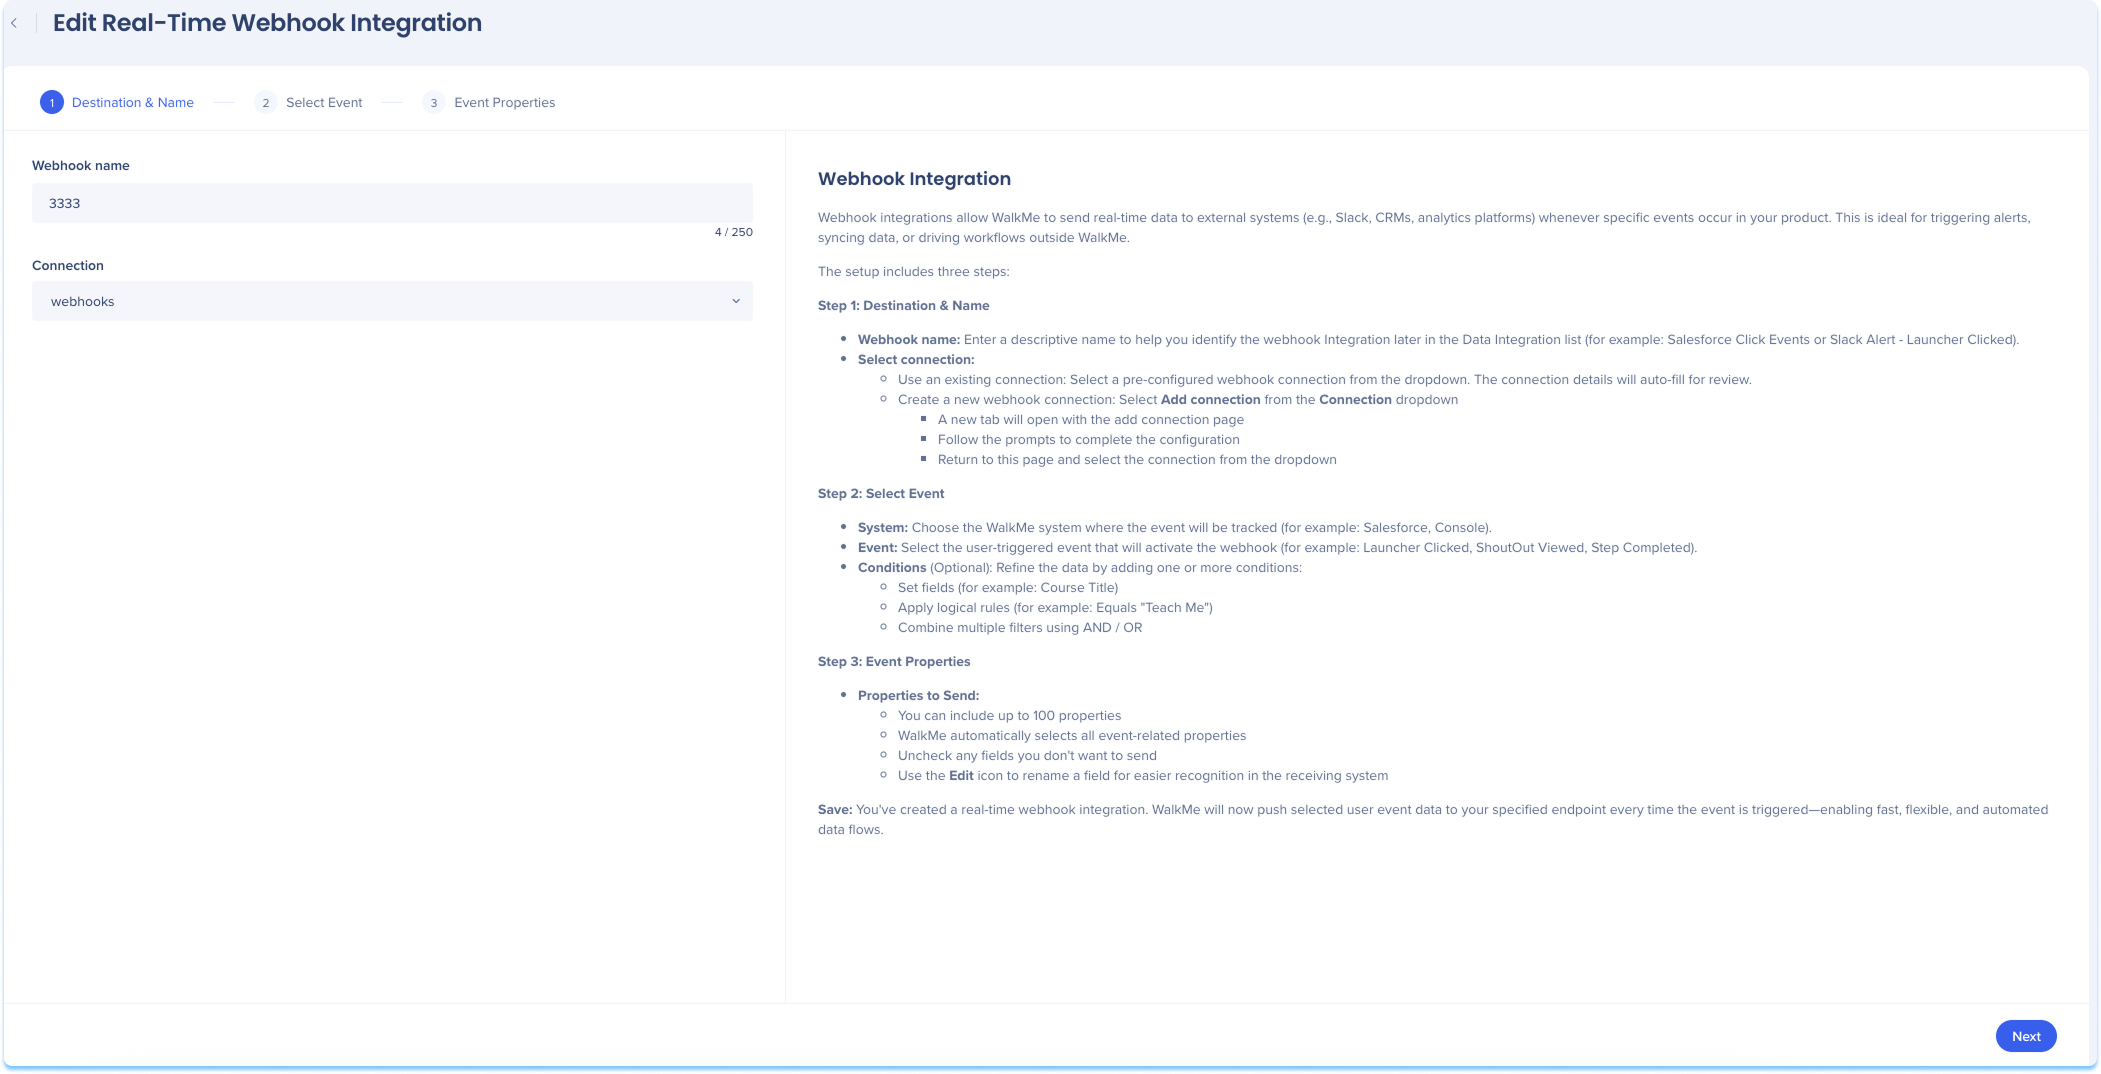
Destination & Name
-
Enter a descriptive name to help you identify this integration in the Data Integration list
-
Select your Webhooks connection. You can use an existing connection or create a new one:
-
Use an existing connection:
-
Select a pre-configured Webhooks connection from the dropdown
-
Select Add connection from the Connection dropdown
-
A new tab will open with the add connection page
-
Follow the prompts to complete the configuration
-
Return to this page and select the connection from the dropdown
Learn more: Connections Page
-
Click Next
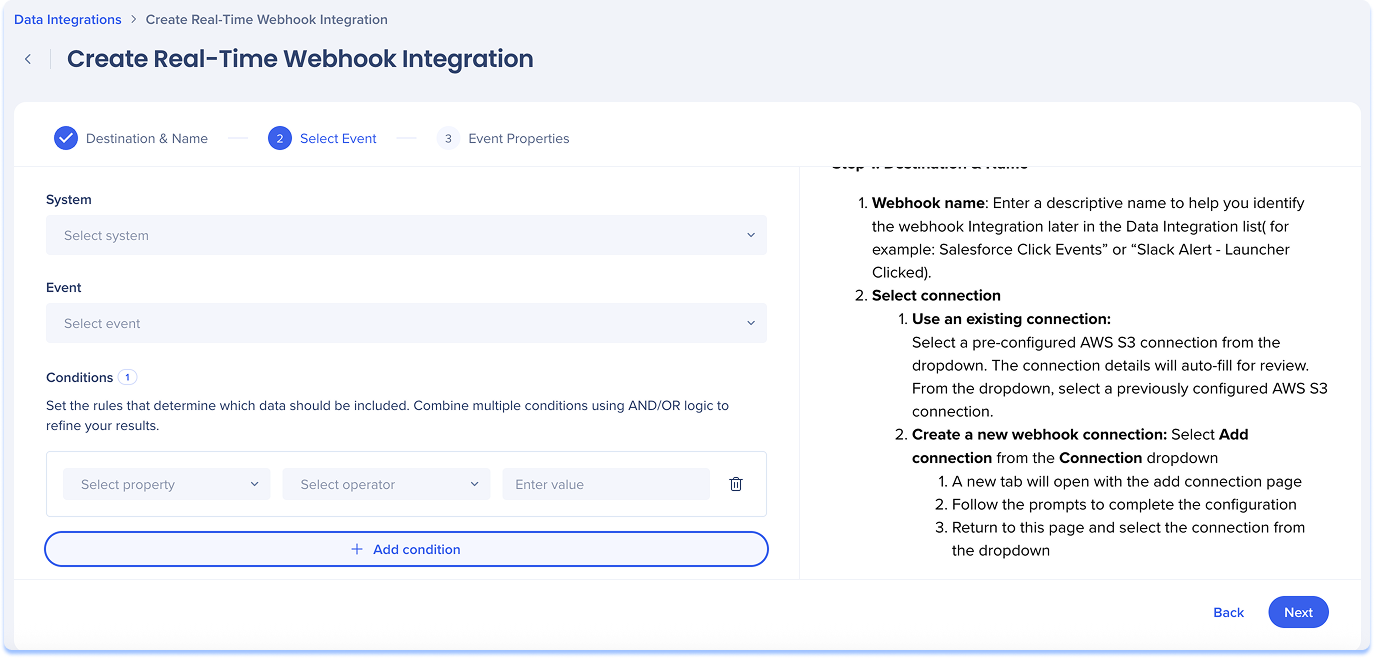
Select Event
-
Select the WalkMe system where the event will be tracked
-
For example: Salesforce
-
Select the user-triggered event that will activate the Webhooks
-
For example: Launcher Clicked
-
Optional: Refine the data by adding one or more conditions:
-
Set fields
-
For example: Course Title
-
Apply logical rules
-
For example: Equals "Teach Me"
-
Combine multiple filters using AND / OR
-
Click Next
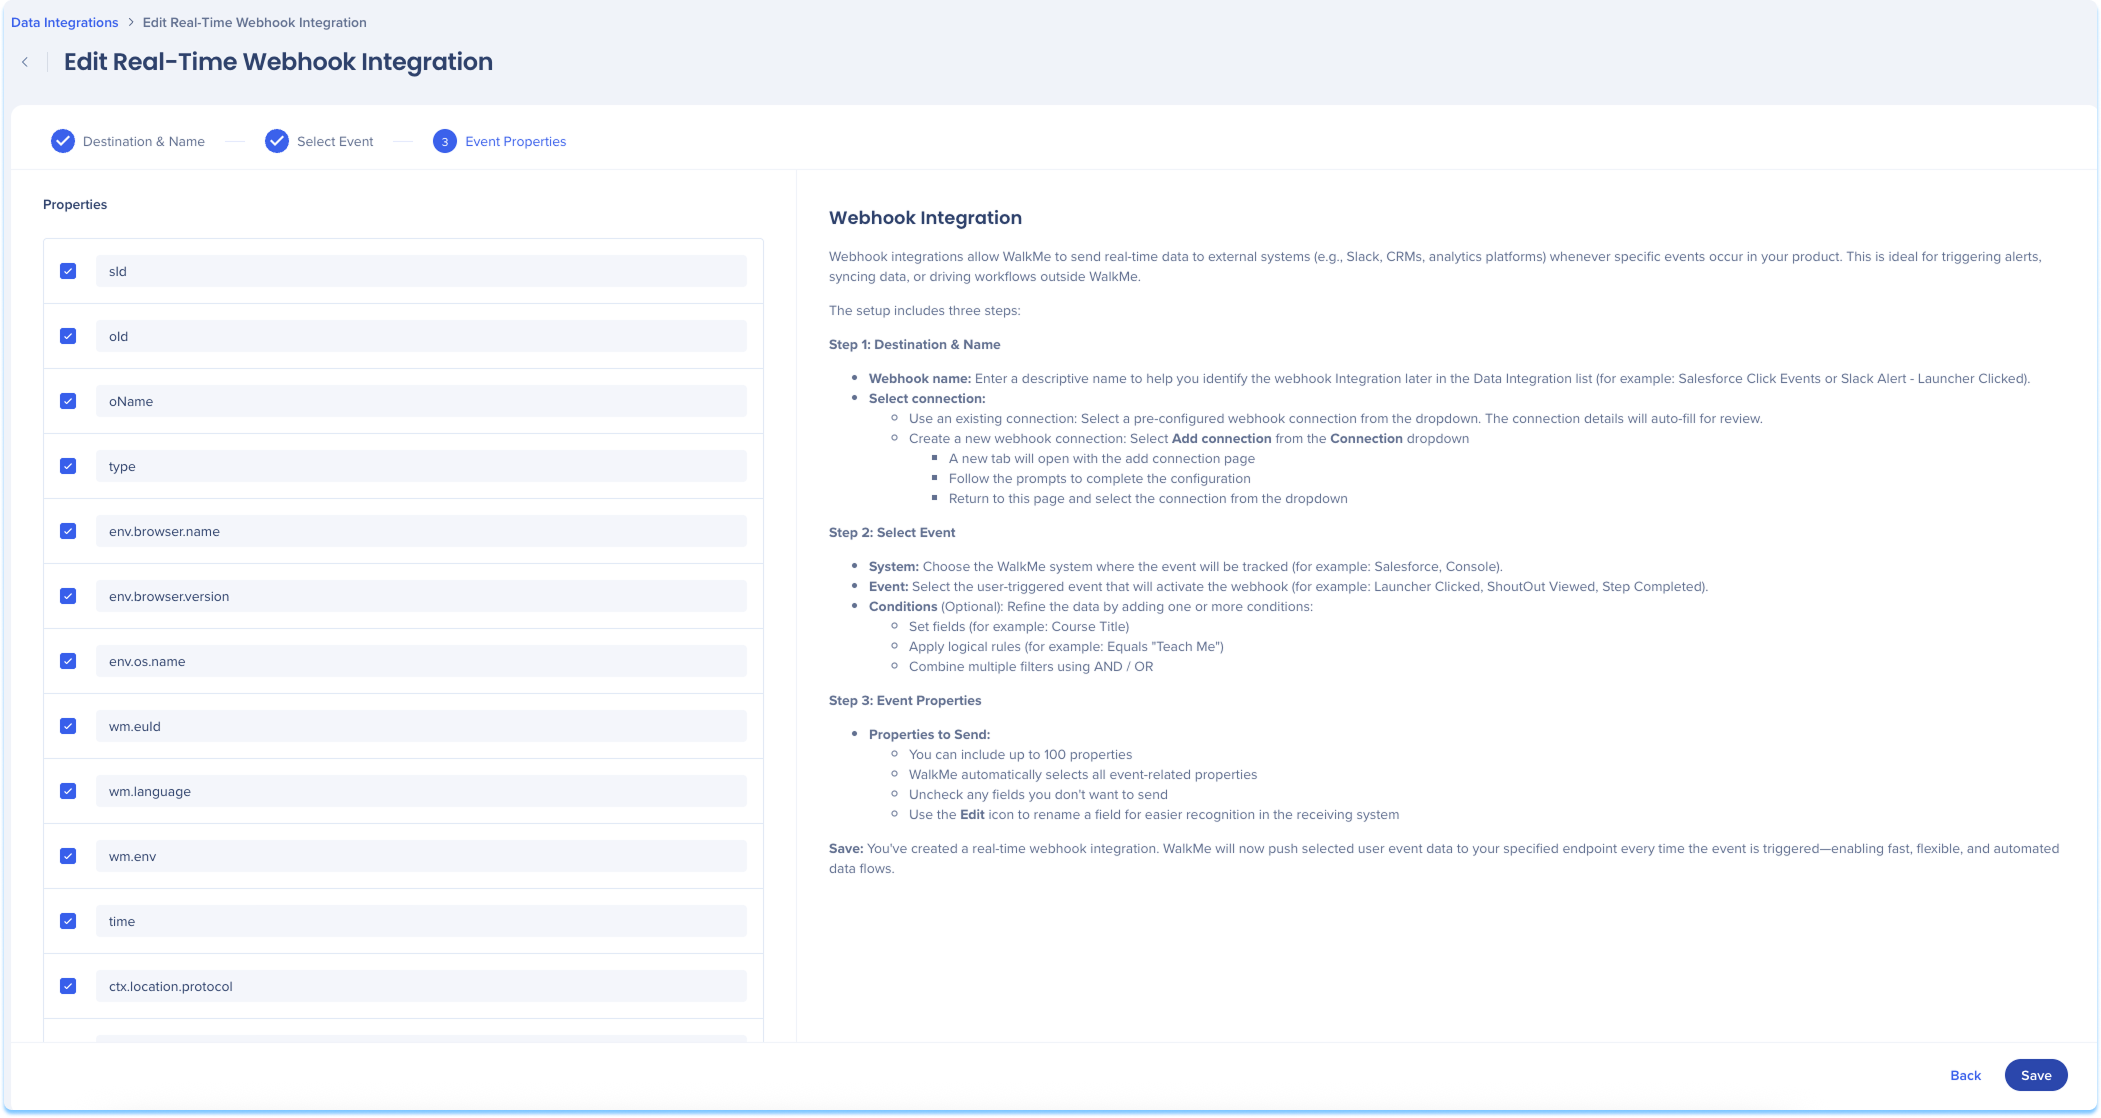
Event Properties
-
Properties to send:
-
WalkMe automatically selects all event-related properties
-
Uncheck any fields you don't want to send
-
Use the Edit icon to rename a field for easier recognition in the receiving system
-
Click Save
Note
Your integration is now active and WalkMe will now push selected user event data to your specified endpoint every time the event is triggered.