Brief Overview
The AI Knowledge Sources page, located within the AI Center, is where admins securely connect internal company documentation to WalkMe. By uploading files, you allow WalkMe to extract and index your organization's proprietary data for AI Knowledge Referencing.
This page provides full control over the knowledge ingestion process. Admins can upload resources, apply user segments to restrict visibility, and add custom Q&As to resolve content gaps.
Once a knowledge source is active, WalkMe's AI features—such as AI Chat, AI SmartTips, and the Action Bar—will use this trusted information to provide company-specific guidance instead of relying on generic external AI models.
How It Works
The AI Knowledge Sources page in the Admin Center allows admin users to upload knowledge source files and integrate tools to the AI-powered conversational search experience.
The page consists of two tabs:
-
AI Knowledge Sources: This dashboard allows admins to view, manage, and upload all of their knowledge sources
-
AI Integrations: This dashboard allows admins to enable AI Answers to their existing integrations
AI Knowledge Sources tab
This dashboard allows admins to view, manage, and upload all of their knowledge sources.
Source tiles
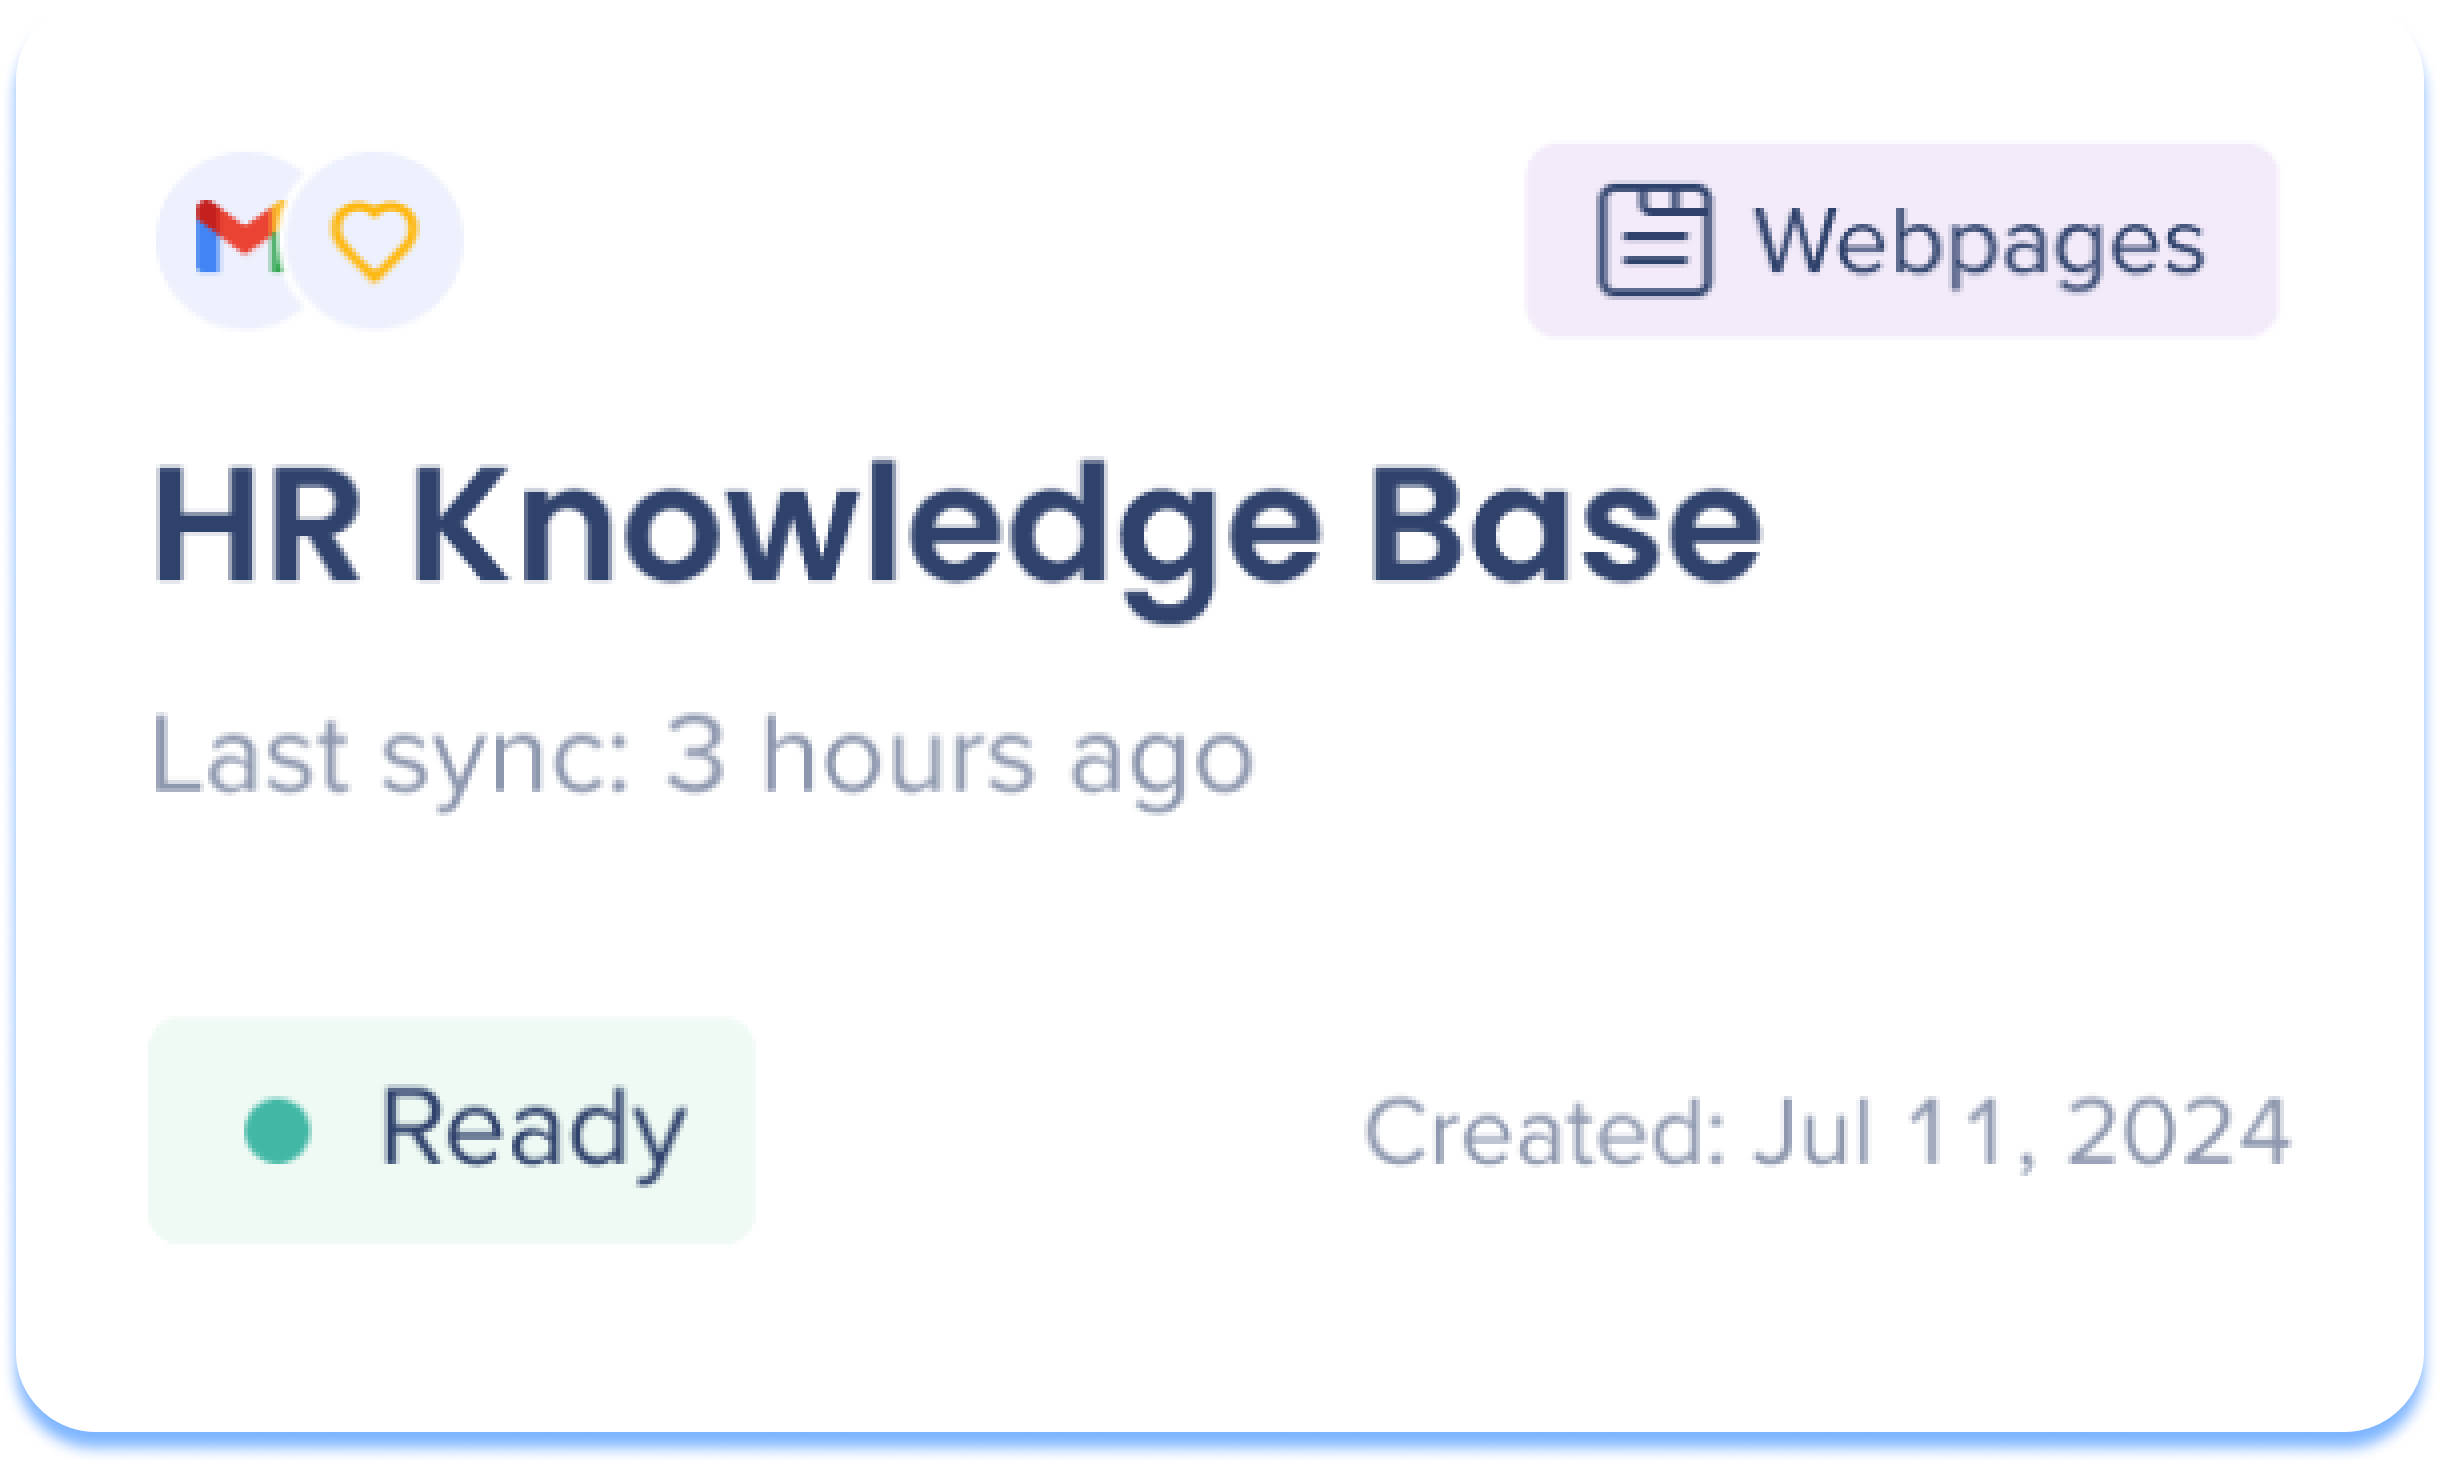
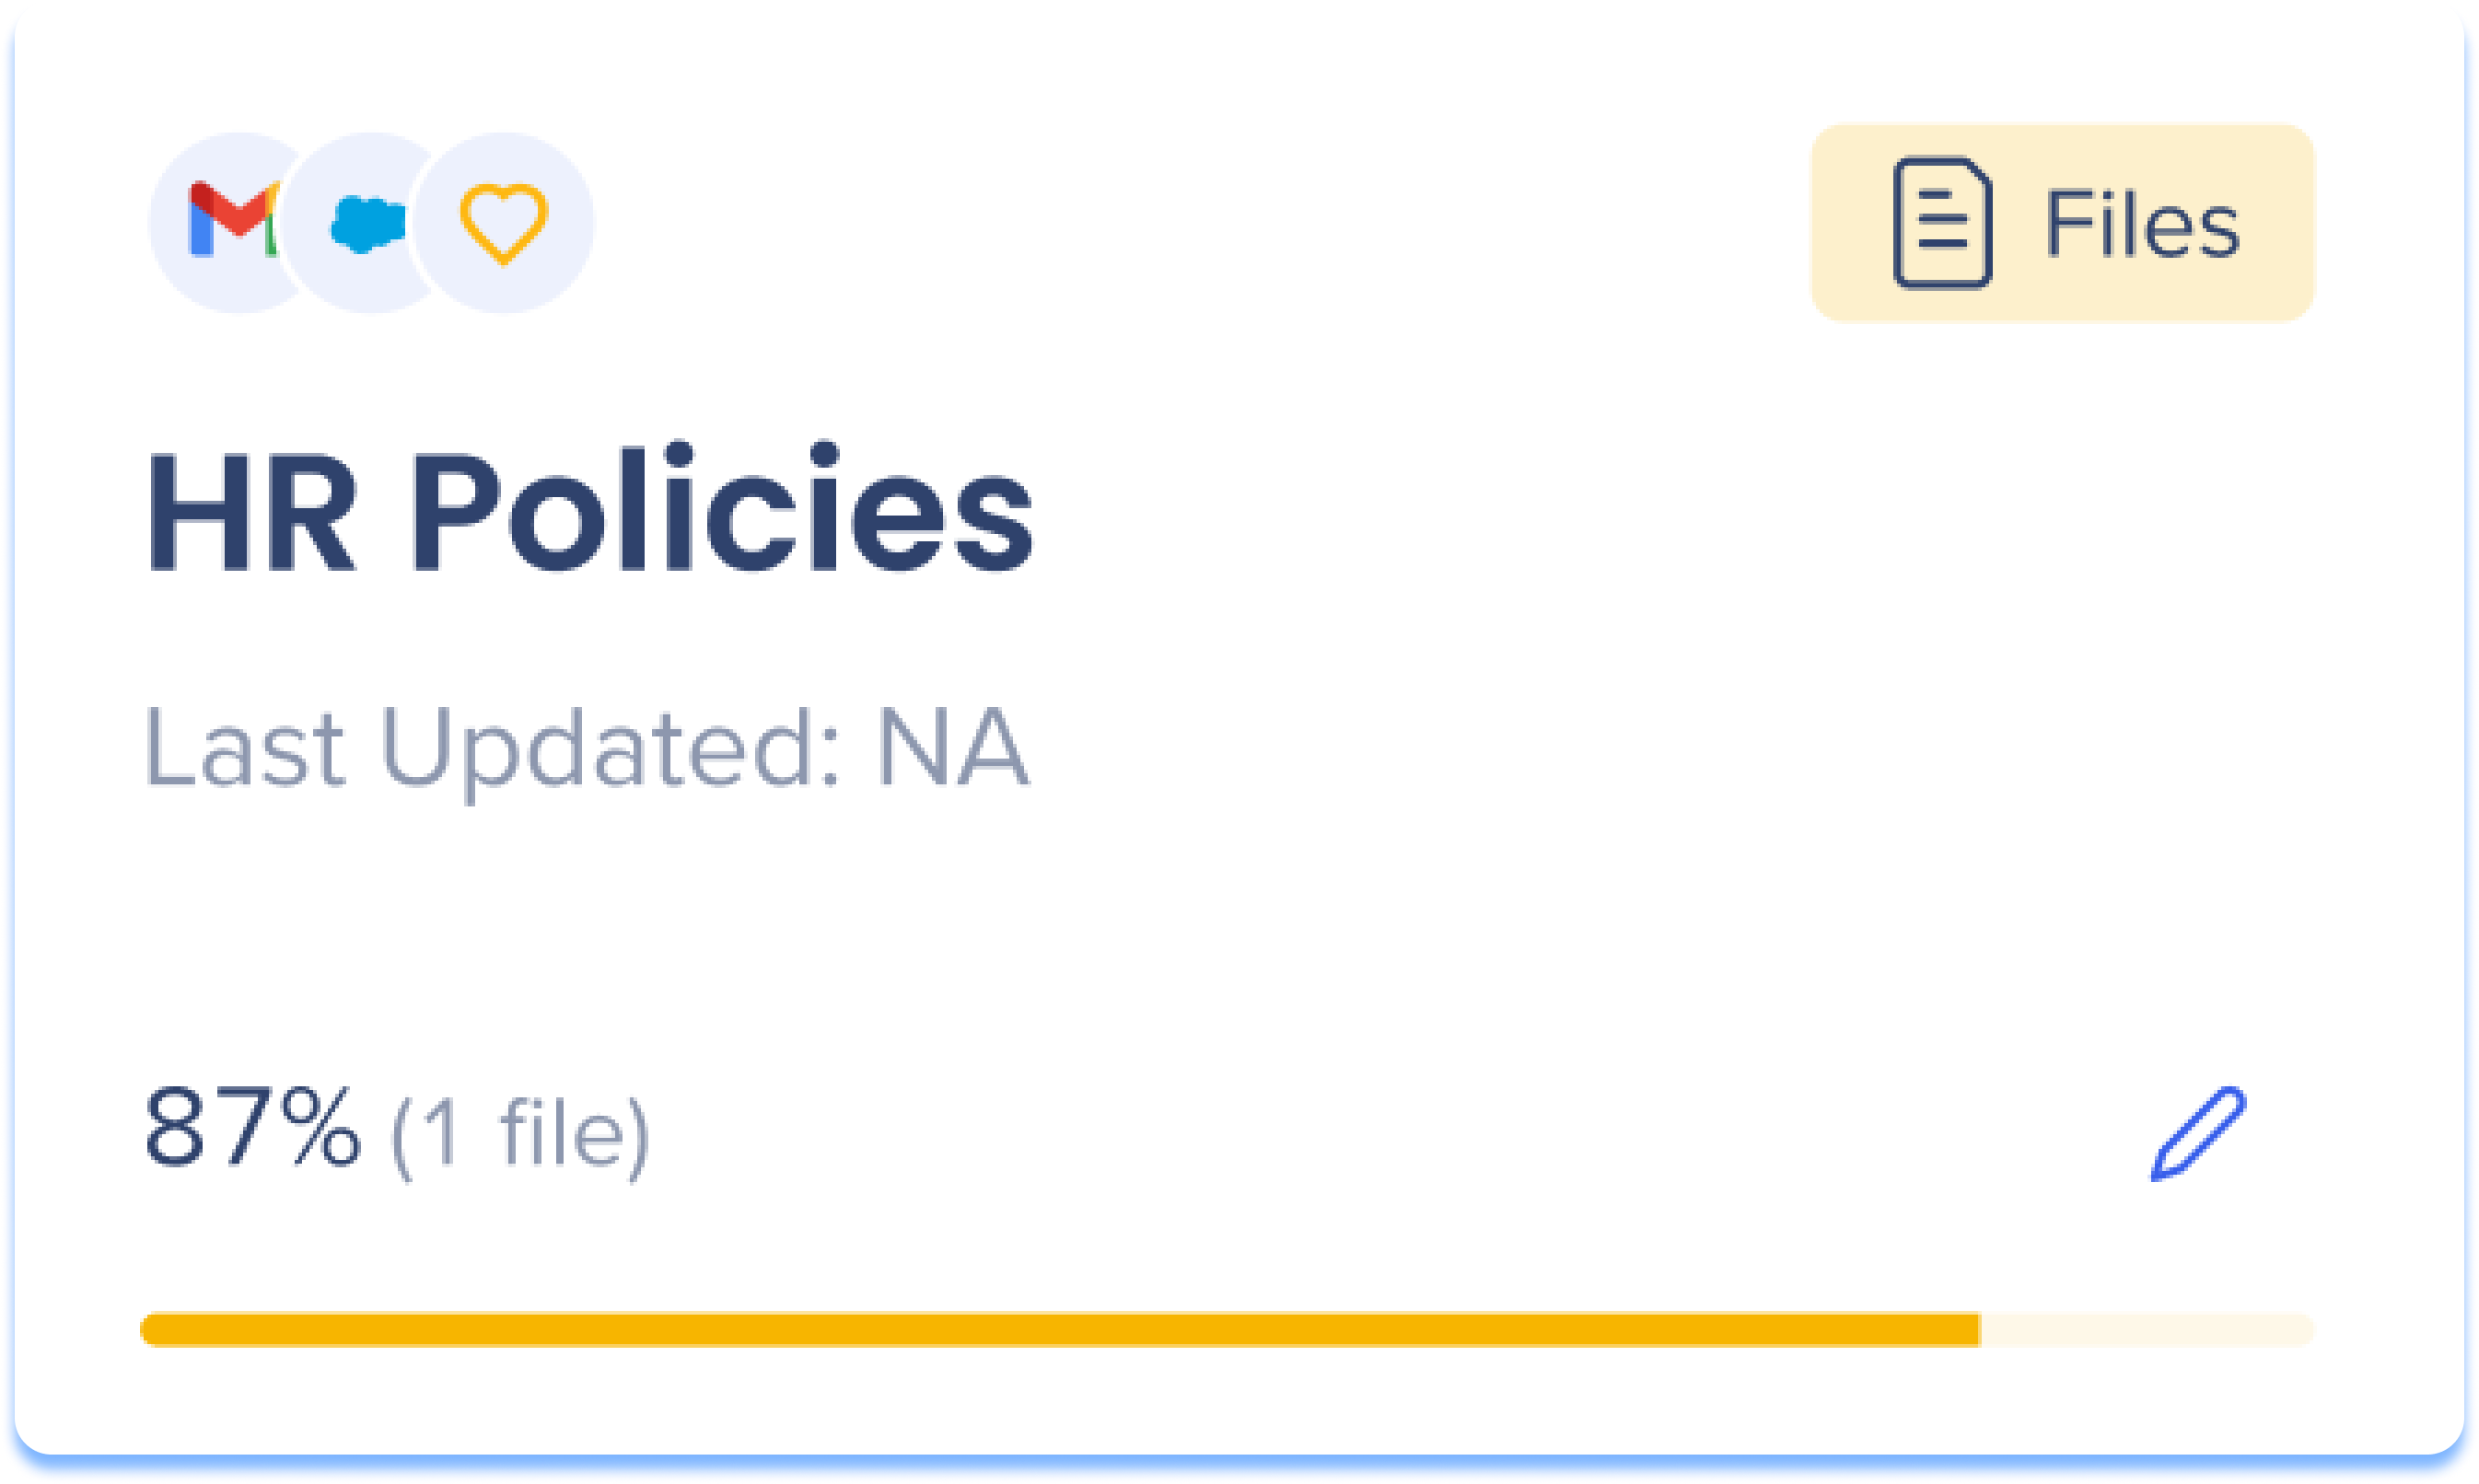
Each knowledge source is presented as a tile on the page and displays the following information:
-
Systems: Which systems have access to this knowledge source
-
Source type:
-
Source name: The name of the source
-
Last sync: Time the source was last updated
-
Status: Displays the uploading progress
-
Created date: Date the source was added
Hover actions

Hover over a source tile to view actions.
-
Delete: Permanently removes the knowledge source from the dashboard and AI Answers
-
Edit: Make changes to the knowledge source
-
Refresh: Re-syncs the knowledge source for updates
-
Demo: Opens a demo of AI Answers so admins can simulate the end-user experience
Filter by system or segment
-
System: Lists all systems with connected knowledge sources. Selecting a system automatically loads its segments
-
Segment: Optional. All segments are selected by default; deselect to narrow results
-
Click Clear All to reset the view
Export AI Chat Data
Admins can export a report of all AI Answers interactions. The report downloads as a CSV file and includes the following columns:
レポート列のリスト...
-
質問:ユーザーが送信したクエリ
-
回答:AIが生成する応答
-
EUID:エンドユーザー識別子
-
タイムスタンプ:インタラクションの日付と時刻
-
システム:インタラクションが発生したときにユーザーが使用していたシステム
-
チャットUUID:チャットセッションの一意の識別子
-
使用されたナレッジソース:回答に貢献したナレッジソース。コンマで区切られた値としてリストされます。
-
ソースリンク:回答の生成に使用される特定の記事またはファイルへの直接リンク。コンマで区切られたURLとしてリストされます。 リンクが利用できない場合は空白です
-
フォローアップ質問:ユーザーが提案されたフォローアップ質問をクリックした(「はい」)、または手動でクエリを入力した(「いいえ」)かどうかを示します。
-
フィードバック信号:回答に関するユーザーのフィードバック:ポジティブ、ネガティブ、またはフィードバックが送信されなかった場合のNull。
AI Integrations
Enable the Slack Integration to use AI Answers within your Slack channels.
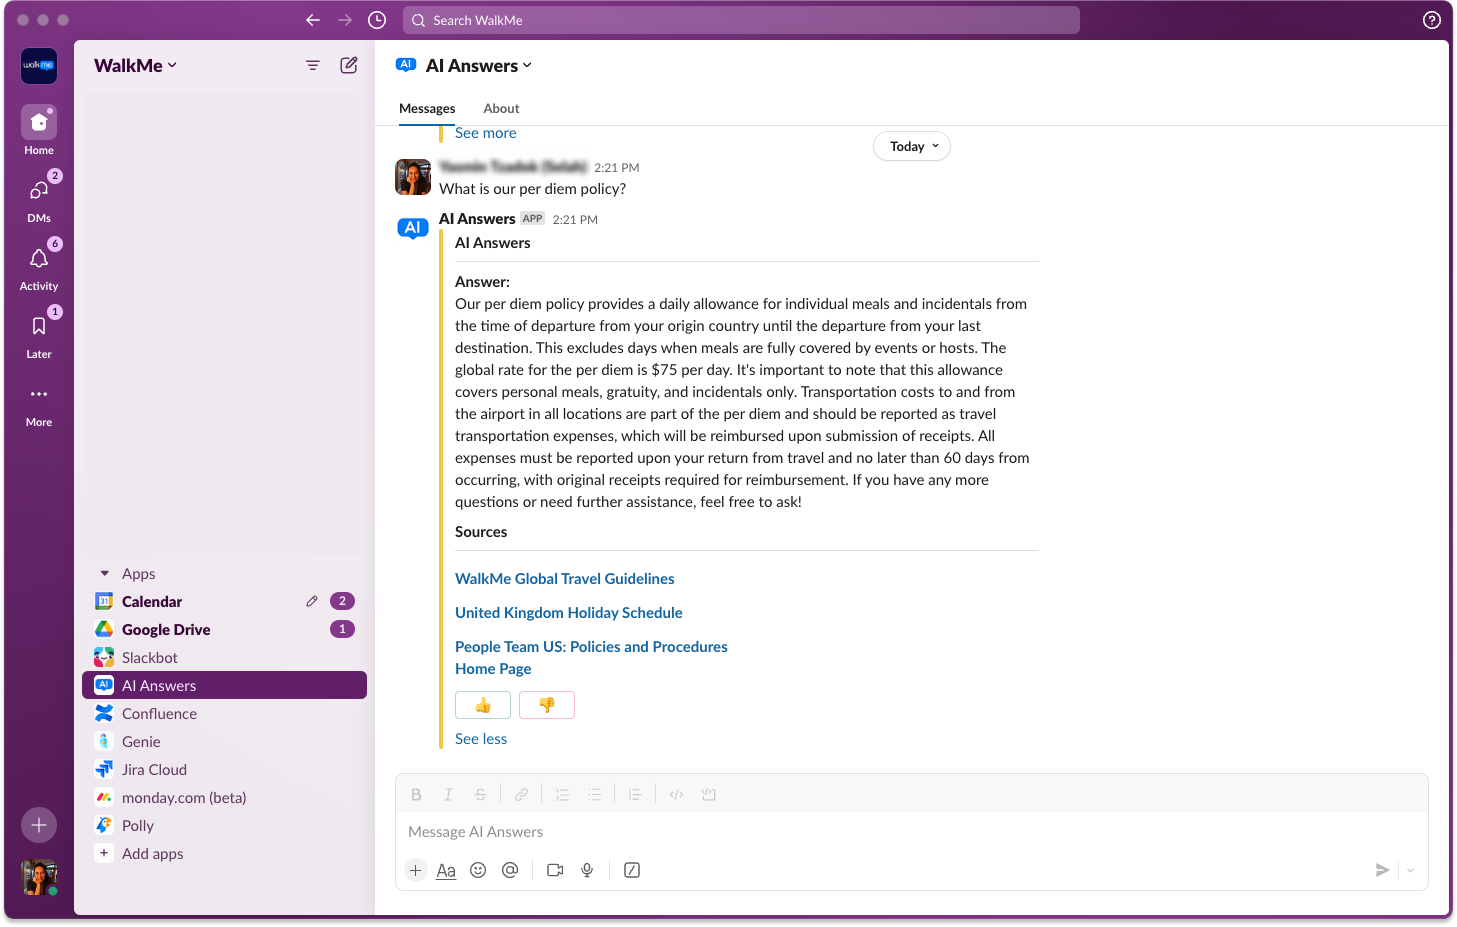
Configure the Slack integration
-
Click the AI Integrations tab on the AI Knowledge source page
-
Click Enable on the Slack tile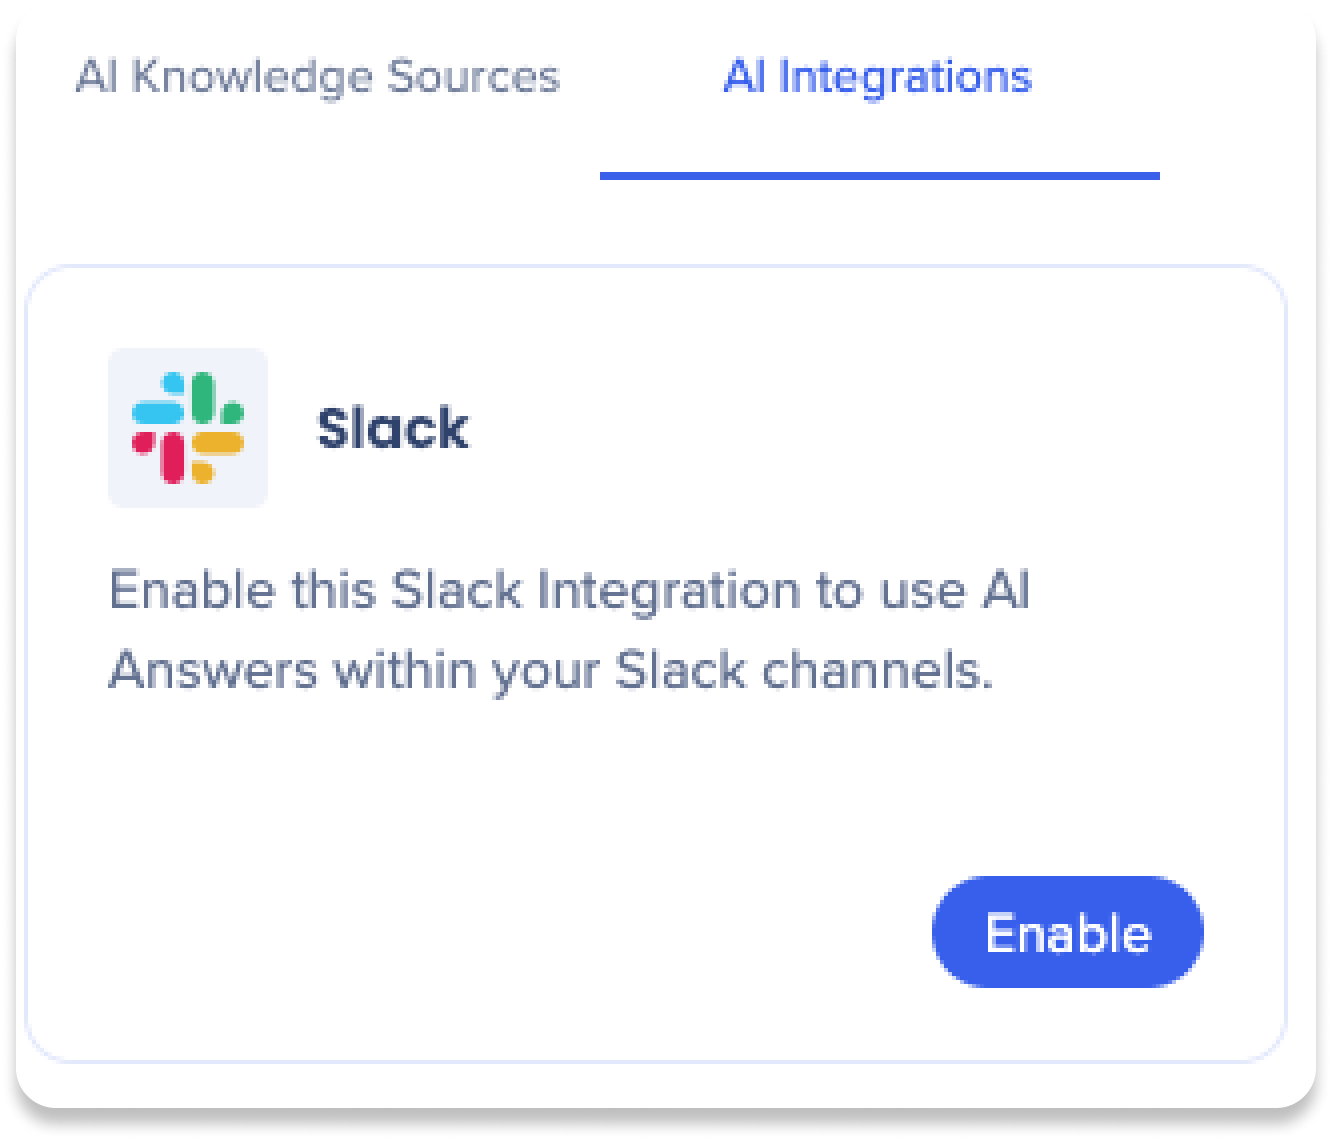
-
A popup will appear to configure the Slack integration
-
Enter a name for the Slack integration
-
Click Next
-
Follow the instructions for the App Manifest
-
Once completed, click Next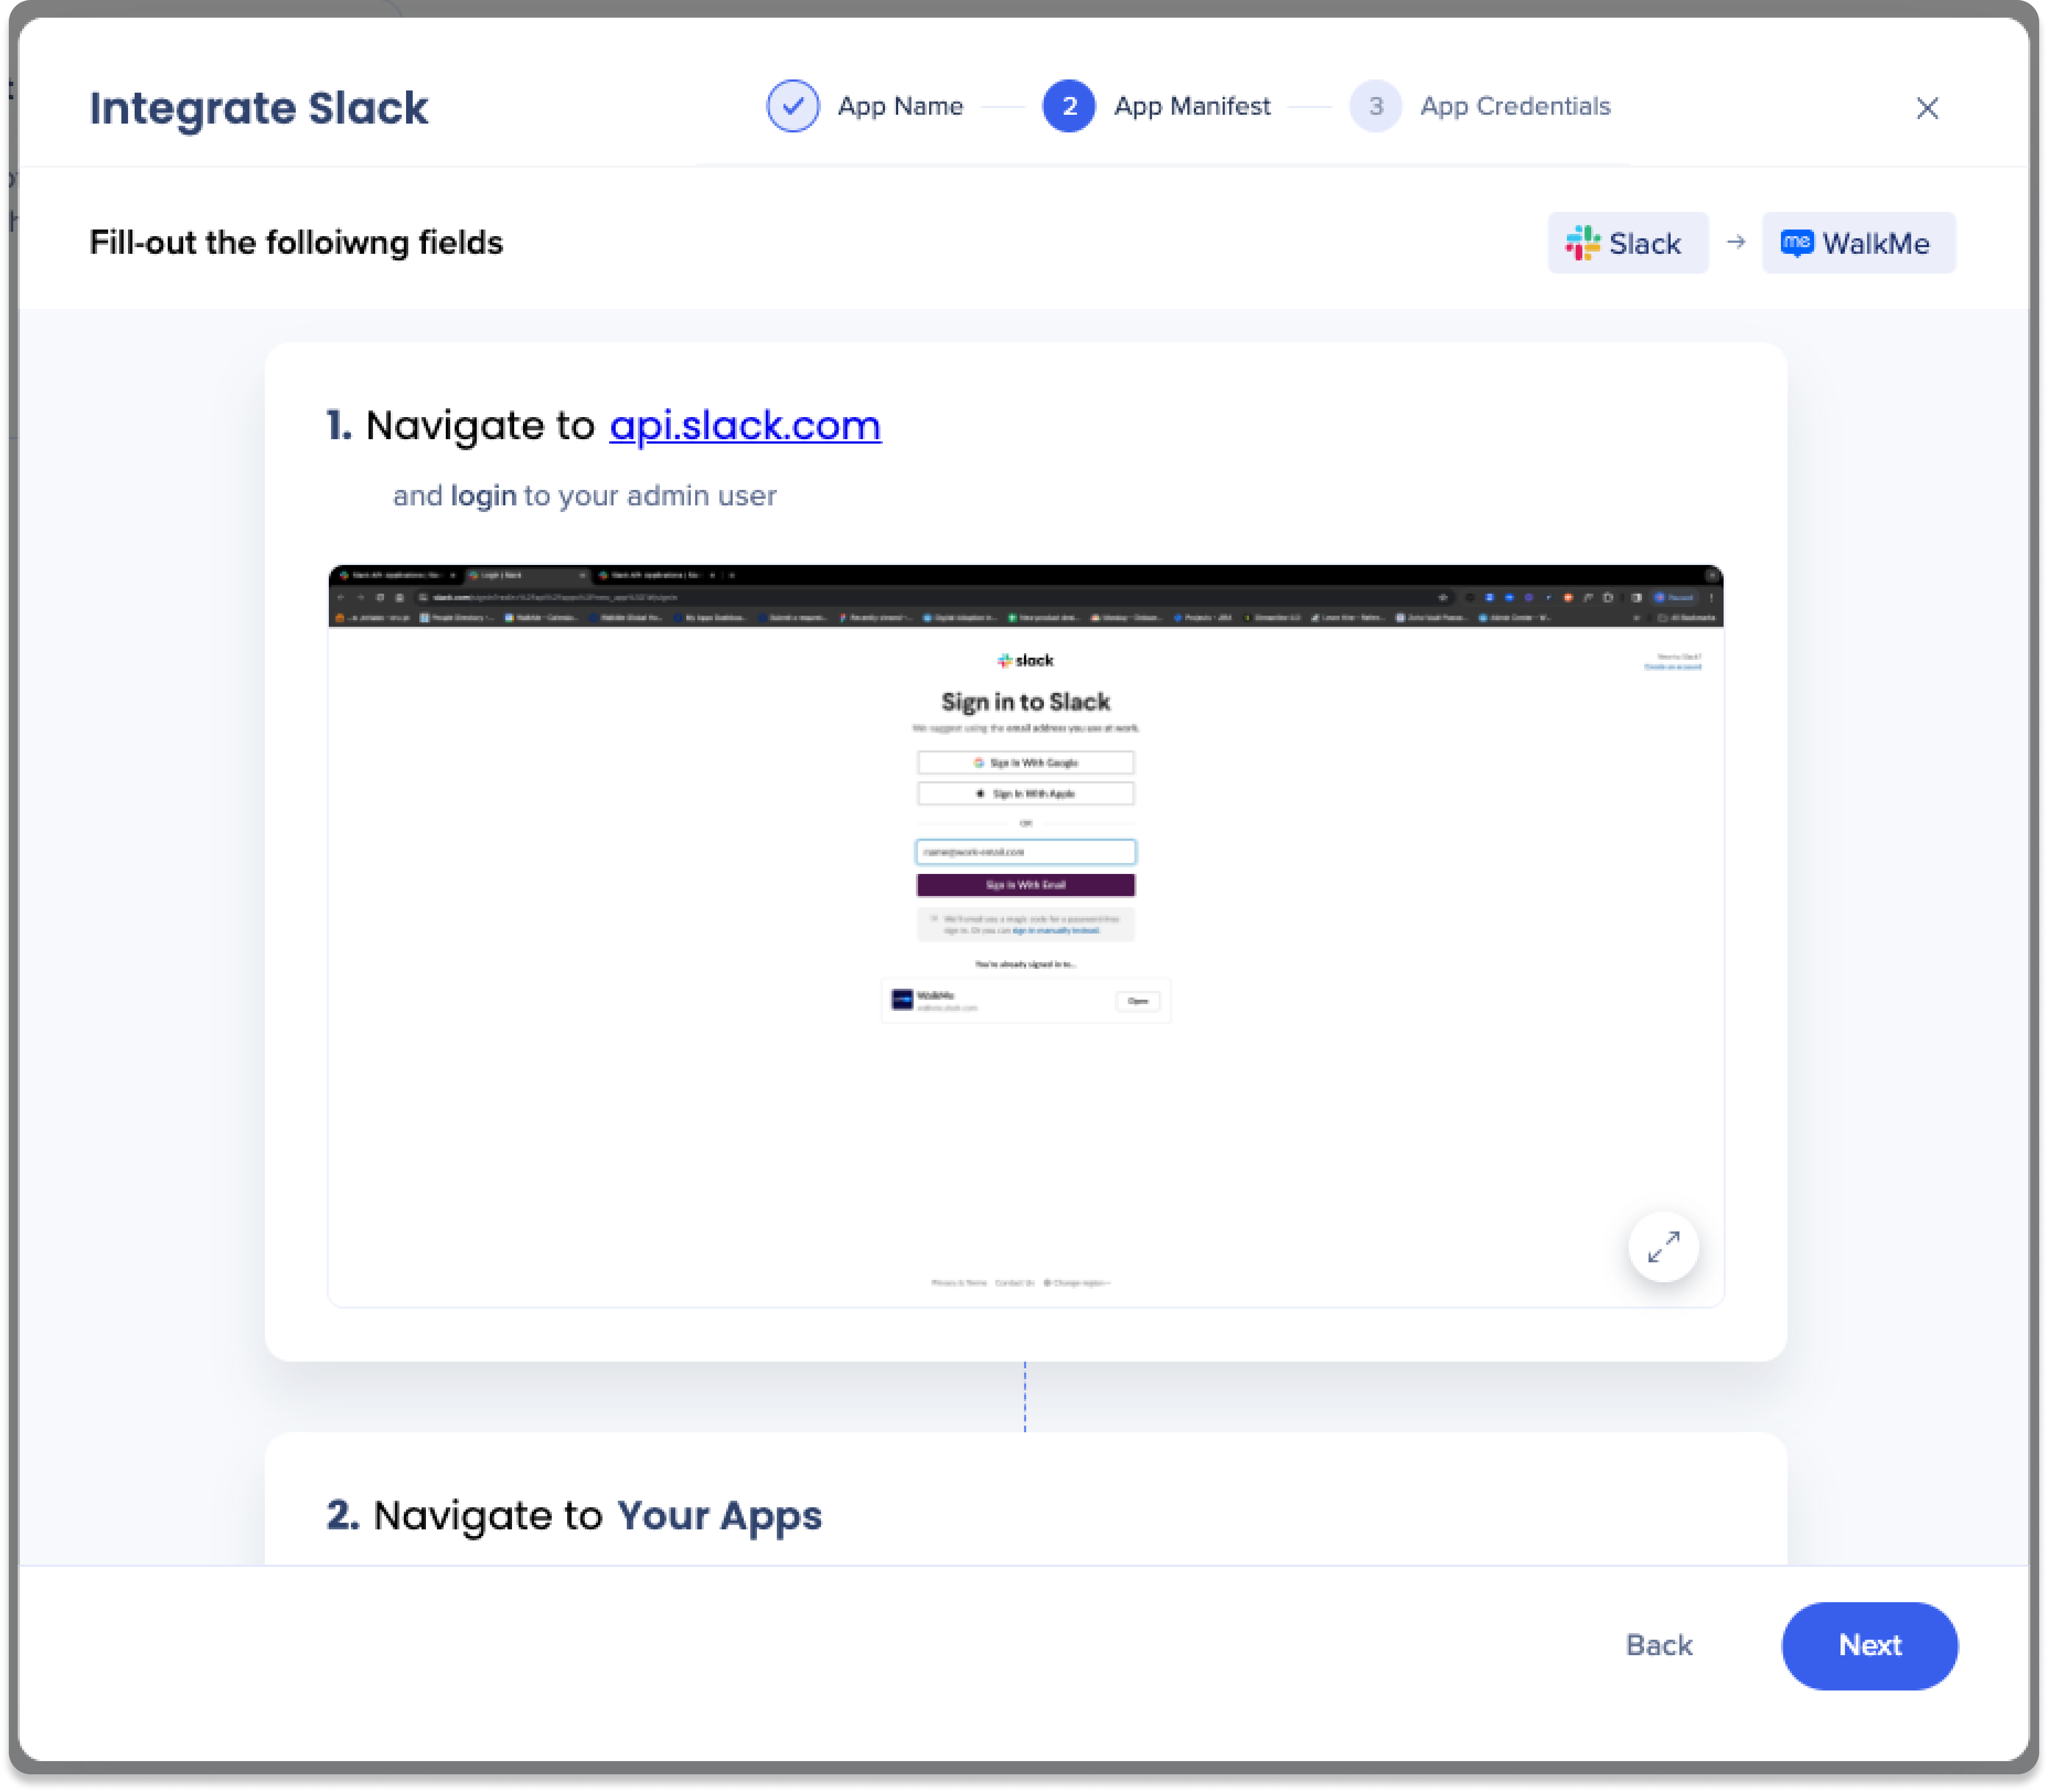
-
Copy and paste the app credentials
-
Signing Secret
-
Bot User OAuth Token
-
Click Add Slack Integration
-
Done!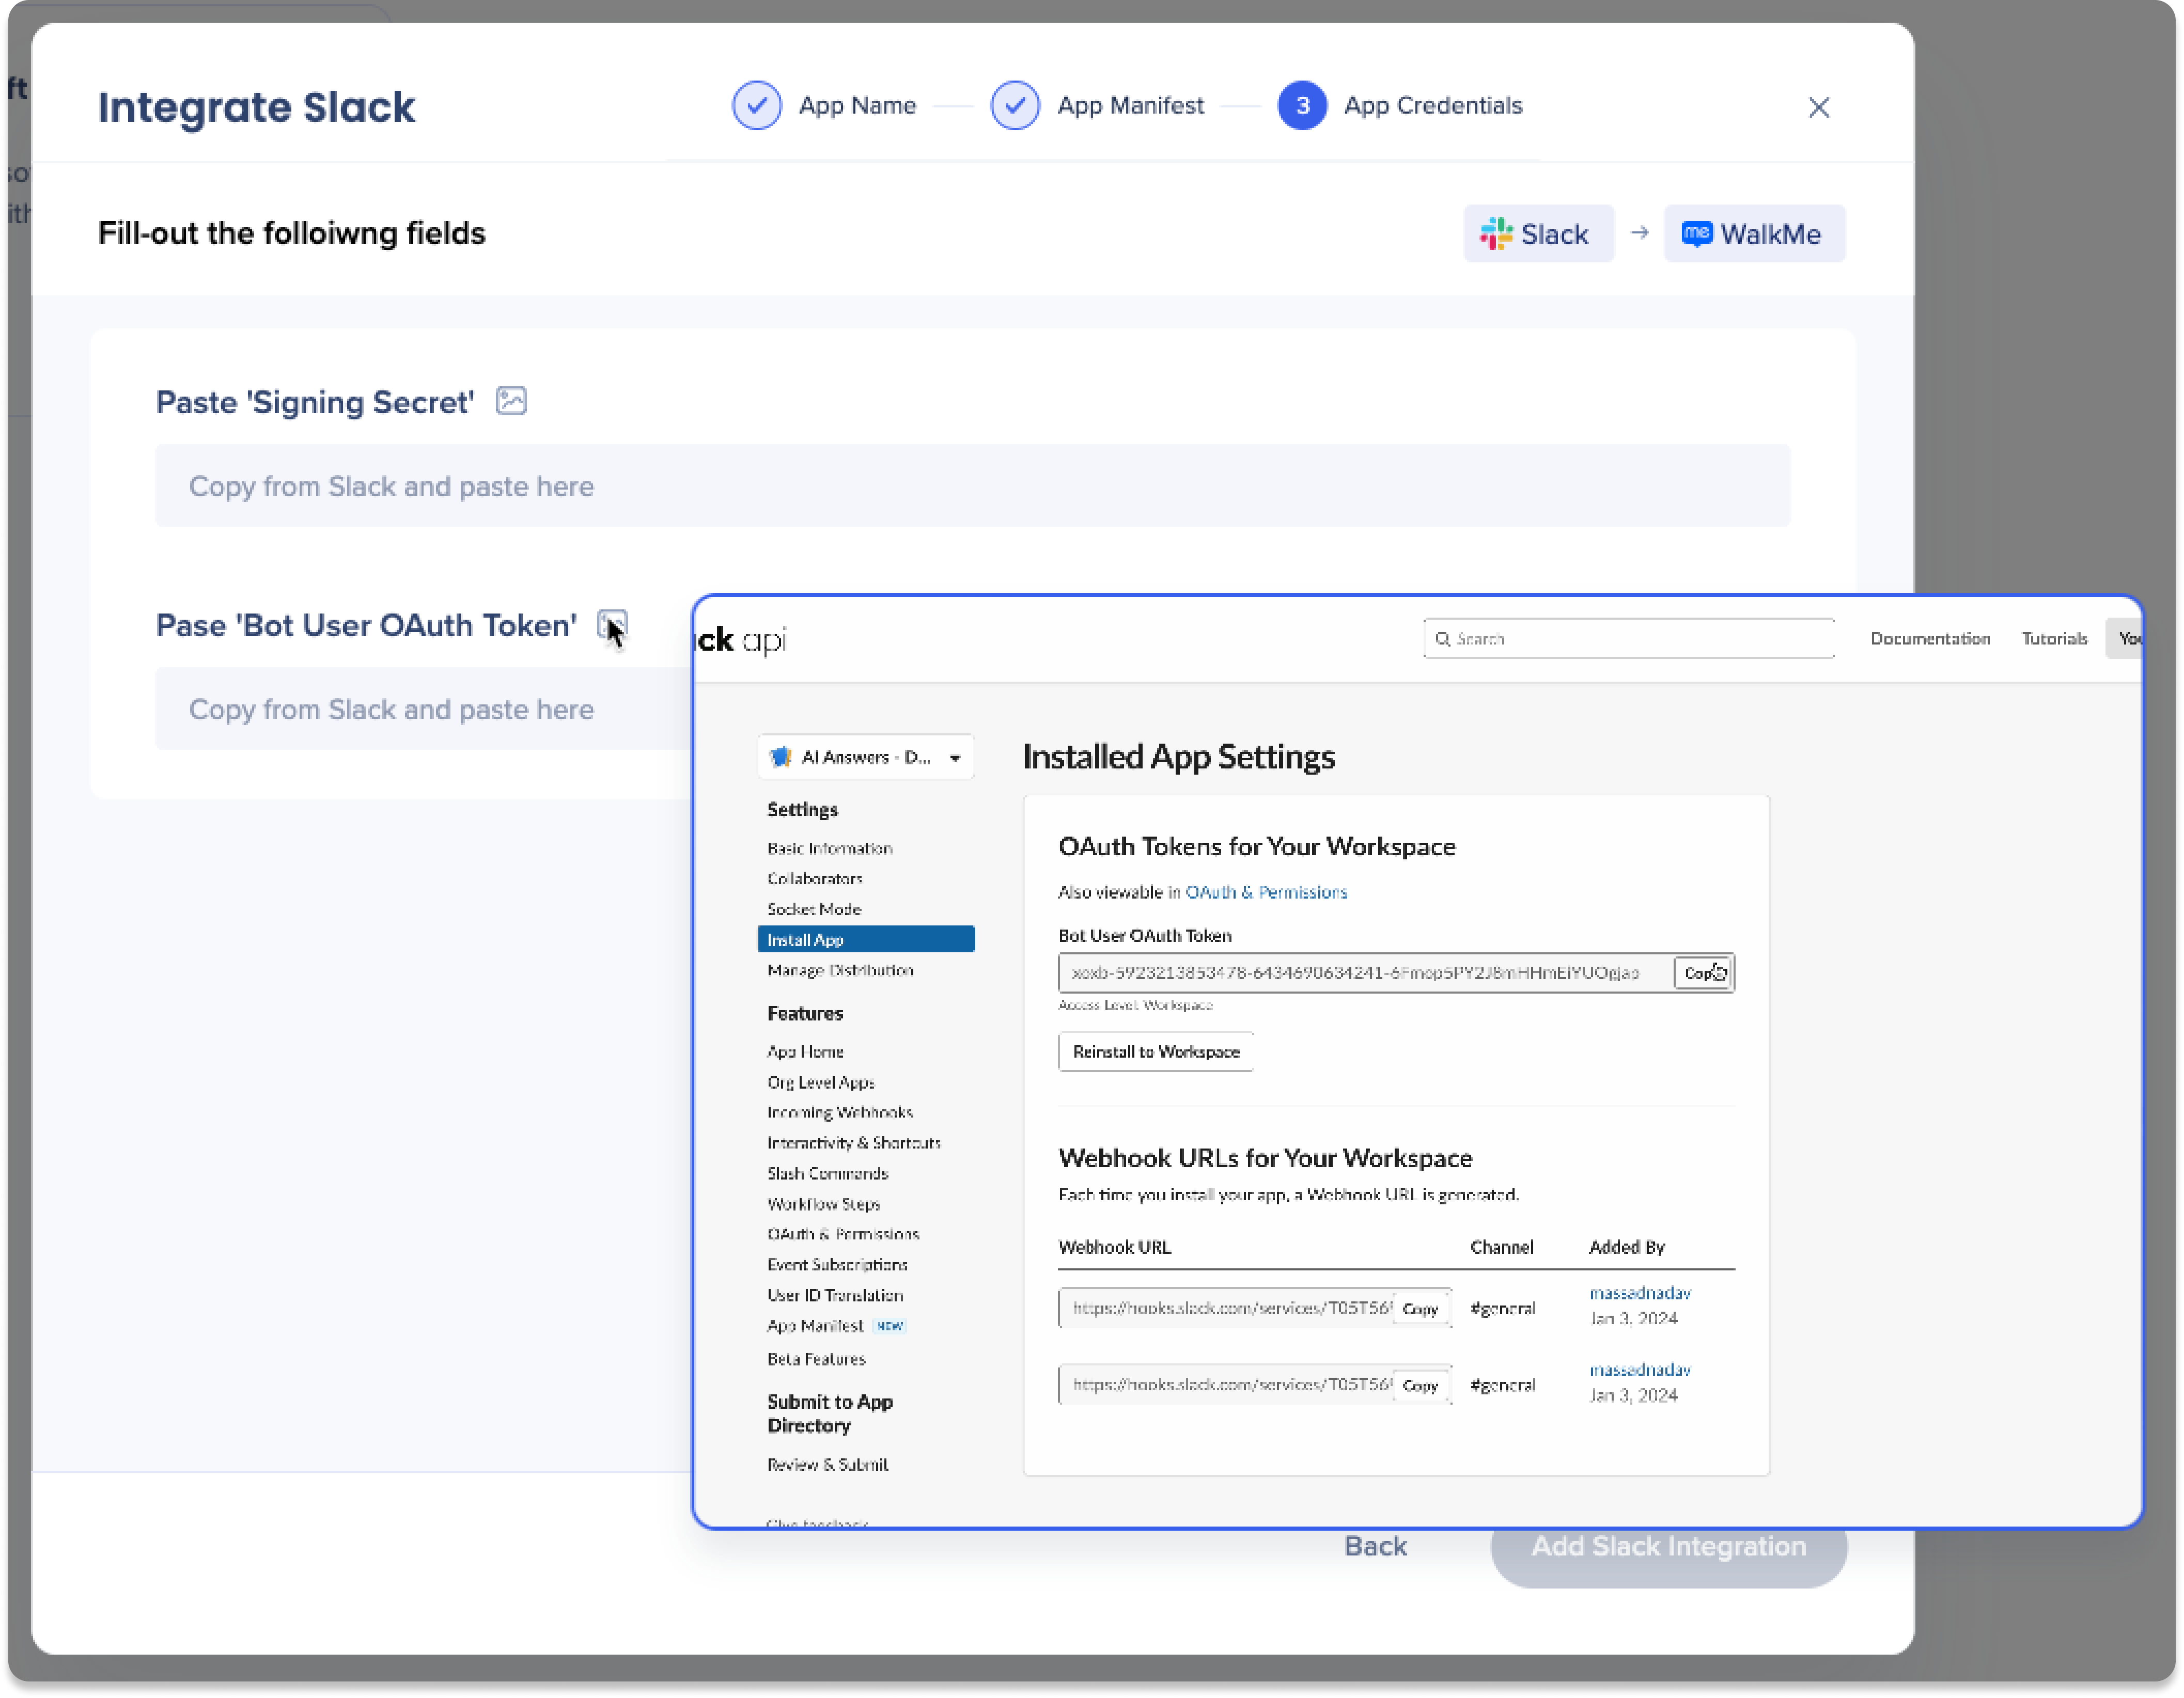
Data Collection Export
Opt in to view full report of Q&A interactions generated by AI Answers.
Enablement
You must opt-in to capture and export full Q&A logs:
-
 Select the Settings icon
-
Turn on the Enable Export AI Chat button toggle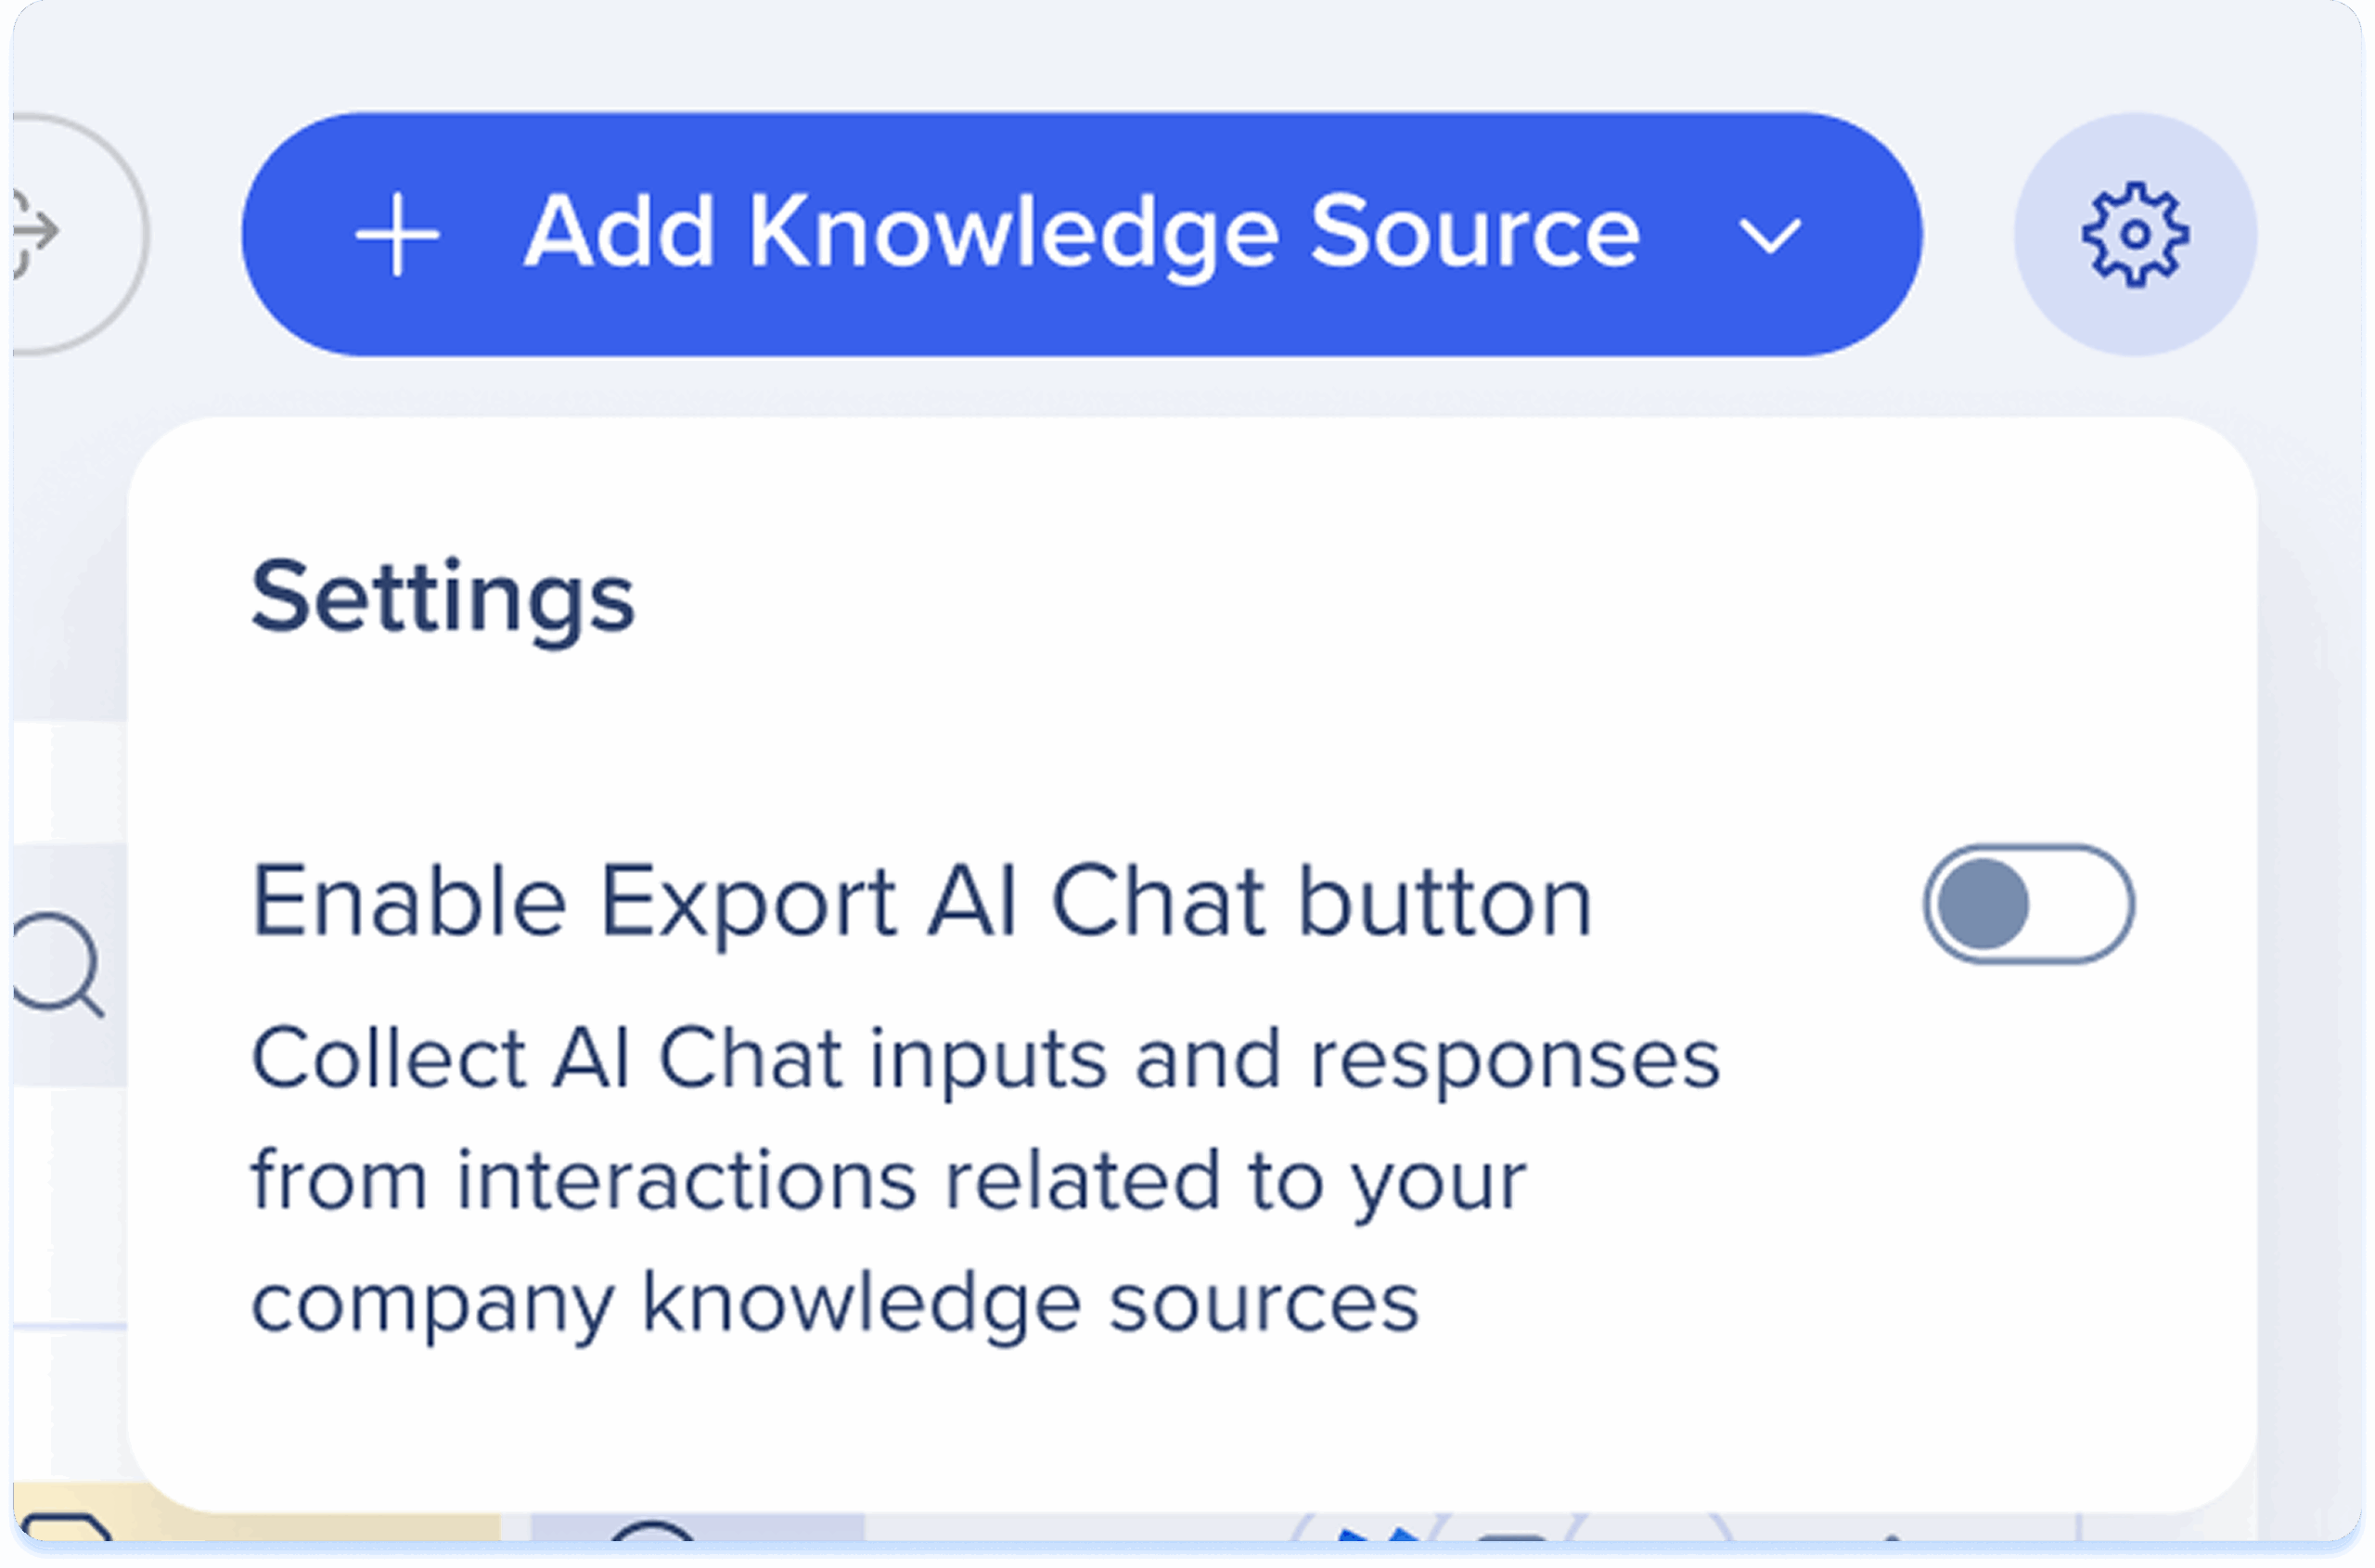
-
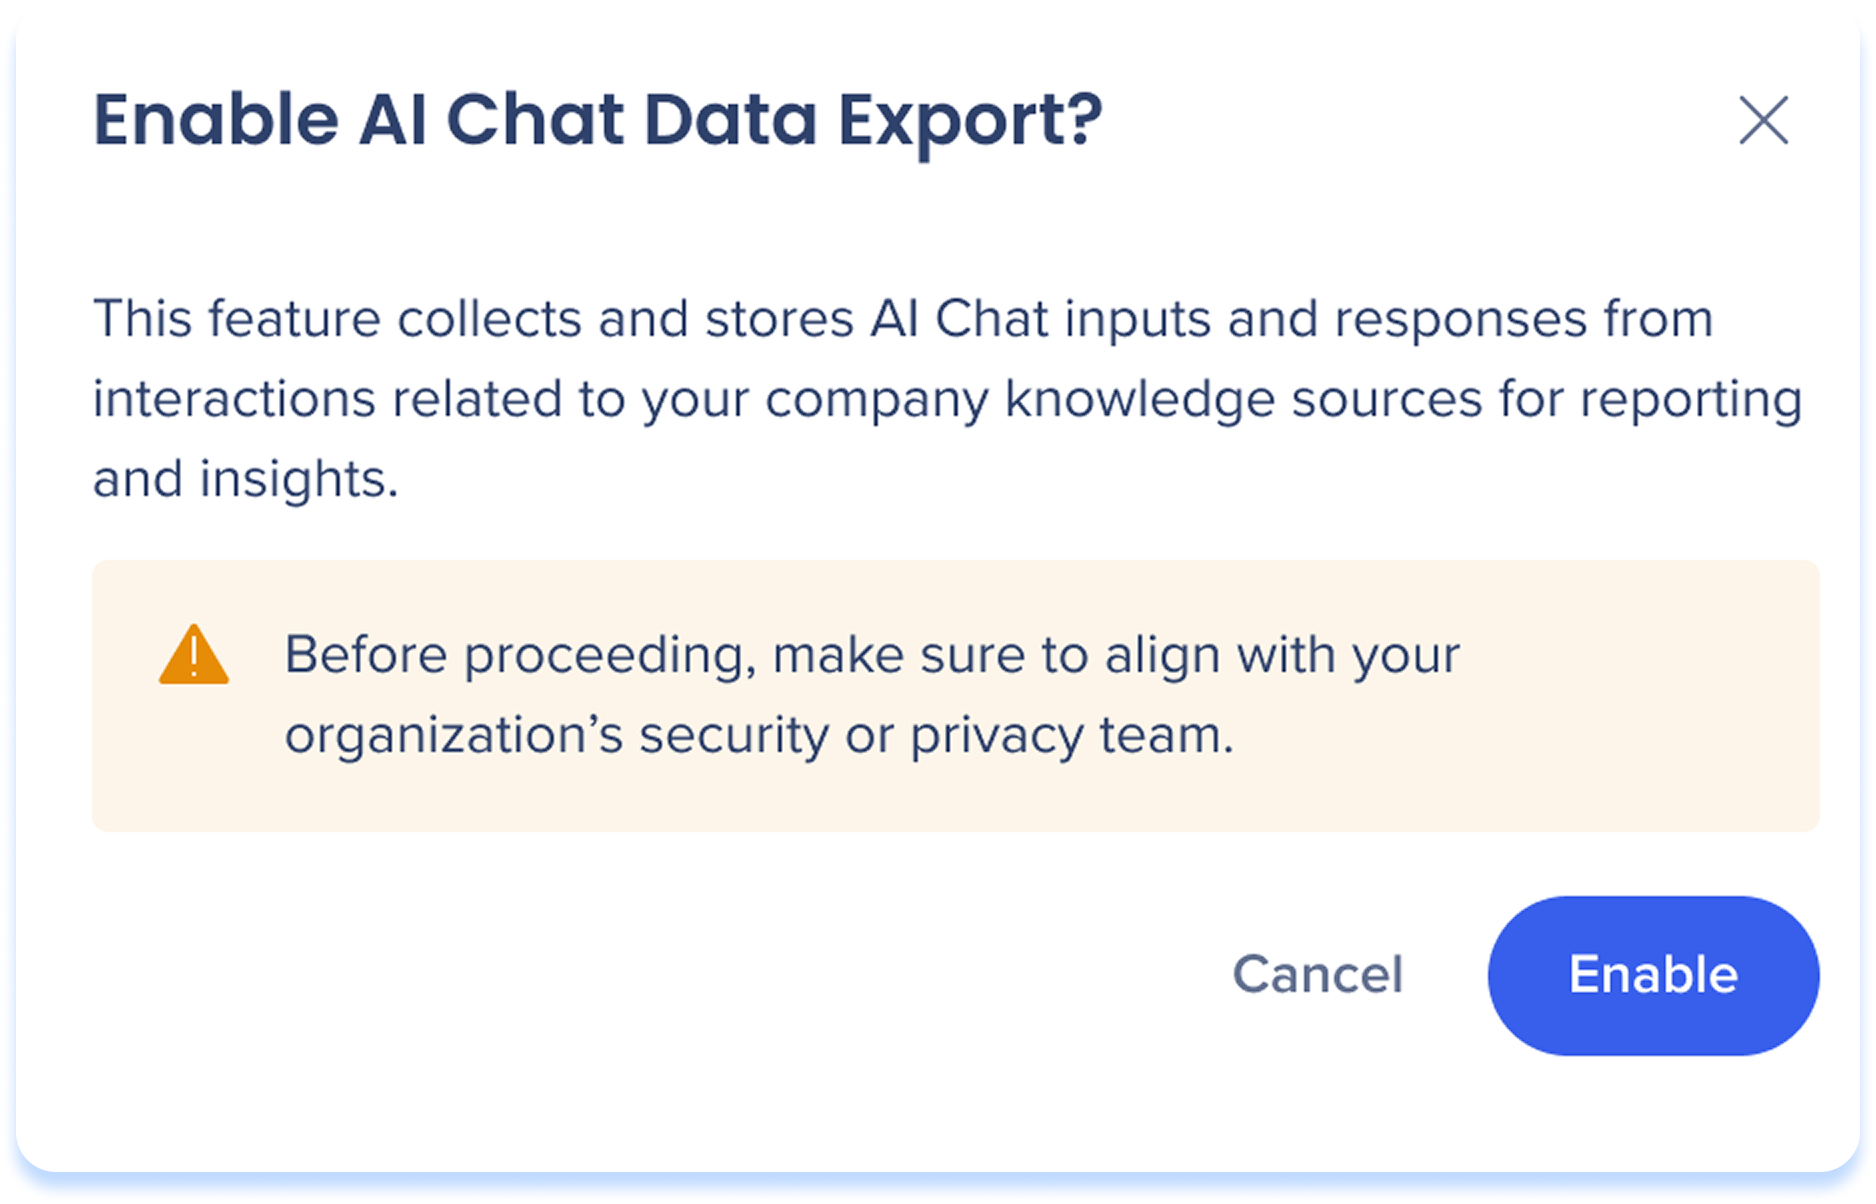
You'll get a popup warning letting you know that this feature collects and stores AI Chat inputs and responses from interactions related to your company knowledge sources for reporting and insight
-
Select Enable
How it works
-
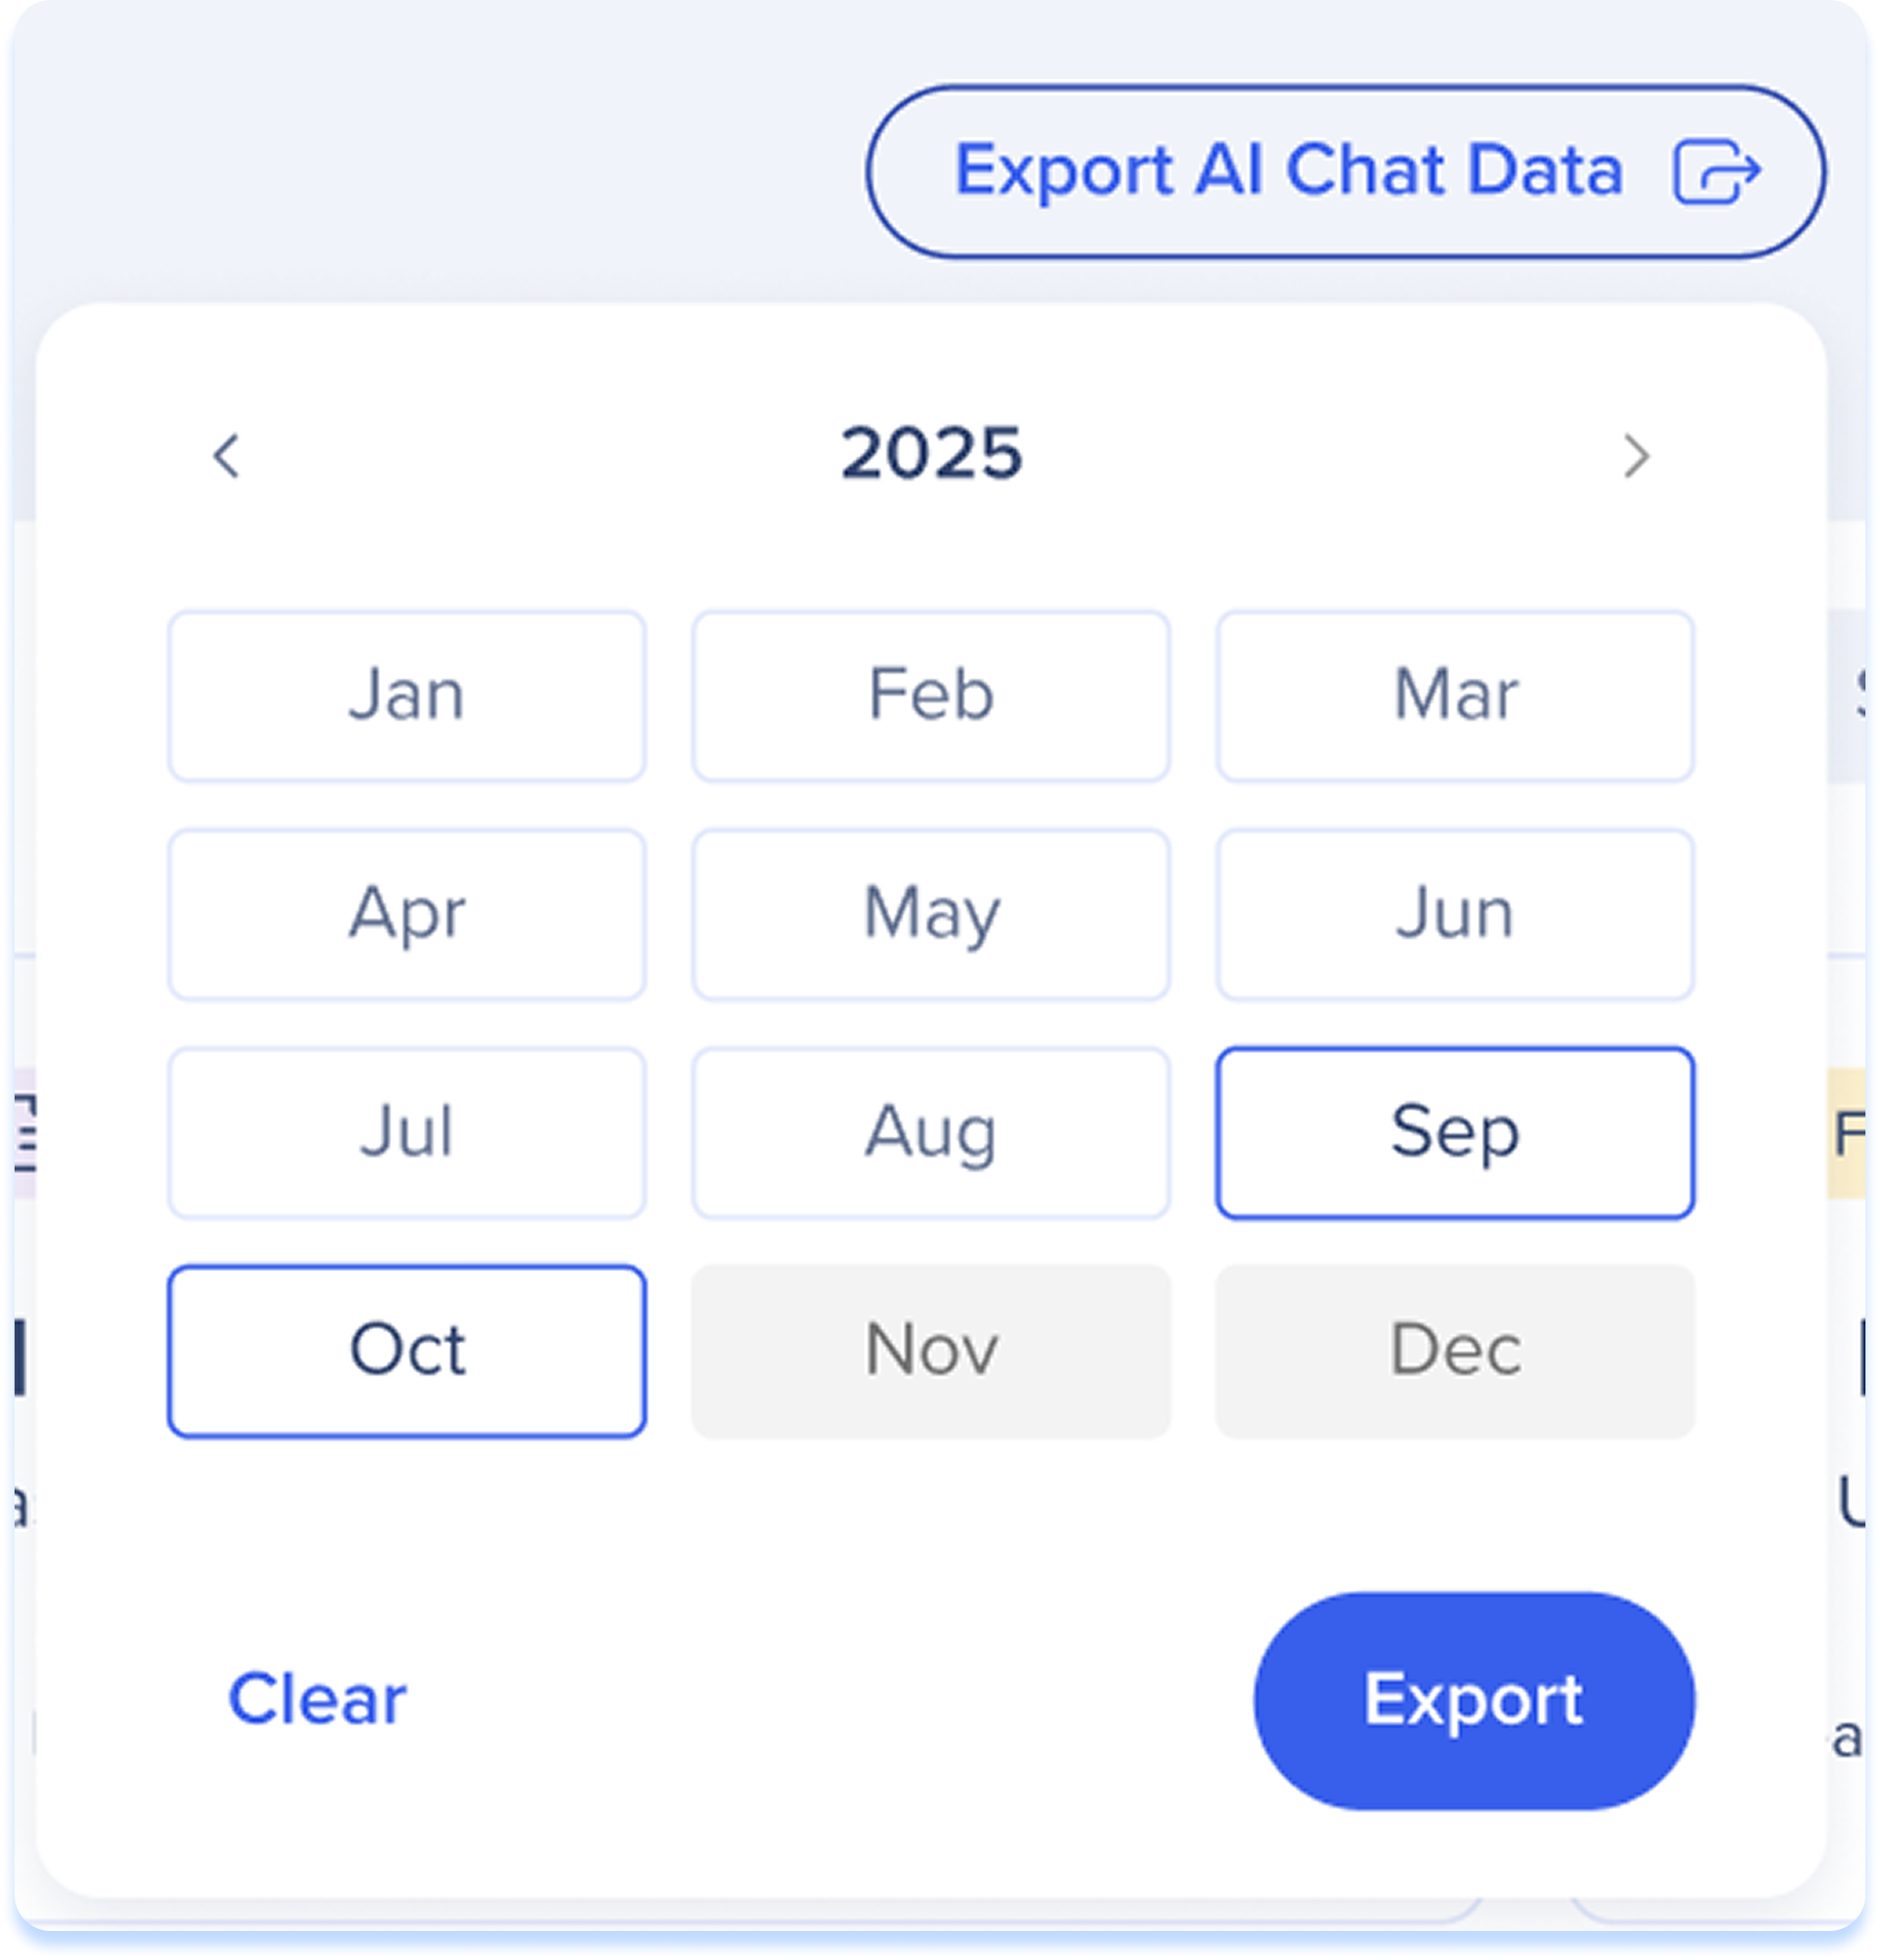
After enablement, Select the Export AI Chat Data button
-
Choose a date range
-
Select Export
How to Add a Knowledge Source
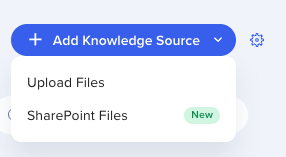
WalkMe supports two types of knowledge sources:
Select the source type that fits your content.
Upload Files
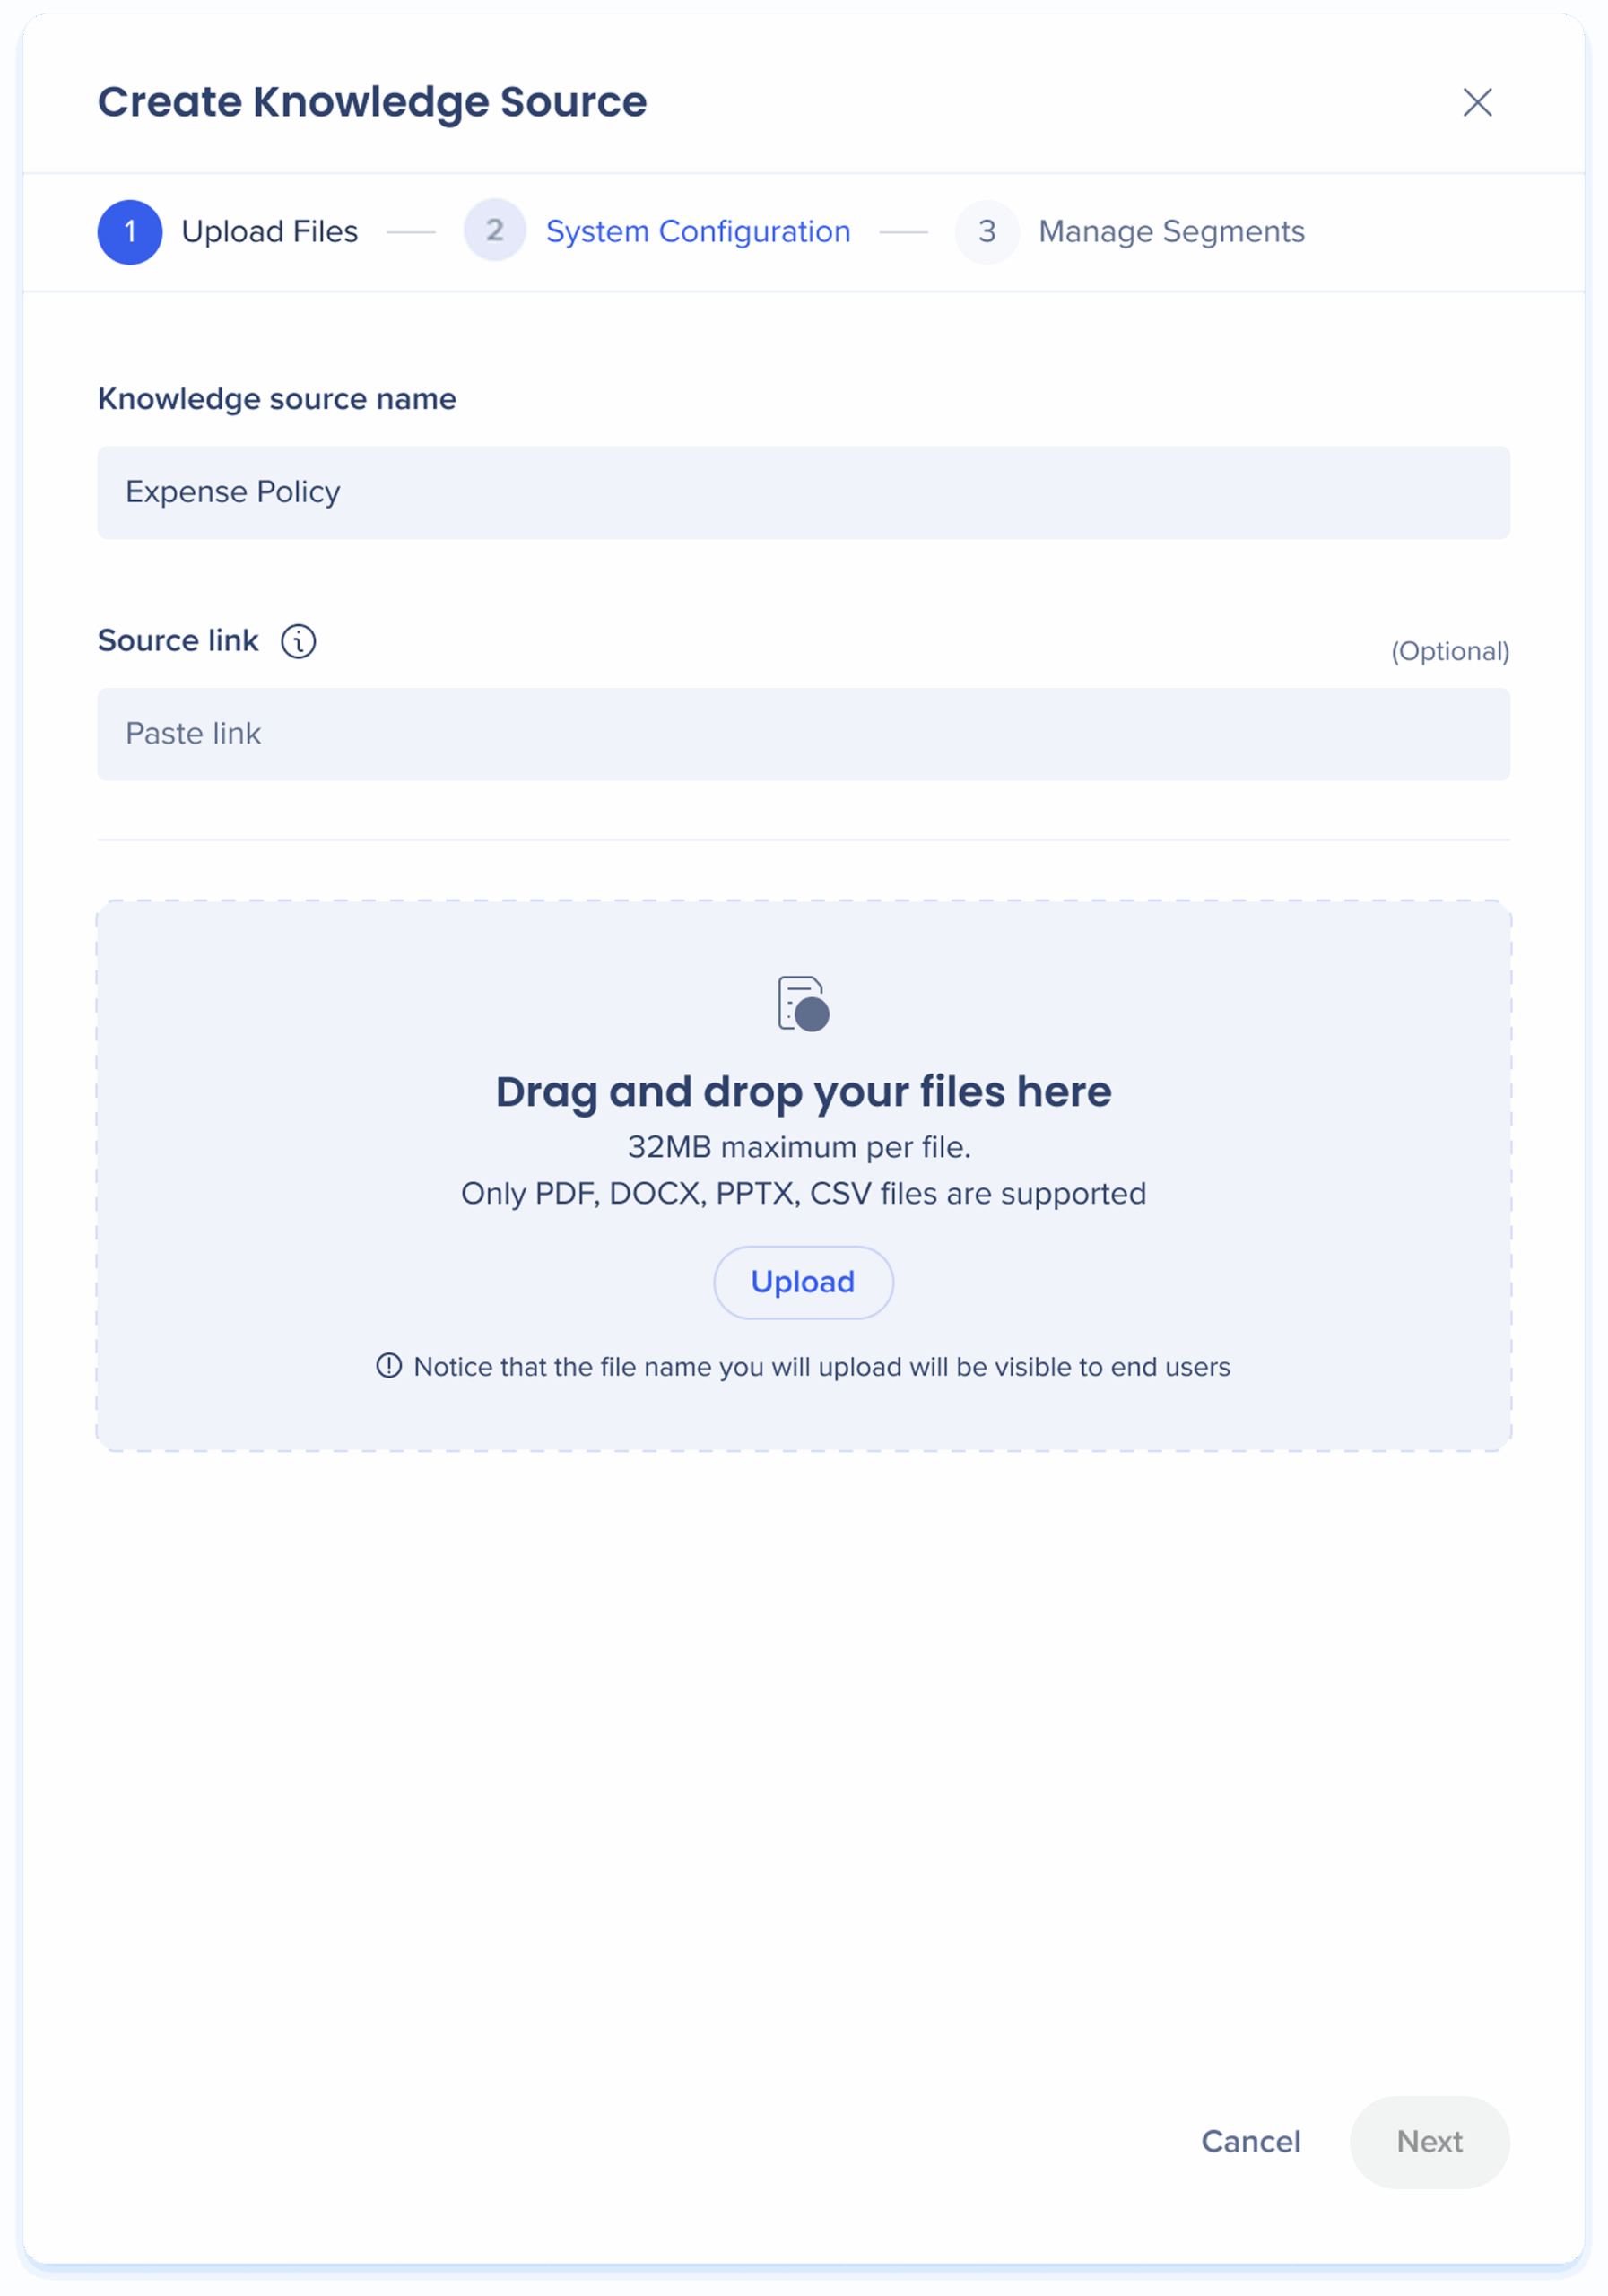
Step 1: Upload source files
- Enter a name for the Knowledge Source
-
Add a link to your file source. This link will appear as a clickable reference in chat responses (optional)
- Drag and drop your files or click Upload
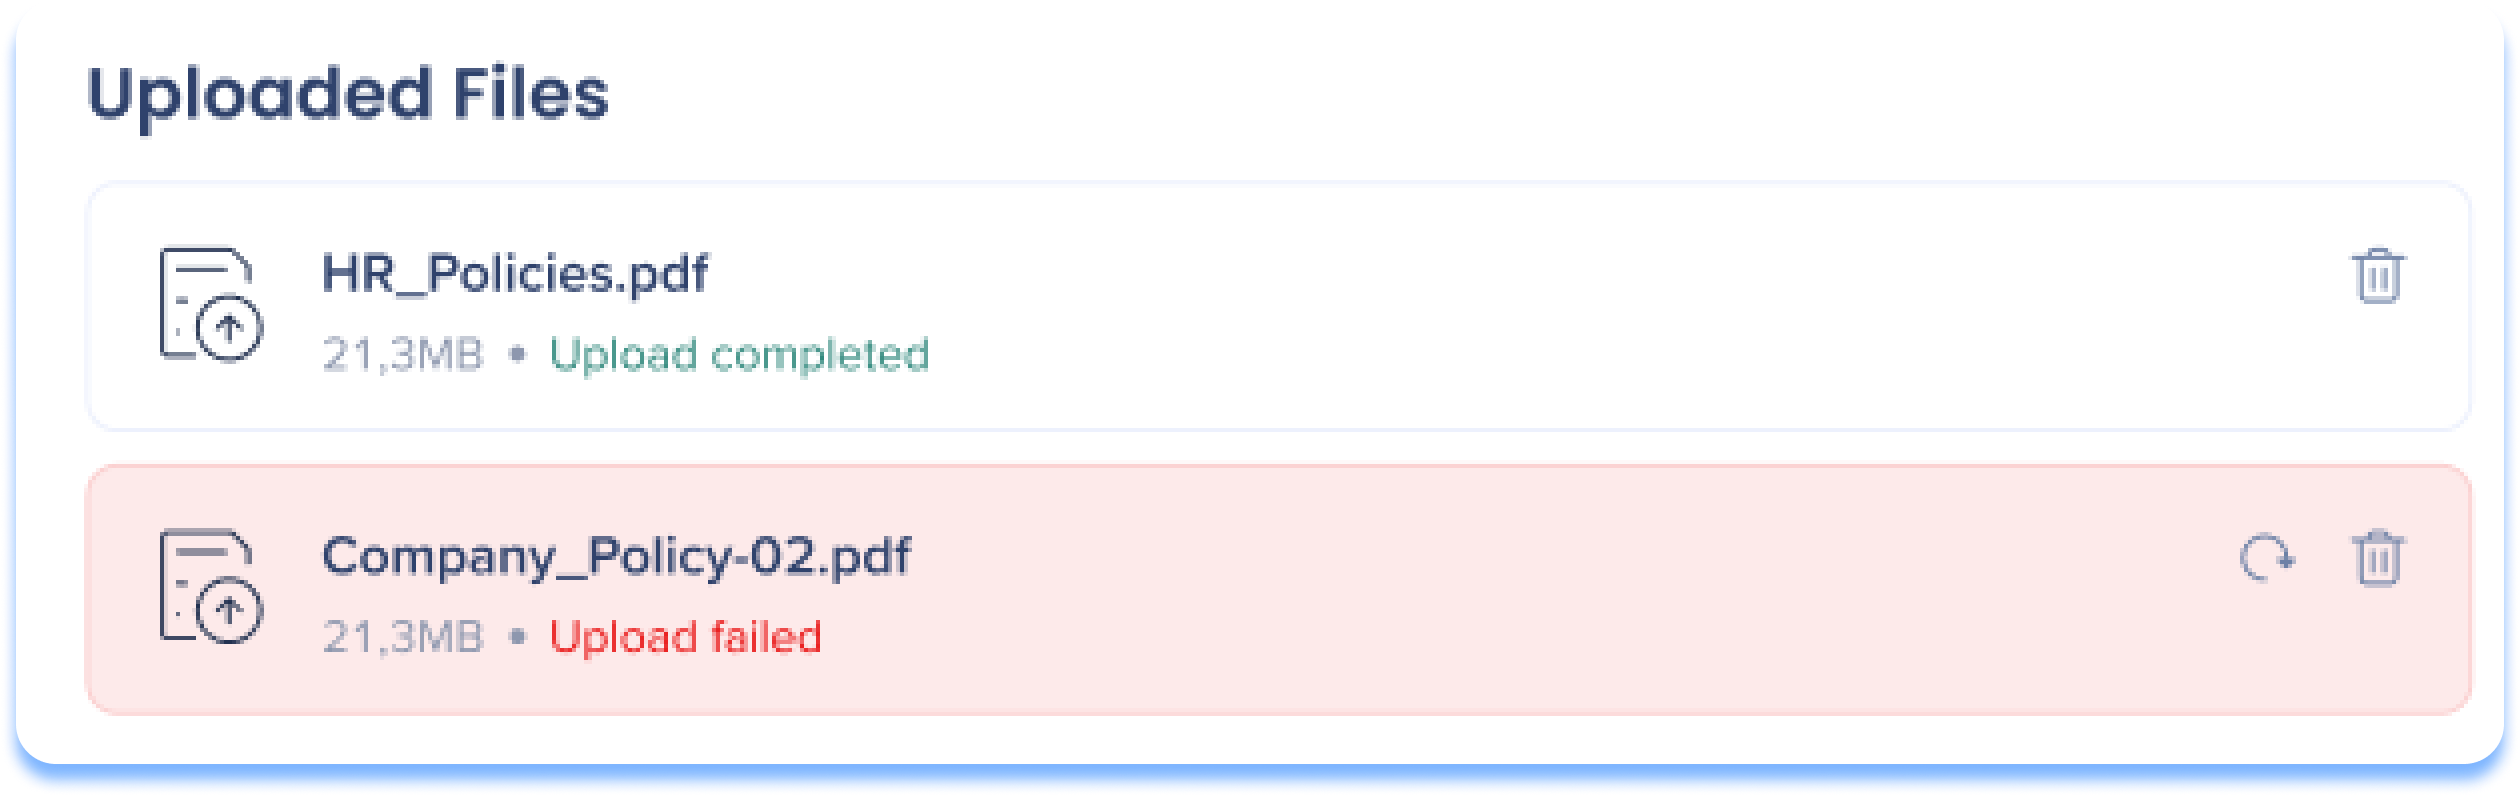
4. The progress of the uploading files will appear
5. Click Next
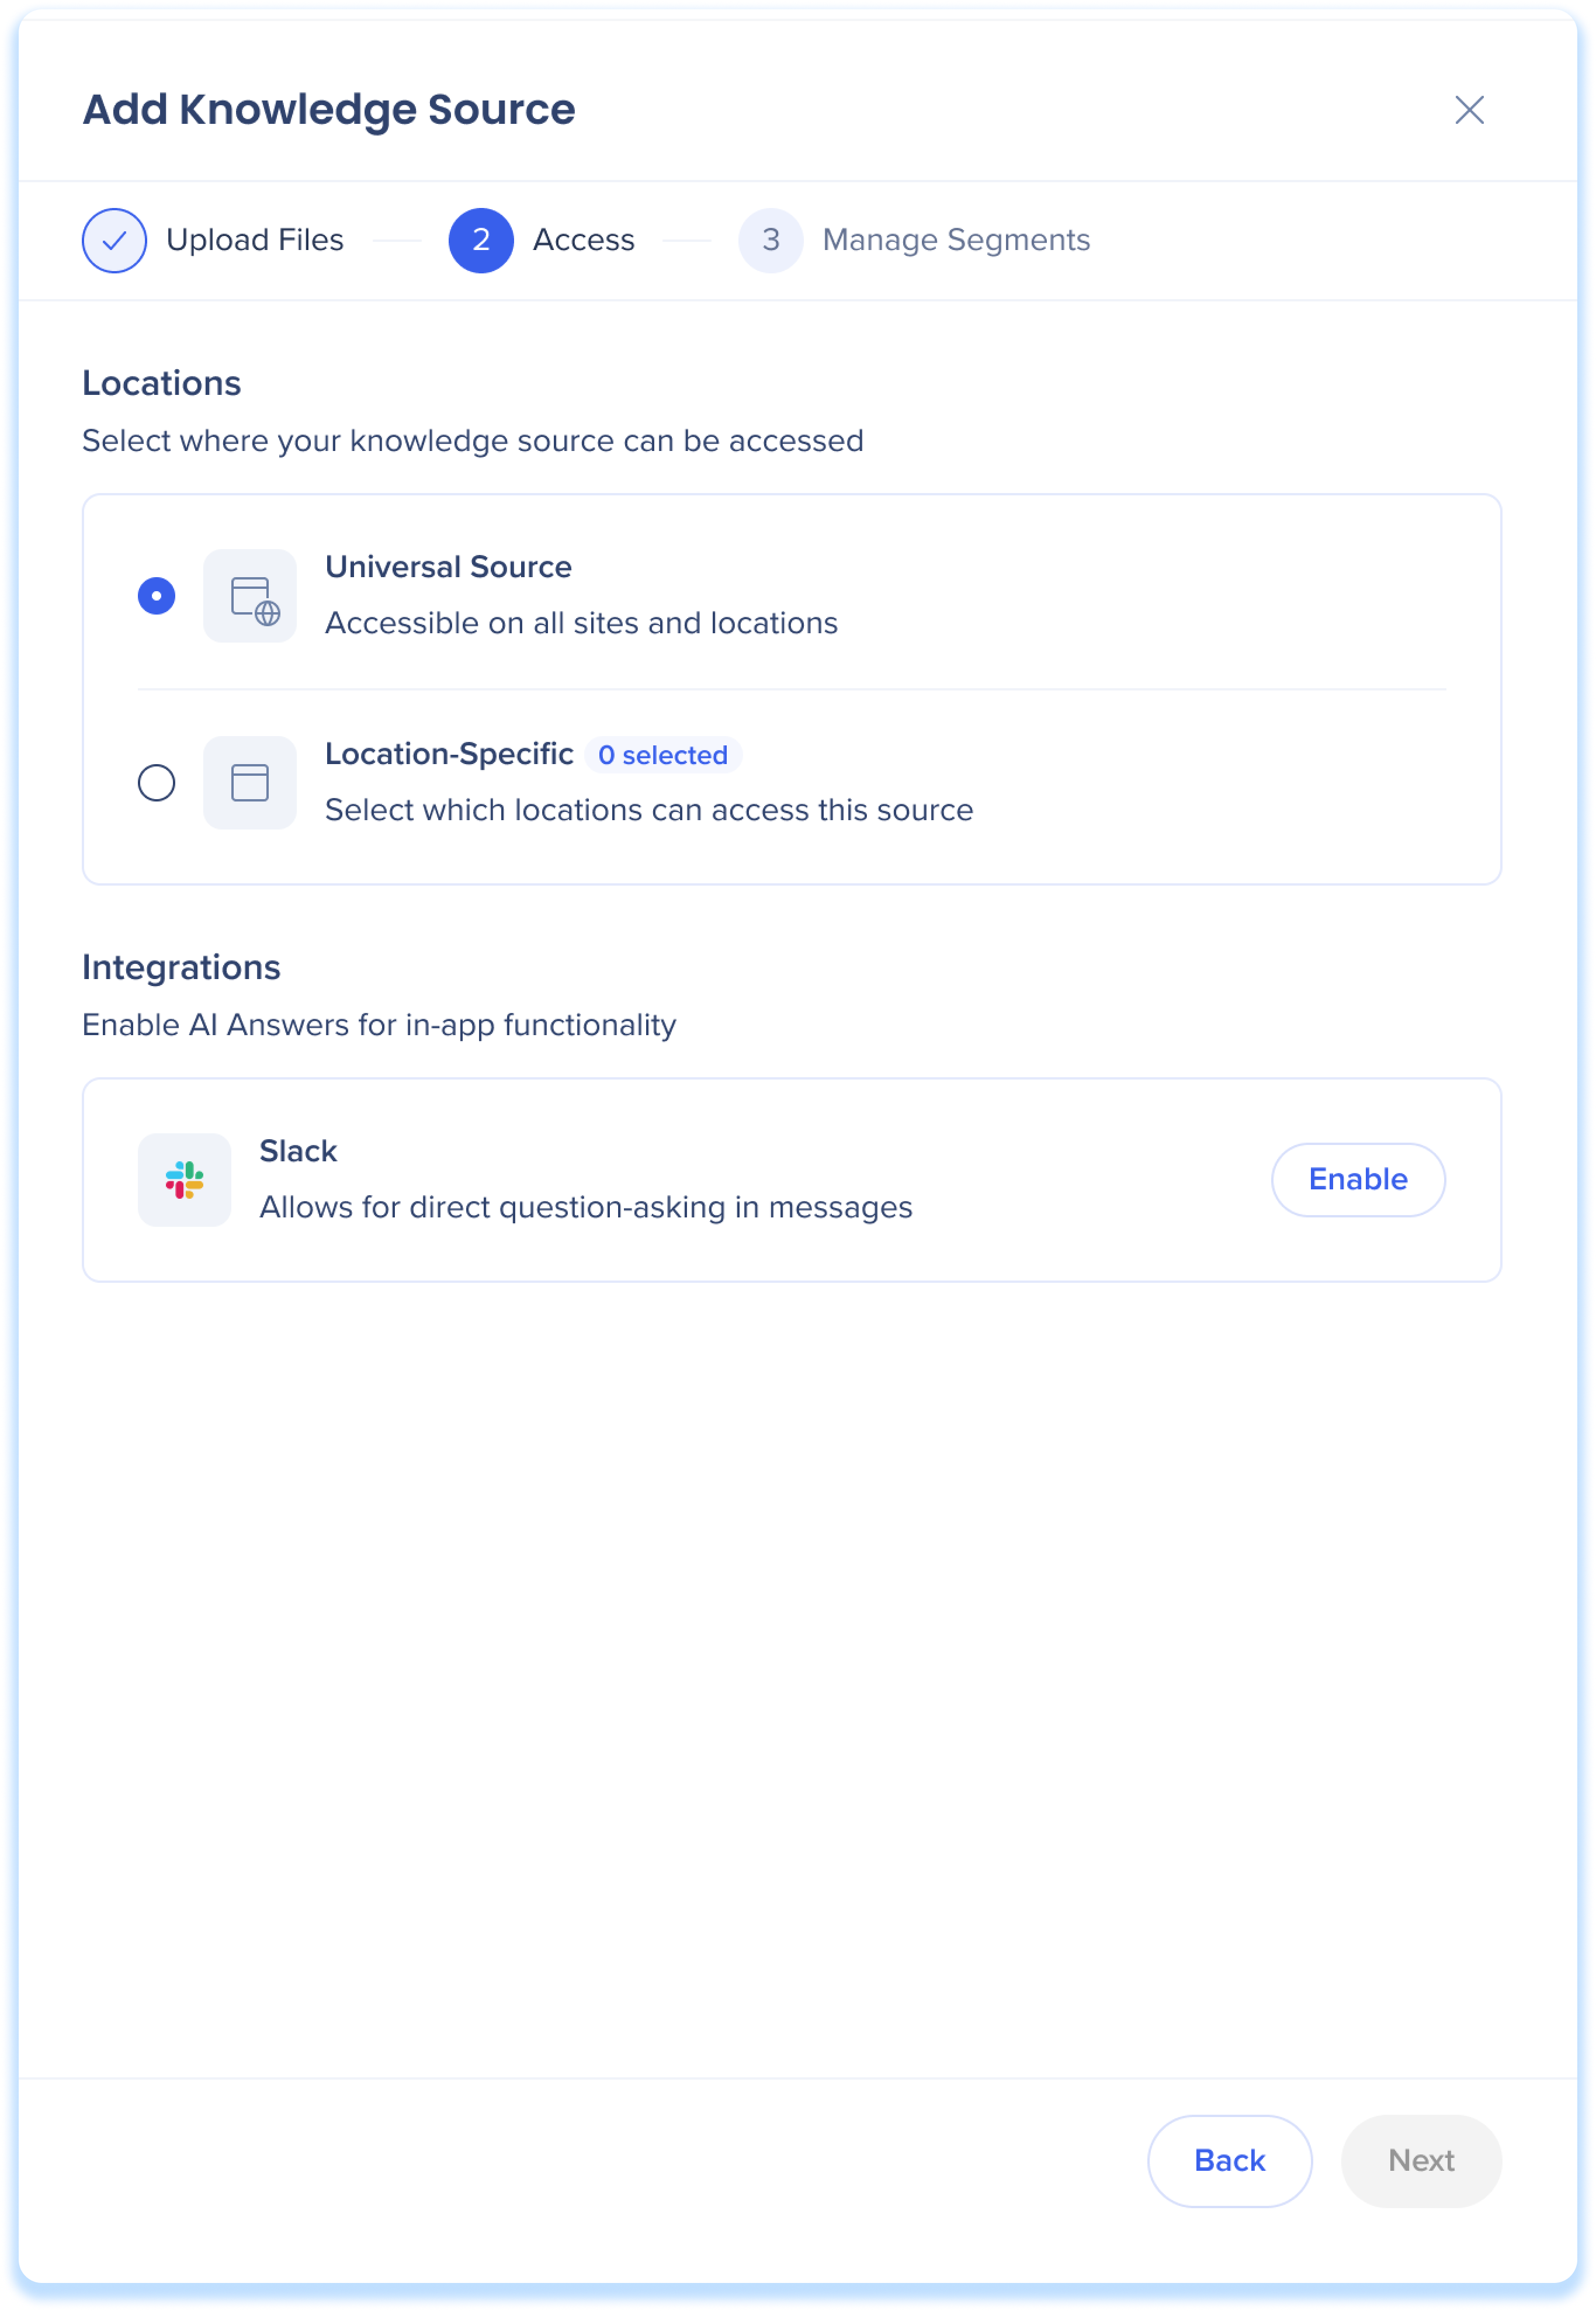
Step 2: Access
-
Select where your knowledge source can be accessed
- Click Next
Step 3: Manage segments
For each system, customers have the option to add their user segments to better control the knowledge source availability.
- Select a system from the list
-
Select the user segments that will have access to your knowledge sources
-
Turn on a user segment toggle to enable per system
-
Click Create Source
-
The new knowledge source will appear in the dashboard
Learn more about segmentation and creating segments in the editor:
Segmentation
Connect SharePoint Files
To connect a SharePoint site, you first register an app in your own Azure AD, then enter those credentials in the wizard. WalkMe can't create the app registration for you — it must live in your Azure AD.
Before you connect
Azure管理アクセス権が必要です
これらのステップには、Azure AD管理が必要です 接続する前に、アプリの登録と管理の同意を組織のAzure ADで完了する必要があります。
Complete these steps in Azure AD, then return to the Add Knowledge Source wizard with your credentials.
Set up your Azure AD app
-
Register a new app in Azure AD
-
Go to App registrations
-
Select New registration. Use a descriptive name that identifies WalkMe as the integration partner, like WalkMe-to-SharePointOnline-Connector
-
Set API permissions
-
Go to API permissions
-
Select Add a permission, then Microsoft Graph, then Application permissions. Add:
-
Sites.Read.All — read-only access to site content (required)
-
Sites.ReadWrite.All — only if WalkMe will create, update, or delete documents
-
Select Grant admin consent for [your organization]. Application permissions don't take effect without this step
注
WalkMeの統合は、サインインしているユーザーなしで無人で実行されるため、アプリケーション権限を使用して認証されます。 委任された権限は動作せず、同意が許可された後でも認証エラーを引き起こします。
Gather your site and library details
You'll need to identify which site and library to connect. Use one of these options:
-
Option A — Site URL and library name: The full site URL, like https://yourcompany.sharepoint.com/sites/Finance, and the exact display name of the document library, like Shared Documents
-
Use the library's actual name, not a link copied from your browser while viewing a folder. A browser link ending in /Forms/AllItems.aspx is a page URL, not the site or library, and WalkMe can't use it
-
Option B — Microsoft Graph identifiers: The raw Site ID and Document library (Drive) ID, if your SharePoint admin already has them.
To connect more than one site or library, prepare the details for each one separately.
Step 1: Connect
Enter your SharePoint app credentials and site details so WalkMe can access your content.
-
App credentials
-
Knowledge source name: Enter a name for the knowledge source
-
Note: Source names are visible to your users. They appear in the Answer sources dropdown of an AI response
-
SharePoint site URL: Enter the full URL of the SharePoint site you want to connect
-
Tenant ID: Enter your Microsoft tenant ID
-
Application (Client) ID: Enter your app ID
-
App secret ID: Enter your app secret ID
-
SharePoint details
-
Document library name: Enter the exact display name of the SharePoint document library as it appears in SharePoint, not a link copied from your browser
-
Site ID: Enter your site ID (optional)
-
Document library ID: Enter your document library ID (optional)
-
Click Next
エラーメッセージ
-
アプリの認証情報を検証できません:テナントID、アプリケーション(クライアント)ID、またはアプリシークレットの値を検証できませんでした。 各値をAzure ADアプリの登録と照合して確認してください。 最も一般的な原因は、期限切れまたは誤入力されたシークレット、またはシークレット値の代わりに入力されたシークレットIDです
-
Sharepoint接続に失敗:認証情報は検証されましたが、WalkMeはサイトに到達できませんでした。 SharepointサイトのURLが正しいこと、およびAzure ADのアプリのアプリケーション権限に対して管理の同意が付与されたことを確認します
Step 2: Settings
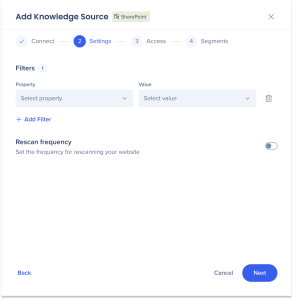
Narrow which content WalkMe ingests and set how often it refreshes.
Filters
Filters limit ingestion to documents that match the properties you choose. Without filters, WalkMe ingests all documents in the connected library.
-
Select a Property
-
Select one or more Values for that property
-
To add another filter, select Add Filter
-
To remove a filter, select the Trash icon
Rescan frequency
Turn on Rescan frequency to keep your connected content up to date. When it's on, WalkMe rescans the SharePoint source on the schedule you set and applies any additions, changes, and removals.
Select Next.
Steps 3-4: Access and segments
The Access and Segments steps are the same as the file upload flow. Follow the steps in Step 2: Access and Step 3: Manage Segments above.
ファイルの権限
ファイルへのアクセスは、SharepointではなくWalkMeセグメンテーションによって制御されます。 接続されたファイルは、Sharepointの権限に関係なくすべてのユーザーが利用できます。そのため、WalkMeセグメントを使用して、それらを表示できるユーザーを制限します。
Additional Capabilities
Custom Q&A
Enhance AI Answers with custom Q&As to resolve conflicts or fill gaps in your knowledge sources.
How it works
The AI prioritizes your custom Q&A over other knowledge sources, treating it as the most authoritative source of information.
It searches both your knowledge sources and your custom Q&A, but always ranks the custom Q&A higher. This ensures users receive the most relevant and correct answers quickly.
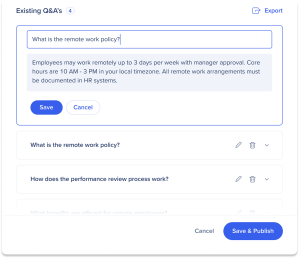
How to create custom Q&A
-
Hover over a knowledge source
-
Select the Options icon
-
Select Manage Q&A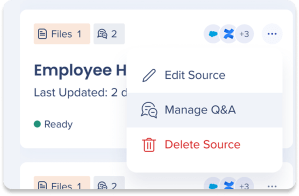
-
Enter your question and answer in the fields
-
Click Add
-
To add additional Q&A click + Add 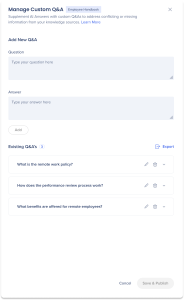
-
Click Save & Publish
-
A popup will appear informing you that the Q&A you've created will be available instantly to end-users. Click Save & Publish
-
To test AI Answers with your new supplement Q&A, click the Demo icon on the source tile you want to test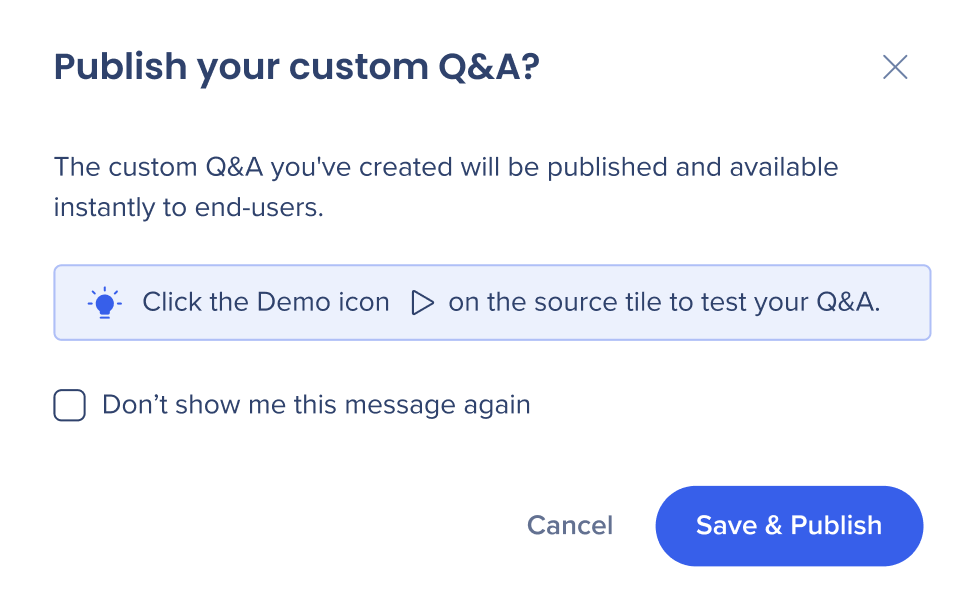
注
[Export(エクスポート)]をクリックして、CSVファイルとしてQ&Aをダウンロードします。
Edit or Delete custom Q&A
-
Select the Q&A you wish to edit or delete
-
To delete, click the Trash icon
-
To edit, select the Edit icon
-
Make any necessary changes then select Save
-
Click Save & Publish
Rescan Sources
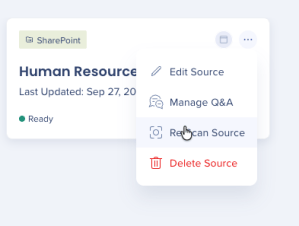
Rescanning SharePoint knowledge sources lets users initiate a rescan for files modified since the last successful scan.
 Select the Options icon
- Select Rescan source
- Select Rescan from the popup
Technical Notes
- New webpage crawling implementations are currently unavailable for AI knowledge sources. To add company knowledge, connect a SharePoint file repository or upload files manually through the AI Center
File Scanning
-
The following file types are supported: txt, doc, pdf, and coming soon csv
-
Only text is pulled from files
-
The file names appear to users in the AI Answers results, but the files aren't accessible by end-users
-
A single knowledge source can consist of one file or multiple files
-
Maximum file size is 30 MB
-
There is no limitation to the number of files you can upload
AI Segmentation
-
By default, sources are applied to all segments (including future segments that will be created in the system)
-
Once specific segments are applied, no publish is required for changes to take effect