Brief Overview
The AI Knowledge Sources page, located within the AI Center, is where admins securely connect internal company documentation to WalkMe. By uploading files, you allow WalkMe to extract and index your organization's proprietary data for AI Knowledge Referencing.
This page provides full control over the knowledge ingestion process. Admins can upload resources, apply user segments to restrict visibility, schedule automated rescans to keep information up to date, and add custom Q&As to resolve content gaps.
Once a knowledge source is active, WalkMe's AI features—such as AI Chat, AI SmartTips, and the Action Bar—will use this trusted information to provide company-specific guidance instead of relying on generic external AI models.
How It Works
The AI Knowledge Sources page in the Admin Center allows admin users to upload knowledge source files and integrate tools to the AI-powered conversational search experience.
The page consists of two tabs:
-
AI Knowledge Sources: This dashboard allows admins to view, manage, and upload all of their knowledge sources
-
AI Integrations: This dashboard allows admins to enable AI Answers to their existing integrations
AI Knowledge Sources tab
This dashboard allows admins to view, manage, and upload all of their knowledge sources.
Source tiles
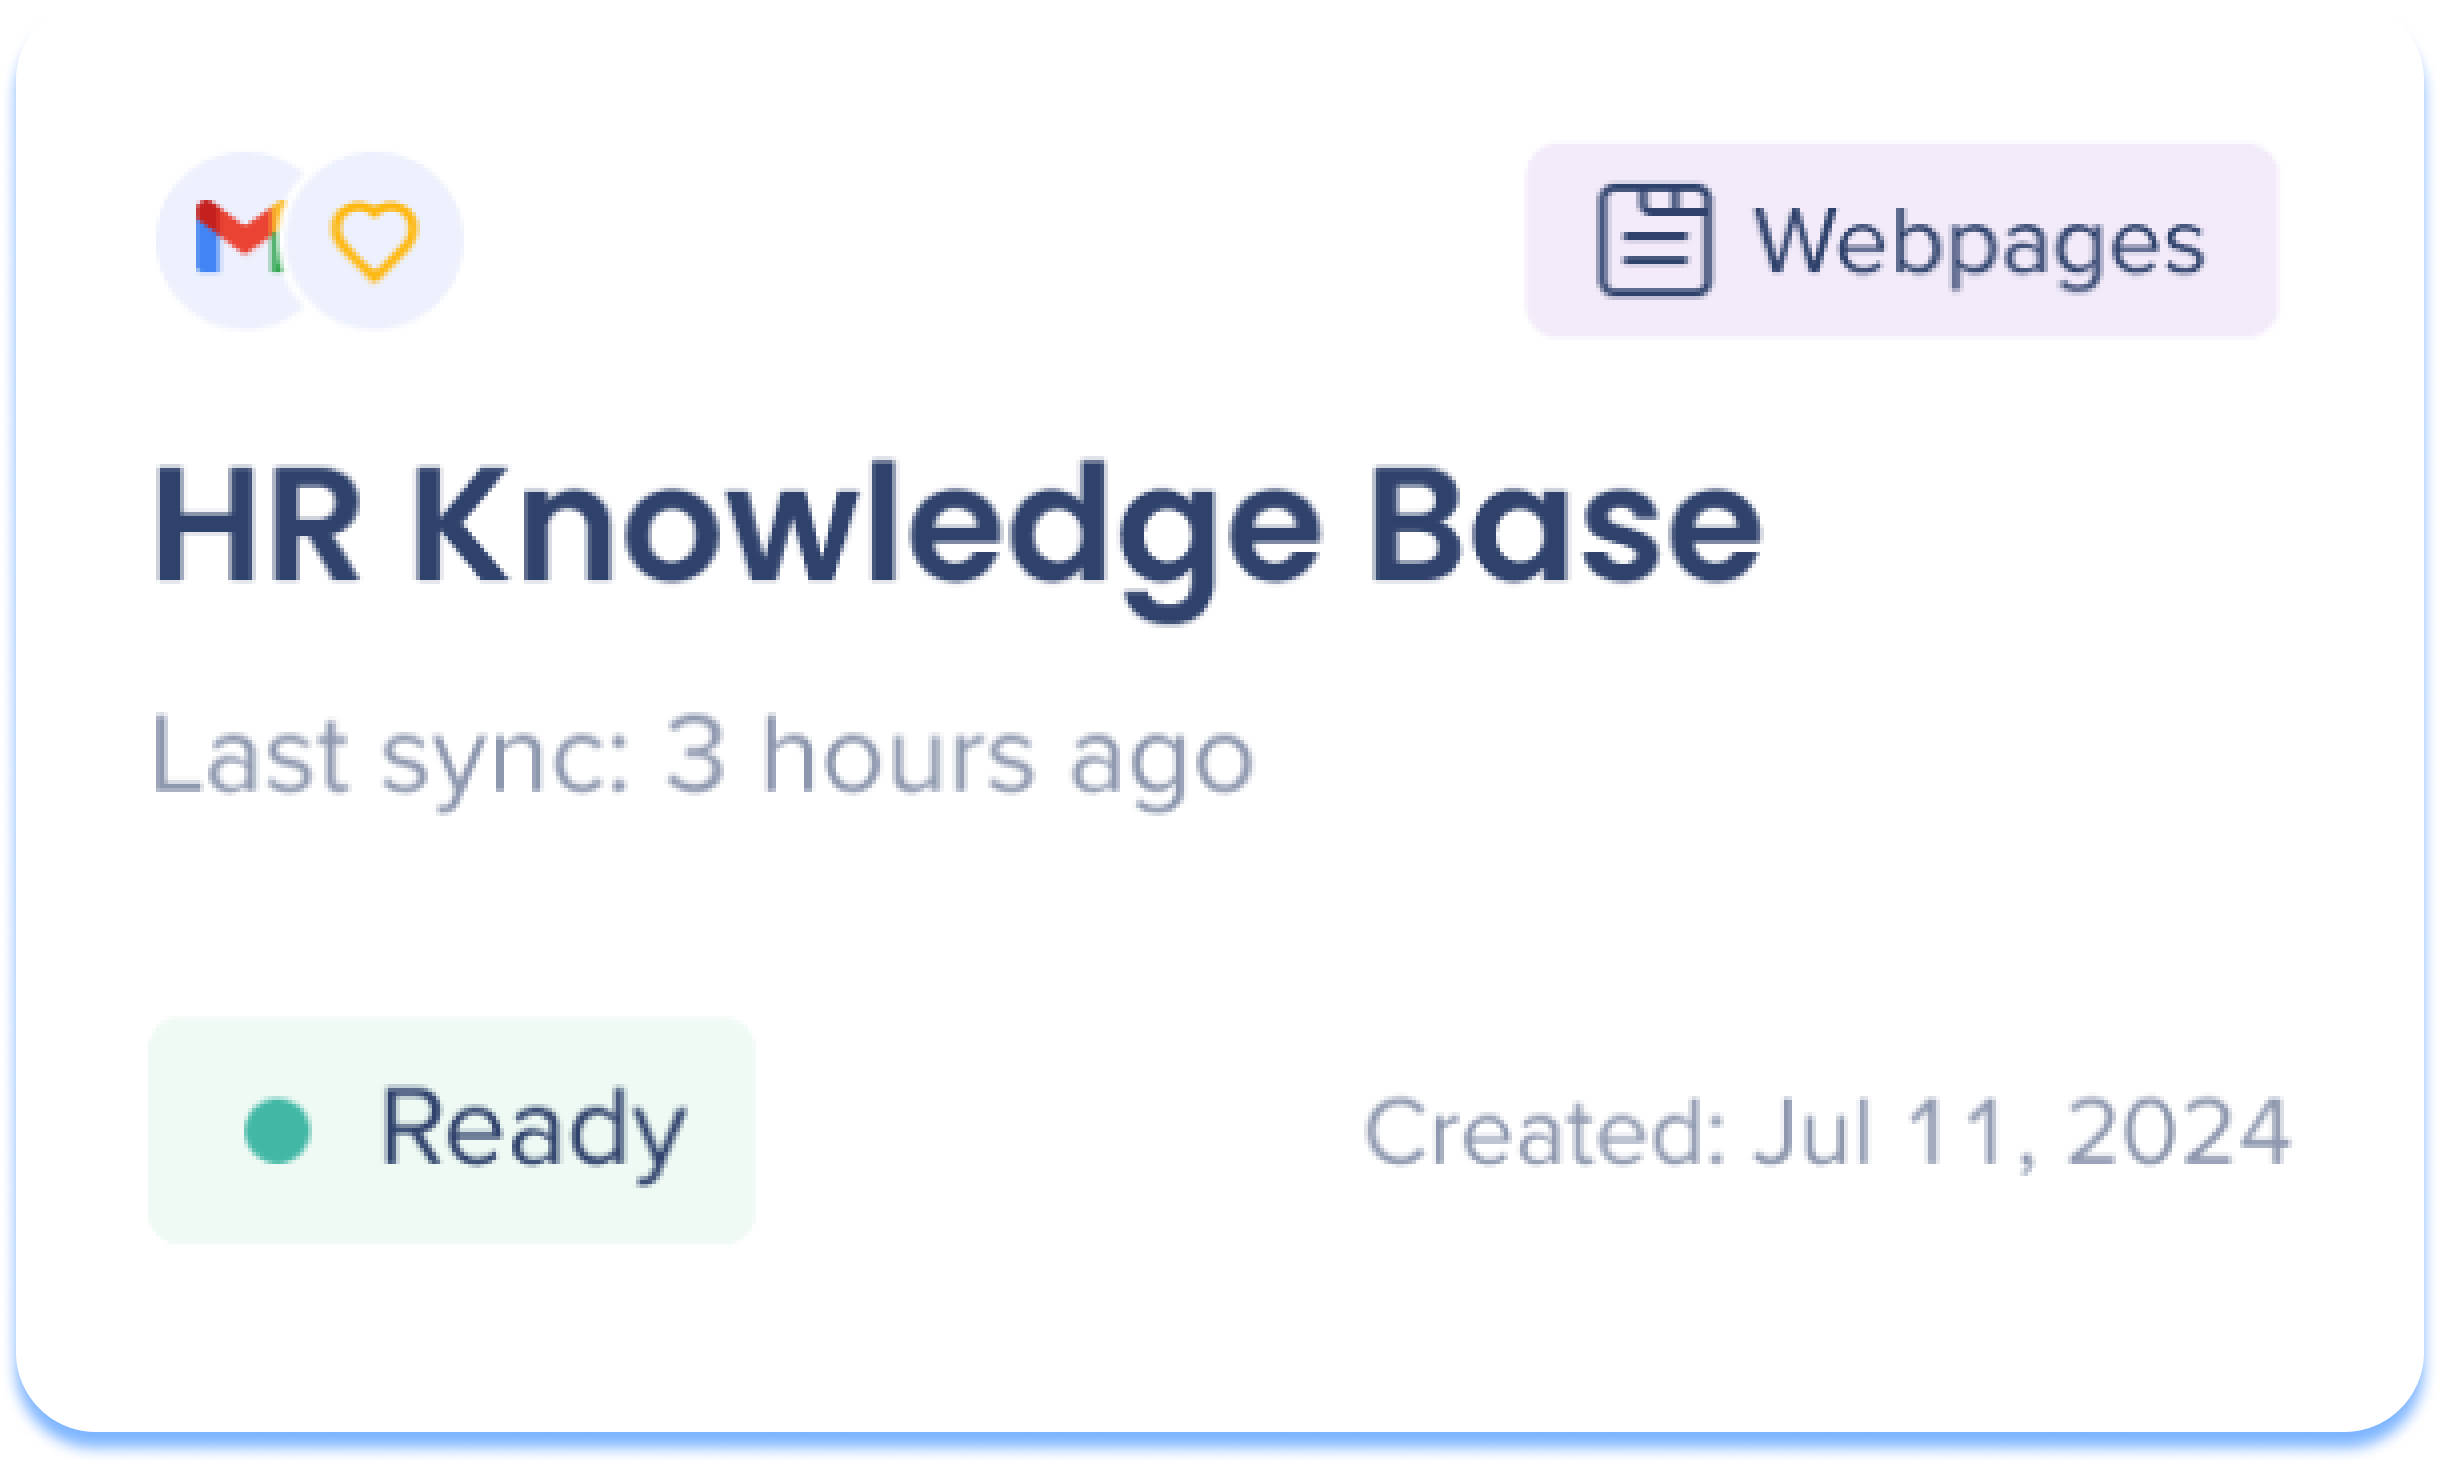
Each knowledge source is presented as a tile on the page and displays the following information:
-
Systems: Which systems have access to this knowledge source
-
Source type:
-
Source name: The name of the source
-
Last sync: Time the source was last updated
-
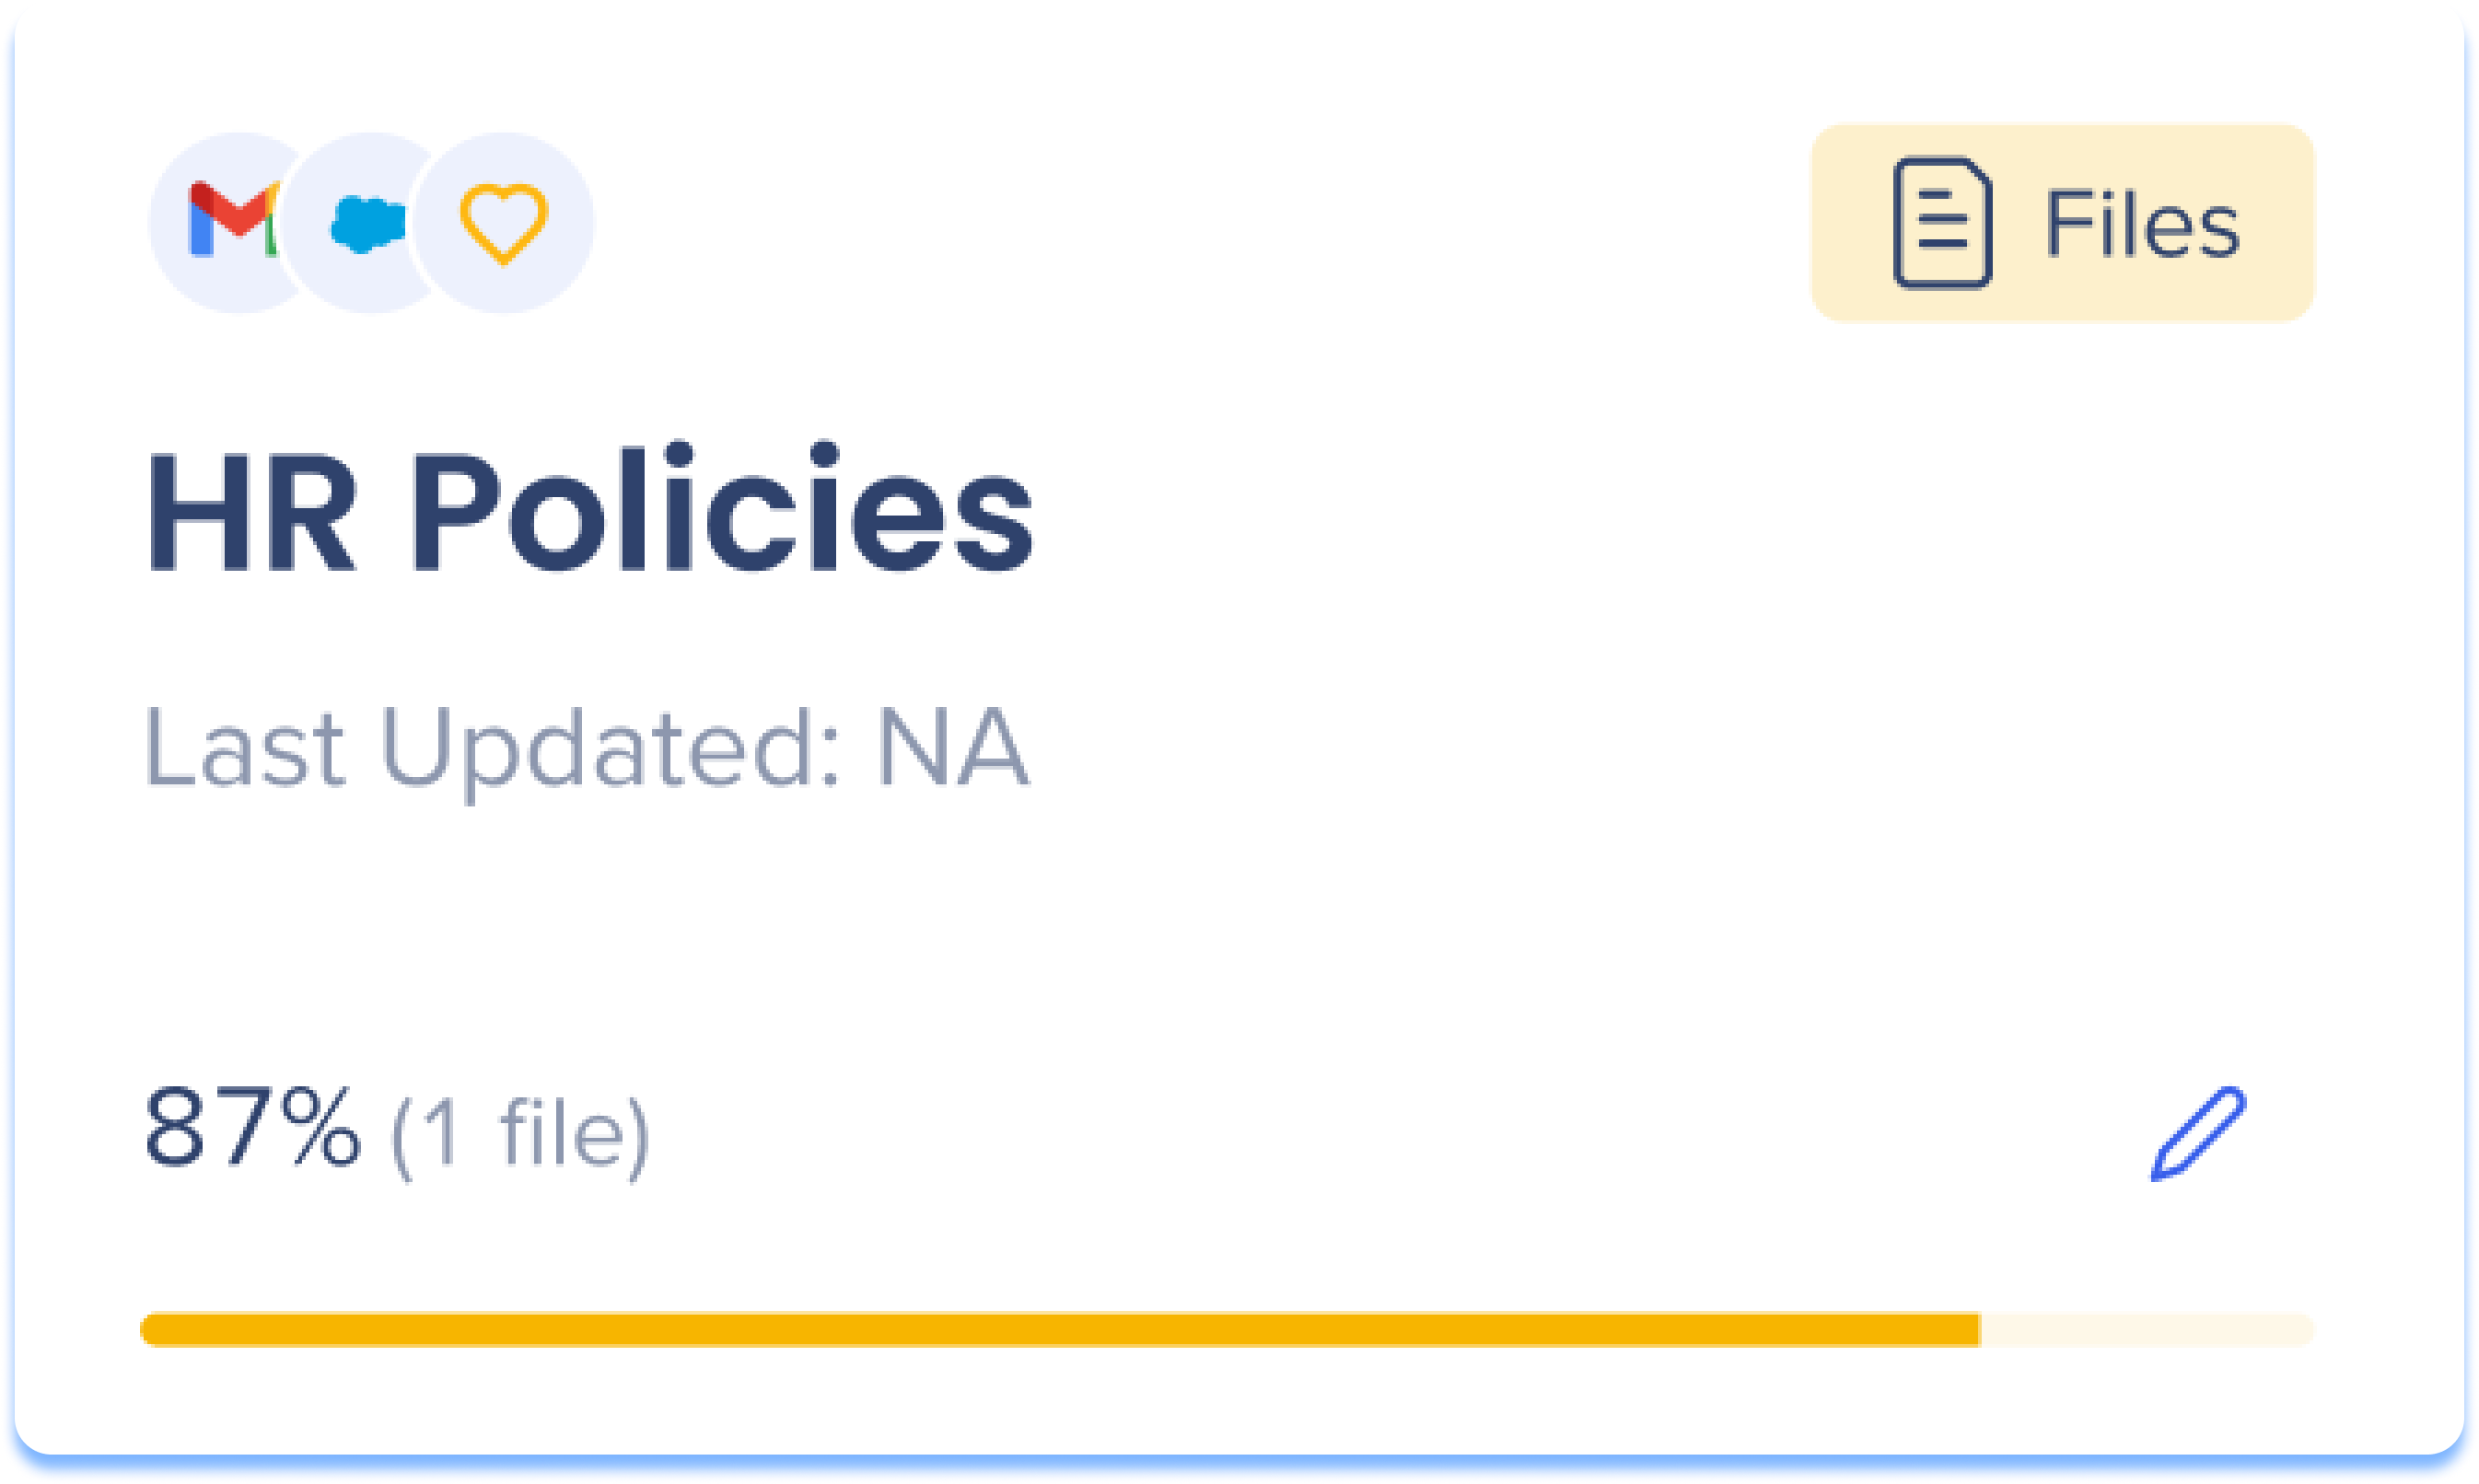
Status: Displays the uploading progress
-
Created date: Date the source was added
Hover actions

Hover over a source tile to view actions.
-
Delete: Permanently removes the knowledge source from the dashboard and AI Answers
-
Edit: Make changes to the knowledge source
-
Refresh: Re-syncs the knowledge source for updates
-
Demo: Opens a demo of AI Answers so admins can simulate the end-user experience
Filter by system or segment
-
System: Lists all systems with connected knowledge sources. Selecting a system automatically loads its segments
-
Segment: Optional. All segments are selected by default; deselect to narrow results
-
Click Clear All to reset the view
Export AI Chat Data
Admins can export a report of all AI Answers interactions. The report downloads as a CSV file and includes the following columns:
Lista de colunas do relatório...
-
Pergunta: a consulta enviada pelo usuário
-
Resposta: A resposta gerada por IA
-
EUID: o identificador do usuário final
-
Carimbo de data e hora: data e hora da interação
-
Sistema: o sistema em que o usuário estava quando a interação ocorreu
-
UUID de chat: identificador exclusivo para a sessão de chat
-
Fonte(s) de conhecimento usadas: as fontes de conhecimento que contribuíram para a resposta, listadas como valores separados por vírgula
-
Links de origem: links diretos para os artigos ou arquivos específicos usados para gerar a resposta, listados como URLs separados por vírgula. Vazio se não houver links disponíveis
-
Pergunta de acompanhamento: indica se o usuário clicou em uma pergunta de acompanhamento sugerida ("Sim") ou digitou a consulta manualmente ("Não")
-
Sinal de Feedback: o feedback do usuário sobre a resposta: Positivo, Negativo ou Nulo se nenhum feedback for enviado
AI Integrations
Enable the Slack Integration to use AI Answers within your Slack channels.
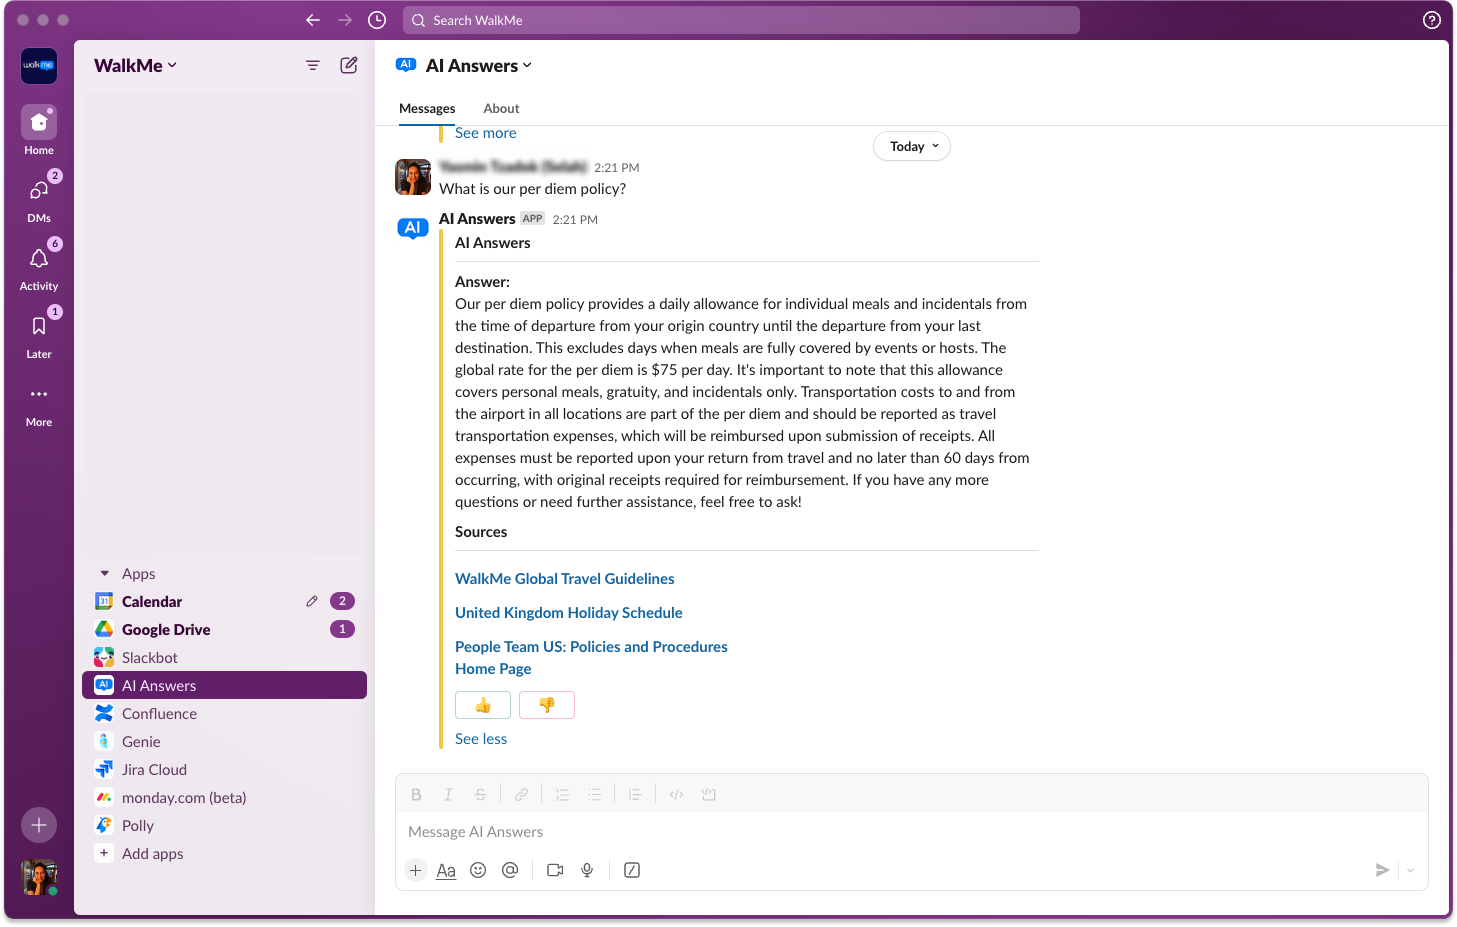
Configure the Slack integration
-
Click the AI Integrations tab on the AI Knowledge source page
-
Click Enable on the Slack tile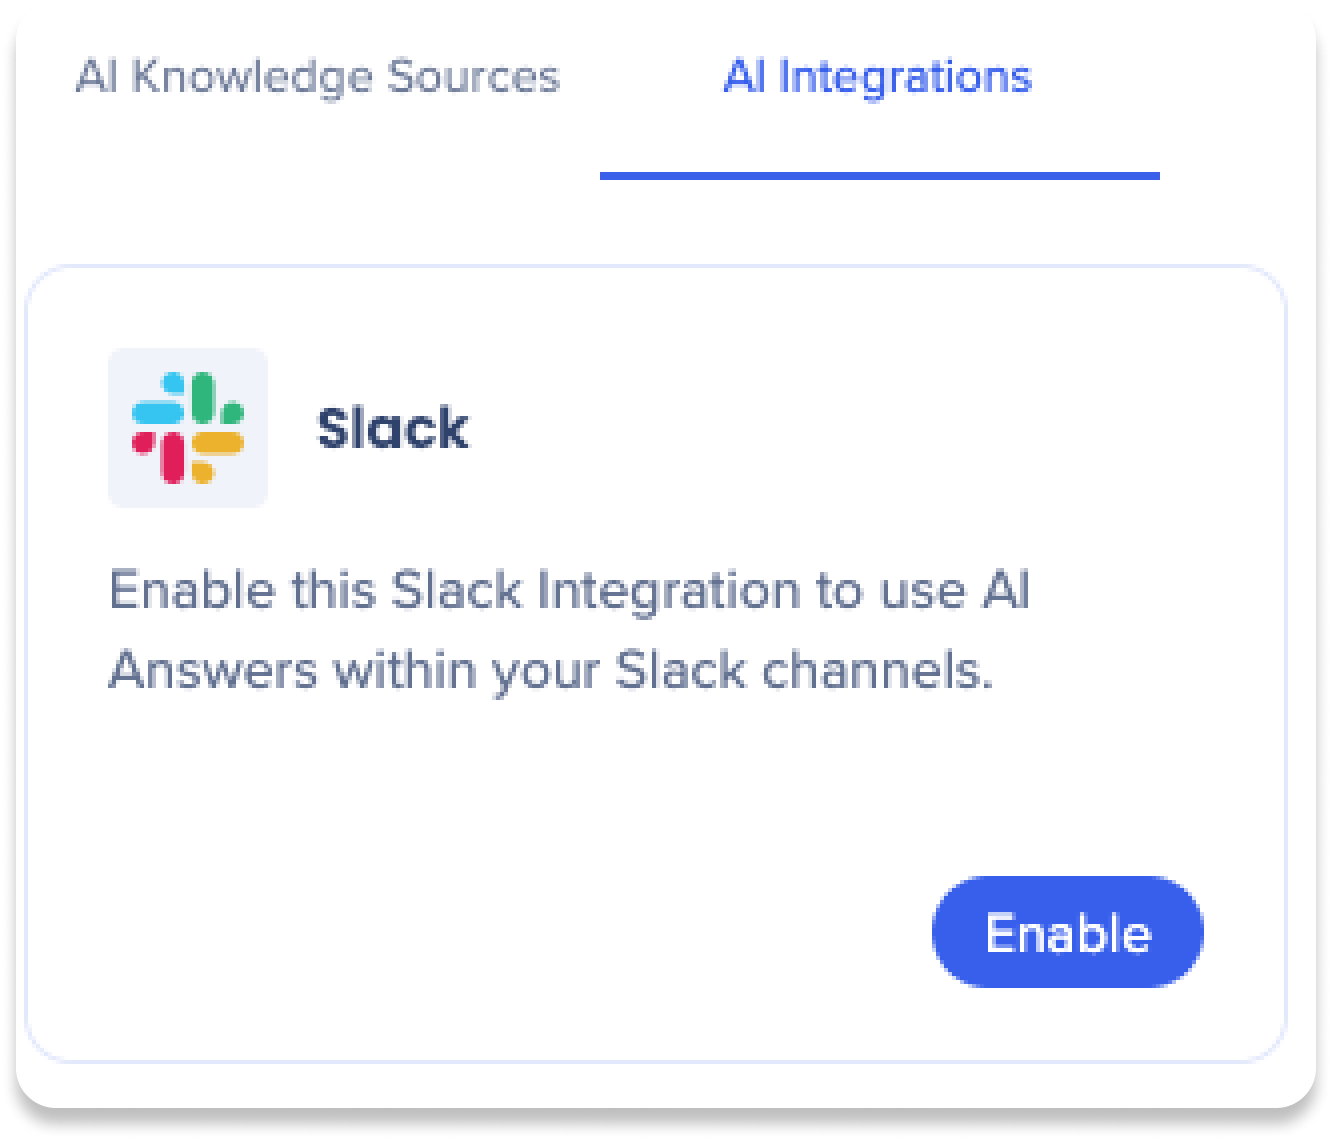
-
A popup will appear to configure the Slack integration
-
Enter a name for the Slack integration
-
Click Next
-
Follow the instructions for the App Manifest
-
Once completed, click Next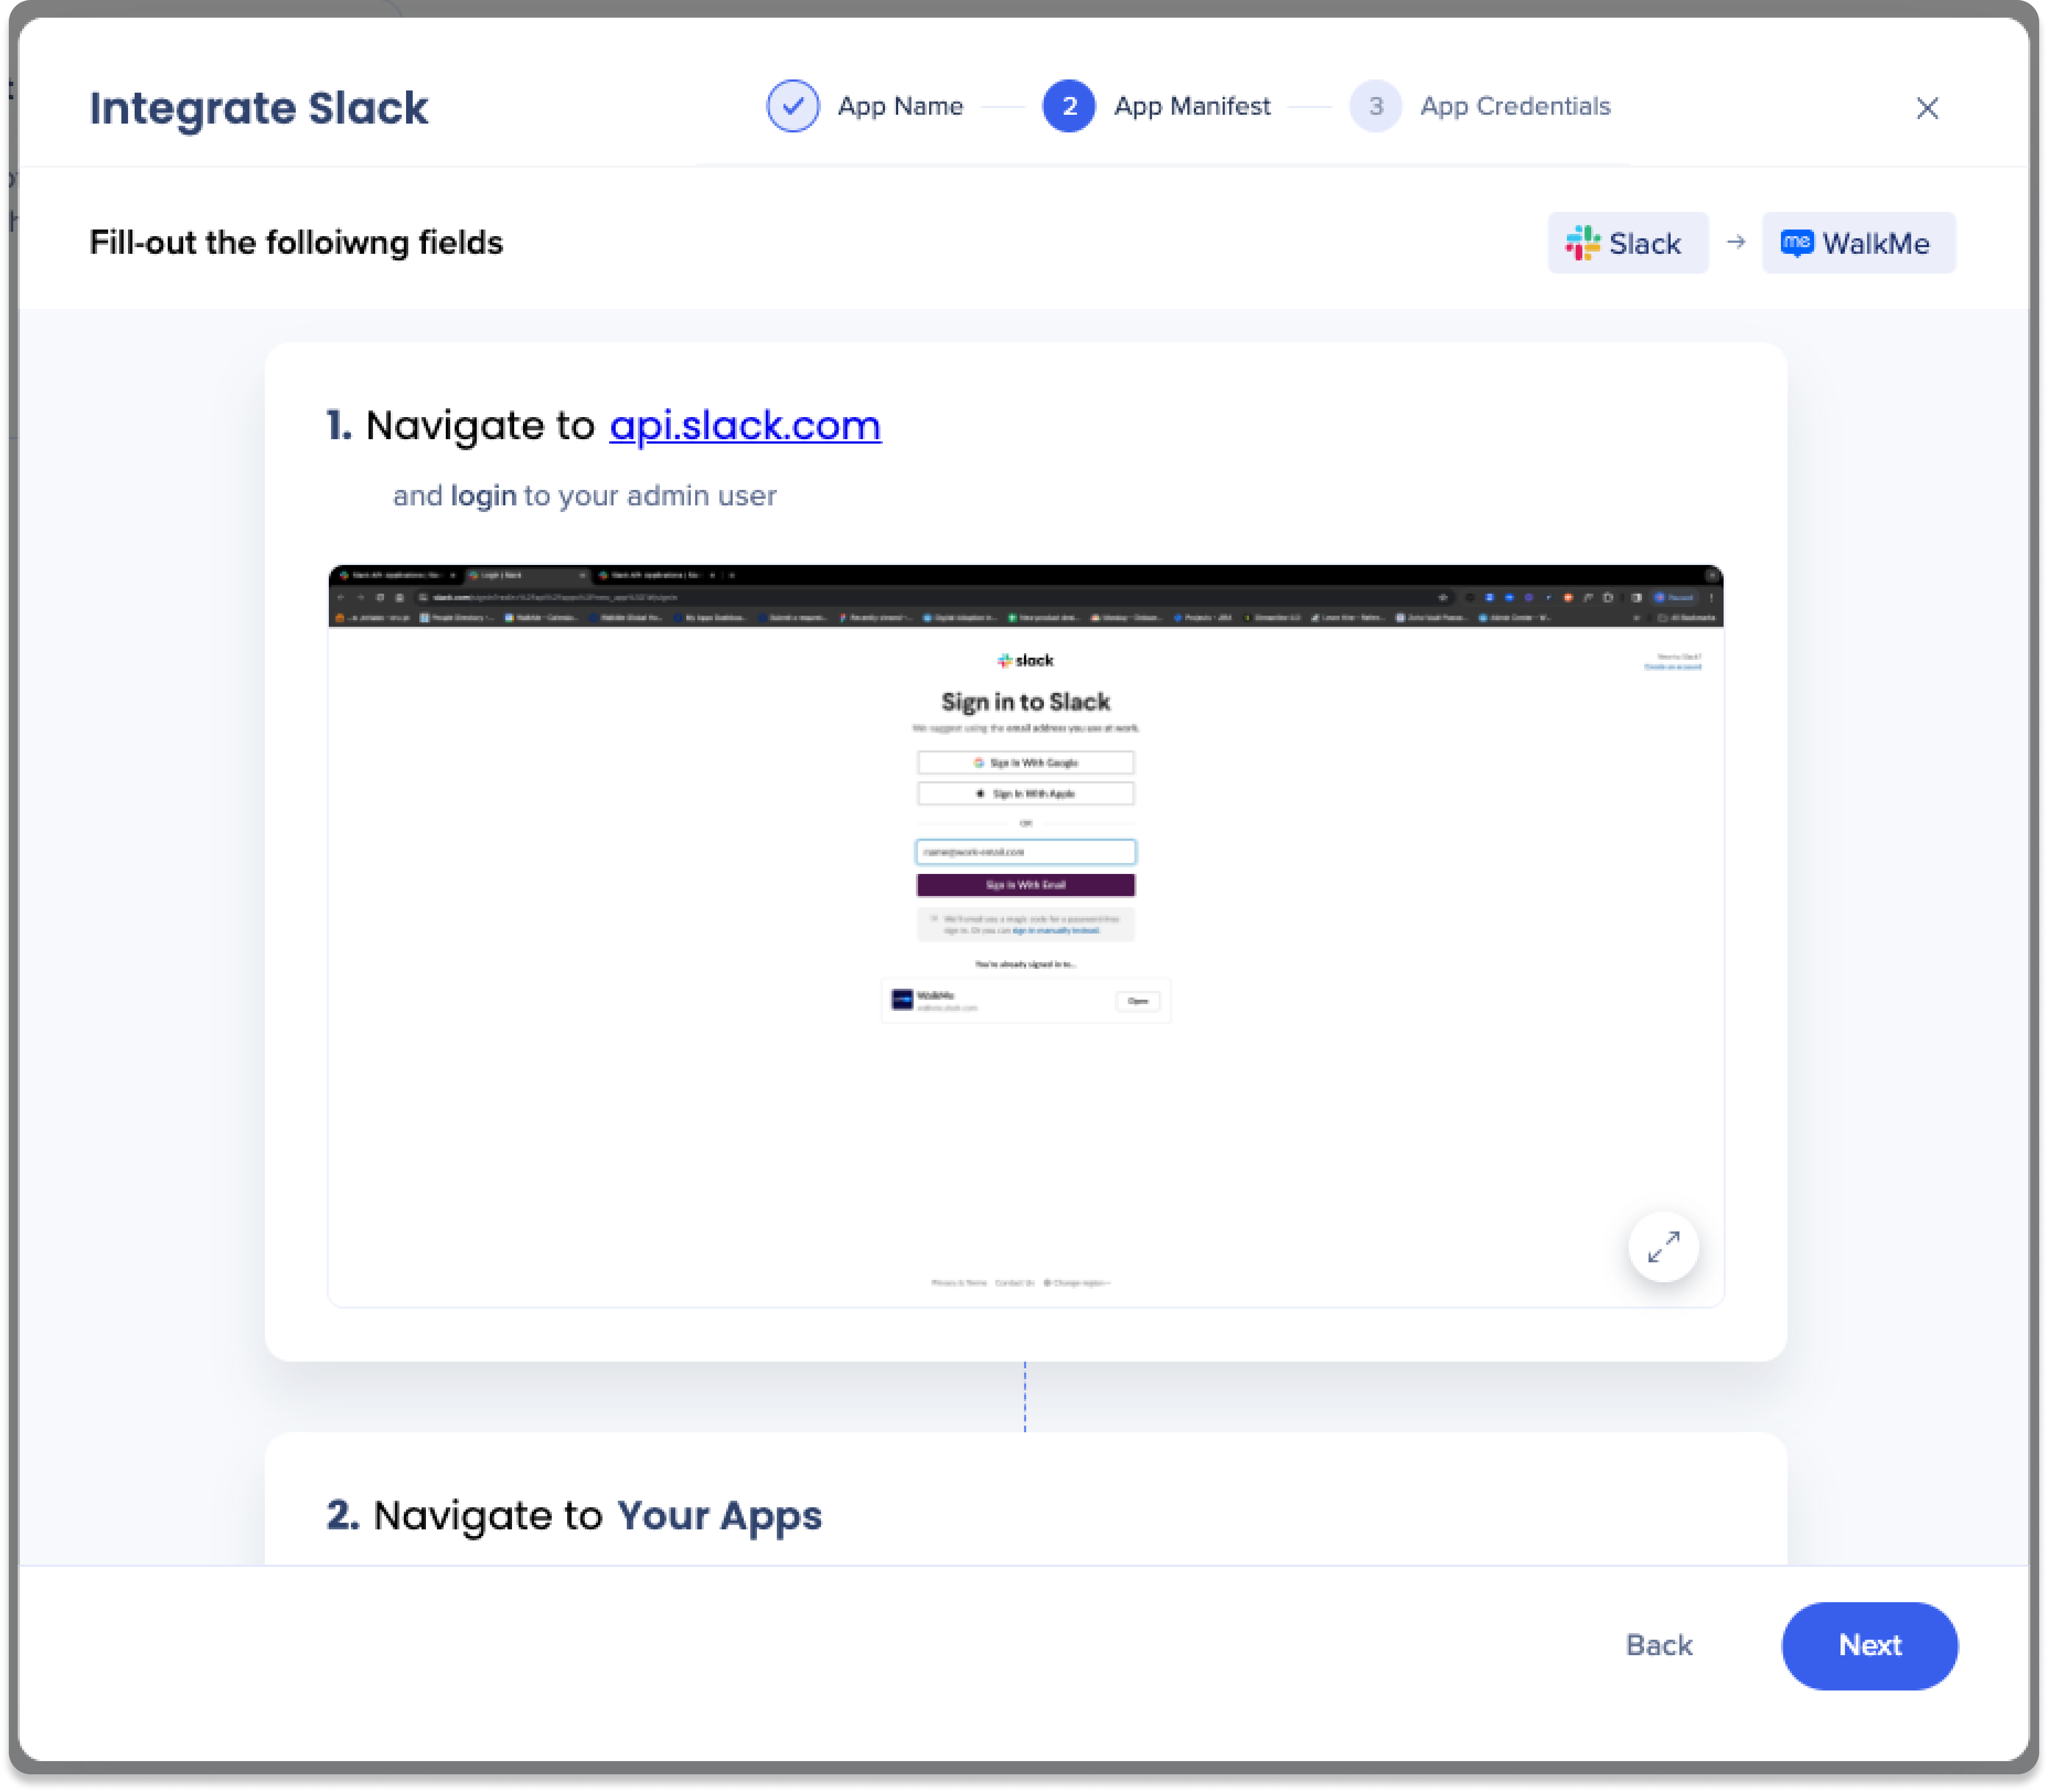
-
Copy and paste the app credentials
-
Signing Secret
-
Bot User OAuth Token
-
Click Add Slack Integration
-
Done!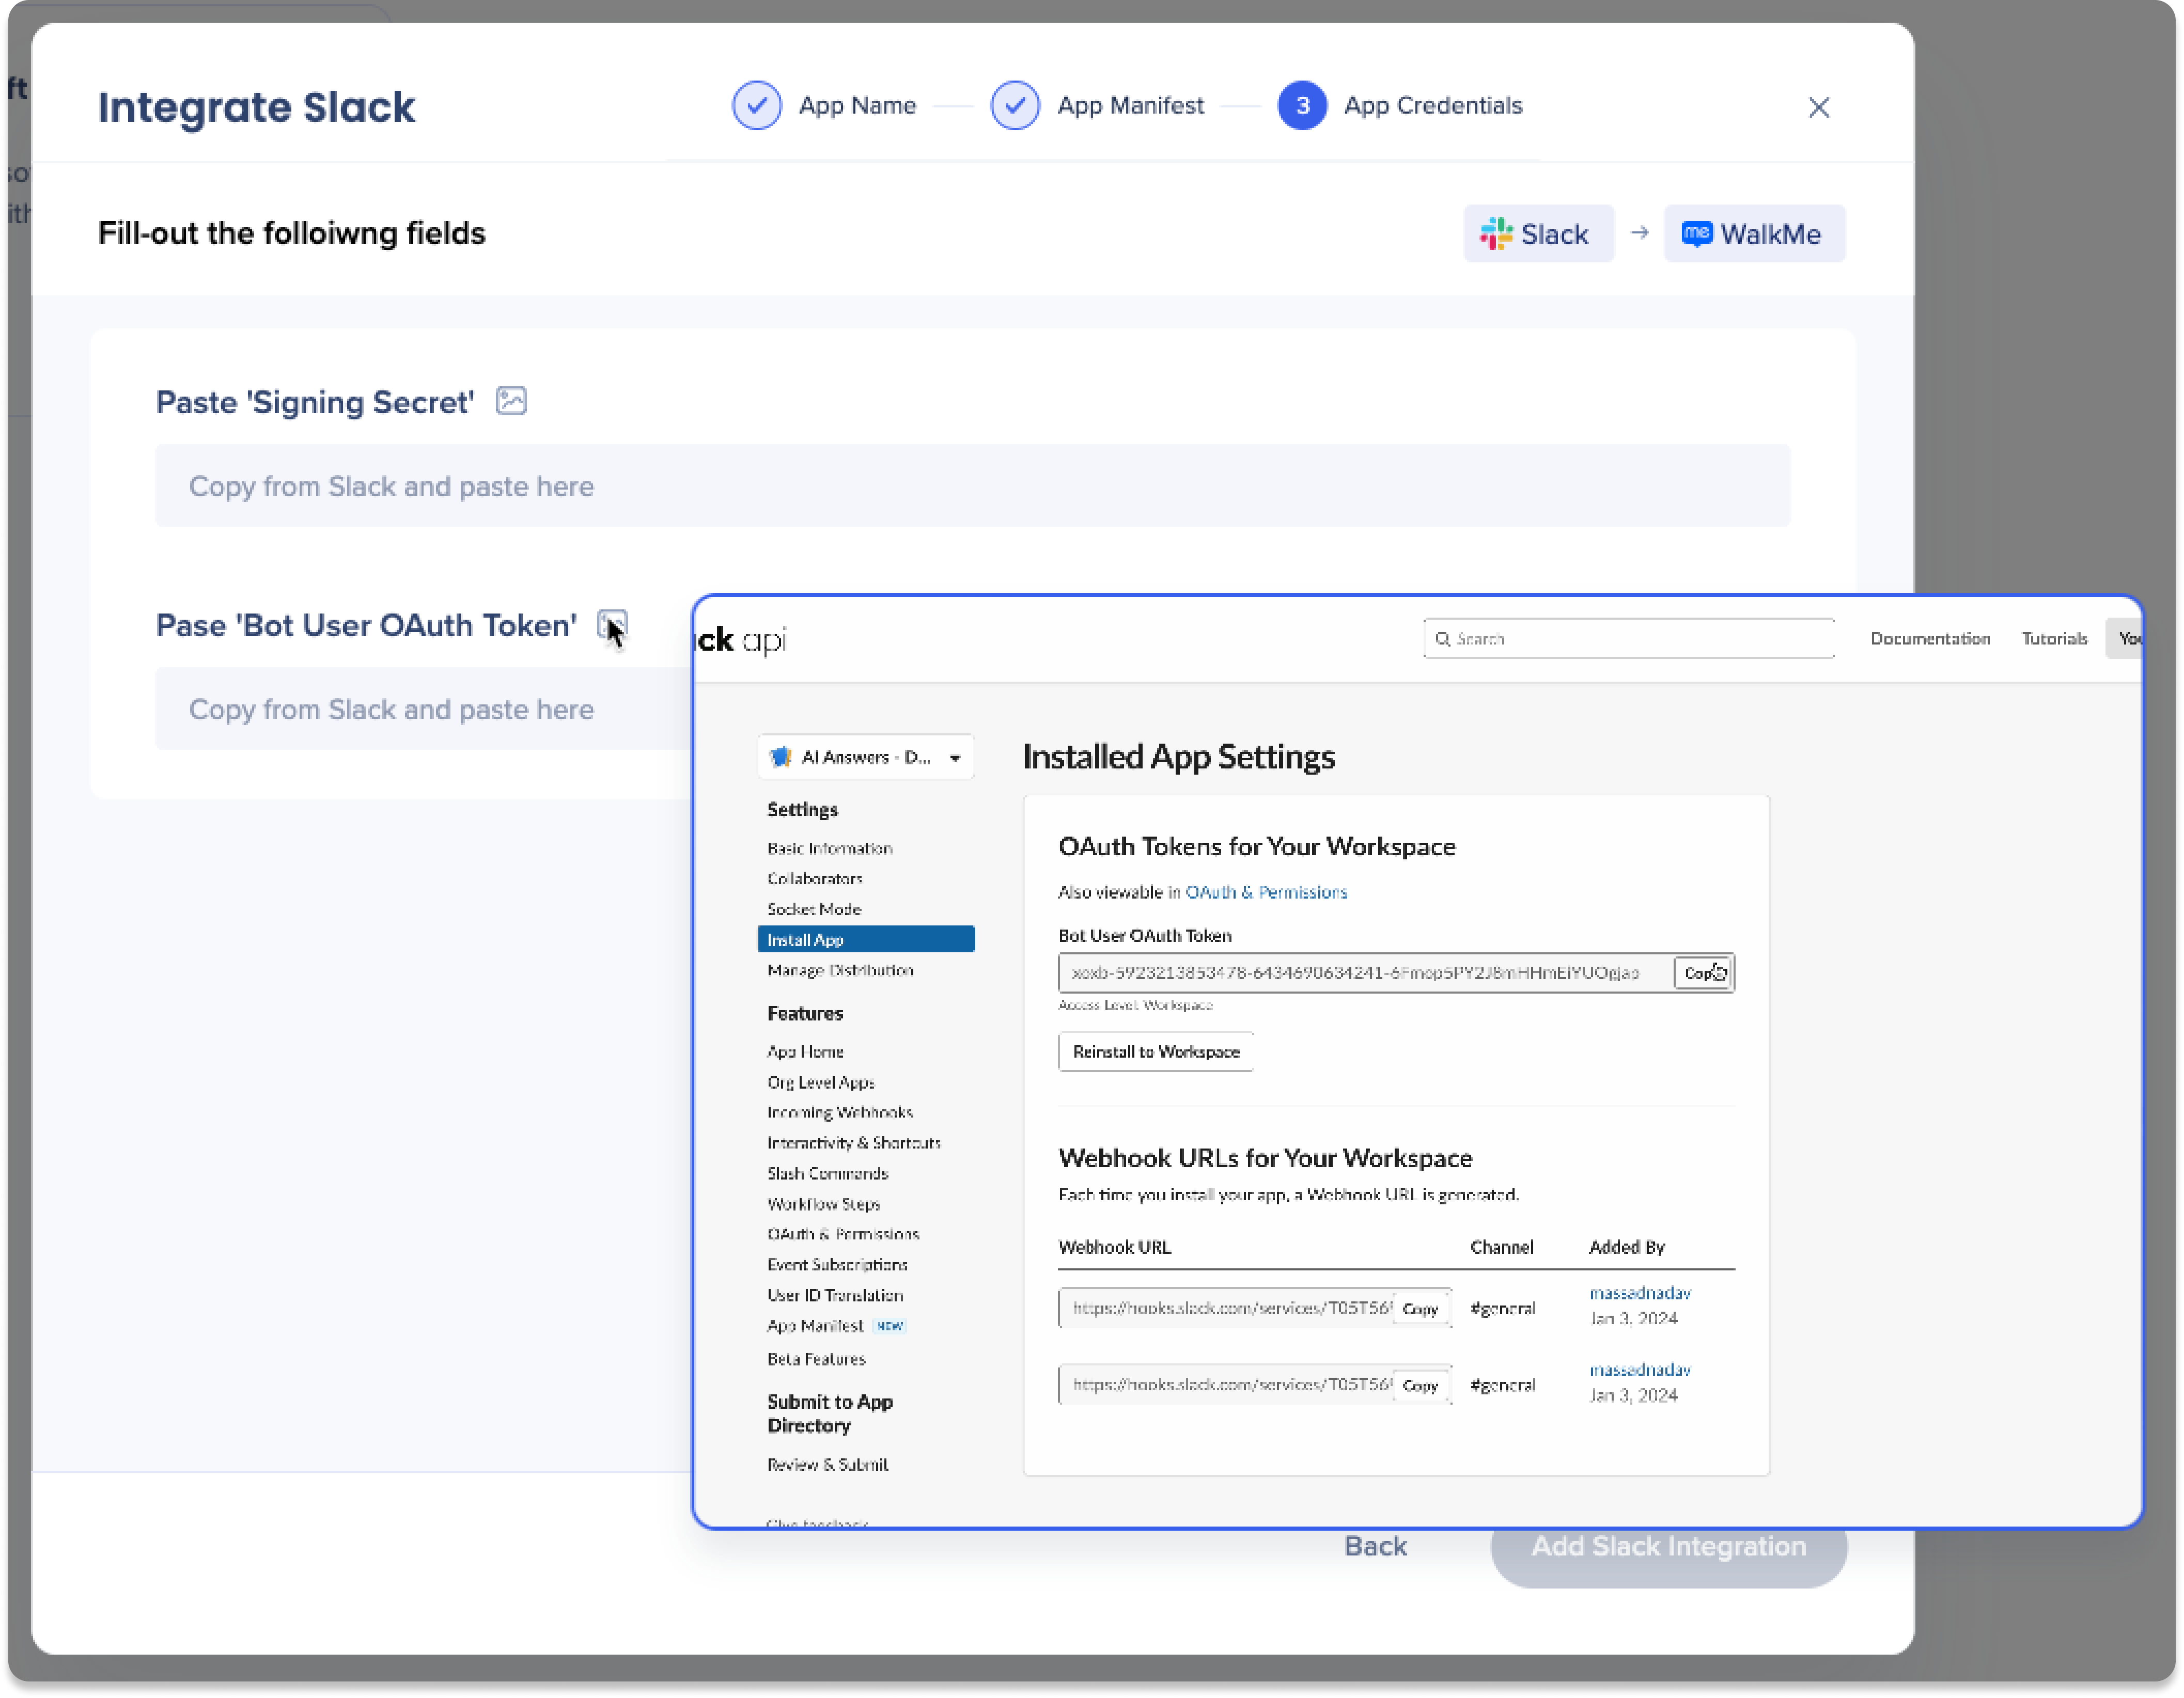
Data Collection Export
Opt in to view full report of Q&A interactions generated by AI Answers.
Enablement
You must opt-in to capture and export full Q&A logs:
-
 Select the Settings icon
-
Turn on the Enable Export AI Chat button toggle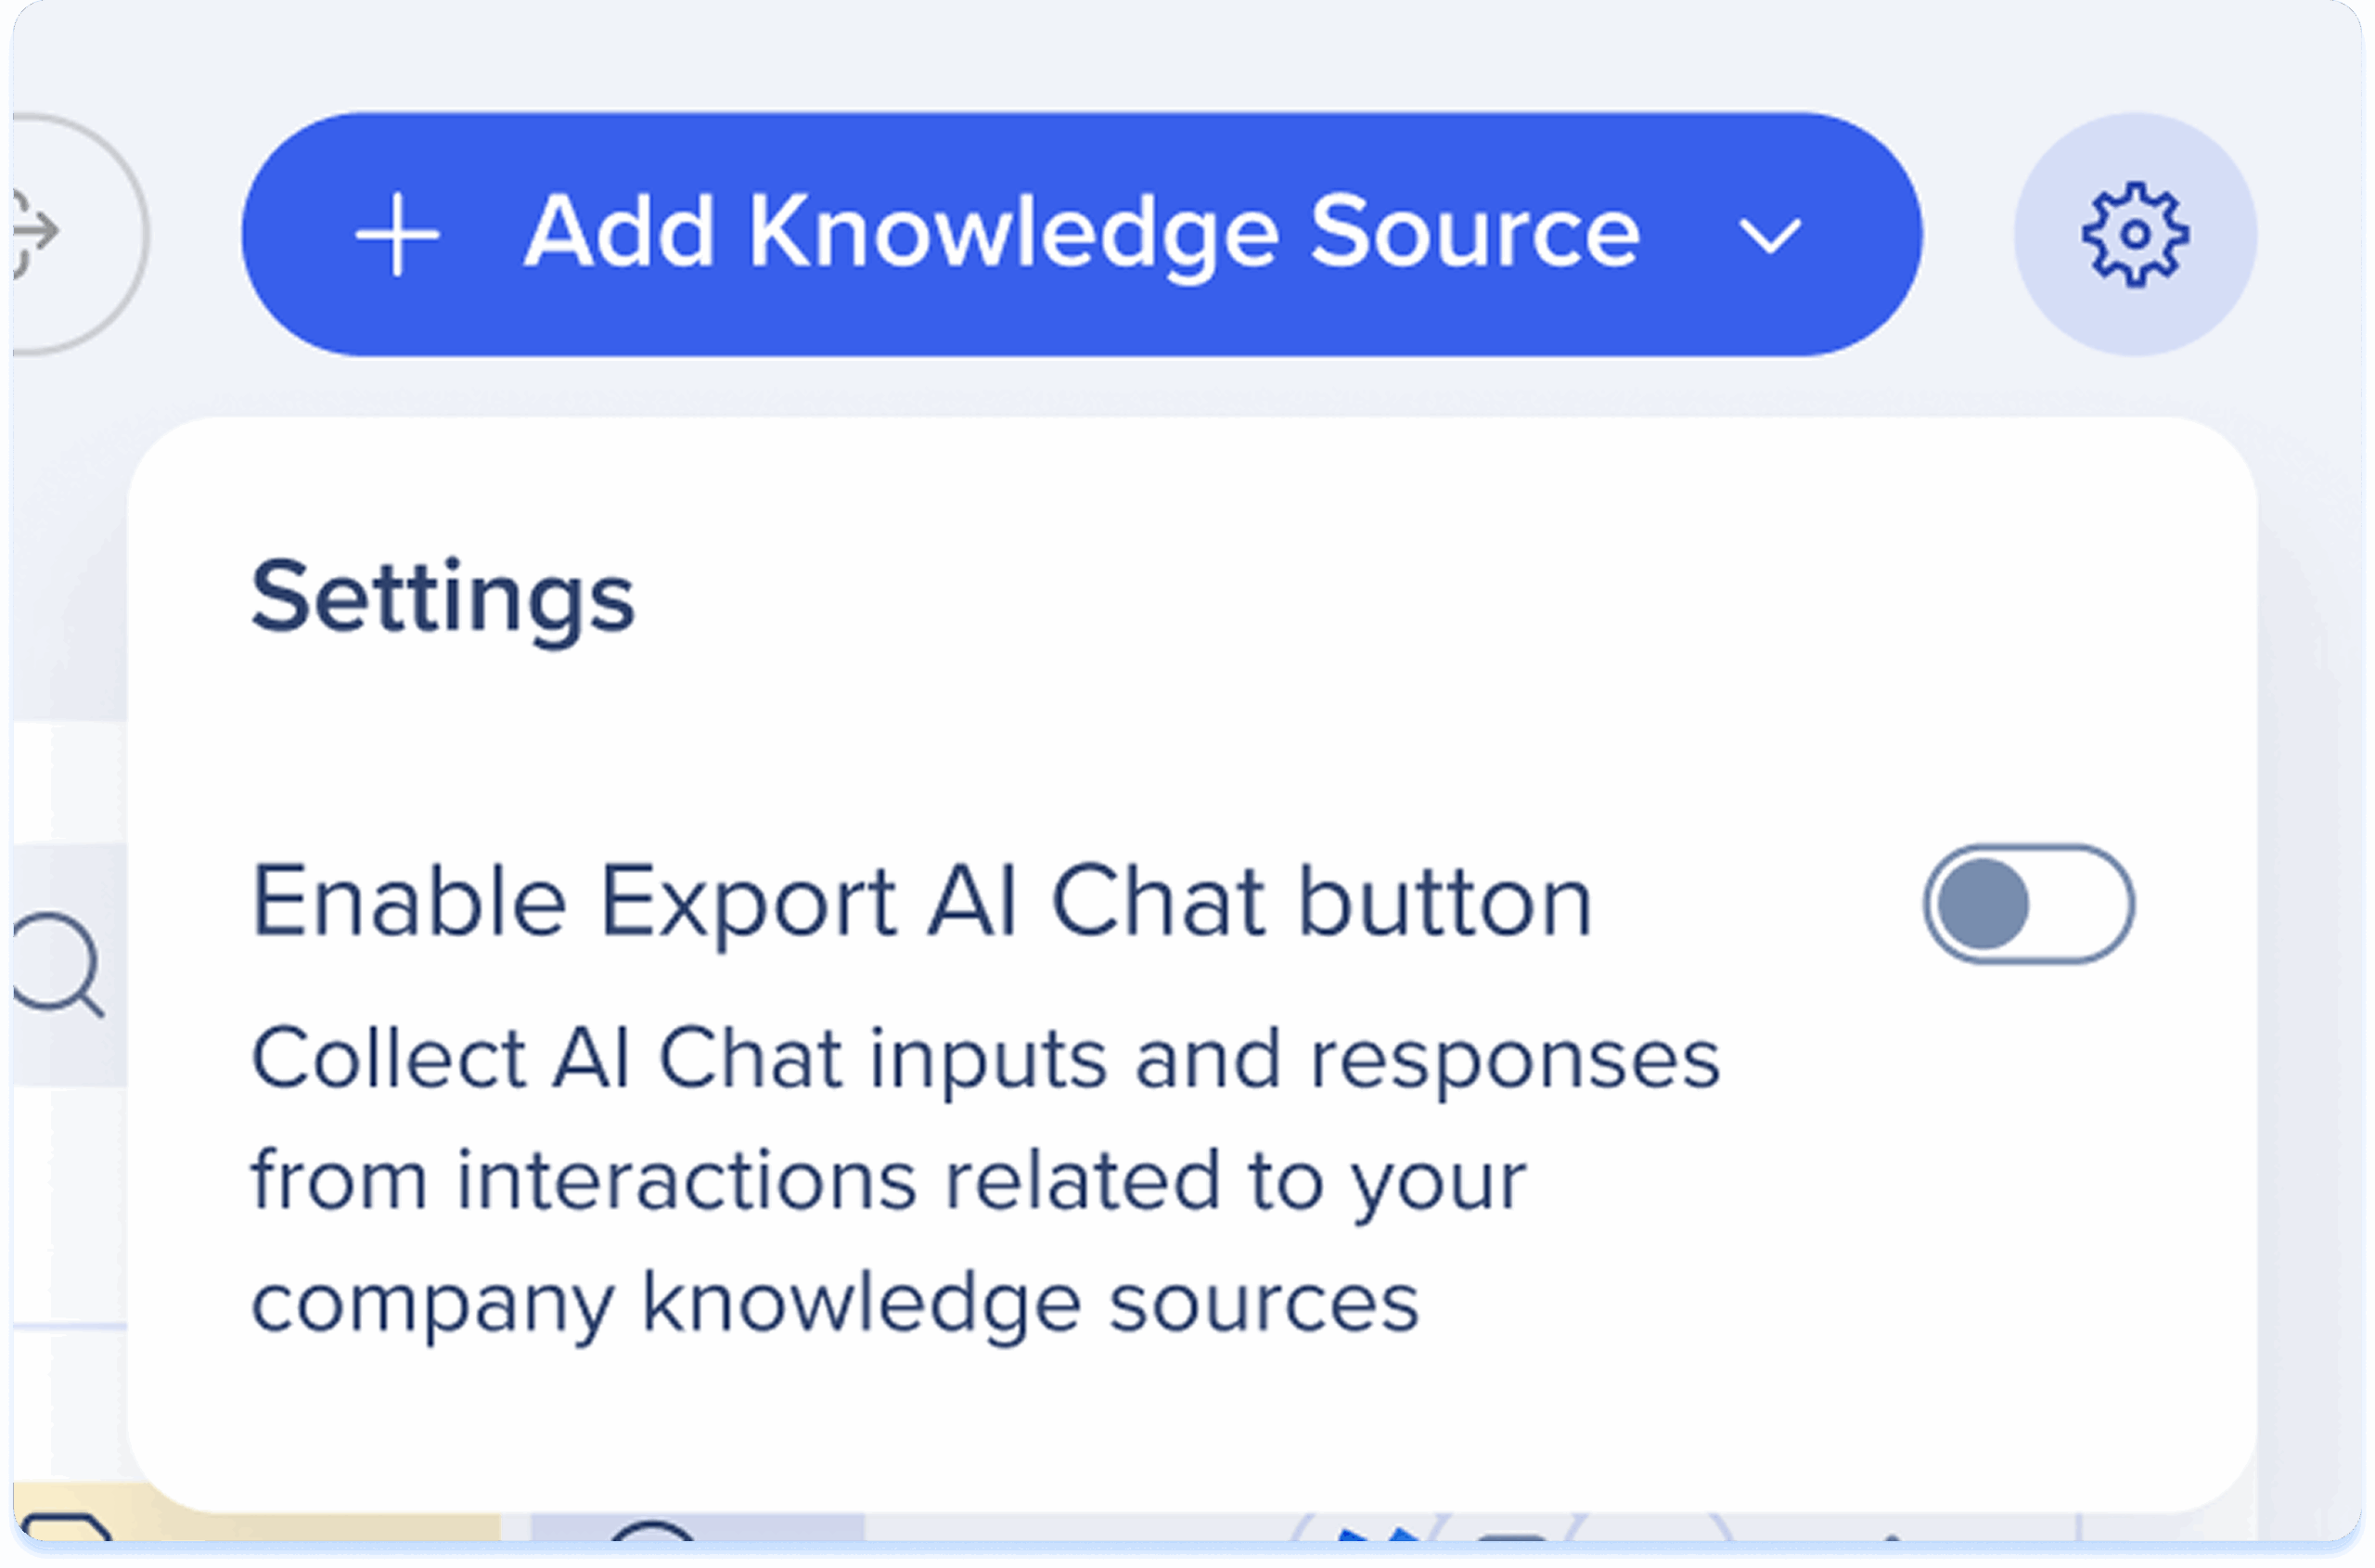
-
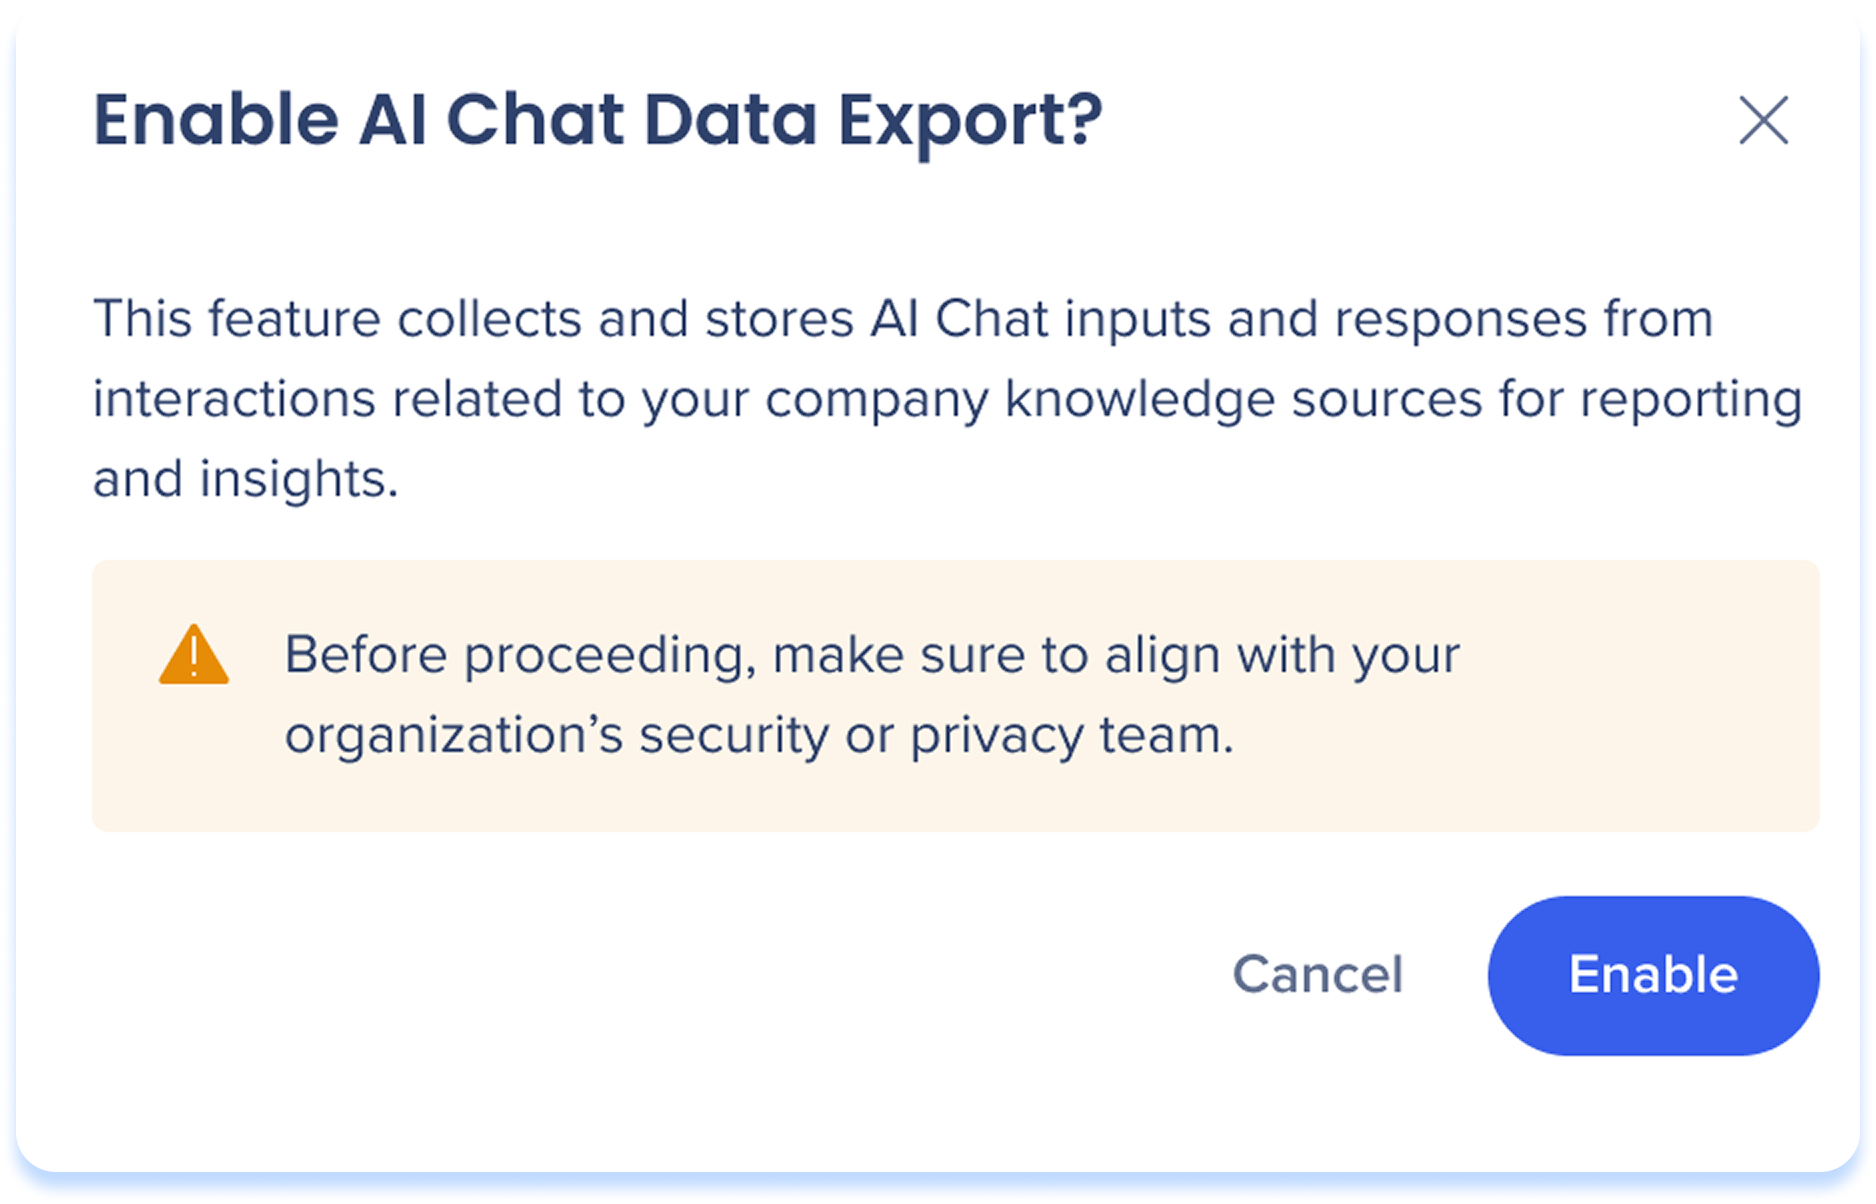
You'll get a popup warning letting you know that this feature collects and stores AI Chat inputs and responses from interactions related to your company knowledge sources for reporting and insight
-
Select Enable
How it works
-
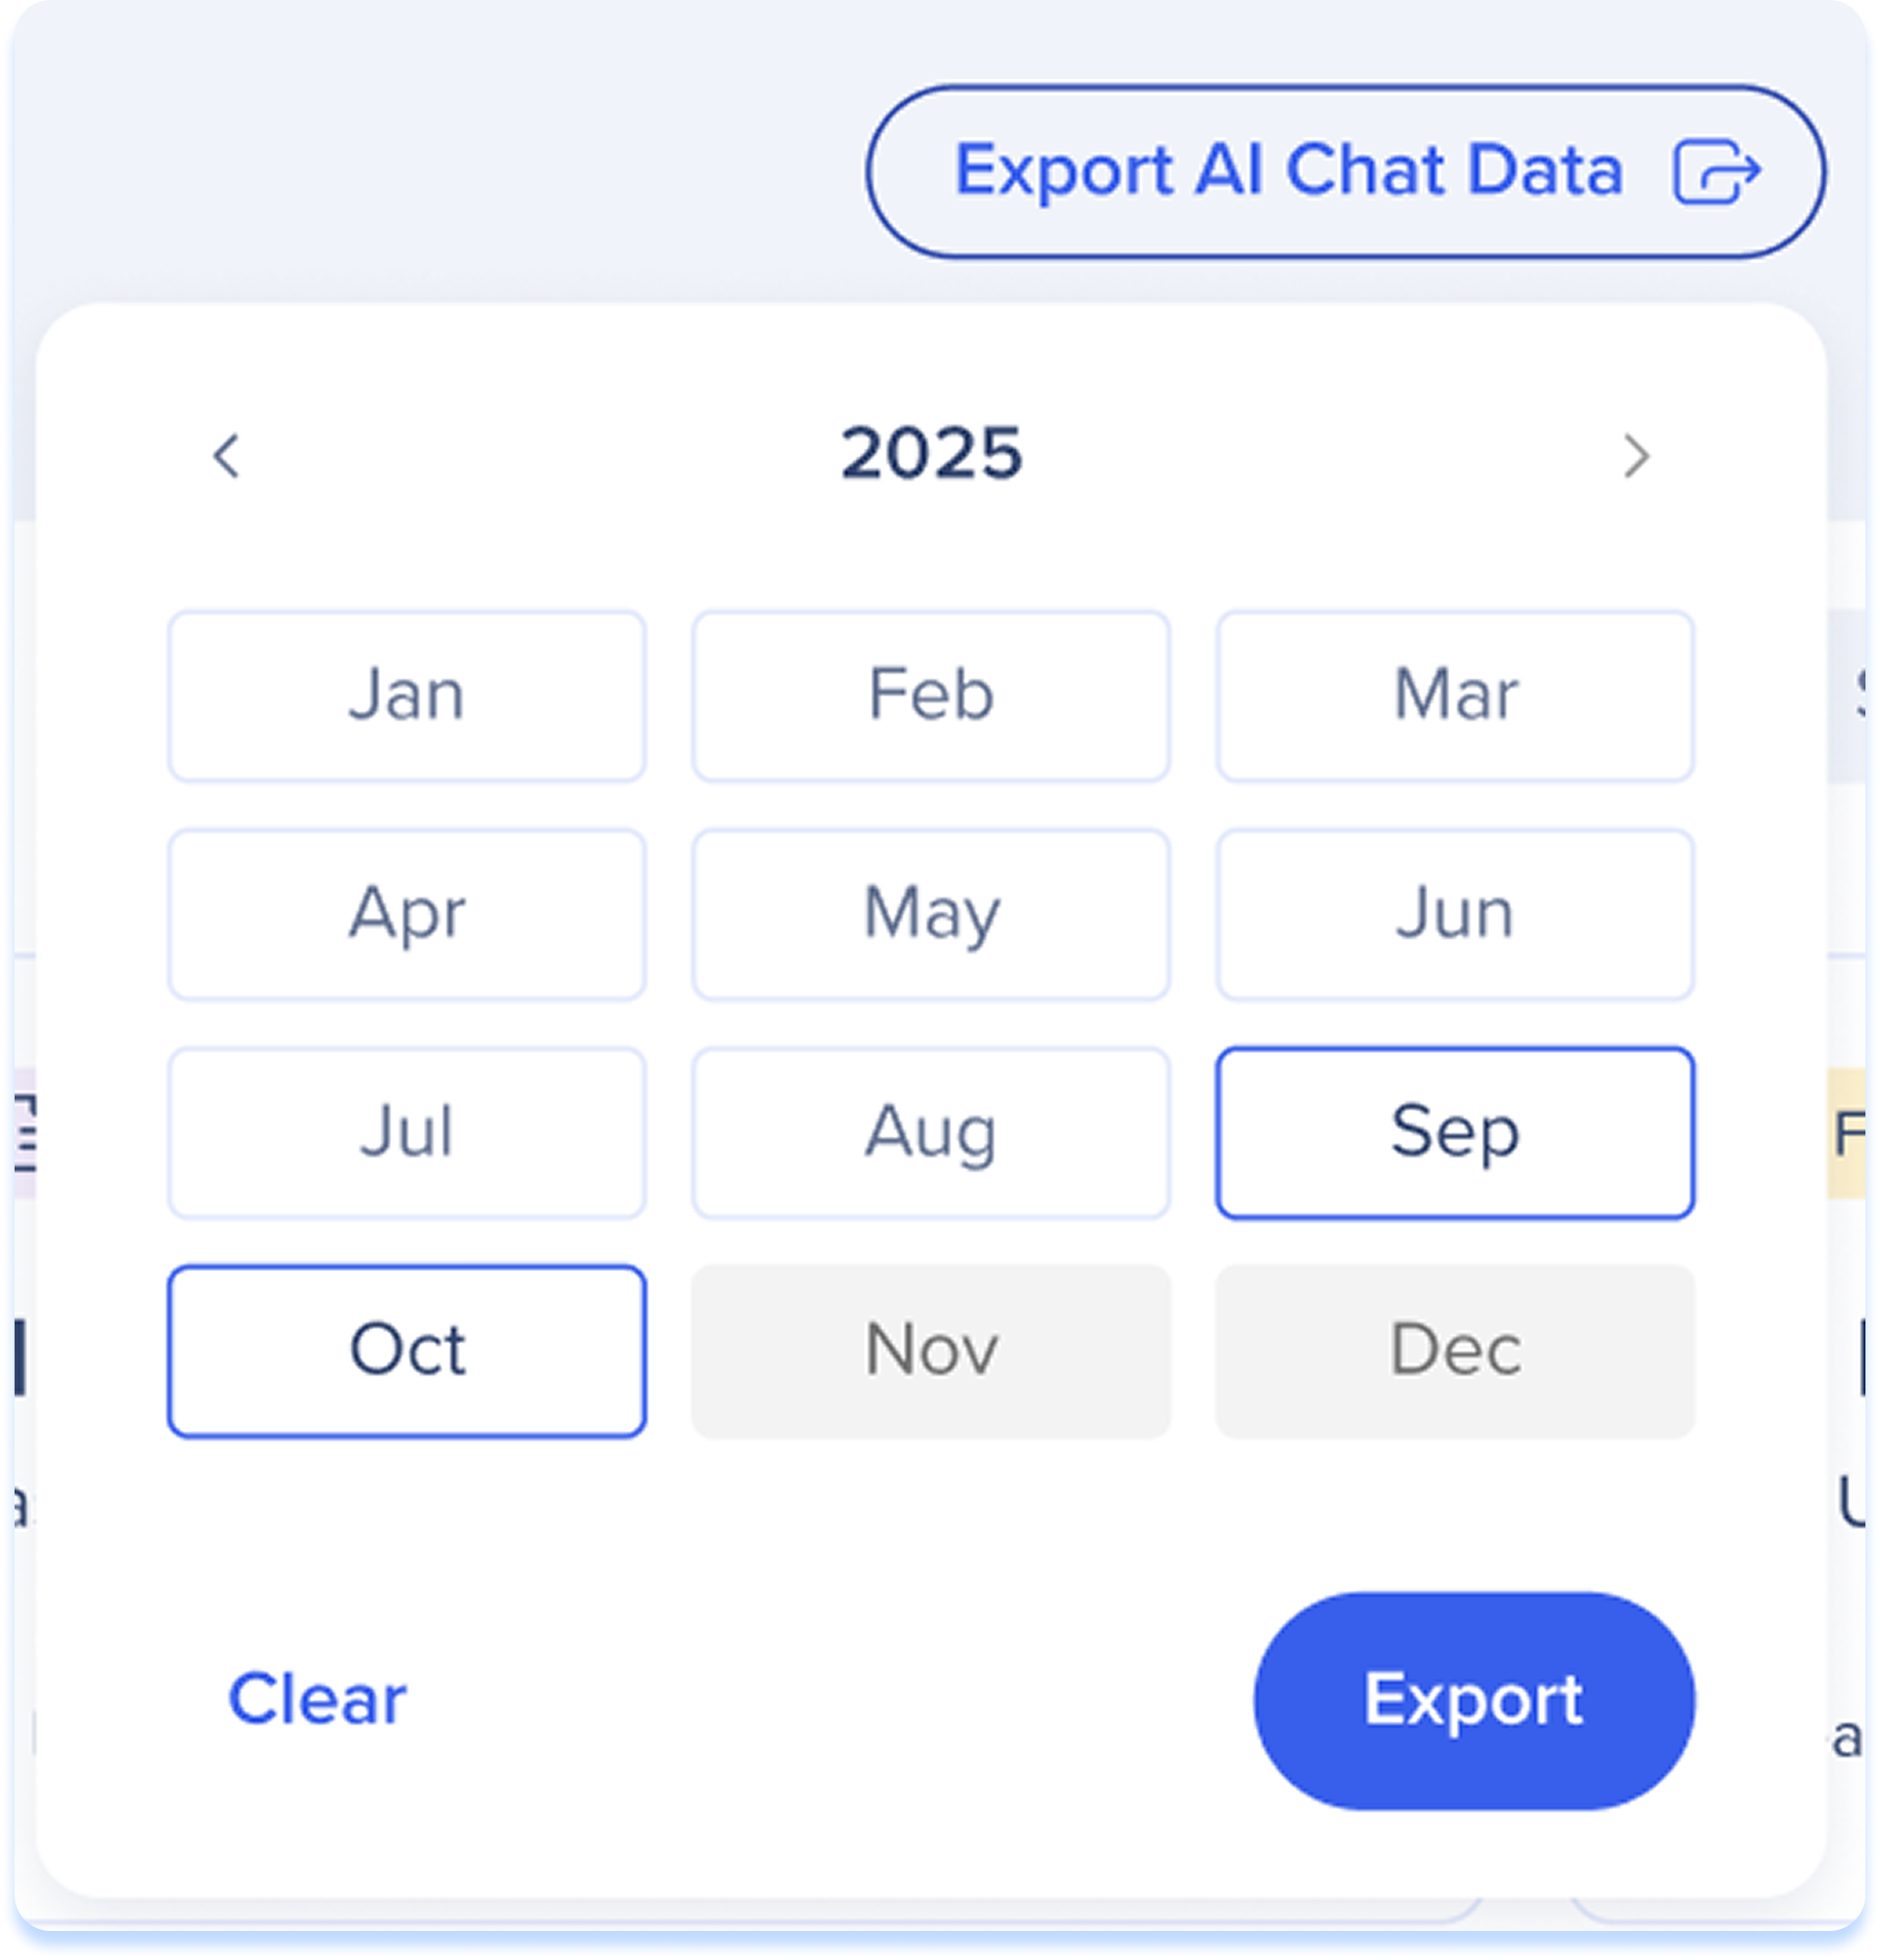
After enablement, Select the Export AI Chat Data button
-
Choose a date range
-
Select Export
How to Add a Knowledge Source
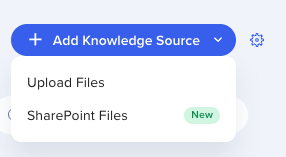
WalkMe supports two types of knowledge sources:
Select the source type that fits your content.
Upload Files
Step 1: Upload source files
- Enter a name for the Knowledge Source
-
Add a link to your file source. This link will appear as a clickable reference in chat responses (optional)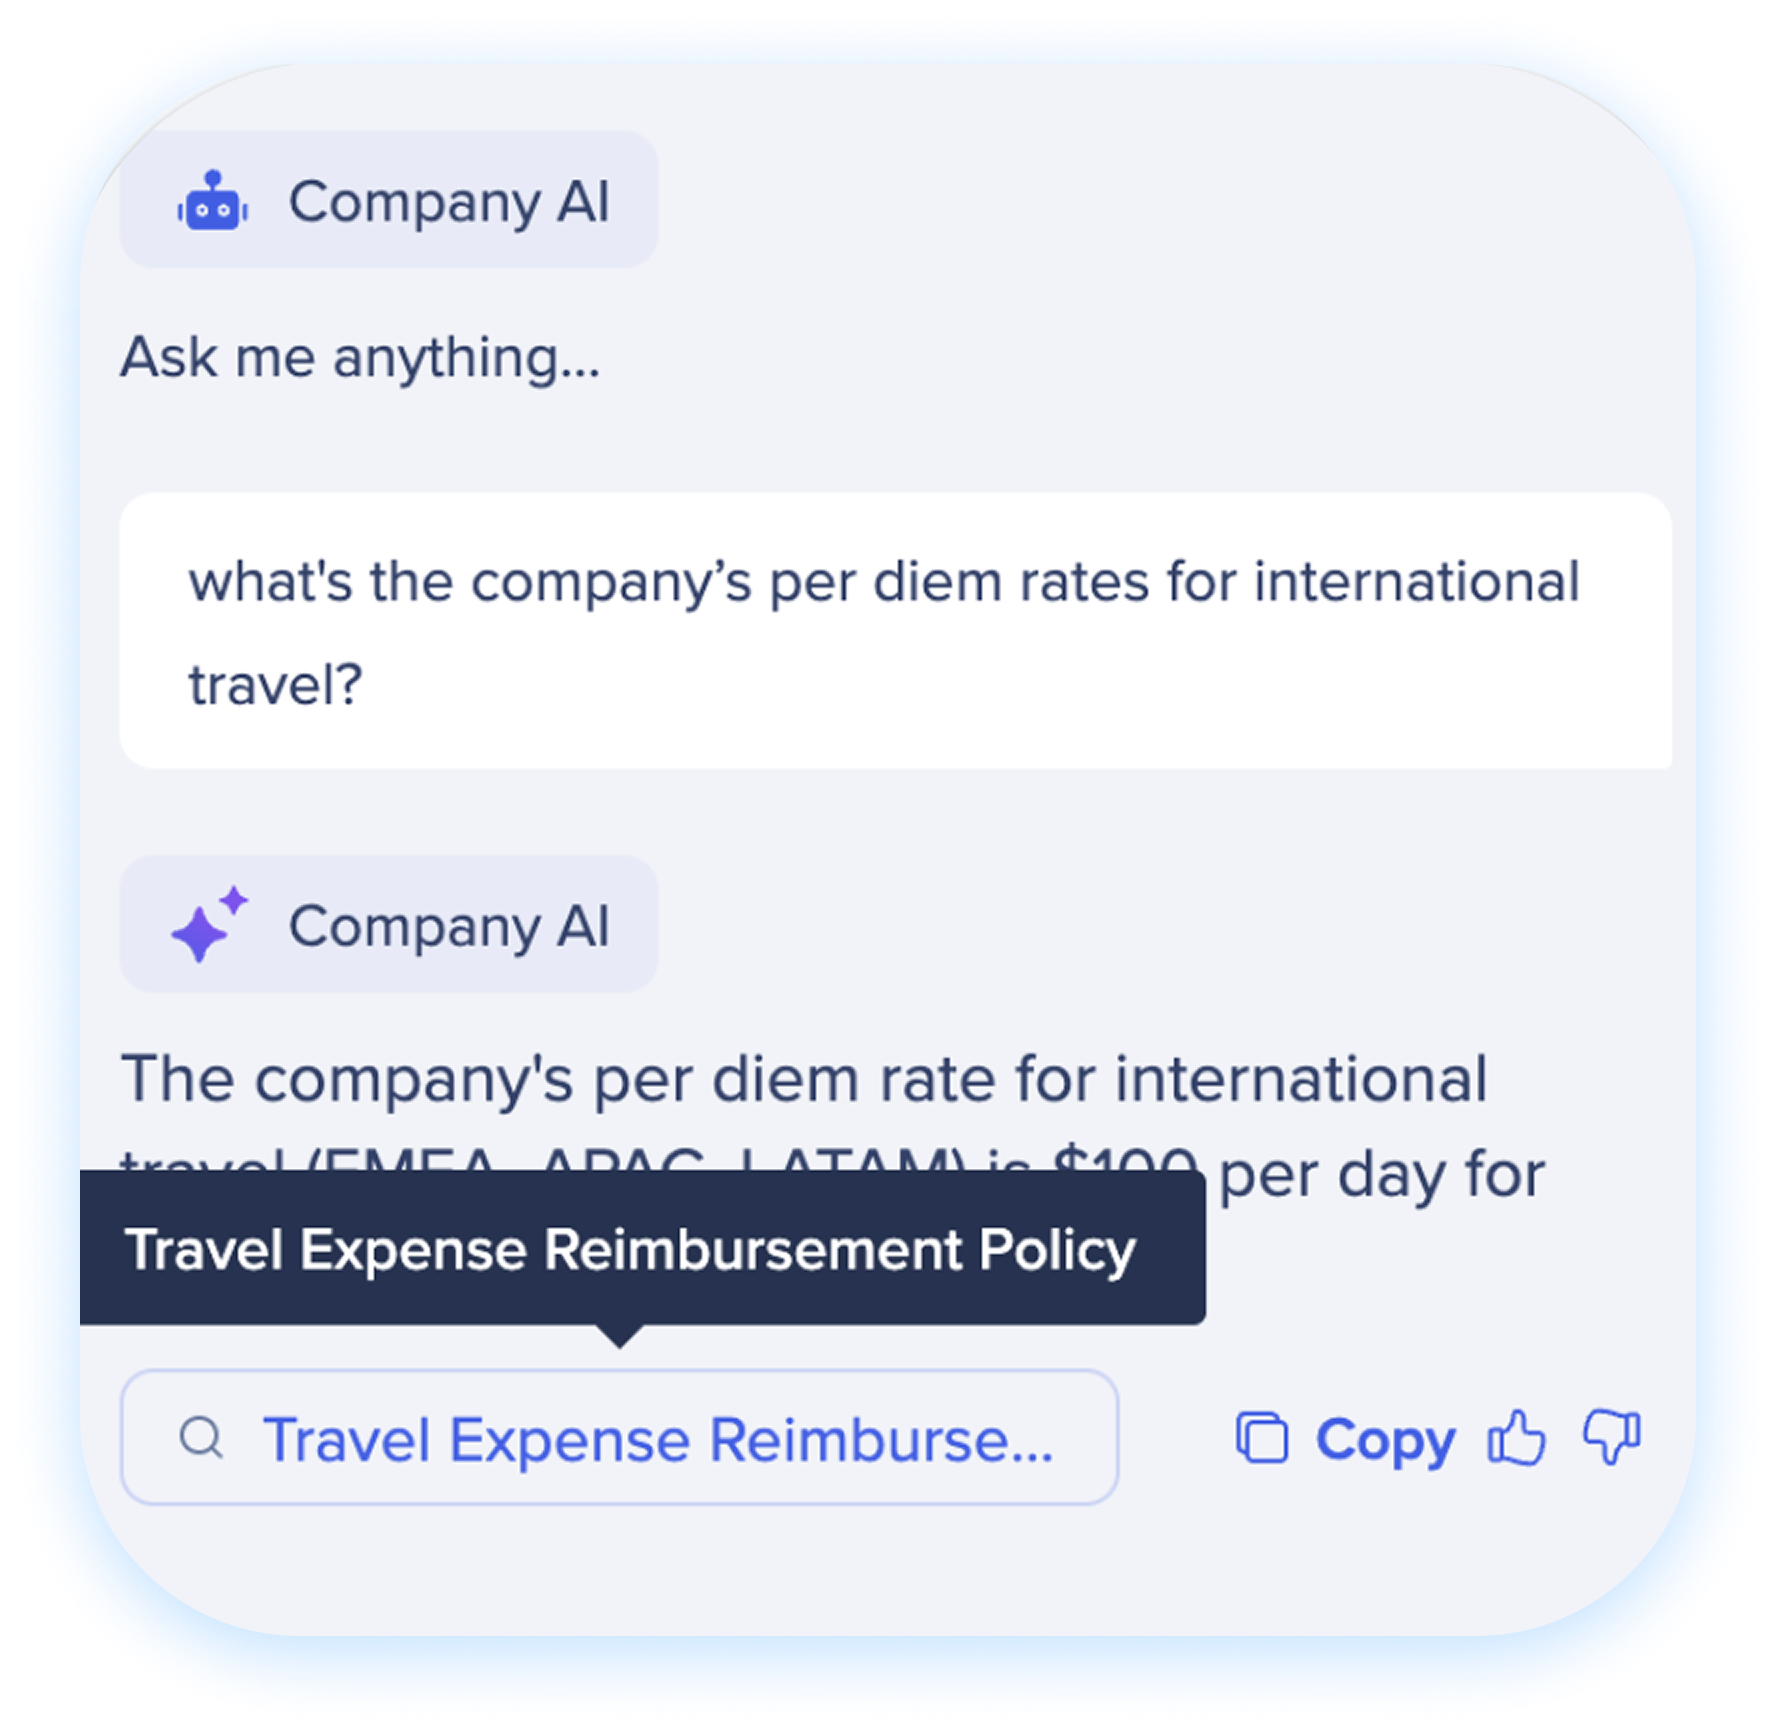
- Drag and drop your files or click Upload
Requisitos de upload de arquivos
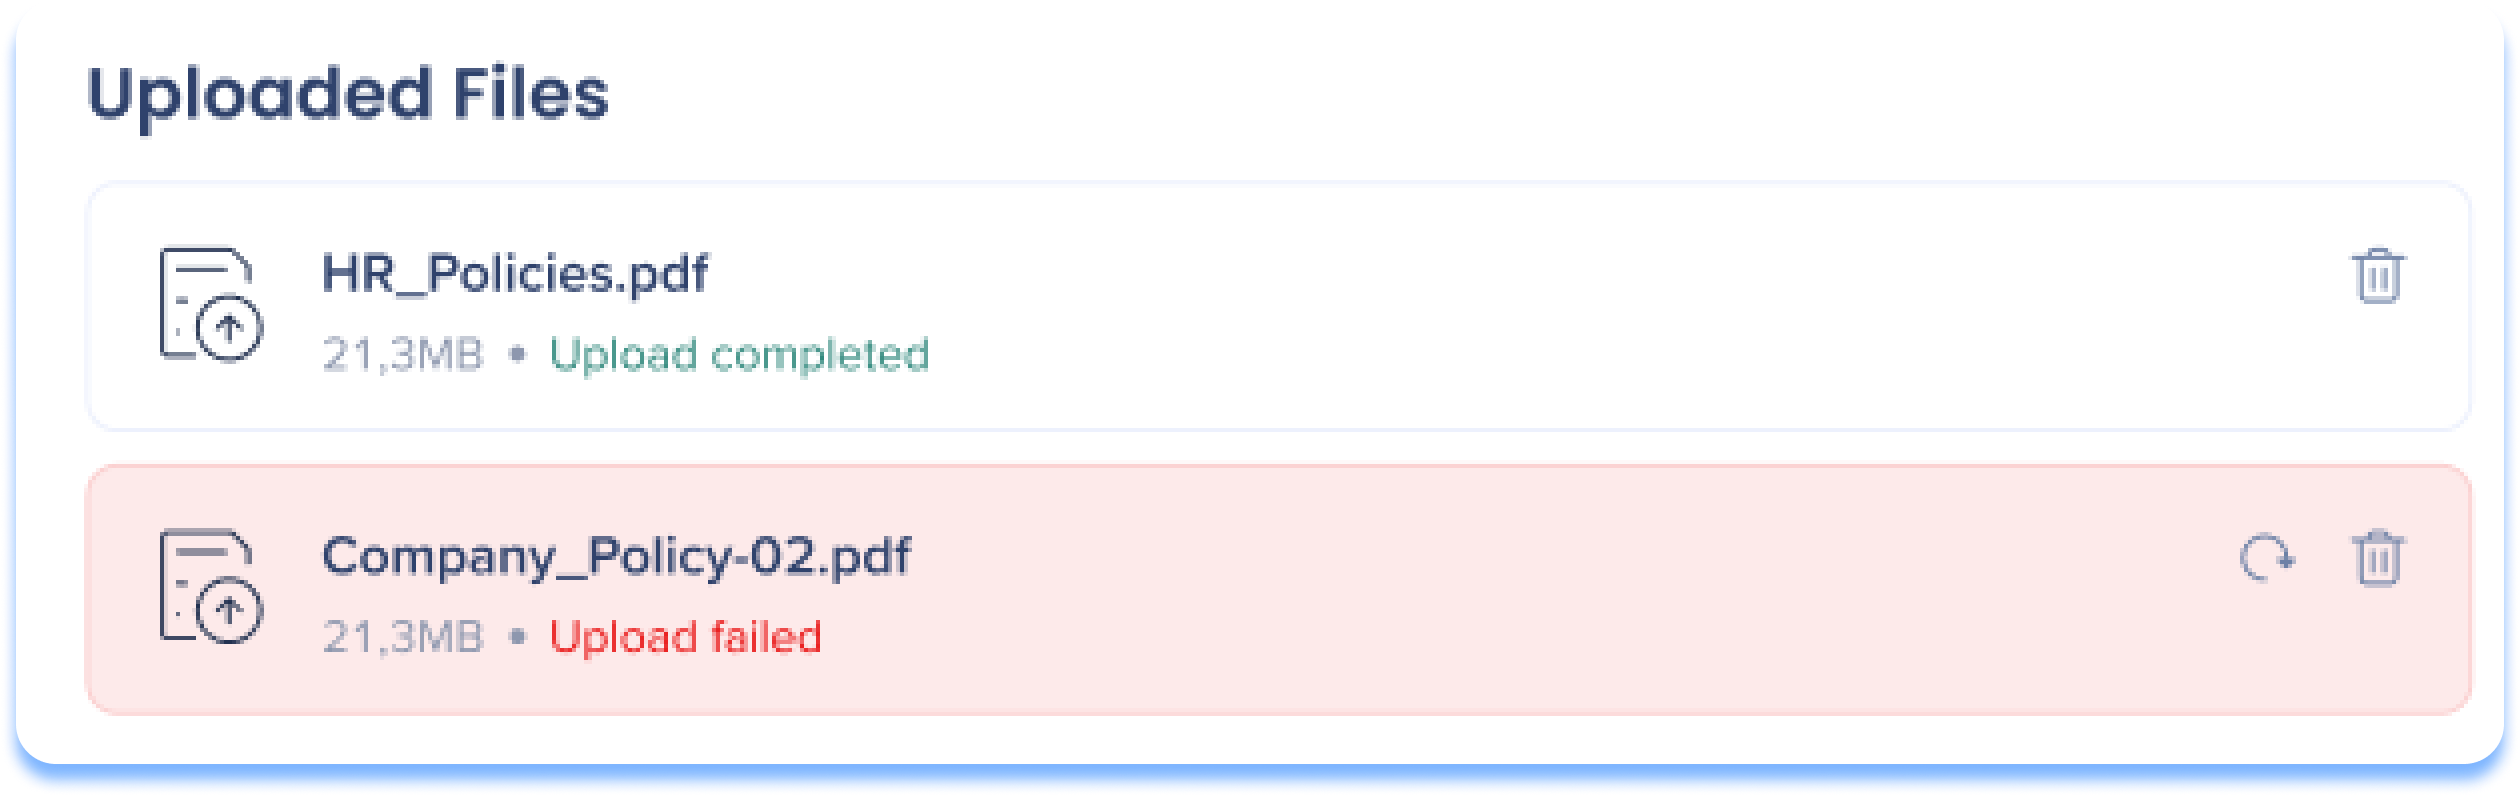
4. The progress of the uploading files will appear
5. Click Next
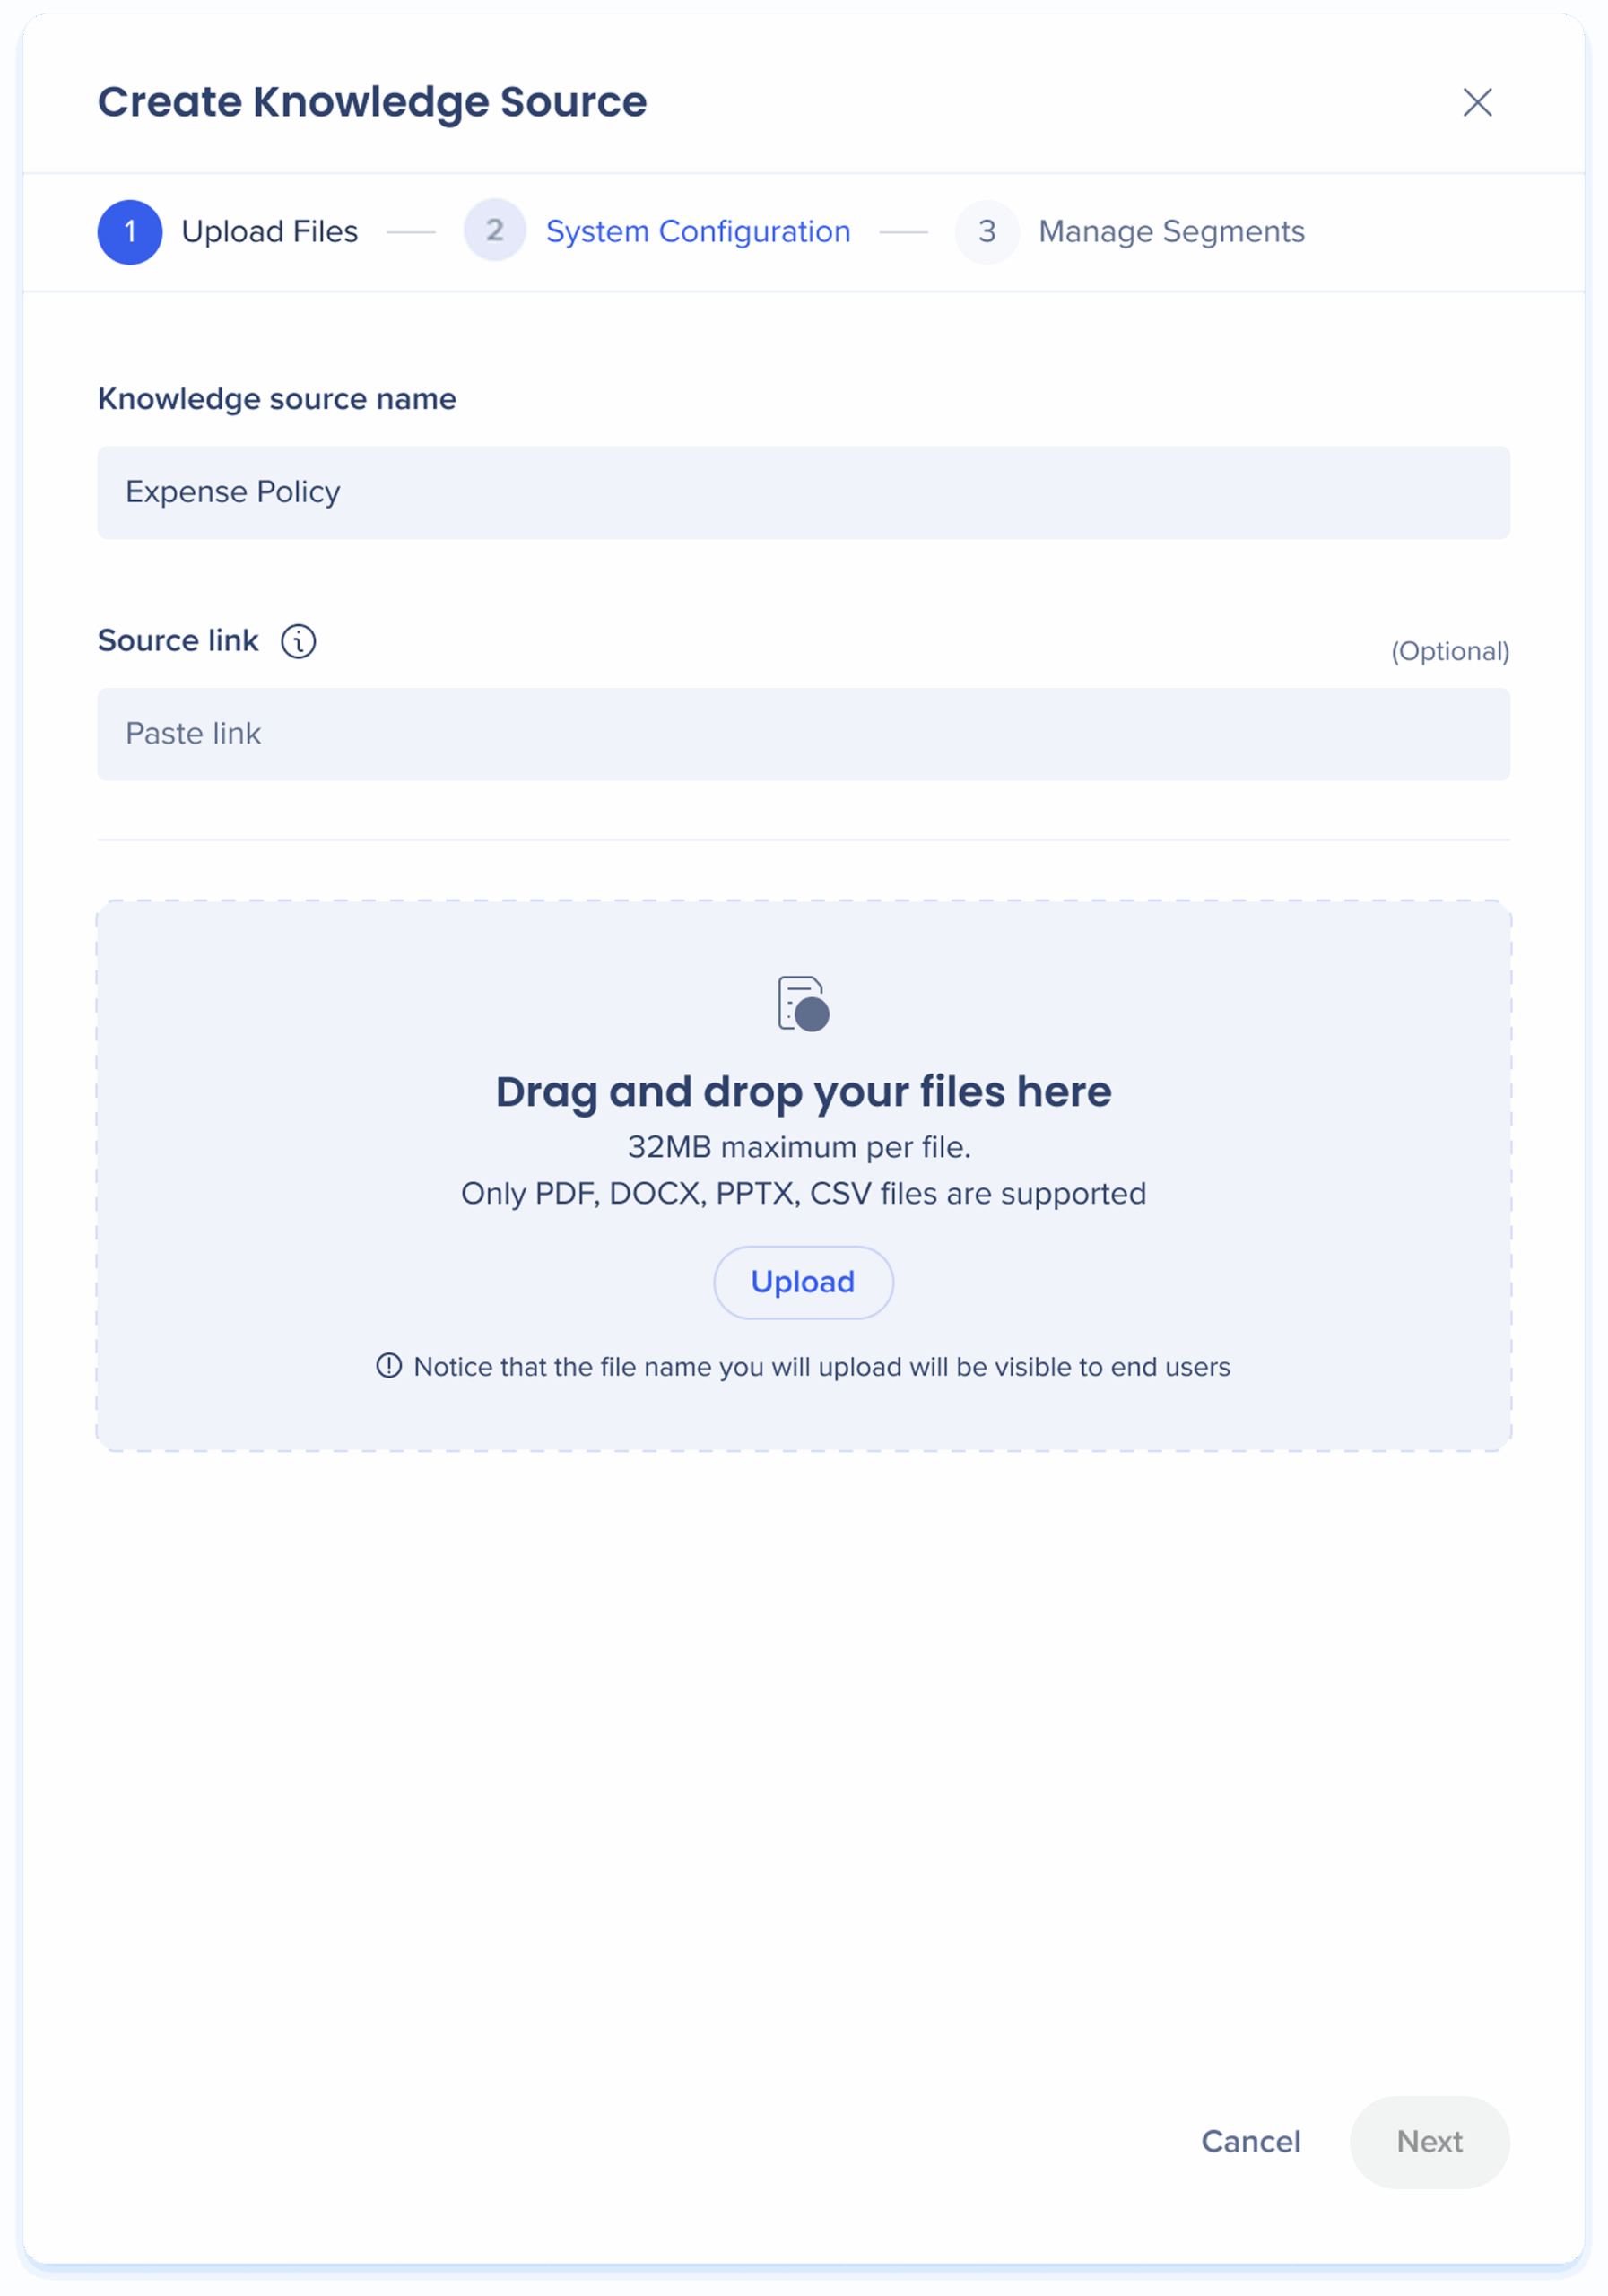
Step 2: Access
-
Select where your knowledge source can be accessed
- Click Next
Step 3: Manage segments
For each system, customers have the option to add their user segments to better control the knowledge source availability.
- Select a system from the list
-
Select the user segments that will have access to your knowledge sources
-
Turn on a user segment toggle to enable per system
-
Click Create Source
-
The new knowledge source will appear in the dashboard
Learn more about segmentation and creating segments in the editor:
Segmentation
Connect SharePoint Files
To connect a SharePoint site, you first register an app in your own Azure AD, then enter those credentials in the wizard. WalkMe can't create the app registration for you — it must live in your Azure AD.
Before you connect
É necessário acesso de Admin do Azure
Essas etapas exigem um Admin do Azure AD. O registro do aplicativo e o consentimento do Admin devem ser concluídos no Azure AD da organização antes que você se conecte.
Complete these steps in Azure AD, then return to the Add Knowledge Source wizard with your credentials.
Set up your Azure AD app
-
Register a new app in Azure AD
-
Go to App registrations
-
Select New registration. Use a descriptive name that identifies WalkMe as the integration partner, like WalkMe-to-SharePointOnline-Connector
-
Set API permissions
-
Go to API permissions
-
Select Add a permission, then Microsoft Graph, then Application permissions. Add:
-
Sites.Read.All — read-only access to site content (required)
-
Sites.ReadWrite.All — only if WalkMe will create, update, or delete documents
-
Select Grant admin consent for [your organization]. Application permissions don't take effect without this step
Observação
A integração do WalkMe é executada sem supervisão, sem usuário conectado, portanto, ela autentica usando as permissões do aplicativo. As permissões delegadas não funcionarão e causarão erros de autenticação, mesmo após o consentimento ser concedido.
Gather your site and library details
You'll need to identify which site and library to connect. Use one of these options:
-
Option A — Site URL and library name: The full site URL, like https://yourcompany.sharepoint.com/sites/Finance, and the exact display name of the document library, like Shared Documents
-
Use the library's actual name, not a link copied from your browser while viewing a folder. A browser link ending in /Forms/AllItems.aspx is a page URL, not the site or library, and WalkMe can't use it
-
Option B — Microsoft Graph identifiers: The raw Site ID and Document library (Drive) ID, if your SharePoint admin already has them.
To connect more than one site or library, prepare the details for each one separately.
Step 1: Connect
Enter your SharePoint app credentials and site details so WalkMe can access your content.
-
App credentials
-
Knowledge source name: Enter a name for the knowledge source
-
Note: Source names are visible to your users. They appear in the Answer sources dropdown of an AI response
-
SharePoint site URL: Enter the full URL of the SharePoint site you want to connect
-
Tenant ID: Enter your Microsoft tenant ID
-
Application (Client) ID: Enter your app ID
-
App secret ID: Enter your app secret ID
-
SharePoint details
-
Document library name: Enter the exact display name of the SharePoint document library as it appears in SharePoint, not a link copied from your browser
-
Site ID: Enter your site ID (optional)
-
Document library ID: Enter your document library ID (optional)
-
Click Next
Mensagens de erro
-
As credenciais do aplicativo não podem ser verificadas: o ID do locatário, o ID do aplicativo (Cliente) ou o valor secreto do aplicativo não puderam ser validados. Verifique cada valor com o registro do aplicativo Azure AD. A causa mais comum é um segredo expirado ou digitado incorretamente, ou o ID secreto inserido no lugar do valor do segredo
-
Falha na conexão do SharePoint: suas credenciais foram verificadas, mas o WalkMe não conseguiu acessar o site. Verifique se o URL do site do SharePoint está correto e se o consentimento do Admin foi concedido para as permissões de aplicativo do aplicativo no Azure AD
Step 2: Settings
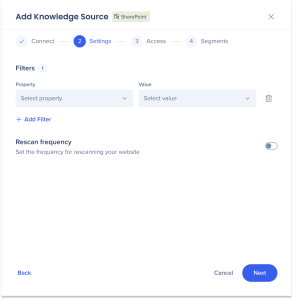
Narrow which content WalkMe ingests and set how often it refreshes.
Filters
Filters limit ingestion to documents that match the properties you choose. Without filters, WalkMe ingests all documents in the connected library.
-
Select a Property
-
Select one or more Values for that property
-
To add another filter, select Add Filter
-
To remove a filter, select the Trash icon
Rescan frequency
Turn on Rescan frequency to keep your connected content up to date. When it's on, WalkMe rescans the SharePoint source on the schedule you set and applies any additions, changes, and removals.
Select Next.
Steps 3-4: Access and segments
The Access and Segments steps are the same as the file upload flow. Follow the steps in Step 2: Access and Step 3: Manage Segments above.
Permissões de arquivos
O acesso aos arquivos é controlado pela segmentação do WalkMe, não pelo SharePoint. Os arquivos conectados estão disponíveis para todos os usuários, independentemente das permissões do SharePoint, portanto, use os segmentos do WalkMe para limitar quem pode vê-los.
Additional Capabilities
Custom Q&A
Enhance AI Answers with custom Q&As to resolve conflicts or fill gaps in your knowledge sources.
How it works
The AI prioritizes your custom Q&A over other knowledge sources, treating it as the most authoritative source of information.
It searches both your knowledge sources and your custom Q&A, but always ranks the custom Q&A higher. This ensures users receive the most relevant and correct answers quickly.
How to create custom Q&A
-
Hover over a knowledge source
-
Select the Options icon
-
Select Manage Q&A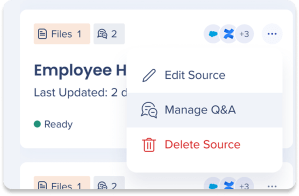
-
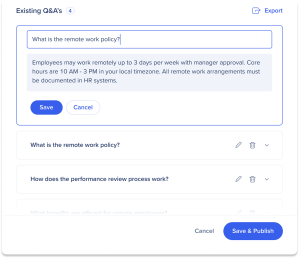
Enter your question and answer in the fields
-
Click Add
-
To add additional Q&A click + Add 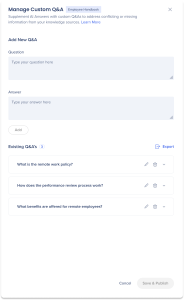
-
Click Save & Publish
-
A popup will appear informing you that the Q&A you've created will be available instantly to end-users. Click Save & Publish
-
To test AI Answers with your new supplement Q&A, click the Demo icon on the source tile you want to test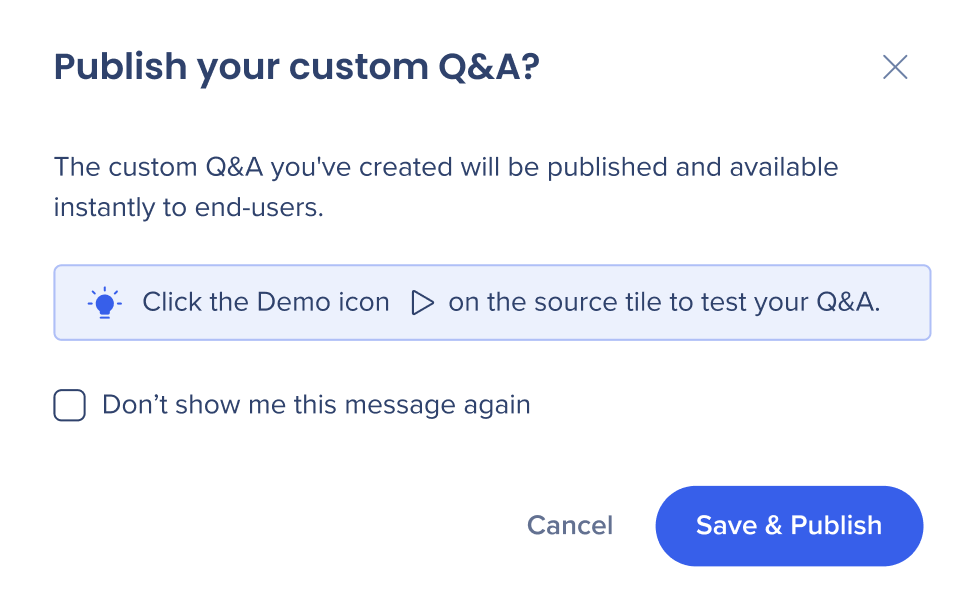
Observação
Clique em Exportar para baixar suas Perguntas e Respostas como um arquivo CSV
Edit or Delete custom Q&A
-
Select the Q&A you wish to edit or delete
-
To delete, click the Trash icon
-
To edit, select the Edit icon
-
Make any necessary changes then select Save
-
Click Save & Publish
Rescan Knowledge Sources
Rescanning knowledge sources lets users schedule updates and view a summary of changes, including additions, modifications, and removals, along with other scanning settings.
How to rescan knowledge sources
-
Go to the AI Settings page in the AI Center
-
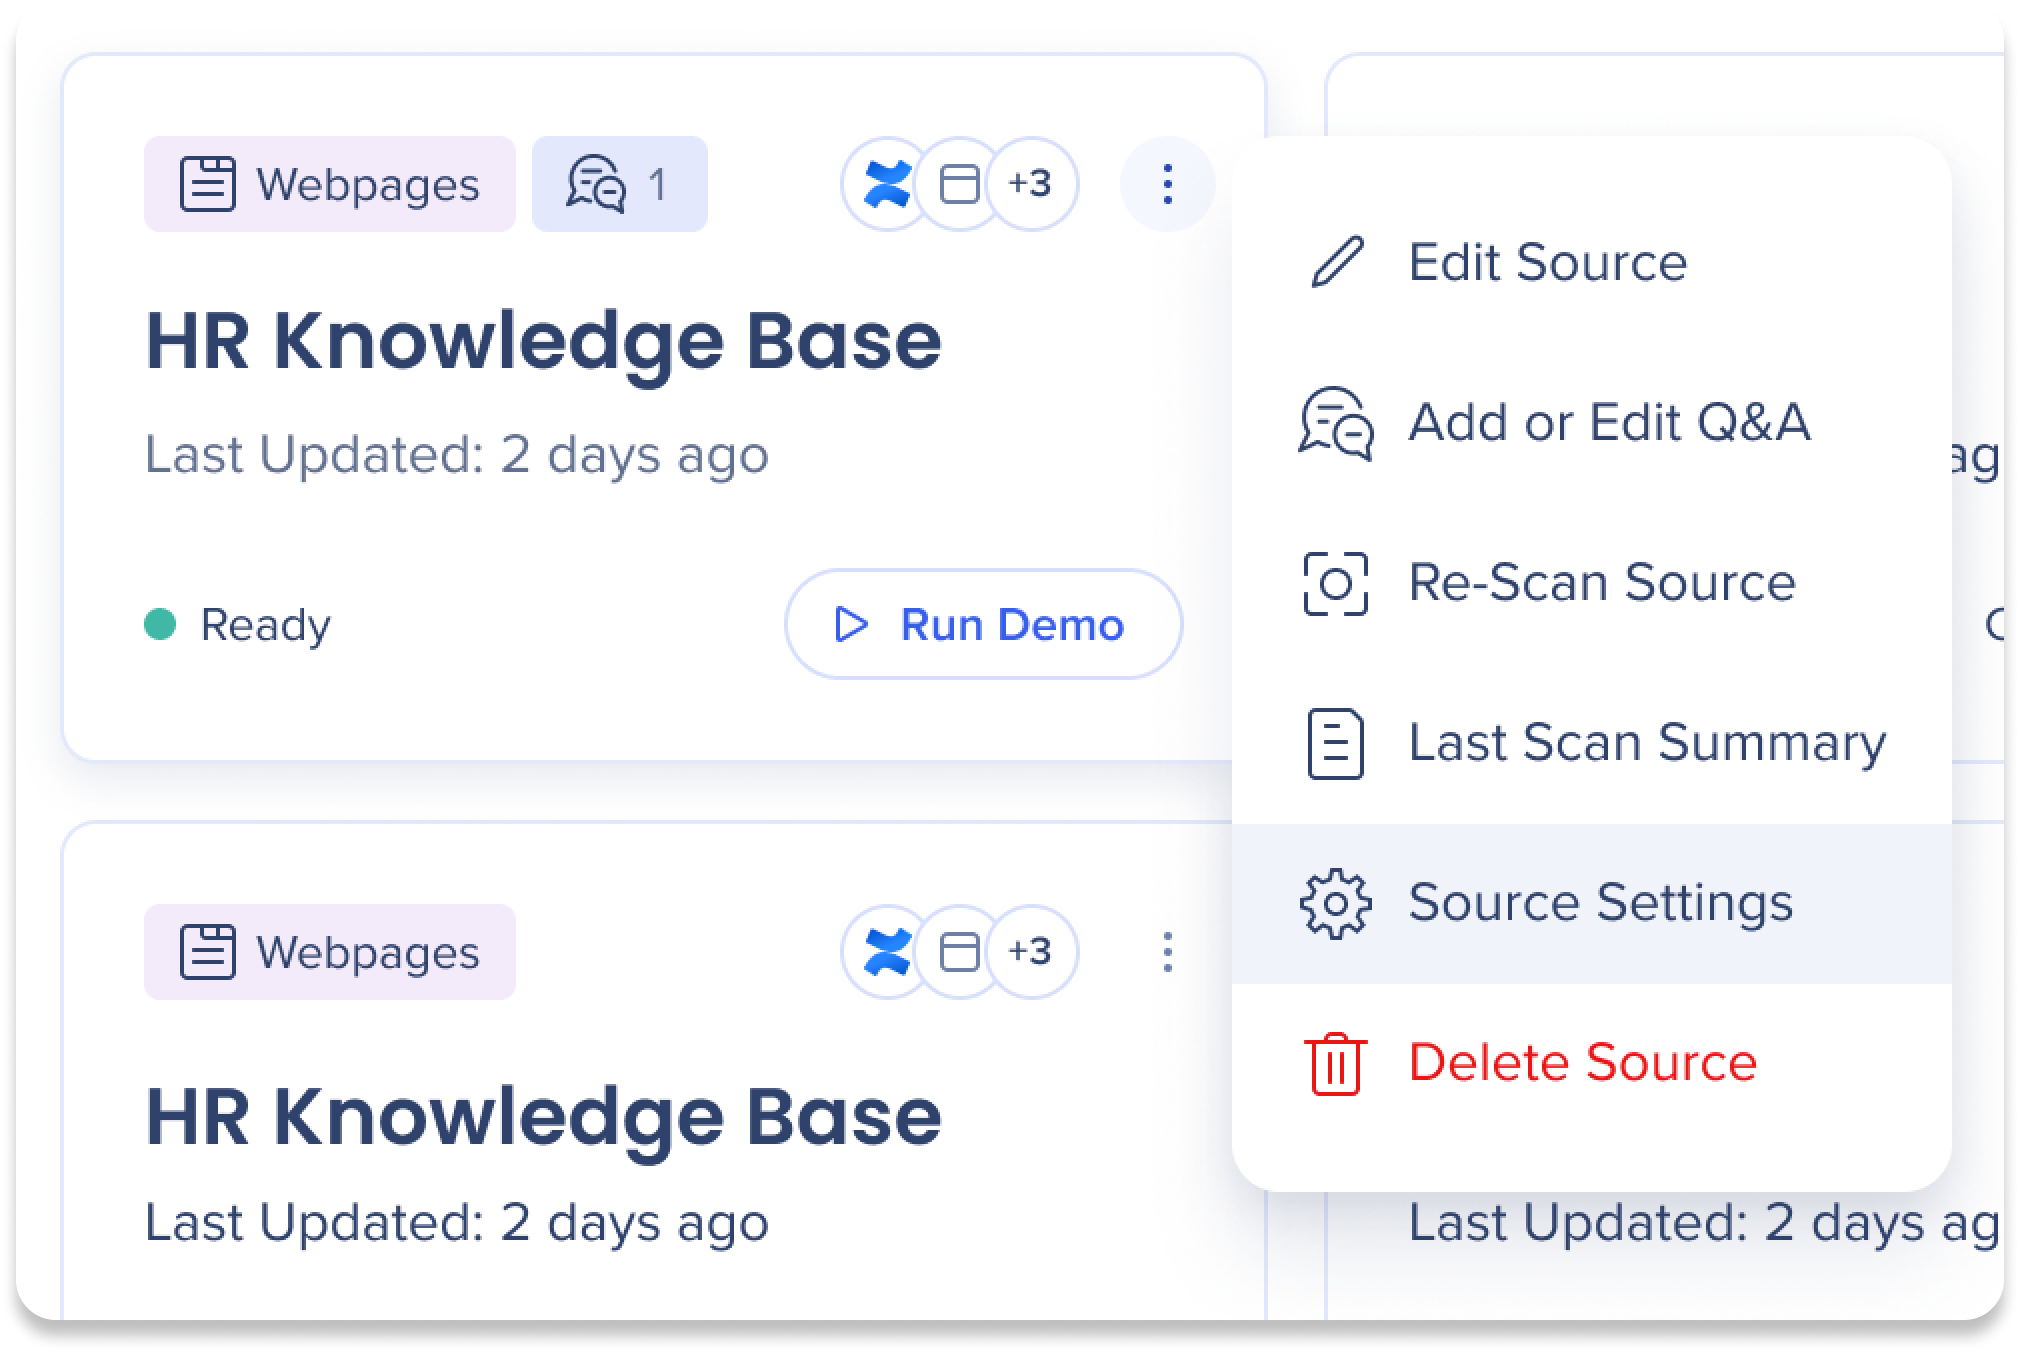
 Click the Options menu on the source you want to rescan
-
Click Source Settings
Rescan frequency settings
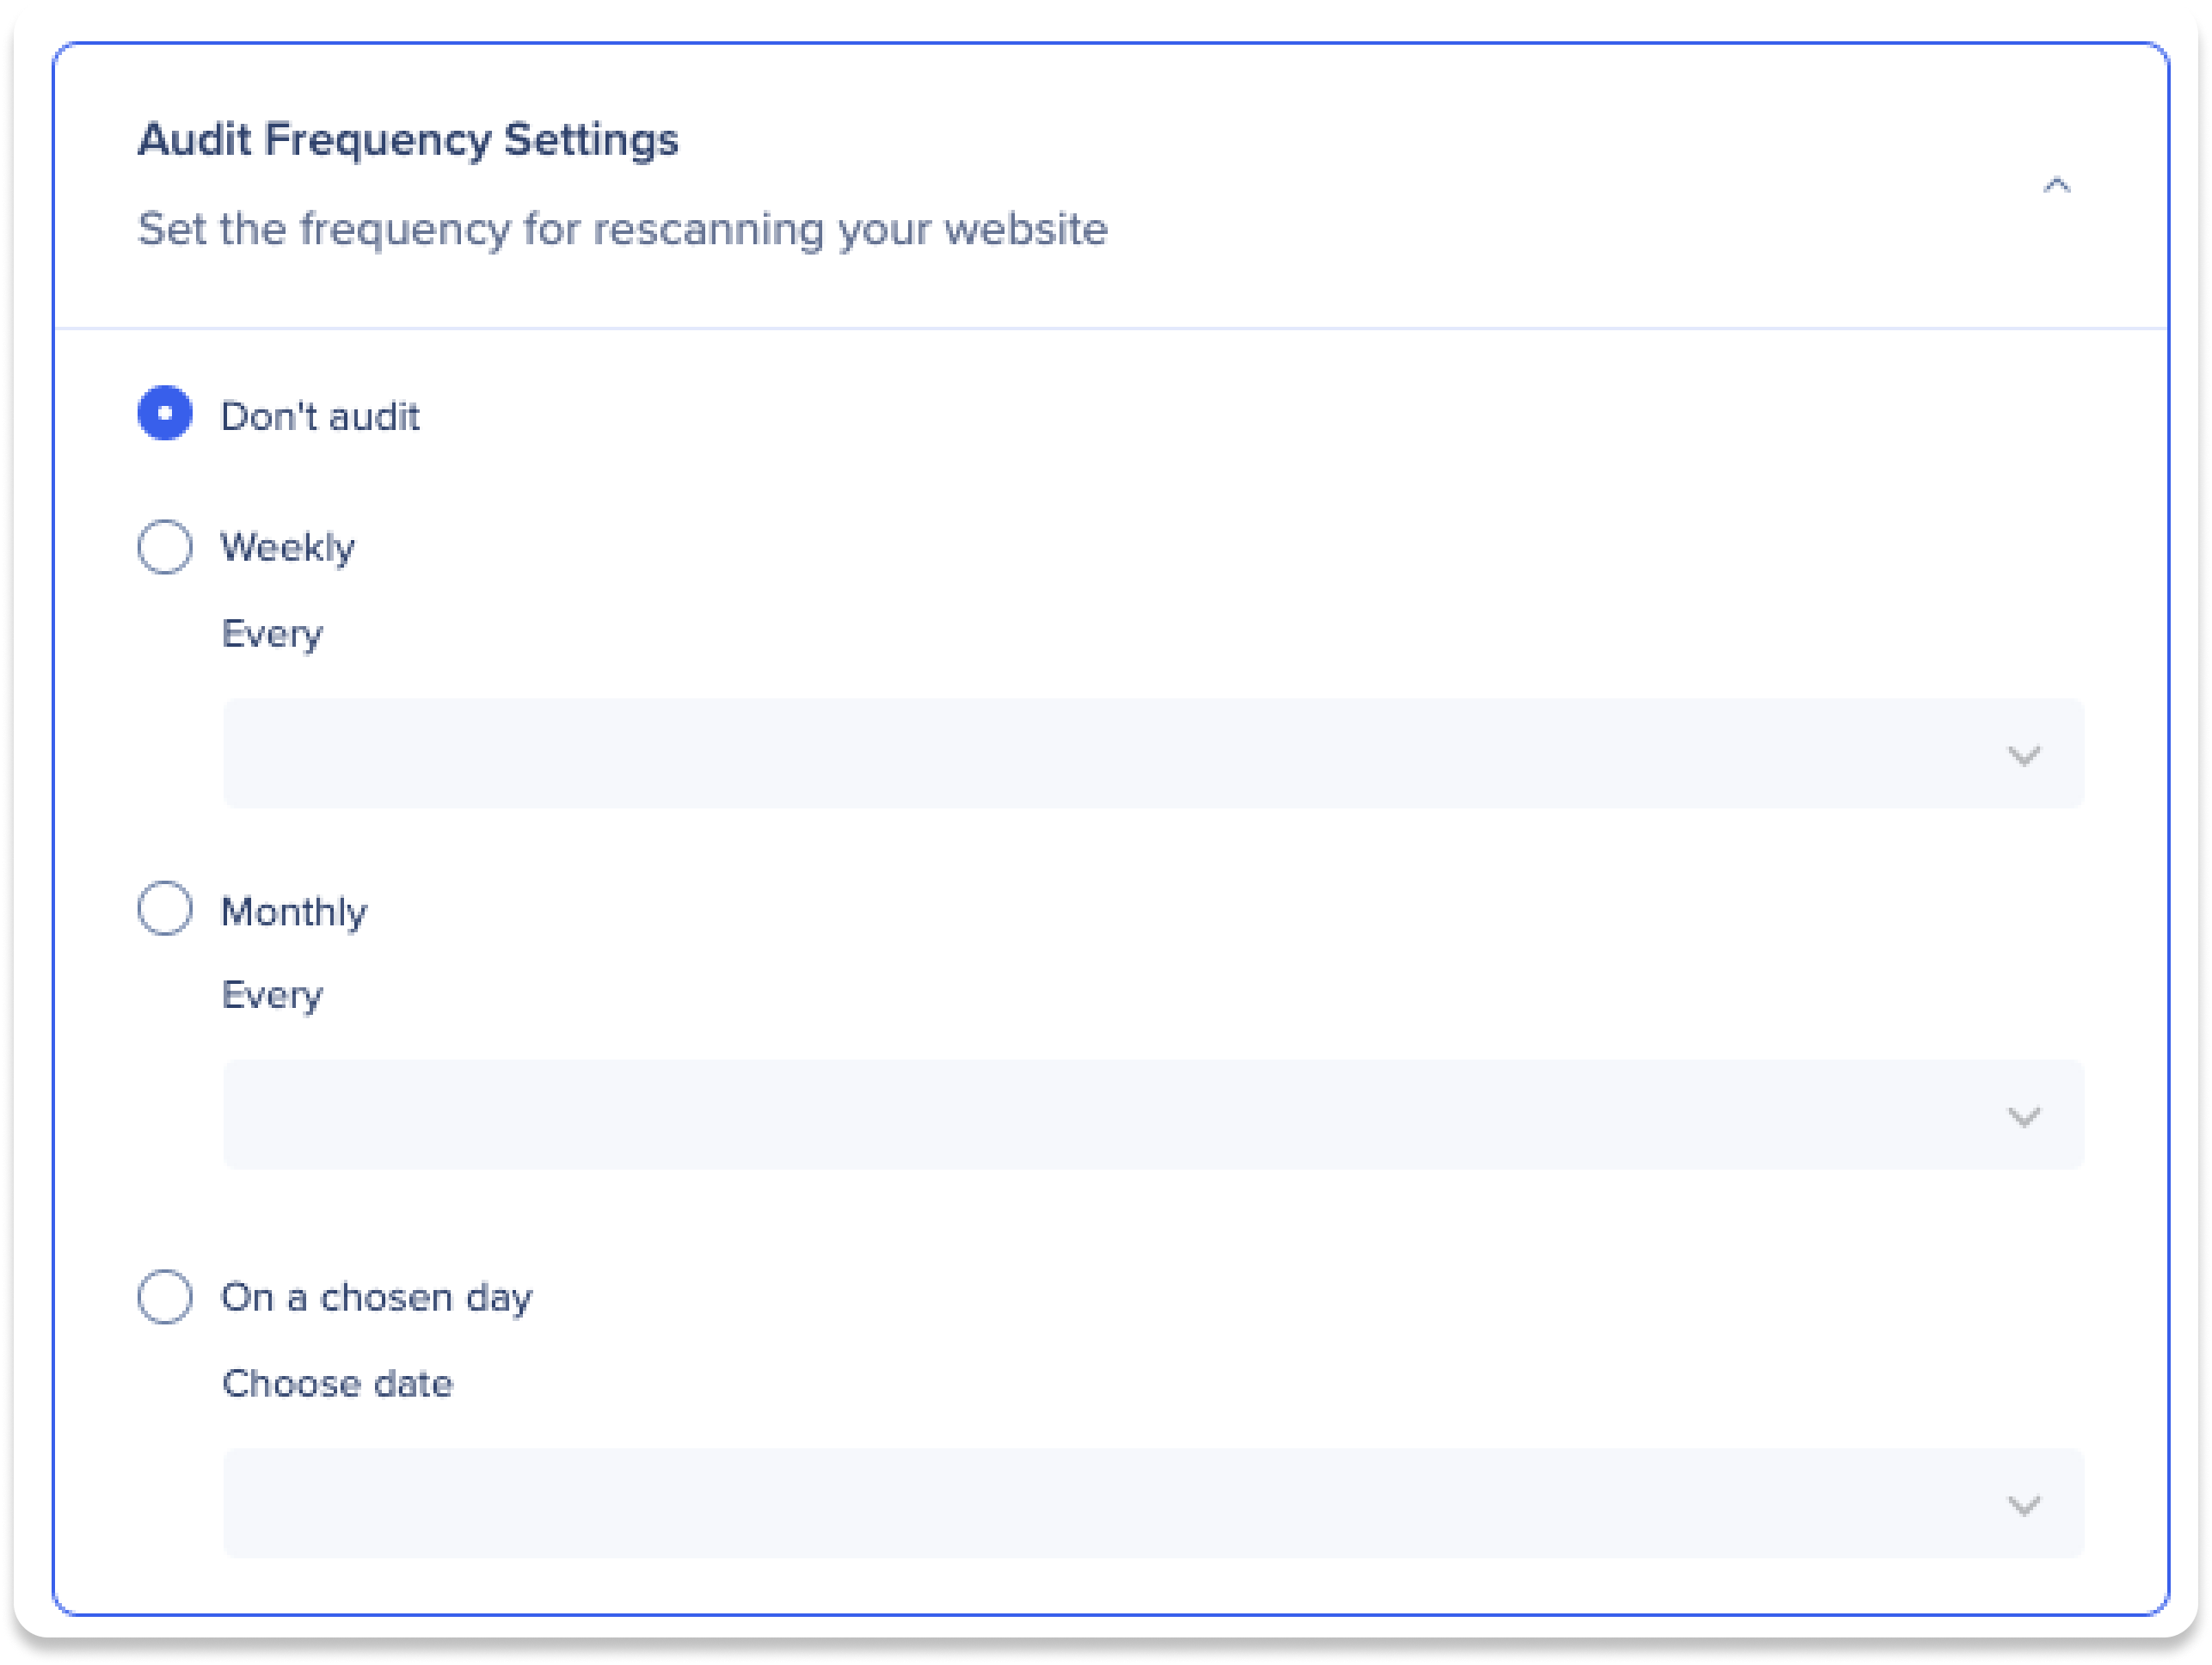
Choose how often you want to rescan your website:
-
Don't audit: Disable automatic website rescanning
-
Weekly: Select the day of the week for the weekly rescan
-
Monthly: Select the day of the month for the weekly rescan
- On months with fewer than 31 days, the rescan will take place on the final day of the month
-
On a chosen date: Select a specific date to rescan
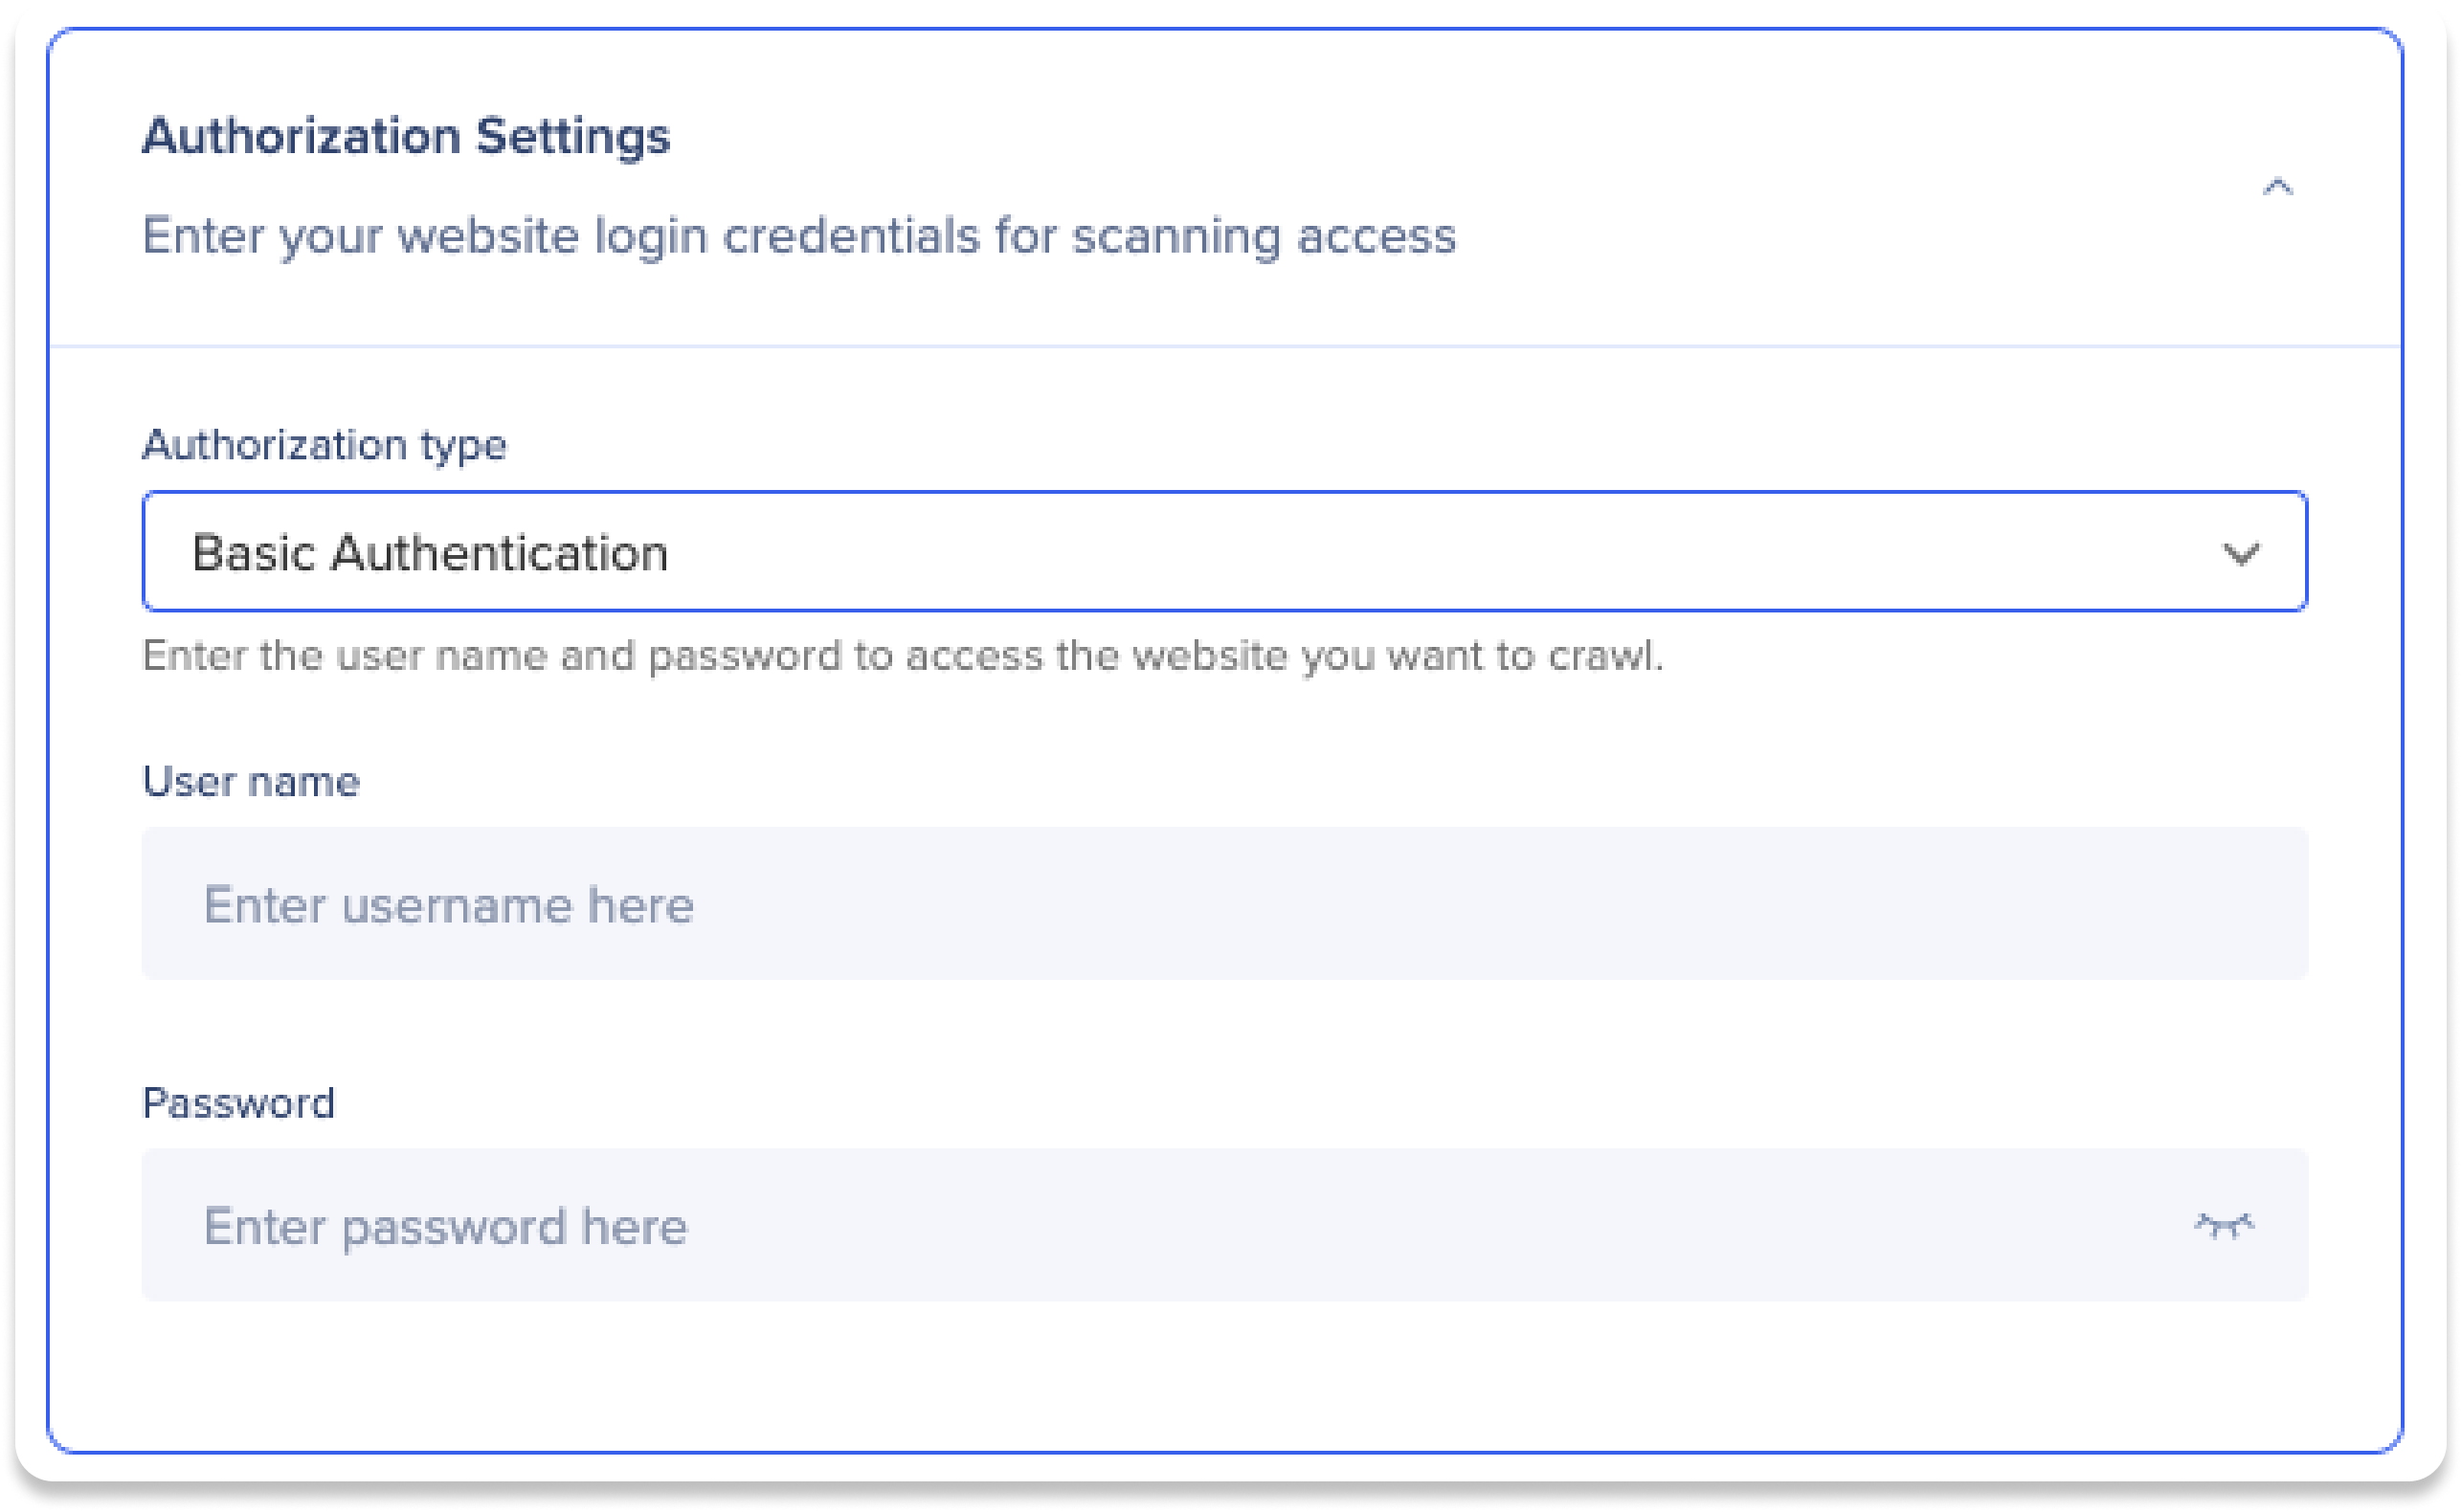
Enter your website login credentials to allow the AI access for scanning your website.
Observação
Algumas informações podem já ter sido preenchidas pela equipe de desenvolvimento do WalkMe. Se houver um problema com credenciais inválidas, provavelmente você só precisa atualizar seu nome de usuário e senha nas Configurações de Autorização.
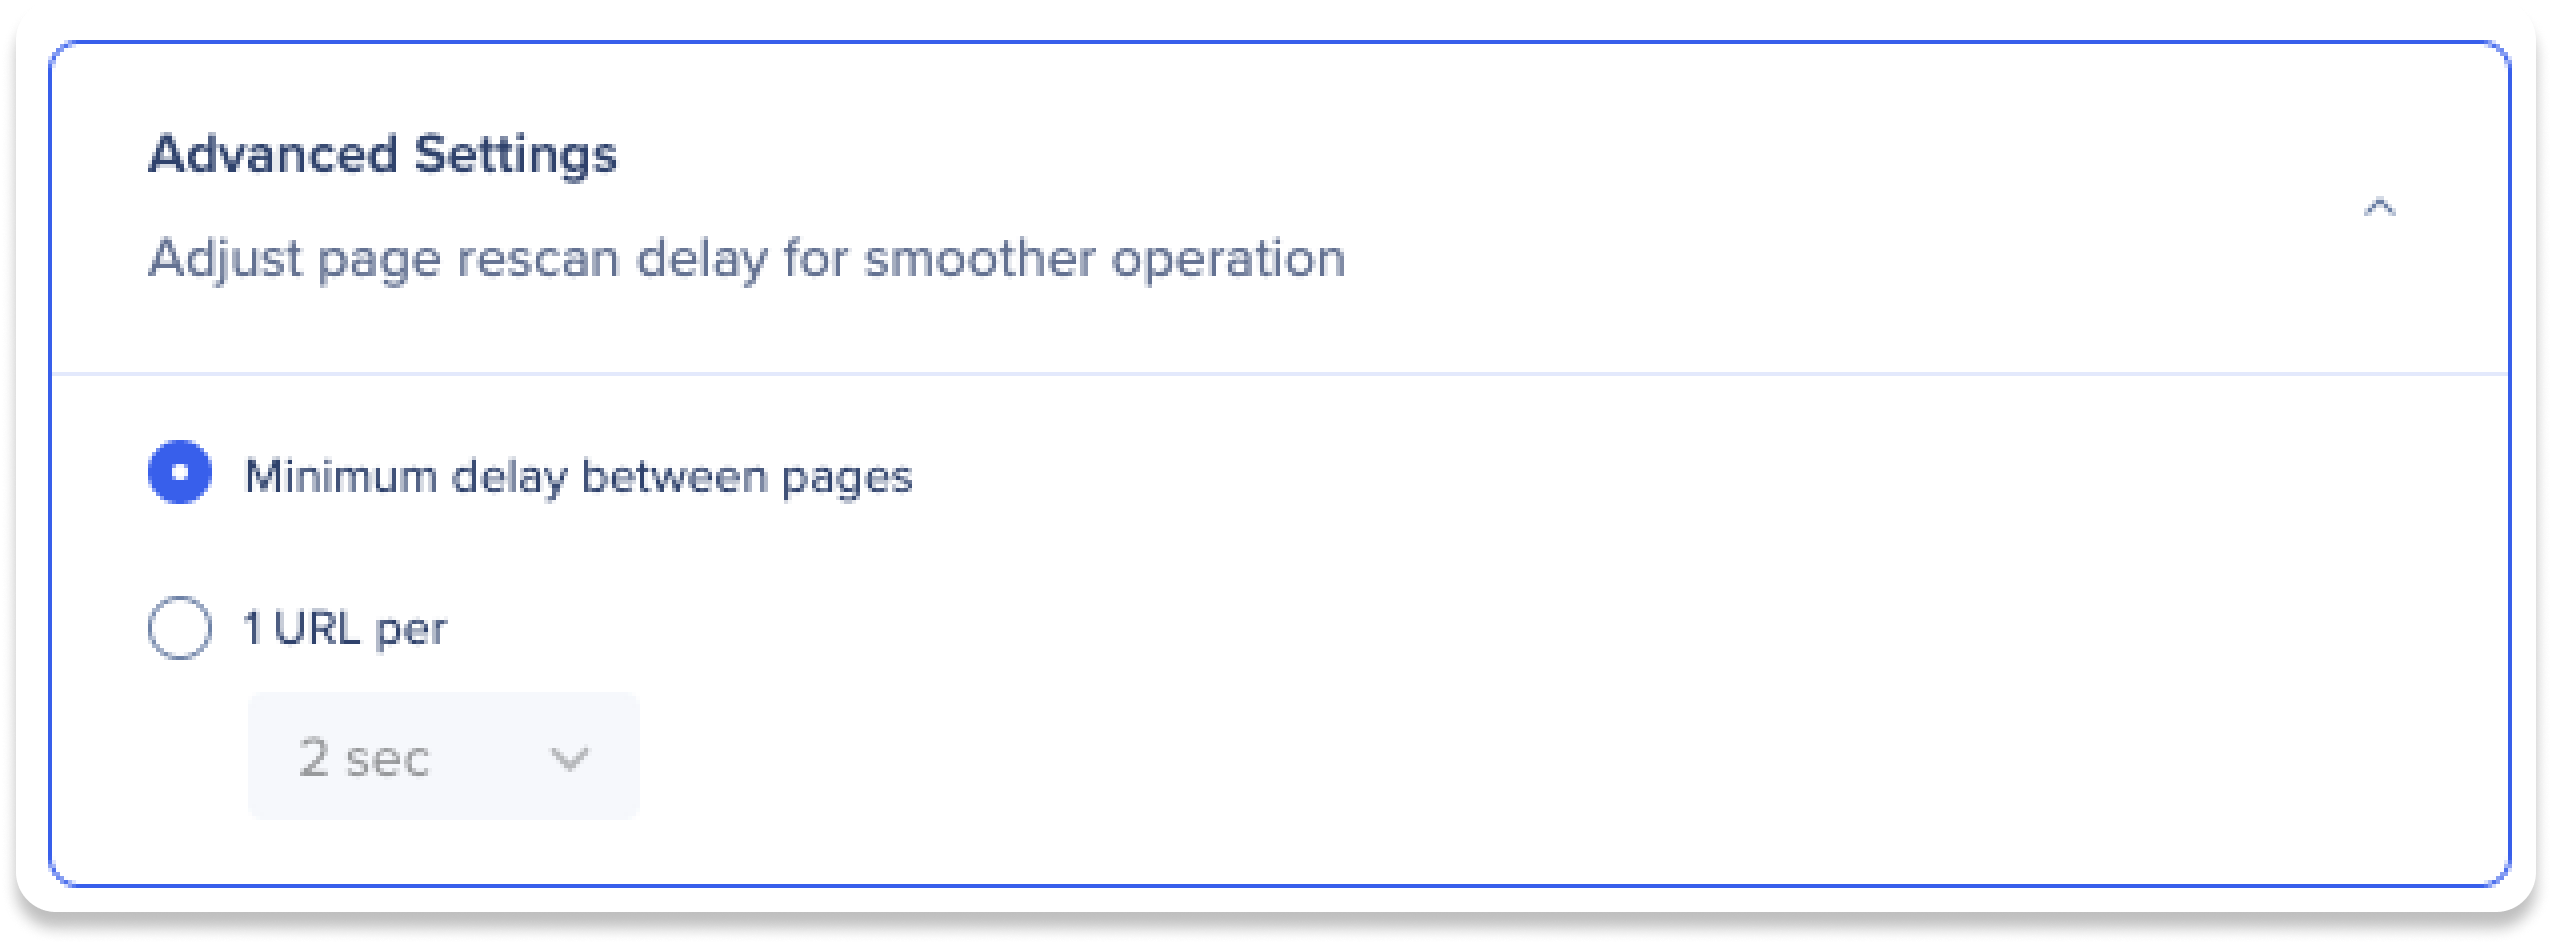
Advanced settings
Set the time intervals between page scans to ensure optimal performance, with the minimum delay usually sufficient.
-
Minimum delay between pages
-
 Best option for most users
-
URL per second
-
Select the amount of seconds between each page scan
Observação
Na maioria dos casos, você pode manter a configuração padrão de atraso mínimo. A configuração URL por segundo geralmente é necessária apenas para situações específicas em que o site pode ter problemas para lidar com grandes volumes de dados.
Scan summary
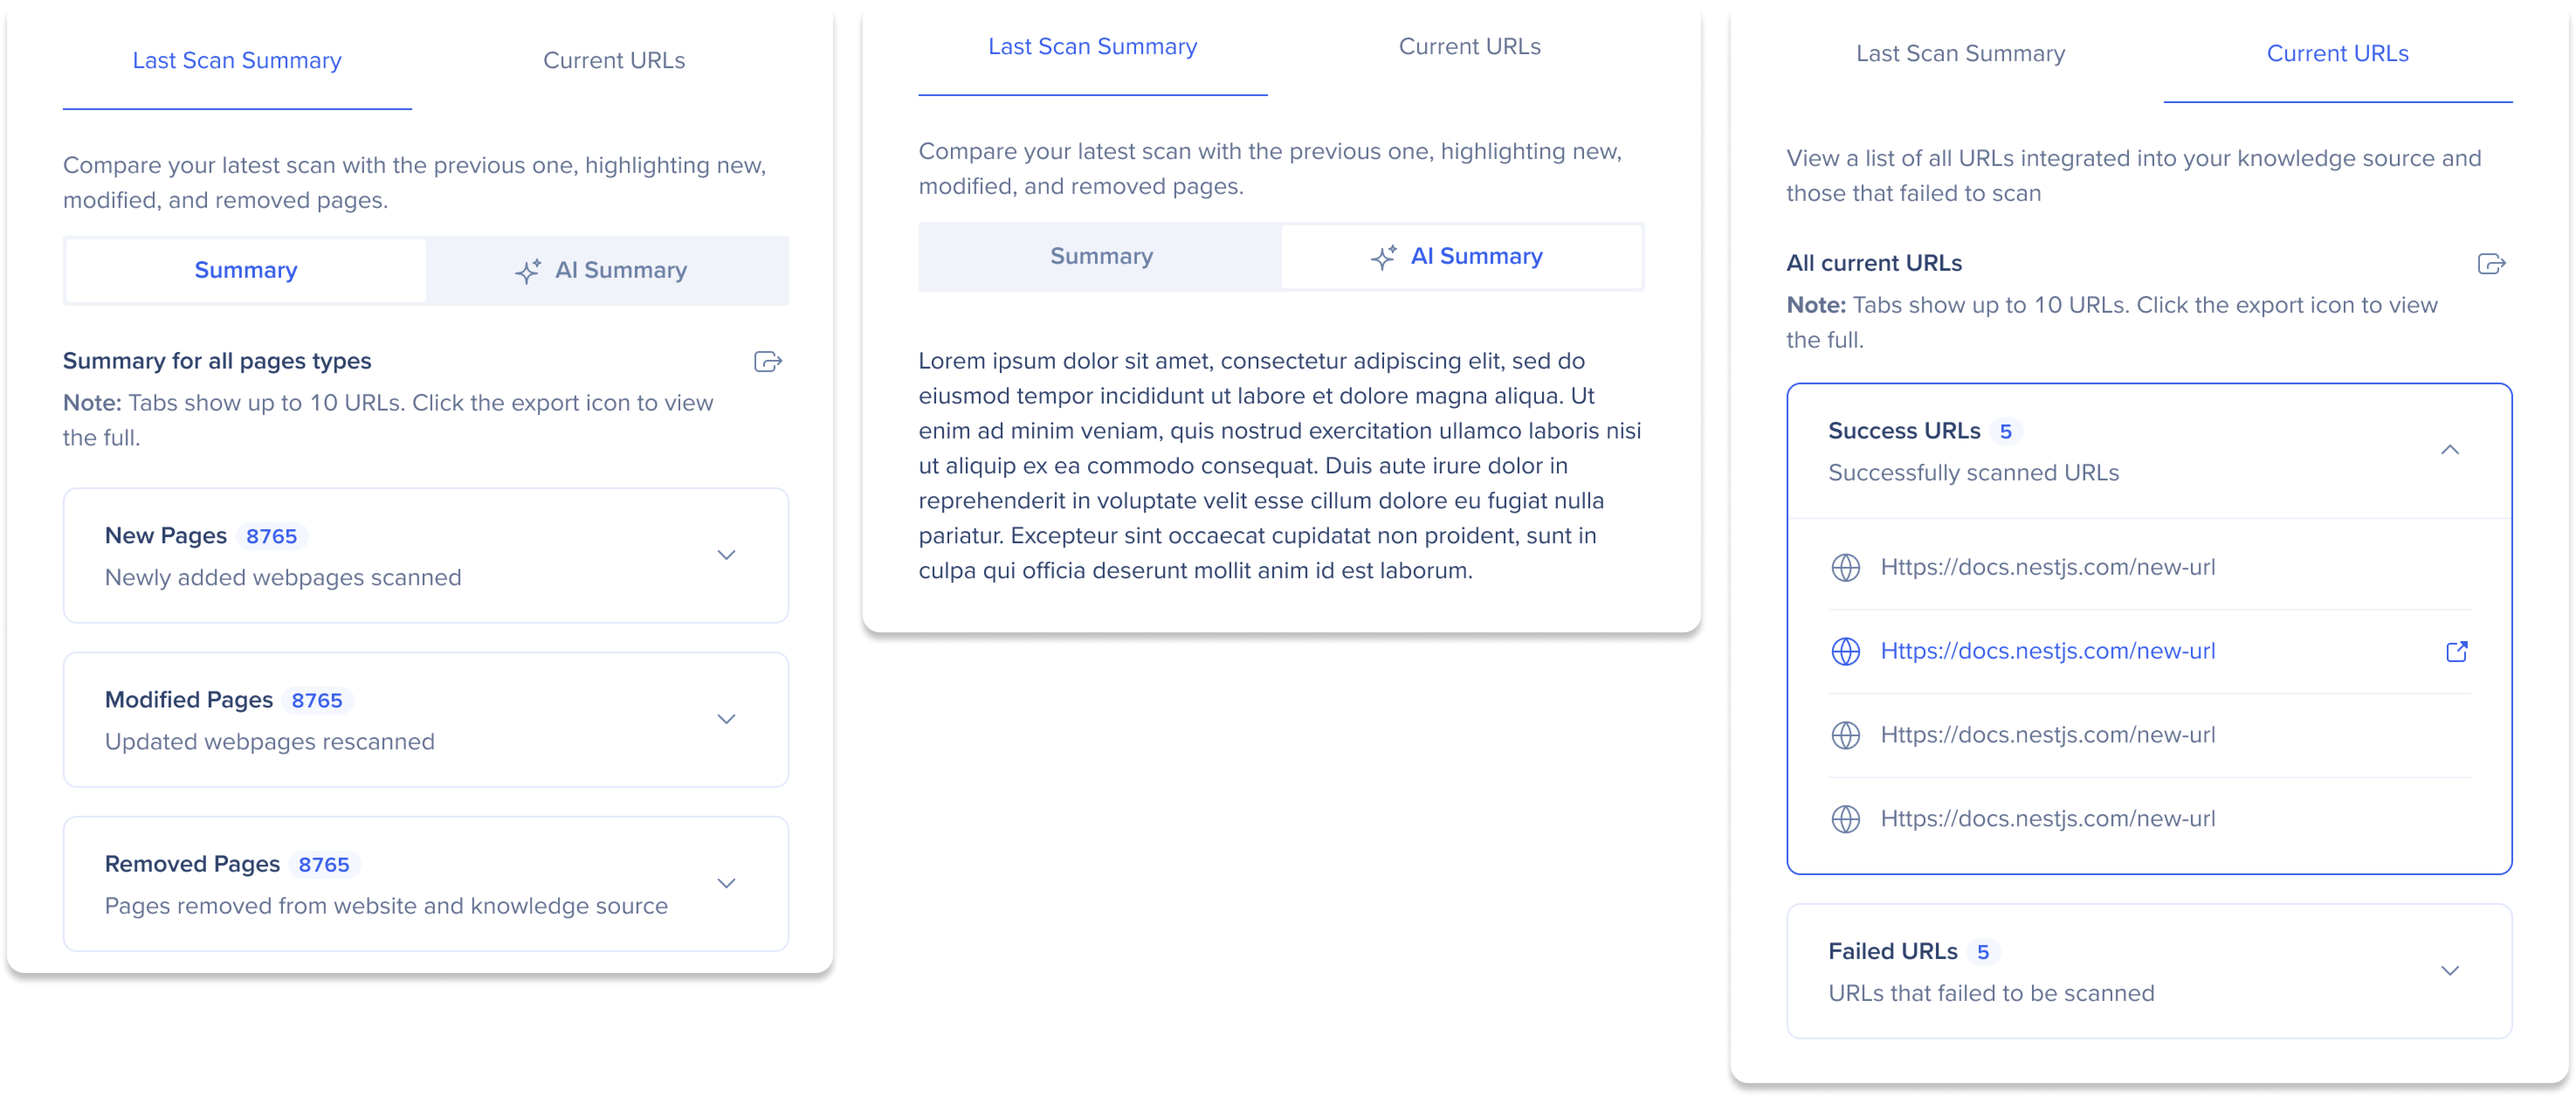
After configuring the rescan settings, click Save Changes to view a summary of the updates and current status of your AI Answers knowledge source. The scan summary consists of two pages:
-
Last Scan Summary: Compare your latest scan with the previous one, highlighting new, modified, and removed pages. Switch between Summary and AI Summary view mode toggles.
-
Summary: Click the tabs to view the webpages that have been added, updated, or removed
-
AI Summary: View a summary of all changes analyzed and generated by WalkMe's AI
-
Current URLs: View a list of all URLs integrated into your knowledge source and those that failed to scan
Observação
-
 Você pode reverter para a verificação anterior, mas apenas uma vez após salvar as alterações. Para fazer isso, clique no ícone Reverter para a versão anterior
-
 As abas mostram até 10 URLs. Clique no ícone Exportar para ver a lista completa
Technical Notes
- Webpages are still supported but no longer part of the Add file source selection. Contact your CSM to request webpage sources
File Scanning
-
The following file types are supported: txt, doc, pdf, and coming soon csv
-
Only text is pulled from files
-
The file names appear to users in the AI Answers results, but the files aren't accessible by end-users
-
A single knowledge source can consist of one file or multiple files
-
Maximum file size is 15 MB
-
There is no limitation to the number of files you can upload
AI Segmentation
-
By default, sources are applied to all segments (including future segments that will be created in the system)
-
Once specific segments are applied, no publish is required for changes to take effect