Brief Overview
The Data Integrations page in the Integration Center is your go-to hub for managing data flows across various systems. It offers comprehensive visibility and control over all your data integrations, whether you're importing, exporting, or using webhooks.
The page is divided into three main tabs:
-
Data Out: Configure and monitor integrations that export data to other systems
-
Data In: Manage and view integrations that import data into WalkMe
-
Webhooks: Handle event-based integrations that trigger data transfers based on specific actions
Each tab includes detailed tables, status indicators, and filters so you can quickly check if your integrations are working and make updates when needed. This functionality is invaluable for maintaining seamless data operations and ensuring efficient data management.
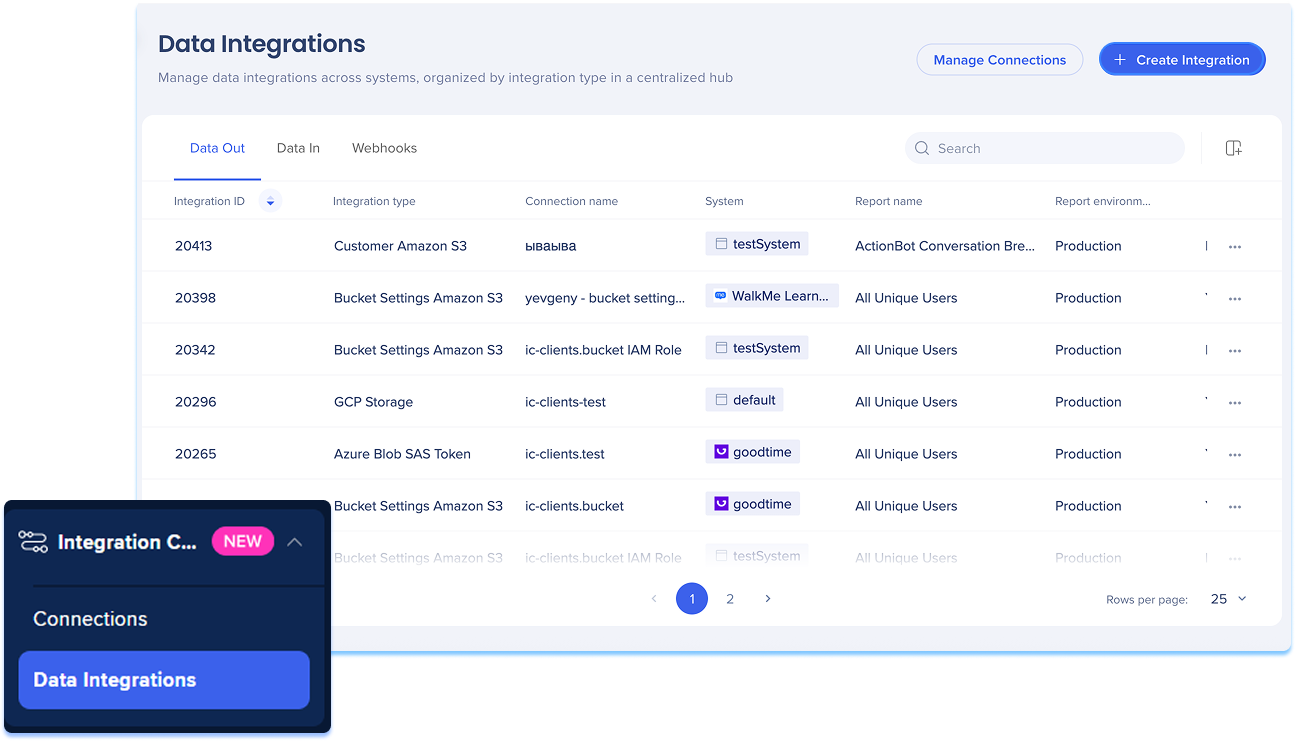
Access
To access the Data Integrations page, navigate to the Data Integrations Center in WalkMe console:
How It Works
Data Integrations page overview
The Data Integration page is the central workspace for managing all incoming, outgoing, and event-triggered data integrations in the WalkMe console. It's organized into three main tabs: Data Out, Data In, and Webhooks, each with its own table and tools to view, manage, and update integrations.
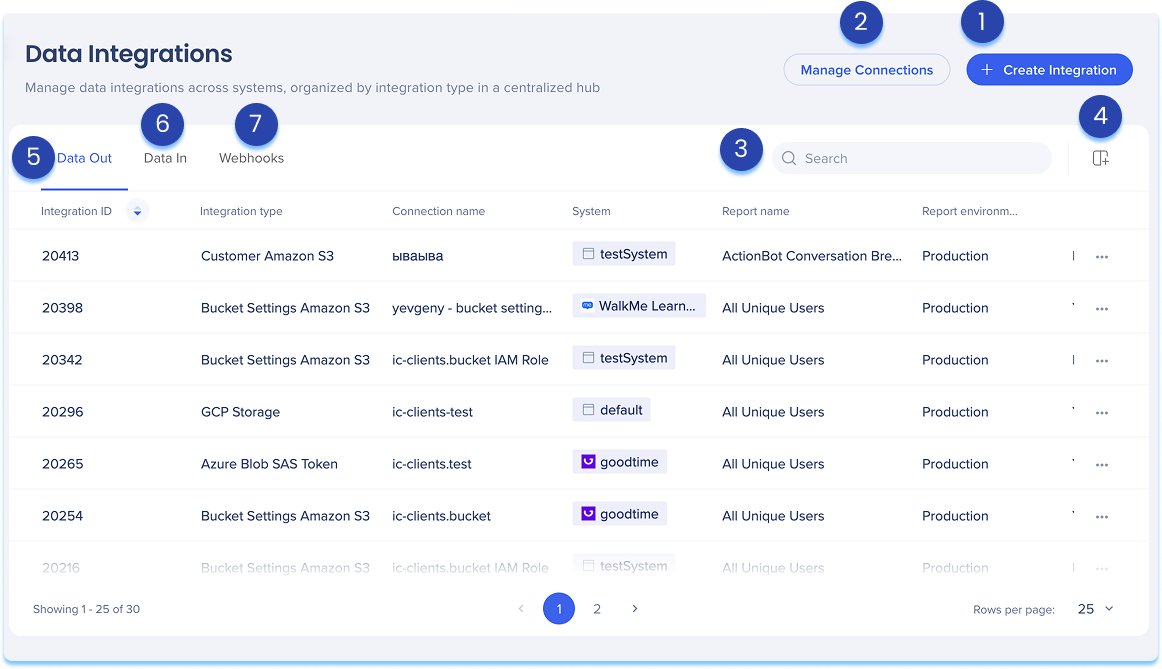
1. Create Integration
-
Click Create Integration in the top-right corner
-
A modal will open with the option to choose the integration type:
-
Data Out: Export data from WalkMe to an external system
-
Data In: Import data into WalkMe from another system
-
Webhooks: Send real-time data from WalkMe when specific events are triggered
Each integration type has its own detailed article explaining setup, configuration, and supported features.
2. Manage connections
-
Click Manage Connections in the top-right corner
-
The connections page will open
-
From there, you can view all available connection types and manage your existing connections
Learn more: Connections Page
3. Search
-
Use the Search bar to quickly locate integrations
4. Manage columns
-
Click the Manage Columns icon to customize which columns appear in each table
-
You can add or remove columns based on what's most relevant to your workflow
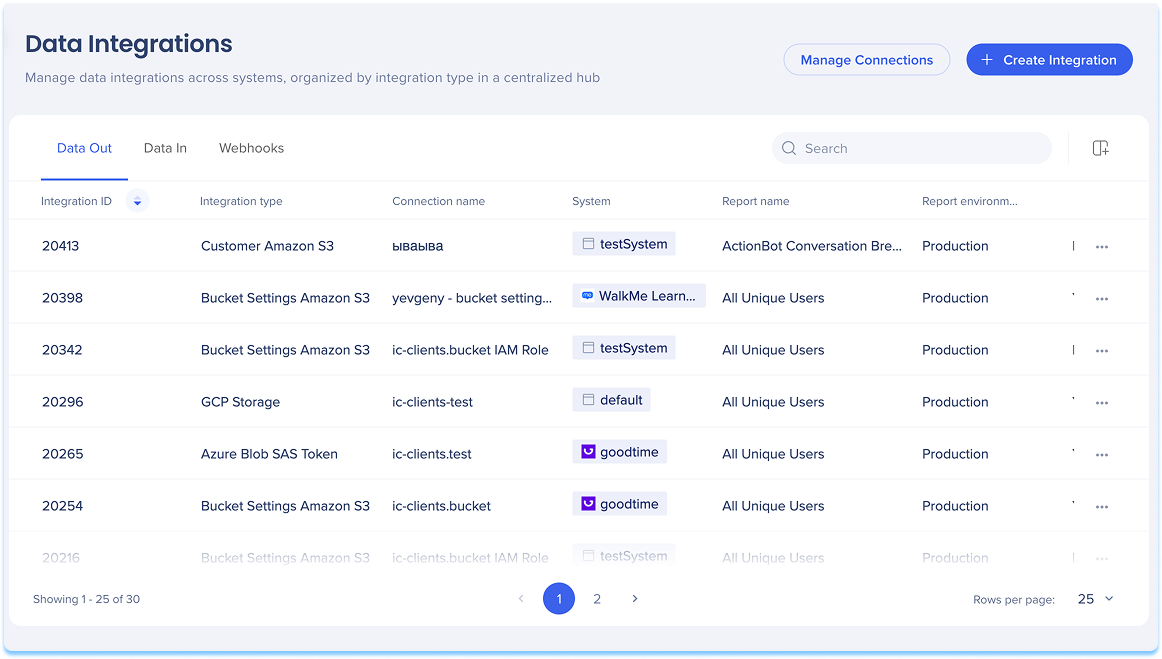
Data Out
The Data Out tab displays a table of all integrations that export data from WalkMe to external systems. Each integration is listed in a table with key information about its configuration and activity.
Table columns
-
Integration ID: Unique ID of the integration
-
Connection type: Type of system it connects to (For example: AWS S3, Salesforce)
-
Connection name: Destination connection used
-
Systems: Where the integration is active
-
Report name: The WalkMe report being exported
-
Report environment: The environment (Production, Test)
-
Date range: Time range of the exported report
-
Frequency: How often the integration runs
-
Last run date: When it was last triggered
-
Last run status: Status of the last run (Success, Fail, etc.)
-
Creation date: When the integration was created
-
Created by: Email of the user who created the integration
-
Last modified date: Date of the most recent change
-
Last modified by: Email of the user who last updated the integration
-
Status: Current status of the integration (Active or Inactive)
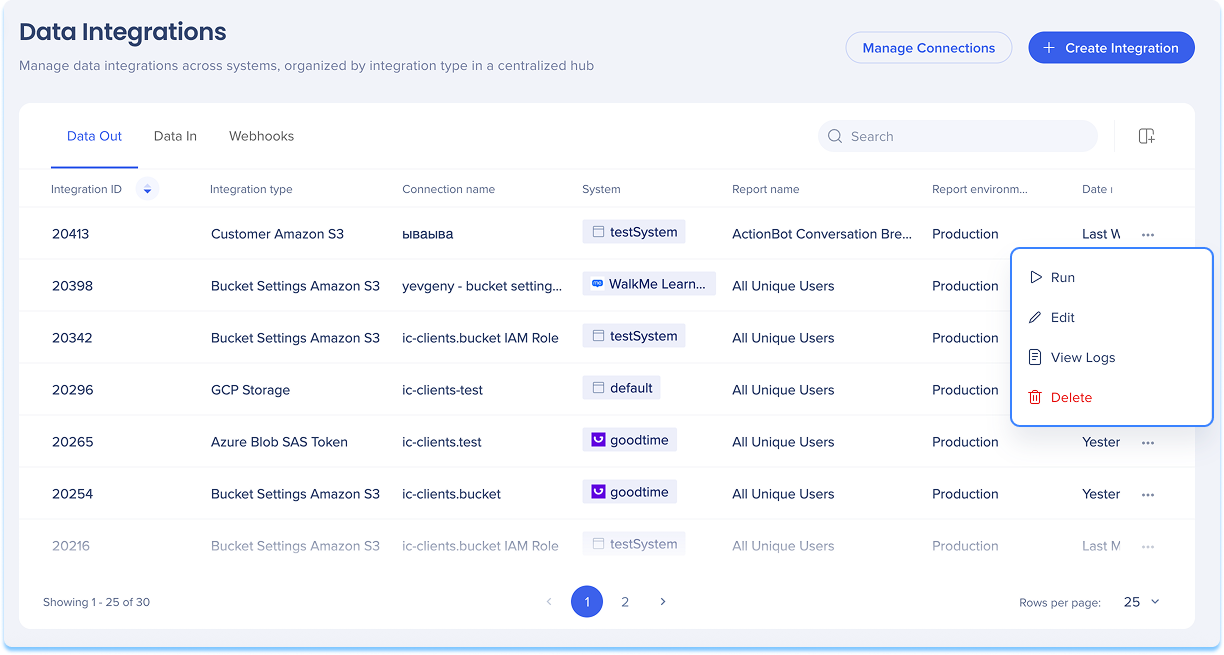
Options menu
You can manage individual integrations directly from the Options menu in the Data Out table.
To open and use the options menu:
-
Locate the integration you want to manage in the Data Out table
-
Click the Options menu at the end of the row to open the menu
-
Choose one of the following actions:
-
Run: Manually trigger the integration to run immediately
-
Edit: Open the edit screen to update integration settings
-
View logs: Review run history, status, and execution time
-
Delete: Permanently delete the integration
-
Complete the action as prompted in the modal or confirmation message
Filter and sort columns
You can customize how integration data appears in the table by using the filter or sort options at the top of each column
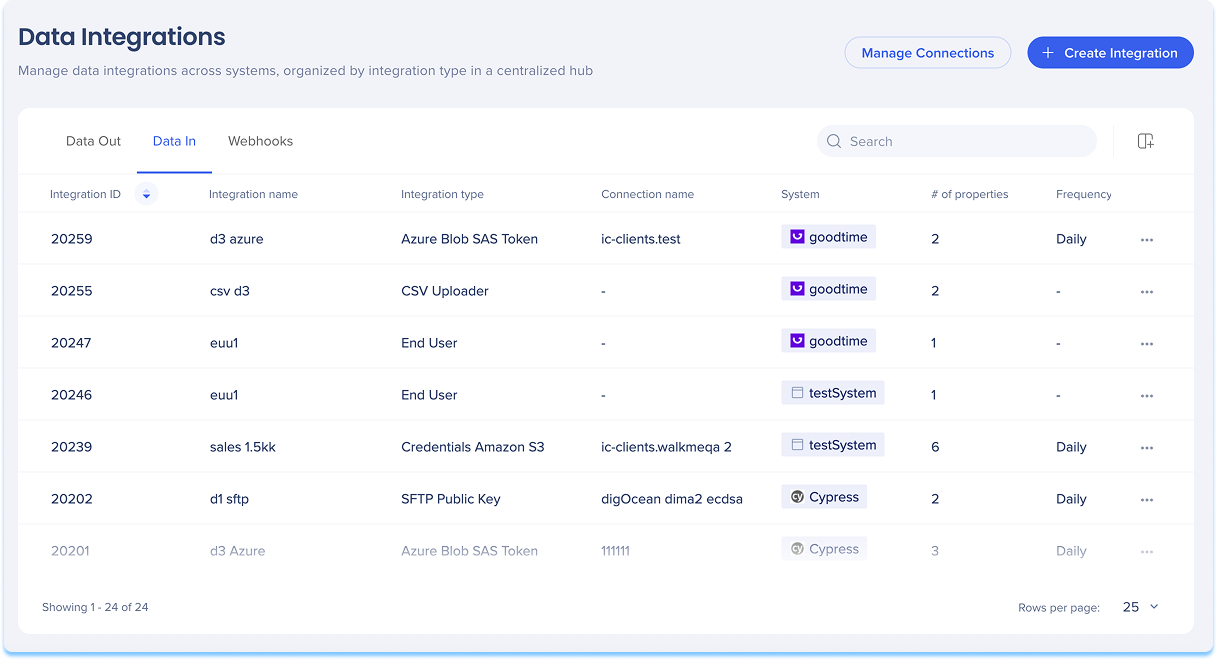
Data In
The Data In tab lists all integrations that import data into WalkMe from other systems. Each integration is listed in a table with key information about its configuration and activity.
Table columns
-
Integration ID: Unique ID of the integration
-
Integration name: Custom name defined by the user
-
Connection type:
-
Connection name: Name of the connection used to import data
-
System: Where the integration runs
-
# of properties: Number of data properties imported from the source
-
Frequency: How often the data is imported
-
Last run date: When the integration last ran
-
Last run status: Result of the last run
-
Creation date: When the integration was created
-
Created by: Email of the user who created the integration
-
Last modified date: Most recent update date
-
Last modified by: Email of the user who made the last change
-
Activity status: Whether the integration is currently Active or Inactive
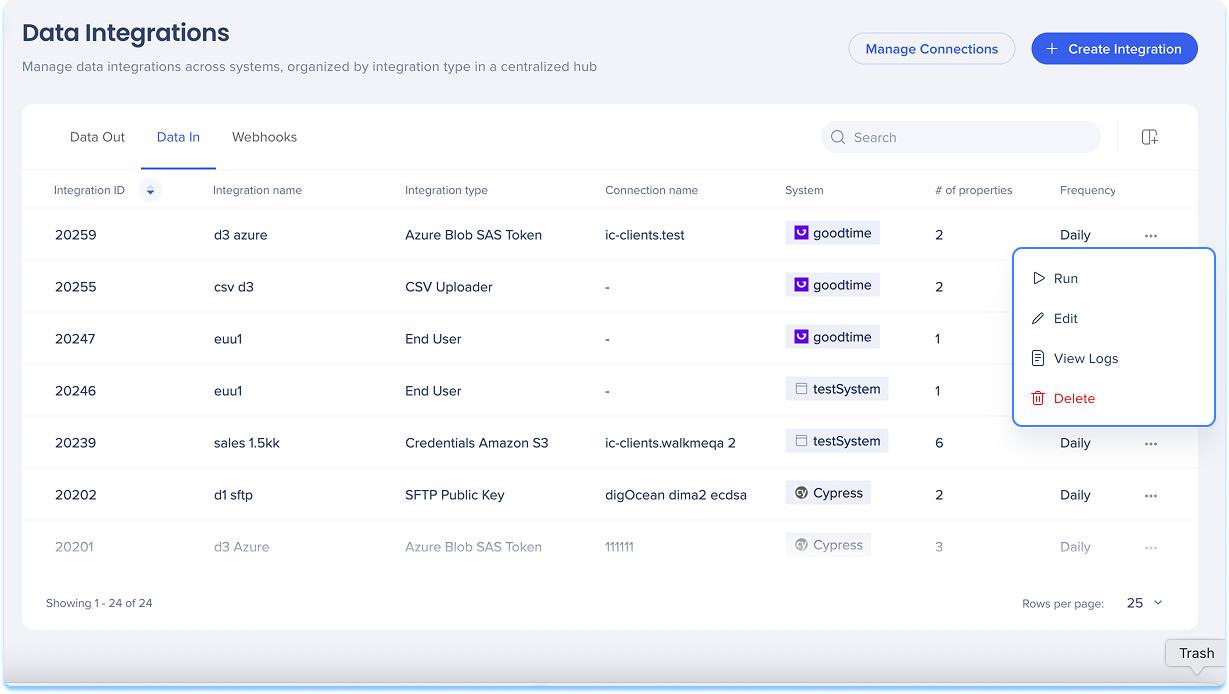
Options menu:
You can manage individual integrations directly from the Options menu in the Data In table.
To open and use the options menu:
-
Locate the integration you want to manage in the Data In table
-
Click the Options menu at the end of the row to open the menu
-
Choose one of the following actions:
-
Run: Manually trigger the integration to run immediately
-
View logs: Review run history, status, and execution time
-
Edit: Open the edit screen to update integration settings
-
Delete: Permanently delete the integration
-
Complete the action as prompted in the modal or confirmation message
Note
CSV connection types do not have the View logs option.
Filter and sort columns
You can customize how integration data appears in the table by using the filter or sort options at the top of each column
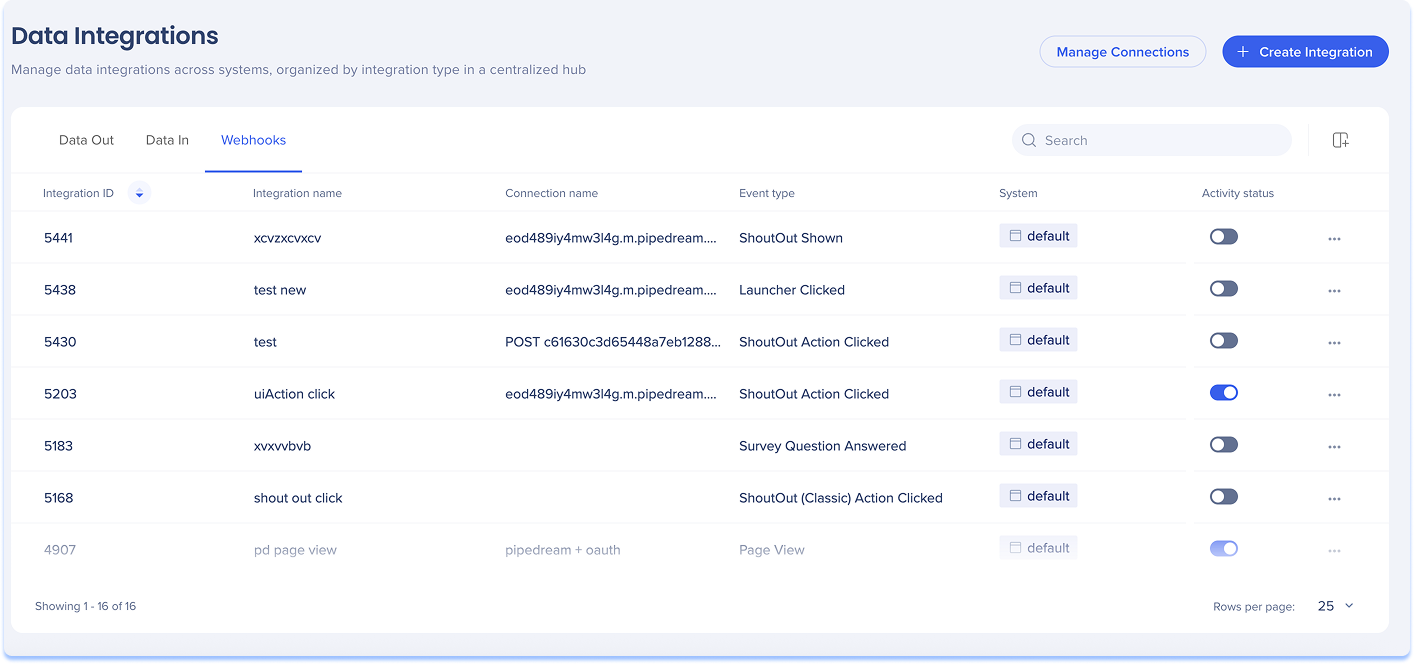
Webhooks
The Webhooks tab shows all event-based integrations that send data to external systems when specific triggers occur. These integrations are especially useful for real-time data flows.
Table columns
-
Integration ID: Unique ID for the integration
-
Integration name: Custom name defined by the user
-
Event type: The event that triggers the Webhooks
-
Connection name: Connection used to send the data
-
System: Where the integration is running
-
Status: Current status of the integration (Active or Inactive)
Options menu:
You can manage individual integrations directly from the Options menu in the Webhooks table.
To open and use the options menu:
-
Locate the integration you want to manage in the Webhooks table
-
Click the Options menu at the end of the row to open the menu
-
Choose one of the following actions:
-
Complete the action as prompted in the modal or confirmation message

Filter and sort columns
You can customize how integration data appears in the table by using the filter or sort options at the top of each column
Activity Logs
The activity log will display these connection actions:


