Brief Overview
The Action Integration Center lets organizations connect business systems—such as Salesforce, Jira, ServiceNow, and Slack—to WalkMe in a centralized, governed environment.
From the Action Integration Center, you can manage system connections and configure predefined automations that allow WalkMe to trigger actions in external systems without custom code or middleware.
Use Cases
Use the Action Integration Center when you need to:
- Connect WalkMe to external systems such as CRM, ITSM, or collaboration tools
- Trigger actions in external systems based on user behavior in WalkMe
- Reduce manual follow-up by automating system updates from in-app workflows
- Standardize and govern how integrations and automations are configured across teams
- Reuse authenticated connections across multiple automations
How It Works
The Action Integration Center is organized into two main pages that work together:
You start by creating and managing connections to external systems. Once a connection is available, you can use it in the Automation Center to configure automations that perform actions in those systems.
Automations cannot function without an active connection.
Connections
The Connections page is where you authenticate and manage integrations between WalkMe and external systems.
The page is organized into two tabs:
- All Integrations: View all available integrations and start setting up new connections
- My Connections: View and manage the integrations that are already connected for your account
Connections are shared across the Action Integration Center and can be reused by multiple automations. Automations cannot be created or published without an active connection.
Note
Only admins and publishers can set up new connections or edit existing ones.
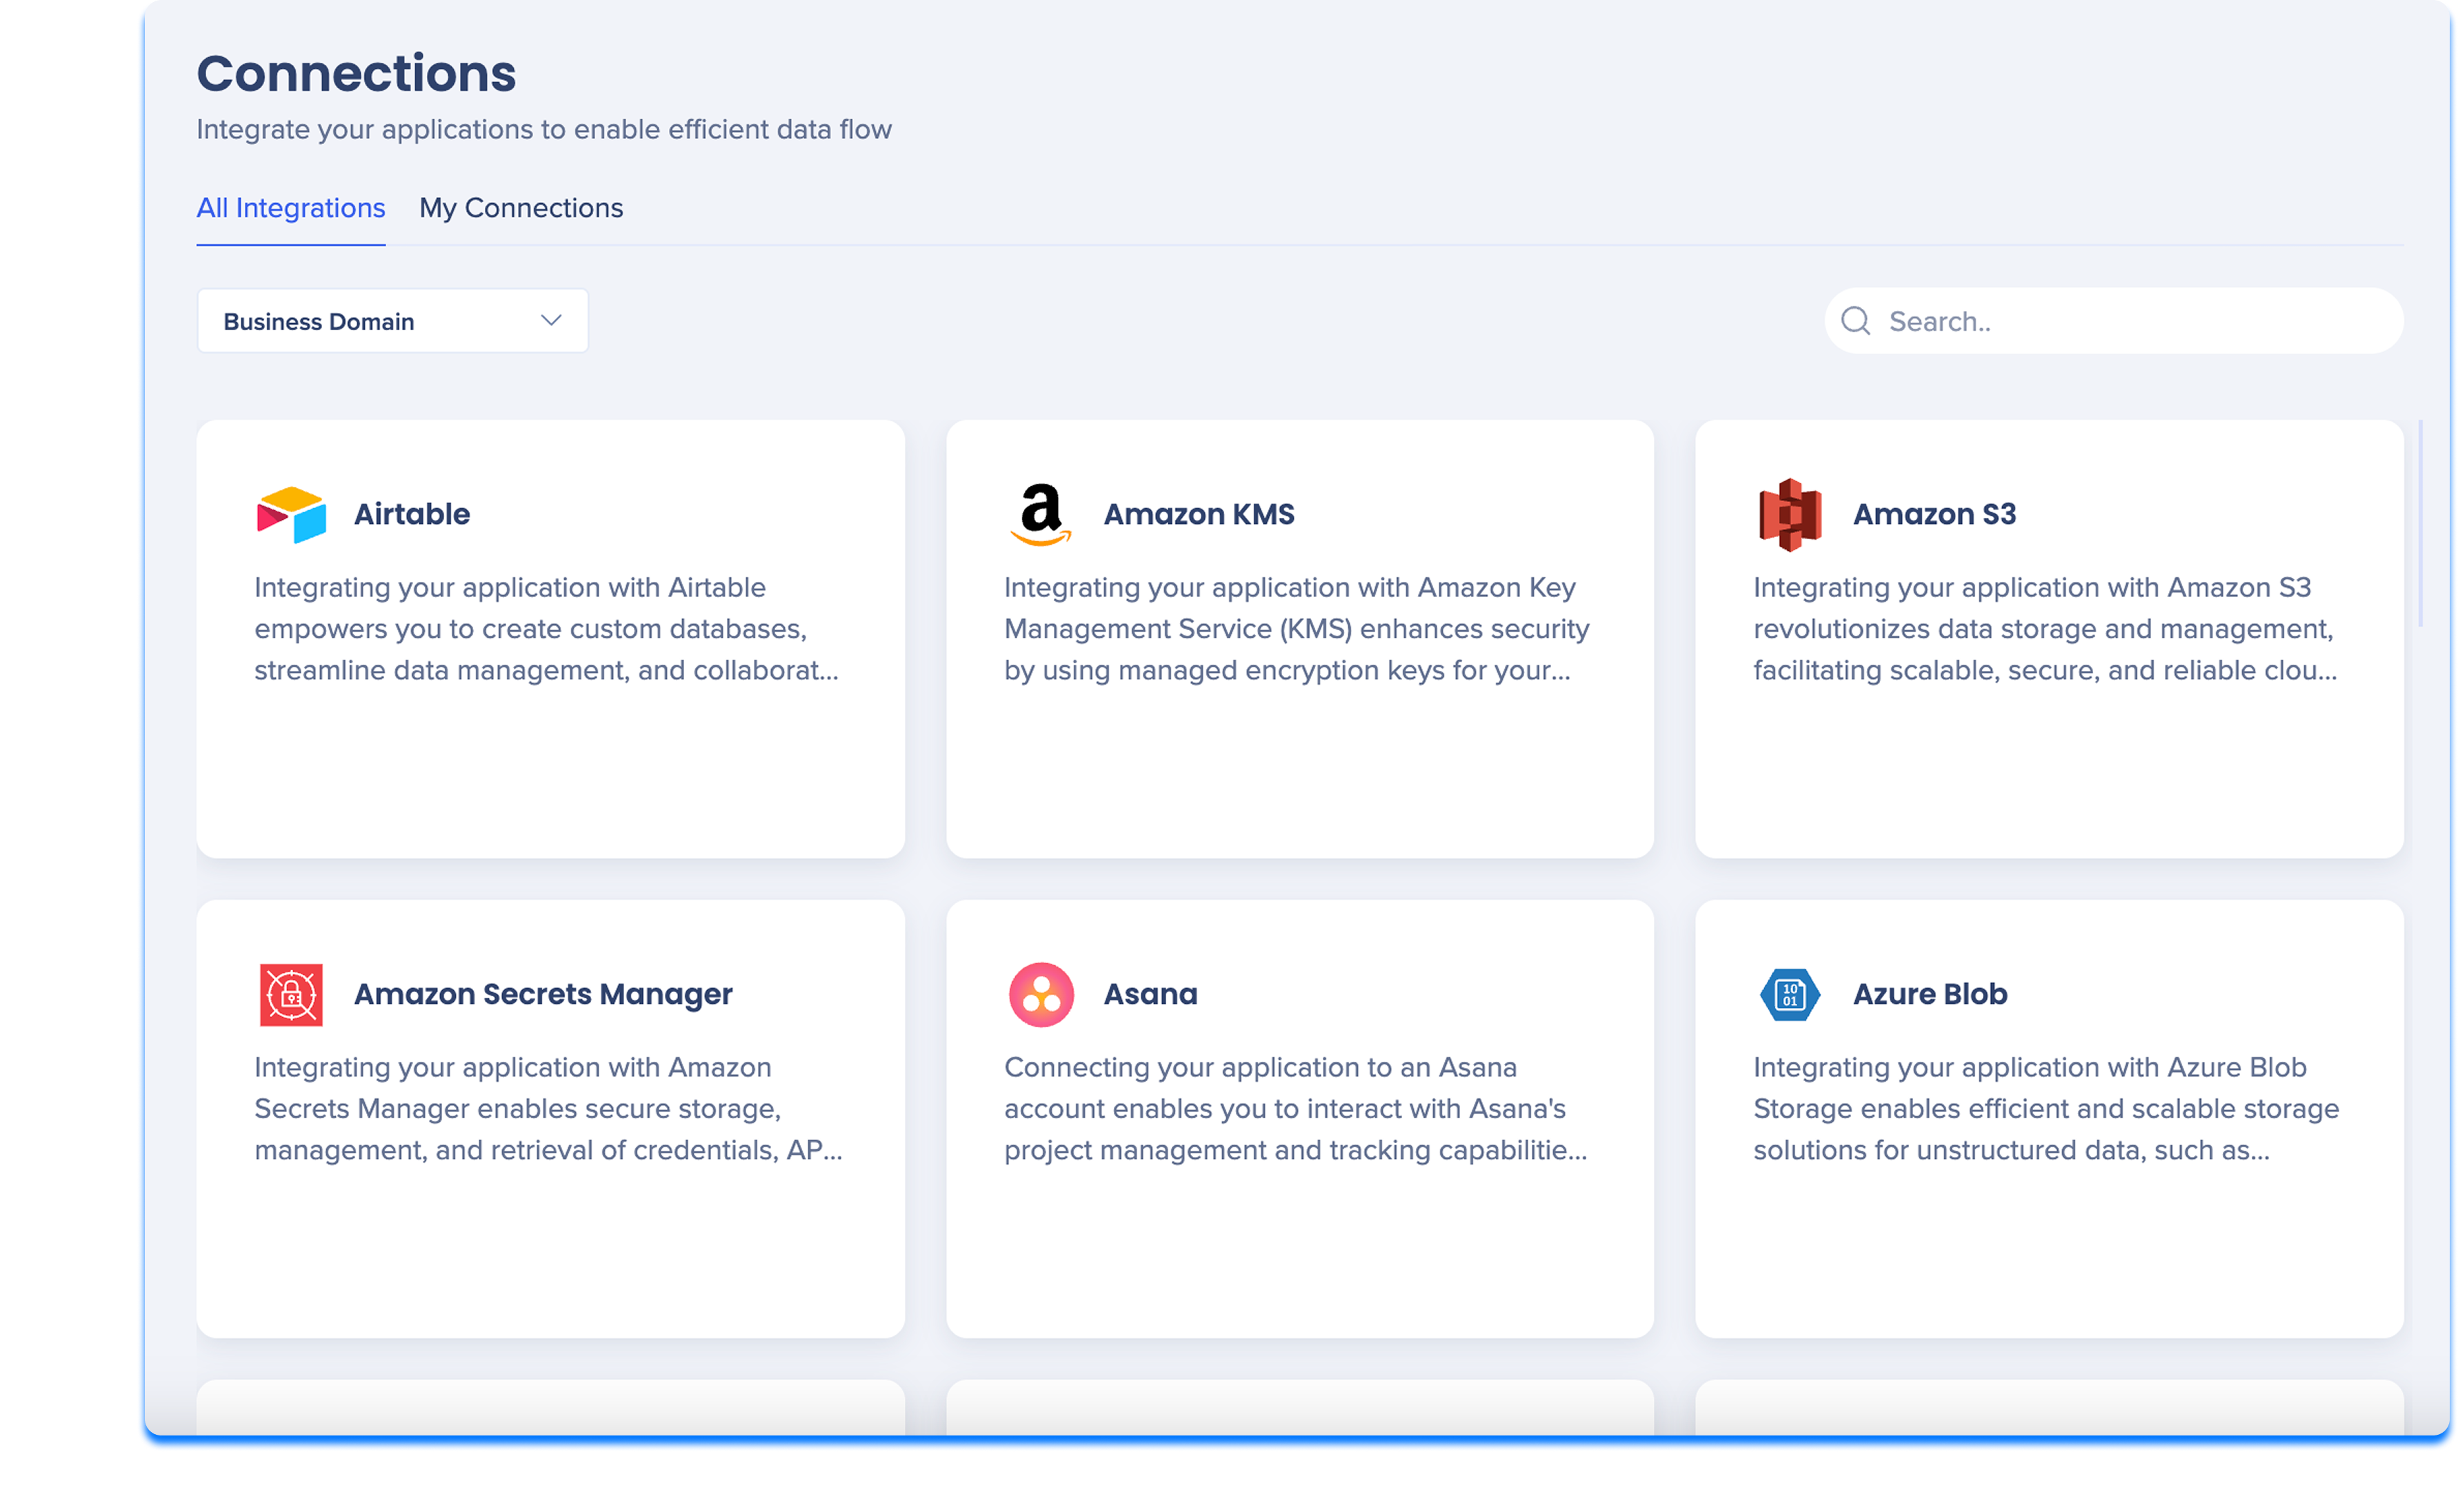
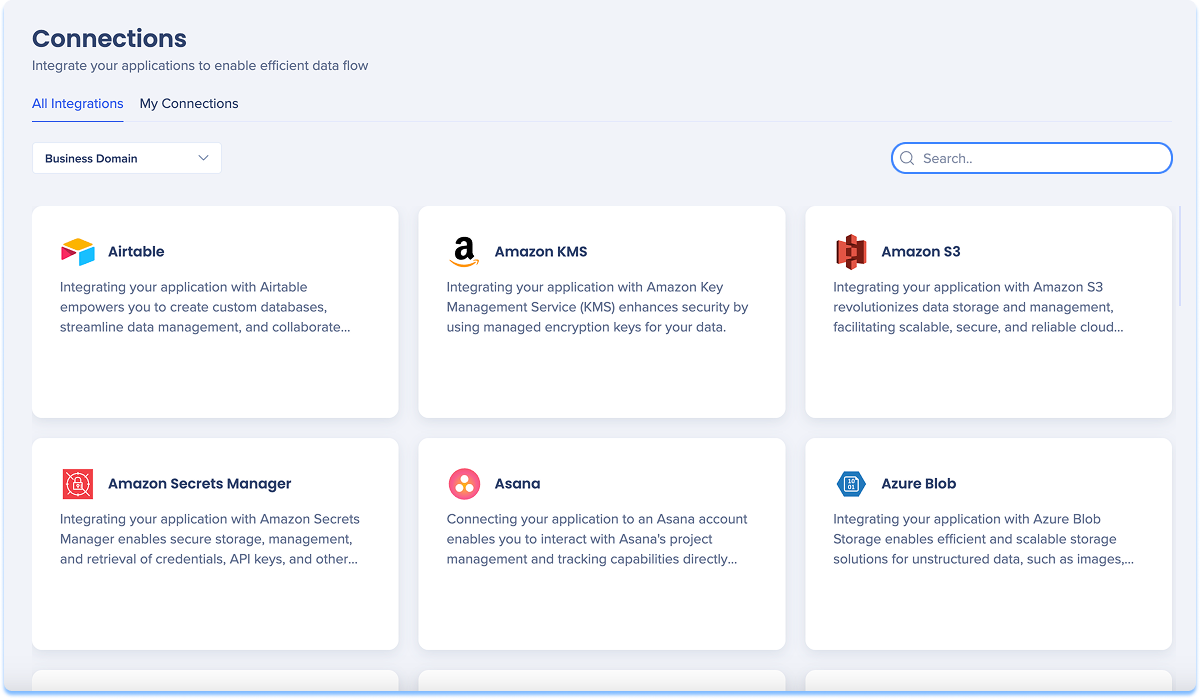
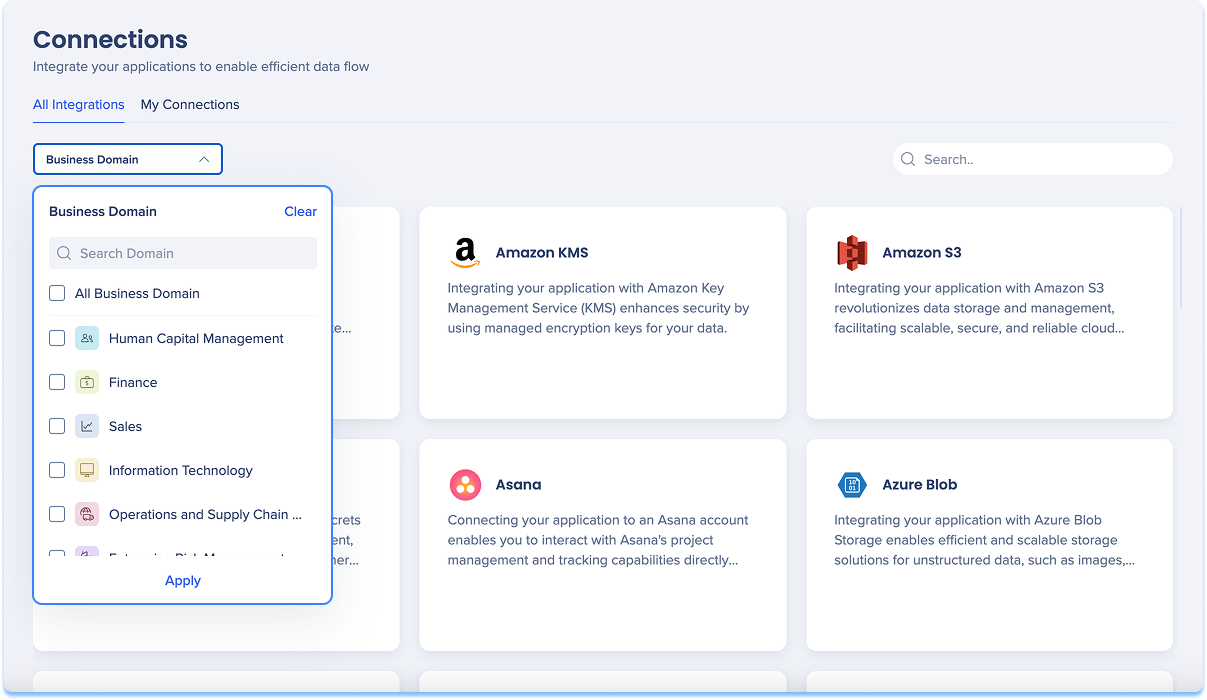
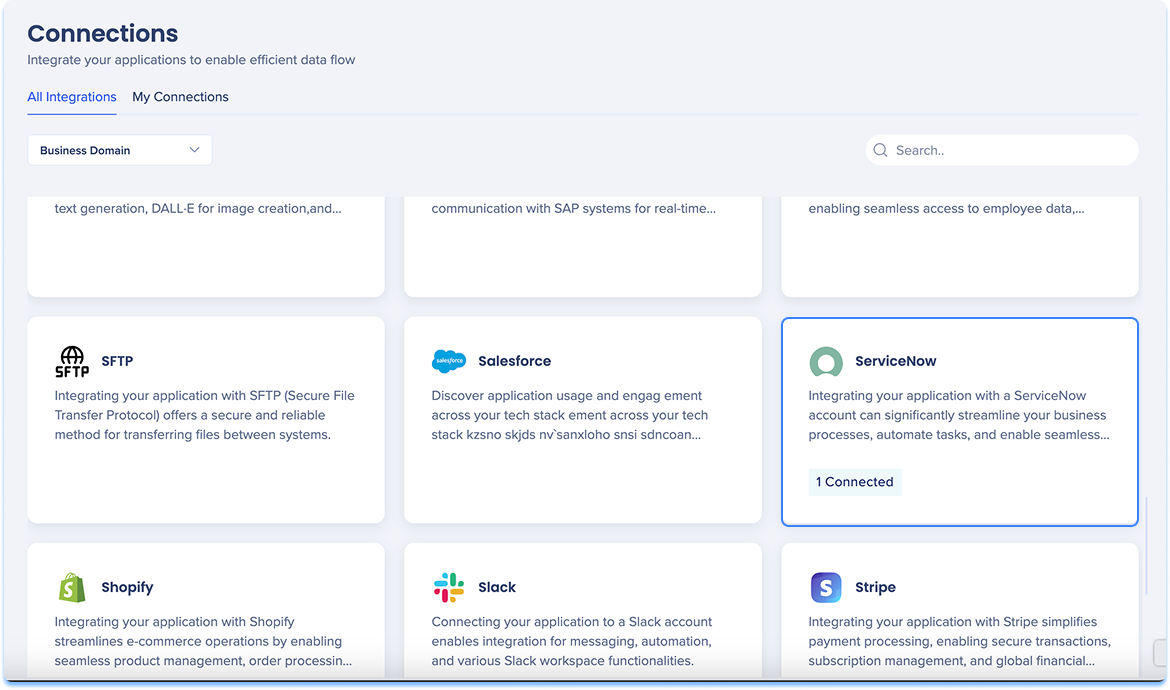
All Integrations
The All Integrations tab displays every integration available for setup. Use this tab to discover integrations and initiate the connection setup process.
From this tab, you can:
- Browse all supported integrations
- Filter integrations by business domain
- Search for integrations by name
- Start the setup process for a new connection
Business domain filter
Business domains represent functional areas such as CRM, ITSM, or Collaboration. Use this filter to narrow the list and focus on integrations relevant to your area.
Integration tiles
Each integration tile includes:
- Integration name
- Short description
- Number of connected integrations
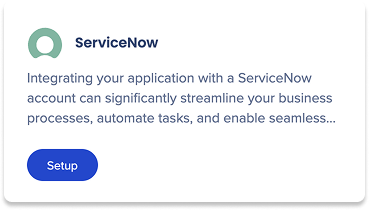
Setup connection
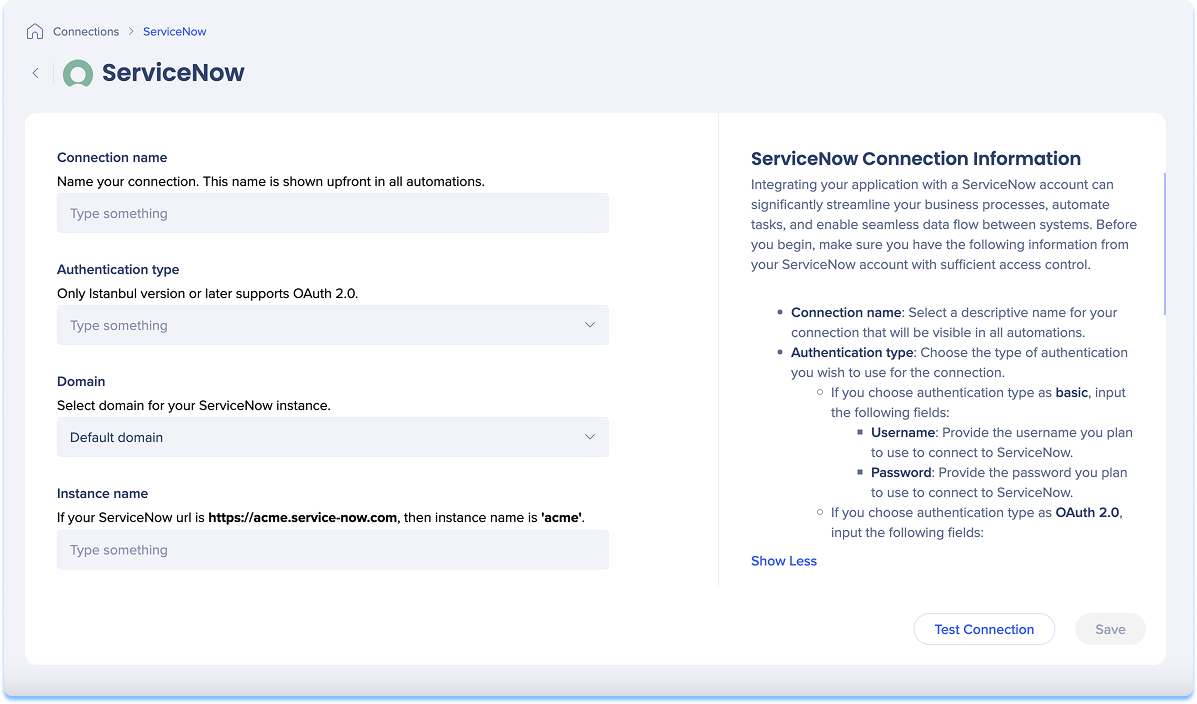
To configure the integration:
- Hover over the application tile
- Select Setup
- Enter the required connection details using the fields on the left, and follow the guidance in the right panel
- Optional: Select Test Connection to verify the configuration
- Select Save
After saving, the connection appears in the My Connections tab.
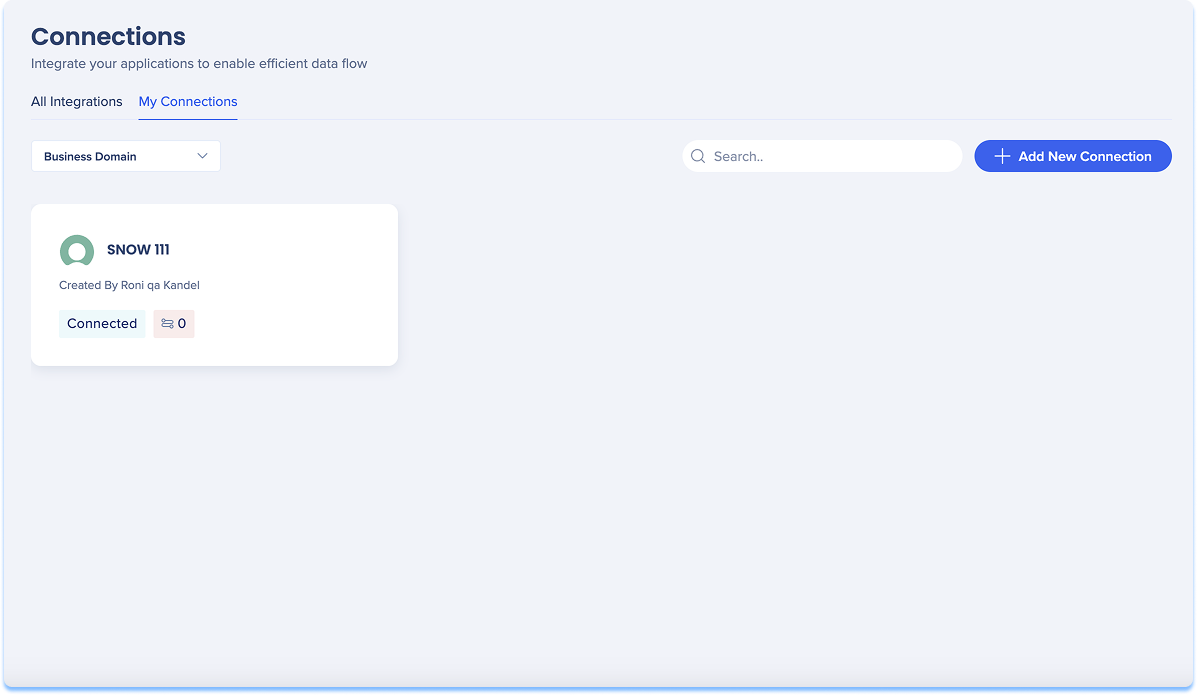
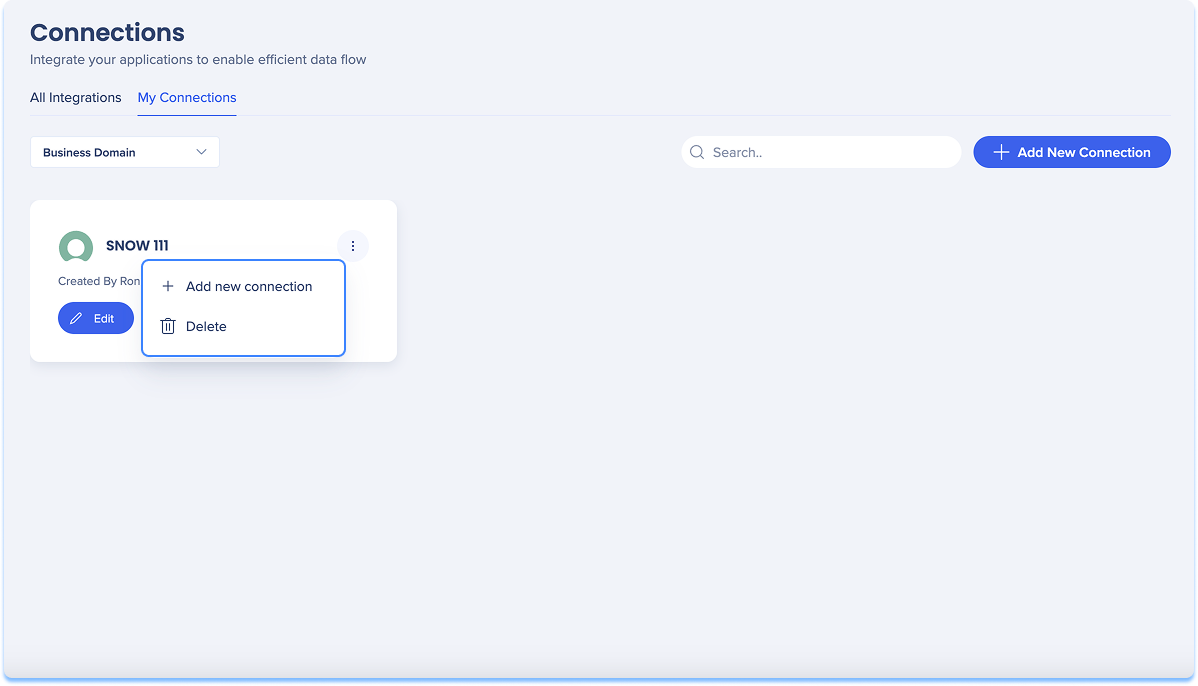
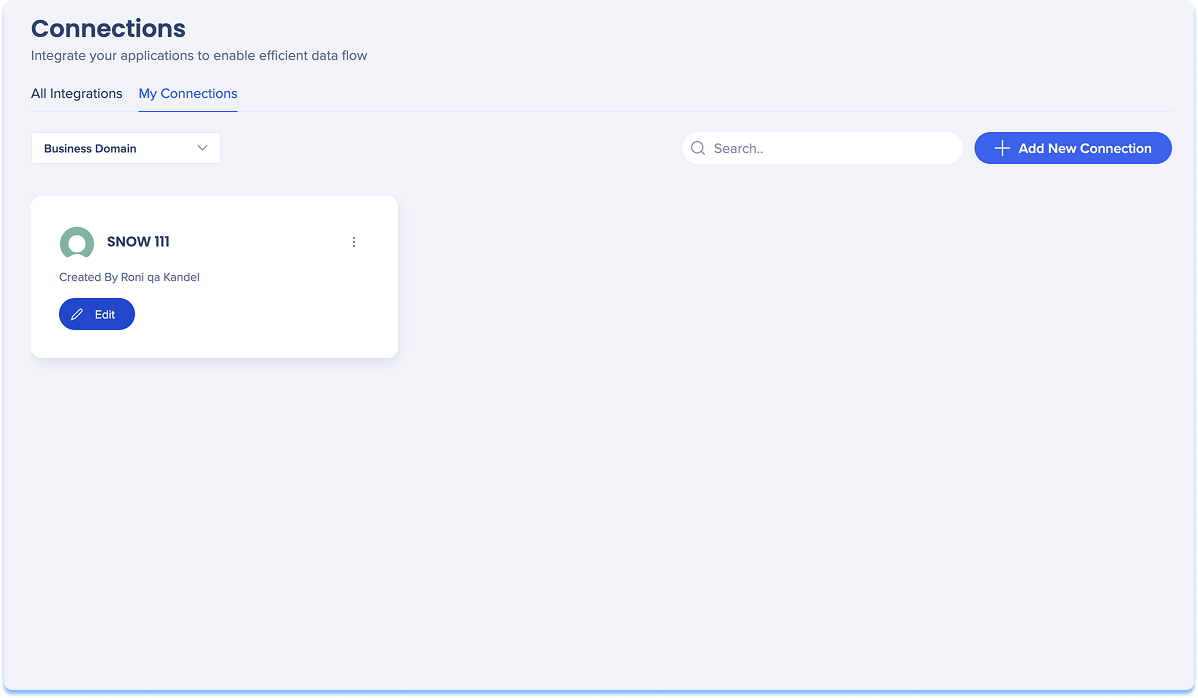
My Connections
The My Connections tab displays only the integrations that are already connected for your account.
From this tab, you can:
- Review existing connections and their status
- See who created each connection
- See how many WalkMe items are using the connection
- Add additional connections for an existing integration
- Edit or delete connections
Each connection tile includes:
- Connection name
- Connection creator
- Number of WalkMe items using the connection
- Connected tag showing the connection status
Add a connection
To add a connection:
- Select + Add new connection, or open the Options menu on an integration tile and select Add new connection
- Complete the setup flow in the All Integrations tab
- Select Save
After saving, the connection appears in the My Connections tab.
Edit a connection
- Hover over the integration tile
- Select Edit
- Update the connection details as needed
- Select Save
Delete a connection
- Hover over the integration tile
- Open the Options menu
- Select Delete
Salesforce connection
A Salesforce connection defines how WalkMe communicates securely with your Salesforce environment.
It includes the information required to authenticate, identify, and authorize WalkMe's access to Salesforce APIs. Each connection is configured once, tested, and reused across multiple automations to ensure consistency and maintain compliance with your organization's security policies.
Permissions and security
WalkMe's ability to perform actions in Salesforce is fully governed by the permissions associated with the credentials provided during setup.
- Access is limited to the scope defined by the authenticated Salesforce user
- All actions performed by WalkMe automations respect your organization's authentication, authorization, and data-handling policies
- Credentials can be revoked or modified at any time directly in Salesforce to immediately terminate WalkMe's access
Customers maintain full control over Salesforce access at all times.
Connection details
When setting up a Salesforce connection, you define the following:
- Connection name: Enter a clear, descriptive name to identify the connection in WalkMe
- Domain: Enter the domain of your Salesforce instance
- Authentication type: Choose the method WalkMe uses to authenticate with Salesforce
- Select the option that aligns with your organization's security policies and Salesforce configuration
Each connection can be tested during setup and then reused across multiple automations.
Automation Center
The Automations Center is where you configure and manage automations that perform actions in external systems using existing connections.
The page is organized into two tabs:
- All Automations: View all available automations and start setting up new automations
- My Automations: View and manage the automations that are already configured for your account
Automations use the connections created in the Connections page. An automation cannot be created, tested, or published without an active connection.
Note
Only admins and publishers can set up new connections or edit existing ones.
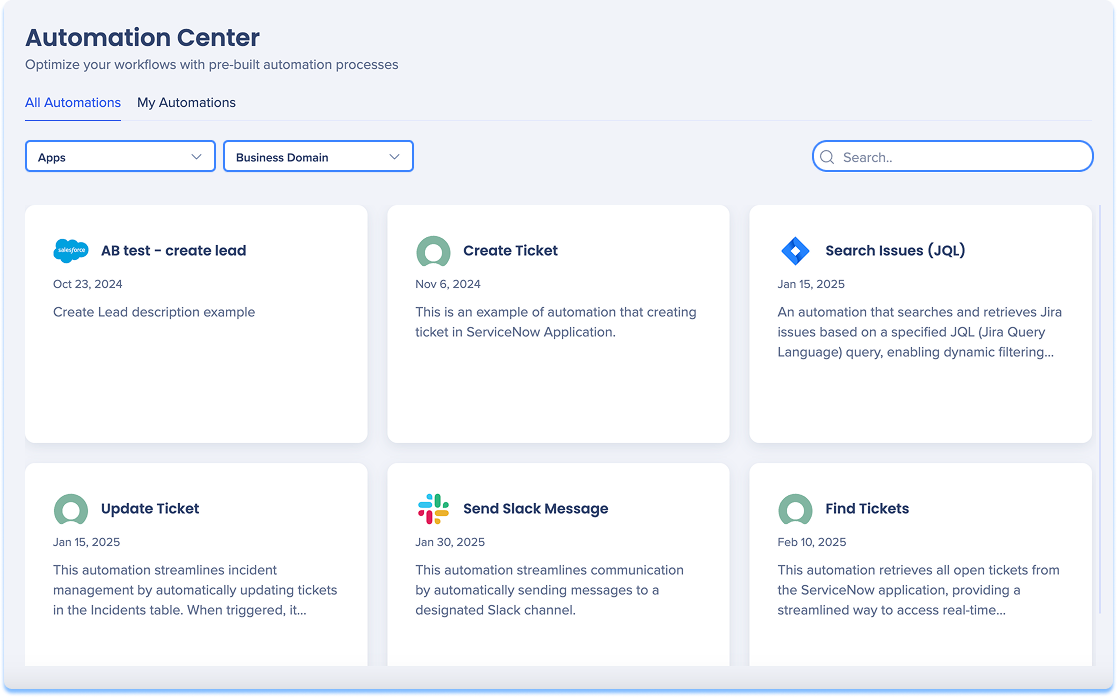
All Automations
The All Automations tab displays all automations available for setup.
Use this tab to:
- Browse available automations
- Review what each automation does and which systems it supports
- Start setting up a new automation
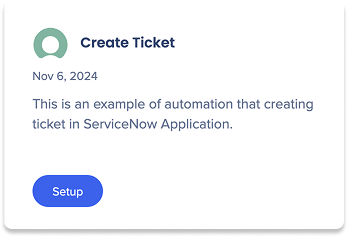
Each automation tile includes:
- Automation name
- Short description
Search and filter automations
Use the search and filter controls in the Automations Center to quickly find relevant automations.
You can:
- Search automations by name or keywords using the search bar
- Filter automations by app to view automations related to a specific integration
- Filter by business domain to narrow automations by functional area
- Filter by status (only available in the My Automations tab)
These filters help you navigate large automation libraries and focus on the automations most relevant to your workflow.
Setup an automation
- Hover over the automation tile
- Select Setup
- Fill in the required details in the General Settings and Parameters tabs

Running toggle
Turn off Running to change the automation status to paused, which affects all connected automations.
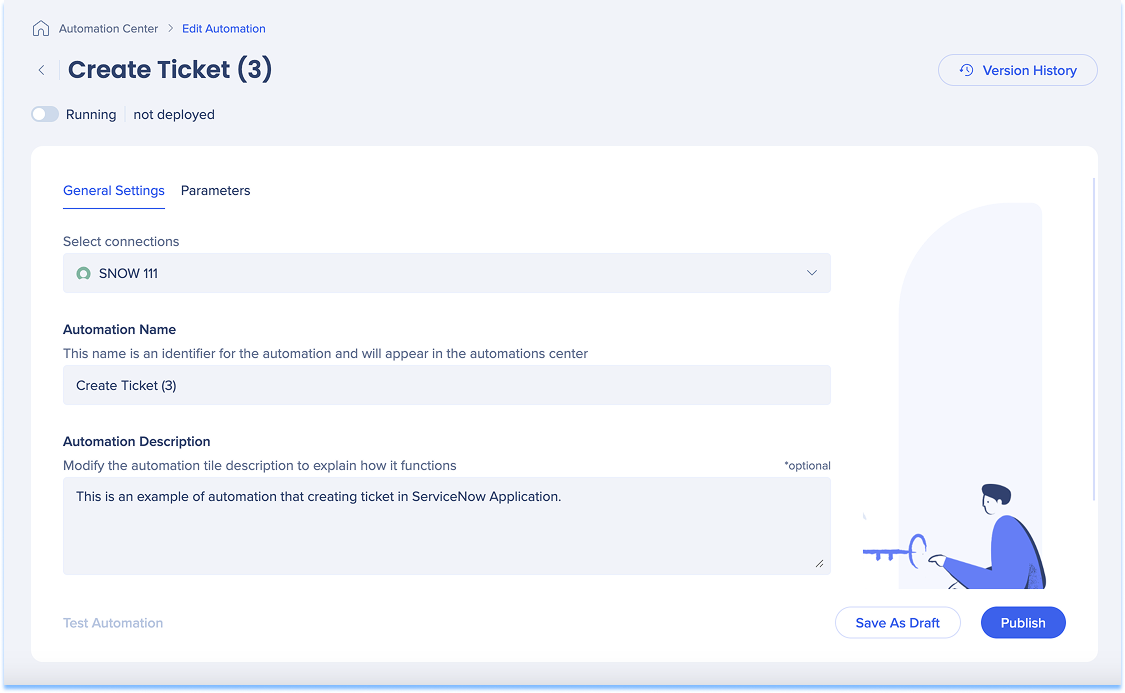
General Settings
- Choose the connection to add the automation to
- Enter a name for the automation
- This name will appear as the tile title in the Automation Center
- Optional: Edit the automation description
- This description will be shown on the tile in the Automation Center
Linked WalkMe content
After the automation is published:
- You can view the WalkMe content linked to the selected connection
- Once the automation is live, you can select a system to see all relevant WalkMe items
- Each item includes a direct link for quick access
If no WalkMe content is linked, this option is disabled.
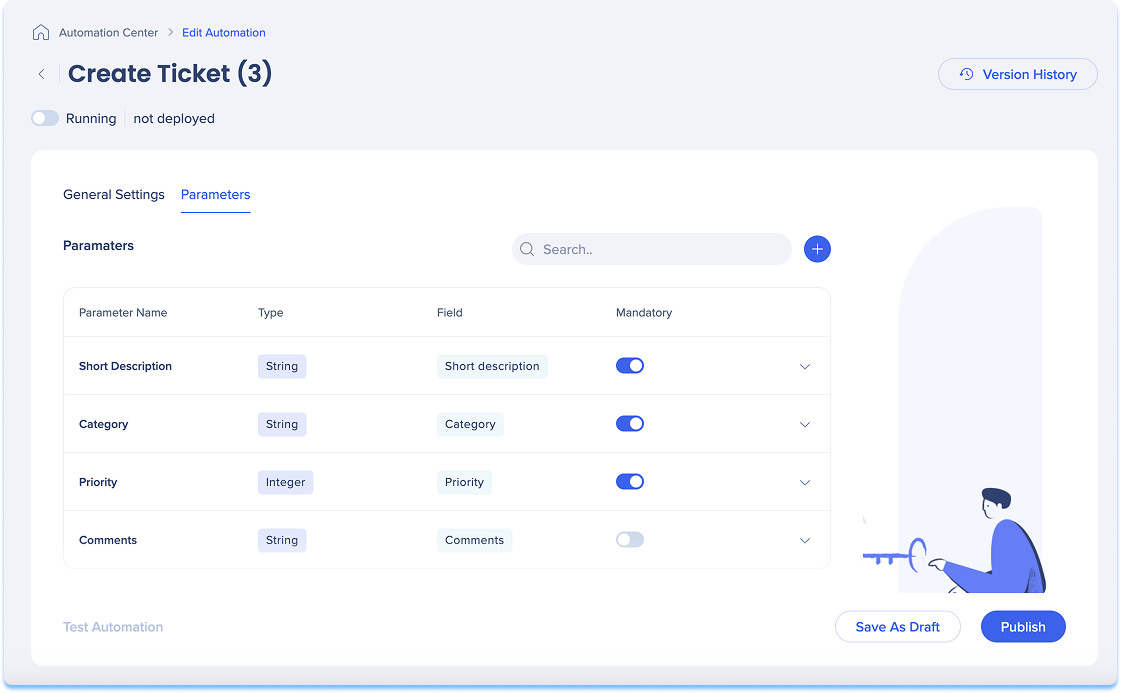
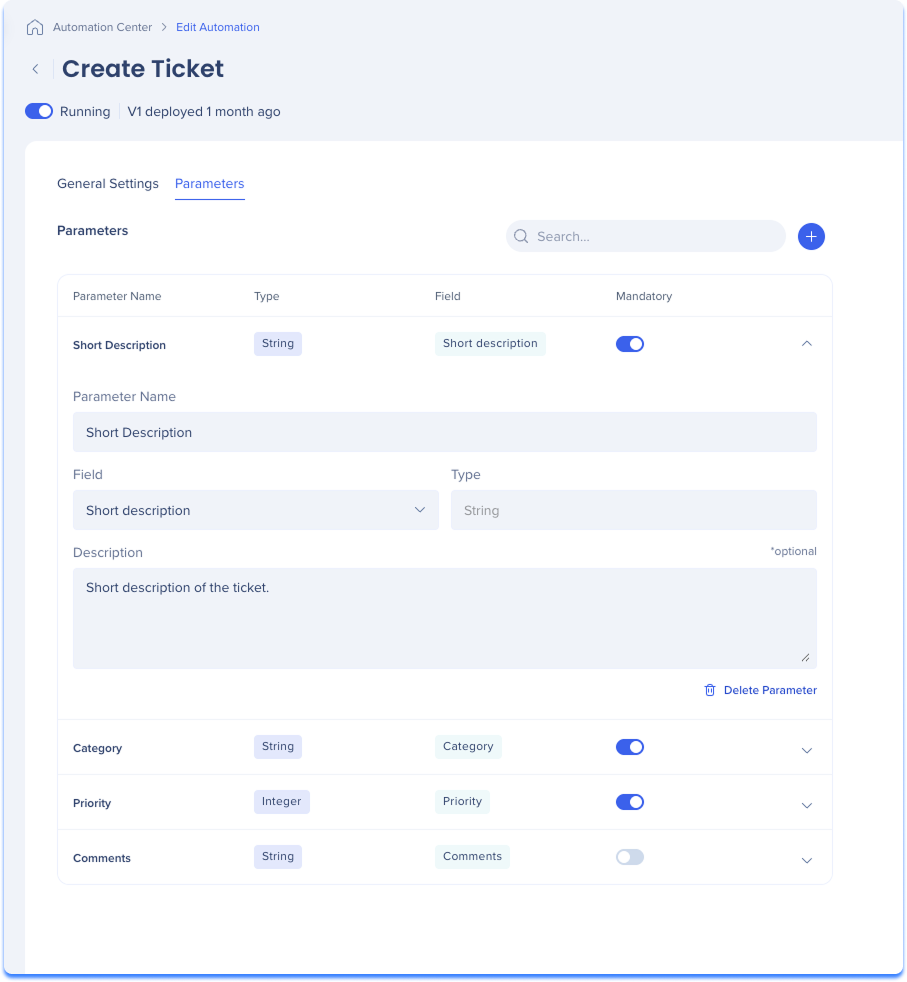
Parameters
- Open the Parameters tab
- Review the list of available parameters for the automation
- For each parameter, review the following fields:
- Parameter name
- Type
- Field
- Identify whether the parameter is Mandatory (required and cannot be changed) or optional
- Optional: Select Test Automation
- Select Save as Draft, or
- Select Publish
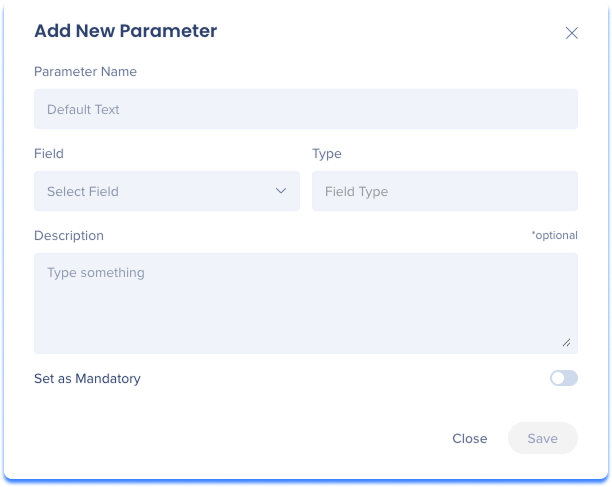
Add a parameter:
- Select +
- Enter the parameter name
- Select the parameter field
- This is the data you receive from the app you're integrating with
- Select the parameter type
- Optional: Enter a description for the parameter
- Optional: Turn on Set as mandatory
- Select Save
Edit a parameter:
- Select the Expand arrow in the parameter row
- Make the necessary changes
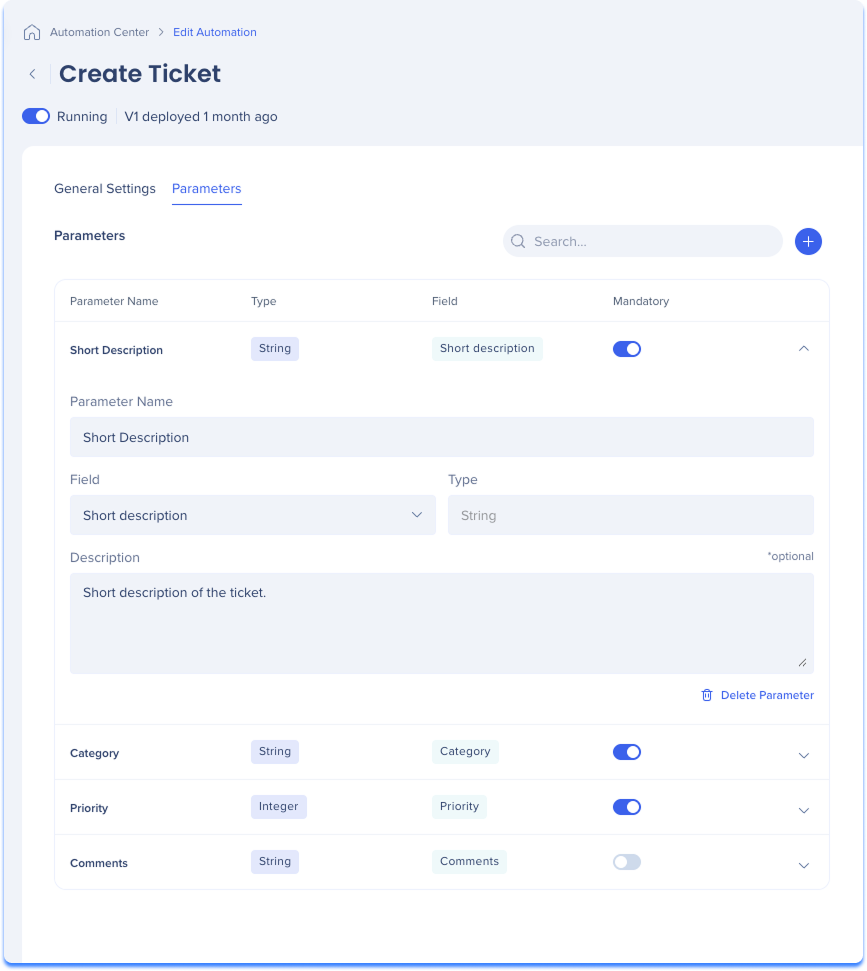
Delete a parameter:
- Select the Expand arrow in the parameter row
- Select Delete Parameter
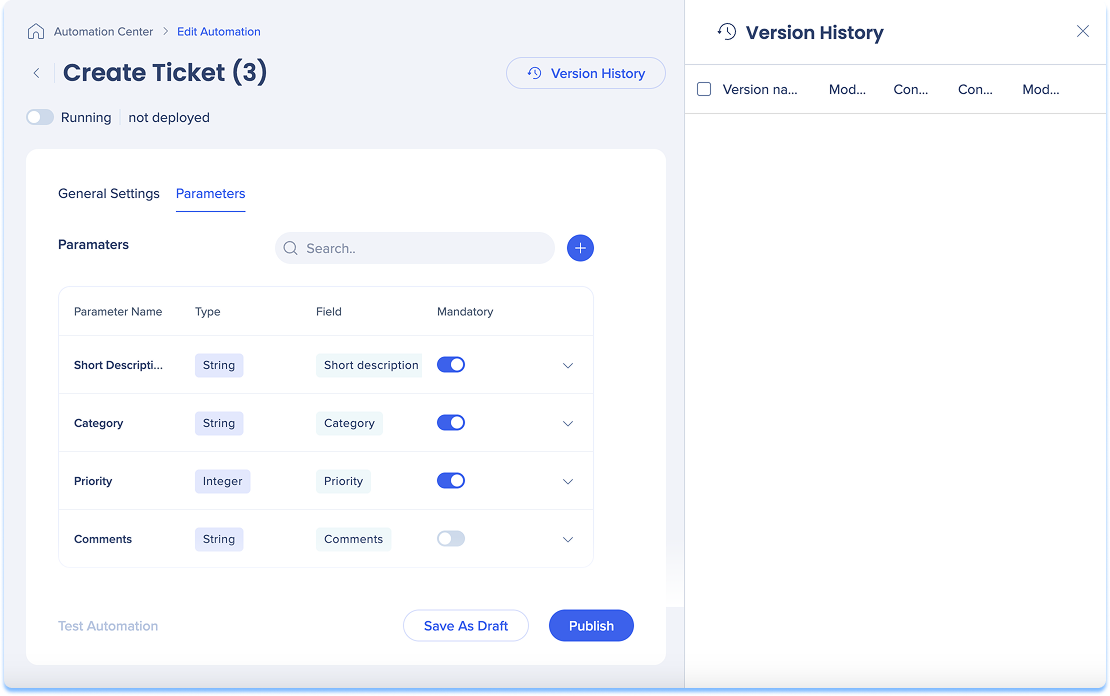
Version history
- Select Version History
- A side panel will appear, displaying the following columns:
- Version Name
- Modified By
- Connection Name
- Connection Status
- Modified Date
- Open the Options menu
- Select an action:
- Delete a version
- Restore a version
- Rename a version
- To perform actions on multiple versions:
- Select the checkbox next to the versions you want to manage
- Choose an action from the floating toolbar
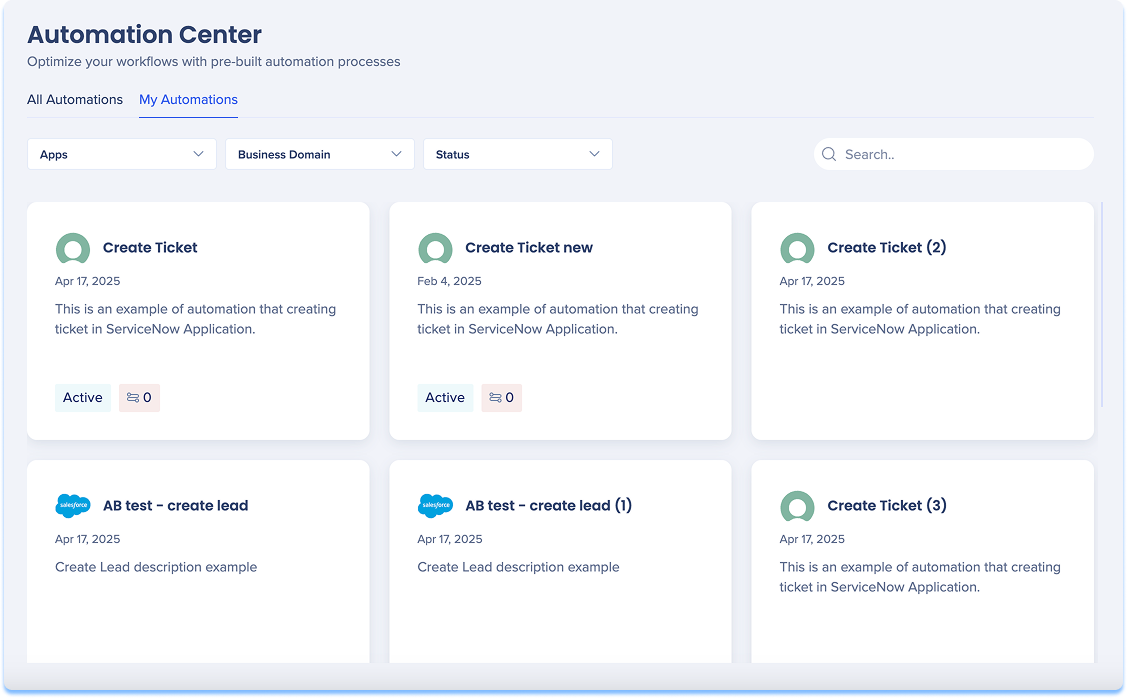
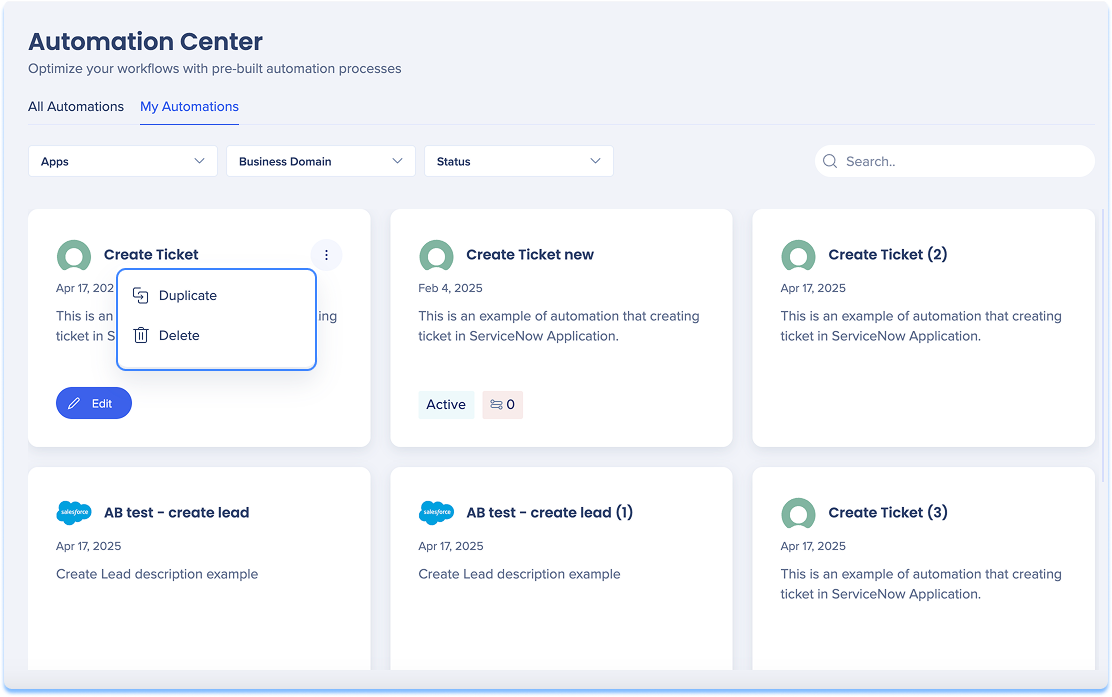
My Automations
The My Automations tab displays only the automations that are already configured for your account.
Use this tab to:
- Review existing automations and their status
- See which connections are used by each automation
- Manage versions and publish status
- Edit or delete automations
Each automation includes:
- Automation name
- Brief description
- Status
- Number of connections
Edit automations
- Hover over the integration tile
- Select Edit
- Make the necessary changes
- Select Save
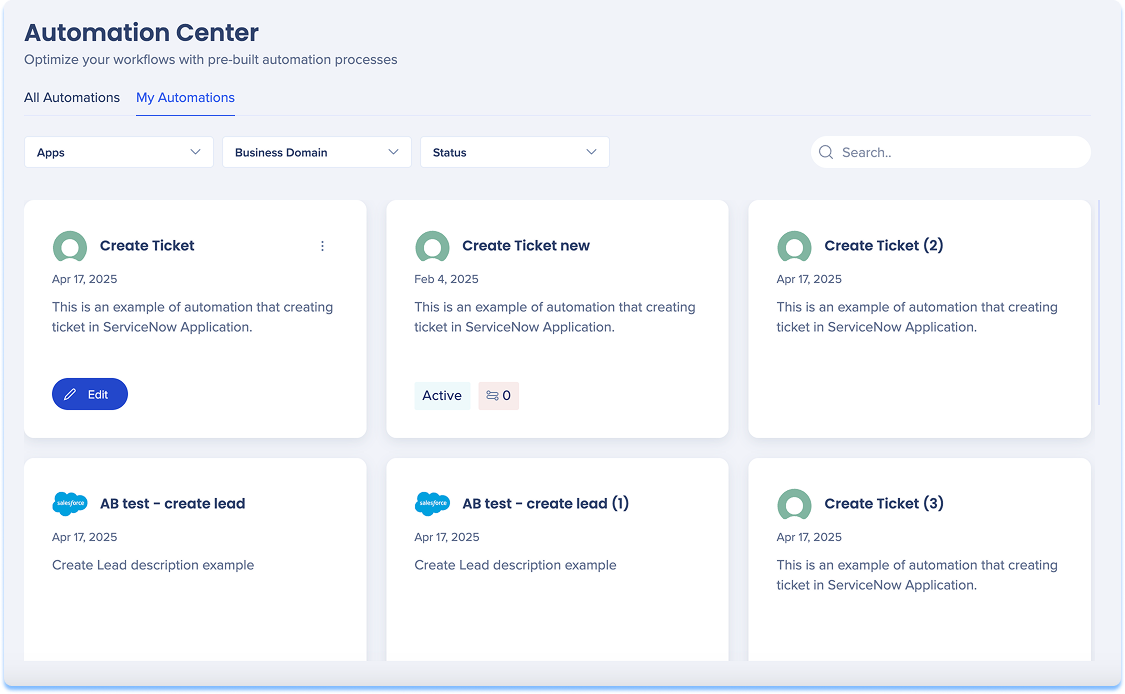
Duplicate or delete automations
- Hover over the integration tile
- Open the Options menu
- Select Duplicate or Delete
Salesforce automation
Each Salesforce automation represents a predefined API request that WalkMe executes via your authenticated connection. These automations let WalkMe perform standard Salesforce actions directly within WalkMe workflows or digital experiences.
Available automations:
- Create an opportunity: Creates a new opportunity record in Salesforce with mapped fields from WalkMe data
- For example: Opportunity name, amount, stage, or close date
- Create a lead: Adds a new lead record with name, email, company, and other attributes collected through WalkMe
- Create a quote: Generates a quote associated with an existing opportunity or account, using mapped pricing or plan data
- Create a contact: Creates a new contact in Salesforce, optionally linked to an existing account
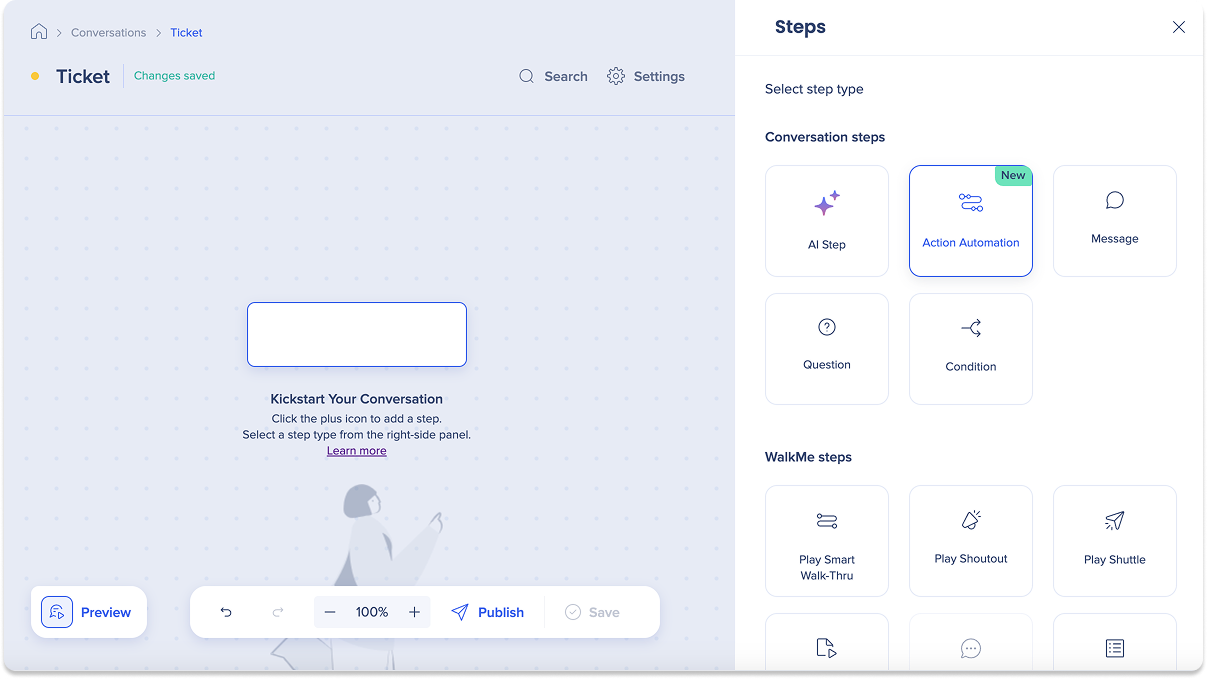
Action Automation in ActionBot
Use the Action Automation step in ActionBot to add automations to your conversations.
ActionBot Conversation Steps