Brief Overview
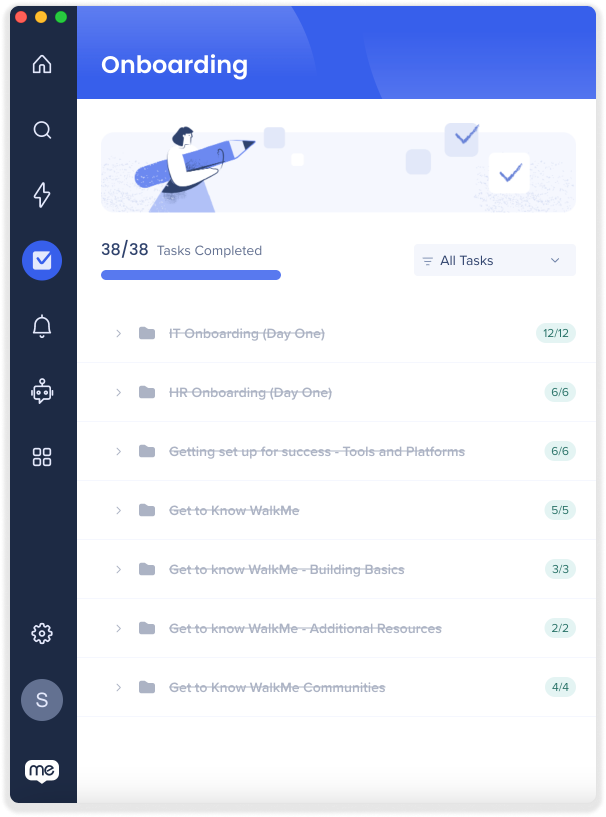
Desktop/mobile menu tasks can be used to onboard new employees with personalized checklists and custom resources, fast-track time-to-value and reduce traditional training costs.
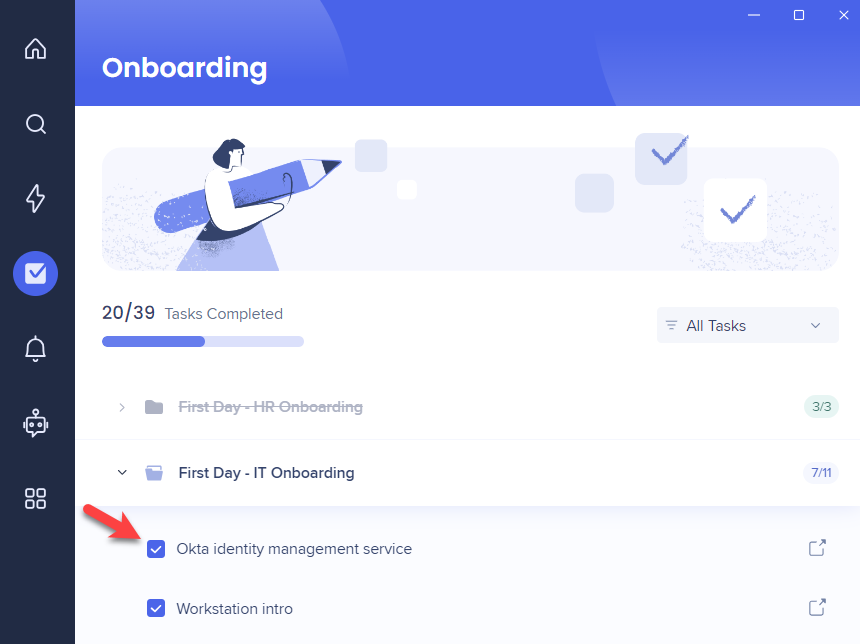
The tasks are added to the desktop/mobile menu app and consist of Smart Walk-Thrus, and video and articles Resources. This checklist enables users to see their progress as they move through the tasks, improving the user experience, and pushing them to complete more tasks and engage with WalkMe.
Use Cases
Accelerate Training
Give users a clear and straightforward path to complete training. For example, create a task list with all tasks necessary for a new employee to get started such as creating a profile, reading about company policies, signing up for HR benefits, and setting up an expense account.
Improve Conversion
End customer confusion and make your product attractive and simple. For example, create a checklist that shows off your product's features and drives customers to action.
Promote Product Adoption
Enhance the customer experience and increase loyalty by boosting engagement with your site. For example, create a checklist that takes the user through all the necessary processes to get started.
How It Works
The checklist in the desktop/mobile menu app is made using Onboarding Tasks that you can create in the WalkMe Editor. These tasks are associated with Smart Walk-Thrus and Resources you have already created.
Once the Onboarding Tasks are published in the editor, they will appear in the console in the menu organizer. There you will be able to compile a list of tasks to be published to the menu.
In the desktop/mobile menu app, the user can click a task in the checklist and WalkMe will launch the associated Walk-Thru or Resource. As each task is completed, the user's progress will be updated in the progress bar.
Create Onboarding Tasks in the Editor
Before you start creating a menu task list, you'll need to create Onboarding Tasks in the WalkMe Editor. To learn how to create Onboarding Tasks in the WalkMe Editor, read this article: Onboarding Tasks: Getting Started Guide
Note
Make sure to set select your Desktop/Mobile system from the system dropdown to add content to the desktop and mobile menus.
Building Tasks
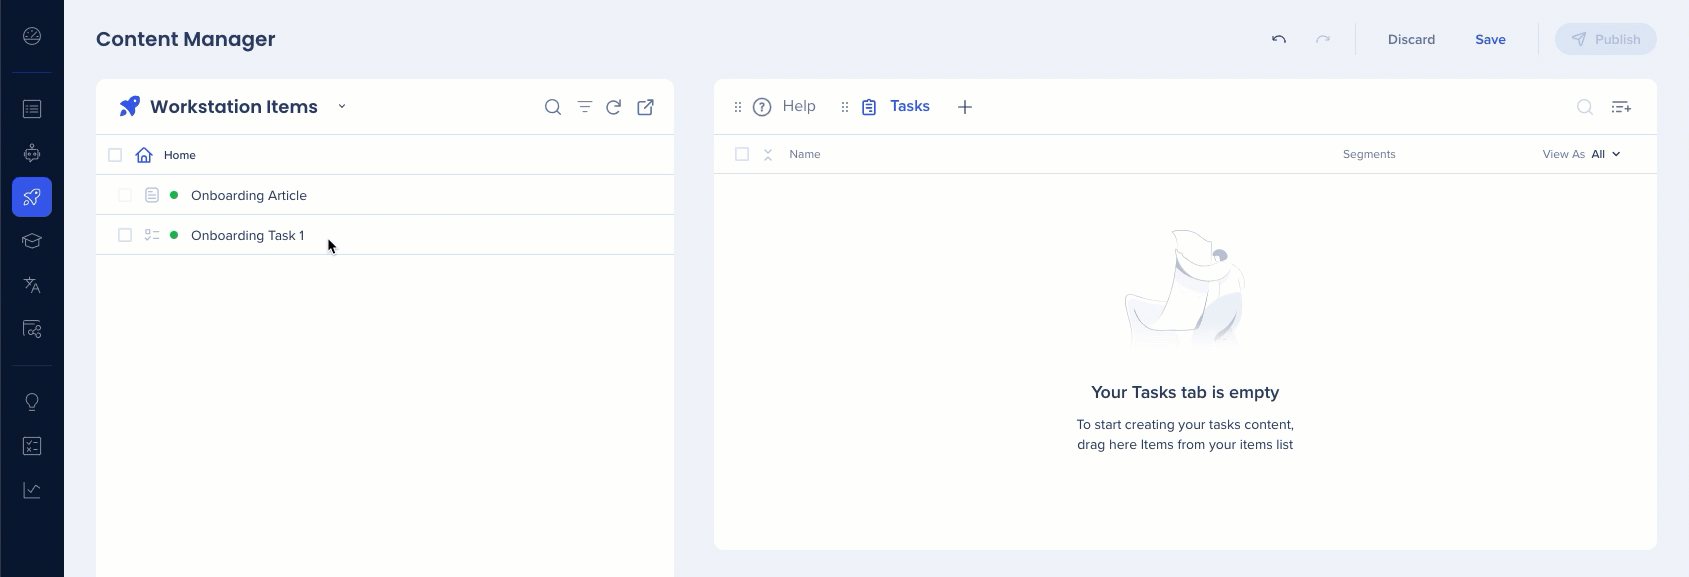
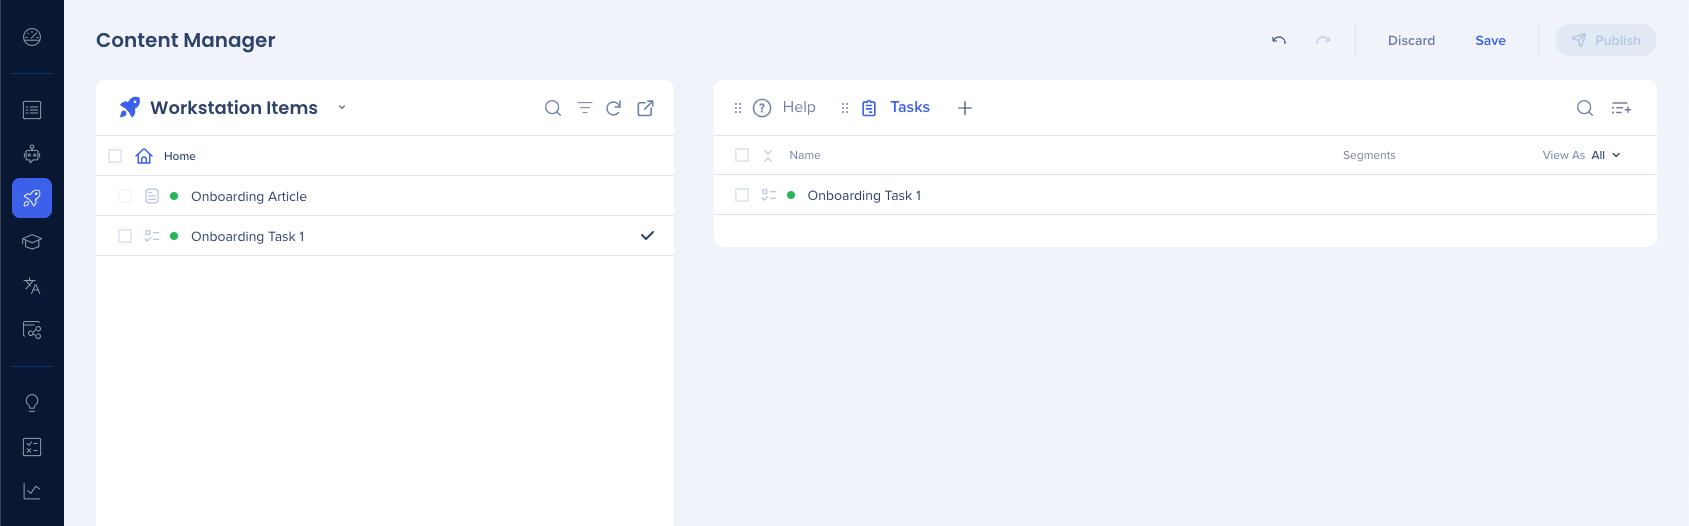
Navigate to WalkMe Console > Menu > Menu Organizer
Step 2: Add items to the Tasks tab
All of the WalkMe content you have created is in the left Items List. The Task tab on the right is where you will place the Onboarding Tasks created in the editor.
Note
- Only one Tasks list is supported
- Onboarding Tasks cannot be added to the Help tab
- You can rename the Tasks tab by clicking and typing a new name
To add items to the Task tab:
- Click the Task tab in the Menu Organizer
- Drag desired items from the Items List to the Task tab
Step 3: How to save and publish your Tasks
- When you have finished adding content to the Tasks tab, click Save
- When you are ready to publish, click Publish

Onboarding Settings
Onboarding Settings are located in the WalkMe Editor and affect all tasks created for the desktop/mobile menu app. Here you can turn the Onboarding task list on or off, add Display Conditions, and have access to different customizations.


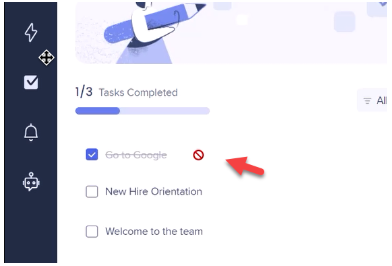
Allow playback after completion
Click this toggle if you want users to be able to open a task again after completion. If this toggle is disabled, a block icon will appear whole hovering over the completed task.
Strike out completed tasks
Click this toggle if you want a line to strike through a task that has been completed.

Click this toggle if you only want the Tasks tab to appear in the desktop/mobile menu If enabled, the Resources tab will not appear in the desktop/mobile menu.
Additional Capabilities
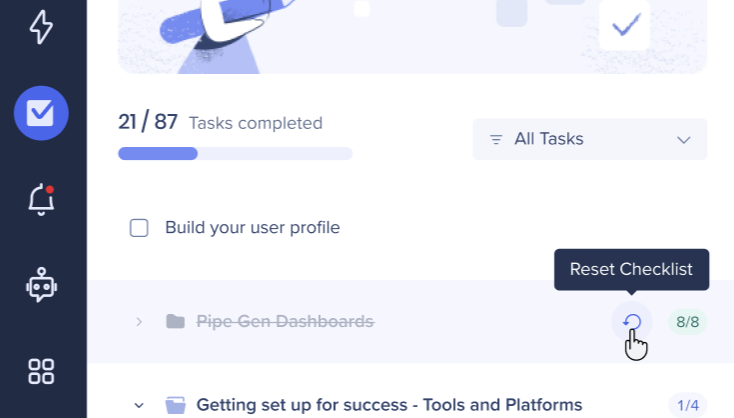
Uncheck Onboarding Tasks
Uncheck a completed onboarding task.
Hovering over a folder will display a Reset Checklist button that will allow unchecking all of that category tasks at once
Permalinks
It's possible to start the onboarding flow using a permalink. This will trigger the onboarding wizard, followed by the product tour. To do so, use the following permalink:
walkme-workstation://aa2c91b1ec444c76a313a68f69478c55/page?p=search&q=/integrations-wizard
Note
You will first need to convert the permalink to a Tiny URL in order for it to work.


