Brief Overview
You can publish more than one theme to the same system and set rules that decide which theme each user gets. Rules are set at the theme level, so a single system can serve different visual treatments to different pages, portals, or user states without splitting the content across systems.
Before, a system supported 2 theming states: a standard setup with a single published theme and a custom SAP theme set with specific identifiers.
Use cases
- Product segmentation: An organization runs separate portals for different product lines and each portal has its own interface. A theme rule per portal keeps the WalkMe content visually consistent with the portal the user is in — for example, a "car" portal and a "truck" portal.
- Light and dark modes: A site exposes a variable that reports whether dark mode is on. A theme rule reads that variable and plays the matching theme.
- Page-level styling: Sections of an application that use a different color scheme get their own theme, matched on the current URL
- Menu vs other WalkMe content: If you want the menu to look like the application and the rest of the content to contrast with it, you can set the menu theme to be different
How It Works
Setting conditions
Each theme in a system can hold its own set of conditions. After you publish more than one theme, WalkMe checks those conditions against the user's session and plays the first theme that matches. A theme with no conditions is always eligible, which is what makes the default theme the fallback.
To set conditions on a theme:
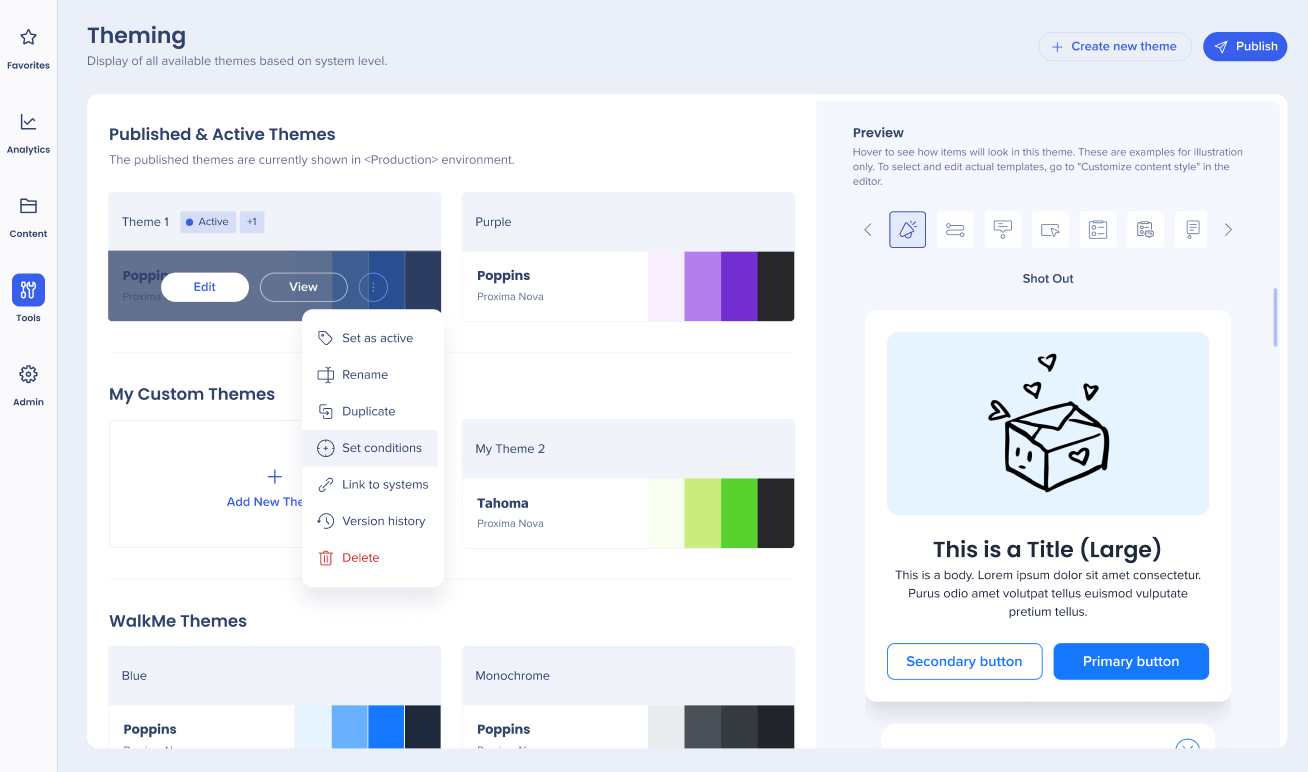
- Hover over the theme you want to set conditions on
- Select the Options menu
- Select Set conditions — the condition builder opens
- Set your conditions
- Select Save
Publishing themes
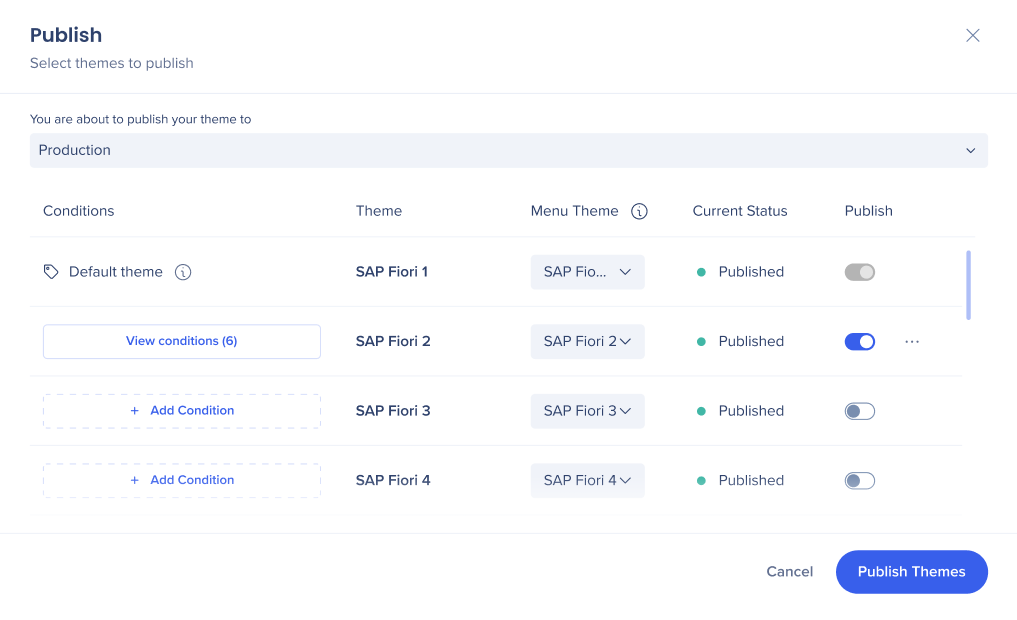
Conditions take effect only after the theme is published. The publish popup shows every theme in the system side by side, so you can review conditions and publish more than one theme at the same time.
- Select Publish
- Select the environment you're publishing to from the dropdown
- Review the theme list — each row shows the theme's conditions, its menu theme, and its current status
- Select View conditions on a theme to open the condition builder and review or edit its conditions
- Select Add Condition on a theme that has no conditions to set them from the popup
- Select a theme from the Menu Theme dropdown for each theme you're publishing
- Turn on Publish for each theme you want to publish
- Select Publish Themes
Evaluation order
- WalkMe evaluates published themes in the order they appear in the theme list and plays the first one whose conditions are met. Evaluation stops at that point — no other theme is checked.
- If a user is on a page where more than one theme matches, position decides the outcome. For example, if a theme with a Current URL condition is higher in the list than a theme with a Variable condition and both are met, the Current URL theme plays.
- You can't reorder the theme list. Reordering is planned for a future release.
Default theme
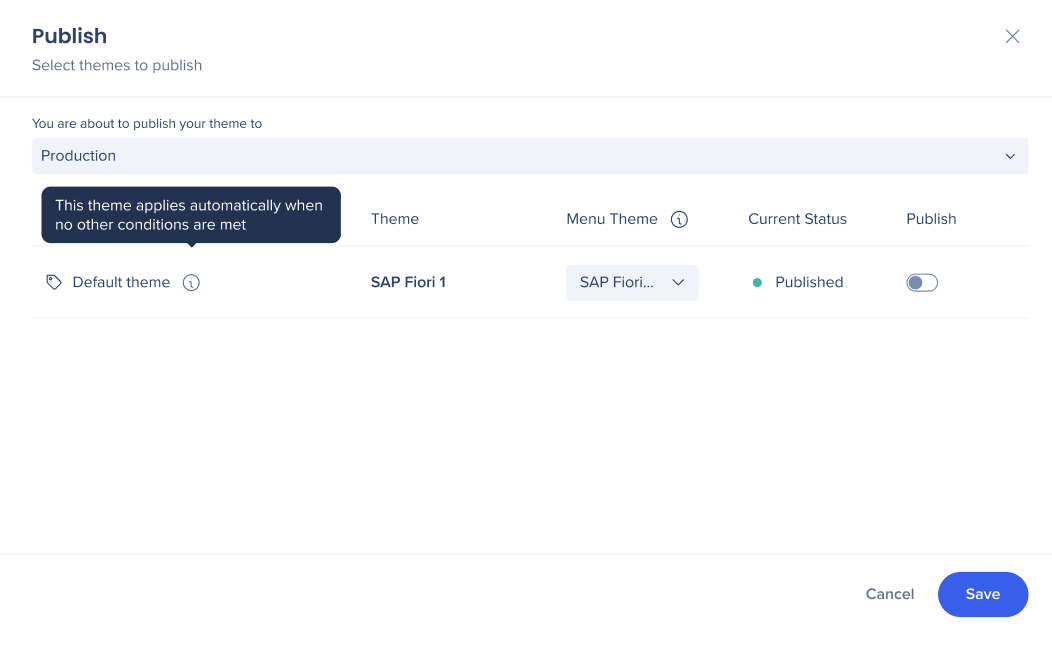
The theme marked Default theme in the publish popup applies automatically when no other conditions are met.
It needs no conditions of its own and keeps the system from loading without styling.
Condition indicator
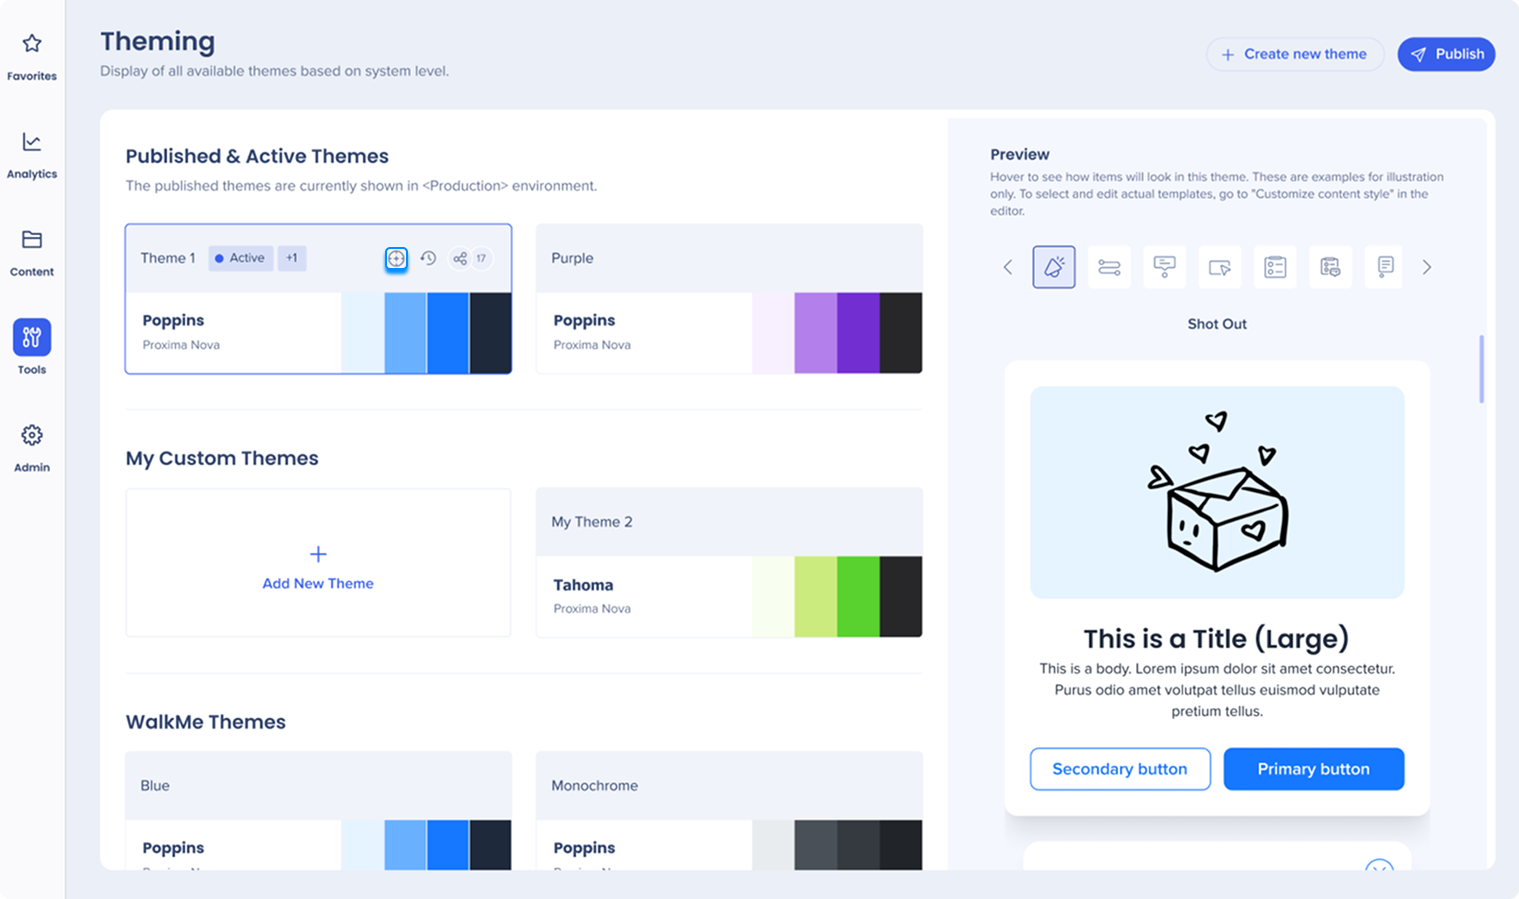
In the theme list, a bullseye icon shows next to every theme that has conditions attached to it.
Themes without conditions show no icon, so you can scan the list and see which themes are condition-driven.
Technical Notes
- Supported conditions:
- Current URL
- Variable
- WalkMe Data
- Cookies
- Segment
-
The first theme in the list whose conditions are met is the theme that plays
-
The theme list can't be reordered. Reordering is planned for a future release.
-
A system with no matching theme falls back to the default theme


