Brief Overview
When creating an action step in a Smart Walk-Thru, you can now select AI Action as the action type. This allows you to use pre-made AI Launchers (created in the editor or console) to utilize the AI-generated output from the AI Launcher.
With the output data, you can save it as WalkMe data to be used in your flow. Additionally, you also have the option to automatically open the AI Launcher in the Action Bar for end-users in this step. Essentially, this AI Action step combines the Action Step and Set WalkMe Data step into one.
Get to Know & Use
-
Add an Action step in a SWT
-
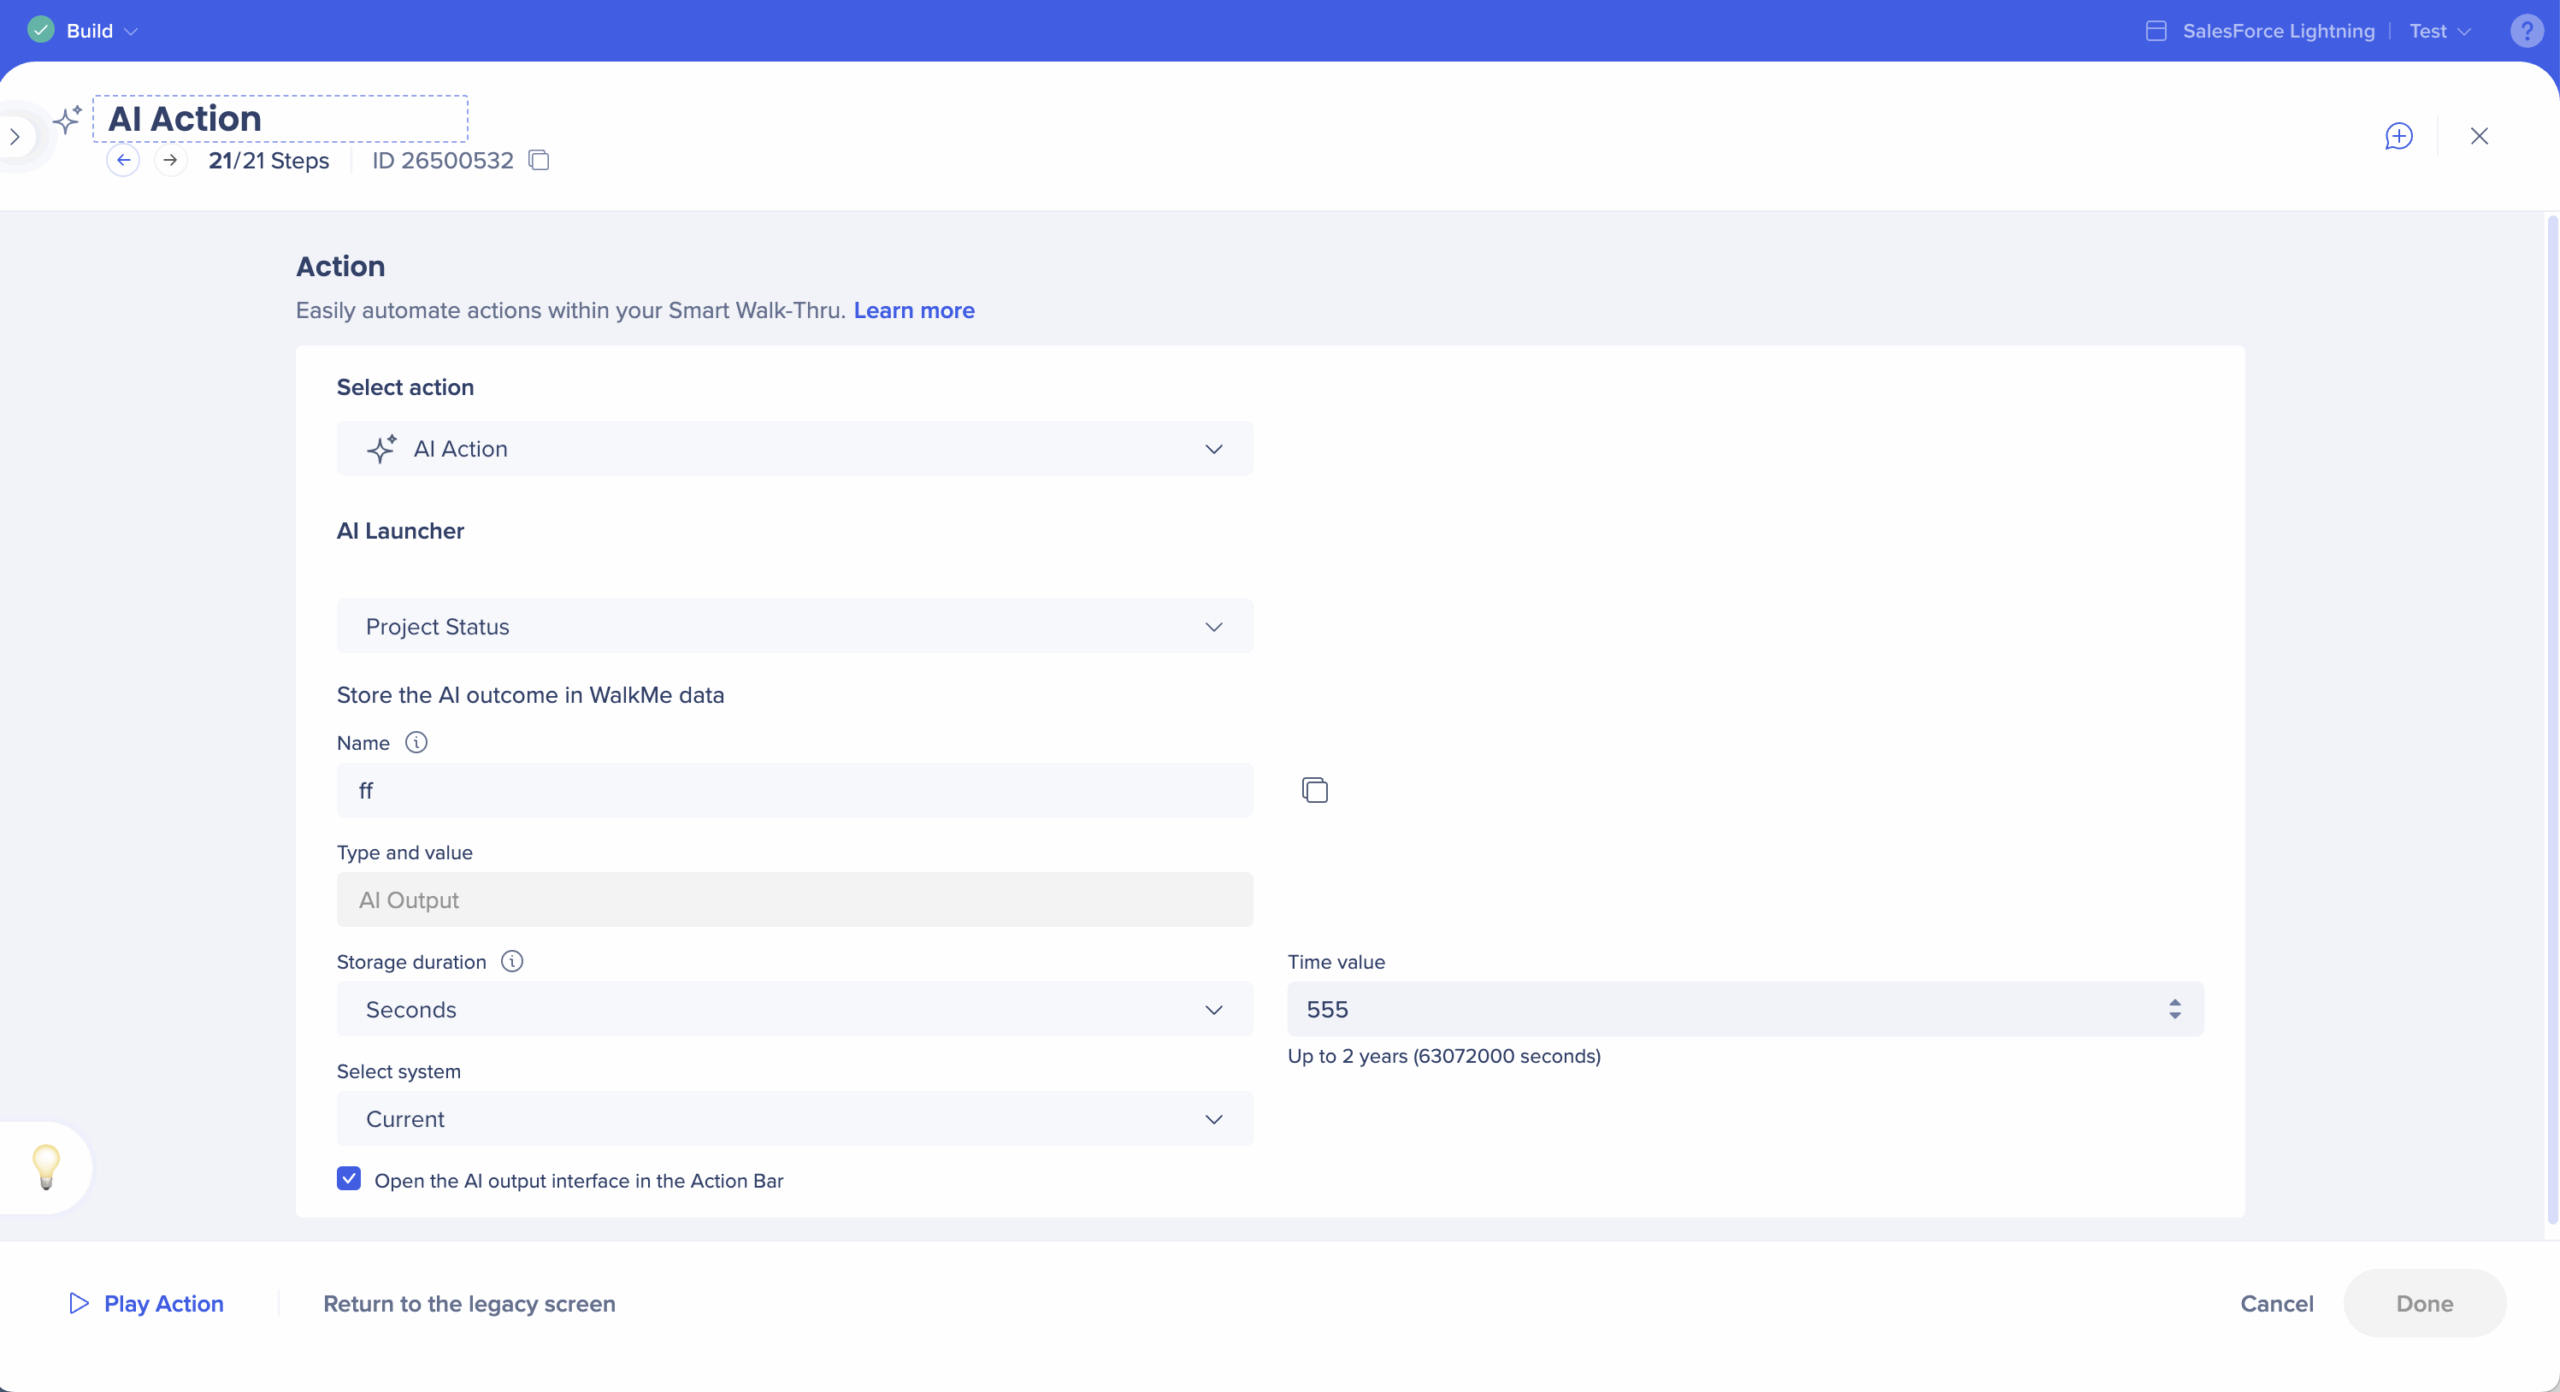
Select AI Action in the select action dropdown
-
Select the AI launcher in the Launcher dropdown
-
Select the AI outcome from the dropdown to control how AI responses are surfaced:
-
Store as WalkMe Data: Saves the AI response as a WalkMe Data item for use elsewhere in your flow
-
Display in Action Bar: Surfaces the AI response directly in the Action Bar
-
Store as WalkMe Data and Display in Action Bar: Does both simultaneously
-
Enter details to save AI launcher output data:
-
Name: Enter a name for the output
-
Type and value: AI output
-
Storage duration: Select storage duration amount
-
System: Select the system for the data
-
Optional: Tick the Open the AI output interface in the Action Bar box if you would like the end-user to get the launcher open automatically in the Action Bar during this step
-
Click Done
Use Case
Multi-field validation with AI Action step
To validate several fields together, use a Smart Walk-Thru that collects values from multiple fields and analyzes them with an AI Action step. This process is initiated by a launcher (for example, “Fill out required fields”), which starts a Smart Walk-Thru running in the background:
- Captures all relevant field values using multiple Set WalkMe Data steps
- Runs an AI Action step that evaluates these values together
- Surfaces a tailored prompt to the user, using dynamic values for each field
- Provides a consolidated recommendation on what to correct or complete
This method enables AI to assess multiple inputs simultaneously and deliver a single, actionable message to the user.
Setup
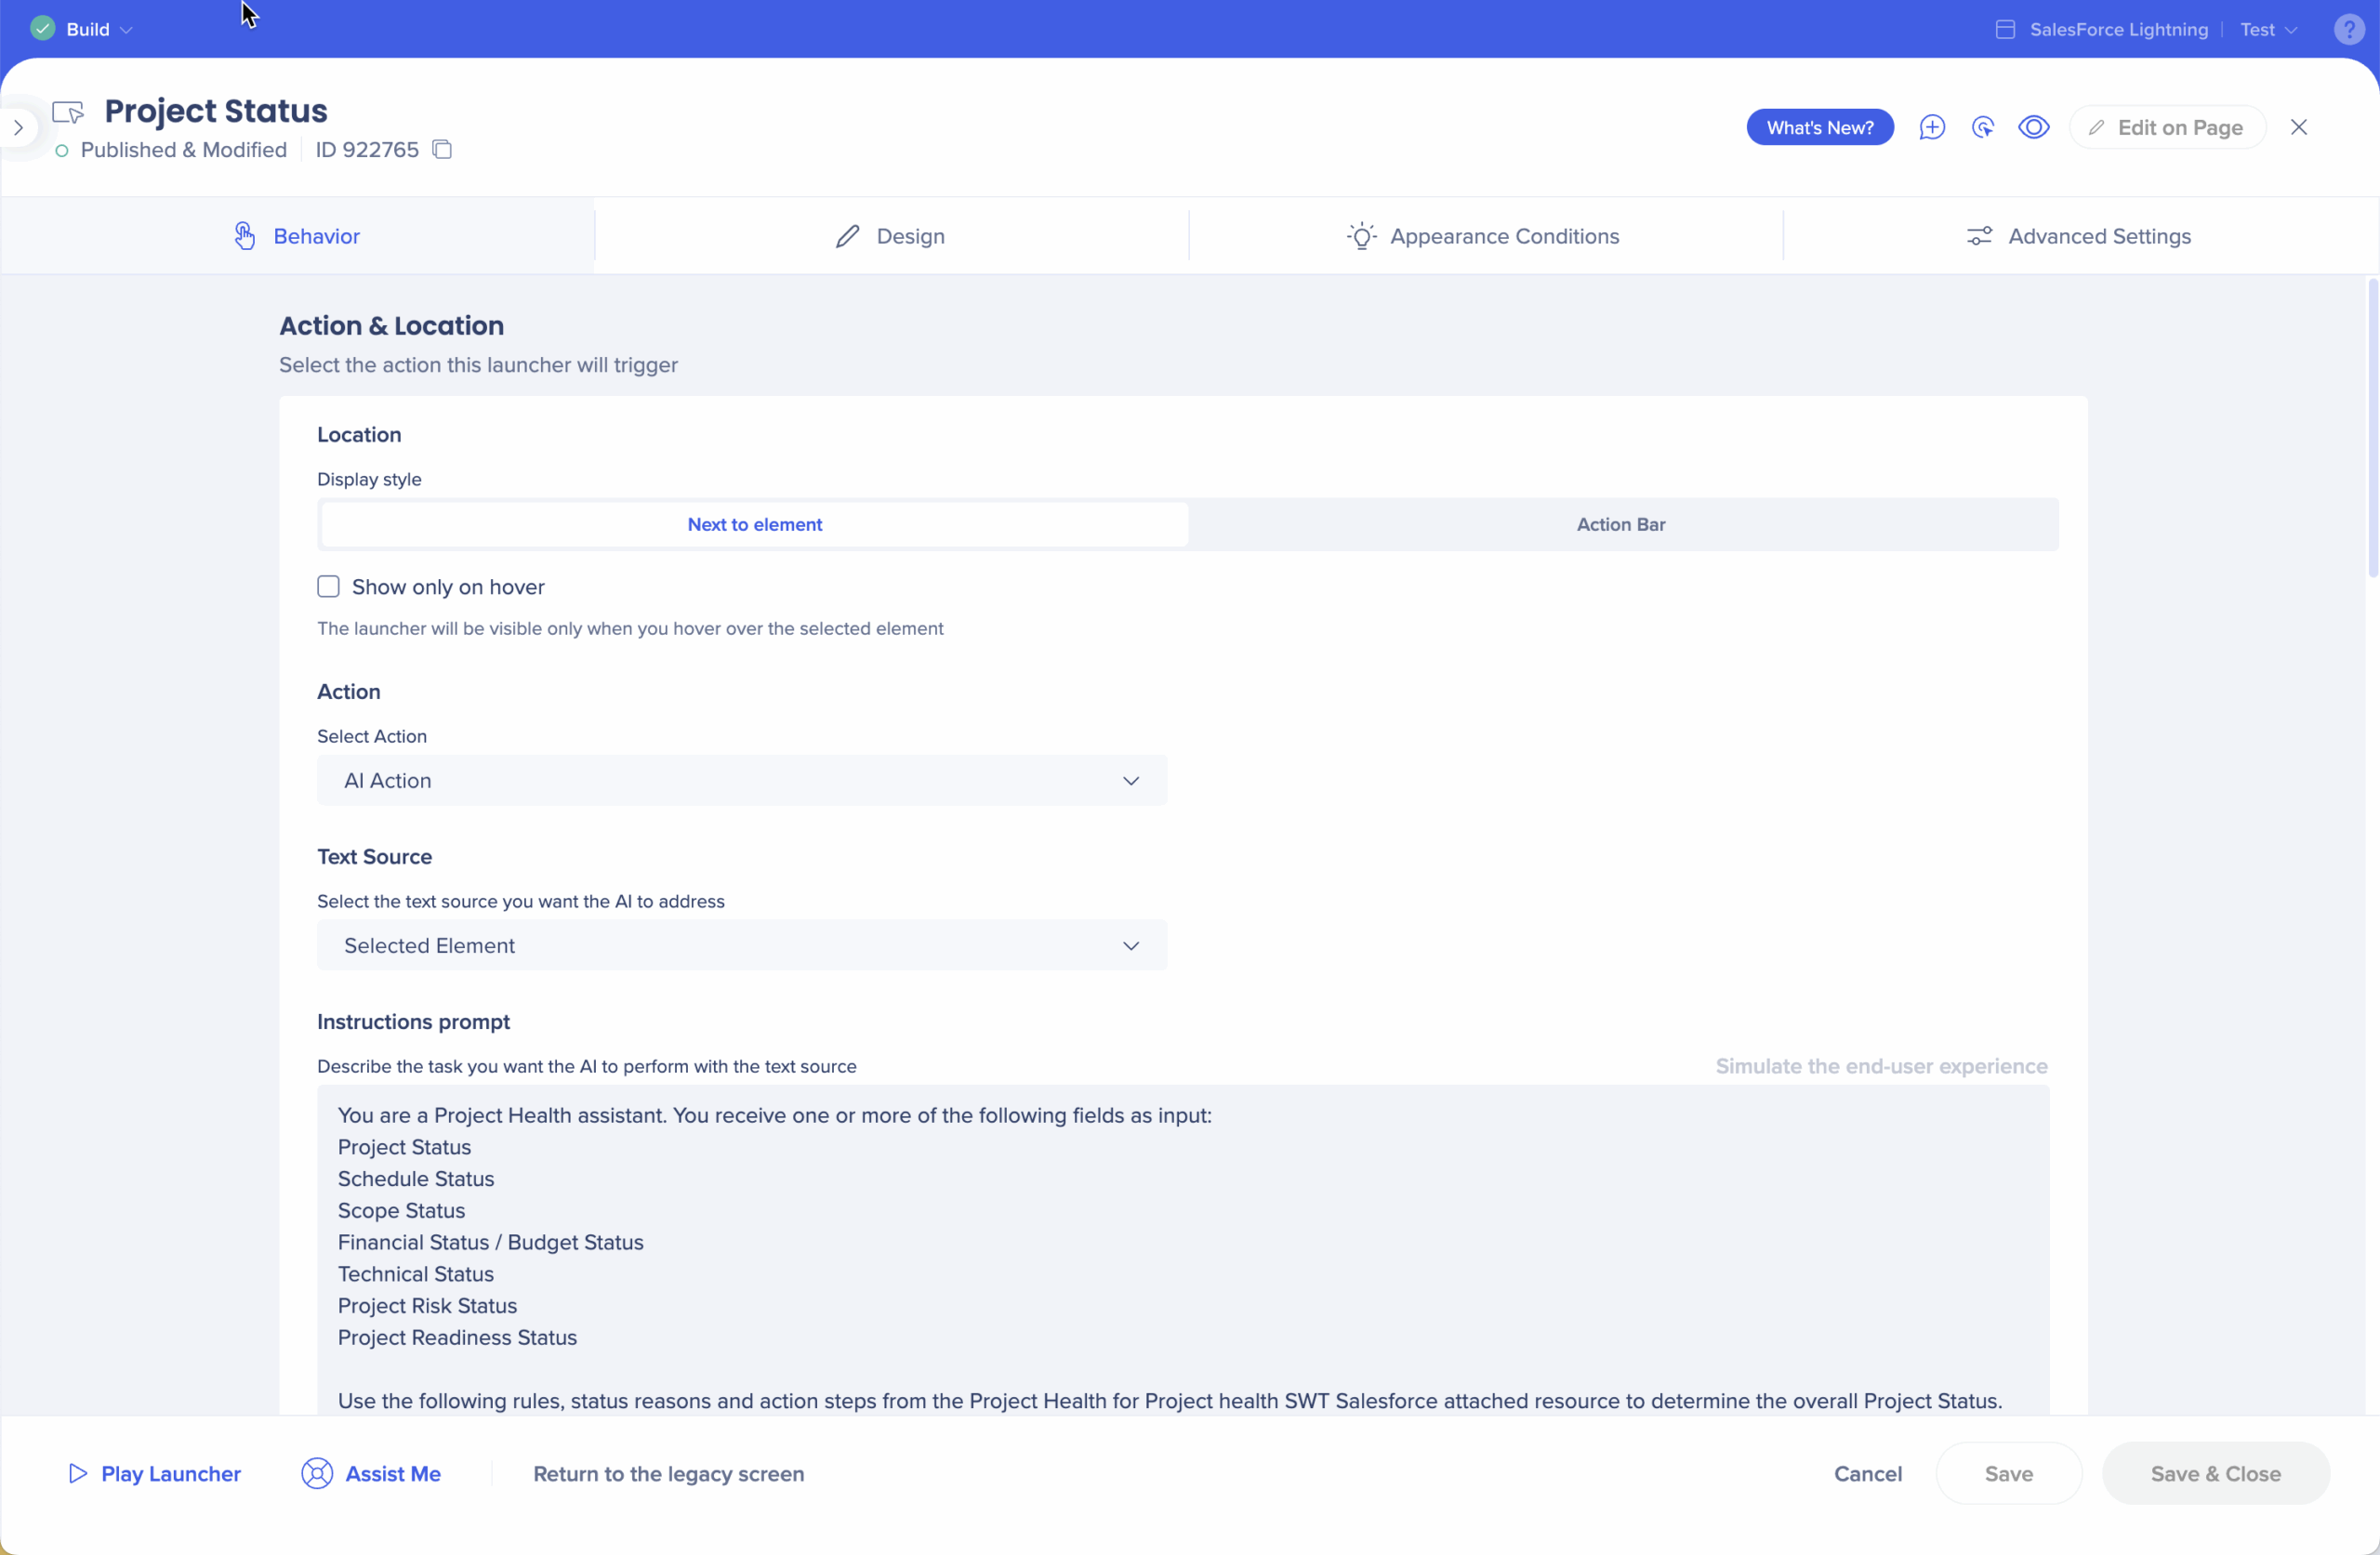
Step 1: Create a SWT and add a launcher on the form
Place a launcher near the field group you want to validate. When clicked, this launcher will start a SWT that works in the background.
- For example, a launcher with the text “Fill out required fields”
 Step 2: Add a Set WalkMe Data step for each field
Use Set WalkMe Data to capture each field's value, one after another.
Examples:
-
wmProjectStatus
-
wmScheduleStatus
-
wmScopeStatus
-
wmFinancialStatus
These steps gather all the values the AI will need.
Set WalkMe Data Flow Steps
Step 3: Configure an AI Launcher
Next you'll need to return to your editor's main screen to create a custom AI Launcher for your SWT. The AI Launcher will allow the AI to analyze the captured WalkMe data values.
- Return to your editor's main screen
- Create a new launcher
- Select any element on the page (doesn't matter where as this launcher won't be visible to users and will work in the background)
- Click the Make invisible icon
- Click Save
-
Click your new launcher from the editor's main page
-
Under the Behavior tab, choose Next to element for the display style
-
For Select Action, choose AI Action
-
For Text Source, choose Selected Element
-
When creating the instruction prompt for the AI Launcher, you can reference all the captured WalkMe Data values
Instruction prompt example
You are a Project Health assistant. You receive one or more of the following fields as input:
Project Status
Schedule Status
Scope Status
Financial Status
Technical Status
Risk Status
Here is the information:
Project Status: [wm-data]wmProjectStatus[/wm-data]
Schedule Status: [wm-data]wmScheduleStatus[/wm-data]
Scope Status: [wm-data]wmScopeStatus[/wm-data]
Financial Status: [wm-data]wmFinancialStatus[/wm-data]
Risk Status: [wm-data]wmProjectRiskStatus[/wm-data]
Technical Status: [wm-data]wmTechnicalStatus[/wm-data]
Step 4: Add an AI Action step at the end of your Smart Walk-Thru
-
Return to your SWT and follow the steps above for creating an AI Action step
-
Make sure to choose the AI Launcher you created for this SWT
-
Tick the Open the AI output interface in the Action Bar to enable the validation message to your users
-
Save and publish your SWT
Note
The output message will appear as a popup to users (not in the action bar).
Additional Resources
Smart Walk-Thru Steps
Introduction to AI-Enabled Action Bar


