Brief Overview
You can create different types of learning content to share knowledge, guide users through processes, or build full training programs. Content can be created manually, generated with AI, or imported from existing sources. After creation, you can organize, edit, and publish it so it's available for learners.
Create Learning Content
To create learning content:
- Go to the Learning Content page
- Select + Learning Content
- Choose the type of content you want to create
After selecting a content type, choose how you want to create it.
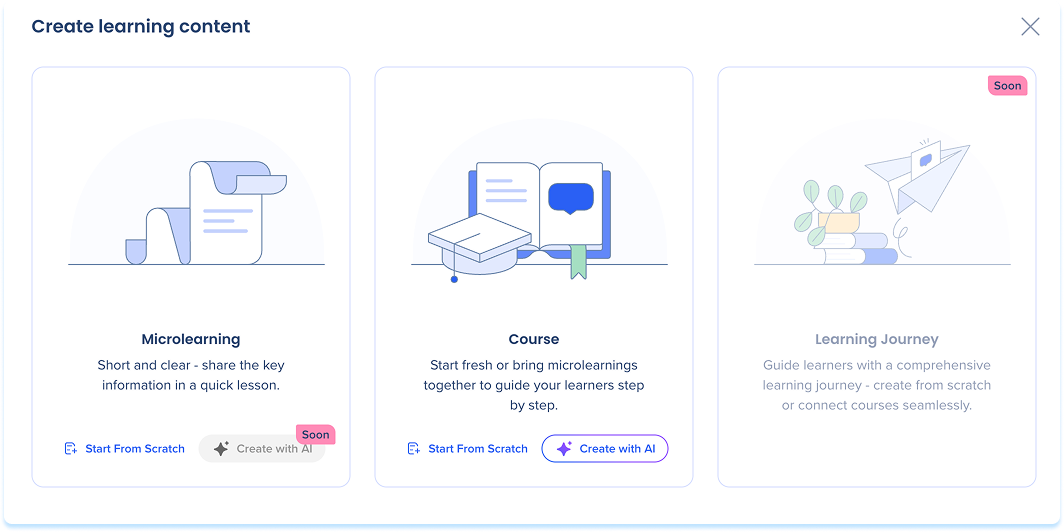
Learning content types
here are three available content types:
- Microlearning: A short, focused lesson designed for quick learning moments
- Course: A structured collection of lessons that guides learners through a broader topic
- Learning Journey: A guided path that connects multiple courses or microlearning items
Choose how to create content
Depending on the content type, you can create learning content in one of the following ways.
Start from scratch: Starting from scratch opens an empty learning content builder. This option gives you full control over the structure, lessons, and content from the beginning.
Create with AI: Creating content with AI generates an initial outline or draft based on the information you provide. You can review, edit, and refine the generated content before publishing.
Create a course with AI
-
Click the + Learning Content button in the Learning Content page
-
Select Create with AI
-
The Create a course with AI popup will open
-
Enter a short summary of what the course is about
-
Add instructions to guide the layout and content (optional)
-
Upload files help customize the content (optional)
-
Uploaded files can be used as references for AI or included directly in the course
-
Select Create Course Outline
Improve with AI
- To optimize your prompt, select the Improve with AI icon
- This tool rewrites your instructions based on four pillars of quality prompts:
- Context: Defines the target audience and learning goals
- Structure: Outlines the preferred organization of lessons
- Rules: Establishes specific constraints or formatting requirements
- Reference: Clarifies how the AI should use any uploaded files
Note
If you upload multiple files, generation may take a few minutes. You'll receive a Learning notification when your course outline is ready.

-
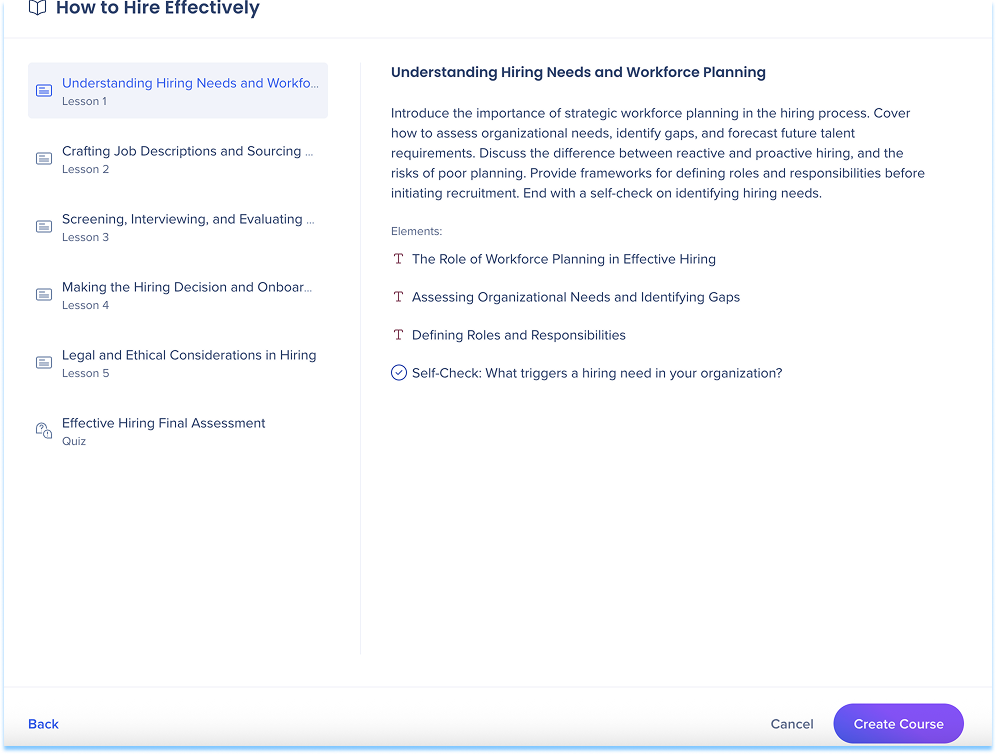
The Course Outline appears with suggested lessons and structure
-
Select Create Course to open the builder with pre-generated content
-
You can edit, rearrange, or remove any part of the generated material

Learning Content Builder Workspace
The learning content builder workspace contains four main areas:
-
Top panel: Main controls for managing and publishing content
-
Elements panel: Toolbar containing all available learning elements
-
Layers panel: Side panel showing covers, lessons, and elements
-
Main canvas: Drag-and-drop area to arrange and edit content

1.Top panel
The top panel appears across all content types and includes:
-
Content title
-
Status
-
Last updated date
-
Undo / Redo
-
Share
-
Publish
-
Save
-
Preview

Edit content title
-
Click the Edit icon next to the title text field
-
Type the new name
-
Press Enter

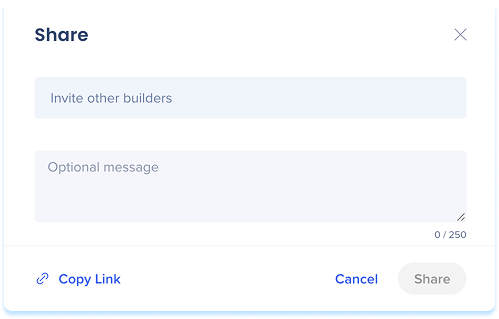
Share content
- Click the Options menu in the top-right corner
- Select Share
- In the Share popup:
- Enter collaborators
- Add a note (optional)
- Choose how to share:
- Copy Link to send manually
- Share to send invites directly
Show history
- Click the Options menu in the top-right corner
- Select Show History to review past versions
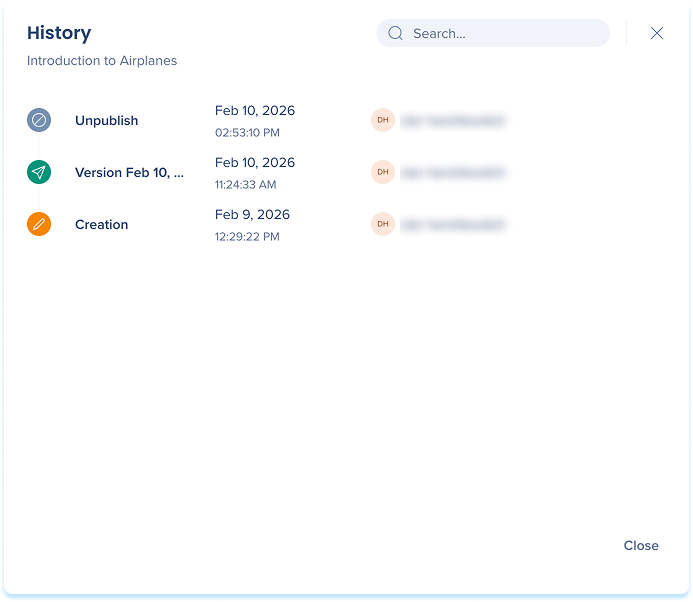
History in WalkMe Learning Arc
Publish content
-
Click the Options menu in the top-right corner
-
Select Publish
- Review course details:
- Click Edit cover to update title, description, or image
- Click Preview to see how learners will experience it
- Select Show History to review past versions (optional)
- Select Activate in-app distribution when item is published to make the content available in-app after publishing (optional)
- Click Publish

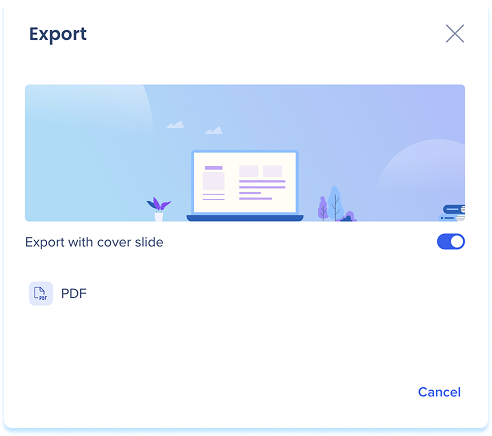
Export content
- Click the Options menu in the top-right corner
- Select Export
- Choose your preferred file format
Note
Exported files are editable.
Preview content
Previewing lets you view your course or lesson as learners see it.
-
Click Preview
-
A preview popup will open, showing the learner-facing version of your content

2. Elements panel
Each course or lesson can include a mix of elements. Drag and drop different content types to add explanations, examples, or practice activities.
Available elements:
-
Text: Add written content to explain ideas, give instructions, or provide context
-
Image: Upload or insert an image to visually support your message
-
Video: Use the video element to record yourself and delivercontent in a more dynamic way
-
Screen Recording: Show a step-by-step recording of a process or workflow
-
Embedded Content: Insert external resources, such as websites, apps, or tools, directly into your lesson
-
Simulation: Let users practice a process in an interactive, guided environment
-
Self Check: Add a short quiz-style question to help users test their understanding
-
Attachment: Provide downloadable files like PDFs or guides
Learn more: Elements in WalkMe Digital Learning
3. Layers panel
The layers panel appears as a side drawer and displays the structure of your learning content. It helps you navigate and manage lessons and elements.
Note
The panel differs depending on the learning content type.

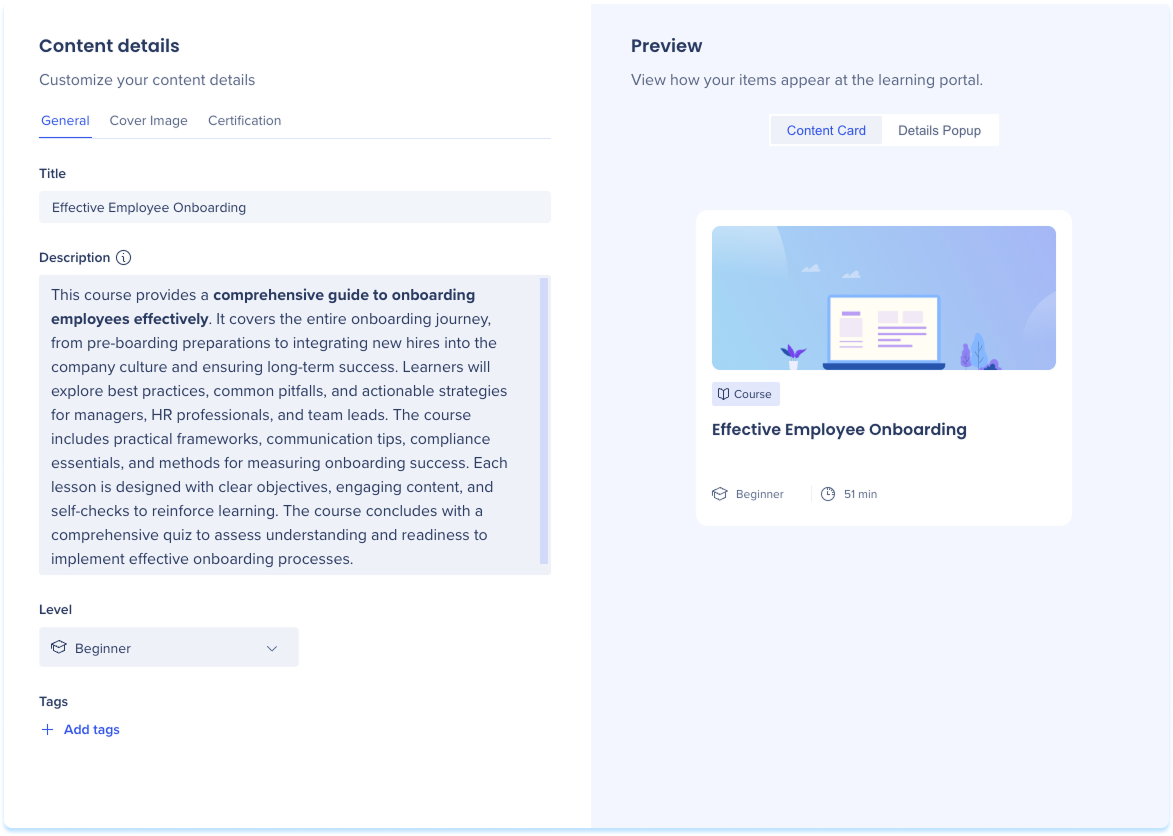
Content details
Content details control what learners see in the portal.
- In the course outline panel, select Content details
- The Content details section includes the following tabs
- General
- Cover image
- Certifications
General
Use the General tab to define core information for the learning content
- Select the General tab
- Update the fields:
- Title: The name of the learning content
- Description: Introduce key concepts, explain fundamentals, and outline what learners will gain
- Level: Beginner, Intermediate, or Advanced
- Tags: Keywords used to organize and surface the learning content
Tip
Use the Preview panel on the right to review how the content appears to learners. Switch between Content Card and Details Popup to see both views.
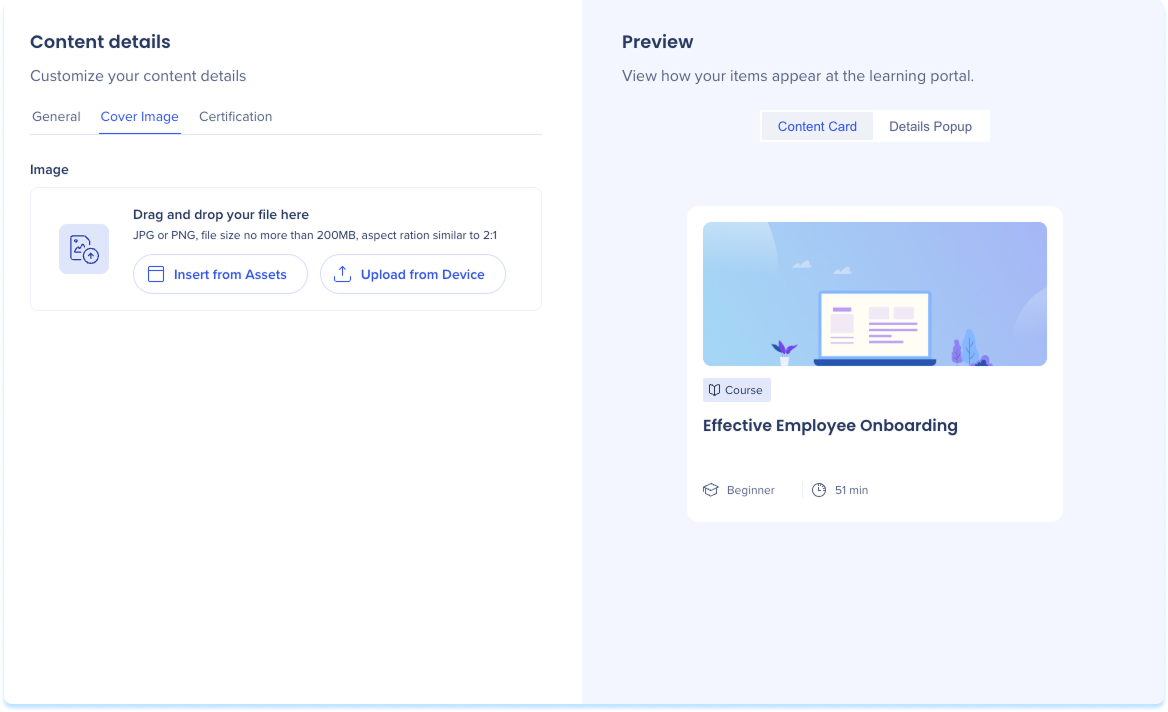
Cover image
Use the Cover image tab to manage the image displayed on the content card.
- Select Cover image tab
- Add or update an image:
- Select Insert from Assets
- Select Upload from Device
Certifications
Configure certificates that learners receive after successfully completing the learning content.
- Select the Certifications tab
- Configure certificate settings as needed (optional)
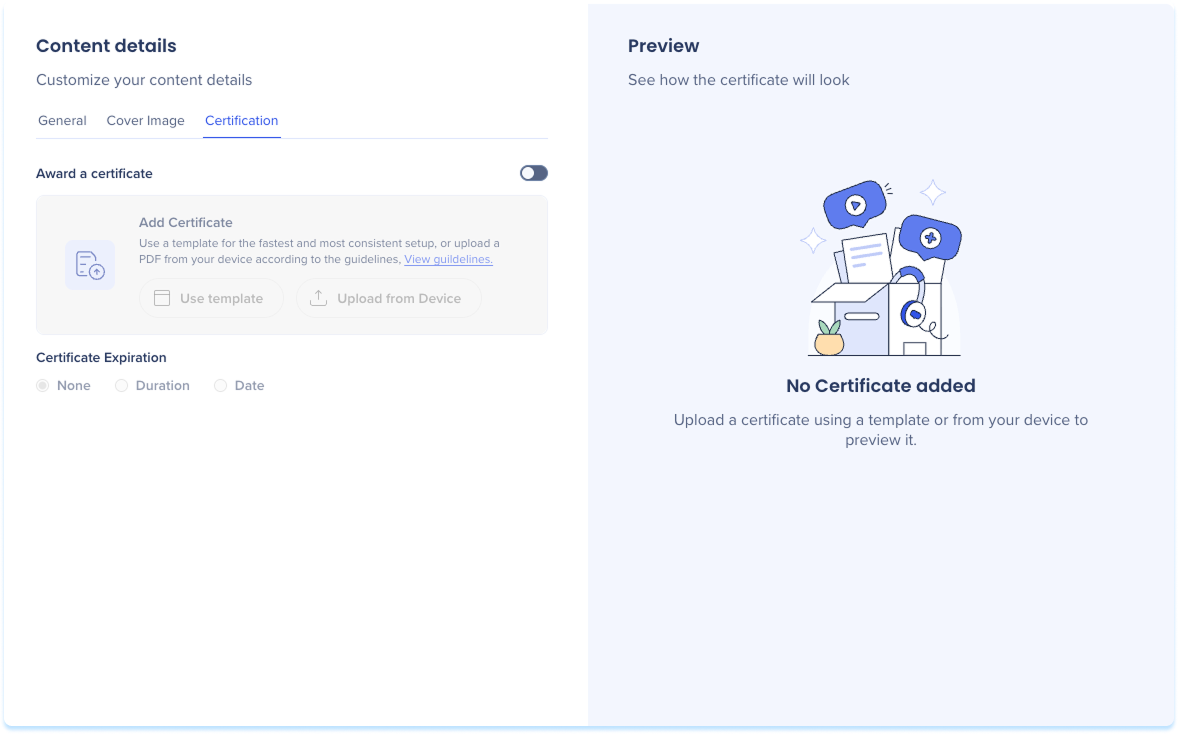
Certificates
Course layer panel
A course structure includes:
- Course cover
- Lessons
- Elements
- Quiz (optional)

Lessons
To add a lesson:
- Click the + button at the bottom of the panel
- Select Add Lesson:
- Choose Start from Scratch or Create with AI


Create with AI
- The Create a lesson with AI popup will open
- Enter a short summary of what the lesson is about
- Add instructions to guide the layout and content (optional)
- Upload files help customize the content (optional)
- Uploaded files can be used as references for AI or included directly in the course
- Click Create Lesson Outline

-
The lesson outline appears with suggested structure.
-
Click Create Lesson to add the generated lesson to the builder

8. You can edit, rearrange, or remove any part of the generated content
Lesson actions:
- Hover over a lesson row to Duplicate or Delete
- Drag lessons to reorder


Elements
Lessons can contain multiple elements.
To view elements:
- Click the dropdown arrow next to a lesson
To manage elements:
- Hover over the element row
- Open the Options menu and choose Duplicate, Hide, or Delete

- Drag elements within or between lessons as needed


Quiz
Quizzes let you create assessments to test knowledge, reinforce learning, and provide feedback directly in the learning flow
To add a quiz:
- Click the + button at the bottom of the panel
- Select Add Quiz
Quizzes in WalkMe Learning Arc

Microlearning layers panel
A Micrelearnings structure contains:

4. Main canvas
The main canvas is where you build and arrange your learning content. When you create a course or microlearning from scratch, the canvas opens in its default state.
Default state includes:
-
Lesson title: A placeholder text field to enter the lesson title
-
Image area: Upload from your device or insert from assets
-
Content space: A blank area to add text
-
+ Add Element: Click to insert elements
Elements in WalkMe Learning Arc

Tip Tuesday Video
Authoring Content in Learning Arc
Technical Notes


