Upcoming End of Life (EOL)
The WalkMe for Desktop Menu OpenAI Integration will reach EOL and be removed in the Winter '26 release in Q1 2026.
Brief Overview
Say Hello to Your New Productivity Partner: OpenAI in the desktop menu!
This powerful collaboration enhances your experience with three key features: a
- QuickSync: Offers a concise summary of search results that includes an Ask the AI for deeper exploration
- Auto-correct: Search results auto-correct eliminates the need for precise spelling.
- ChatGPT: This widget offers interactive and dynamic conversations with realistic and contextual responses.
Set up this integration on the Console's Integrations page for effortless knowledge retrieval.
Requires admin configuration
OpenAI requires admin configuration on the WalkMe Console before it can be added to your desktop menu. If you don't see ChatGPT or the other features as an option in your desktop menu, speak to your organization's WalkMe admin.
Subscription required
In order to access the OpenAI integration and enjoy its complete set of features, a paid subscription to OpenAI is required.
Get to Know
Integrate OpenAI into your desktop menu to get the following features:
OpenAI Enterprise search capabilities
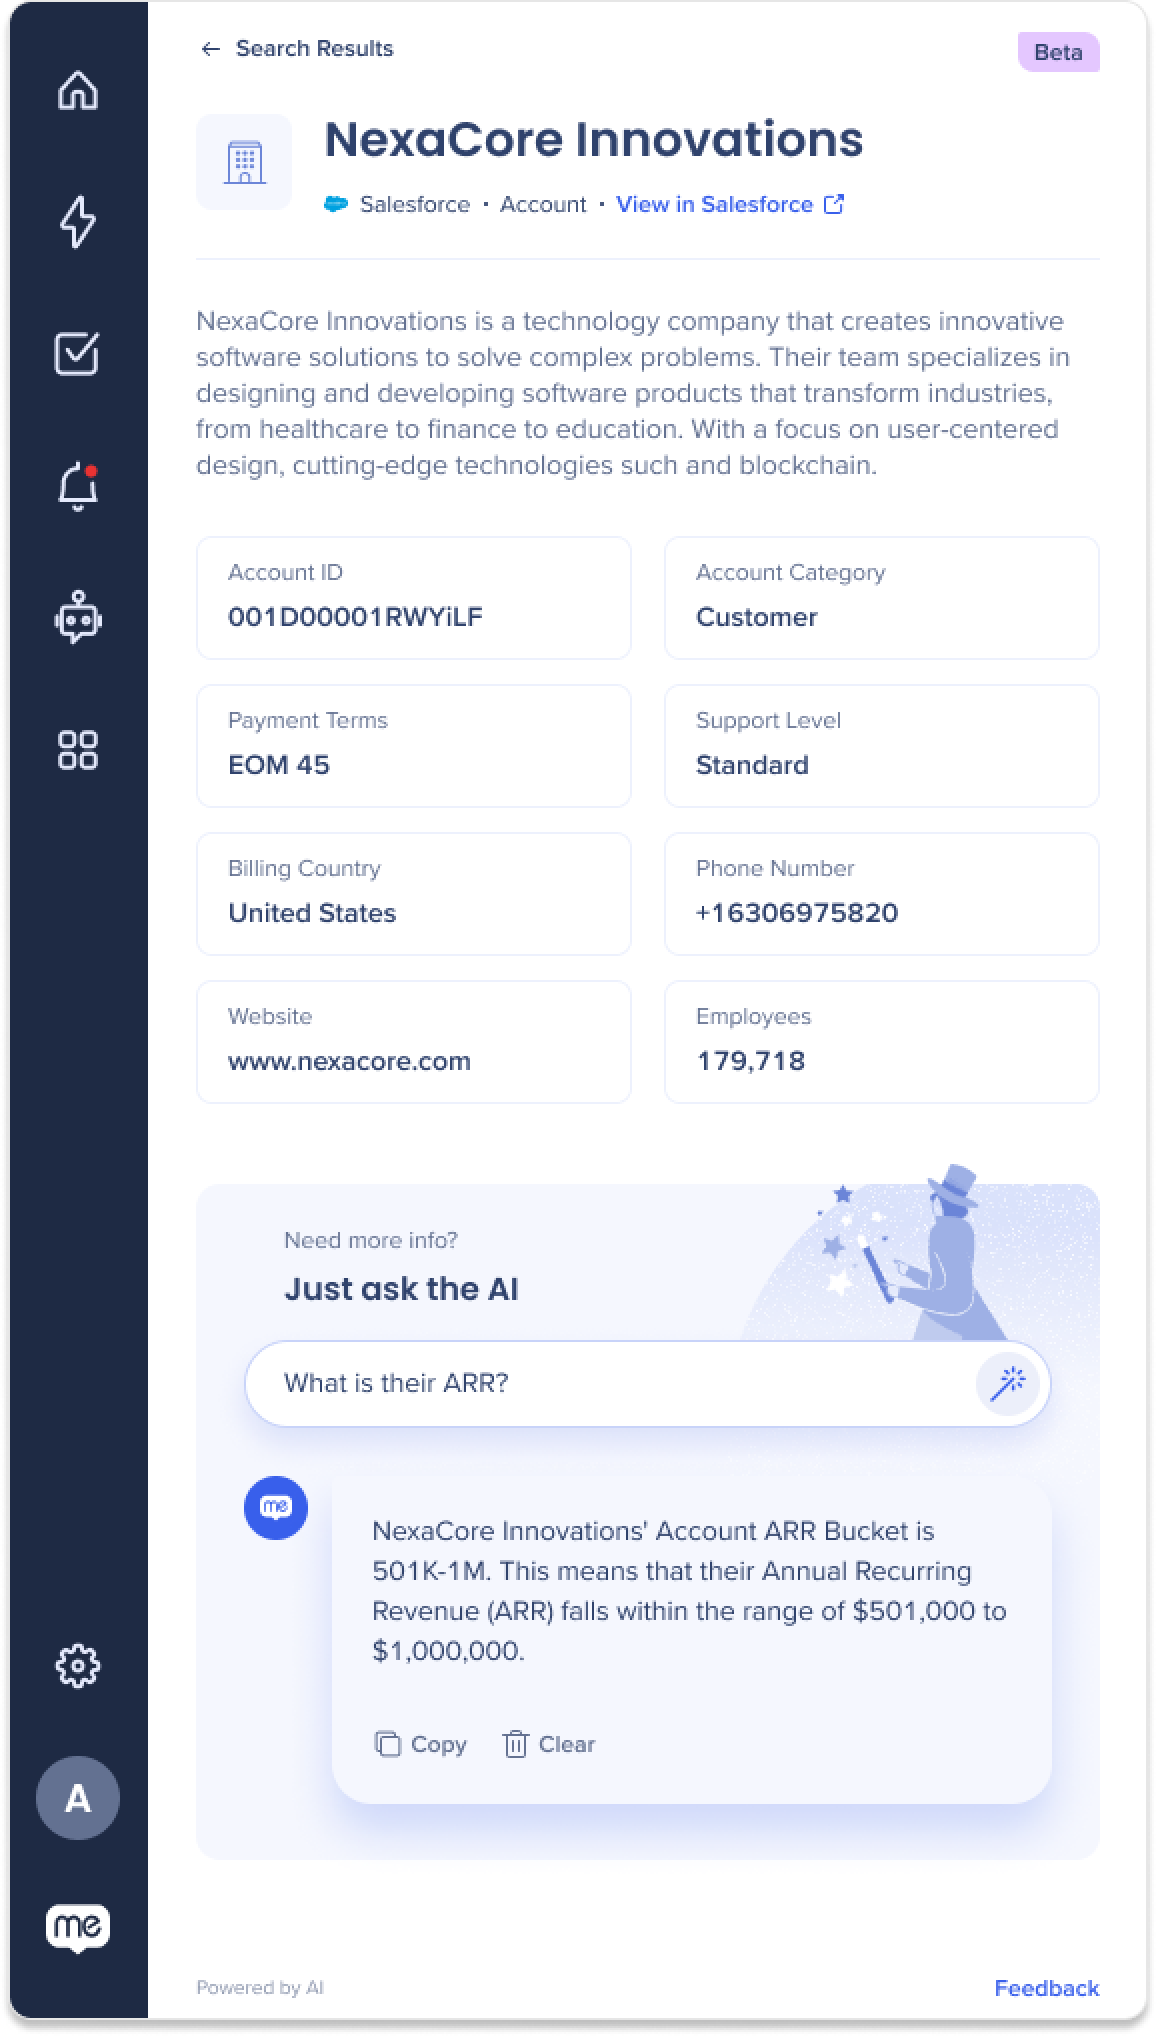
Click on the Expand button on a search result to open the QuickSync page.

It is divided into three sections, all generated using OpenAI:
- Summary: Get a concise summary of the query, providing you with a quick overview of the key details.
- Parameters: 8 fields are selected based on relevance and importance to ensure you have the info you need at a glance.
- Ask the AI: Want to dig deeper? Ask the AI anything related to the record, allowing you to retrieve specific details or explore related topics effortlessly.
QuickSync is only available for Salesforce
QuickSync capabilities are only available for Salesforce search results, for now.
Enterprise Search Auto-Correct
Users no longer need to worry about precise spelling or exact matches. Our improved search capability will intelligently understand their intent and provide the most relevant results, even if there are minor errors or misspellings in the search query.
Learn more about Enterprise Search here.
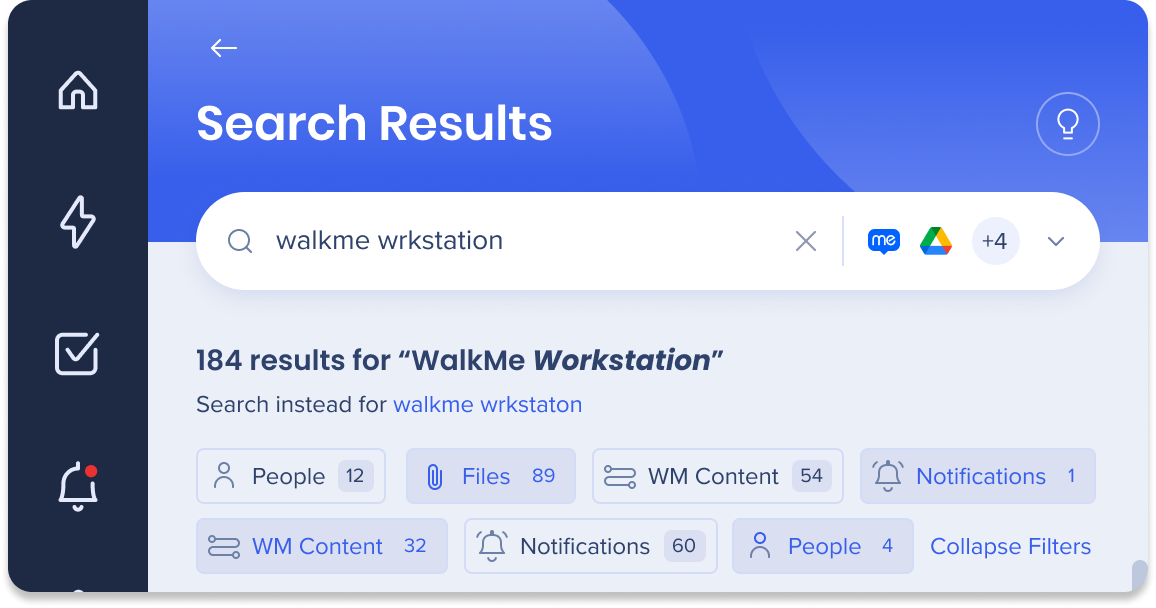
Here's how it works:
- Open-source library (non-AI): An open-source library will fix common grammar and vocabulary mistakes in search queries.
- OpenAI integration: The integration with OpenAI will take search query corrections to the next level using AI-based algorithms.
Note of the following:
- Query Length: AI correction will be applied to search queries with 10 characters or more, as longer expressions benefit more from AI improvements.
- Minimum Query Length: Both AI and non-AI corrections will be applied only if the search query has 3 characters or more.
Note on accuracy
Note that while we strive to maximize the accuracy of the query correction, it is important to understand that there may be instances where typos remain unfixed. To mitigate this, we have taken steps on our end to adjust the text before retrieving relevant information from our trusted third-party sources.
ChatGPT
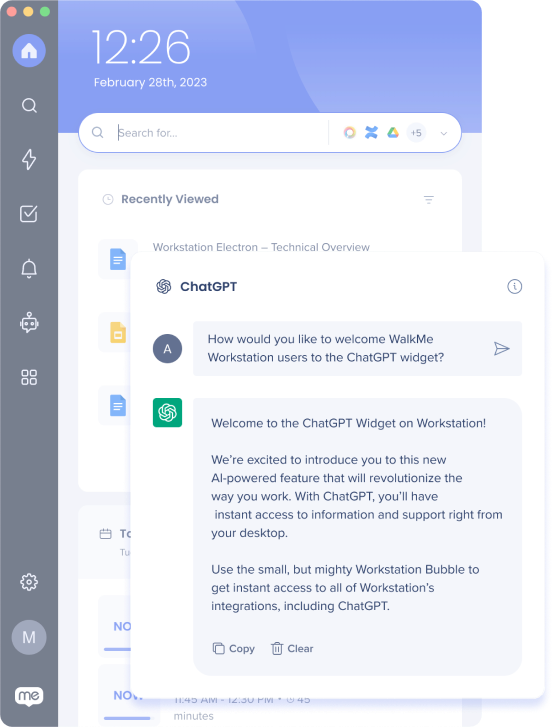
Interact with ChatGPT directly from the desktop menu! Send an input to the ChatGPT powerful language model to generate a human-like text in response.
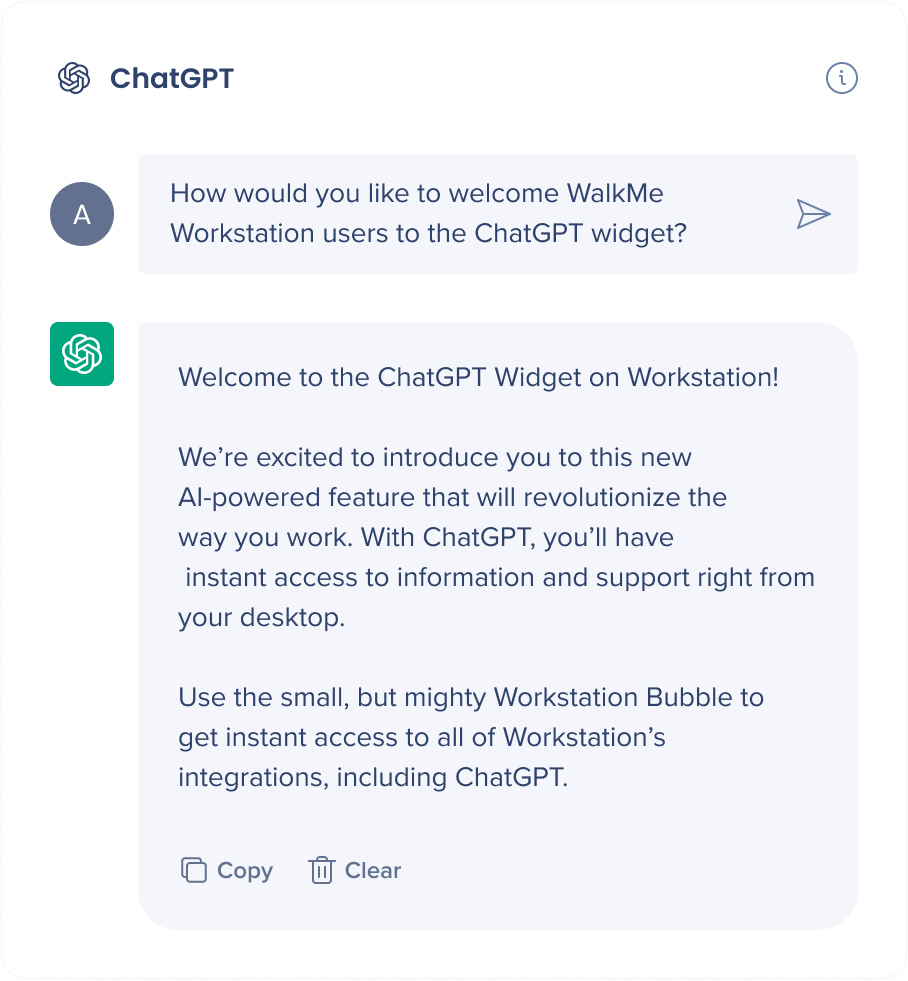
Here's what you can do with ChatGPT's responses from the desktop menu:
- Click Copy to copy the entire response
- Click Clear to clear the chat and start over
- Right click to copy, paste, and apply text correction
- Select a portion of the response to copy
Additional Capabilities
Full Conversation
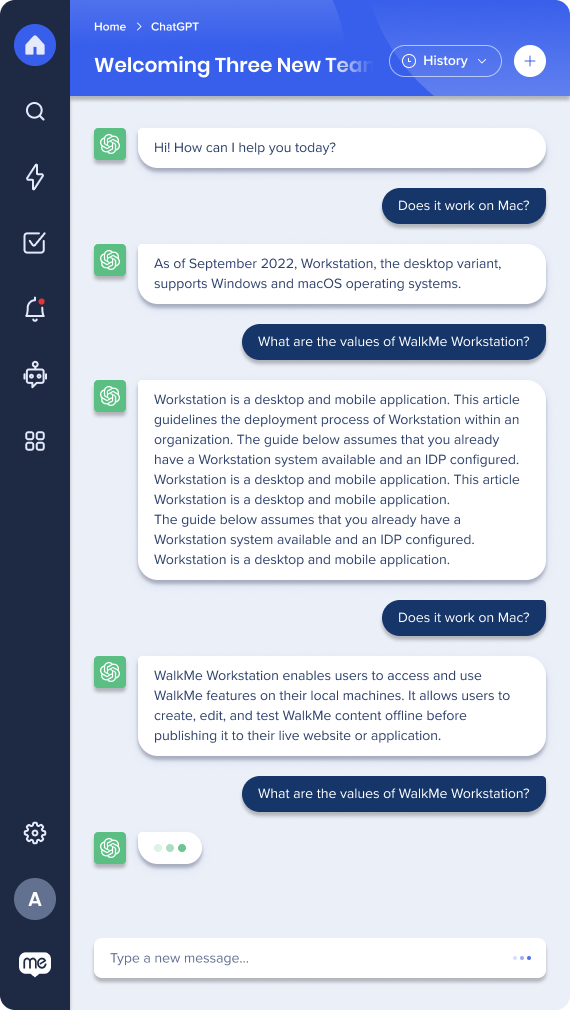
Enjoy an expanded conversation screen via the desktop menu to make having full conversations with ChatGPT more efficient and get all of your questions answered.
Click the reply button inside the chat's answer to your initial question to open a full conversation screen.
History
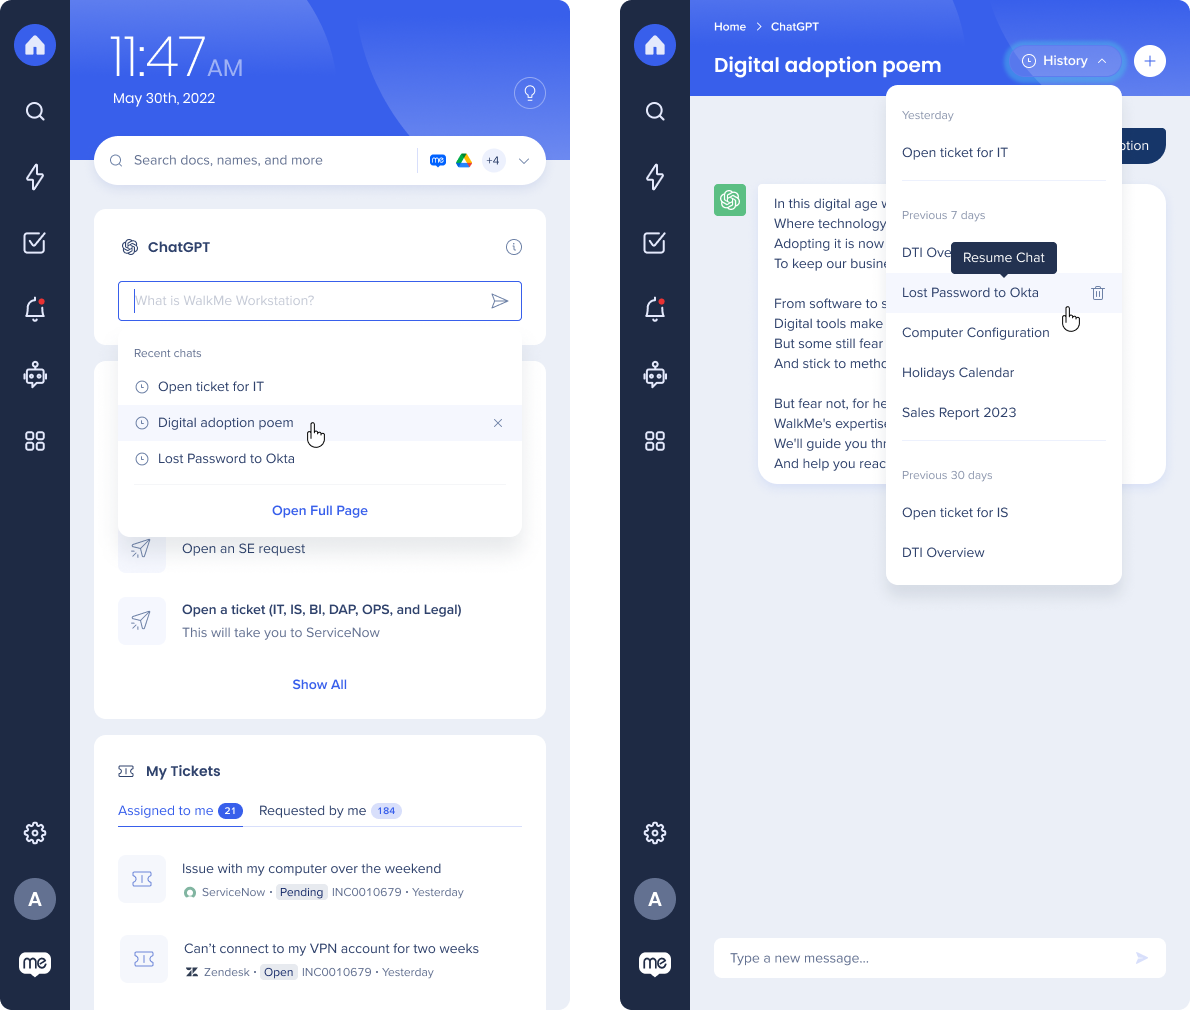
Easily access and manage your previous conversations with the History feature.
Retrieve old conversations through the query dropdown, or by clicking History in the ChatGPT full conversation expansion.
- The widget can save up to 10 conversations
- Users can delete old conversations
Permalink
Organizations can now direct their users to the desktop menu ChatGPT page instead of the public ChatGPT. This means that you can now have a more secure and controlled environment for your team to communicate and collaborate without the risk of public access.
Link: walkme-workstation://{{systemGUID}}/page?p=chatgpt
Add ChatGPT
To add the ChatGPT widget, click the Settings icon in your desktop menu navbar and go to the Integrations tab. Then, click Connect next to ChatGPT.
Security Overview
Read more about menu's integration security and menu's Enterprise Search.
Admin Configuration
The OpenAI integration is configured by an API key by the organization's admin on the Console. Once it's been configured and enabled, it will automatically be added to the menus on that system.
OpenAI can be integrated using OpenAI directly, or you can integrate to OpenAI via Azure or Mulesoft.
- Microsoft Azure is a cloud computing platform that provides cloud-based services for building, deploying, and managing applications and services through Microsoft-managed data centers
-
Mulesoft is a middleware platform designed to facilitate communication and data sharing between diverse software applications. This integration offers numerous benefits, including streamlined standardization, increased scalability, and enhanced security
Click to read more about the different configurations....
- Access and Authentication:
- OpenAI: When integrating directly with the OpenAI API, you interact with the API endpoints provided by OpenAI directly. This involves obtaining an API key from OpenAI and using it for authentication in your API requests.
- Azure: Integrating via Azure means leveraging Azure's services and infrastructure to access the OpenAI API. Azure provides its own set of tools and authentication mechanisms to manage access to the API.
- Platform and Tools:
- OpenAI: Integrating directly with the OpenAI API allows you to work directly with OpenAI's API documentation, SDKs, and code samples. You have direct control over the implementation details and can choose the programming language and tools that best suit your needs.
- Azure: Integrating with OpenAI via Azure involves utilizing Azure's platform and tools for managing resources, deploying applications, and interacting with the OpenAI API. You may need to use Azure-specific libraries, services, or interfaces for integration.
- Additional Services and Management:
- Azure: Integrating with OpenAI via Azure gives you access to additional services and features provided by the Azure platform. This includes capabilities such as Azure Functions for serverless computing, Azure Machine Learning for model training and deployment, Azure Cognitive Services for advanced AI capabilities, and more. Azure provides a comprehensive suite of tools for managing and monitoring your applications, scaling resources, and handling infrastructure aspects.
- Pricing and Billing: The pricing structure and billing details may vary between integrating directly with OpenAI and integrating via Azure.
- OpenAI: When integrating directly with OpenAI, you typically pay for the usage of OpenAI API resources directly through OpenAI's pricing plans.
- Azure: When integrating via Azure, you may have additional cost considerations related to Azure's pricing model, including compute resources, storage, network usage, and Azure-specific services you utilize in conjunction with the OpenAI API.
Read more about Azures OpenAI service on Microsoft's Knowledge Base.
Enable and disable OpenAI features
Admins can choose which OpenAI features to include in your organization's menuss. The toggles appear in the console in the configuration set up pop-up.
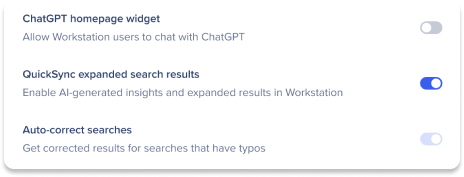
Toggles have three states:
| Toggle state |
Meaning |
| Off |
Admin turned the toggle off. When a toggle is off, that feature won't be available in the organization's menus. You can turn a toggle off anytime. |
| Of |
Admin turned the toggle on. When the toggle on, that feature is available in the organization's menus. You can turn a toggle on anytime. |
| Disabled |
A toggle is disabled if the configuration setup isn't complete yet. Complete the setup to enable the toggles. |
Change the toggles anytime
If you turn a toggle off that was previously on, the feature will be removed from all menus after the next refresh. Conversely, if you turn a toggle on that was previously off, the feature will be available in all menus after the refresh.
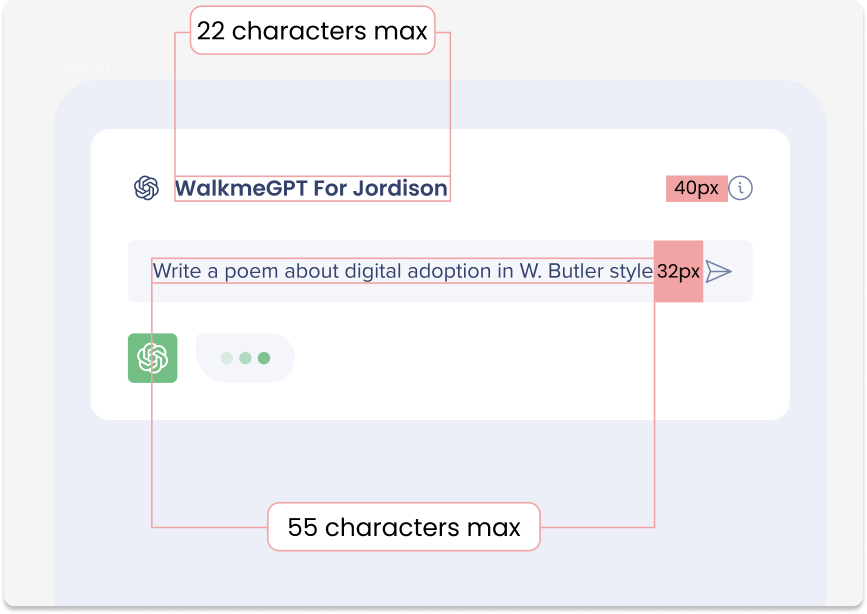
Now you can customize the ChatGPT widget title and placeholder text. Add your customized text to the following fields:
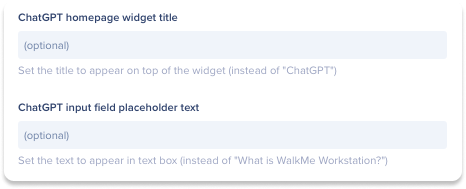
Requirements for configuration
Here are the requirements for configuring OpenAI via the WalkMe Console:
- API Key
- Completion algorithm from OpenAI / or Azure deployment name
- / or Azure embedding model name
- Azure Resource Name (required if using Azure)
- Azure API version (required if using Azure)
Use this table to determine which fields are required for each feature then follow the relevant configuration instructions to integrate OpenAI to desktop menu:
| Feature |
API Key |
Widget Completion Algorithm |
Text Completion Algorithm / Azure Deployment Name |
QuickSync Embedding Model |
Azure Resource Name / Mulesoft URL |
Azure API Version |
| ChatGPT Widget |
Required |
Required |
Required |
|
Required (Azure/Mulesoft Only) |
Required (Azure Only) |
| QuickSync |
Required |
|
Required |
Required |
Required (Azure/Mulesoft Only) |
Required (Azure Only) |
| FuzzySearch |
Required |
|
Required |
|
Required (Azure/Mulesoft Only) |
Required (Azure Only) |
Step 1: Get the API key from OpenAI
To configure the desktop menu to OpenAI, you'll need to generate an OpenAI key:
- Go to OpenAI API Keys: https://platform.openai.com/account/api-keys
- Click Create a new secret key. A popup will appear with your key.
- Copy the key that was generated and paste it somewhere safe and convenient, you'll need it later
- Tip: Go ahead and paste this into the API Key field in the OpenAI integration setup on the WalkMe Console
Step 2: Complete the setup on Console
- Go to the menu Integrations page on WalkMe Console
- Search for OpenAI
- Click Set Up
- Paste the API key from step 1 into the API key field
- Type gpt-3.5-turbo into the Completion algorithm field
- Click Save
- Now you can enable the integration, click Enable
- The ChatGPT widget will automatically be added to all of the menus on this system
Follow Microsoft's guide to learn how to create an OpenAI deployment and resource via Azure
Tip: After you've created and deployed the OpenAI model, go to the Deployment tab and copy the deployment name and embedding model and paste them into the relevant fields in the OpenAI integration setup on the WalkMe Console
- Go to the menu Integrations page on WalkMe Console
- Search for OpenAI
- Click Set Up
- Depending on which OpenAI features you want, you'll need to copy the following information from the Azure OpenAI studio:
- API key: Go to Settings->Resource, copy the key from the Key column (you may need admin permissions)
- Deployment name: Go to the Deployment tab and copy the name under the Deployment name column (we recommend using: text-davinci-003)
- Embedding model: Go to Deployment tab and copy the embedding model under the Deployment name column (we recommend using text-embedding-ada-002)
- Resource name: You can easily find this by clicking your account's icon in the top right corner -> copy what's under the Current resource.
- Azure API version: Find this by:
- From the Azure OpenAI studio, go to Playground -> Completions.
- Click View Code to open a sample code pop-up.
- Copy the value next to the openai_api_version key.
- To configure with Mulesoft, follow all the steps for Configure with OpenAI directly
- You will also need the following:
- api key
- text completion algorithm
- Mulesoft url (resource name)
Assistance with Mulesoft Configuration
We apologize for the inconvenience, but we are currently working on obtaining the step-by-step configuration process for the Mulesoft interface. To get immediate configuration help contact your CSM
Limitations
- The ChatGPT integration is only available for desktop menu Electron version 1.0 or higher
Character Limitations for Widget Customization
