Brief Overview
A CSV file connection lets you bring your own data into Smart Highlights without connecting a source application. Upload a CSV file, choose which column Smart Highlights looks for on screen, and build the highlight card from the file's columns.
Use a CSV file connection when the data you want to highlight lives outside a supported data source, such as internal terminology, product codes, or a list of records exported from another system.
New to Smart Highlights? Start here:
Smart Highlights Overview
Access
Access Smart Highlights in the console:
- Open the WalkMe Console
- US data center
- EU data center
- SAP US data center
- SAP EU data center
- Go to the Content category
- Select the Smart Highlights page
How It Works
A CSV file connection works like any other data source connection, with one difference: the card fields are mapped to columns in your file instead of fields in a live system. You upload the file, create an entity, choose a layout, and map each part of the card to a column.
CSV file requirements
Before you upload, check that your file meets the following requirements:
- Format: CSV
- File size: Up to 10MB
- Header row: The first row holds the column names. You select these names when you build the card
- One value per cell: Smart Highlights reads each cell as one value. It doesn't split values separated by special characters, such as semicolons. To show several values, put each one in its own column
- Title column: One column holds the values you want Smart Highlights to look for on screen, such as a product code or a term. Each value in that column becomes a highlight
- One row per record: Each row is one highlight card
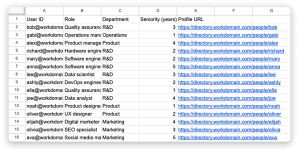
Check out CSV file examples...
Glossary layout
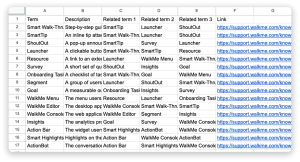 Info card layout
Connect a CSV file
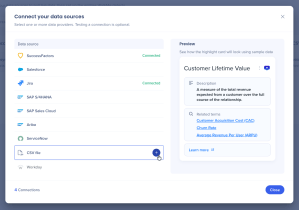
- On the Connections & Entities page, select Connect a Data Source
- In the Connect your data sources popup, select CSV file from the data source list
- Select the plus icon
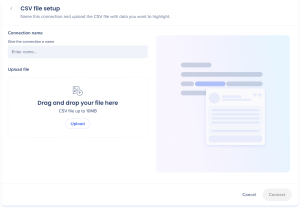
- On the CSV file setup screen, fill in the following:
- Connection name: A name for this connection, for internal use only
- Upload file: Drag and drop your CSV file, or select Upload and choose the file
- Select Connect
Your CSV file now appears as a data source on the Smart Highlights page.
Create an entity
An entity defines what gets detected on screen and what the highlight card shows.
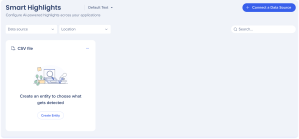
- Select Create Entity
- Enter a name for the entity, for internal use only
- Select a layout template to decide how content is arranged on the highlight card:
- Info card: Shows a record's key details as labeled fields. Best for tickets, accounts, orders, and similar records
- Glossary: Shows content sections. Best for definitions, descriptions, and internal terminology
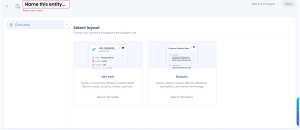
Once you select a template, you can configure the card setup.
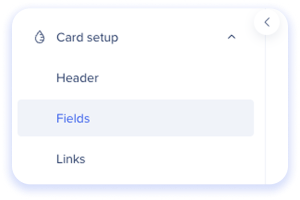 You build the card across three tabs (header, body, and links), with a live preview on the right. The preview reads data from your uploaded file, so it shows a real record instead of sample content.
Every field on the card is mapped to a column in your CSV file. Select Save when you finish, or Discard Changes to drop your edits.
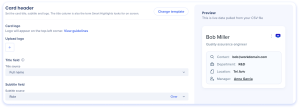
The header holds the card logo, title, and subtitle. The title column is also the term Smart Highlights looks for on screen.
- Card logo: Select the plus icon to upload a logo. Select View guidelines for the image requirements.
- Title field: Select the column that holds the values you want detected on screen
- Subtitle field: Select the column to show under the title
Body
The body settings depend on the layout template you selected.
Info card
Fields are listed one per row. For each row, set the following:
- Icon: Select the icon to show next to the field
- Field: Select the column to show
- Display name: Enter the label users see on the card

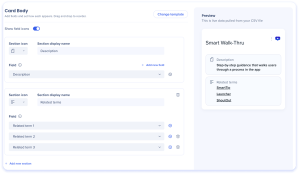
Glossary
Fields are grouped into content sections, so each section has its own heading and the content under it. For each section, set the following:
- Section icon: Select the icon for the section
- Section display name: Enter the label users see for the section
- Field: Select the column to show
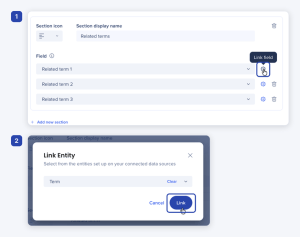
Add entity links to field items
Select the Settings icon to add entity links
- Linking a field to an entity turns its value into a link on the card
- For example, a card shows a field whose value is a term not every user knows. Link that field to the entity that defines the term, and a user selects it on the card to read the definition without leaving the page
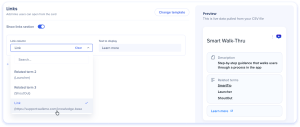
Links
Links are buttons users can open from the card, such as a link to the full record or a wiki page.
- Show links section: Turn on to show links on the card
- Link column: Select the column that holds the URL
- Text to display: Enter the label for the button, such as "Learn more"
Select Add new link to add another link.
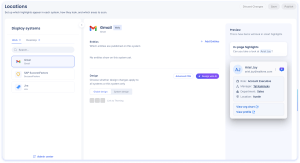
Locations and design
On the Locations page, you control where Smart Highlights appear and how the cards look:
- Which systems the highlight appears on, and the environment and segments for each system
- Whether the highlight is active
- The design of the highlight card and the highlighted text, so the card feels native to the app it appears in
The Locations page works the same way for a CSV file connection as it does for a connected data source.
Learn more:
Smart Highlights Setup in Console
Replace the CSV file
Card data comes from the uploaded file, so you update the data by uploading a new file.
- Select the Options menu on the CSV connection
- Select Edit
- Upload the updated CSV file
Technical Notes
- A CSV file can be up to 10MB
- Card data is read from the uploaded file, so it updates only when you replace the file. It doesn't refresh on its own like a connected source application
- Admin permissions are required to set up Smart Highlights in the console