How to Use the WalkMe(X) Action Bar
Brief Overview
WalkMex appears to the end users as a WalkMe widget which expands into the Action Bar, containing the pre-built prompts/actions.
This article covers the pre-built actions available in the Action Bar, bar settings, and how to create custom actions. Key topics include:
-
Menu launcher
-
Help me write
-
Reading and writing tools
-
Workflow tools
-
Creating custom actions
-
Action Bar settings
-
User onboarding
Main Features
Menu
Access to employee resources and get instant assistance with the AI Chat.
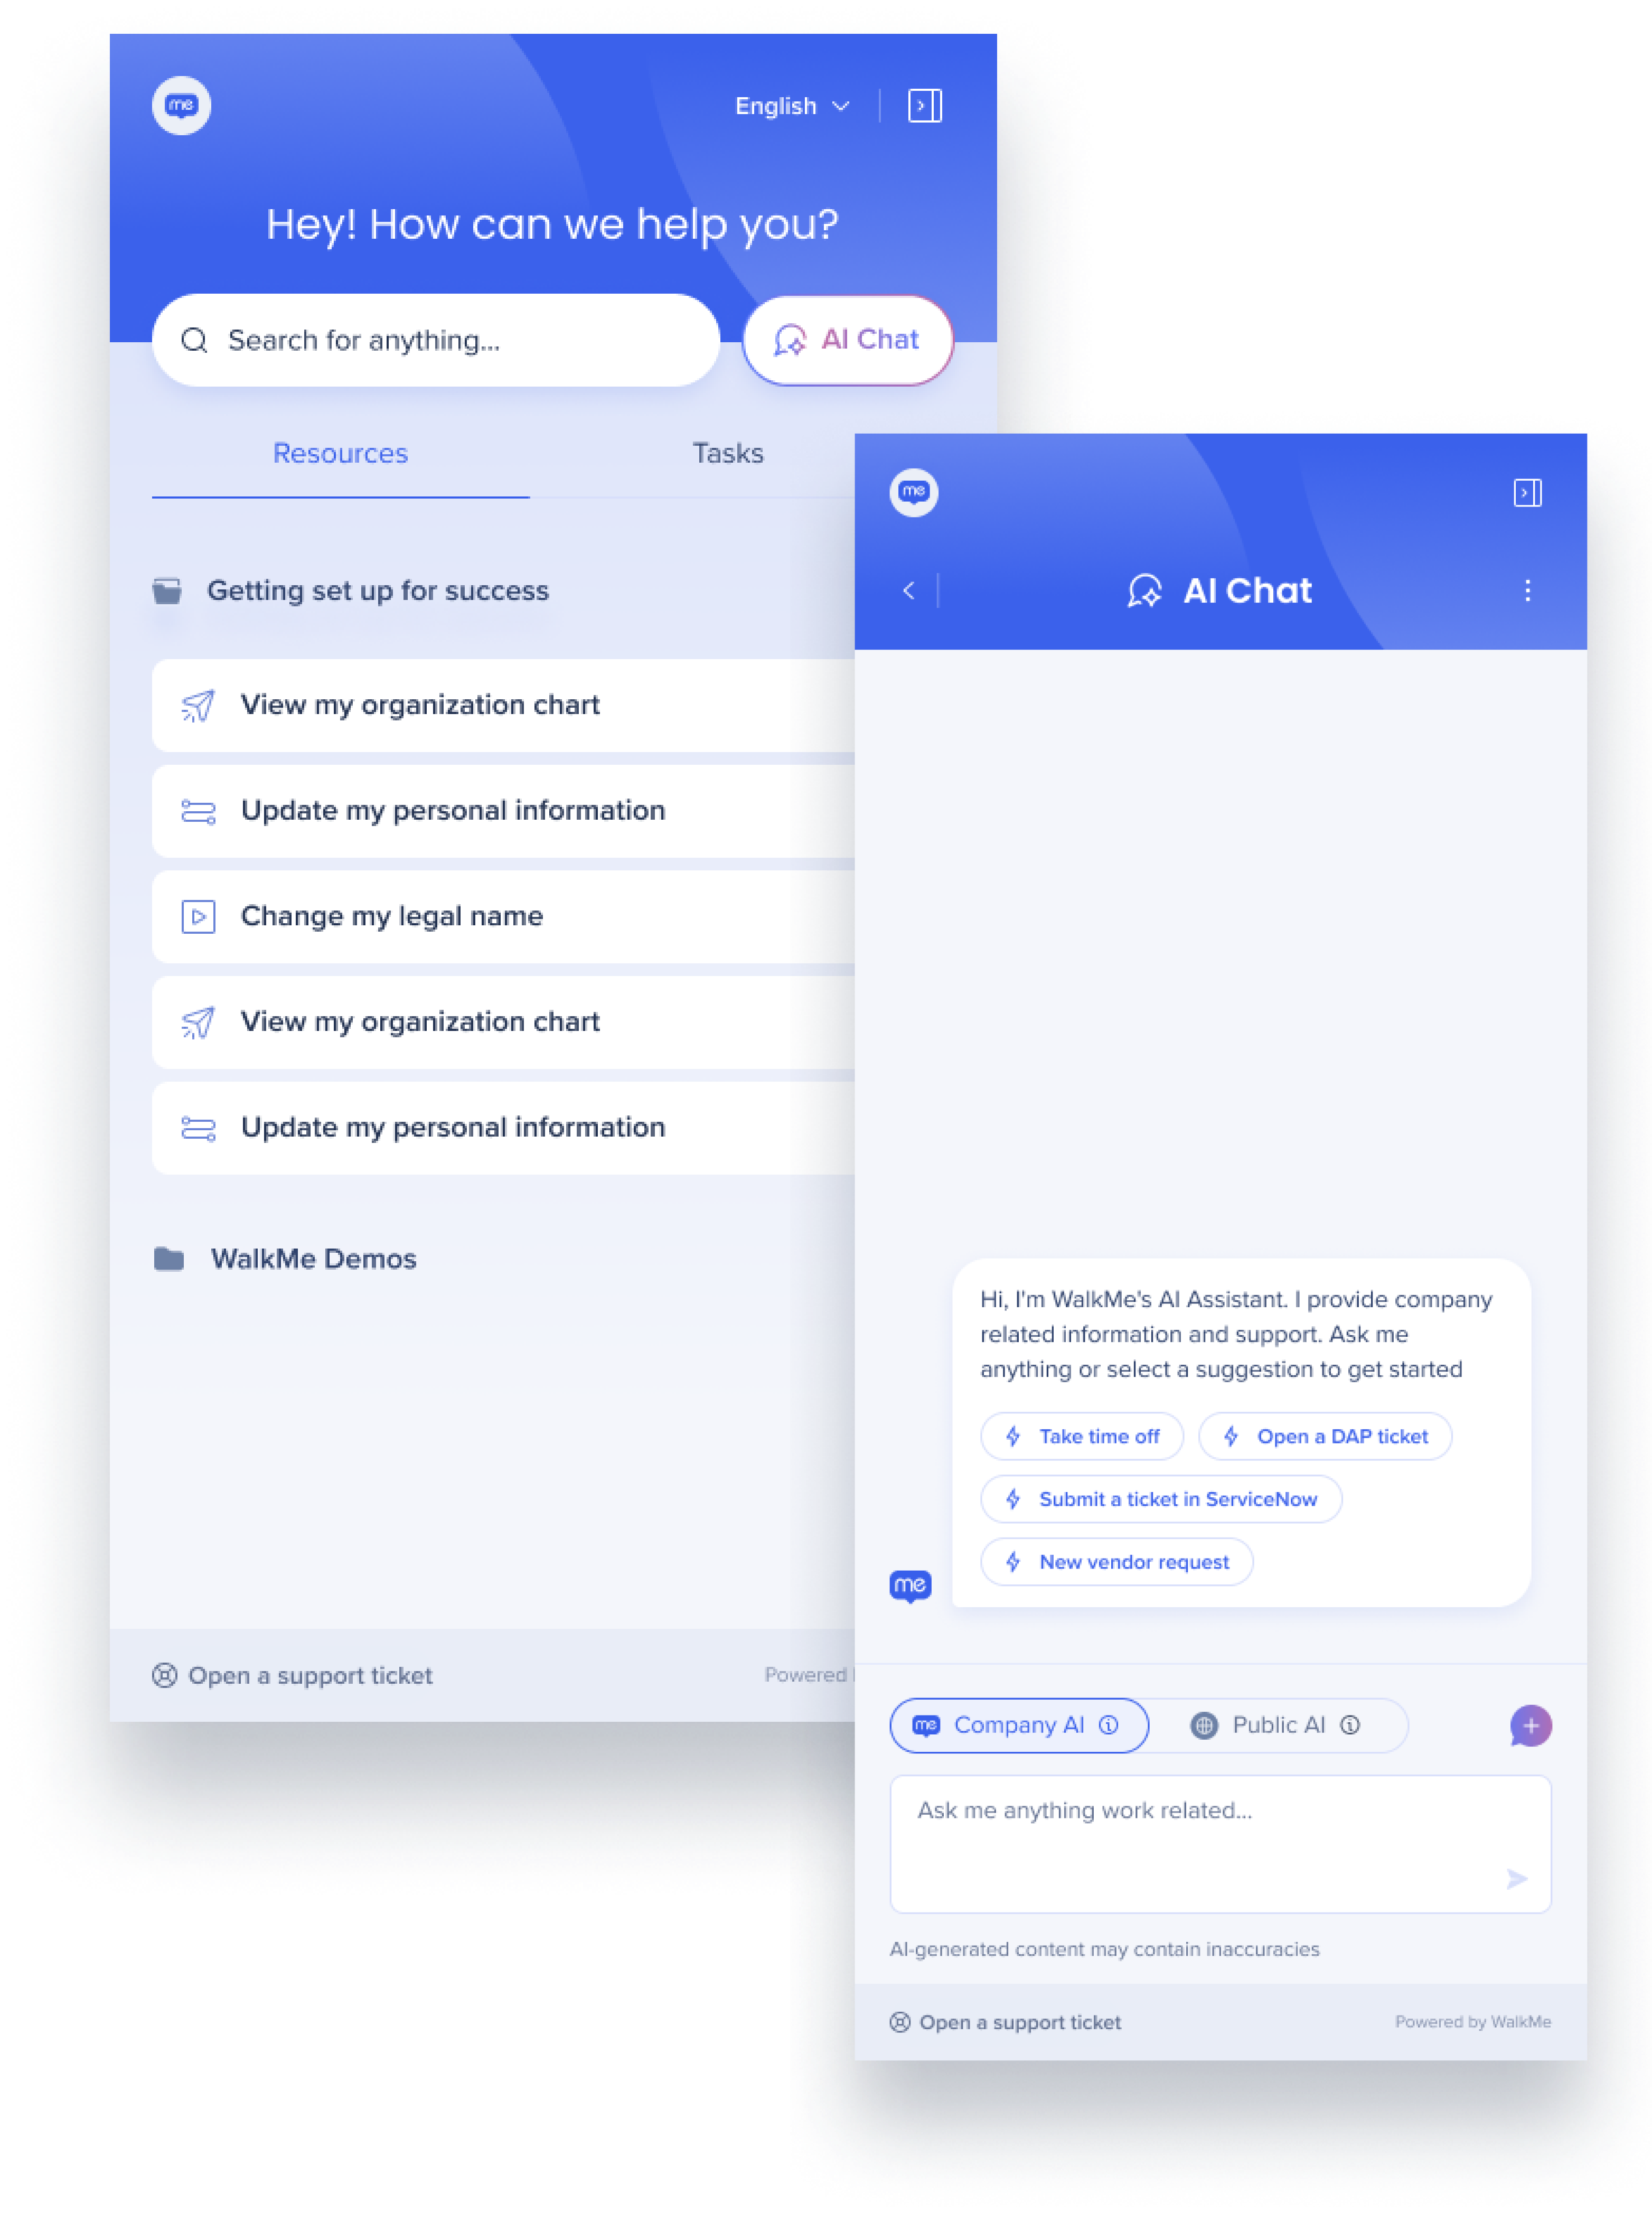
- Click the Open Menu icon
 to open the WalkMe Pro Menu and get instant answers to your questions with our conversational AI Chat.
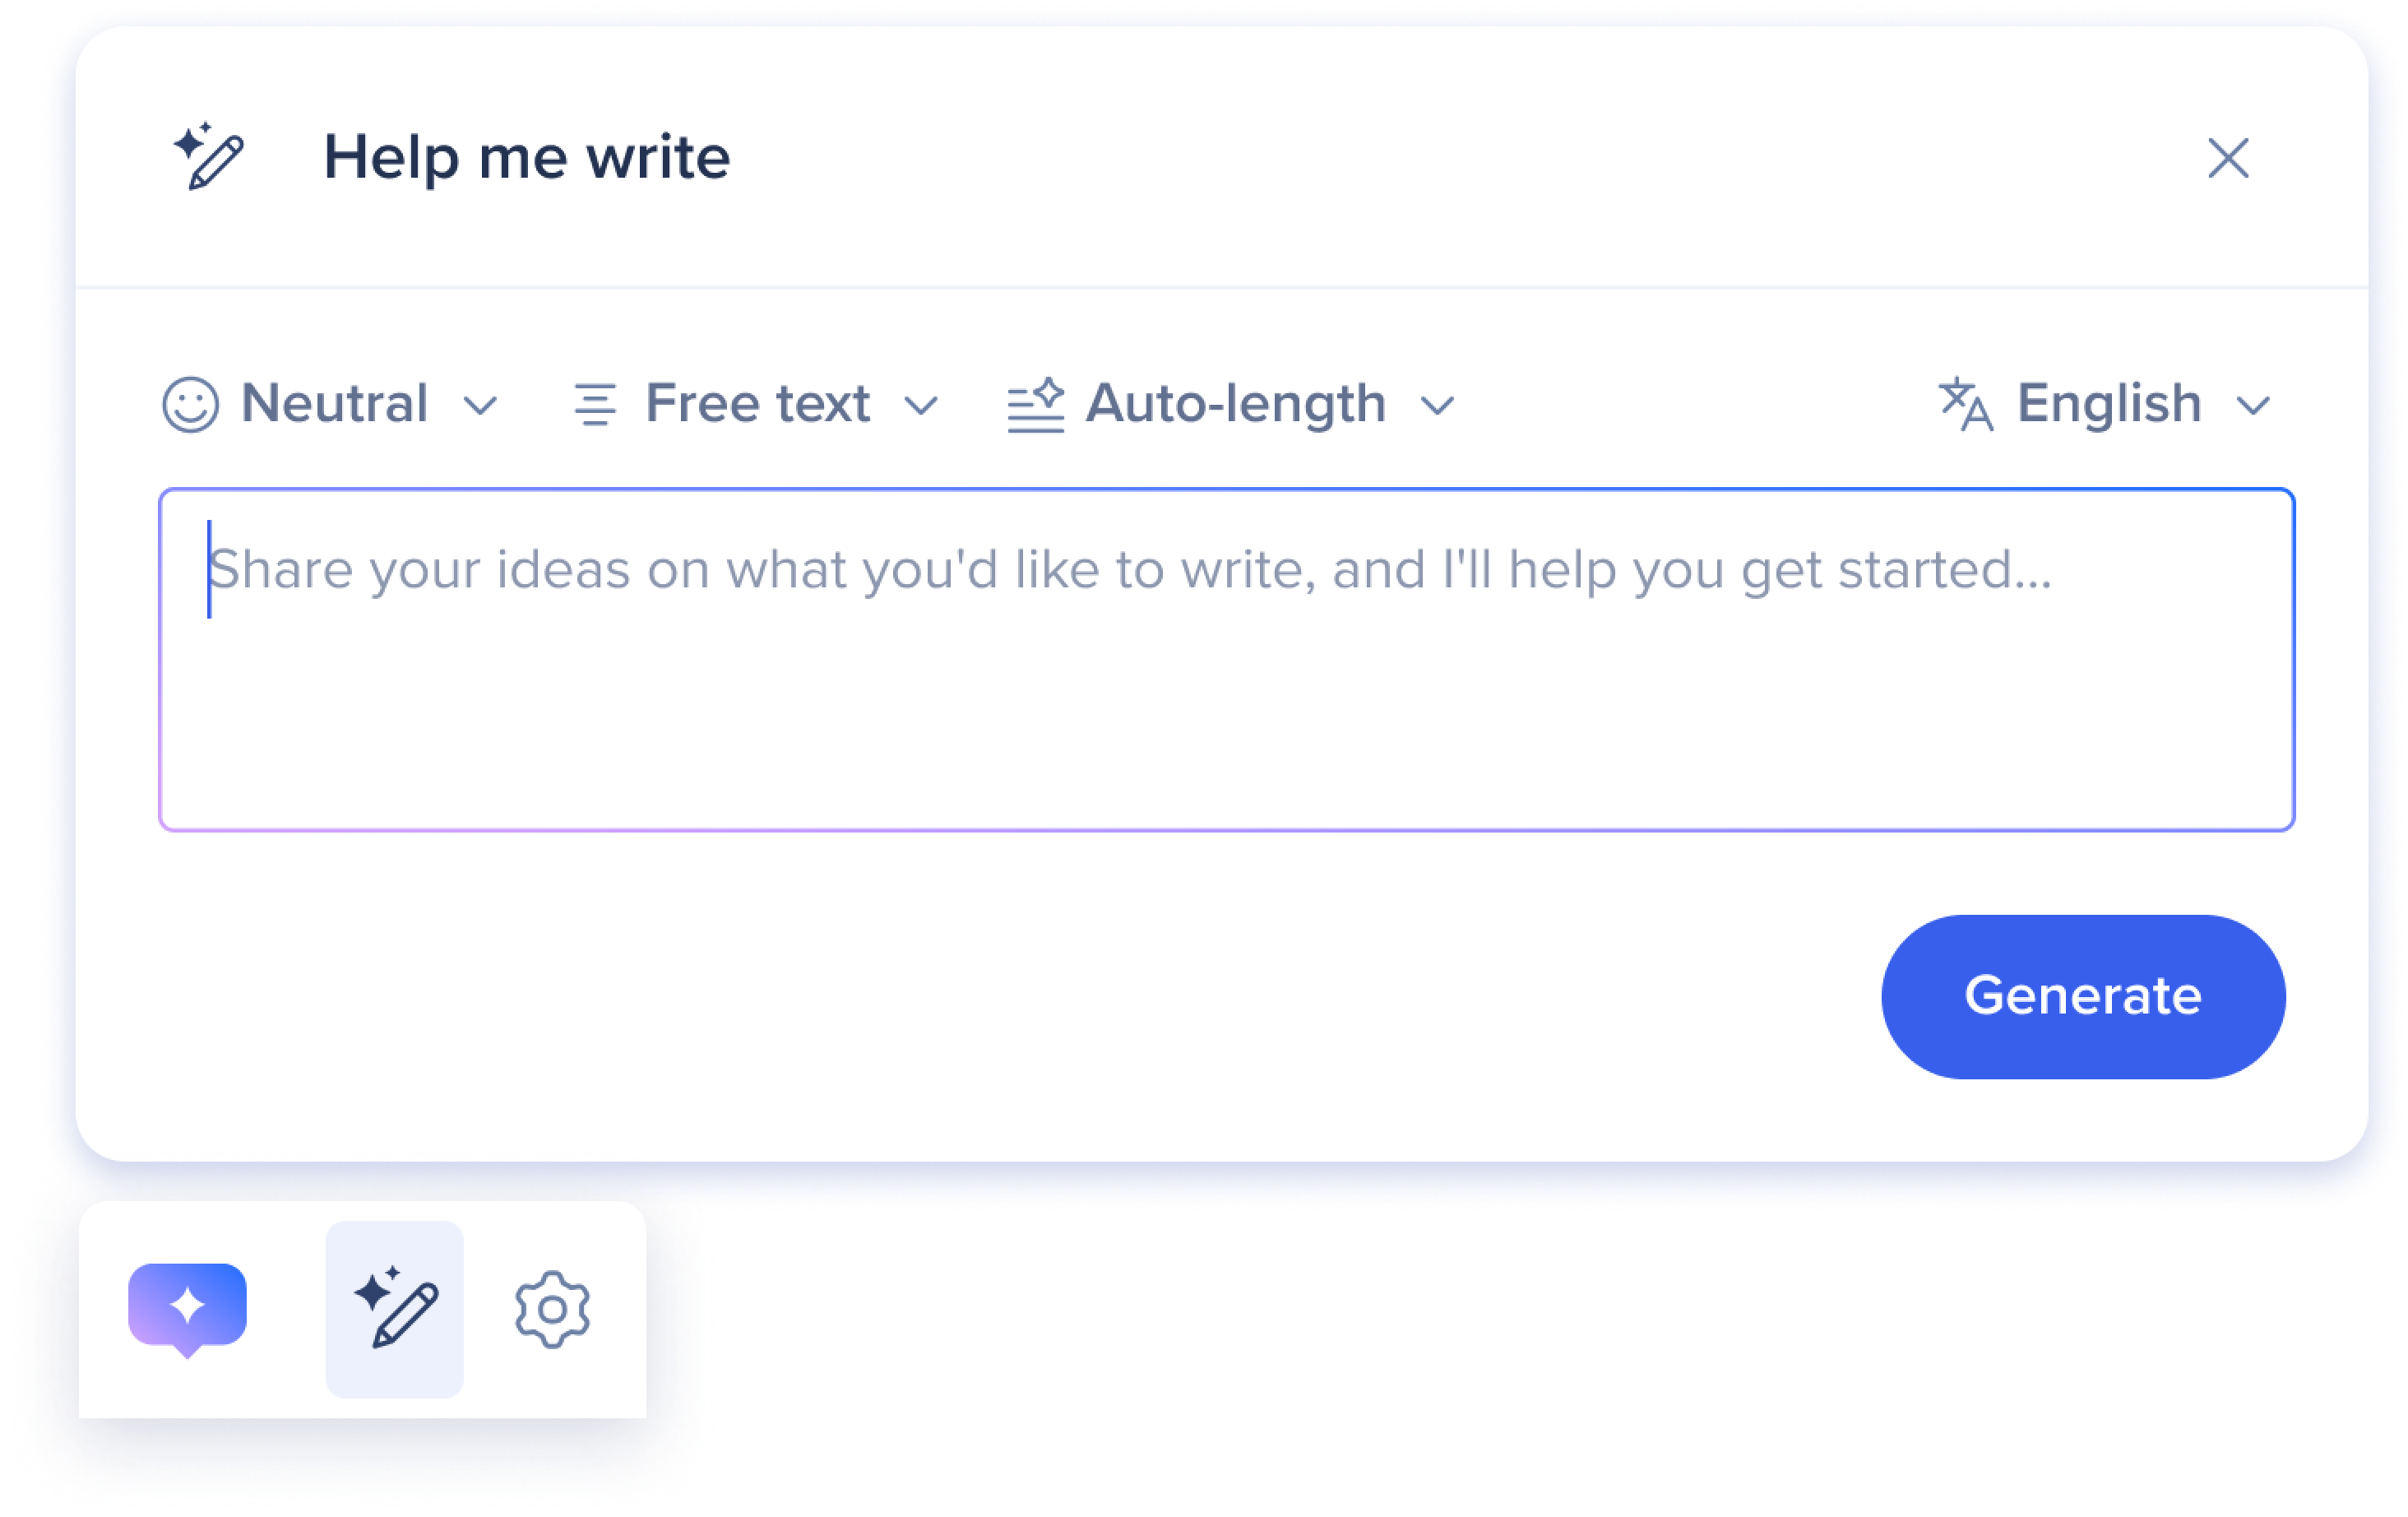
Help me write
Draft content from scratch with the help of AI.

How it works
- Click the Help me write icon

-
Enter your ideas into the field. Your input will prompt the AI to draft content
-
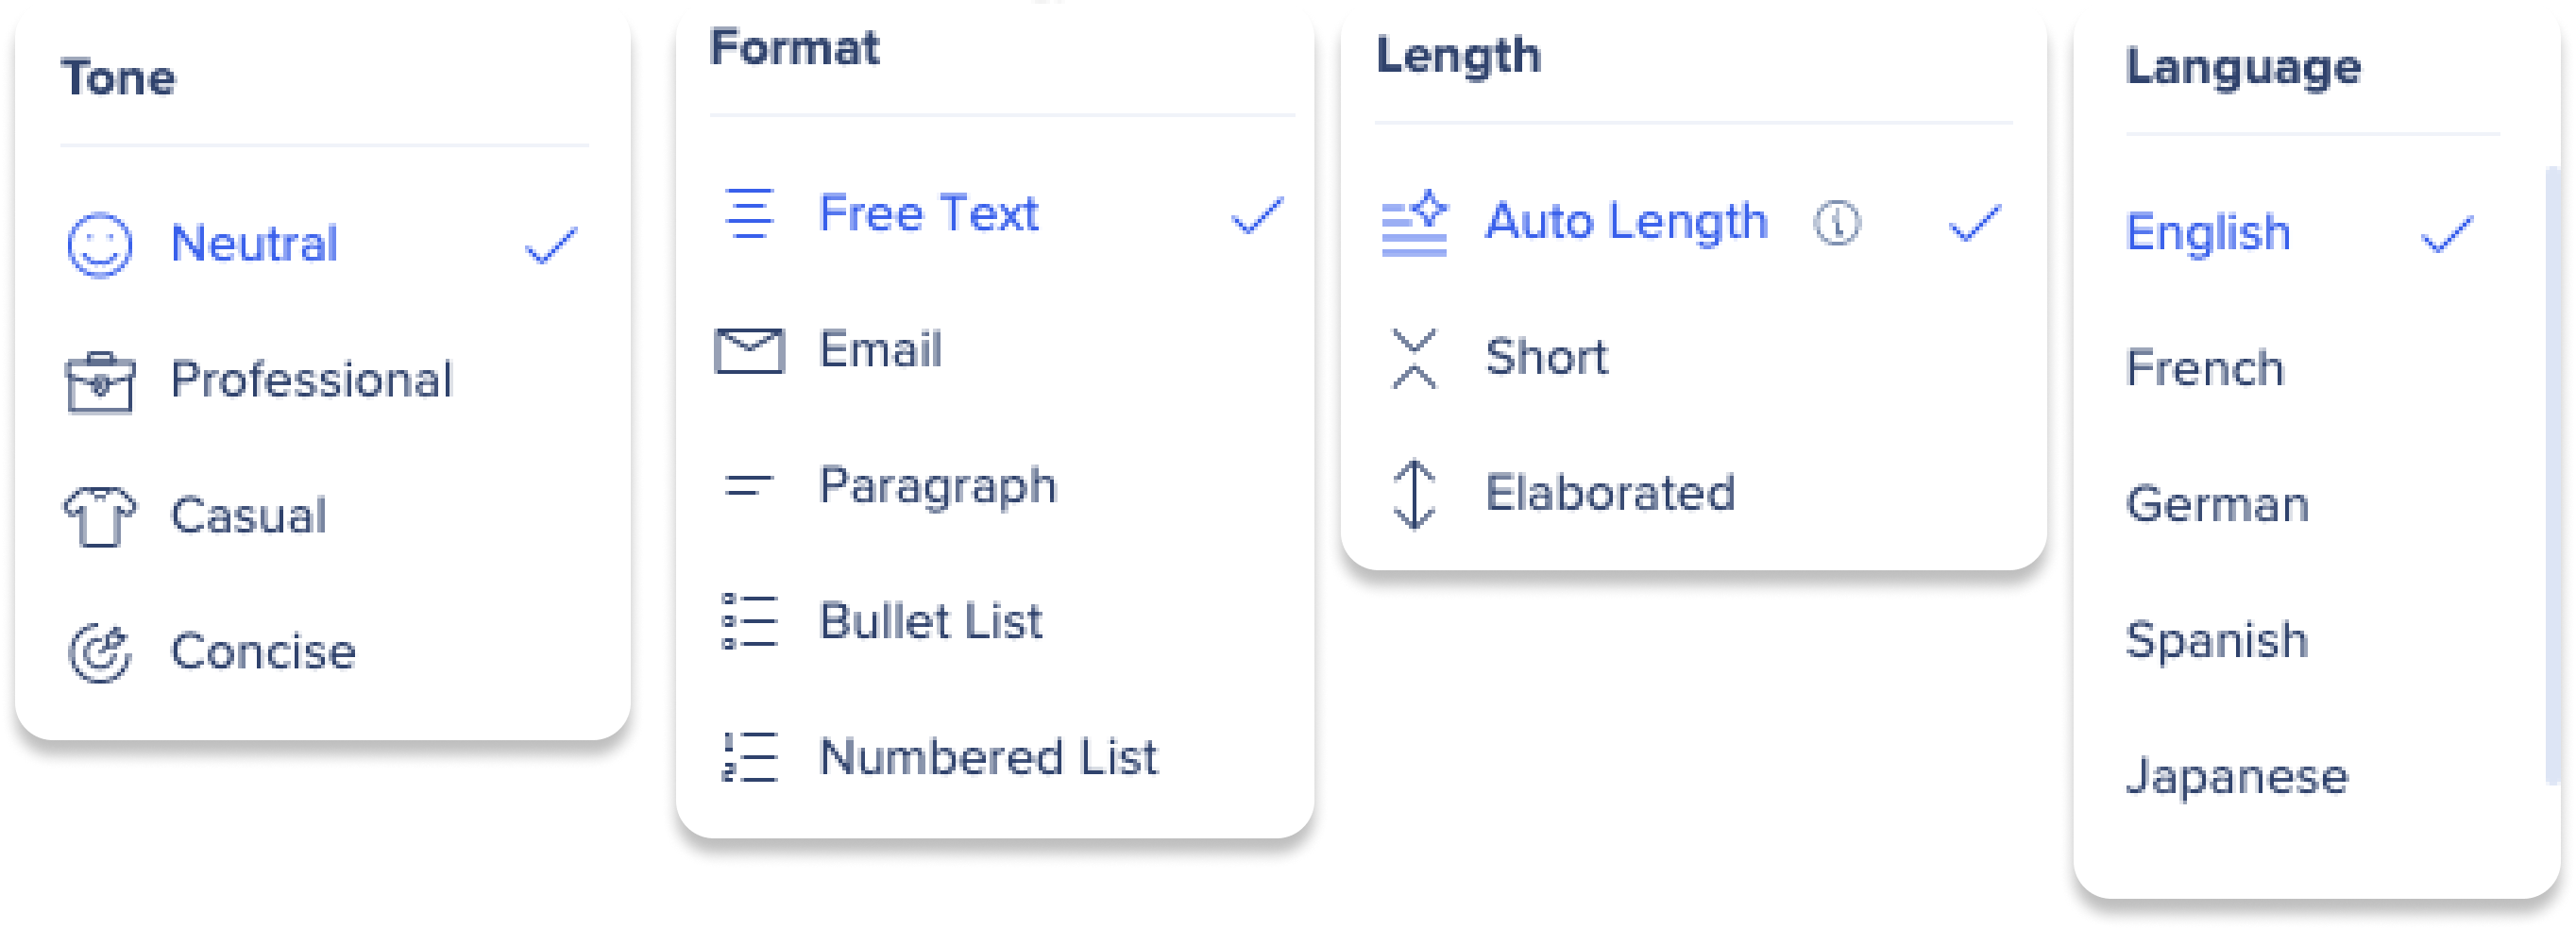
Adjust the prompt controls to refine your content:
-
Tone: Select the desired language style: neutral, professional, casual, or concise
-
Format: Select which format to present your content
-
Length: Select how long to make your content
-
Auto Length will generate an appropriate length by analyzing the user input
-
-
Language: Select the language for your content
-
- Click Generate
Included context
Inside the input field is the included context, which consists of highlighted text or content from the whole page to provide extra background information for the AI when generating new content.
-
Context can be used to rewrite highlight text, provide background information, or even ask specific questions about the text on the page
-
Click the X icon to remove the included context

After generating
Once content is generated, one of the following action buttons will appear:
-
Insert: Clicking Insert adds the text to the page

-
Insert below: After highlighting text, clicking Insert below will insert the text below the highlighted text
-
Replace: After highlighting text, clicking Replace will replace the highlighted text with AI-generated text

Additional actions
-
Copy: Click Copy to copy the AI-generated text

-
Refine: Click Refine to adjust the AI-generated text with prompt controls

-
Refine suggestions: Enter text in the Refine suggestion… field to adjust the AI-generated text with a new prompt
Highlighted text tools
Highlight text to use AI reading and writing tools, including text summarization, translation, and writing editing tools.

-
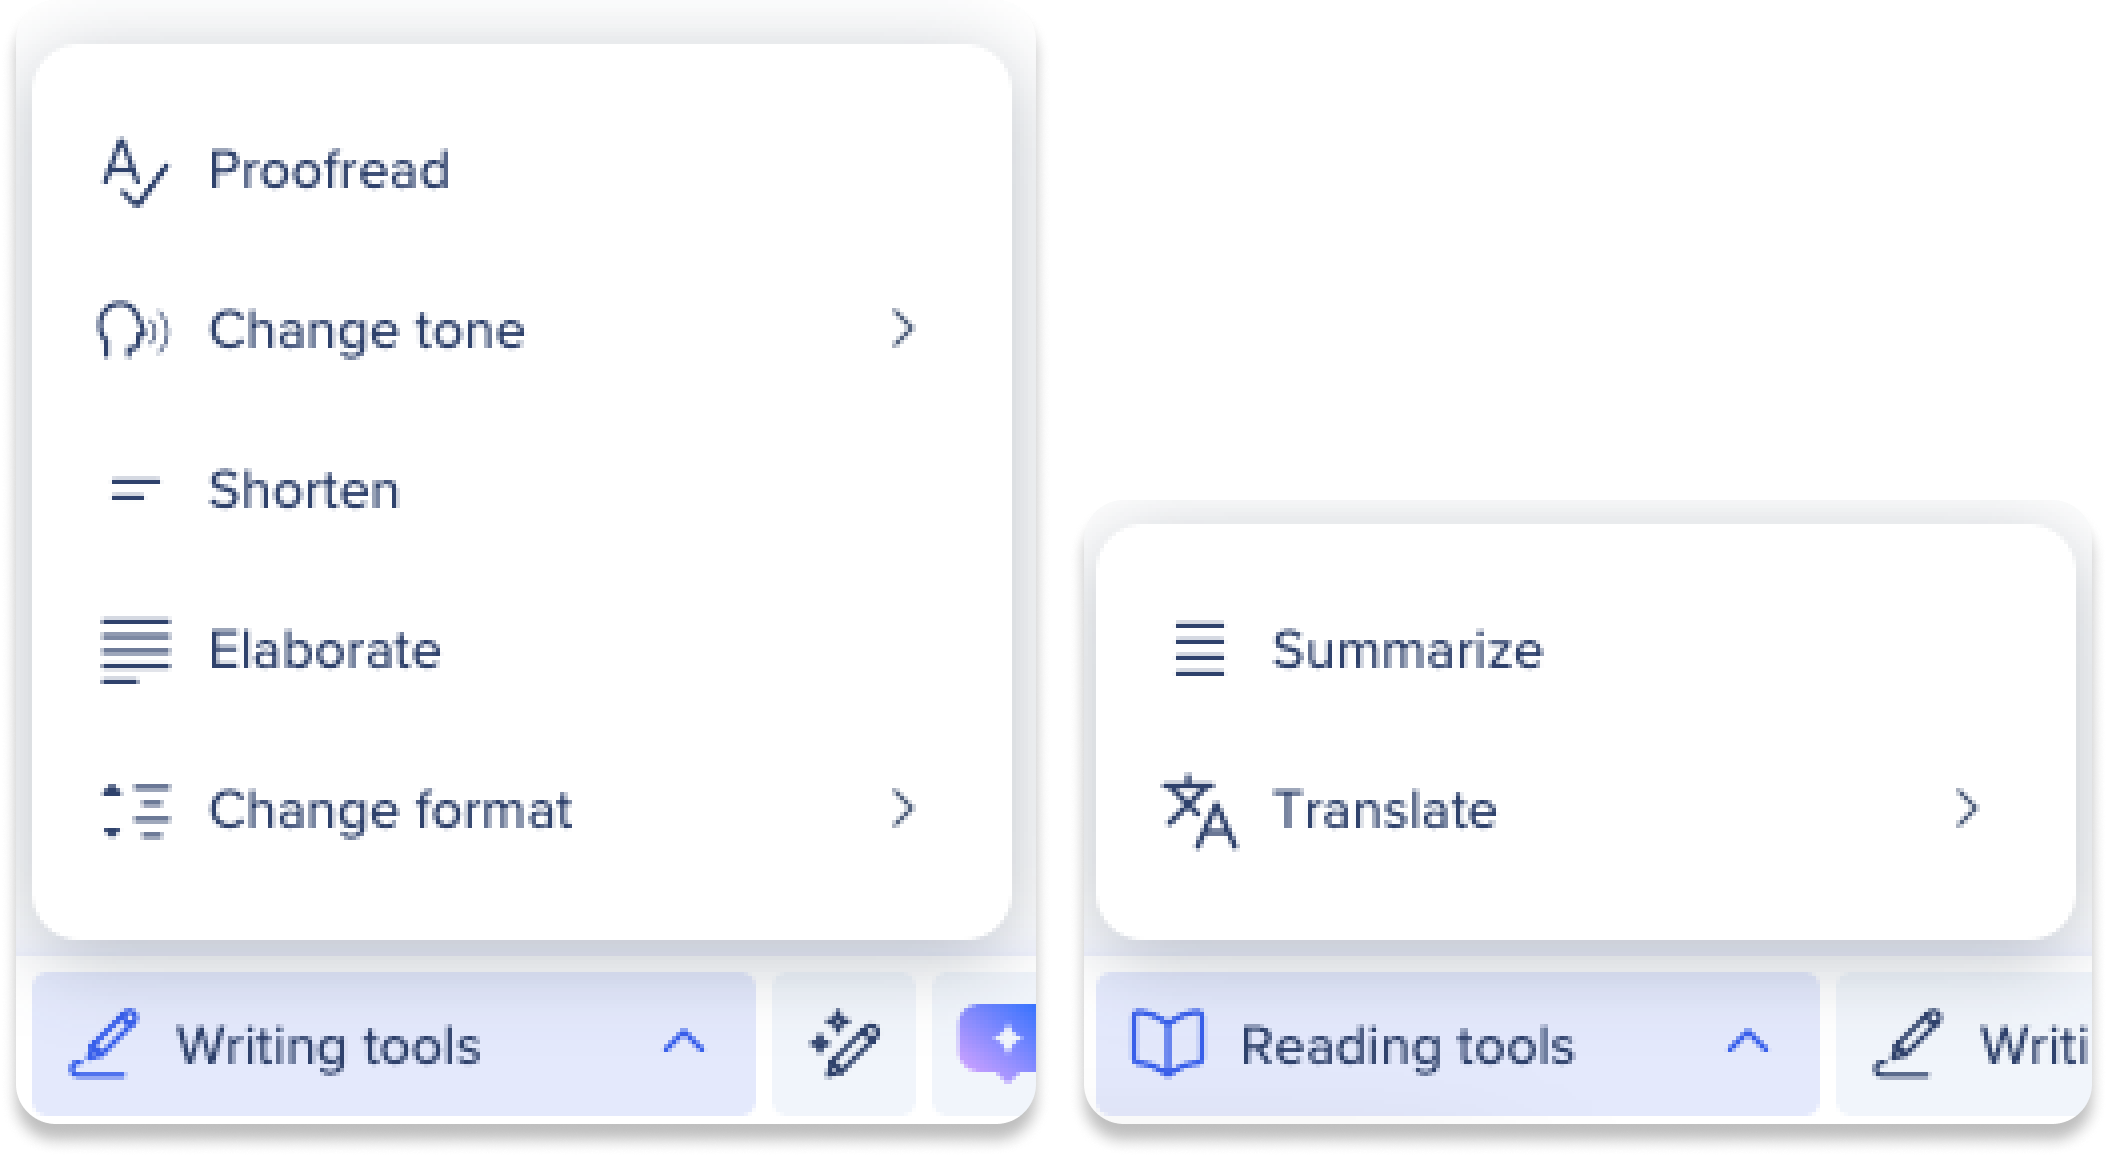
When you highlight text on the page, the Action Bar shows text tools and dropdown menus for writing and reading assistance:
Writing tools
-
Proofread: Reviews text for grammar and spelling errors
-
Change Tone: Adjusts the text tone according to the tone options menu
-
Sound neutral
-
Sound formal
-
Sound casual
-
Sound engaging
-
-
Shorten: Provides an alternative text that make the highlighted/captured text more concise
-
Change format: Adjusts the text format according to the format options menu
-
Write in bullet list
-
Write in numbered list
-
Write as paragraph
-
Write as email
-
Reading tools
-
Summarize: Summarizes text into a shorter version retaining key points
-
Translate: Translates text according to the select languages available in the language options menu
-
Translate to English
-
Translate to French
-
Translate to German
-
Translate to Spanish
-
Translate to Japanese
-
Translate to Hebrew
-
Workflow tools
Workflow tools in the Action Bar appear in the flow of your work and provide organization-made guidance.

Workflow tools are actions created by your organization for specific contextual use cases. They are condition-based and will only appear in the Action Bar when certain conditions are met. These tools are designed to pop up during your workflow to make tasks easier or to alert you. Examples of workflow actions include:
- Appearing when a phishing attack is detected
- Notifying you of inappropriate language detected in an email
- Providing suggestions to assist in writing an email
- Generating a sales pitch email for highlighted content
Create custom actions
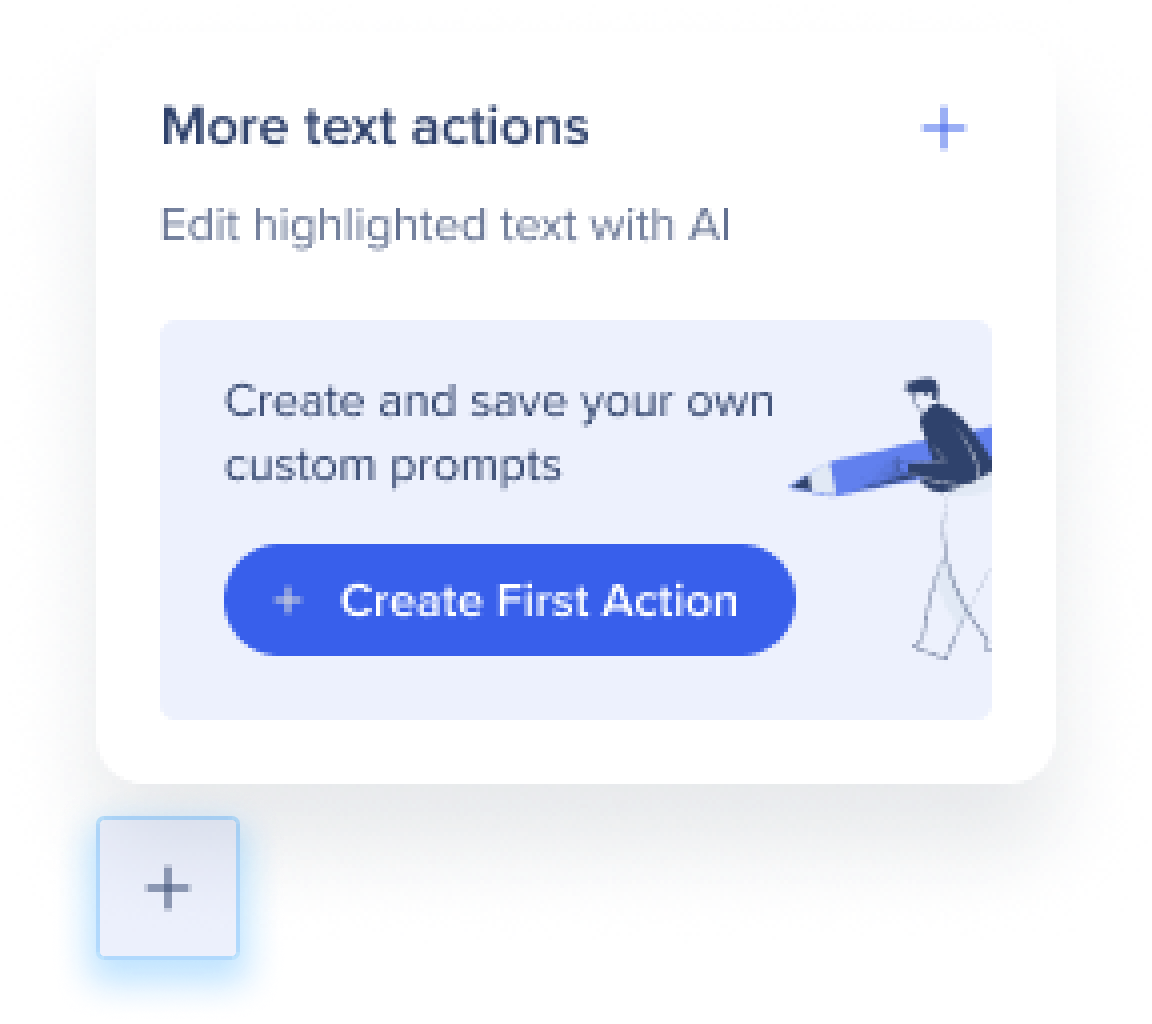
Create and save your own personalized prompts for fast reuse whenever text is highlighted on screen.
How it works
-
Click the Create icon in the Action Bar

-
Click Create First Action
-
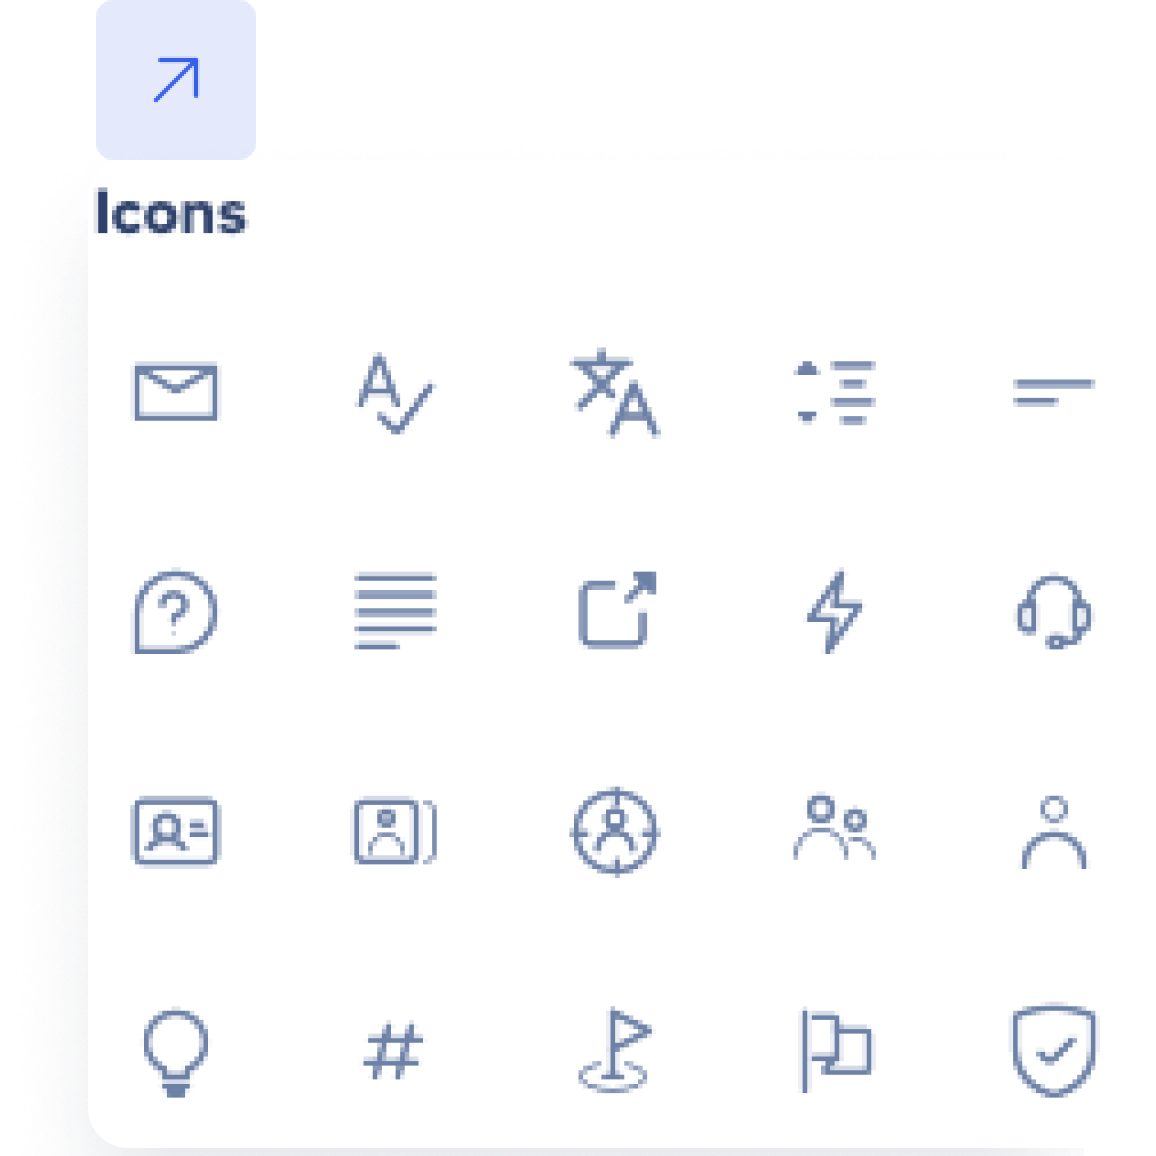
Click the Icon button to select an icon for your action

-
The icon will appear in the Action Bar when text is highlighted on screen
-
-
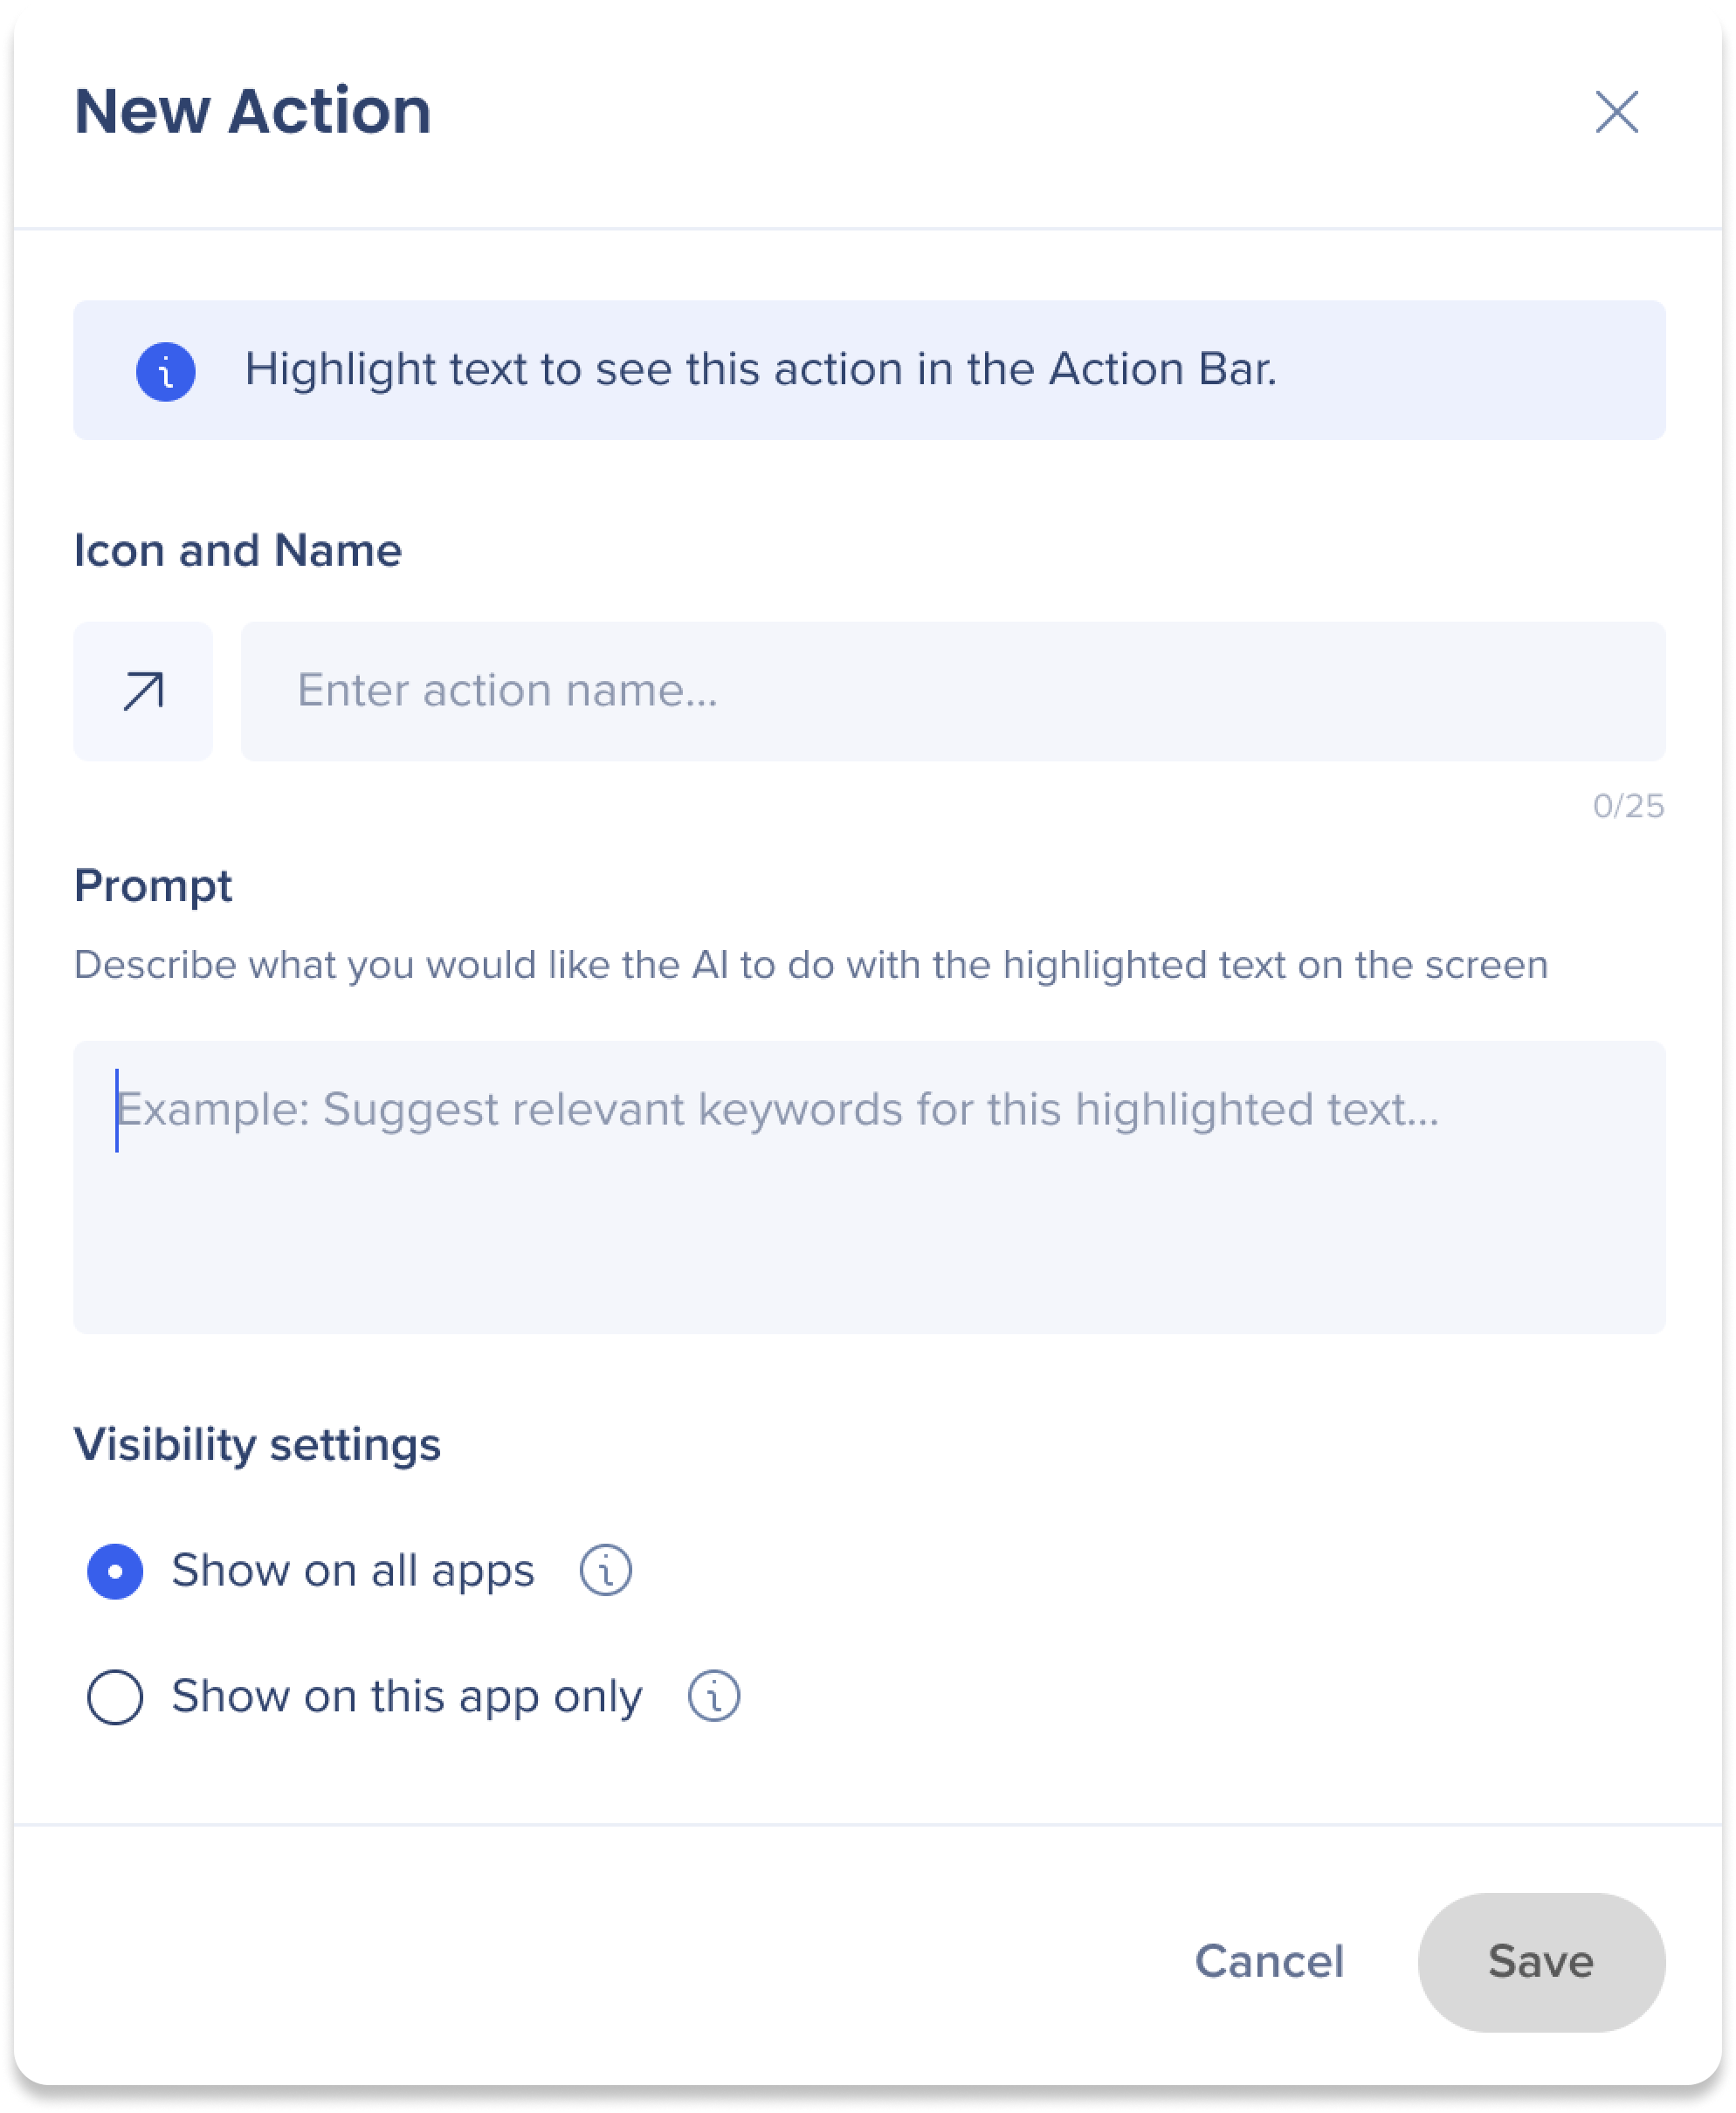
Enter a name for the new action
-
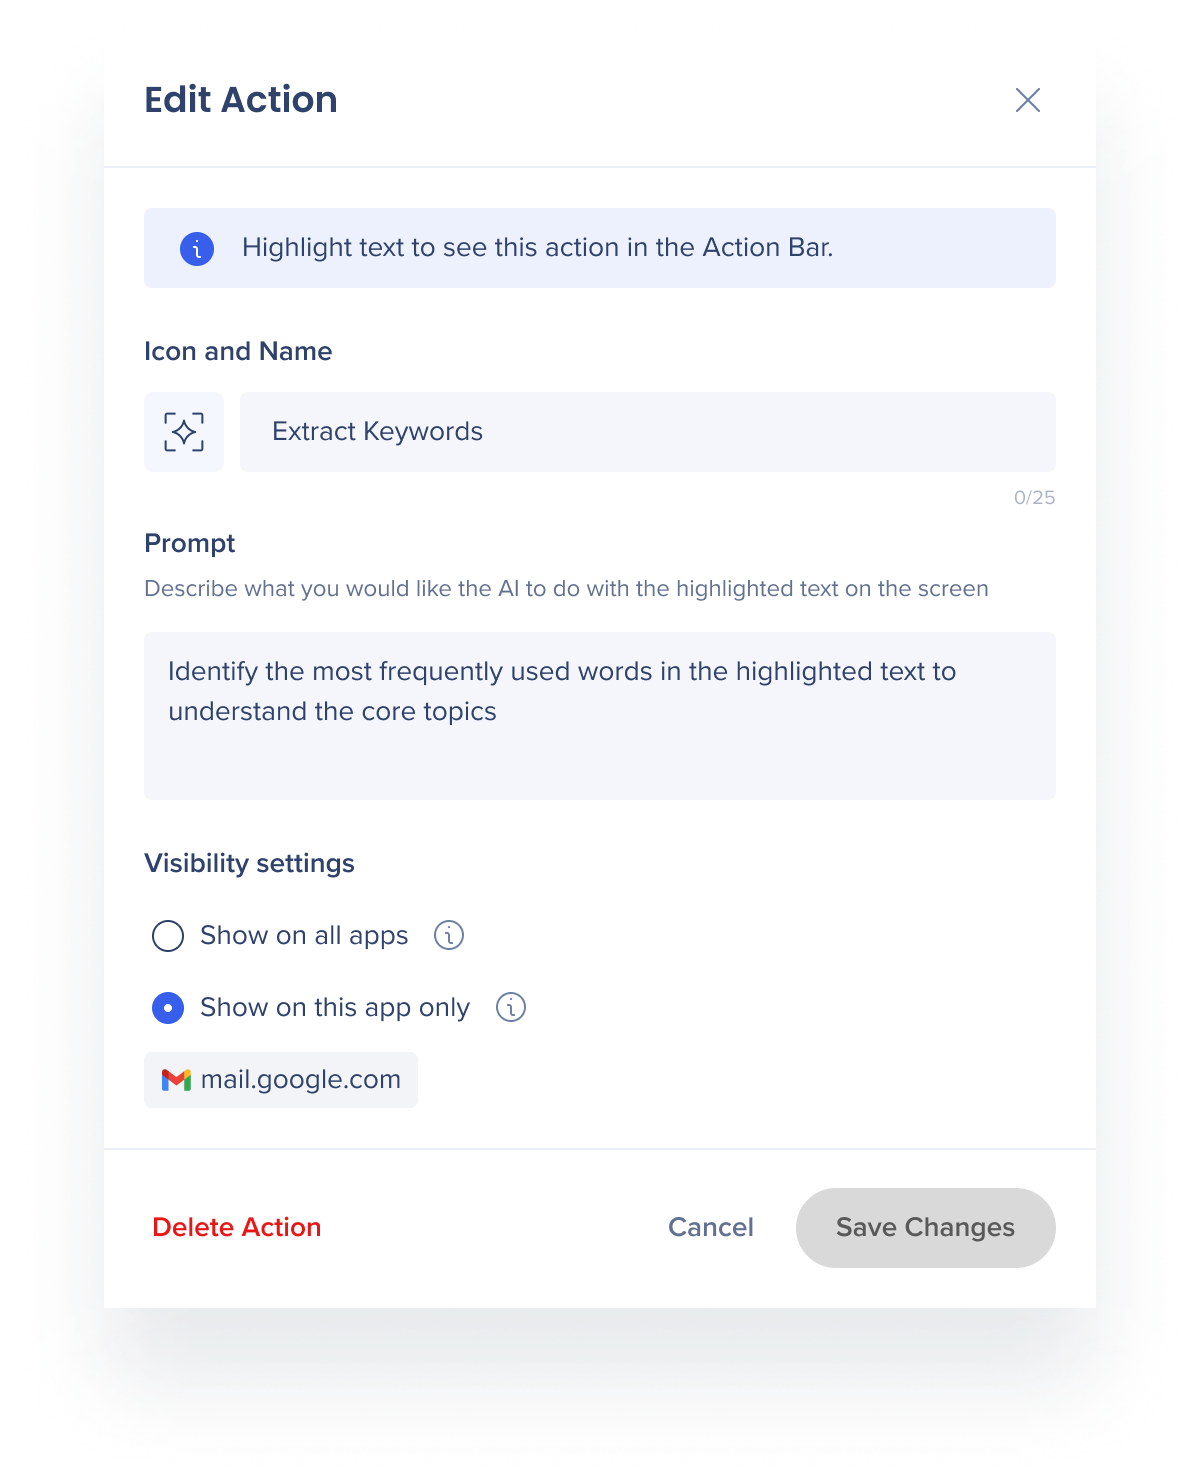
Enter a prompt for the new action
-
Describe what you would like the AI to do with the highlighted text
-
-
Select a visibility setting:
-
Show on all apps: Select when the action is relevant for any website or application
-
Show on this app only: Select when the action is relevant only to the current application you're in
-
-
Click Save
Additional Features
Maximize window
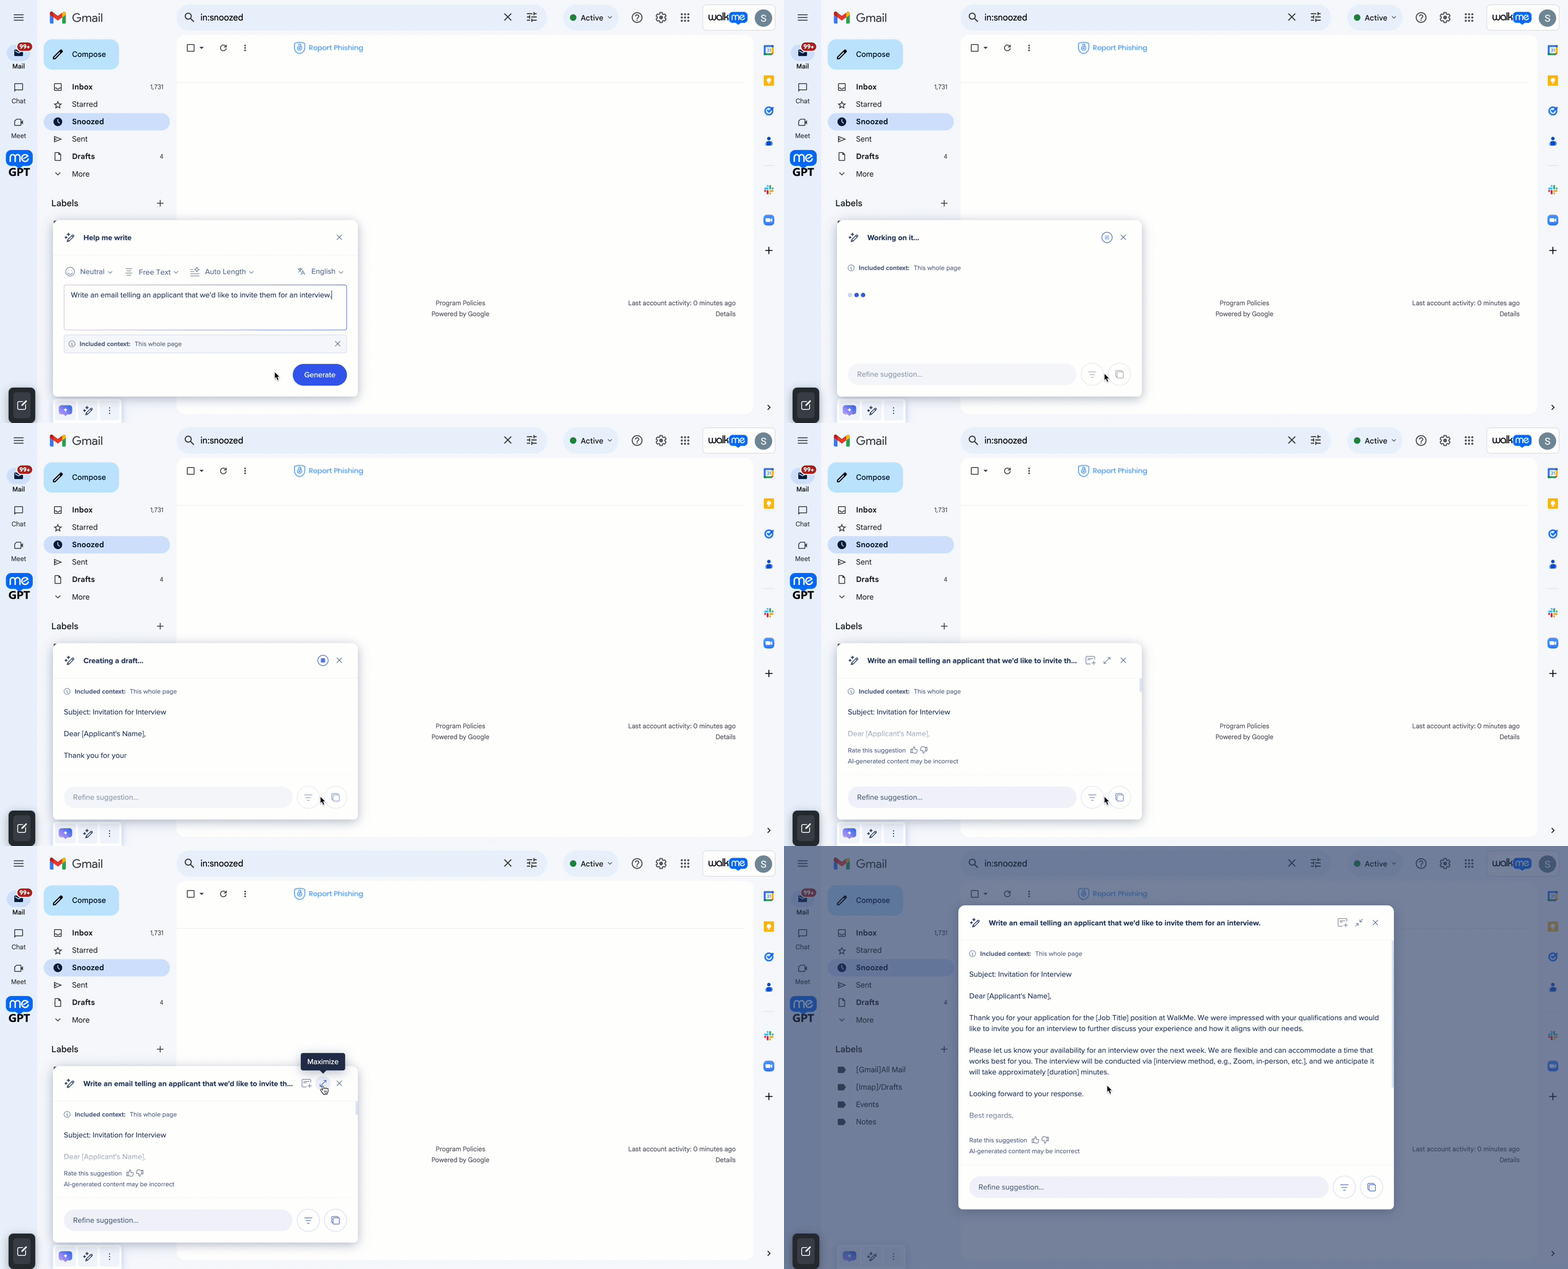
After generating content, click the Maximize icon to enlarge the action window.
Pin highlighted actions
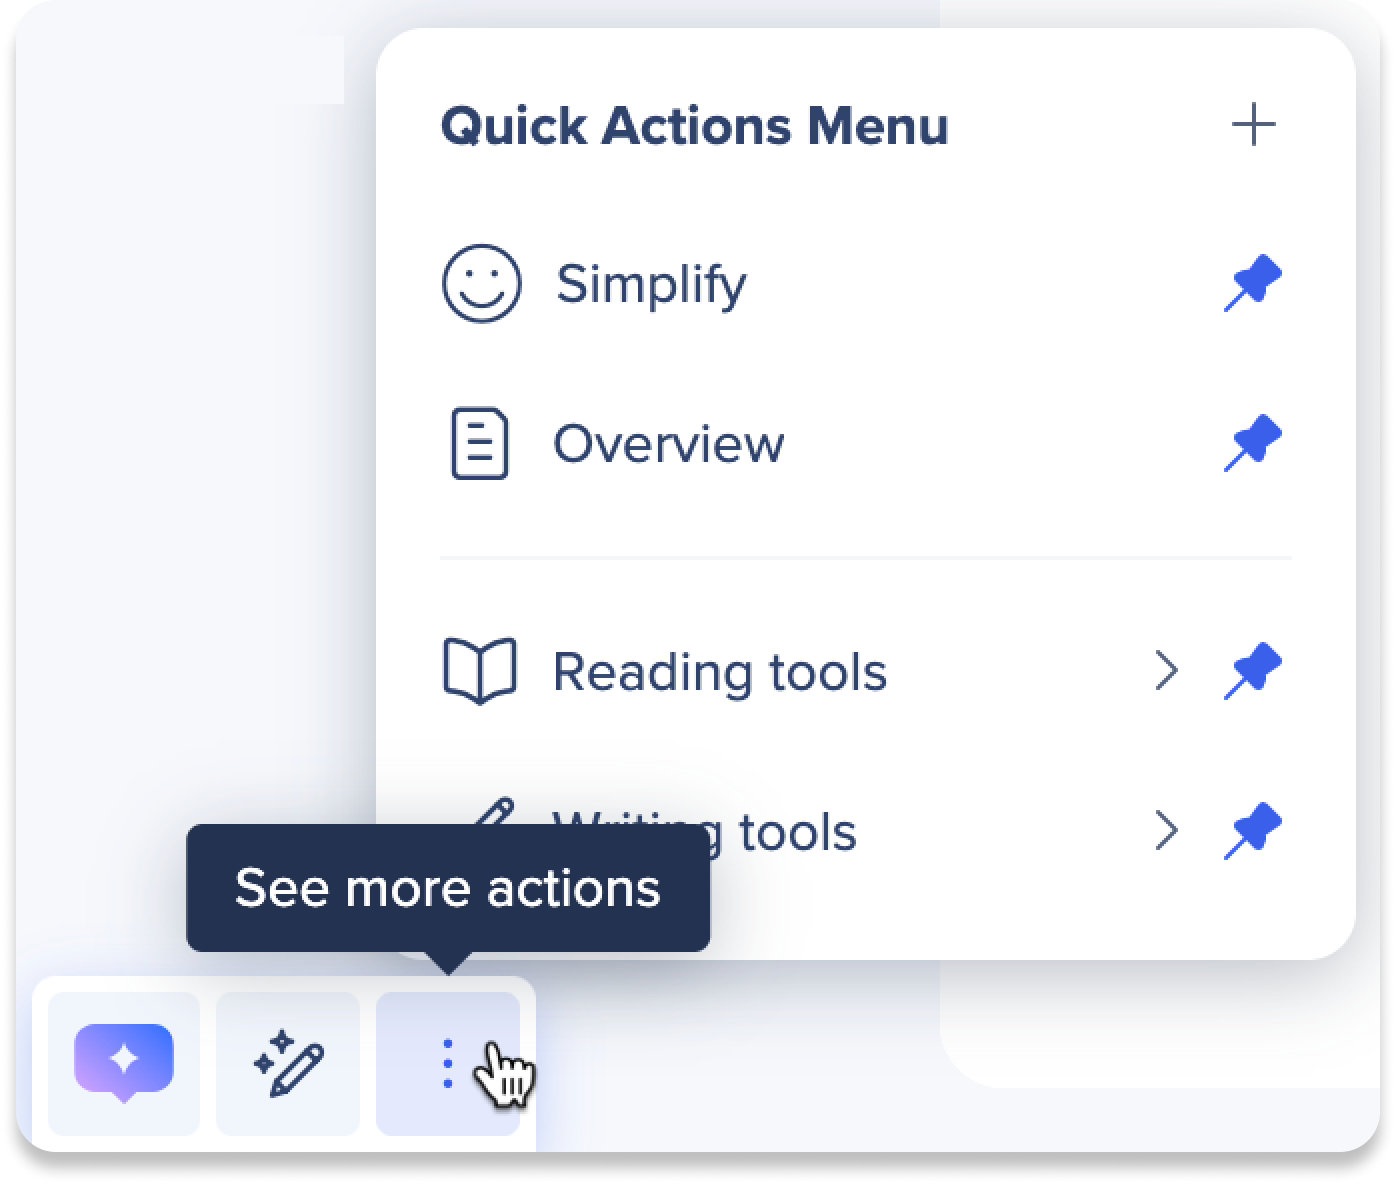
Pinning actions to the Action Bar provides quick access to frequently used tools and custom actions.
When you highlight text, your pinned actions will appear in the Action Bar. You can pin or unpin actions as needed, ensuring your most-used tools are always available for improved productivity.
- Click the See more actions icon in the bar
- Click the Pin icon to pin or unpin actions
New user onboarding
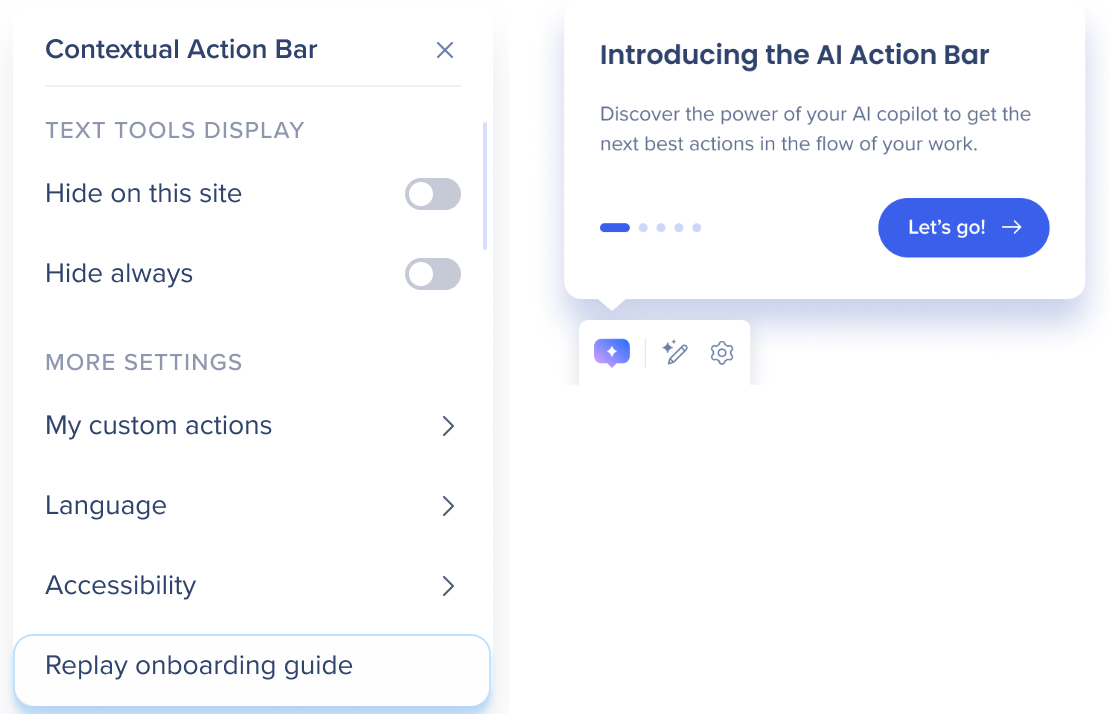
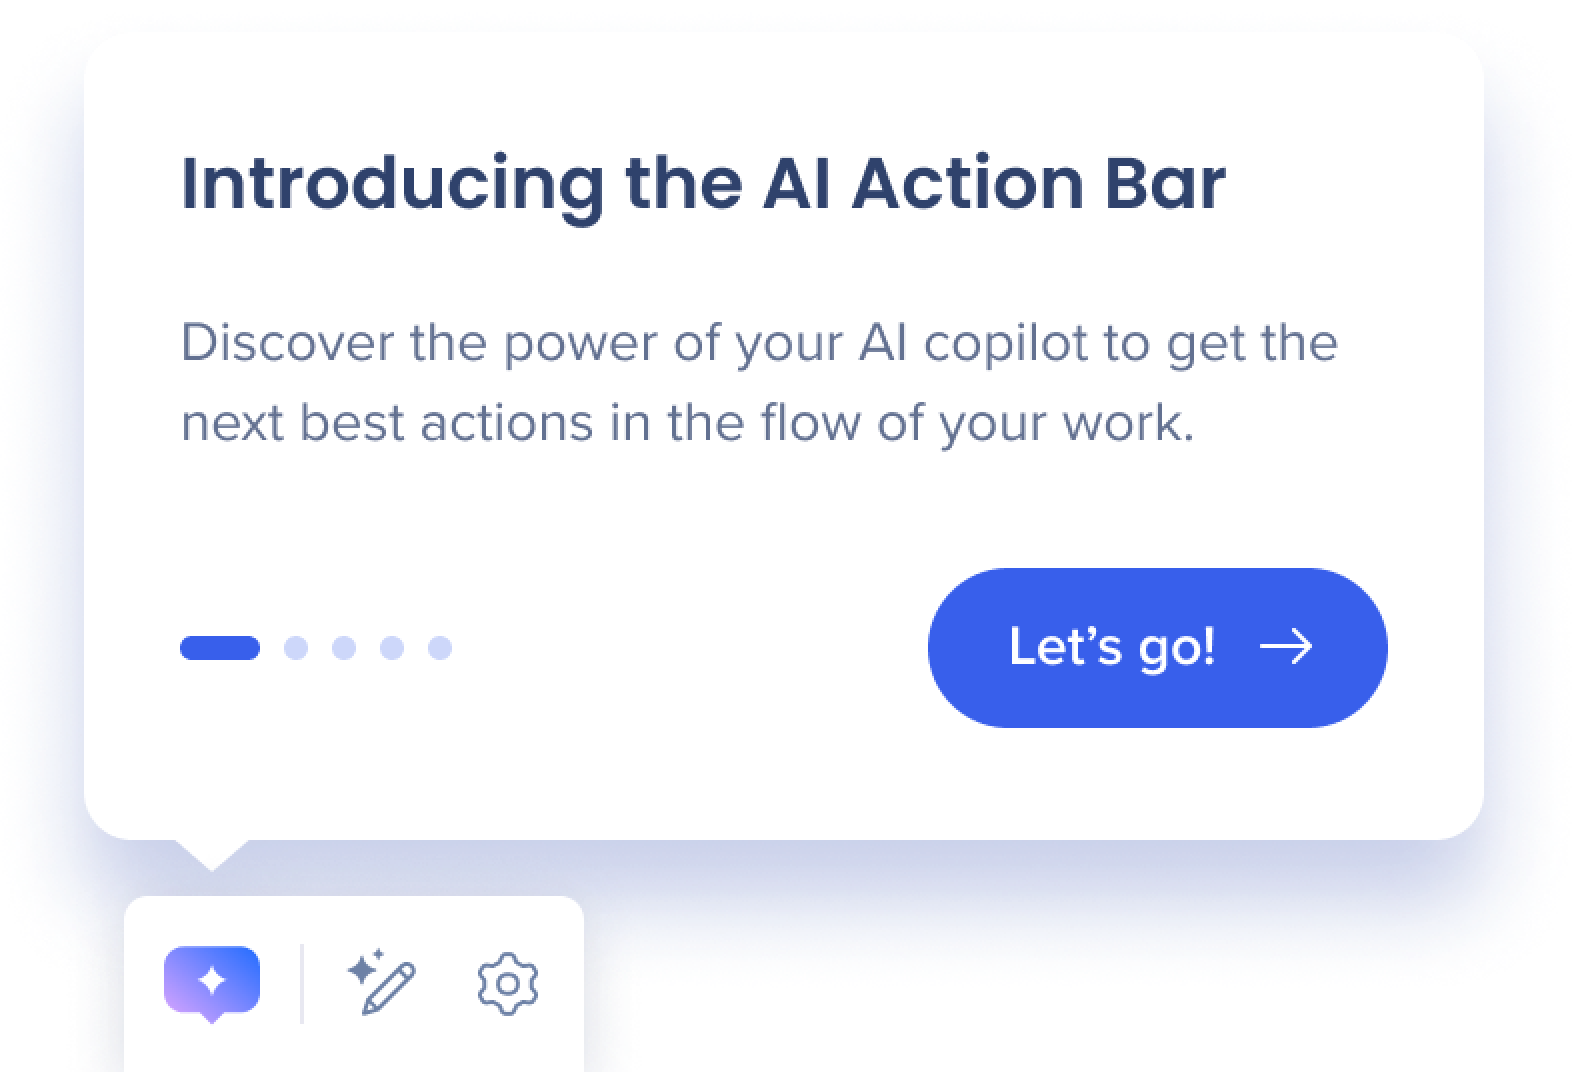
When users first view the Action Bar, the onboarding guide will automatically appear. This guide walks users through the main features of the Action Bar, providing brief videos to explain each feature. The onboarding process ensures that users understand how to utilize the Action Bar effectively, enhancing their overall experience with the tool.
Action Bar Settings
![]() Click the Settings icon to adjust display, language, accessibility settings, and manage custom actions.
Click the Settings icon to adjust display, language, accessibility settings, and manage custom actions.
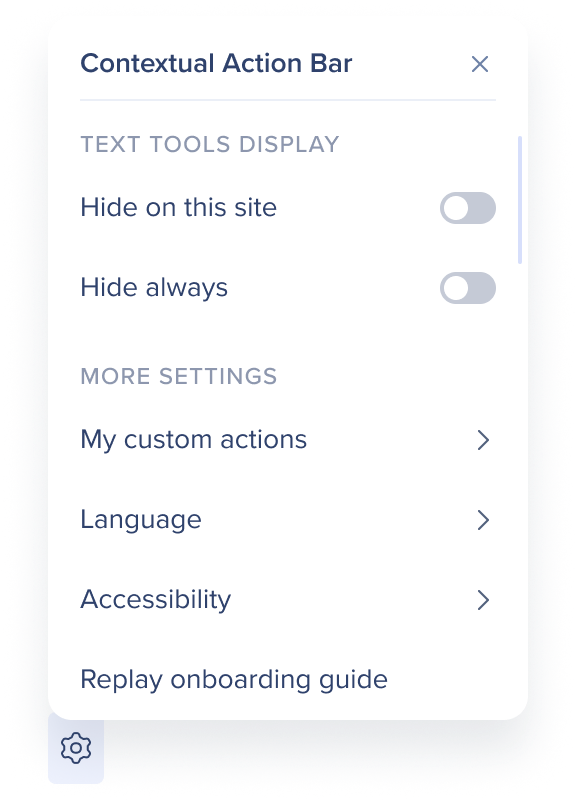
Text tools display
Control when highlighted text tools can be displayed on apps and websites:
-
Hide on this site: Turn on the toggle to hide the text tools on the current site
-
Hide always: Turn on the toggle to always hide the text tools on all apps and sites
My custom actions
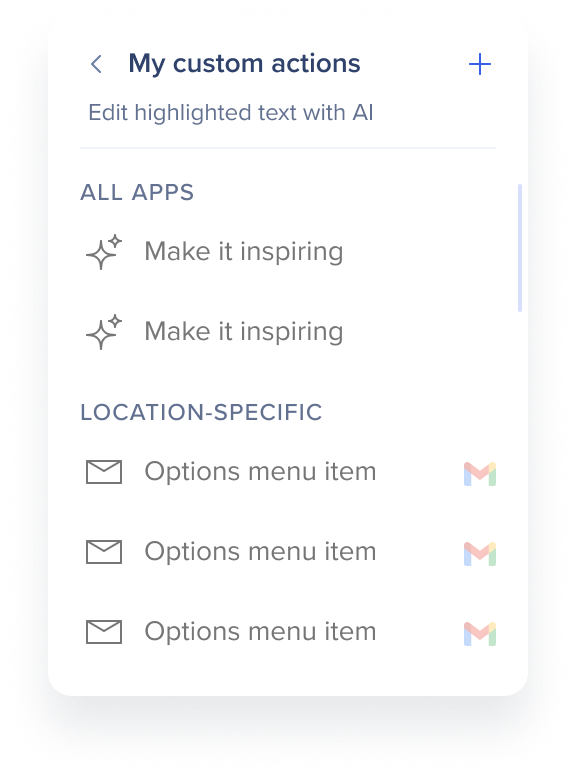
My custom actions lets you manage and create all your custom actions.
Custom actions are split into two lists:
-
All Apps: Actions available on the action bar across all apps and sites
-
Location-specific: Actions available only on specified apps
Edit custom actions
-
Click the Settings icon to open your custom actions menu
-
Select My custom actions
-
Hover over the action you wish to edit
-
Click the Edit icon
-
Make any changes
-
Click Save Changes
Delete custom actions
-
Click the Settings icon to open your custom actions menu
-
Select My custom actions
-
Hover over the action you wish to edit
-
Click the Edit icon
-
Click Delete Action
Language
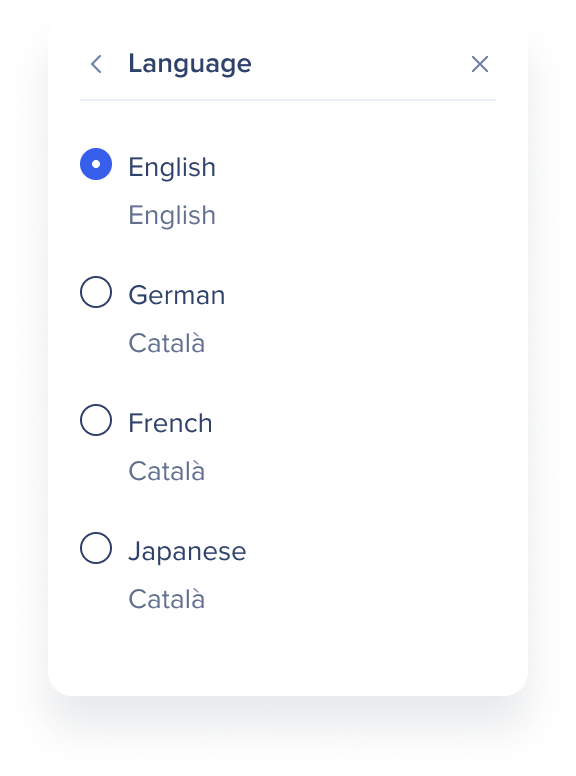
The Action Bar offers four language options:
-
English
-
German
-
French
-
Japanese
Replay onboarding guide
Click Replay onboarding guide to restart the user onboarding process and learn about all the features in the Action Bar.
