Brief Overview
In the new Workstation design, users are able to update their branding settings directly on their own, via Console.
In the old design, customization is still available for the Welcome screen and the app. However, old existing customizations will not migrate. Customers will be required to submit their customizations from the branding page to have it apply on their new Workstation redesign.
The following settings can be customized in the new Workstation design by the user vi the Console.
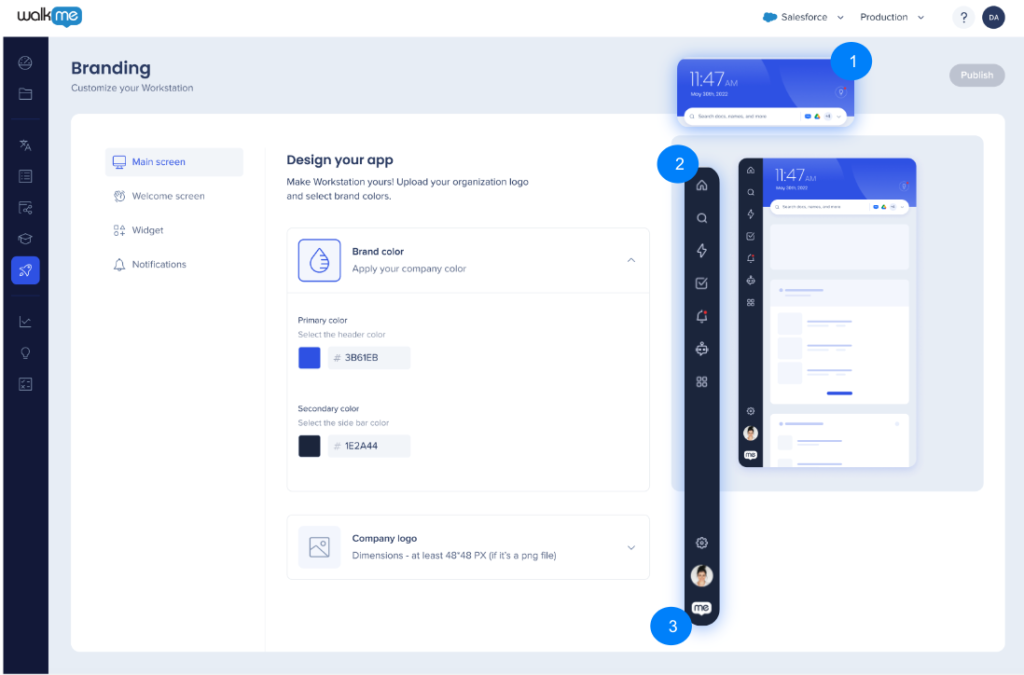
Main Screen
- The primary color can be applied for the header of the screen
- The secondary color - for the sidebar icon background
- A company logo (PNG file, minimum resolution - 48x48 ) can be uploaded. It will appear in the left bottom corner of the screen
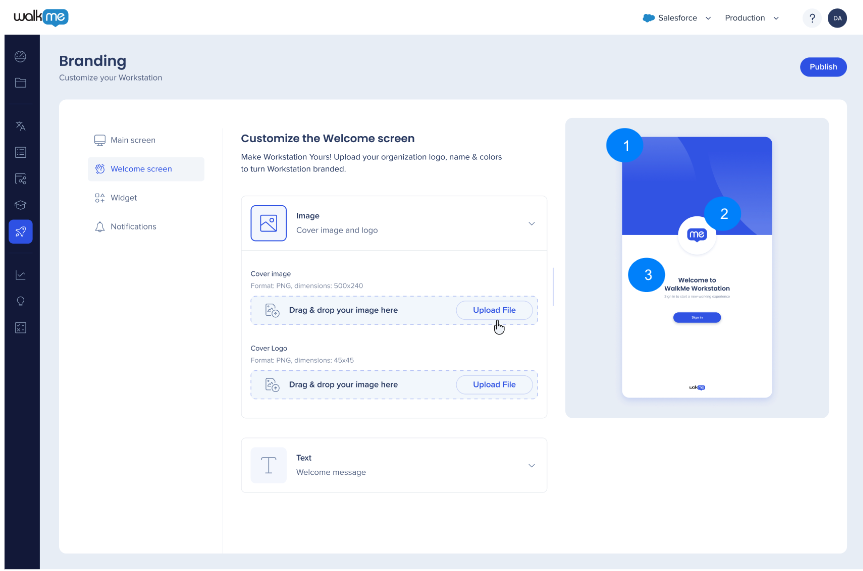
Welcome Screen
The following can be uploaded and/or customized:
- The cover image for the upper part of the screen (PNG file, dimensions: 500x240)
- Company logo which will appear in the center of the screen (PNG file, dimensions: 45x45)
- Welcome text, including title (up to 60 characters), subtitle (up to 70 characters), and the button (up to 15 characters)
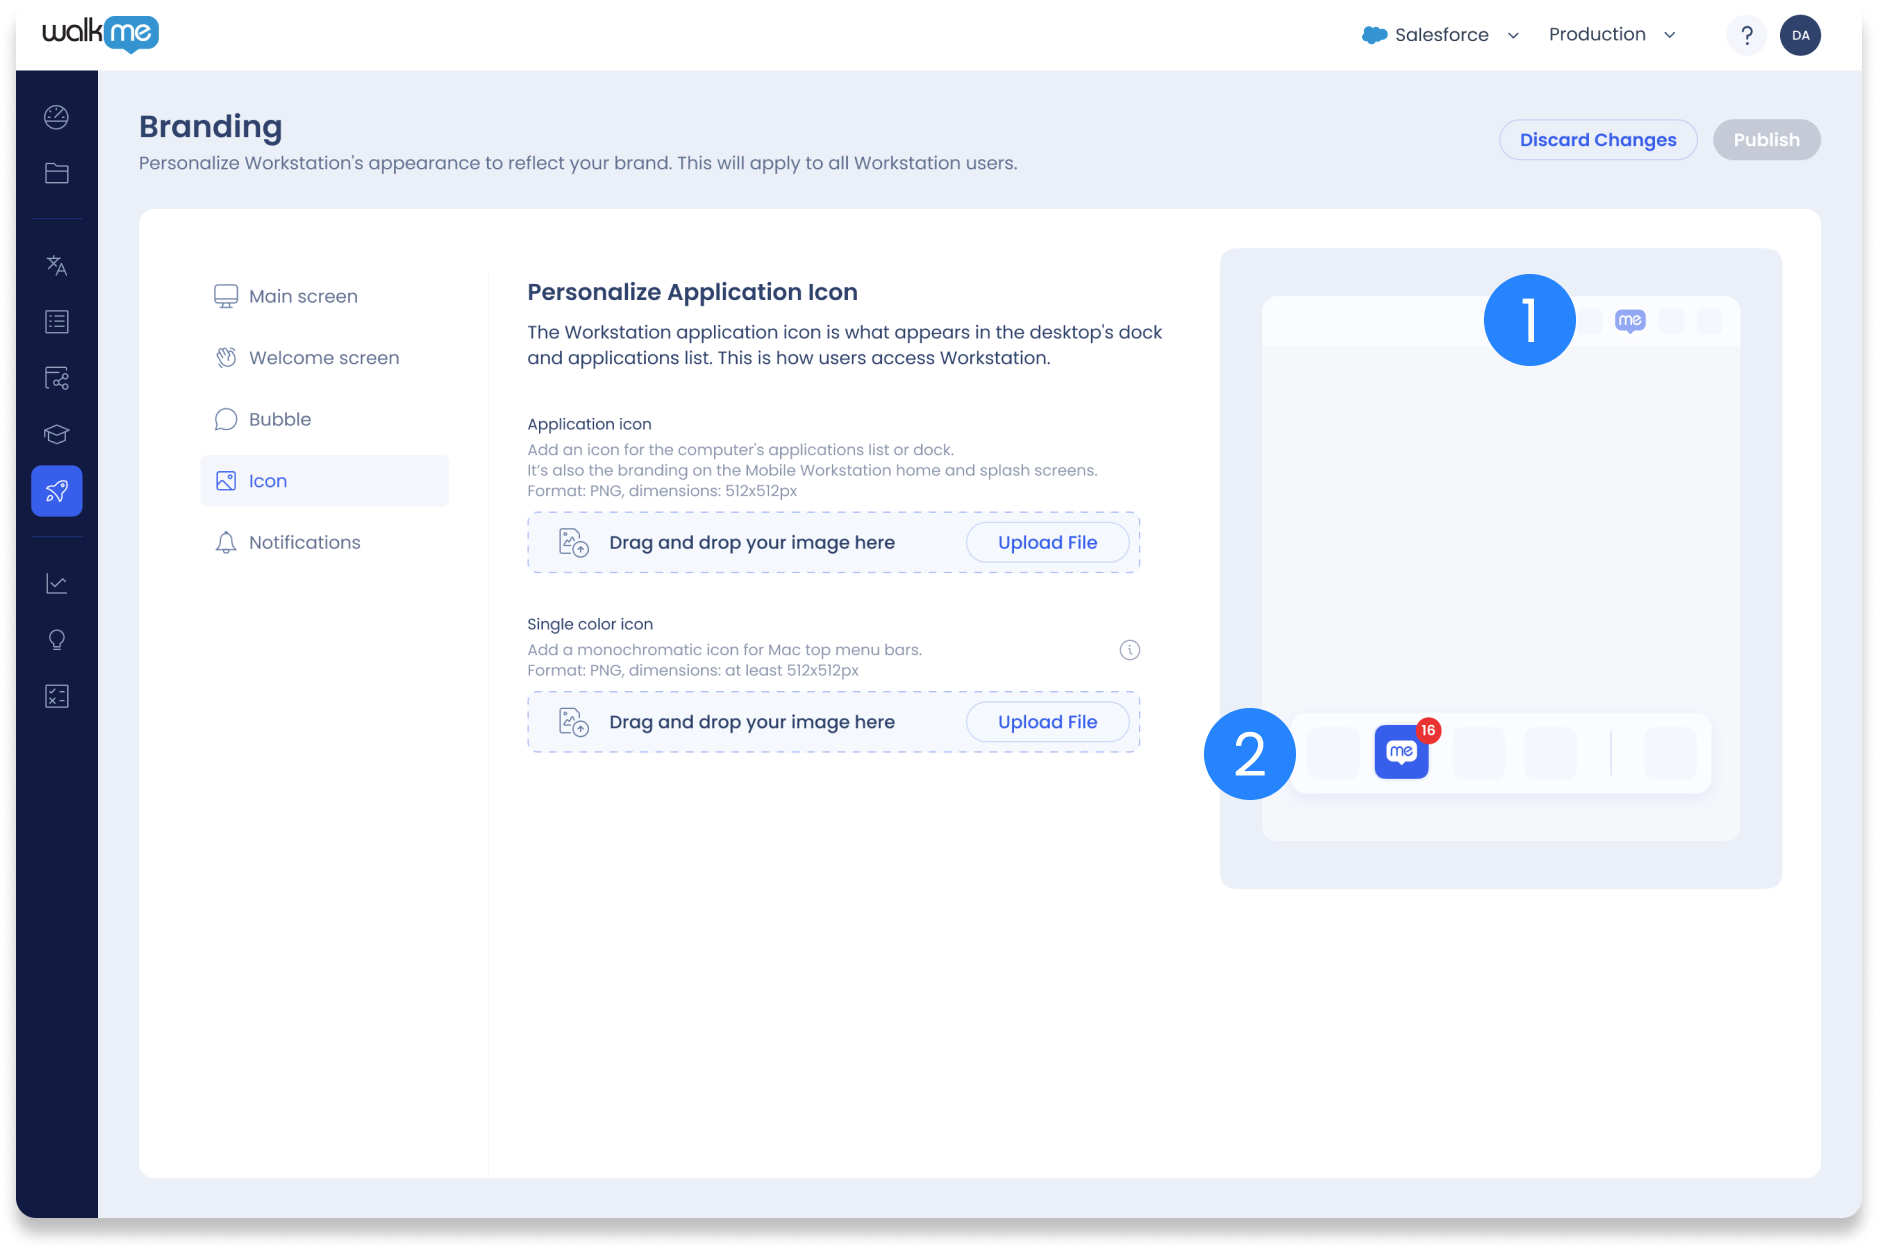
Icon
To change the application icon:
- Go to the WalkMe Console→ Workstation→ Branding→ Icon
- Click Upload and select the icon you want to add
- Format: PNG, dimensions: 512x512px
Note the following limitations:
On Mac: The icon will change as Workstation loads and will change back to default if Workstation process stops
On Windows: Limitations for specific installation configurations:
- Machine MSI with Auto-Update enabled - Taskbar Icon and shortcuts will not be branded
- Machine MSI with Auto-Update disabled - Taskbar Icon will be branded but not shortcuts
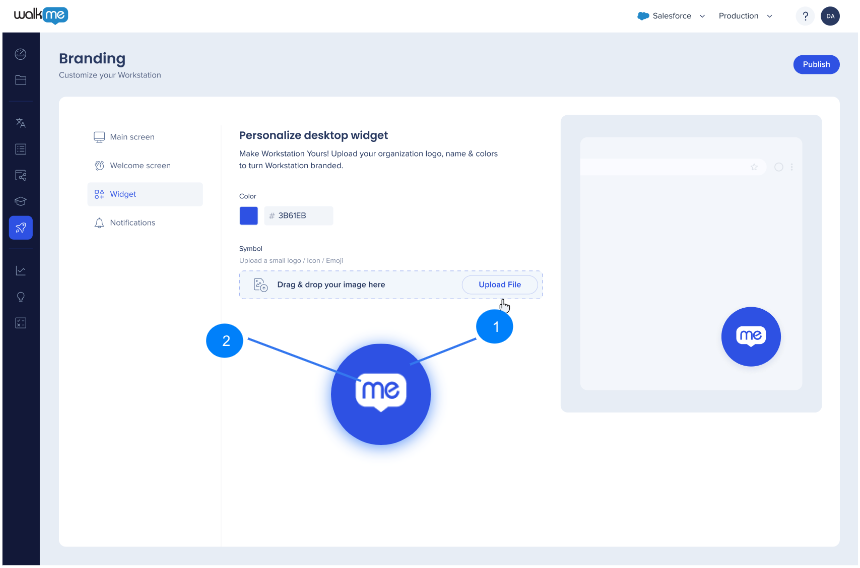
- The color of the desktop widget can be selected
- The logo which will appear inside the widget can be uploaded (PNG file)
Notifications
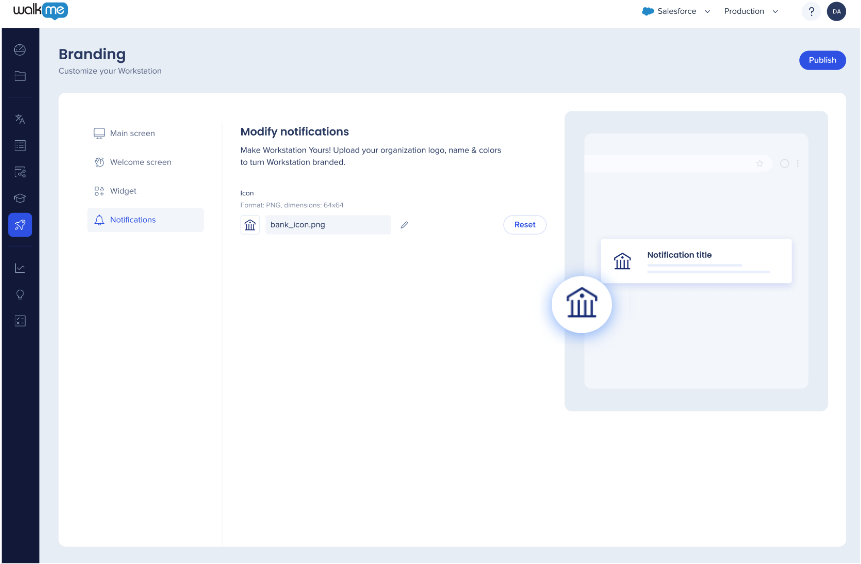
Changing the Notifications Icon No Longer Available
- Modifying the notifications icon is no longer available in the Workstation Branding page in the Console
- Existing customers who have already had a custom notifications icon enabled will still be able to keep their custom icons. Any manual changes require opening a ticket to rnd
