Welcome to the WalkMe Help Center

Please login in order to continue:

Work flows better with WalkMe
Work flows better with WalkMe.

Theming

Theming is currently in closed beta

Check out our beta program page for more information.

Brief Overview

Theming is a new WalkMe feature that allows you to unify the design across different WalkMe apps. With Theming, you can easily apply a consistent look and feel to all of your WalkMe items, using a wide range of pre-maid and customizable design elements, including color schemes, typography, and layouts.

How to Access

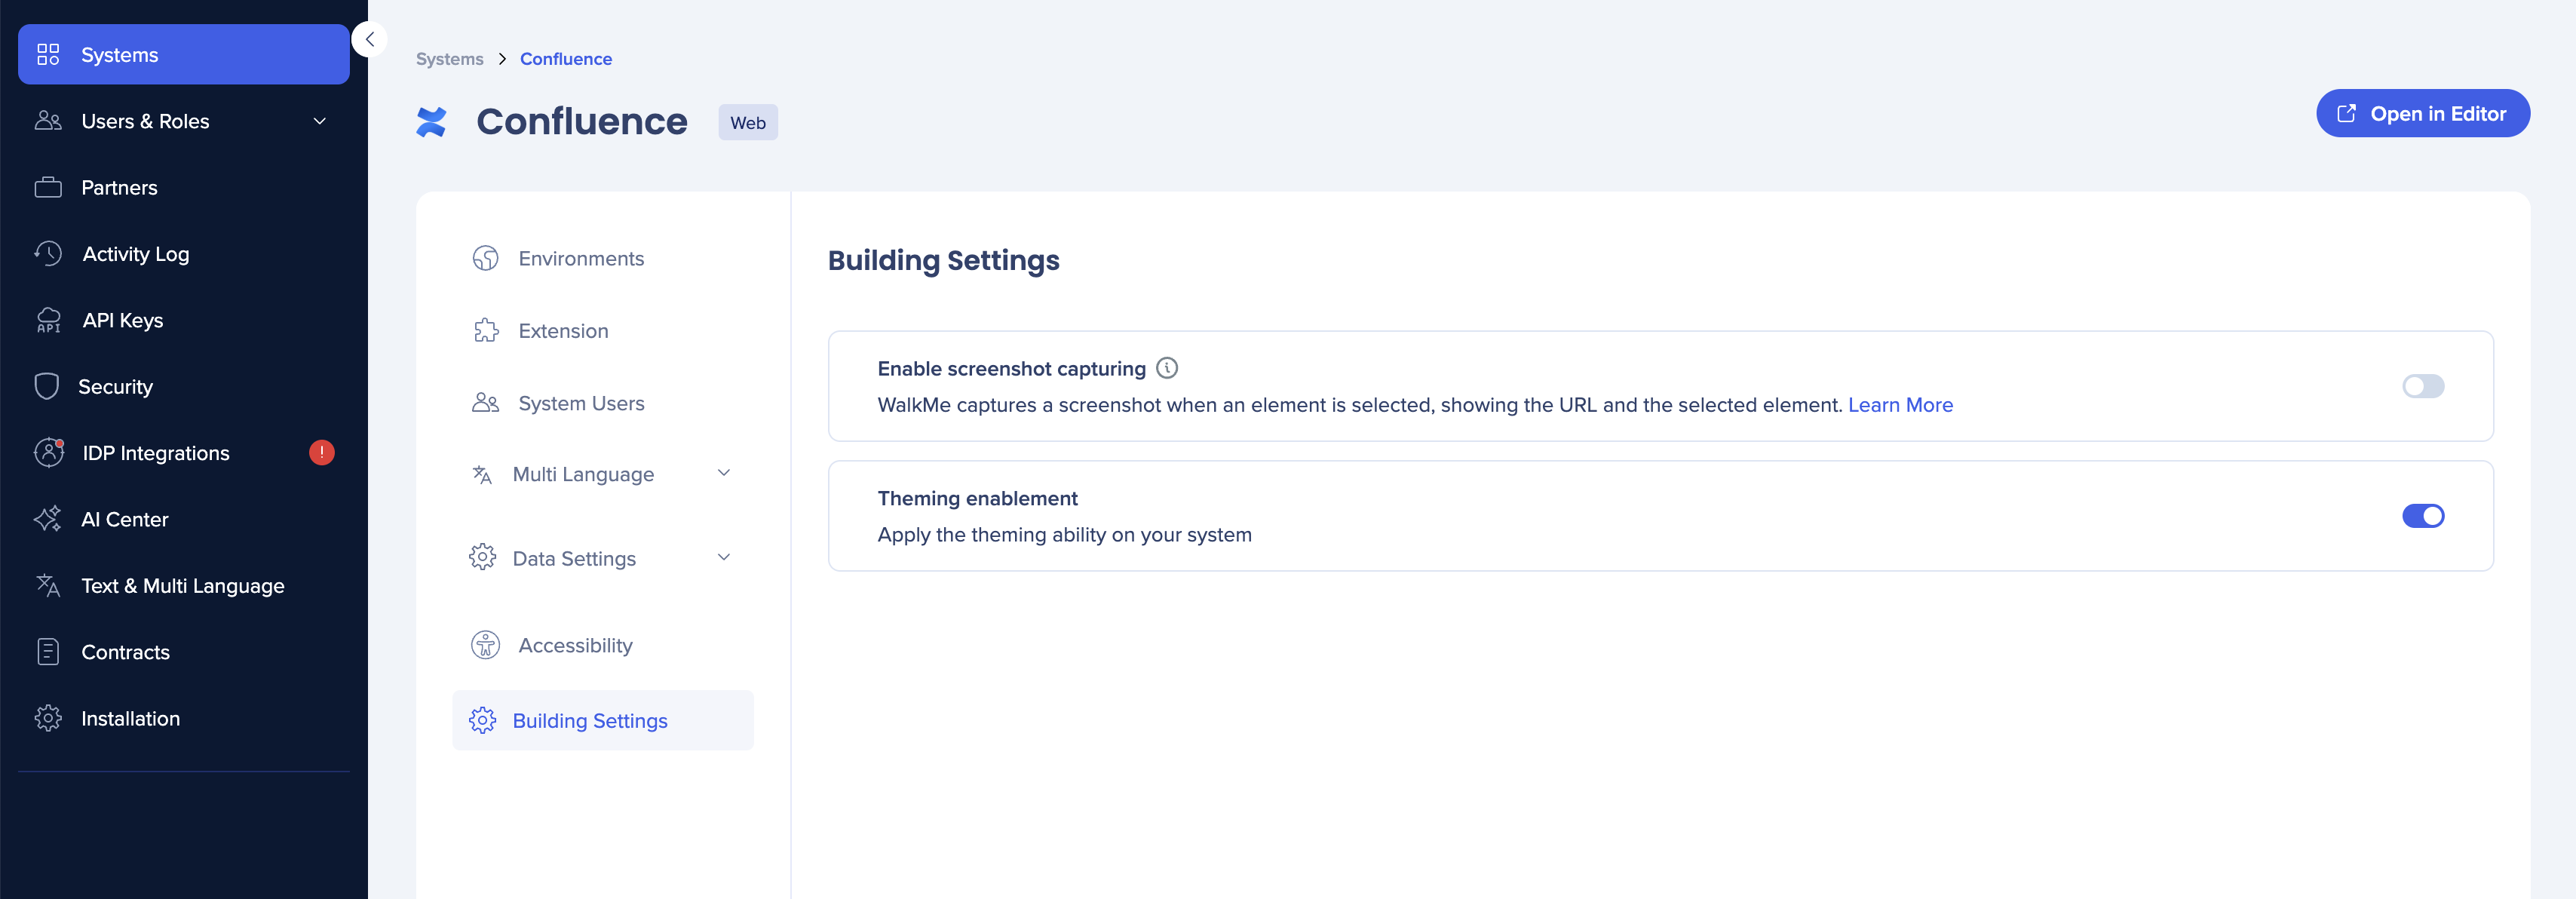
Theming is located in the console and can be accessed

How to Use

Main Screen

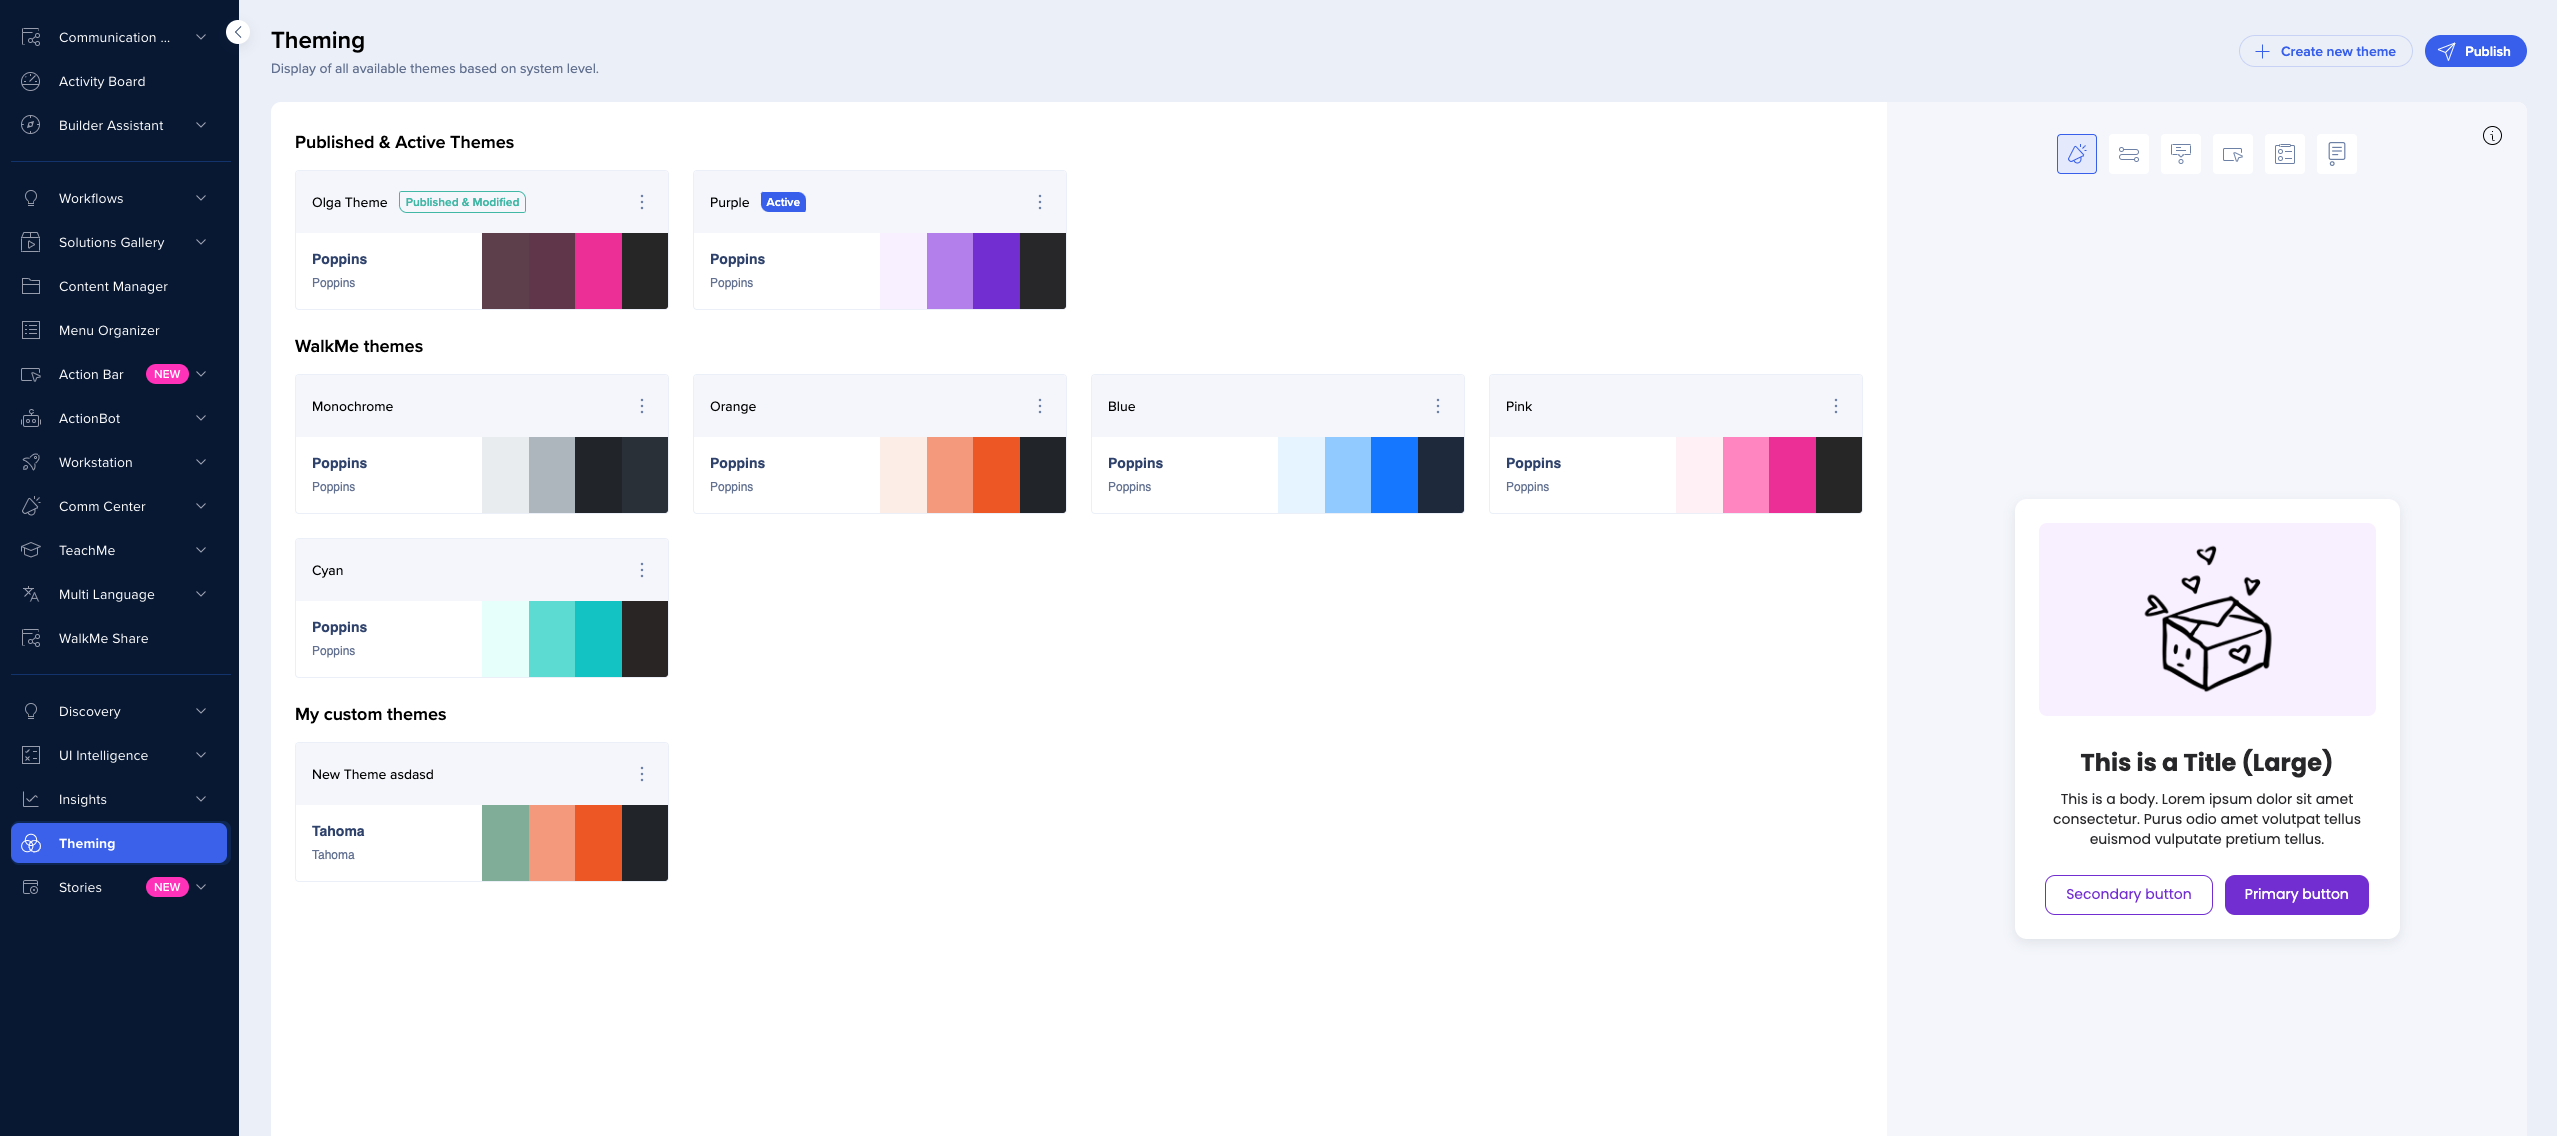
When you access Theming for the first time, on the main screen you'll see all the themes offered by WalkMe.

On the right side of the screen, you can see the preview of what this theme looks like. You can navigate between different item types and see how each of them looks in this theme.

Hover over different elements of the preview to see what they inherit from the theme. For example, the frame which contains the image in this ShoutOut inherits the color (Background, Main), and the text title inherits the Title (Large) typography and the color Text, Main.

Note

The preview only demonstrates what the theme consists of and looks like. It doesn't show your real editor content.

In the editor you can see a variety of different templates, each one inherits from the theme in a different way.

Active and Published Themes

Label Active means that this theme is currently the one applied to your editor content.

Label Published means that this theme is currently the one displayed to your users in the published environment.

Note that there might be a case when active theme and published theme are not the same.

If you set a theme as active, you'll be able to see it in the editor. However, to make it theme visible to your users, you need to publish it first.

To set a theme as active:

  1. Click on the Options menu
  2. Select Set as active

  3. If you don't want to publish the theme yet, click Confirm
  4. To also publish the theme, check the box and then click Confirm

Editing Themes

You can edit WalkMe themes and save the result as a new theme.

To edit a theme, click on the Options menu and select Edit, or double click on the theme.

Here you can change the colors, typography, and button properties of the theme.

Colors

  • In the Colors tab, you can change the color of different design elements
  • You can see what exactly is changing in the preview on the right
  • When making changes, you will see animation on the item navigation bar showing in which item you can see this change 

Typography

  • In the Typography tab, you can change the font type and size for all the text elements
  • You can change primary and secondary font
  • You can select which of the two you want each of the titles and text types to inherit - primary or secondary

  • You can see where each of the text elements is currently used
    Did you know?

    This is what we generally recommend, however, you can choose to use these text types in other locations. For example, to have your launchers inherit the Title (Large) properties. This can be set in the editor - see more information below.

Buttons

  • Change the border width and the corner radius of your buttons
  • You can choose to have a colored border and set the thickness on each of the sides
  • The fill and text colors are automatically inherited from the theme - you cannot change them from here, but you can change the color which the button inherits in the Color tab, and it'll affect the button here

  • Secondary text buttons don't have fill color (are transparent) by default (for example, Back button in this ShoutOut)

  • Additional buttons inherit most of their properties from the theme
  • You can only change the color of the text

When you're done editing, you can save the theme as new.

Your themes will appear under My custom themes.

Unlike WalkMe themes, your custom themes can also be renamed, duplicated, and deleted.

Theming in the Editor

Note

Theming is now only supported in Pro and Pro Lite menus. It'll later become available for other menu types.

Theming is applied to all of your editor content. Go to Customize content style to see how it affects your balloons and SmartTips.

Balloons

In the Balloon tab, you can see the active theme applied to your balloons.

You can change the highlighter color to be any of the theme colors.

You can also detach from the theme if you want your content not be affected by the theme.

For example, if you detach the highlighter color from the theme, it'll stay to be this color (in this case - pink Primary, Main) even if you change the theme in console.

Click Change template to see all the templates available.

To better understand how different text and color types from the theme are connected to different templates, see the Mapping: Theme-Template Relationship section below.

If you want to make changes to a specific template of the theme, click on the Edit icon.

The CSS console will open. Here you can adjust any of the balloon's properties.

You can replace the primary color with the secondary, or change it completely - for example, to black or white.

You can find the CSS variables coming from the theme in the CSS in Theming article.

Note

The CSS inserted in the global CSS, balloon template, or local balloon, will override the theme.

You can save the edited template as new, and it'll appear in the User Templates tab.

New!

All the steps that are connected to this template will change. 

In the Smart Walk-Thru step screen, you can select the color of the text parts from the theme colors. The typography style cannot be changed from here, since it's inherited from the theme.

You can also change a different template.

SmartTips

In the SmartTip tab, you can see the active theme applied to your SmartTips.

Click Change icon to select the icon you want your SmartTip to have.

Click Edit icon of you want to change the color and the size of the icon. You can select any color from the theme.

You can also change the color of the tip itself.

You can also detach any of the values from the theme if you want this design element not be affected by the theme.

Launchers

When you create a launcher, you can choose between all the templates available in this theme.

In the Design dropdown you can set the preferred colors from theme.

You can also detach from the theme, and set a color unrelated to it.

When you detach the color from the theme, you'll see a dedicated icon illustrating it.

You can always connect back to the theme.

After you created the launcher, you can change the template in the Launcher Options screen. Text of your launcher will stay the same.

You can also change the typography style or select different colors from the theme.

Surveys

  • Surveys are connected to themes by default
  • Only one template is available for surveys

Mapping: Theme-Template Relationship

  • All the text and color values (Title 1, Body 1, Primary, Secondary, etc.) work differently in different templates, even inside one theme
  • For example, the Smart Walk-Thrus templates attached here are using the same theme
  • As you can see, the relationships between the values are different in different templates
  • Find the mapping of the colors and text in the images attached

Smart Walk-Thru templates

Launcher templates

SmartTip templates

Theming in Visual Designer

New Templates

When you create a new ShoutOut, you'll see the new templates, all of them presented in the theme that you now have set as active.

When you hove over the Theming icon next to the color, you can see which theme is currently used.

You can choose between the theme colors and typography styles, or detach from the theme and set a color or font properties of your own.

Buttons

You can decide which properties of the button you want to be connected to or detached from the theme. For example, you can detach font and choose a font of your own, and keep the text color and fill color connected to the theme.

Changes in the Editor

Global Balloon

Before

  • You can select colors in the editor, edit the CSS of the template and see the CSS, save CSS design as template

After

  • Color and typography editing is done in theme
  • New theme-connected templates will be provided to user
  • You can edit the global balloon template CSS

SmartTip tooltip

Before

  • You can select colors for text, background, border

After

  • The colors come from the theme and you are able to change the mapping and to disconnect from the theme

SmartTip icon

Before

  • Icons are images - the color cannot be changed (user can only select a different image)
  • Colors cannot be changed with CSS

After

  • Icons are HTML
  • Icons are linked to the theme and impacted when colors of the theme are changed

  • You can change the mapping and the size of the icon

Local Balloon

Before 

  • You cannot change font family

After

  • You can see the applied typography of the title and the body
  • Design is attached to the theme

Local Launcher

Before 

  • You can't change the text of the launcher
  • You can only created a new template with different text

After

  • The gallery was refreshed and now offers new theme connected templates

Technical Notes

  • Only Admin and Content manager roles have edit and publish permissions. All other roles only have permissions to view the themes
  • The widget menu is not supported yet
  • Only the Pro menu and Pro Light menu are supported
  • Only California balloons are supported - classic balloons aren't supported
  • Only dynamic layout templates in the Visual Designer are supported
  • The following fonts are supported:
    • Arial, Tahoma, Georgia, Courier, Proxima Nova, Poppins, Open Sans
  • Preview in the Multi-language app works, but will not reflect the actual colors

Was this article helpful?

Thanks for your feedback!

Be part of something bigger.

Engage with peers, ask questions, share ideas

Ask the Community
×