Brief Overview
WalkMe Stories enables organizations to document, share, and collaborate on any workflow by automatically converting processes into step-by-step guides, thereby enhancing operations using WalkMe's capabilities.
Using the WalkMe editor extension, users can easily:
-
Plan and review DAP implementations
-
Streamline onboarding, independent of WalkMe
-
Record SOPs for compliance purposes
-
Document guides in knowledge bases
Access
Access Stories in the console:
- Open the WalkMe Console
- Go to the Tools category
- Select Stories
Prerequisites
- Creating stories from recording requires the WalkMe Editor Extension installed on the browser
How It Works
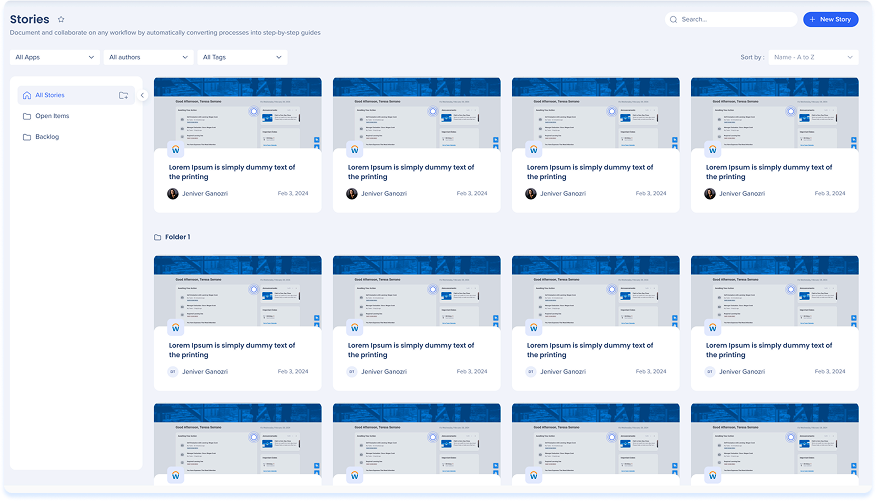
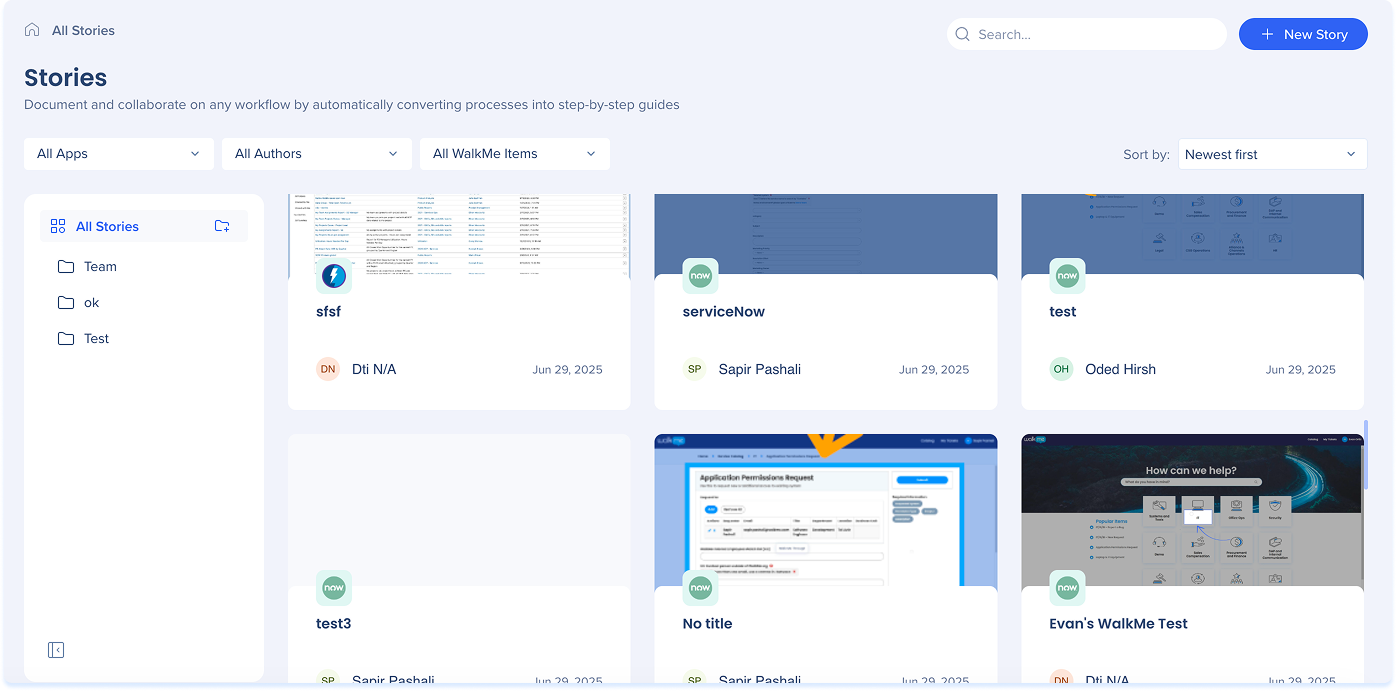
The All Stories page is where you can create new stories and manage existing ones.
Folders
Use folders to keep stories organized by topic, team, or use case.
- A list of your folders will be shown under All stories
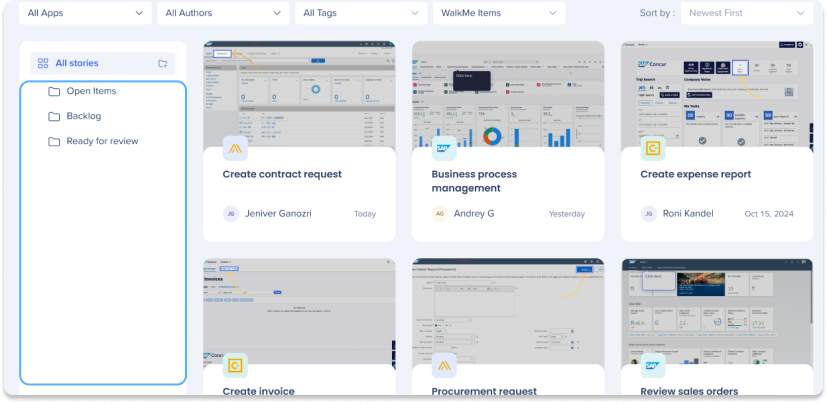
Creating a folder
- Click the Add a folder icon in the upper-left corner
- Enter a name and choose a color
- Click Enter
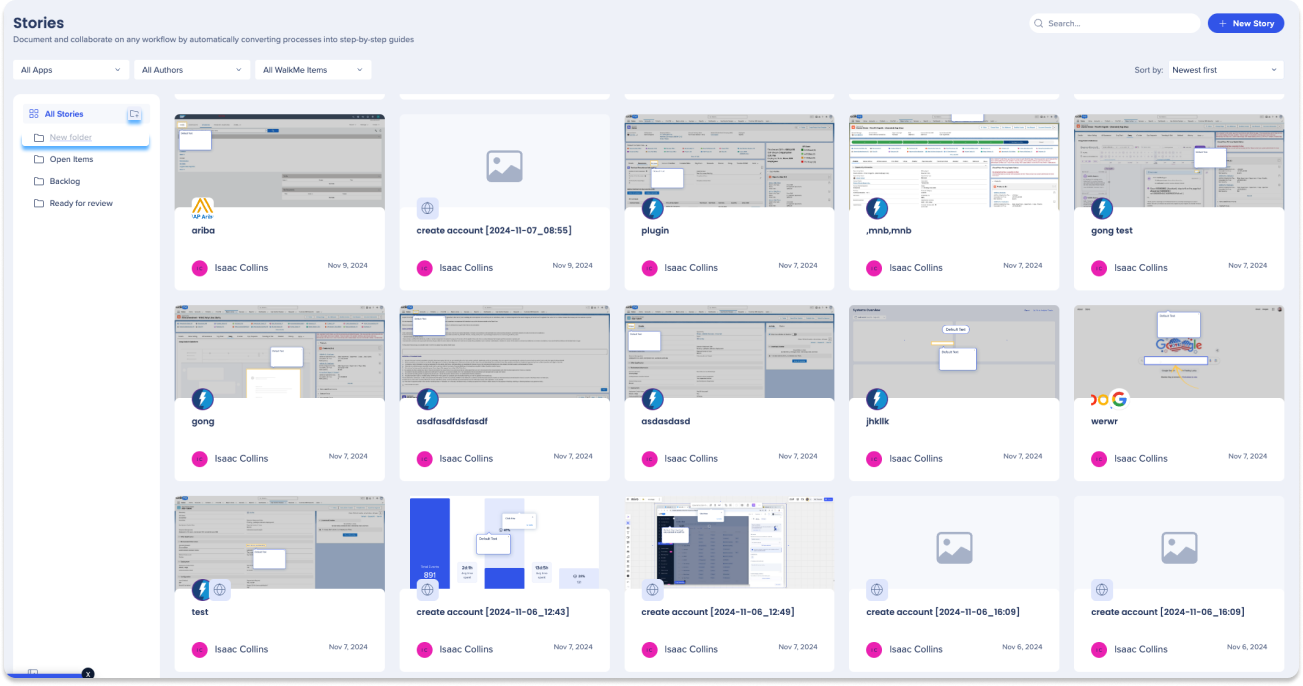
Folder options
- Click the Options menu to open a dropdown menu
- Choose one of the following actions:
- Rename
- Delete
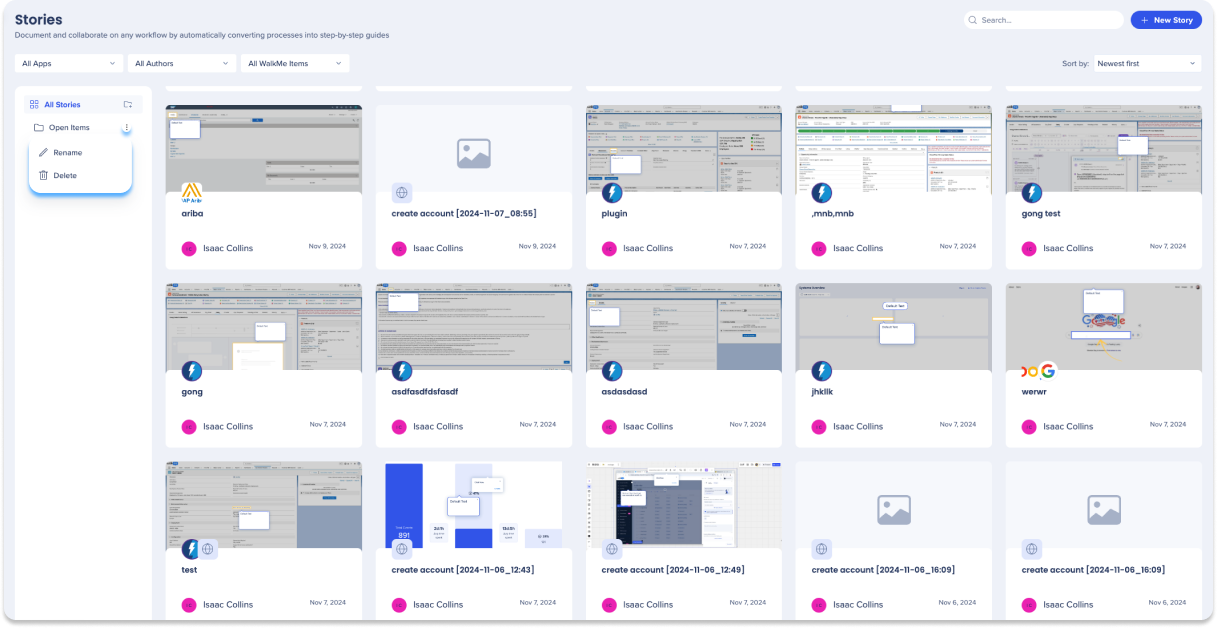
Filters & sorting
Apply filters to customize your view settings.
- Filter Stories by:
- Apps
- Authors
- Includes WalkMe items
- Sort Stories by:
- Newest first
- Oldest first
- A to Z
- Z to A
Search capabilities
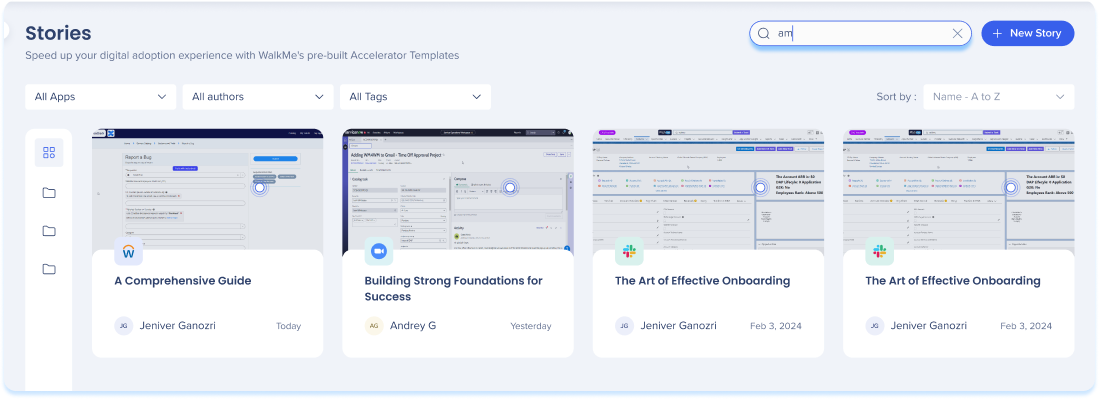
Easily navigate all your stories with a comprehensive search feature.
- Search for stories using the Search bar
Solo puedes buscar utilizando el nombre de la historia
Tile options
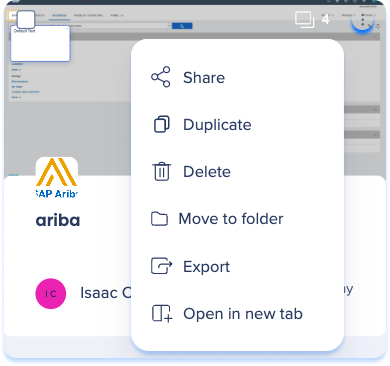
- Click on the Options menu on the top right of the story tile
- The following actions are available:
- Share
- Duplicate
- Delete
- Export
- Open in new tab
Bulk tile options
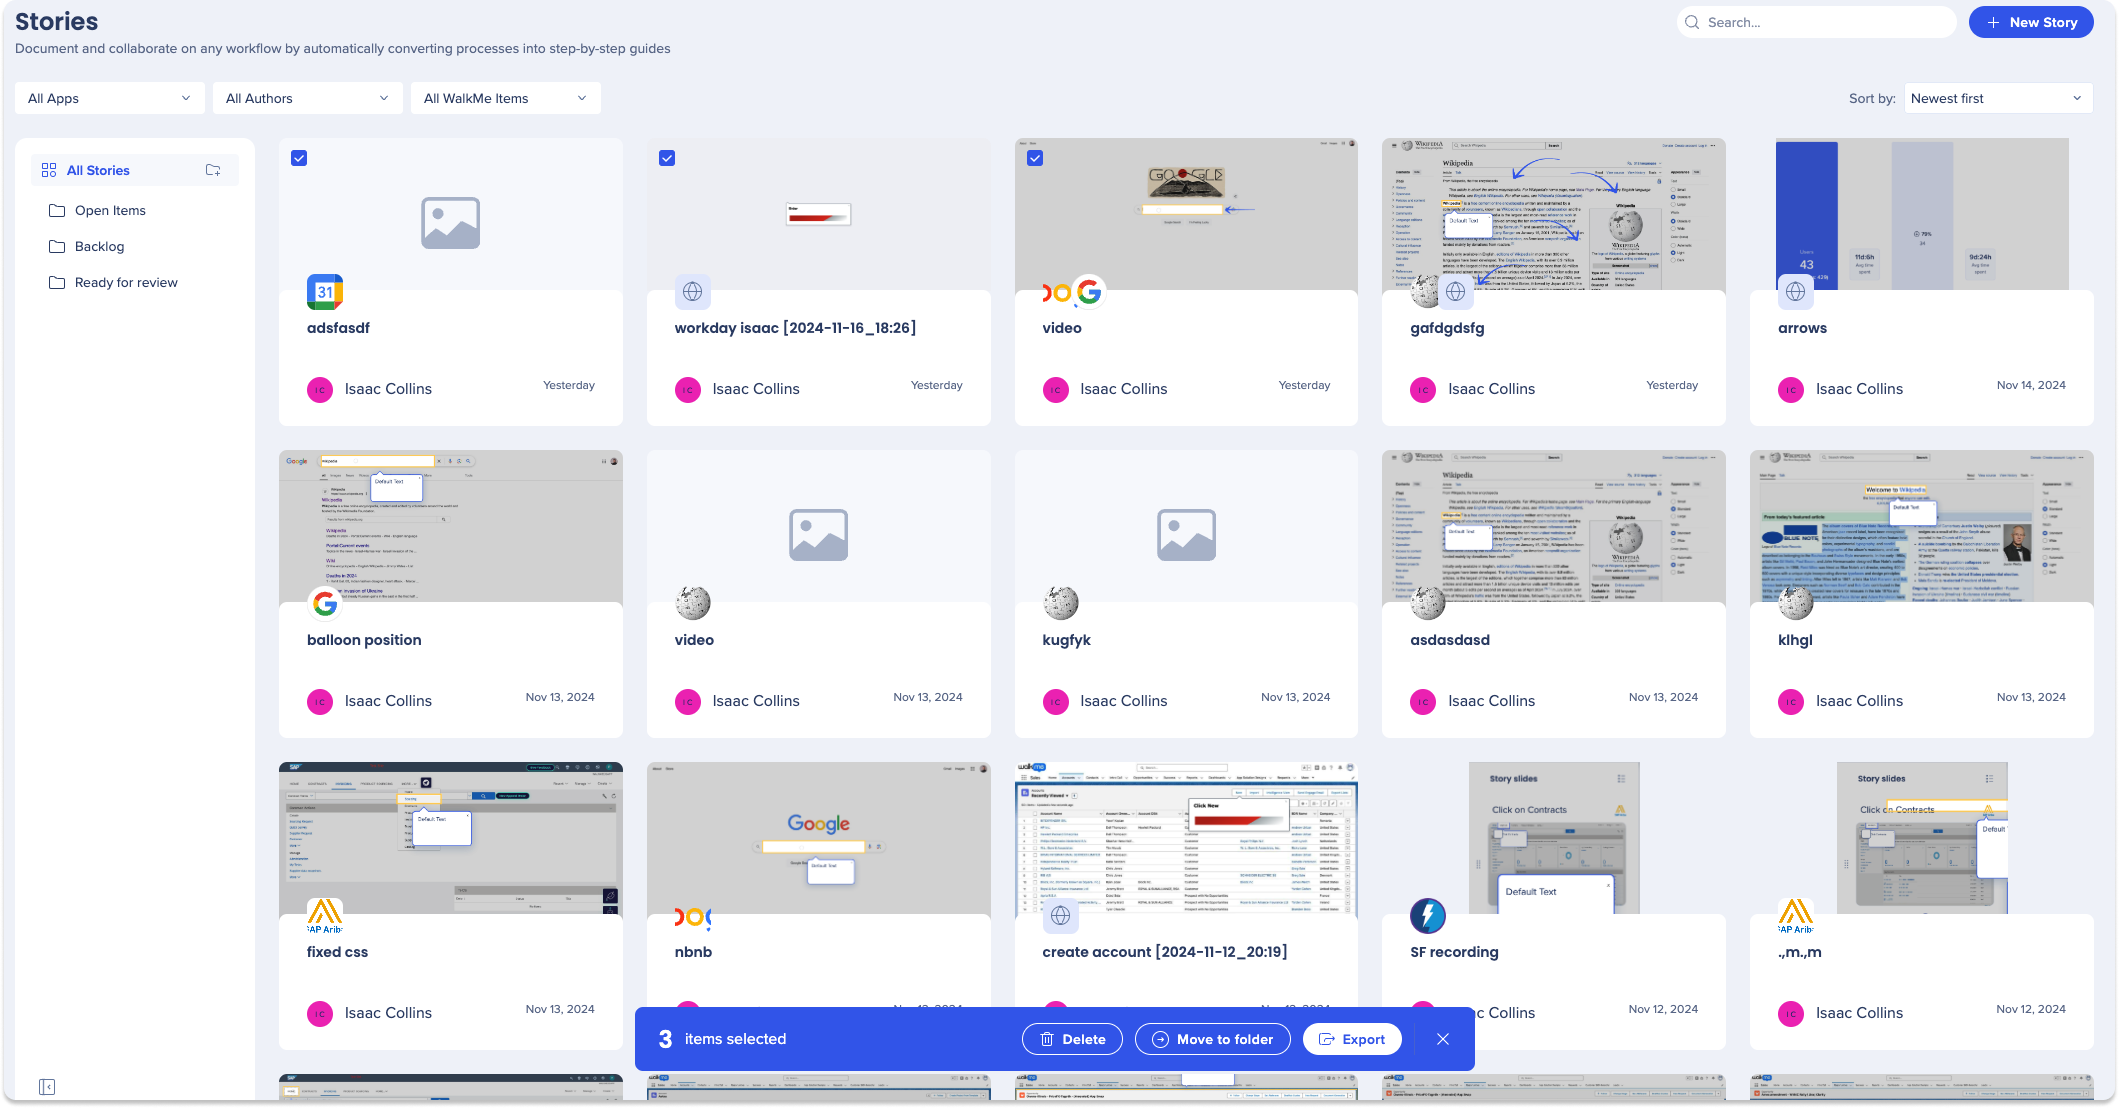
- Select the slide or slides from which you wish to perform supported actions
- Choose one of the following actions from the floating toolbar:
- Delete
- Move to
- Export
How to Create Stories
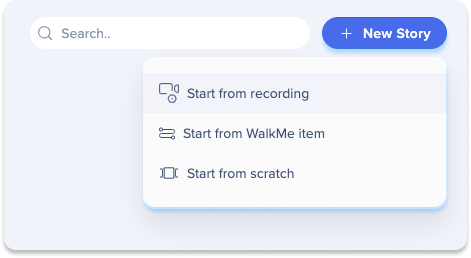
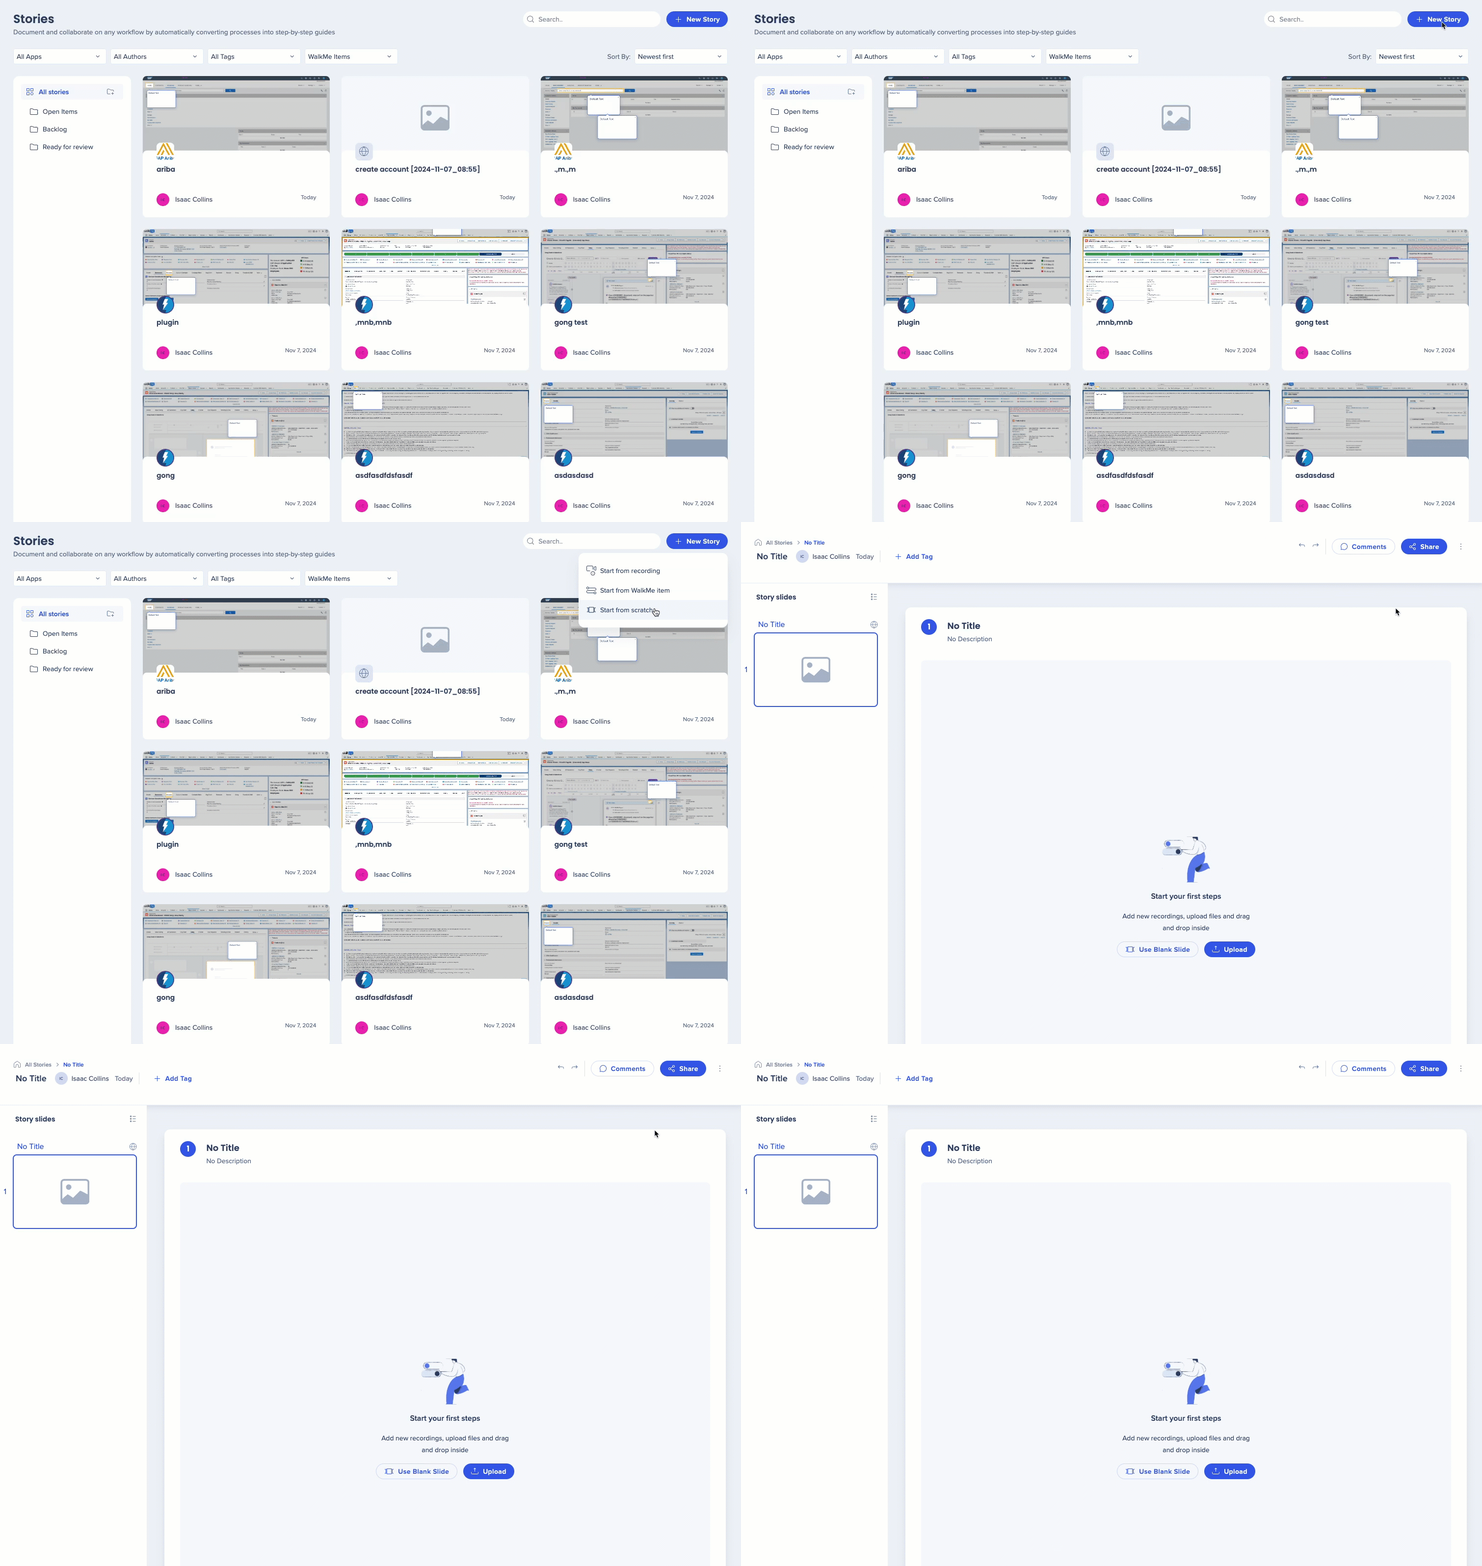
- Click the + New Story button in the top-right corner of the page
- A popup will appear with three creation ways to choose from:
- Start from recording: Capture your screen to start creating
- Start from WalkMe item: Use pre-built WalkMe content to begin
- Start from scratch: Create and customize from a blank slide
1. Start from recording
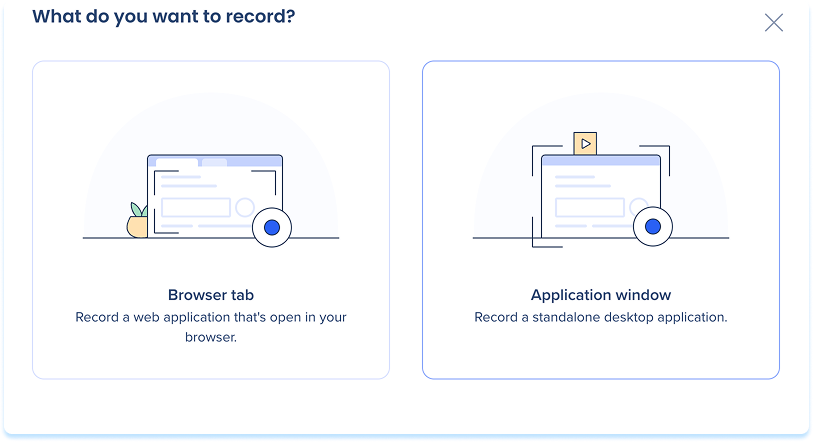
Stories can be recorded from a browser tab or a desktop application window.
- In the What do you want to record popup, choose a recording source:
- Browser tab: Record any tab in your browser
- Application window: Record a desktop application window
- Select Next
Nota
Un administrador de cuenta debe activar la configuración de "Sitios web y WalkMe" para permitir la creación de historias a partir de grabaciones.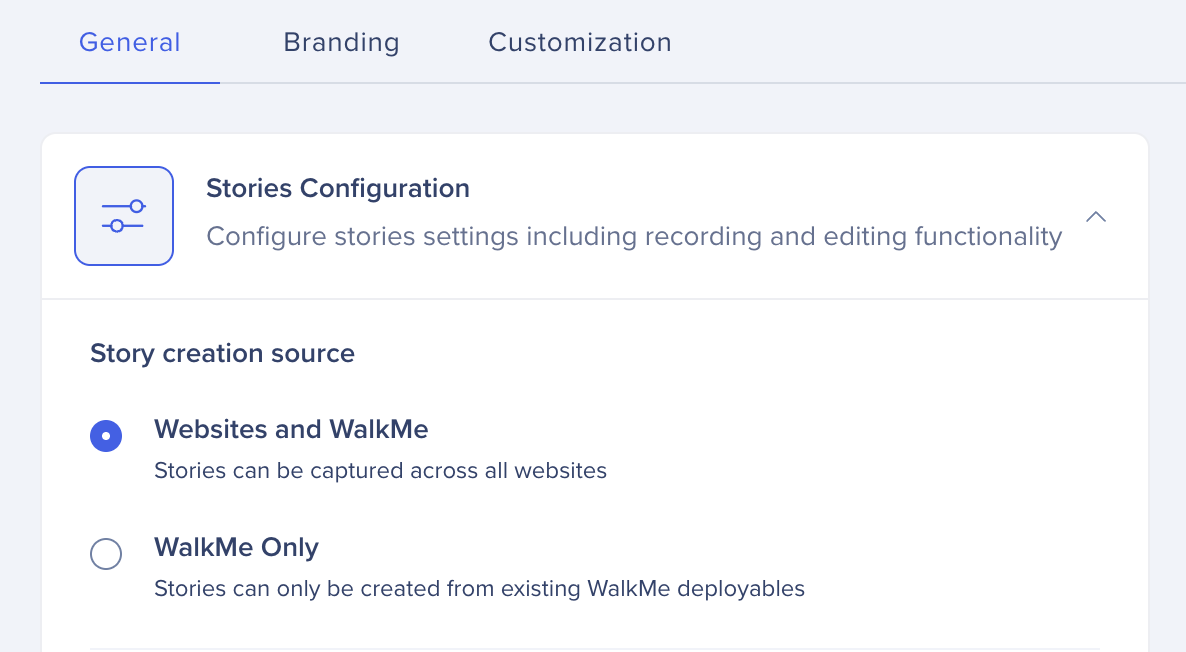
Record from browser tab
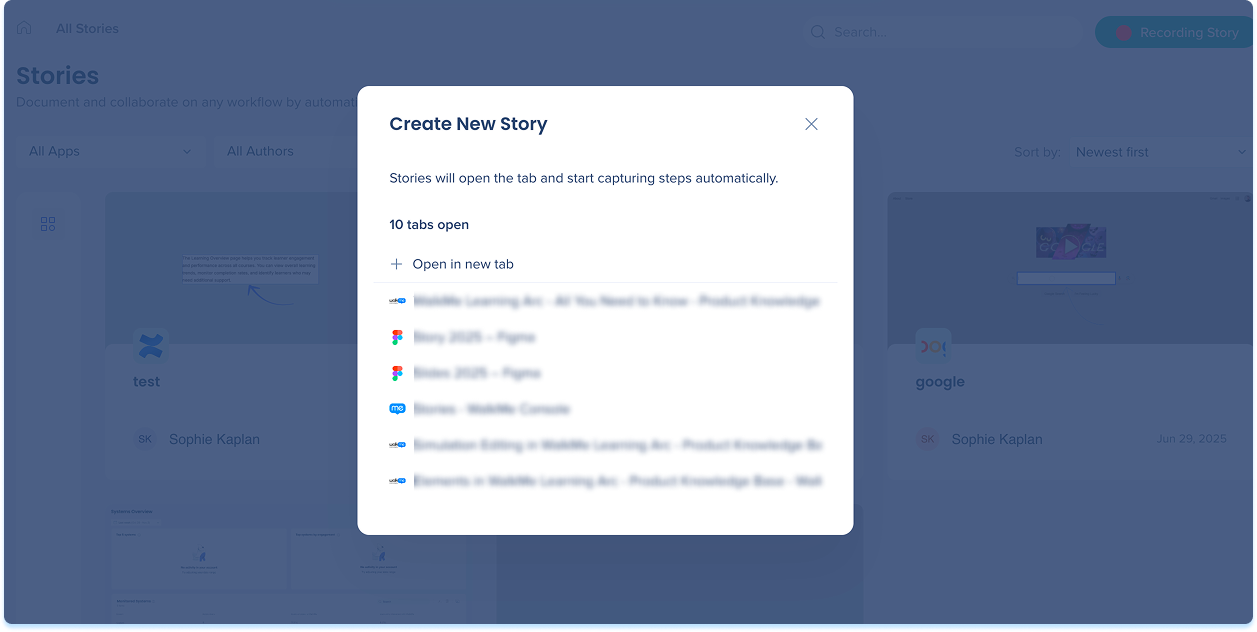
- Select which tab to record in the Create new story popup
- If the tab you want to record is not shown on the list, open a new tab and it will appear in the list below
-
Go through the process you want to capture in the story
-
While recording, you can:
-
Pause
-
Restart
-
Delete
-
Manually record screen
Nota
El icono Registro muestra el número de pasos que se capturan durante la grabación
- When finished, click the Finish recording button

- Enter a Name for the story
- Click Save

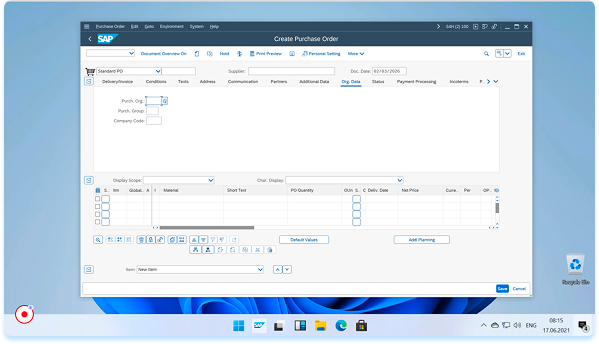
Record from an application window
- If the WalkMe Menu for desktop isn't installed, select Learn more in the load screen and follow the on-screen instructions to download and install the WalkMe Menu
- Complete the workflow you want learners to practice
- Select Stop Recording when you're done
- When finished, select Finish recording
- Type a Name for the story
- Select Save
Nota
La primera vez que grabas una simulación de escritorio en macOS, se te pedirá que otorgues permisos de grabación de pantalla. Sigue las instrucciones en pantalla para permitir el acceso.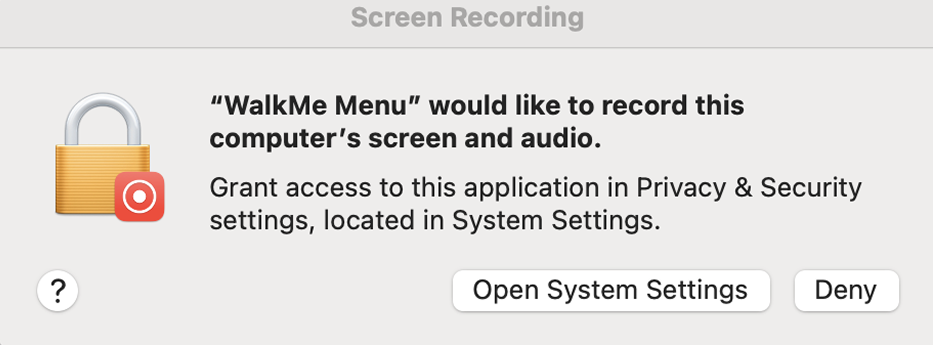
Installing the WalkMe desktop application
Mac
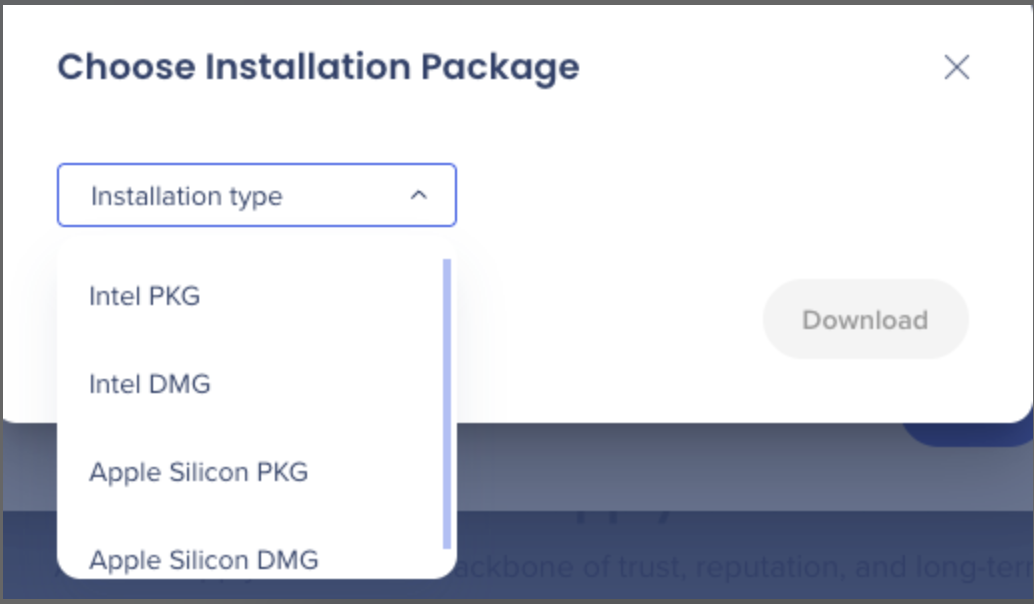
WalkMe for Mac is available in two formats: DMG and PKG.
- The DMG is the simplest option — open it and drag the app to your Applications folder.
- The PKG is designed for organizational deployment, installs WalkMe for all users on the machine, and supports automatic updates. Admin permissions are required.
- Not sure which chip you have? Go to Apple menu → About This Mac. Select Intel DMG for Intel-based Macs, or Apple Silicon DMG for M-series Macs.
Windows
The User Installer (EXE) installs WalkMe for the current user only. In some environments, administrator permissions may be required.
2. Start from WalkMe item
- Select a system from the dropdown in the Add items to story popup
- Select the items
- You can filter by items, status or system
- You can select a folder/multiple items
- Click Select

3. Start from scratch
- A blank story will open where you can create your story step-by-step by:
- Drag and dropping files
- Uploading files
- Using a blank slide
How to Edit Stories
The stories editing page includes four main areas:
- Stories slides panel
- Top panel
- Main canvas
- Annotation toolbar
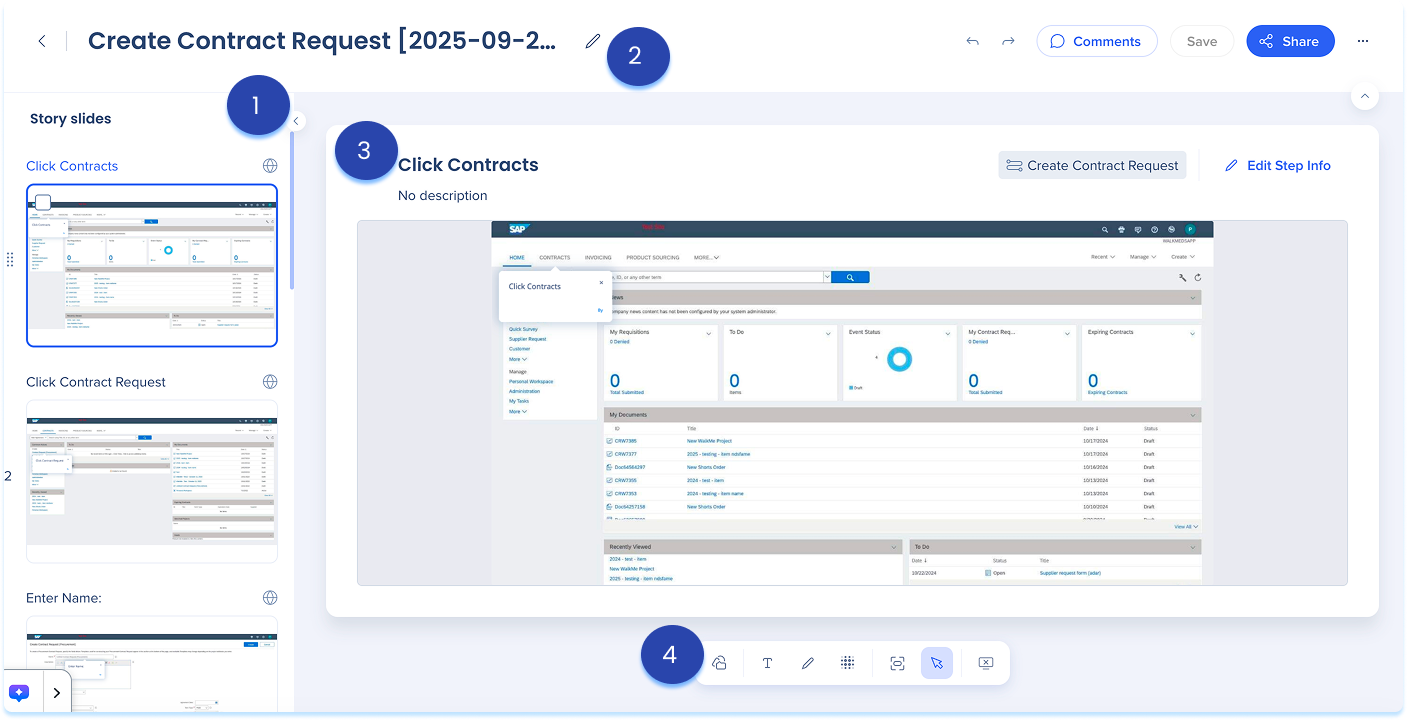
1. Stories slides panel
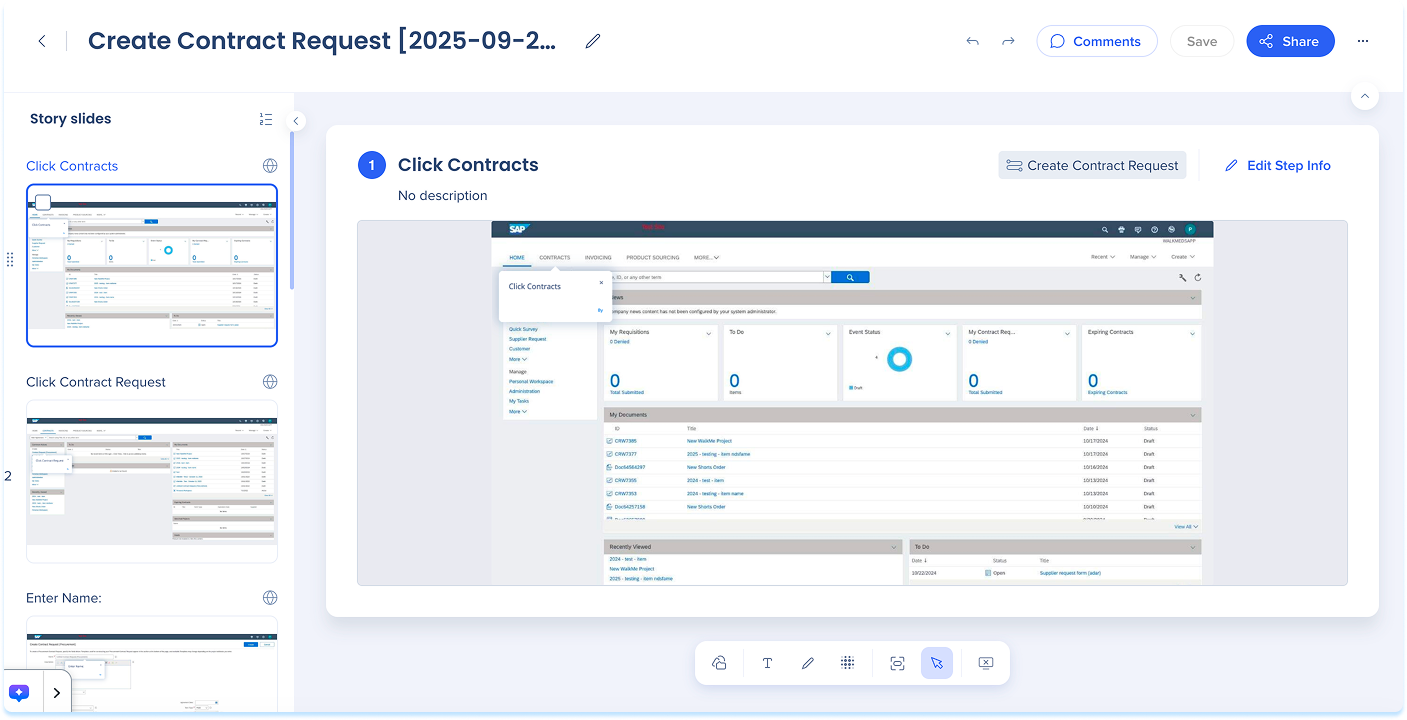
The slides panel appears on the left and shows the stories steps in order.
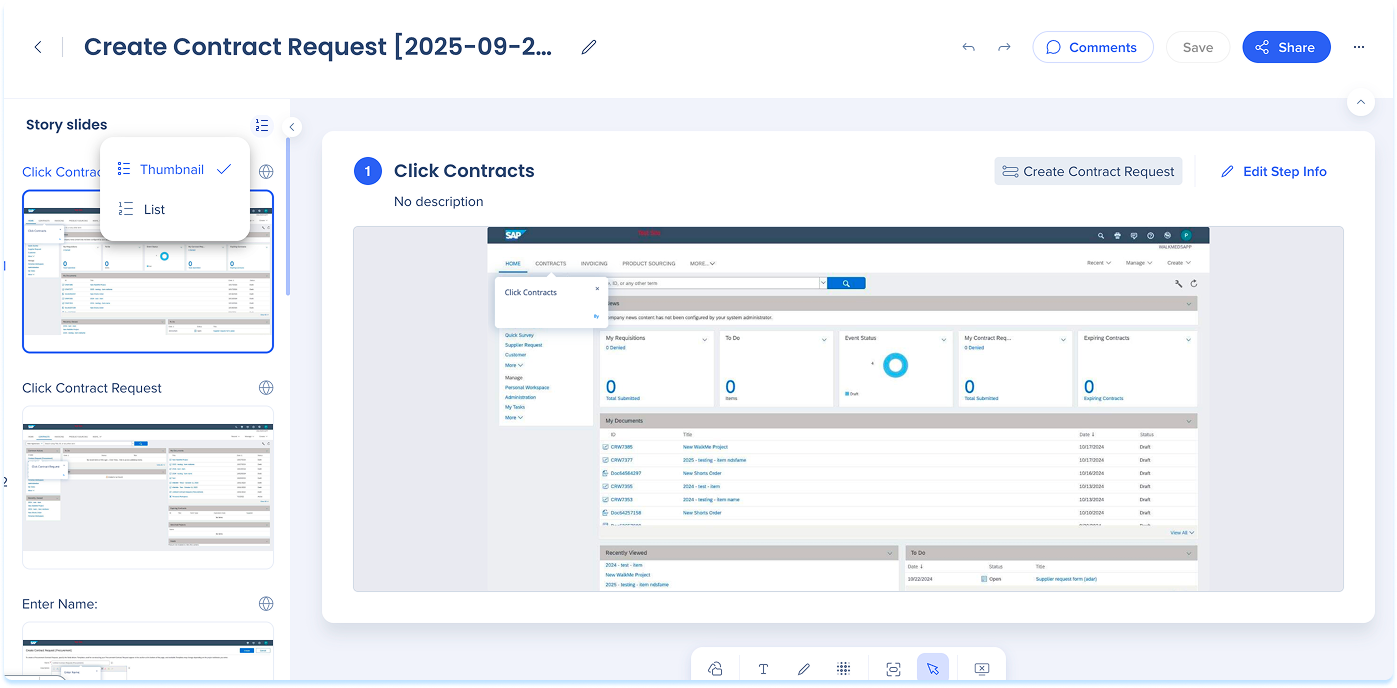
Display mode
- In the panel header, select the Display mode icon
- Choose one of the following:
- Thumbnail: Large image previews of each slide
- List: Compact view showing step numbers and titles
Slides options
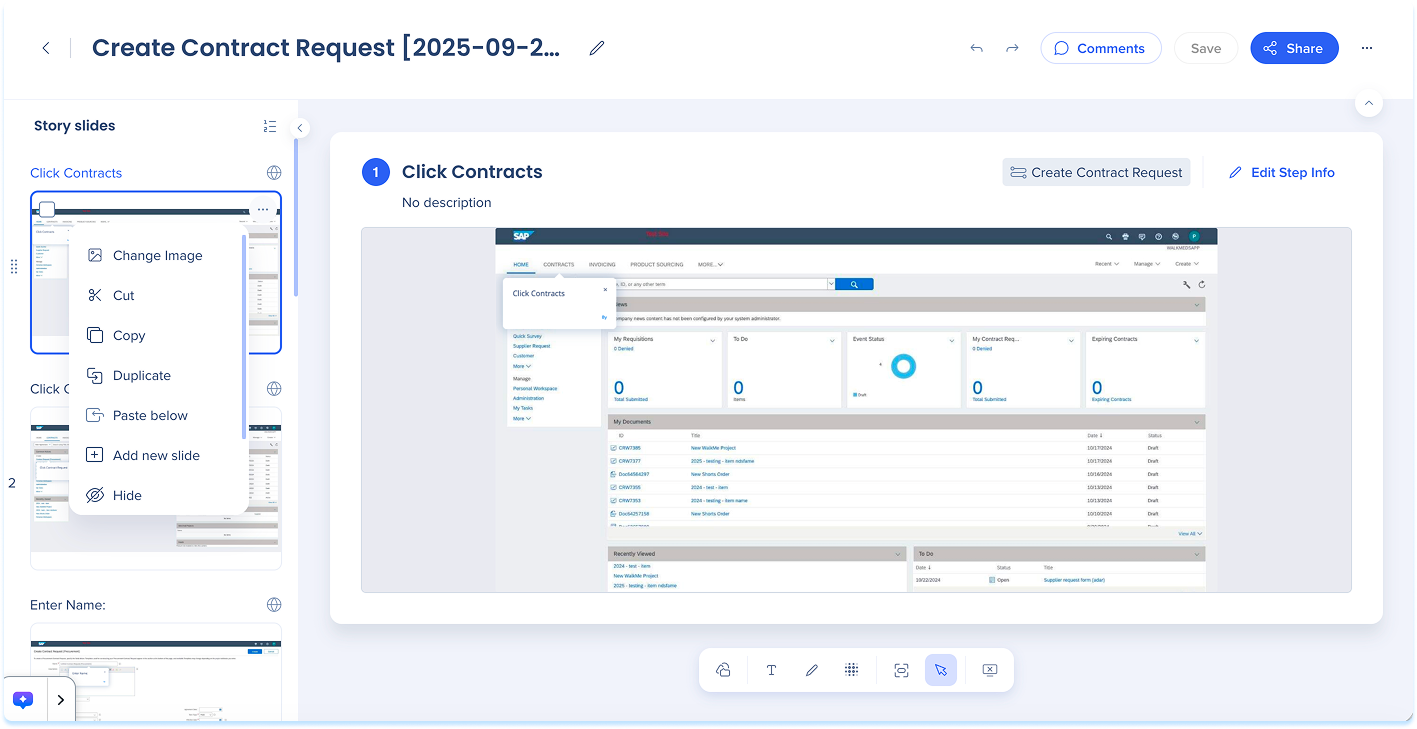
Each slide includes an Options menu with tools for managing steps.
Available actions:
- Change image: Choose a different image for the slide
- Cut / Copy / Paste below: Move or duplicate slides
- Duplicate: Create a copy directly under the current slide
- Add new slide: Add an additional slide below
- Hide: Exclude the step from playback without deleting it
Bulk slide options
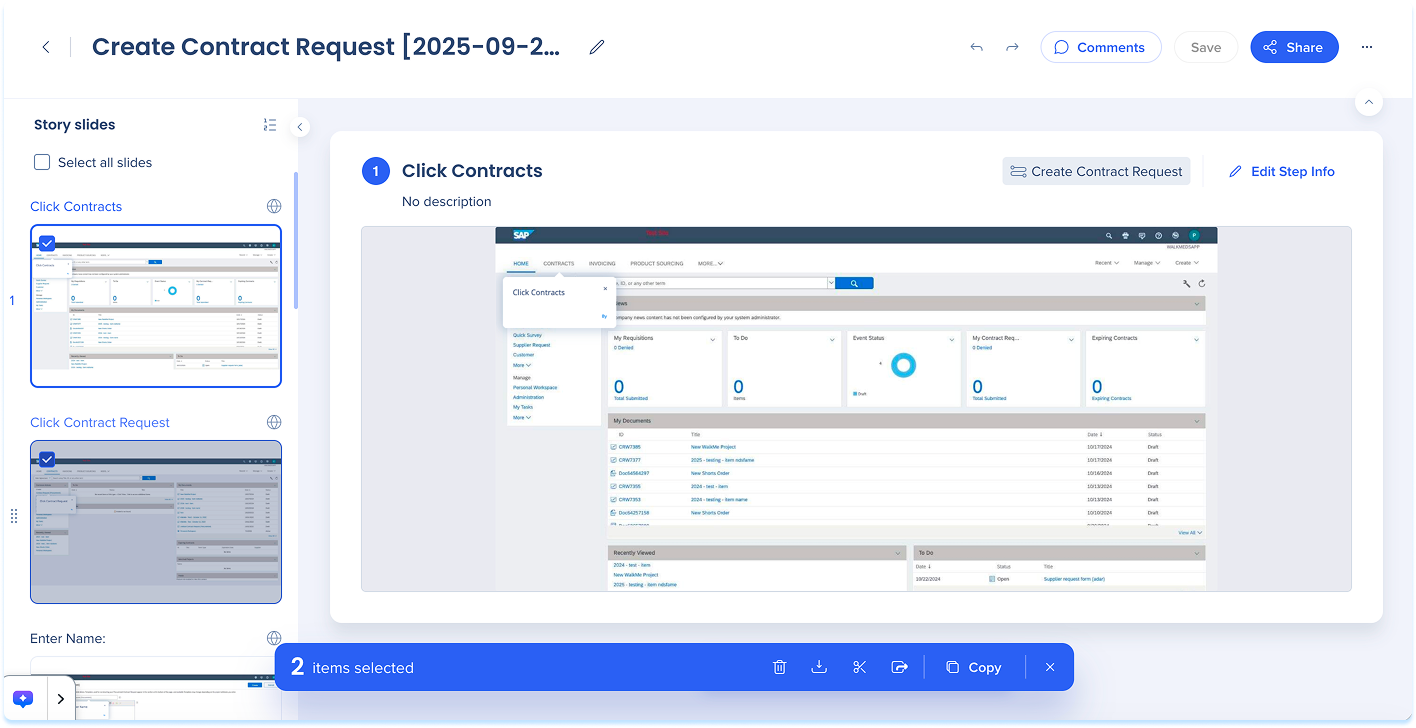
To manage multiple slides:
- Select slides using the checkboxes or select Select all slides
- A blue toolbar appears with these actions:
- Delete
- Download
- Cut
- Export
- Copy
Reorder slides
- Drag a slide to a new position
Add a new slide
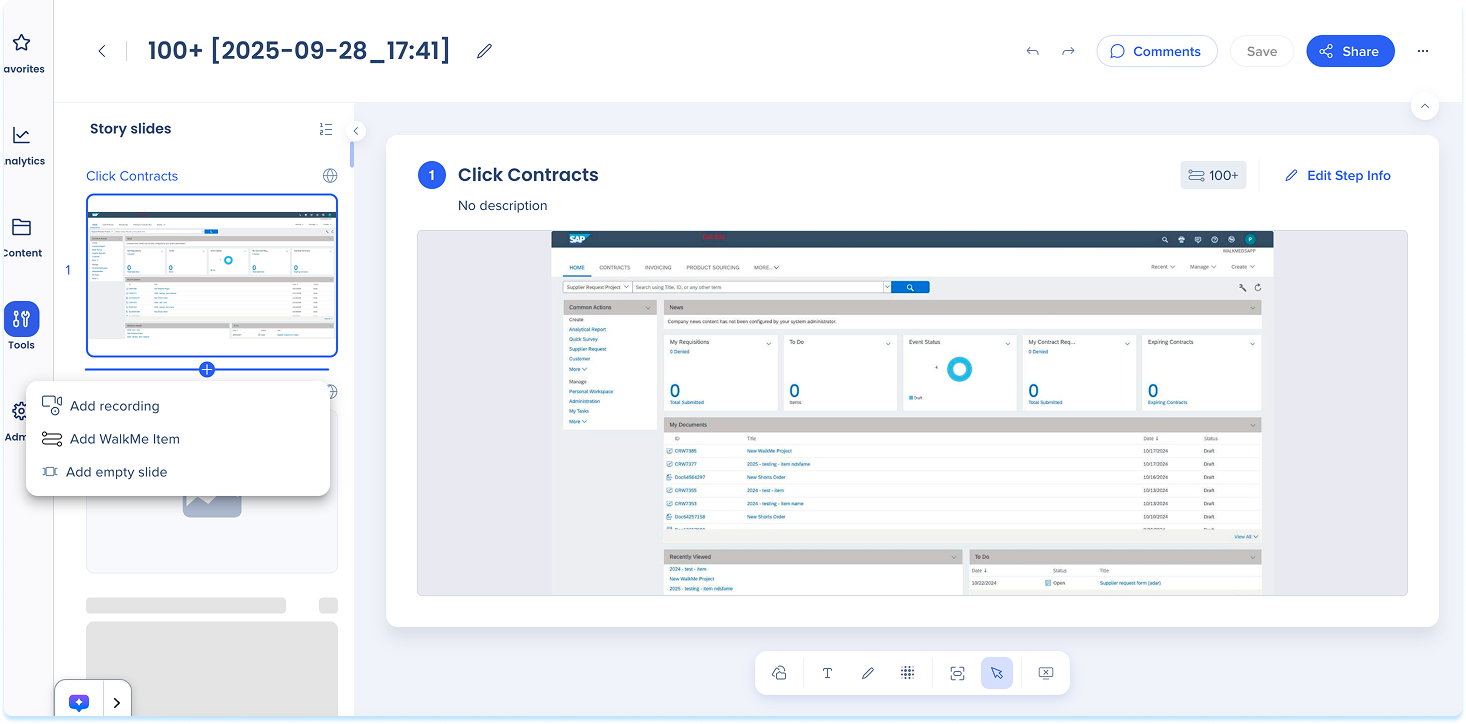
You can insert new slides anywhere in the story.
- Hover between slides to show the + Create divider
- Select Add Recording
- Follow the capture flow to record new steps
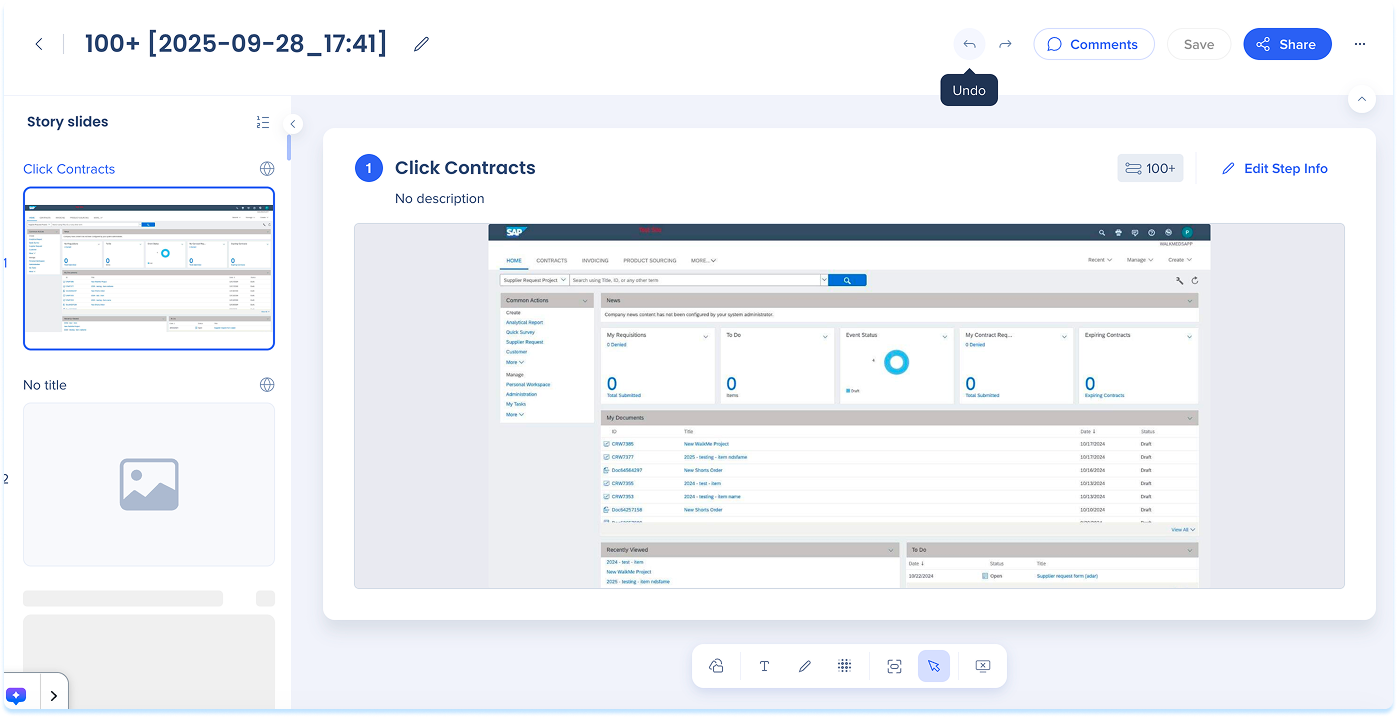
2. Top panel
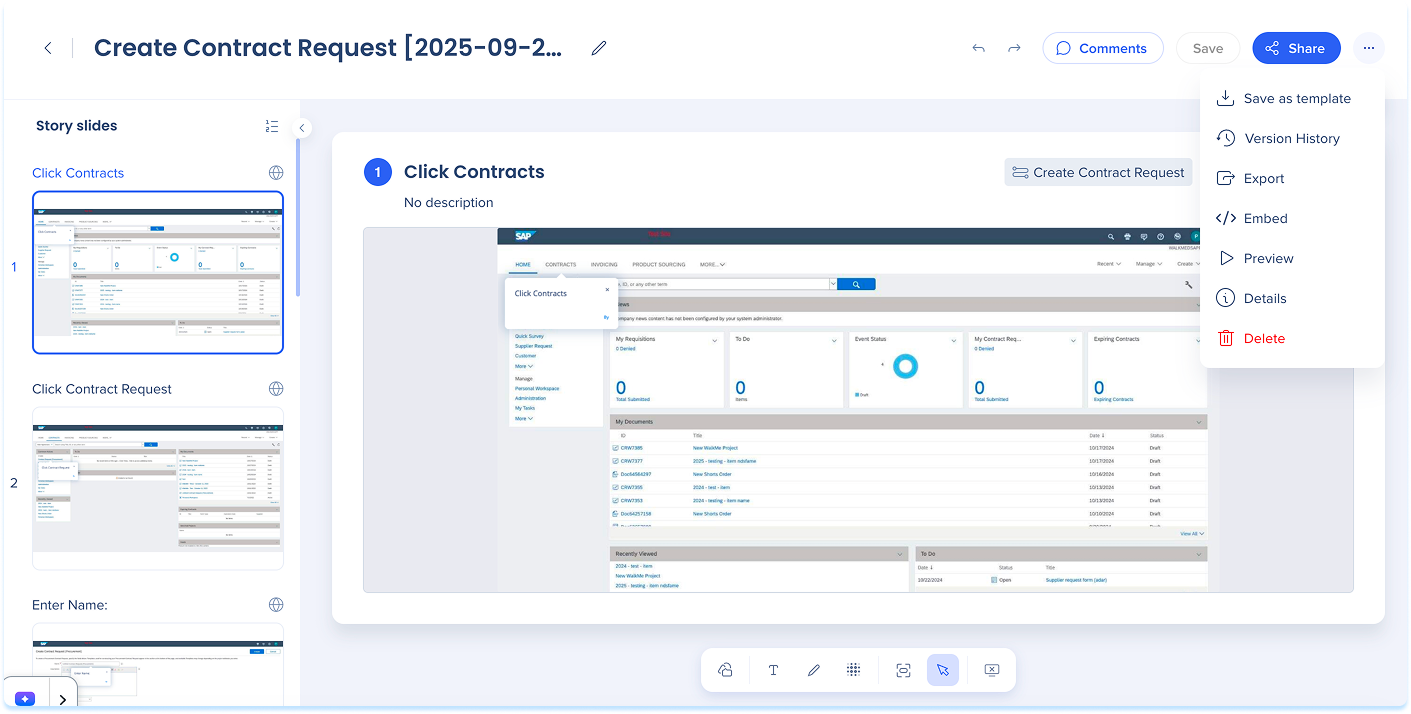
The top panel contains controls for managing the entire story.
Includes:
- Undo / Redo
- Comments
- Save
- Share
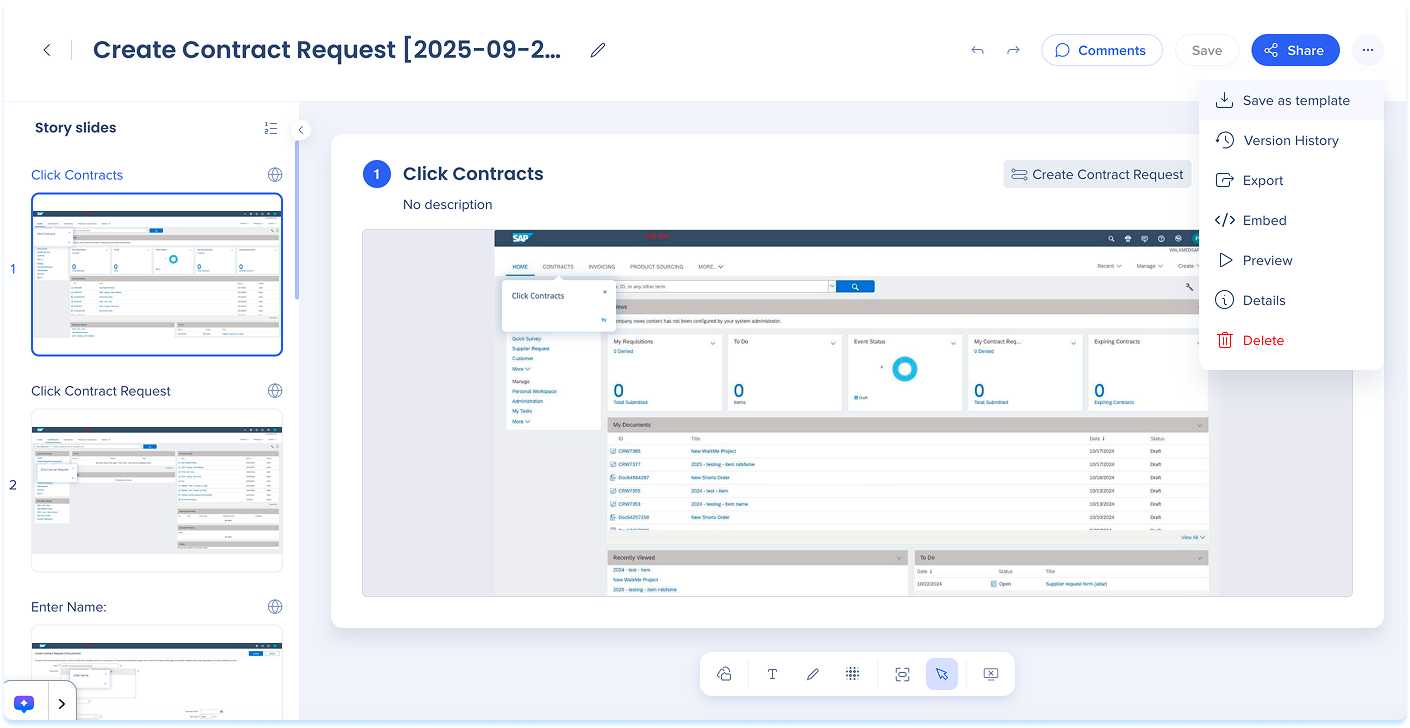
- Options menu:
- Save as template
- Version history
- Export
- Preview
- Details
- Delete
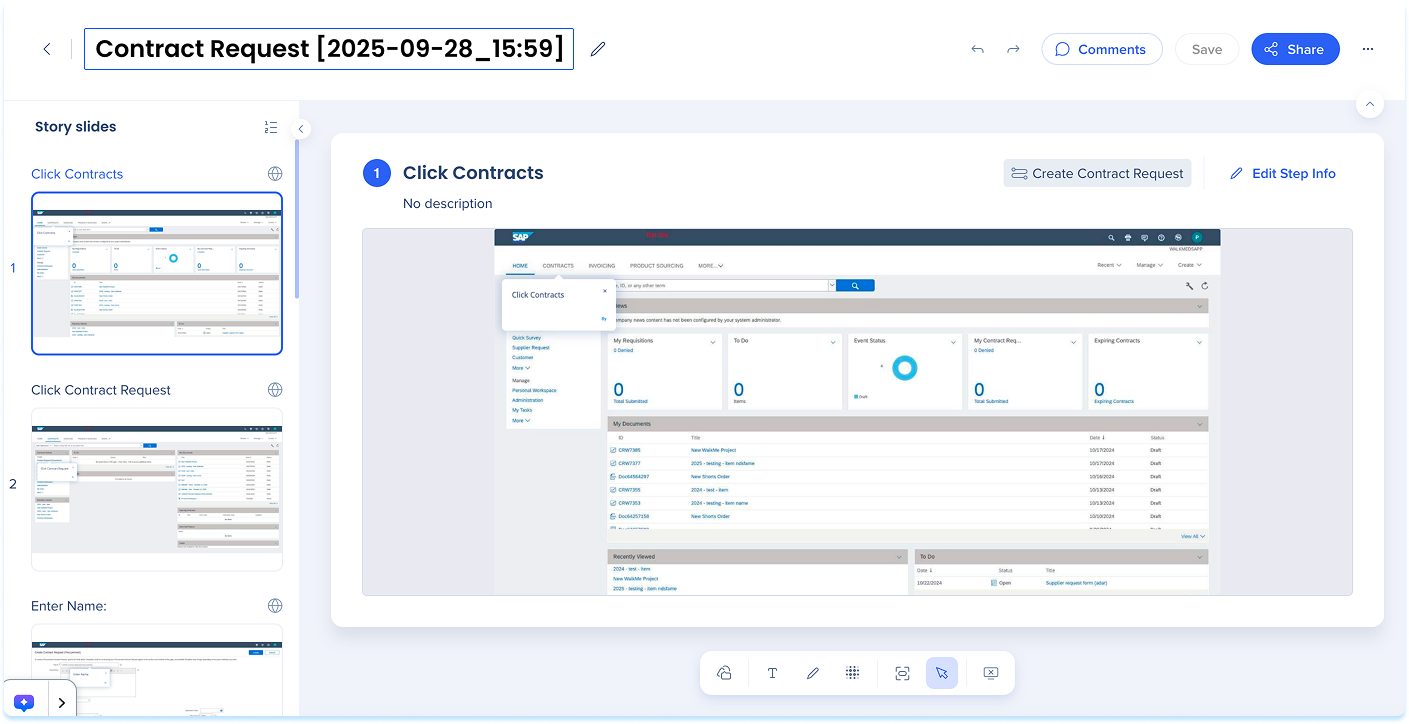
Edit story title
- Select the title field, type a new name, and press Enter
Undo/Redo
- Select Undo to revert your last change
- Select Redo to apply it again
Share
WalkMe Stories users can share slideshow presentations with other stories users.
Share Stories
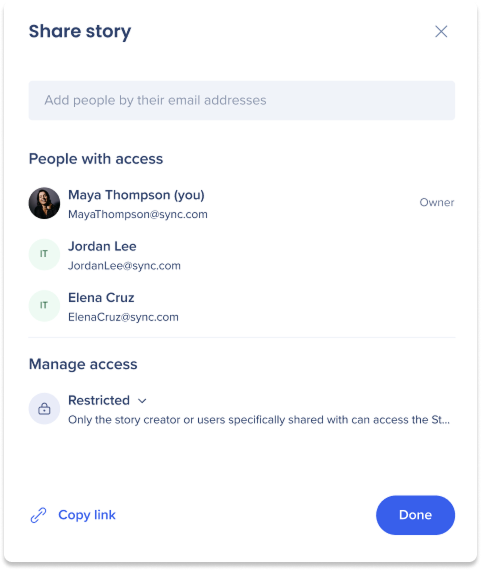
- Click the Share button near the top-right of the page
- A Share story popup will appear
- Add users:
- Enter one or more email addresses in the text field to share the story with specific users
- People with access:
- View the list of users the story is currently shared with
- Click the Delete icon next to the person's name to remove their access to the story
- Manage access:
- Choose an access level:
- Restricted: Only the story creator or users specifically shared with can access the story
- Everyone: All users within the account can view and access the story
- Copy Link: Copy the story's link and share it manually
- Click Done
Nota
Se notificará a los usuarios que se compartió una Historia con ellos en el icono de Notificaciones y en un correo electrónico.
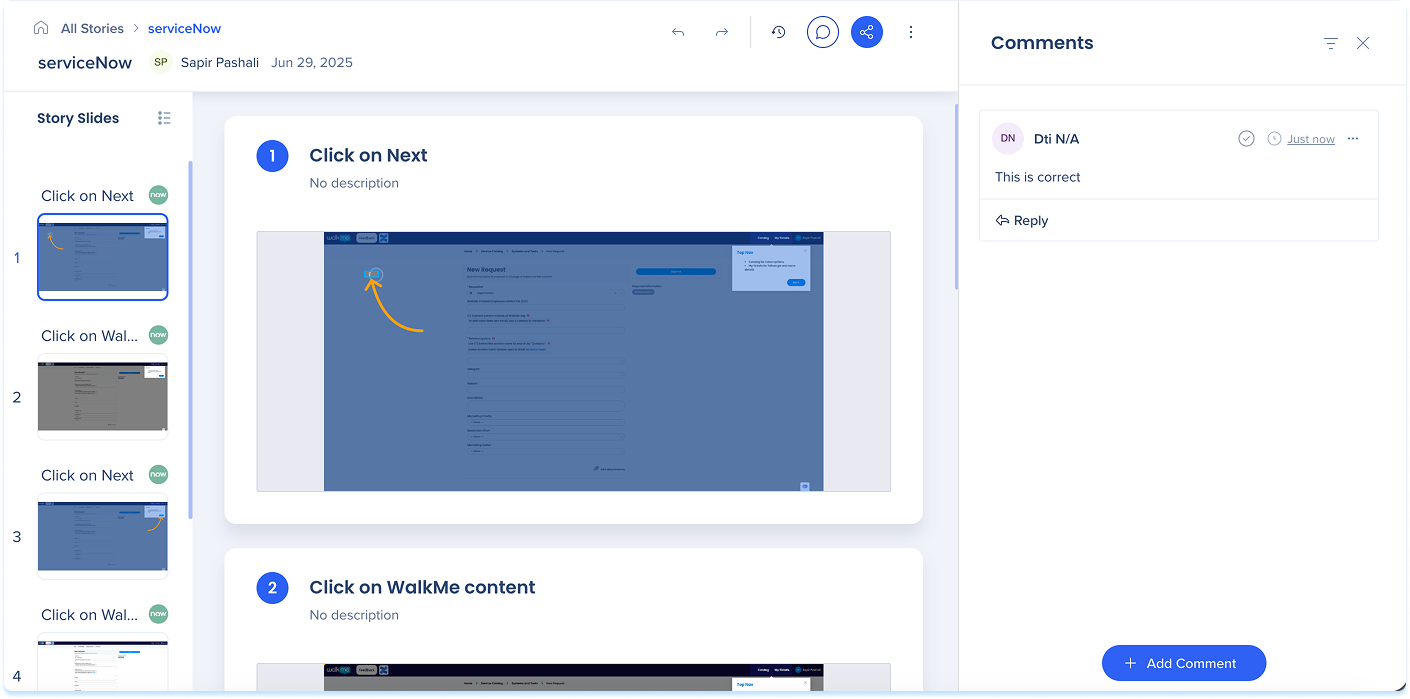
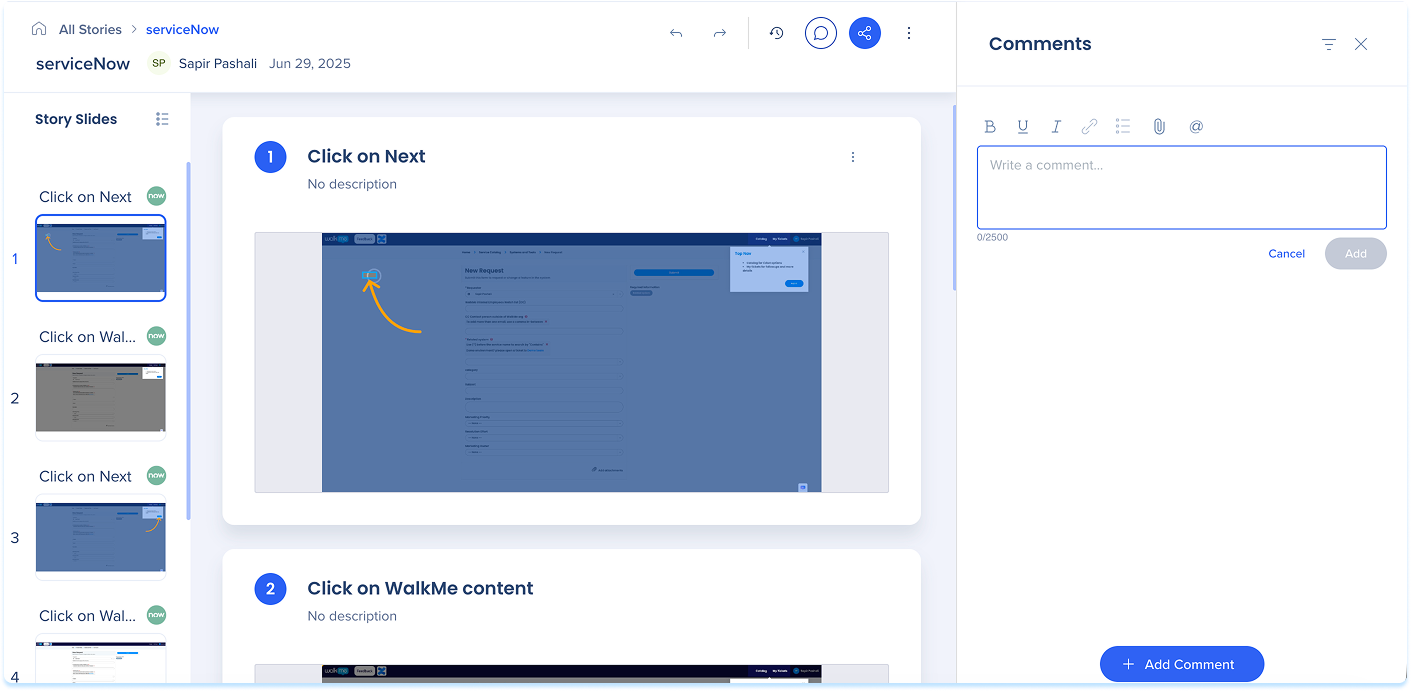
Use comments to collaborate on story slides.
View comments
You can view comments of a slide in two ways:
-
Click the Comments icon, next to the heading of each individual slide 
-
Click the Comments button at the top-right of the page
Add a comment
- In the comments panel select + Add Comment
- Type your feedback, then select Add
Manage Comments
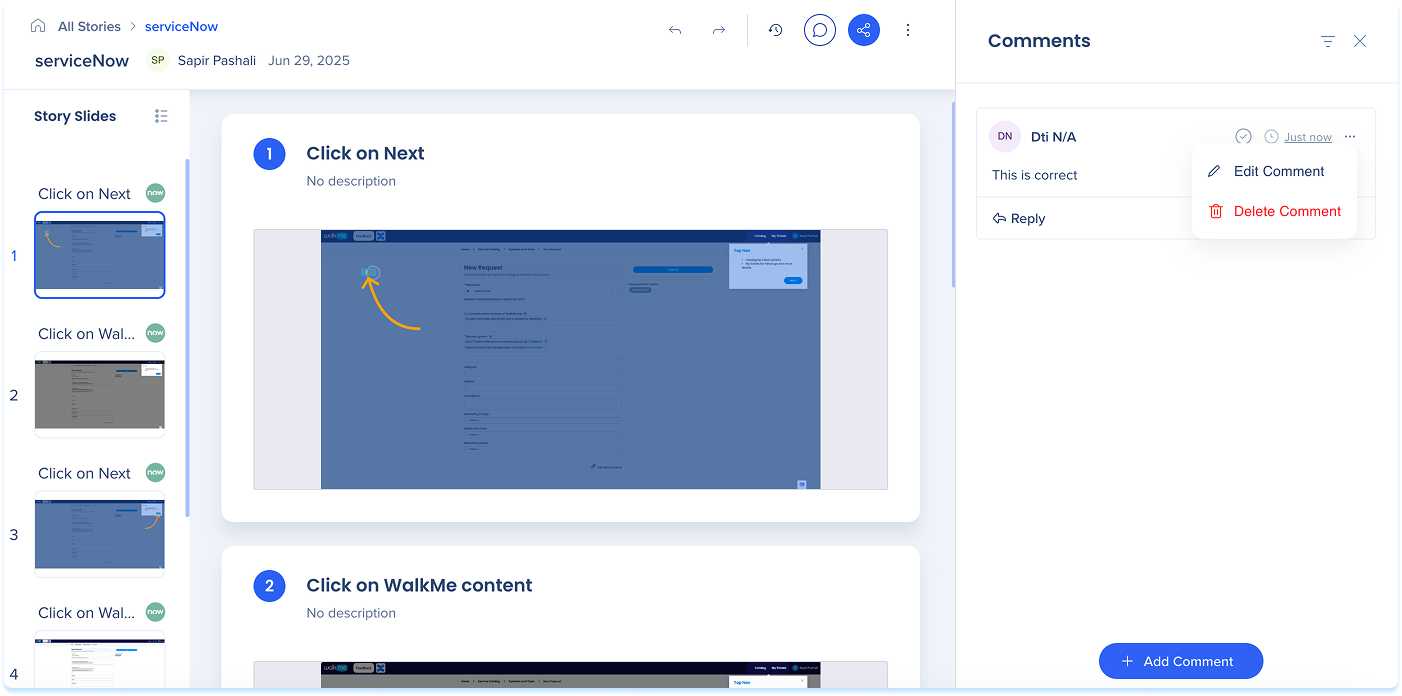
- In the comments panel, open the Options menu next to a comment
- Select Edit Comment or Delete Comment
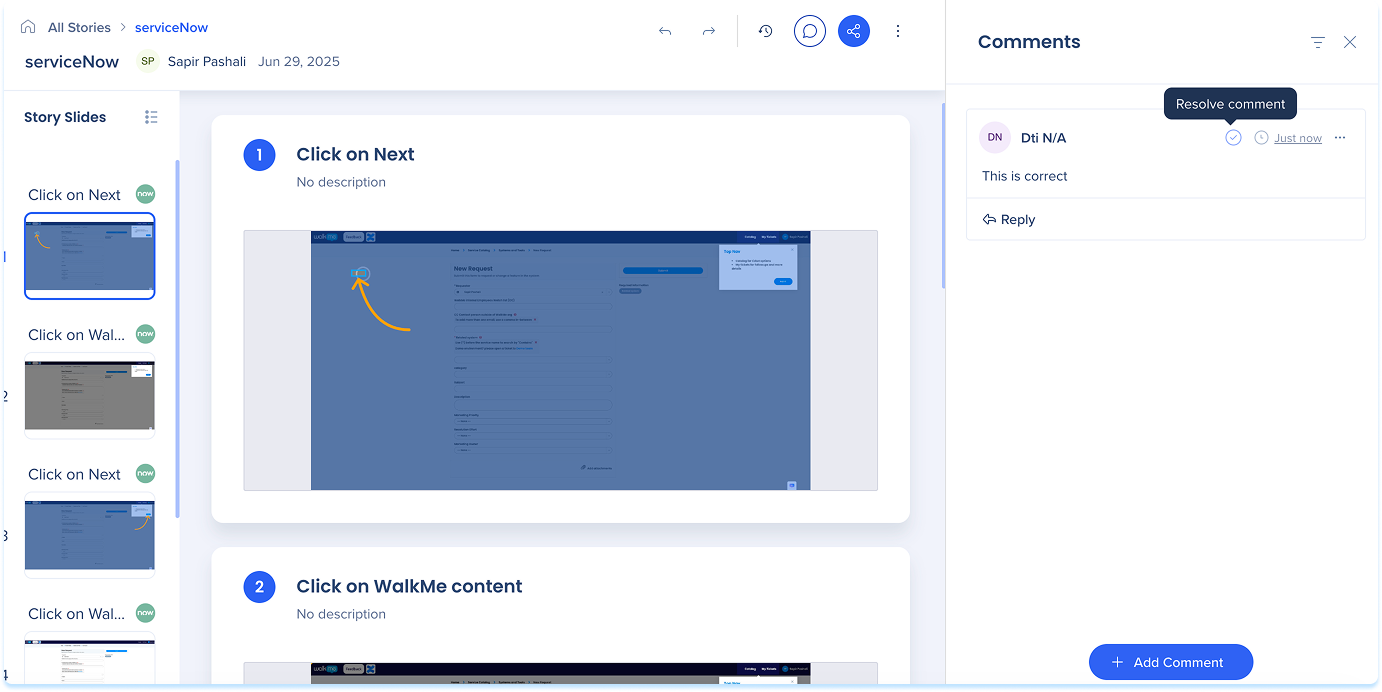
Resolve comments
- When feedback is addressed, select the Check icon to mark it as resolved
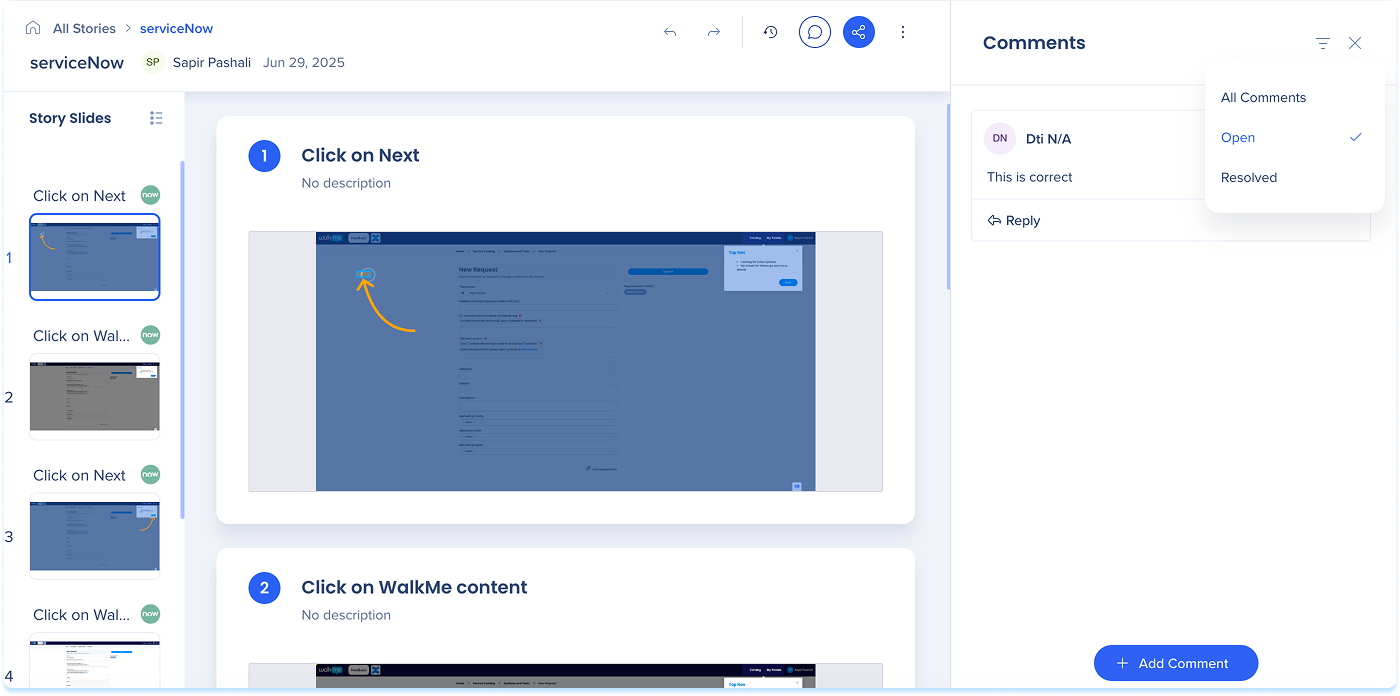
Filter comments
- Select the Filter icon to view:
- All comments
- Open
- Resolved
Save as template
- Click the Options menu at the top right hand side of the page
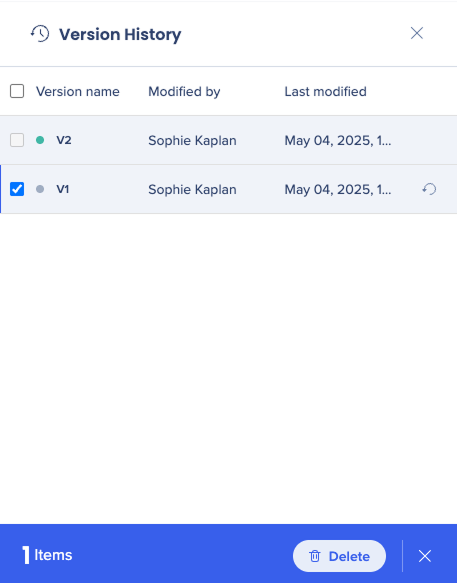
Version history
- Select Version History to view previous versions
- The side panel shows:
- Version name
- Modified by
- Modified date
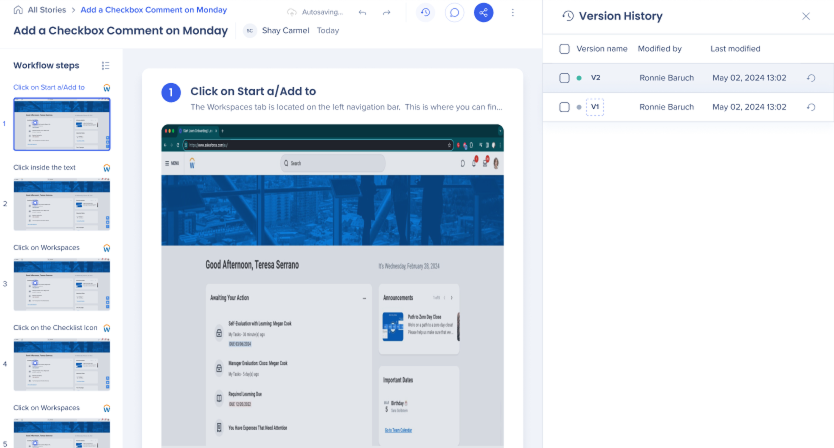
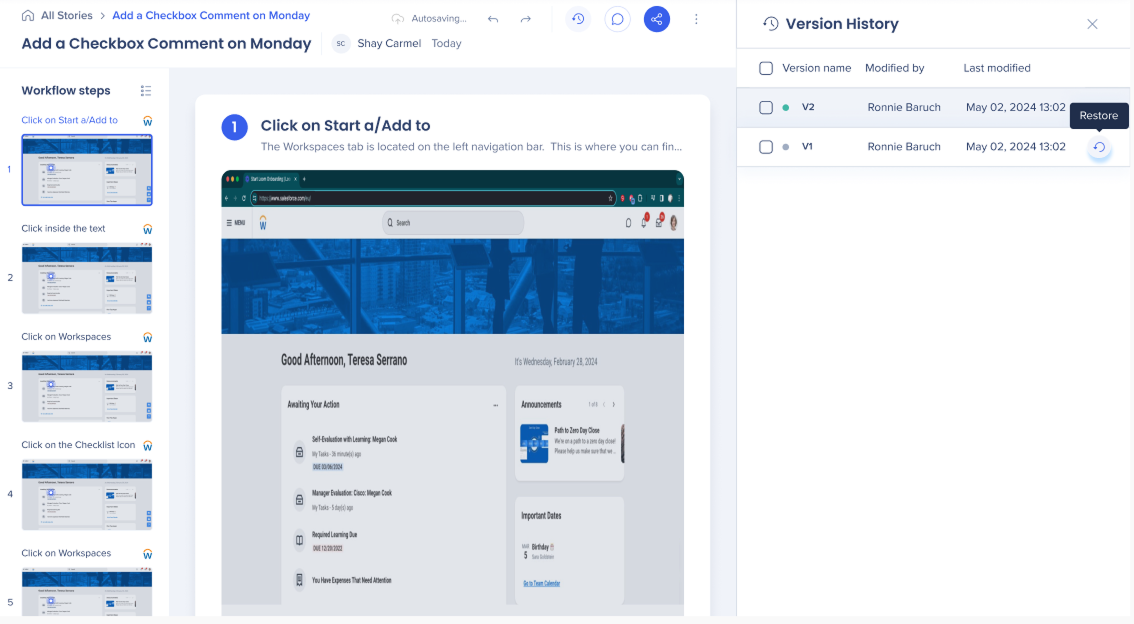
- To restore, select a version and choose Restore
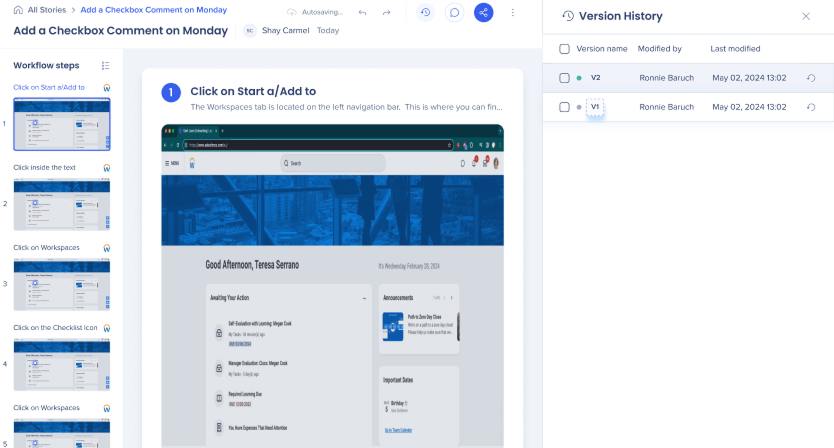
- To rename, select the version name, type a new one, and press Enter
- To delete, select versions and choose Delete in the floating toolbar
Export
- Click the Options menu at the top right hand side of the page
- Select Export
- Turn on Export with cover slide (optional)
- Choose a format:
-
- PDF Document
- Word Doc
- PowerPoint
- Zip scorm (p3)
- Video
- HTML - embed stories in sites which support HTML formatting
- Markdown - embed stories in sites which support Markdown formatting (i.e. github, notion, sharepoint)
Nota
Los documentos descargados se pueden encontrar en la carpeta de descargas local del ordenador del usuario

Embed
- Click the Options menu at the top right hand side of the page
- Select Embed
- Choose a format to share the story:
- Copy to Source Code
- Copy HTML
- Copy Markdown

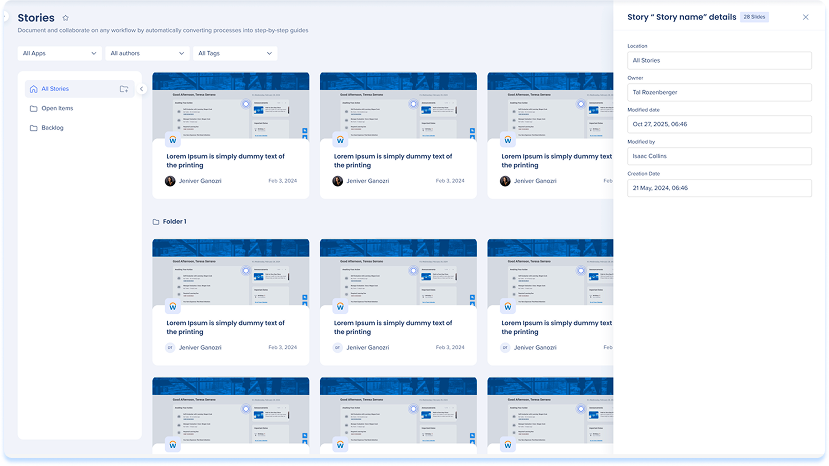
Details
- Click the Options menu at the top right hand side of the page
- Select Details
- The story details appear in the right-hand panel
3. Main canvas
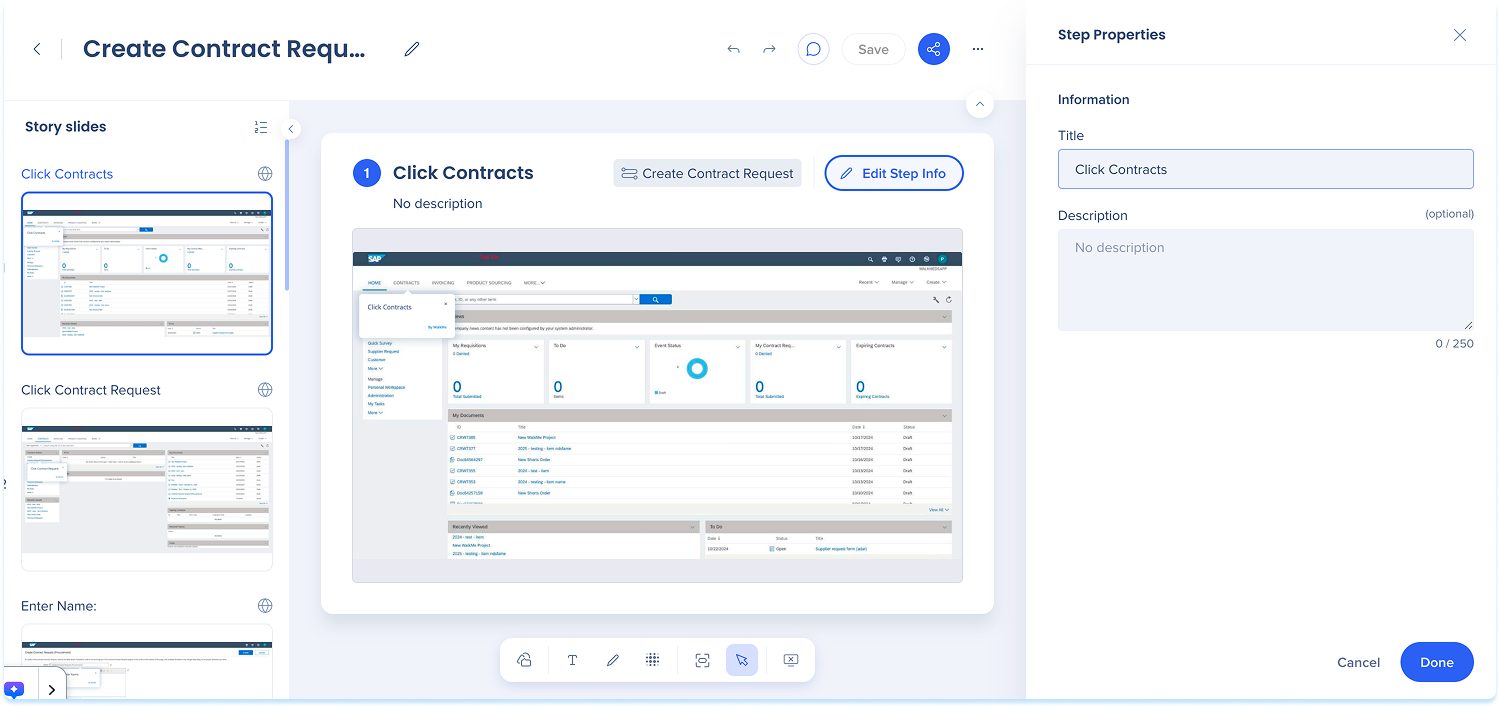
The main canvas displays the currently selected slide at full size for review and editing.
Edit step info
- Click the Edit step info button at the top right of the slide
- Update the title and description as needed
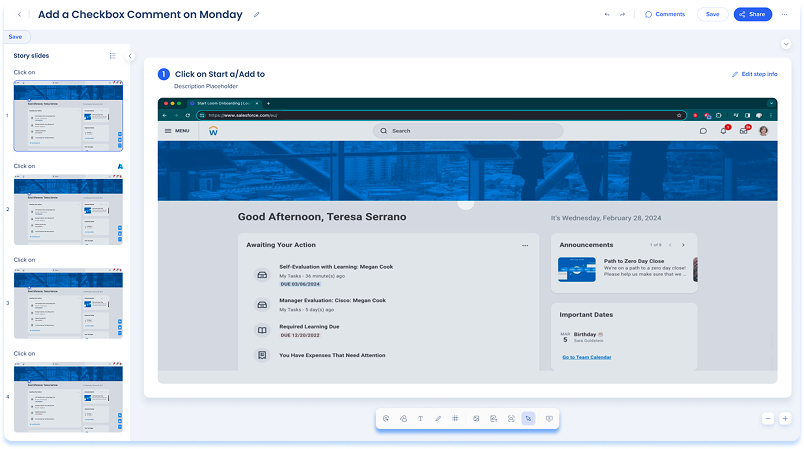
Use the annotations toolbar at the bottom of the page in demo mode to add visual guidance to a slide.
Available annotations:
- Captured element: Highlighted captured UI element to show where to click or type
- Shapes: Add boxes, arrows, or pointers
- Text: Add short instructions or labels
- Pencil: Draw freehand marks
- Blur: Hide sensitive content
- Zoom: Adjust your view
- Clear all: Remove all annotations
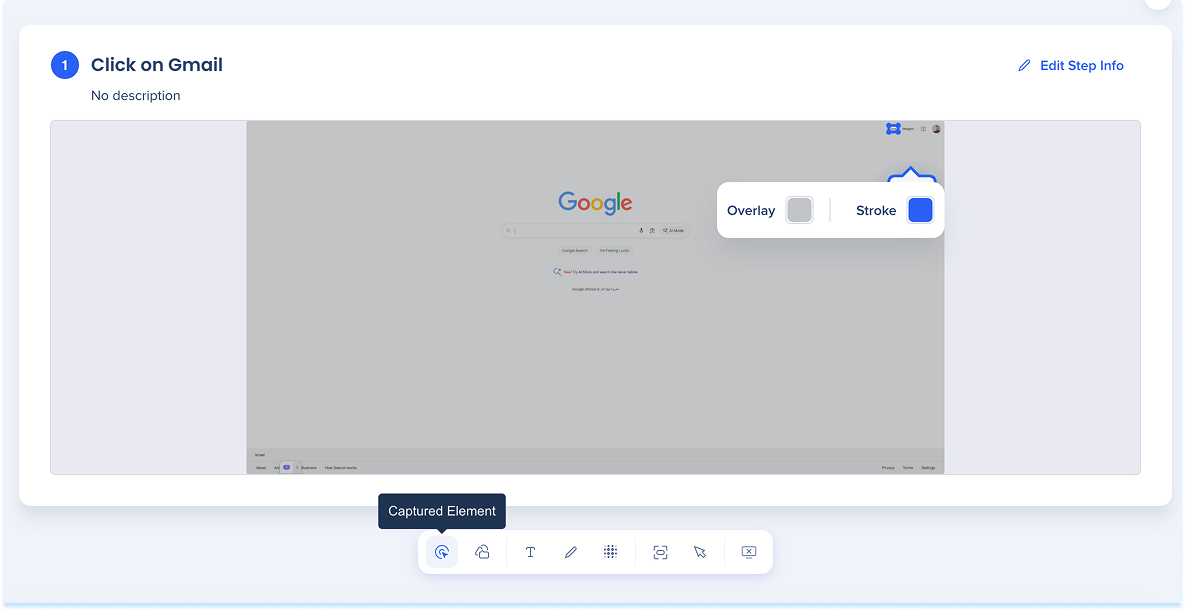
Captured element
- Select Captured Element in the annotation toolbar
- Use the inline toolbar to adjust:
- Overlay: Dim everything except the highlighted element and choose a shade
- Stroke: Set the outline color
Shapes
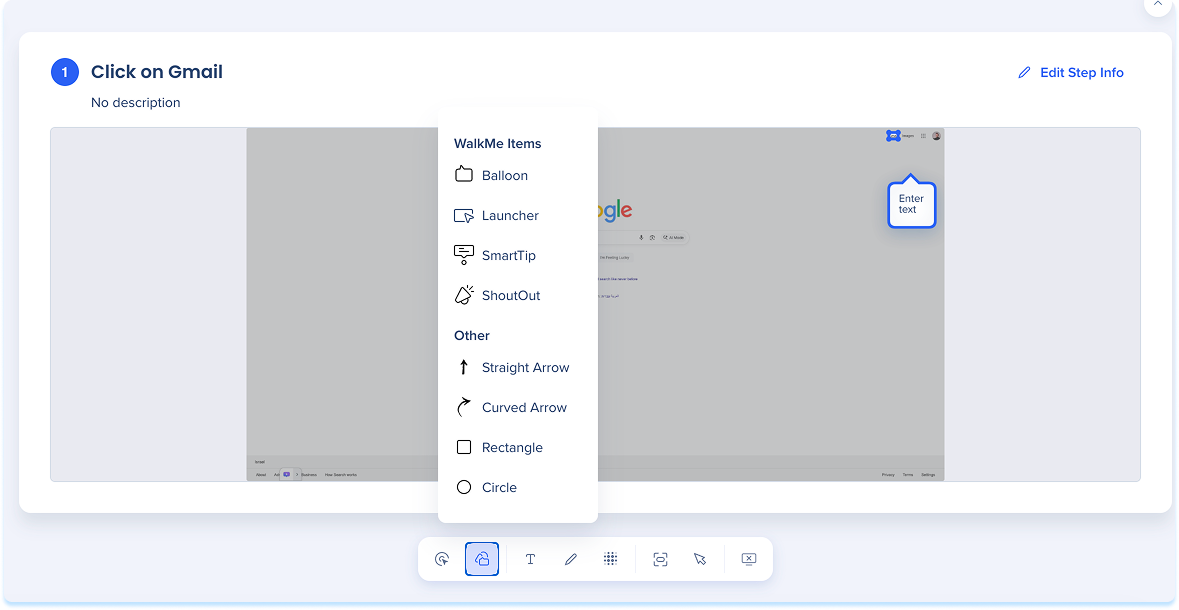
- Select Shapes in the annotation toolbar
- Choose a shape:
-
Balloon
-
Launcher
-
SmartTip
-
ShoutOut
-
Straight arrow
-
Curved arrow
-
Rectangle
-
Circle
- Use the inline toolbar to adjust:
- Fill: Background color (balloon, rectangle, or circle)
- Stroke: Border or line color
- Width: Set the border thickness
Nota
La forma de globo admite texto enriquecido y enlaces.
Text
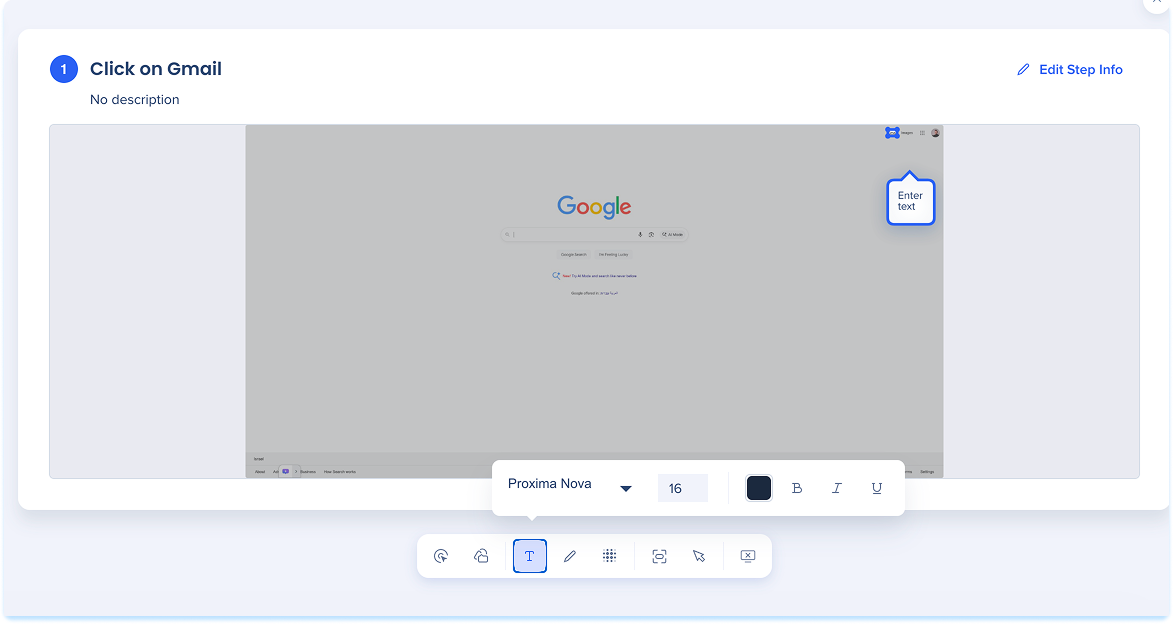
- Select Text in the annotation toolbar
- Click on the slide and type your instruction or label
- Use the inline toolbar to apply the following formats:
- Font
- Font size
- Color
- Format text: Bold (B), Italic (I), Underline (U)
Pencil
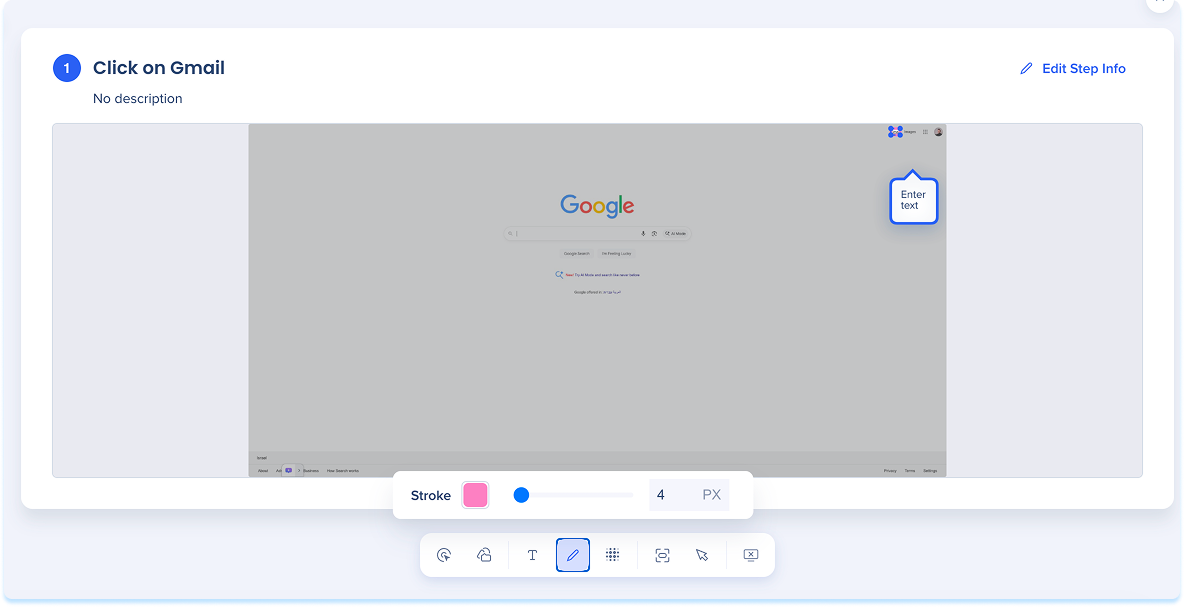
- Select Pencil in the annotation toolbar to draw freehand on the slide
- Use the inline toolbar to adjust:
- Stroke: Line color
- Width: Line thickness
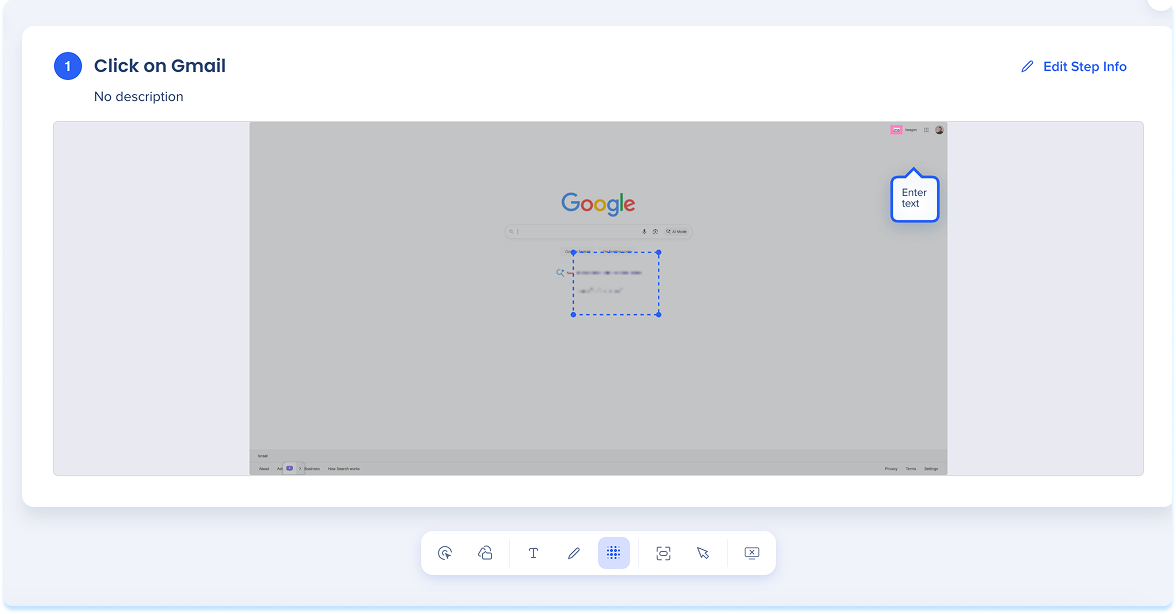
Blur
- Select Blur in the annotation toolbar
- Drag to draw a blur box
- Resize or move the box as needed (optional)
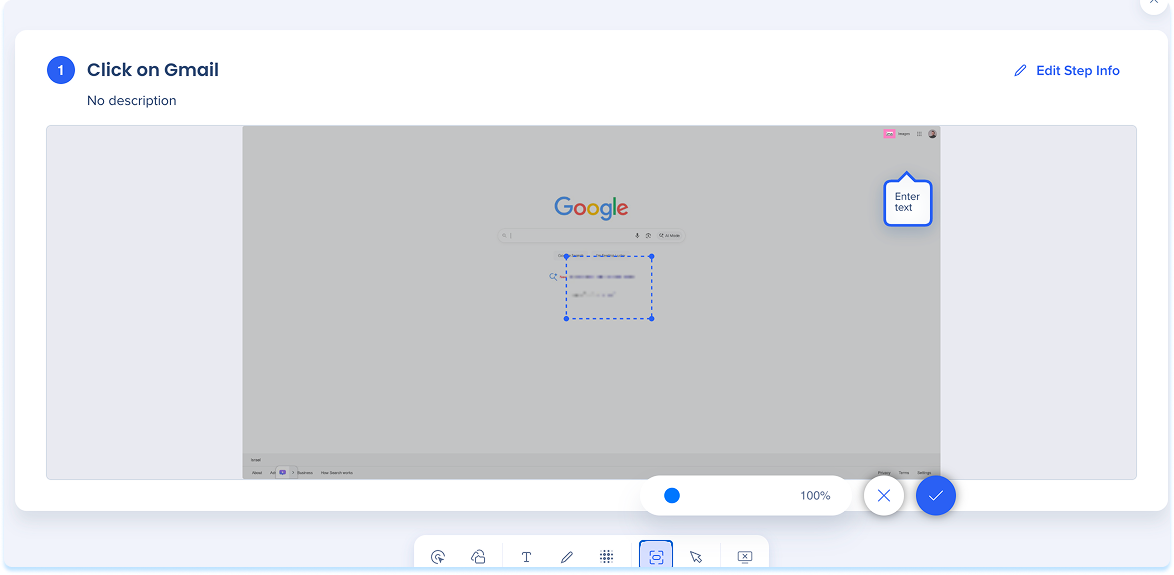
Zoom
- Click Zoom in the annotation toolbar
- Use the slider to zoom in or out
Demo Video
Technical Notes
-
Stories is enabled on the account level, and switching between systems and environments there is not supported. However it is possible to create stories from the Content Manager, where systems and environments are available.
- Desktop recording supported platforms:
- Windows 10
- Windows 11
- macOS Sonoma 14 or later
Tip Tuesday Videos
Customizing a WalkMe Story
Stories in Action


