Brief Overview
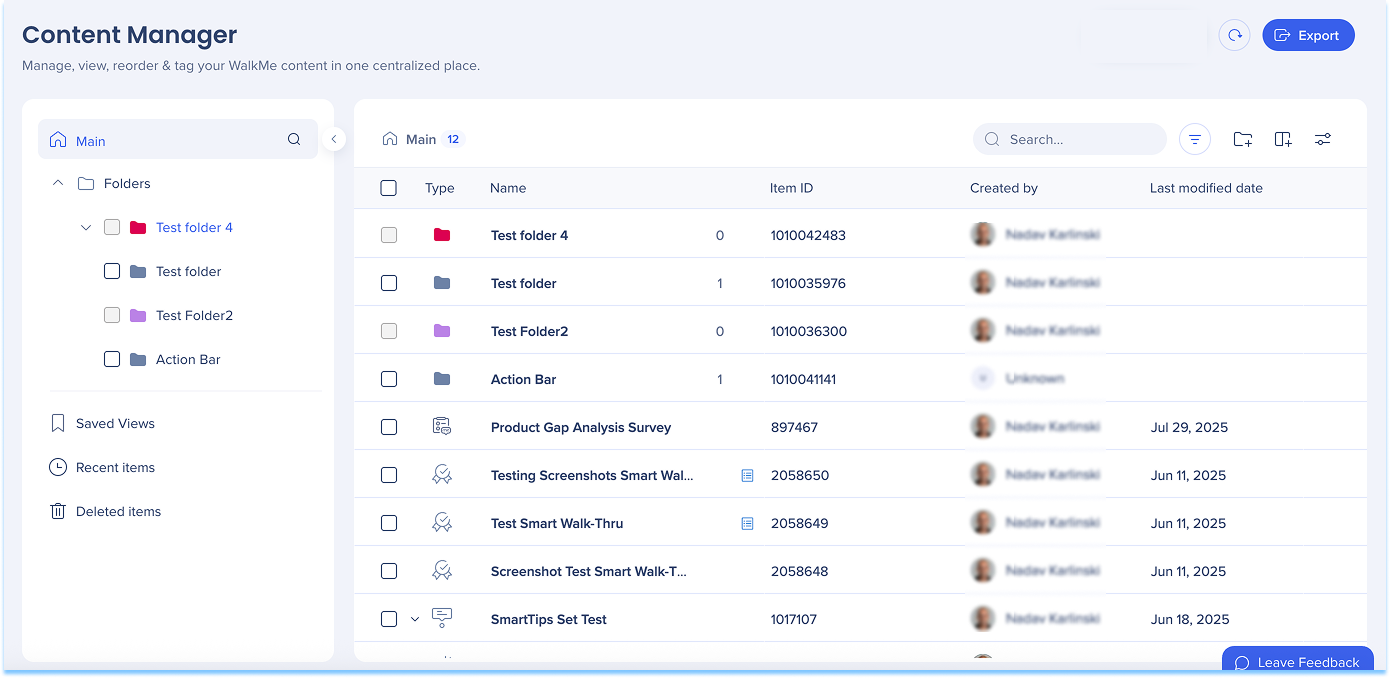
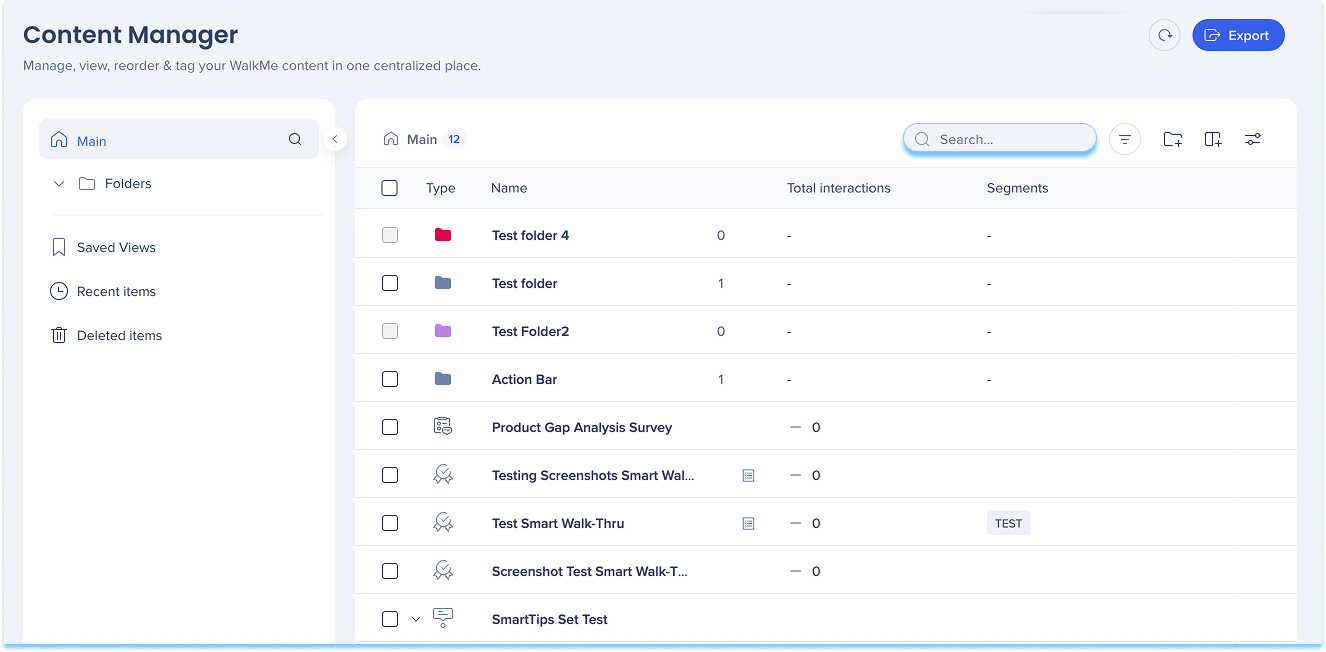
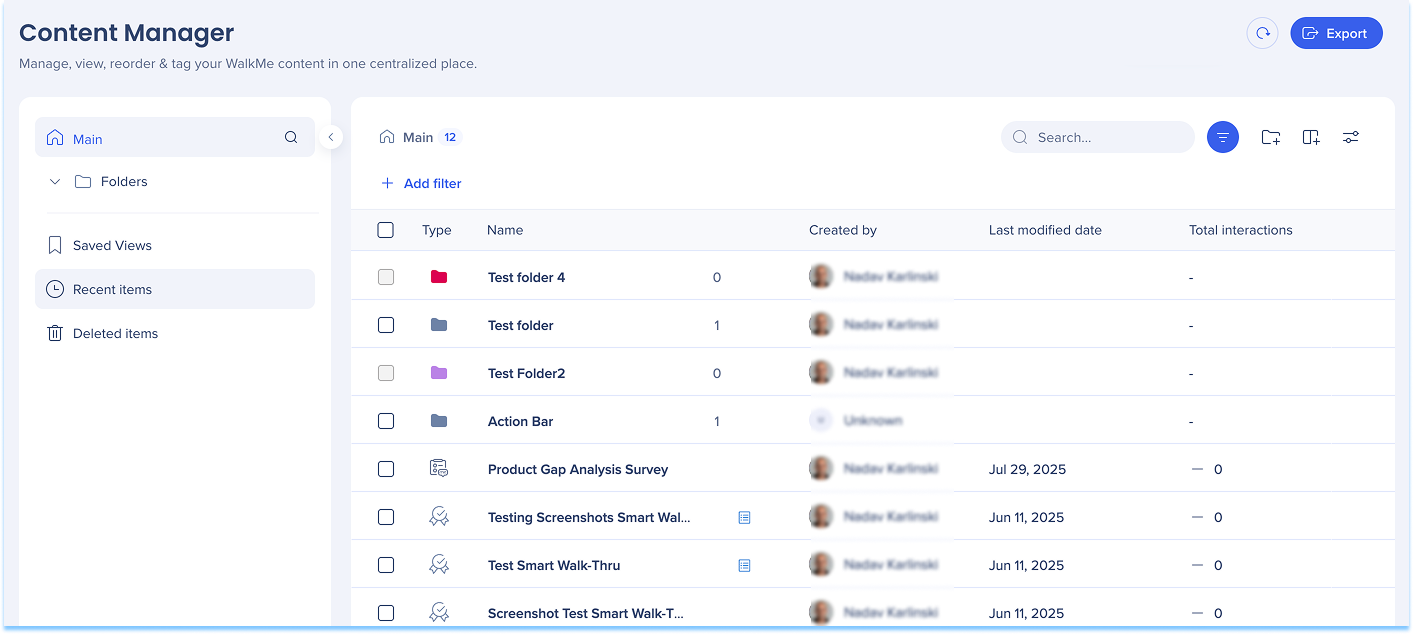
Content Manager provides a centralized workspace for managing WalkMe items. It includes a table-based interface that supports flexible views for organizing content, collaborating with teammates, and opening items in the editor.
Content Manager
Access
Access the Content Manager in the console:
Open the WalkMe Console
Go to the Content category
Select Content Manager
Organize Content with Folders
Folder structure
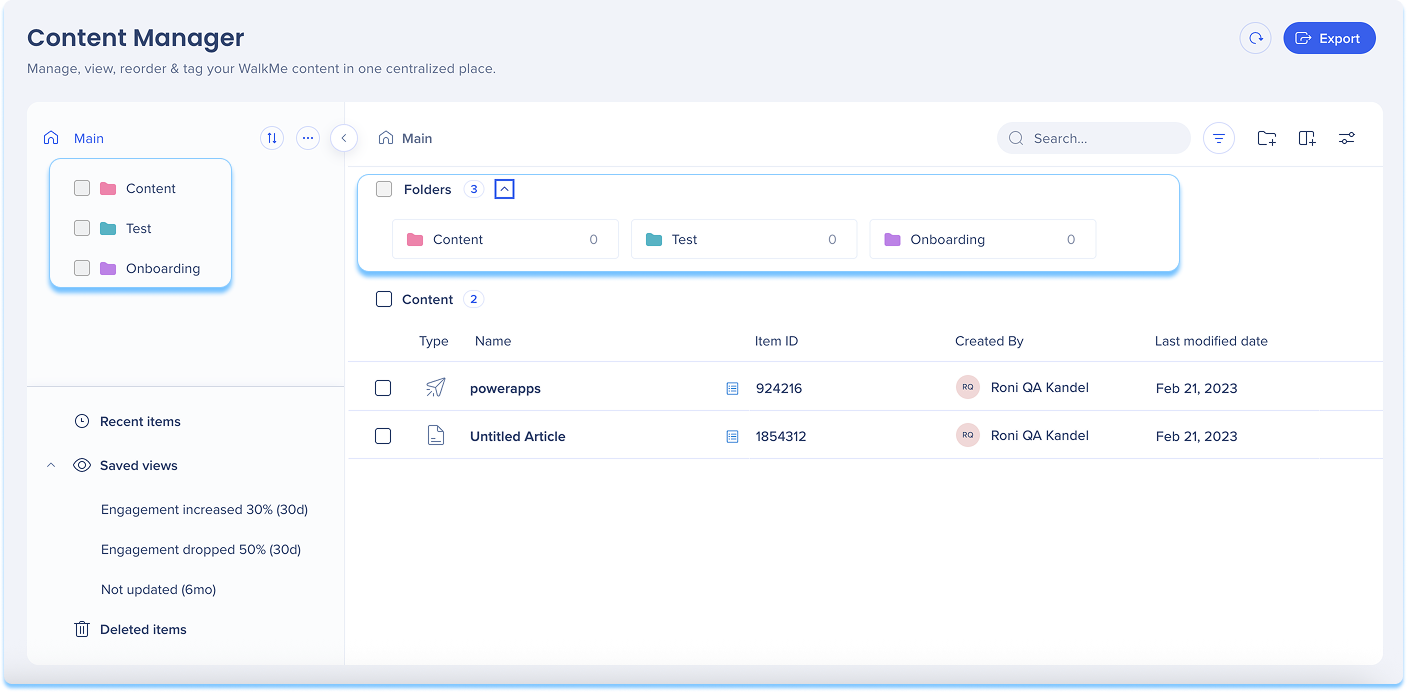
Folders appear in the left panel and organize items hierarchically. Select a folder to view its contents in the main list. In Tree view, folders also appear directly in the list.
Creating a folder
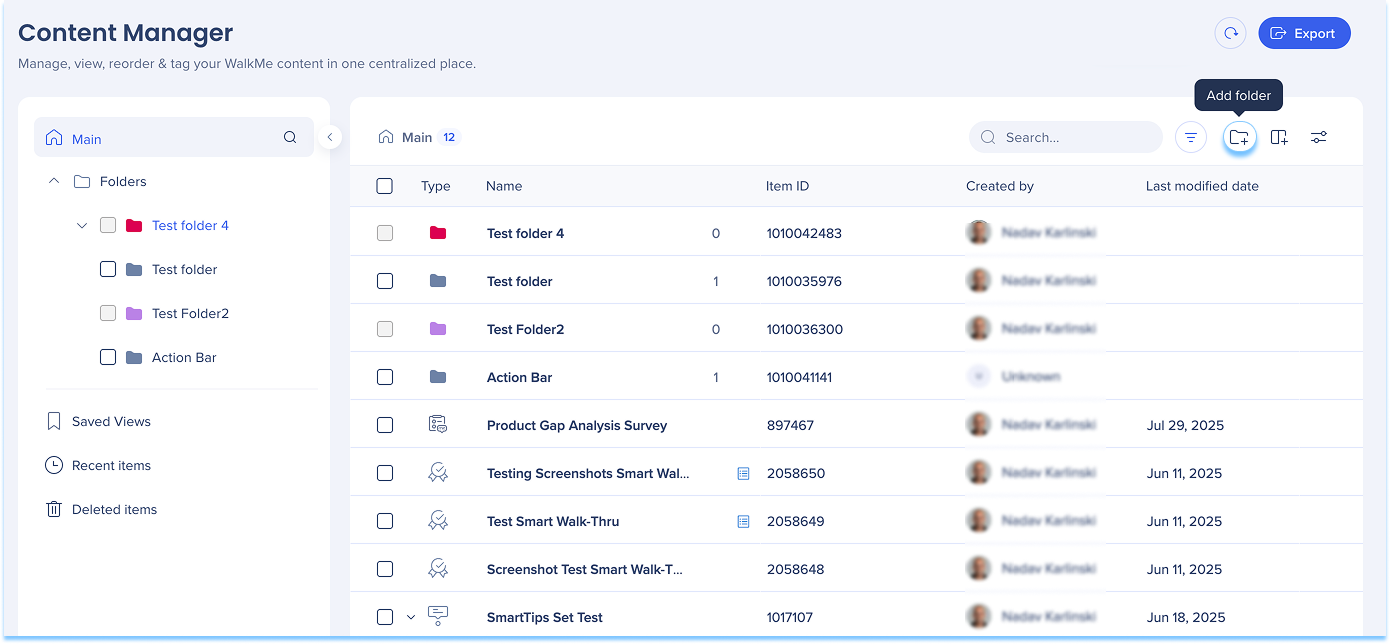
Select Folder + , or
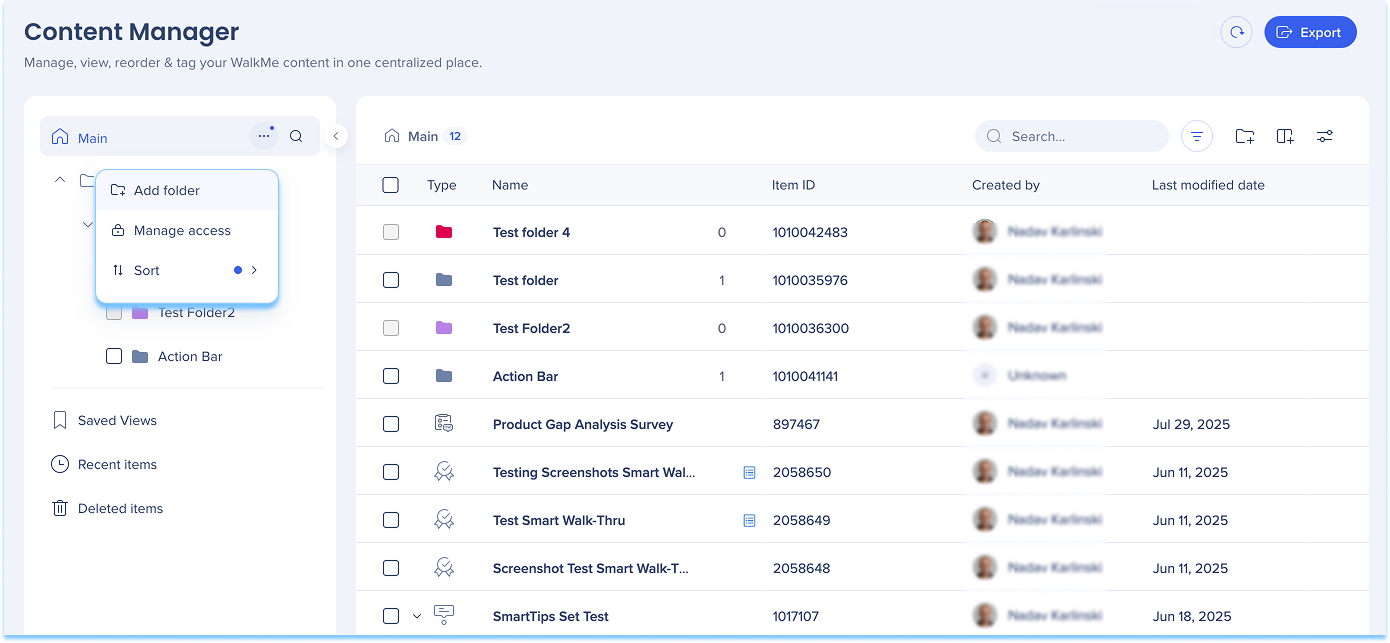
Open the Options menu and select Add Folder
Enter a folder name and select a color
Select Add folder
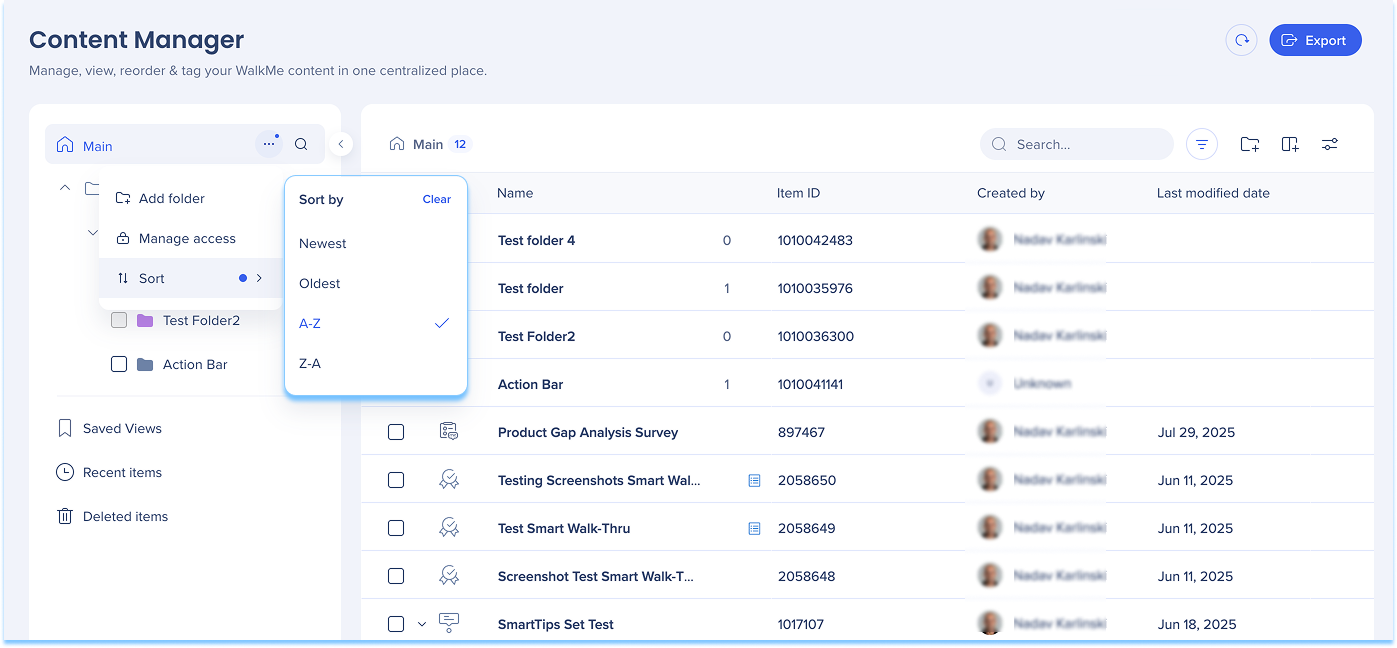
Sort folders
Select the Sort icon
Choose a sort order:
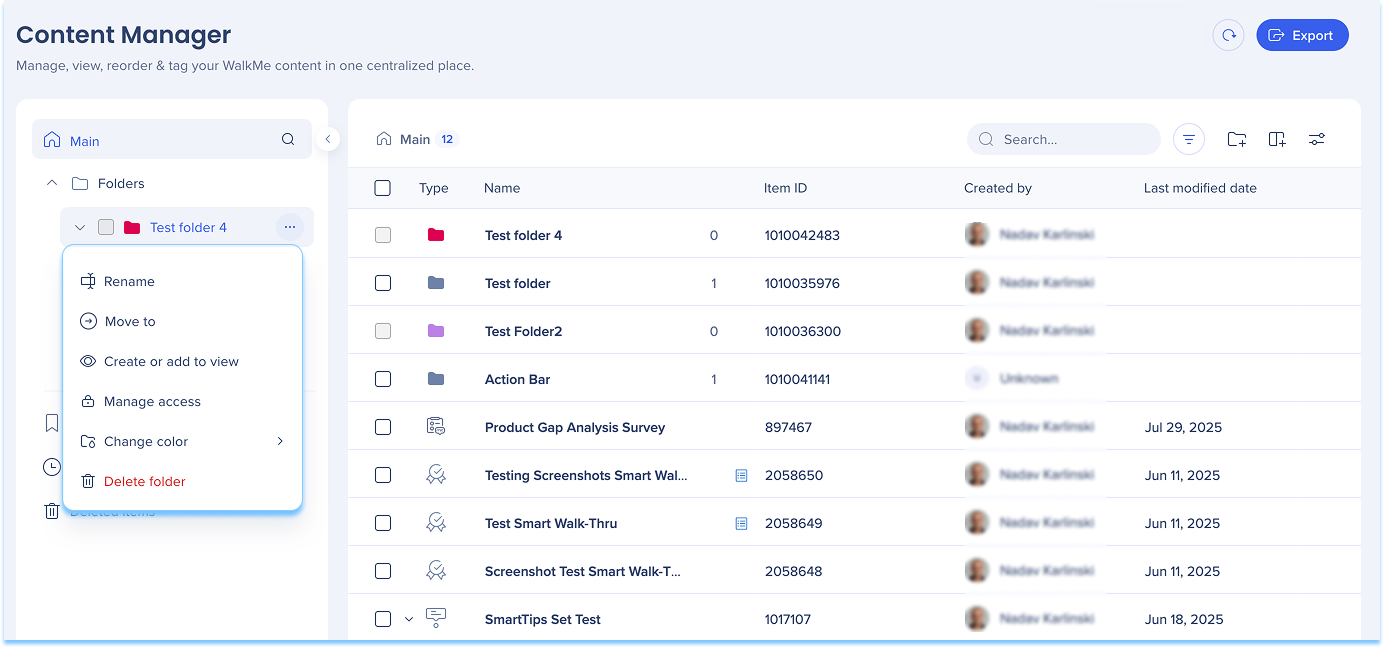
Folder actions Select the Options menu next to a folder to manage it:
Publish
Rename
Move to folder
Share
Change color
Archive
Manage access
Delete folder
Create or add to view
Create Solution
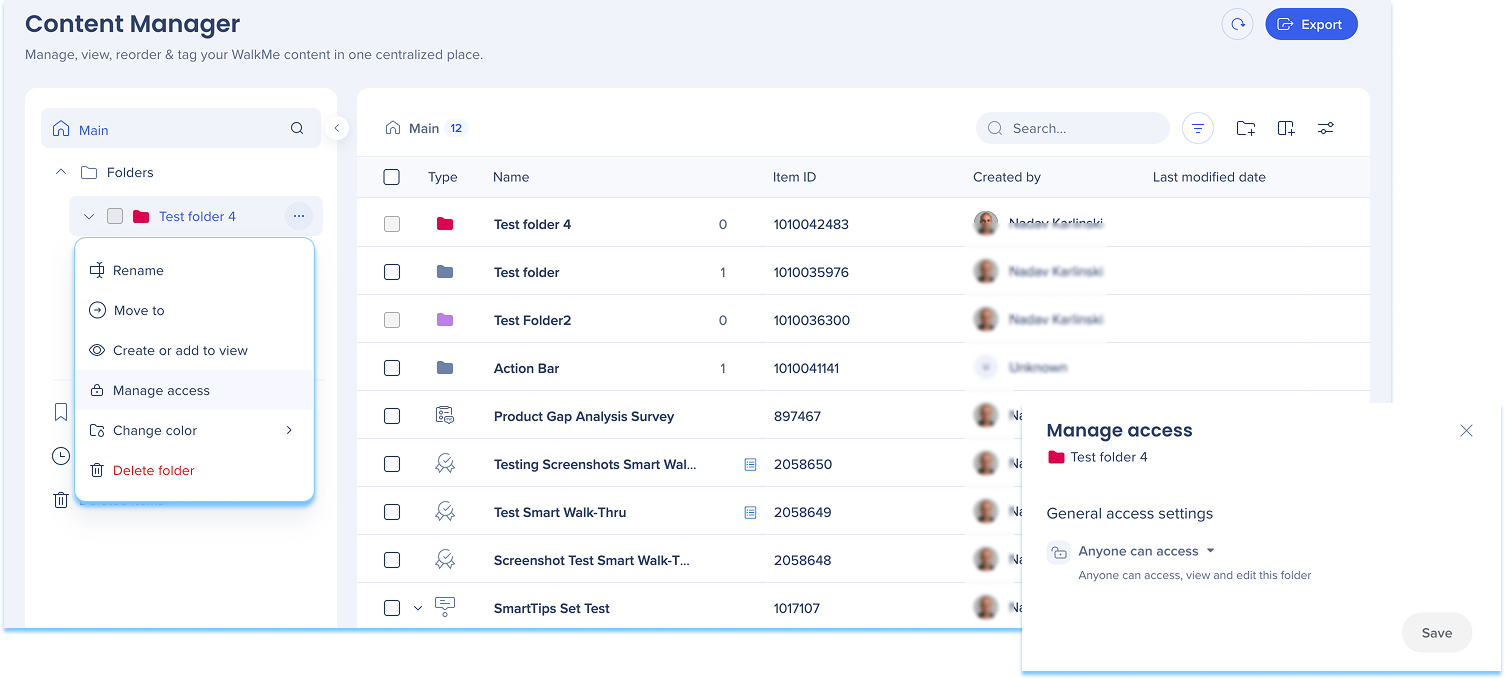
Folder permissions Folder access management works the same way as in the editor.
Open the folder Options menu
Select Manage access
Choose your access settings
Folder Permissions
Find Content Quickly
Use search and filters to quickly locate items across folders, views, and environments.
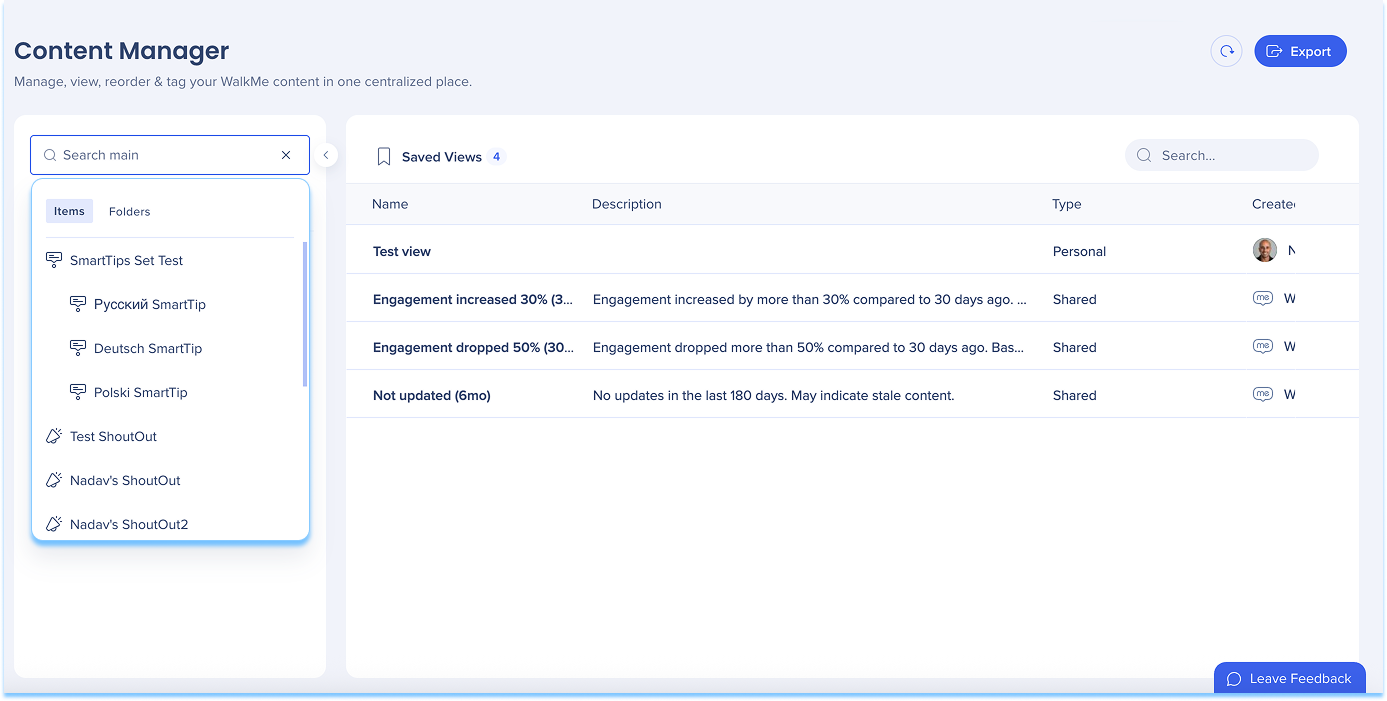
Global search Use the search bar in the left panel to find items and folders.
To refine results:
Switch between Items and Folders
Enter a full or partial name
Filters
Filter content by:
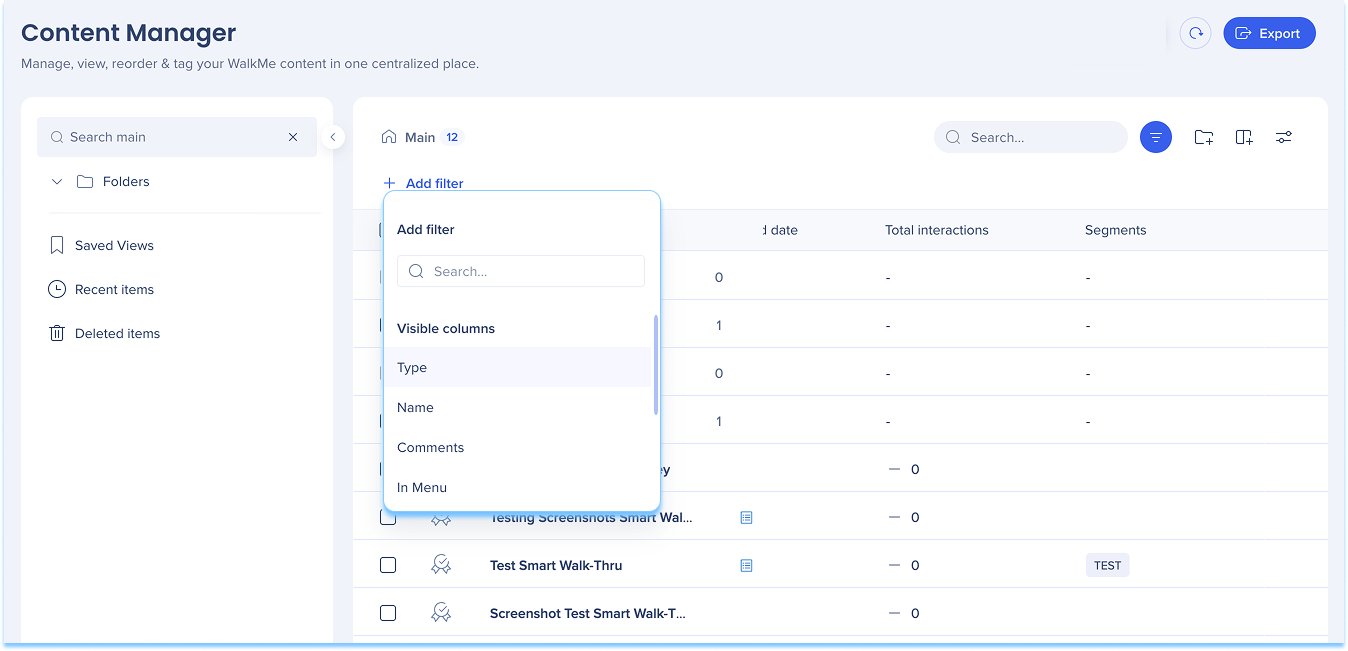
Content attributes, such as item type, workflow tag, location, and keywords
Ownership and status, such as creator, publish status, and last modified by
Delivery and visibility, such as segment, status by environment, and in-menu status
Collaboration, such as comment status and permalink availability
注
フィルターは、表示された 列と非表示 の列で分類されています。
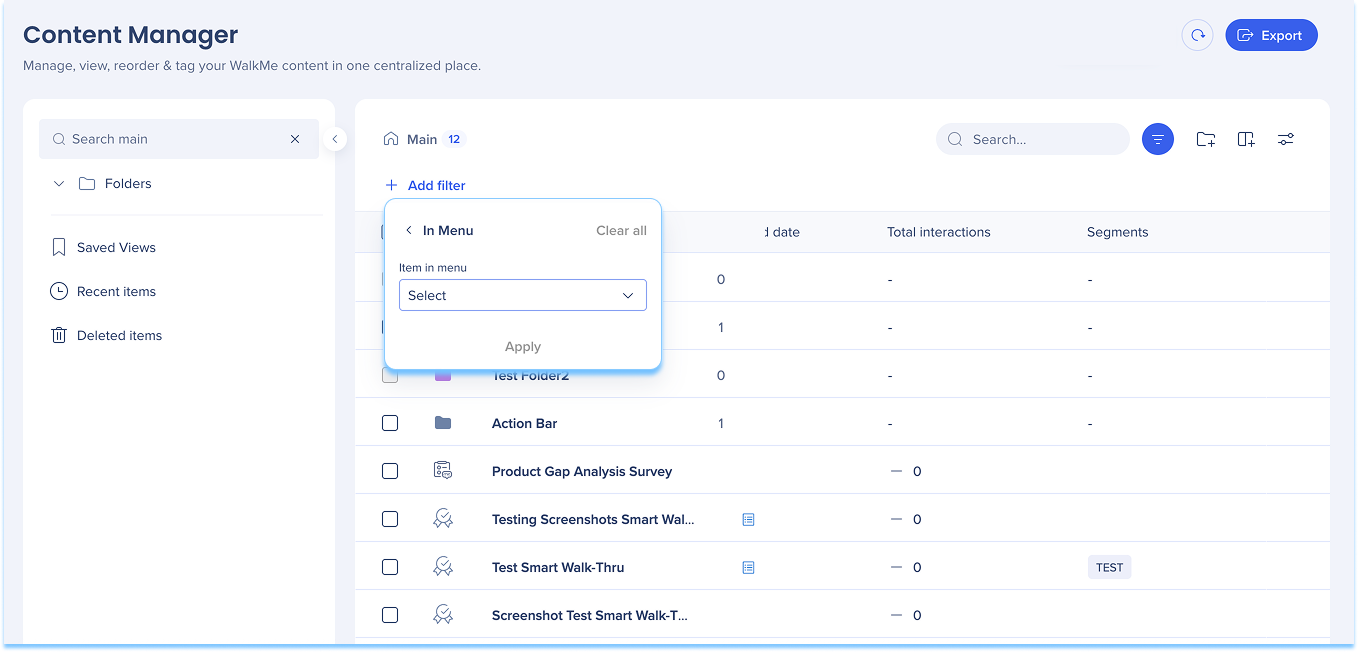
Filter content based on whether it appears in the WalkMe Menu.
Select the In Menu filter
Select Yes (appears in the menu) or No (doesn't appear in the menu)
Select Apply
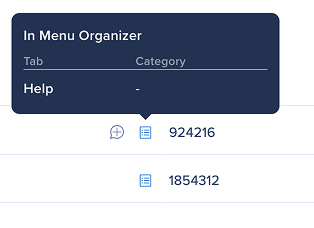
Items that appear in the menu show an icon in the Type column. Add filters
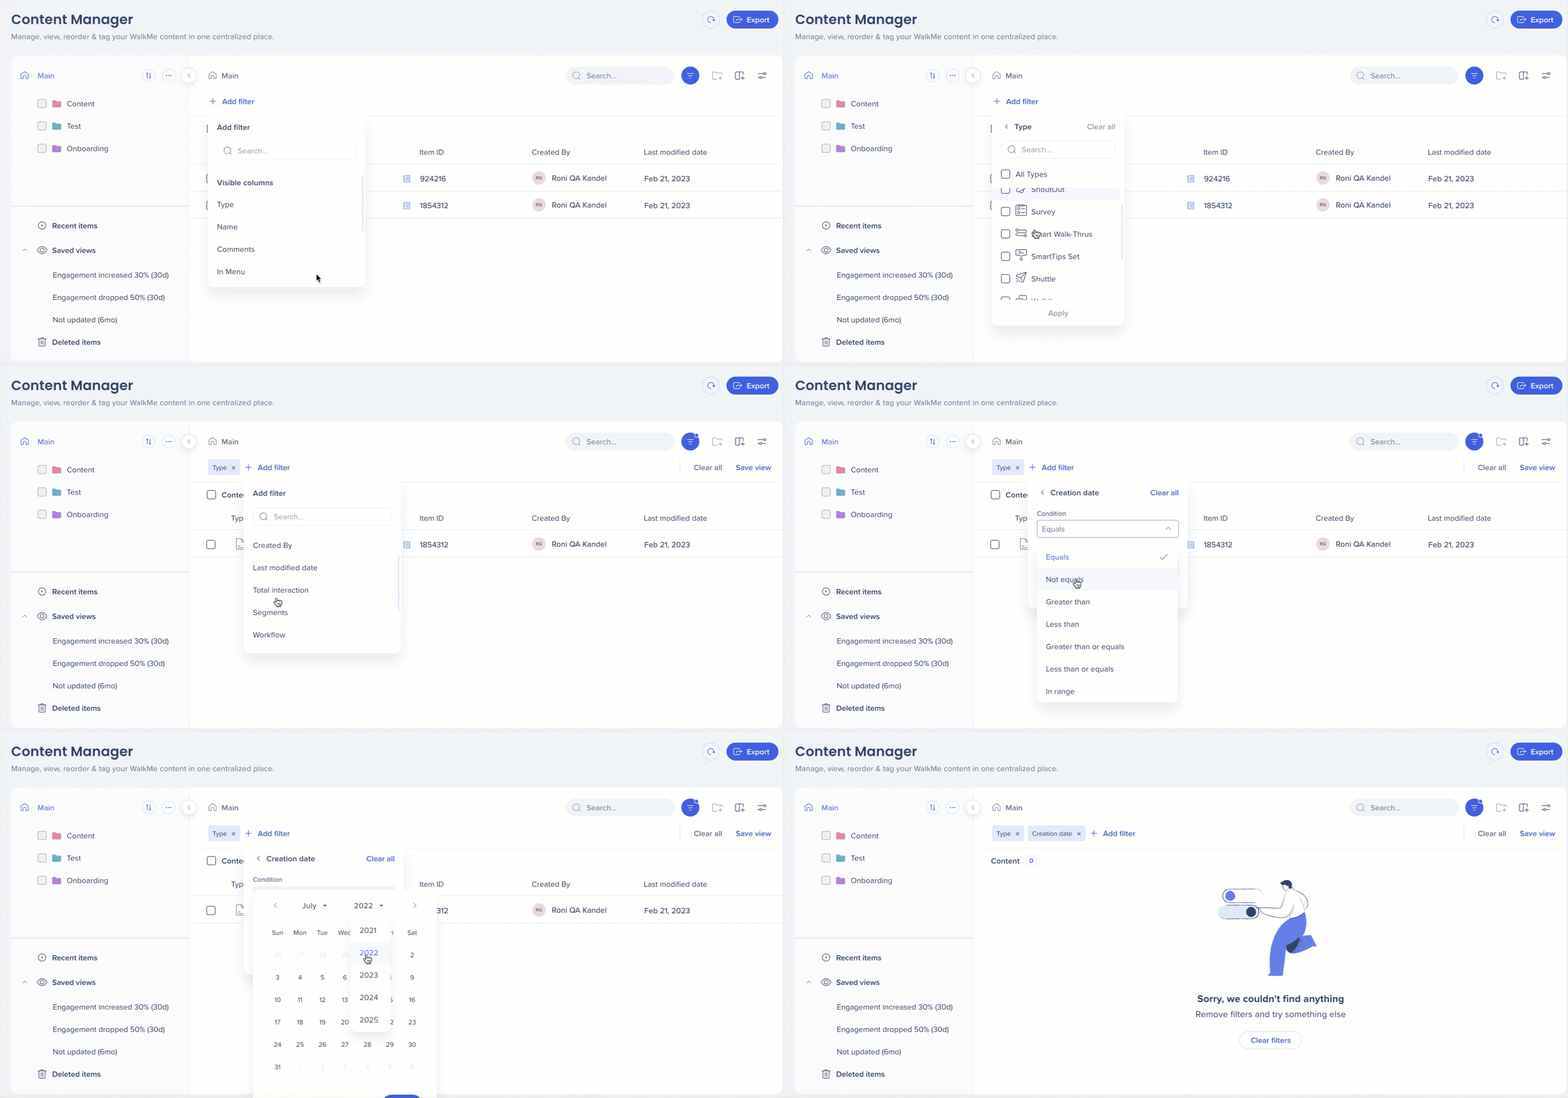
To narrow your results:
Select the Filter icon
Select + Add Filter
Choose a column
Set the condition and value
Select Apply
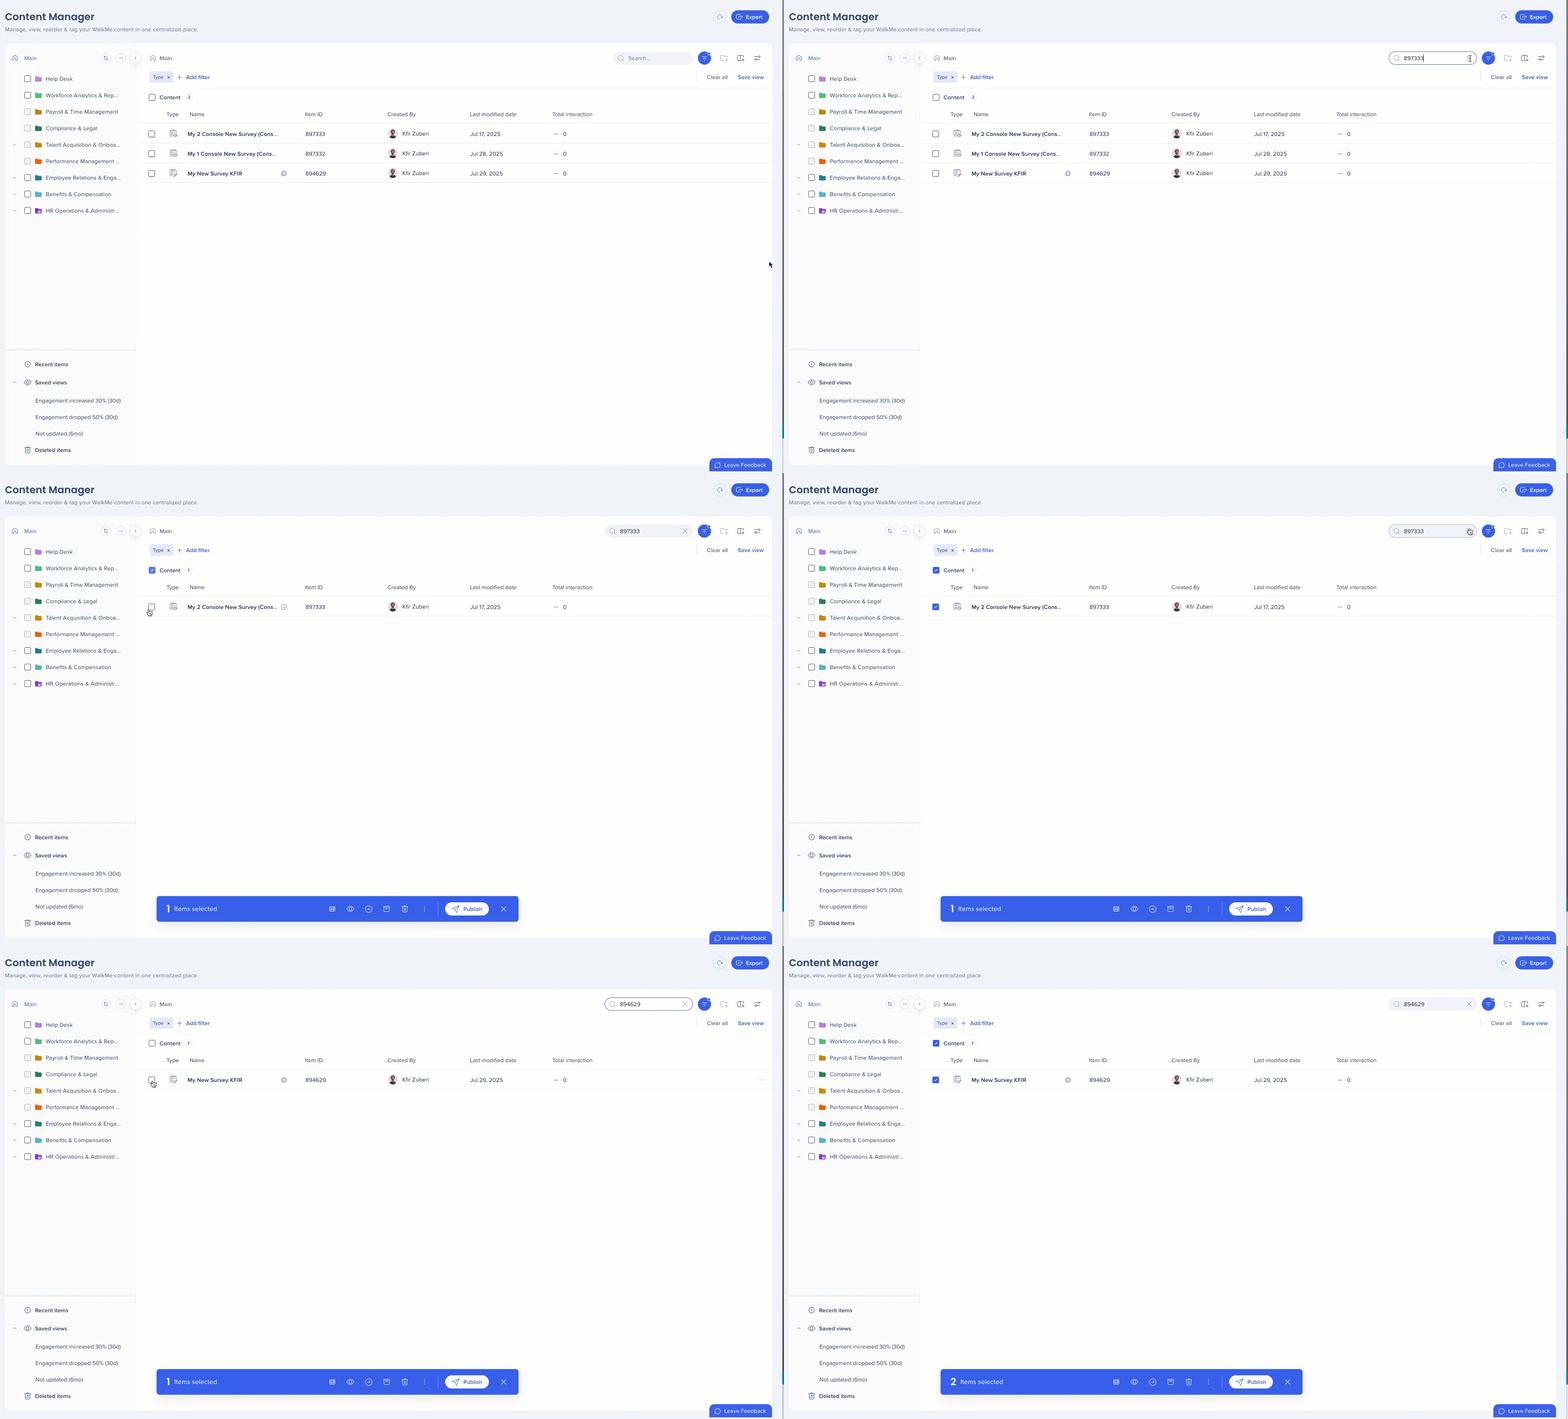
Contextual search
Use contextual search to find items by:
Item name
Item ID
Item type
Example : Type Launcher to view launcher results.
Bulk selection across searches Keep selected items while running new searches, then apply a single bulk action to all selected items.
Segments
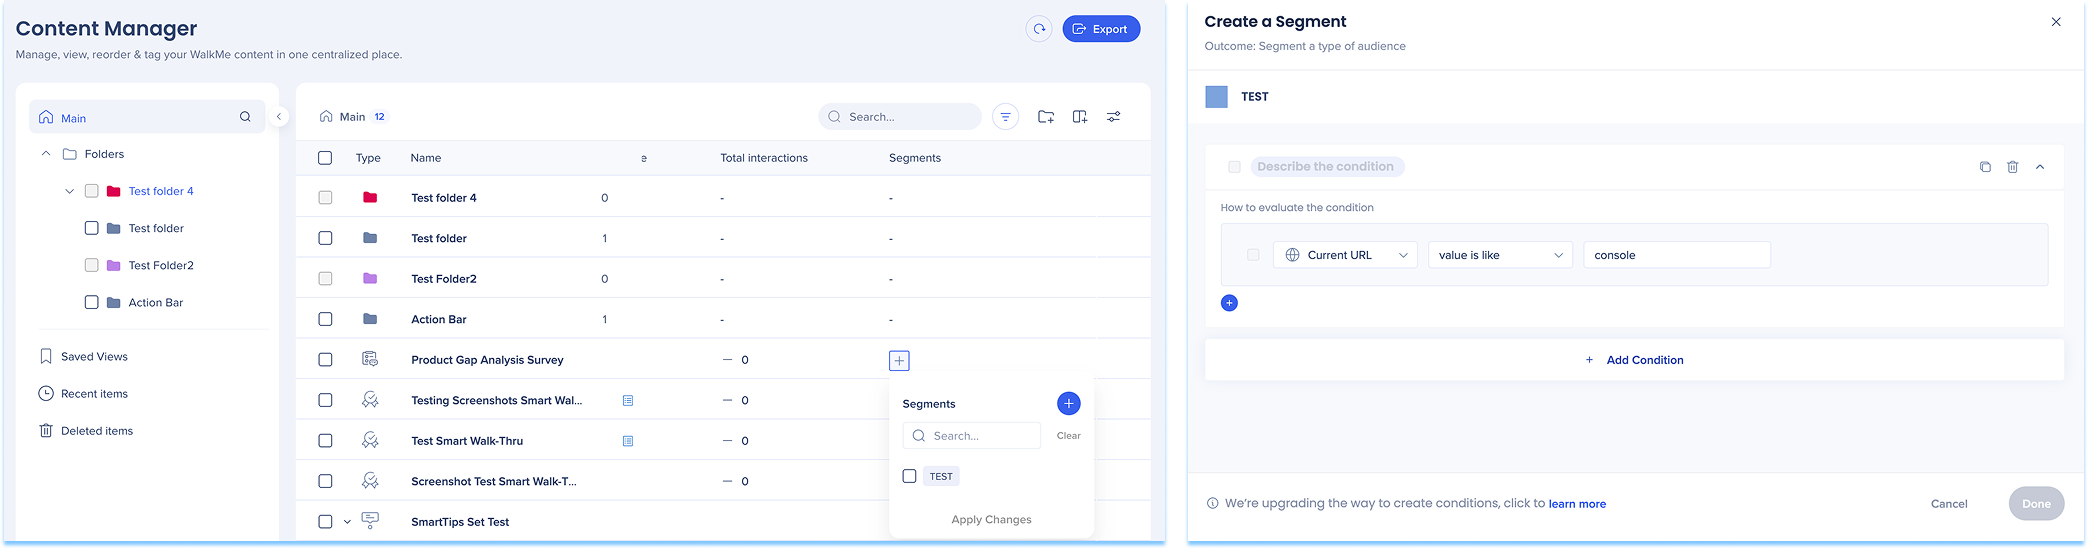
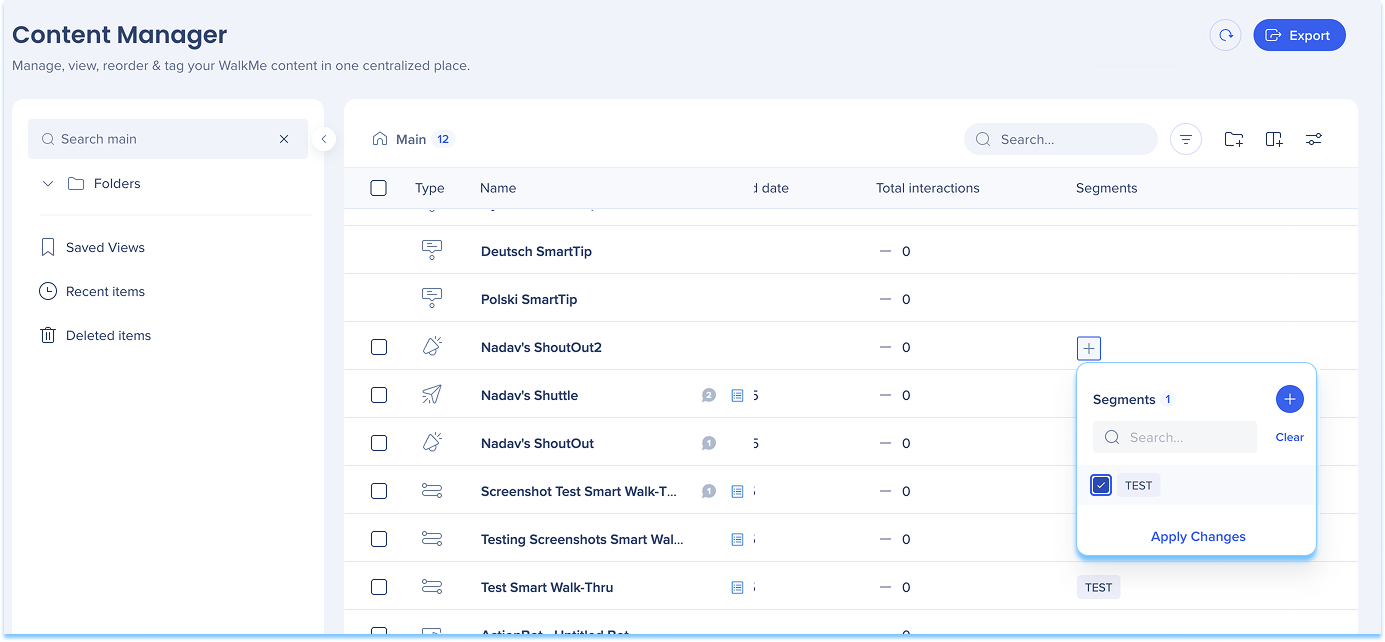
Create, define, apply, and manage segments directly within the Content Manager. This functionality mirrors the capabilities available in the editor, enabling users to streamline their segmentation workflows.
To create a segment :
Select the + icon in the Segment column of the item line
Click the Create icon
The Create Segment condition builder will appear
Click Done
Condition Builder
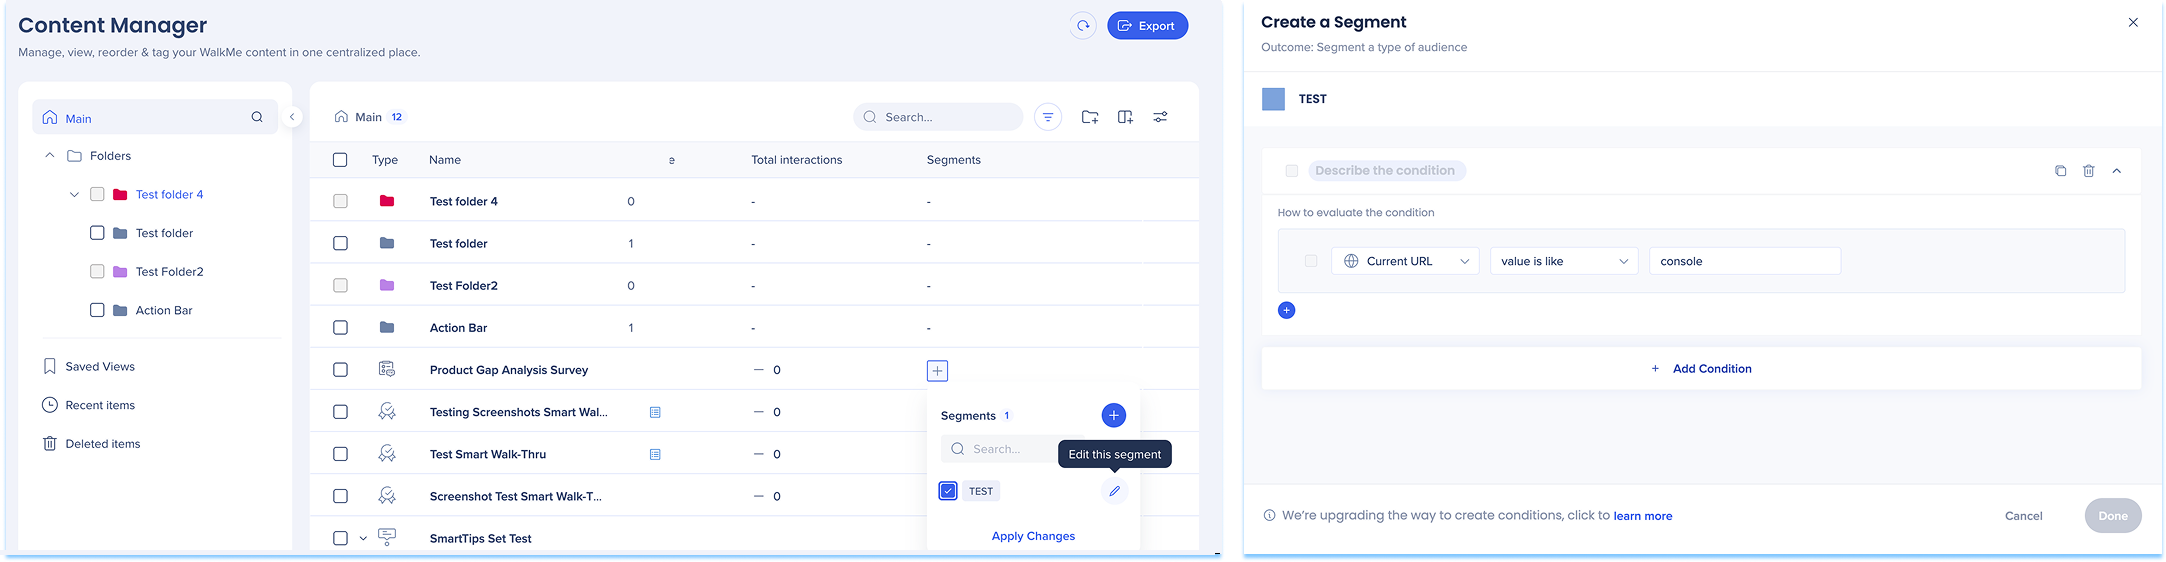
To edit a segment
Click on + icon in the Segment column of the item line
Click the Edit icon
Click Continue
The Edit Segment condition builder will appear
Click Done
注
セグメントを編集すると、保存されたすべてのデータがリセットされ、セグメントに接続されたWalkMeアイテムの配信が中断する可能性があります。
または
アイテムの管理
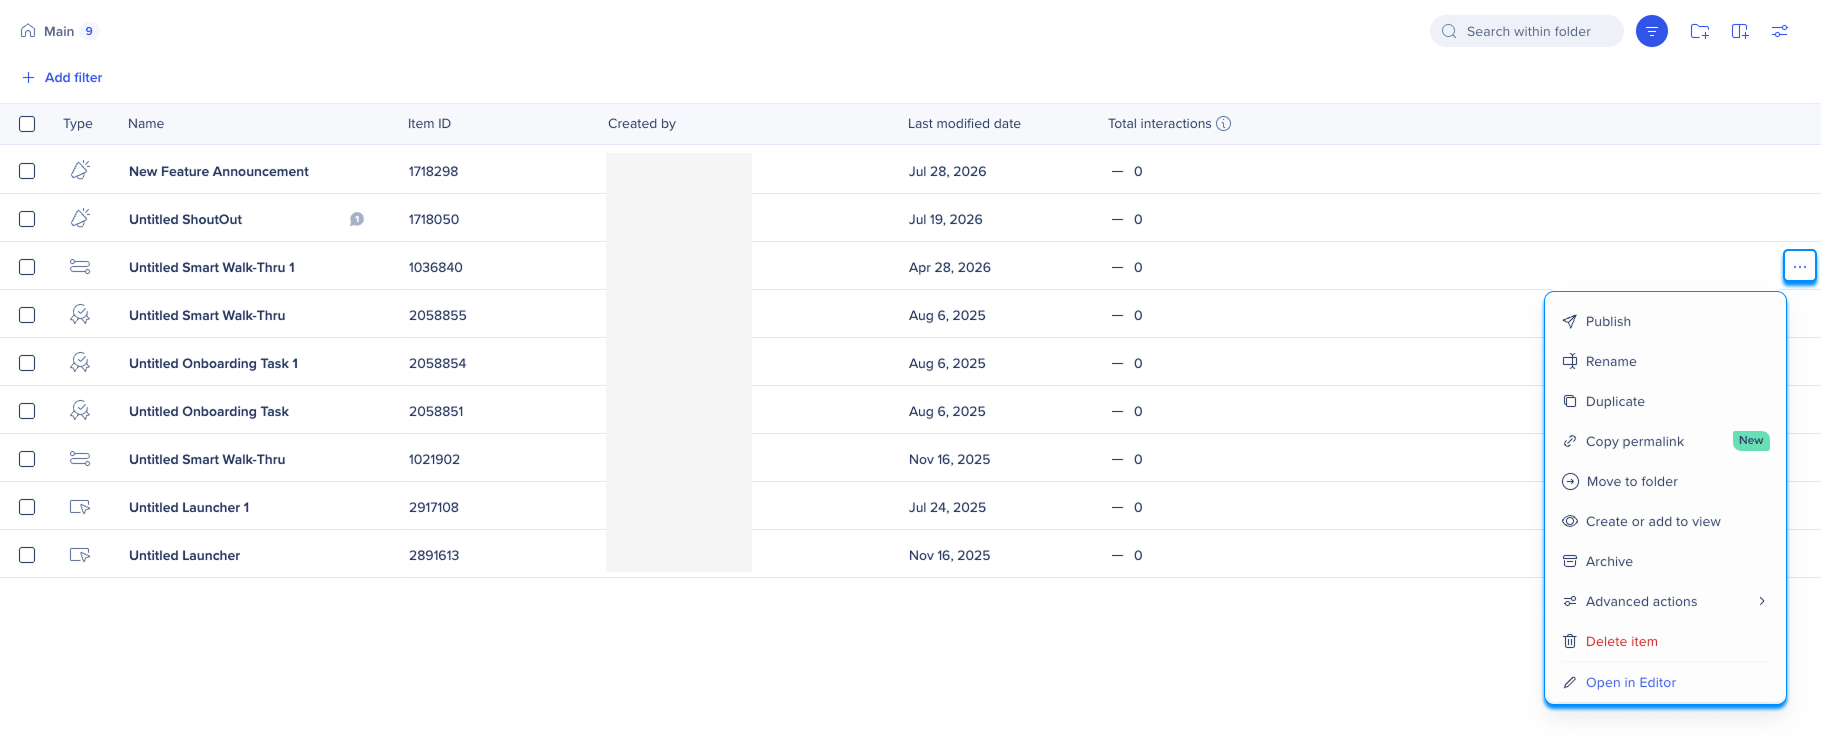
アイテムアクション
アイテムの行にある「オプション 」メニューを選択して、アイテムを管理します。 利用可能なアクションには、以下が含まれます:
パブリッシュ
名前を変更
複製
パーマリンクをコピーします。
フォルダに移動
表示のために作成または追加
アーカイブ
高度なアクション:
アイテムを削除
エディタで開く
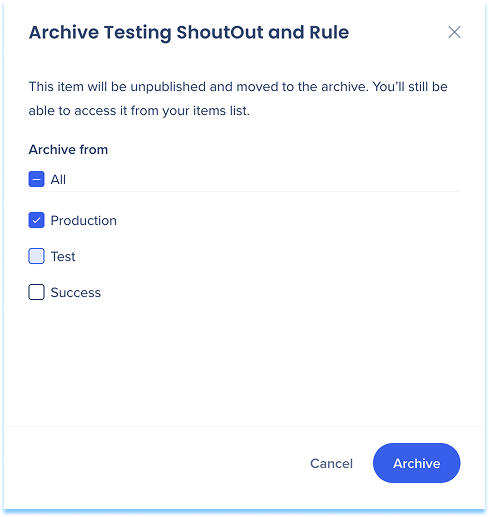
アーカイブアイテム
一度に複数の環境にまたがるアイテムをアーカイブできるため、各環境で個別にアーカイブアクションを繰り返す必要はありません。
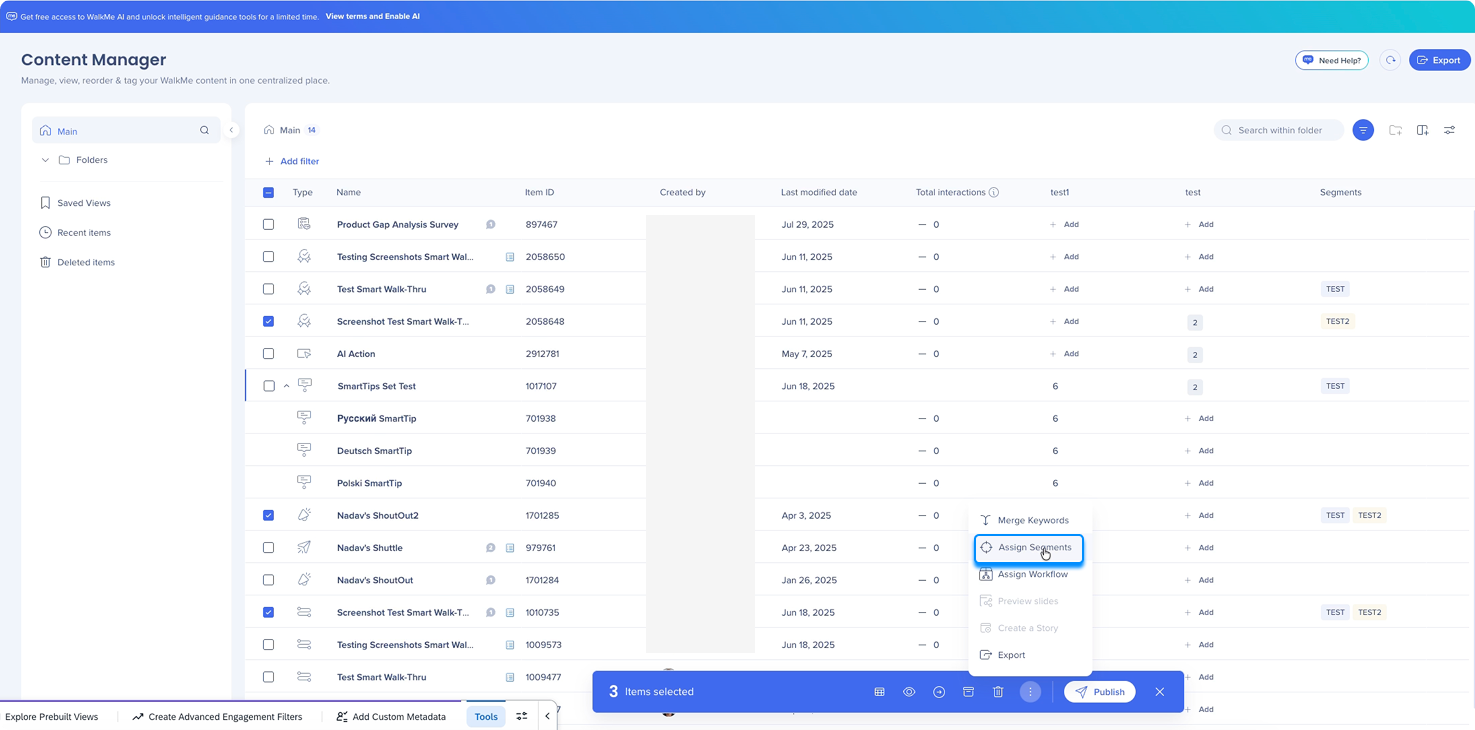
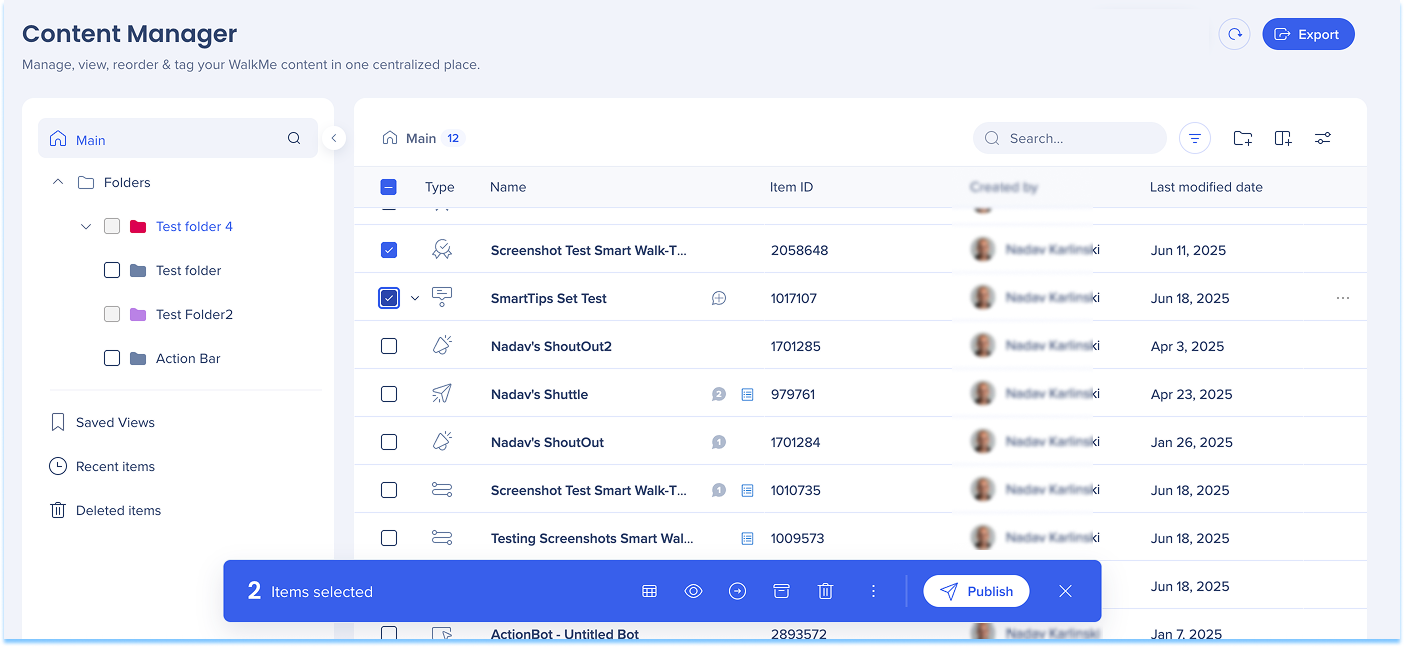
バルクアクション
チェックボックスを使用して1つ以上のアイテムを選択します。
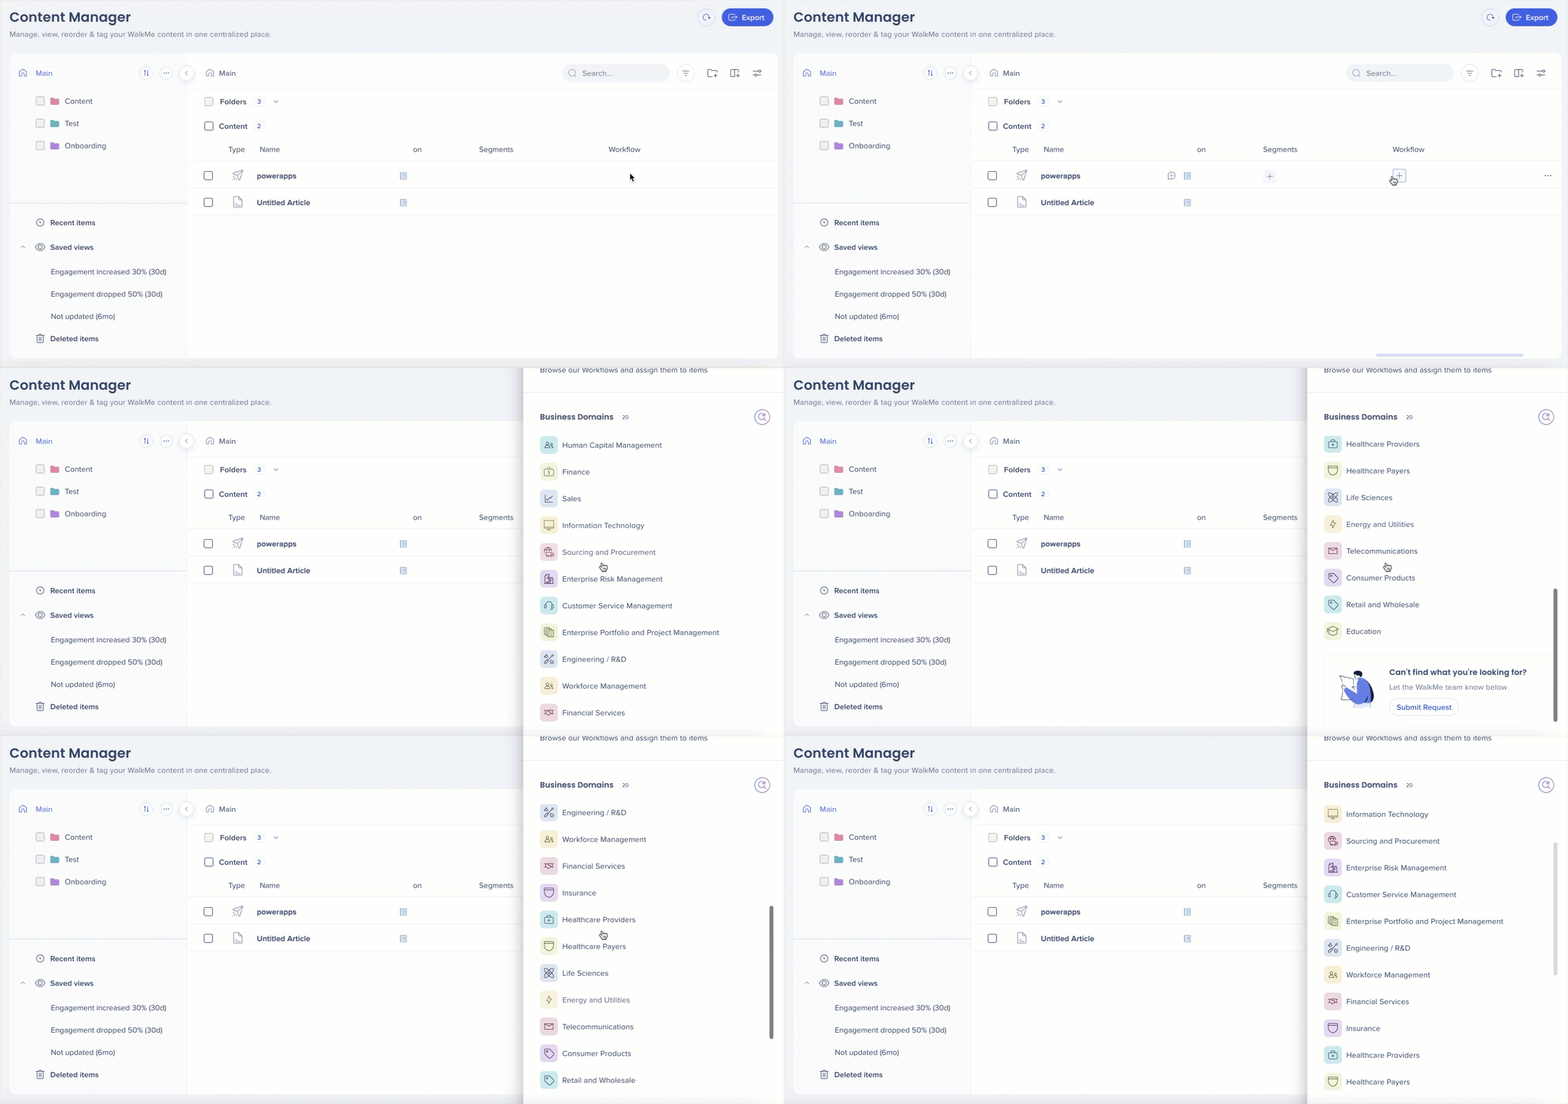
一括アクションツールバーから、次のようなアクションを選択します。
セグメントまたはワークフローの割り当て
アイテムの移動またはアーカイブ
アイテムの公開または削除
ビューの作成または追加
キーワードの統合またはカスタムフィールドの更新
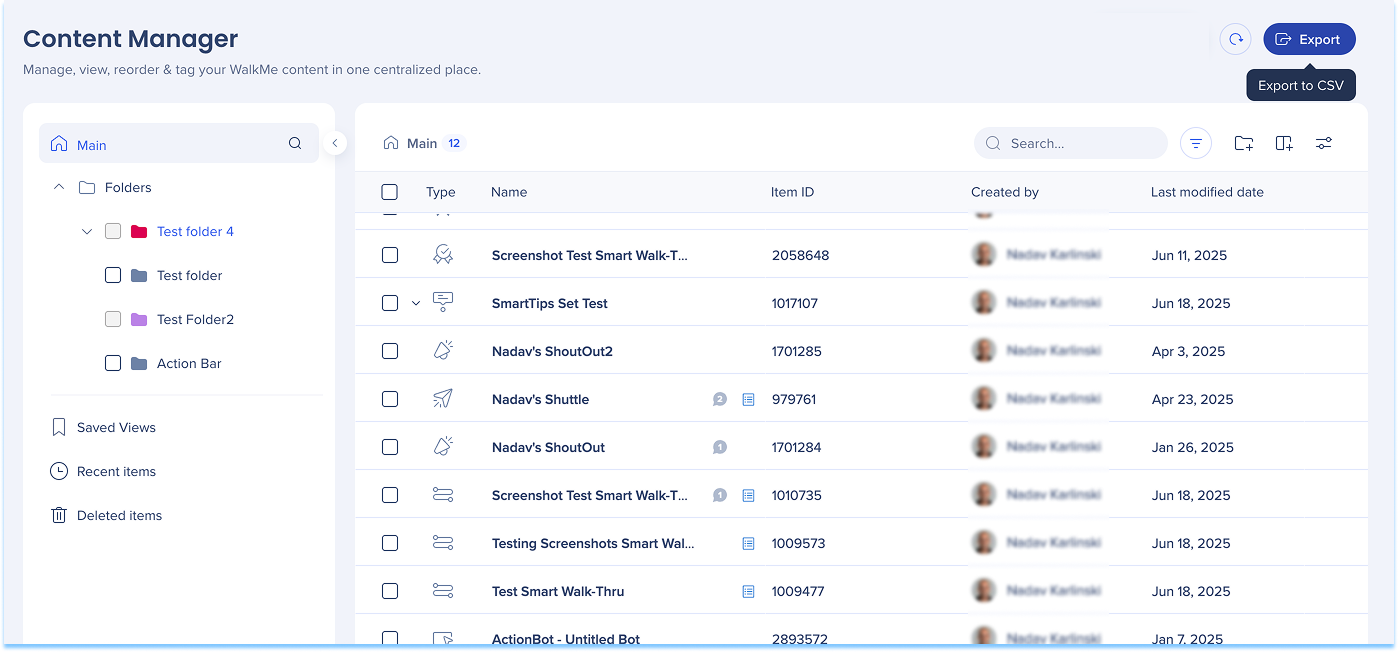
コンテンツのエクスポート 任意のビューからCSVファイルにコンテンツデータをエクスポートします。
エクスポート アイコンを選択しますCSVファイルをダウンロードします
CSVには、表示される列や列順序など、現在の表示が反映されます。
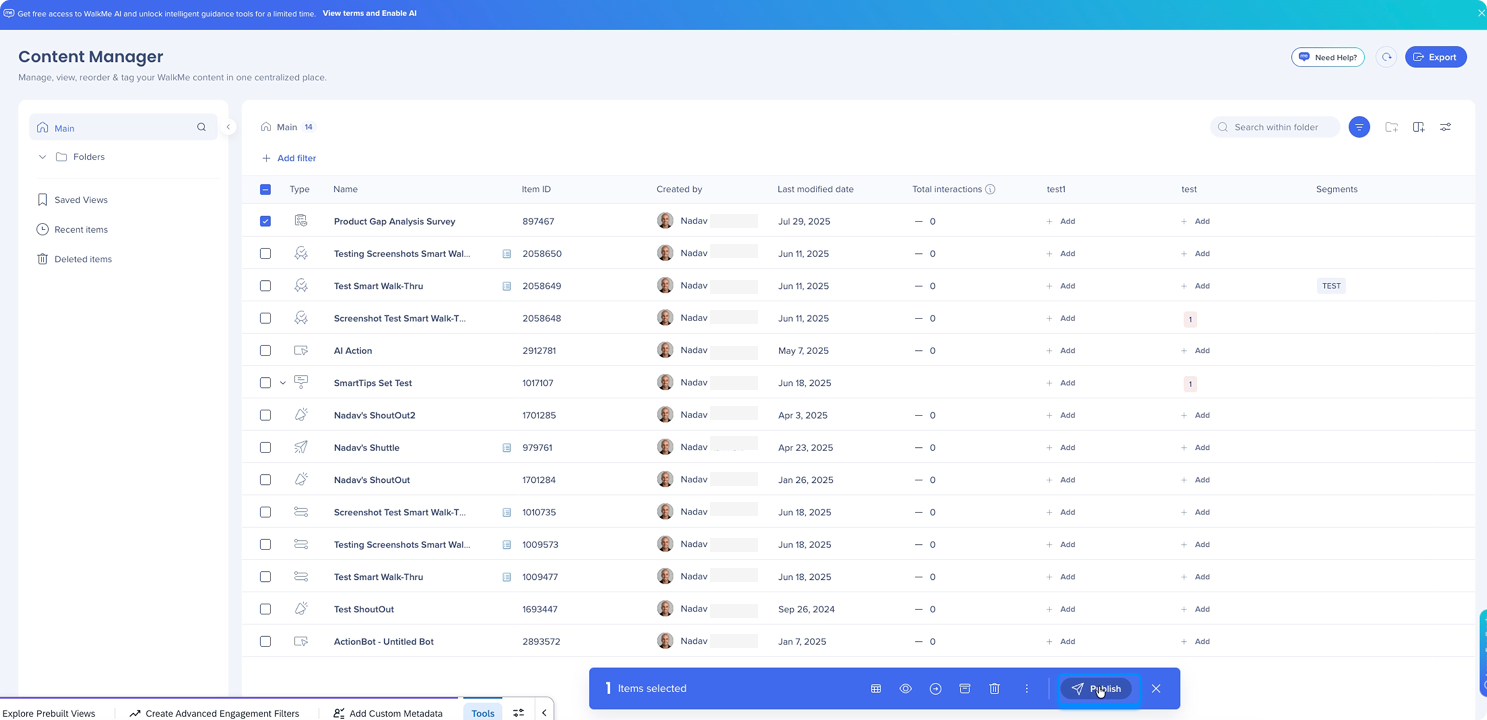
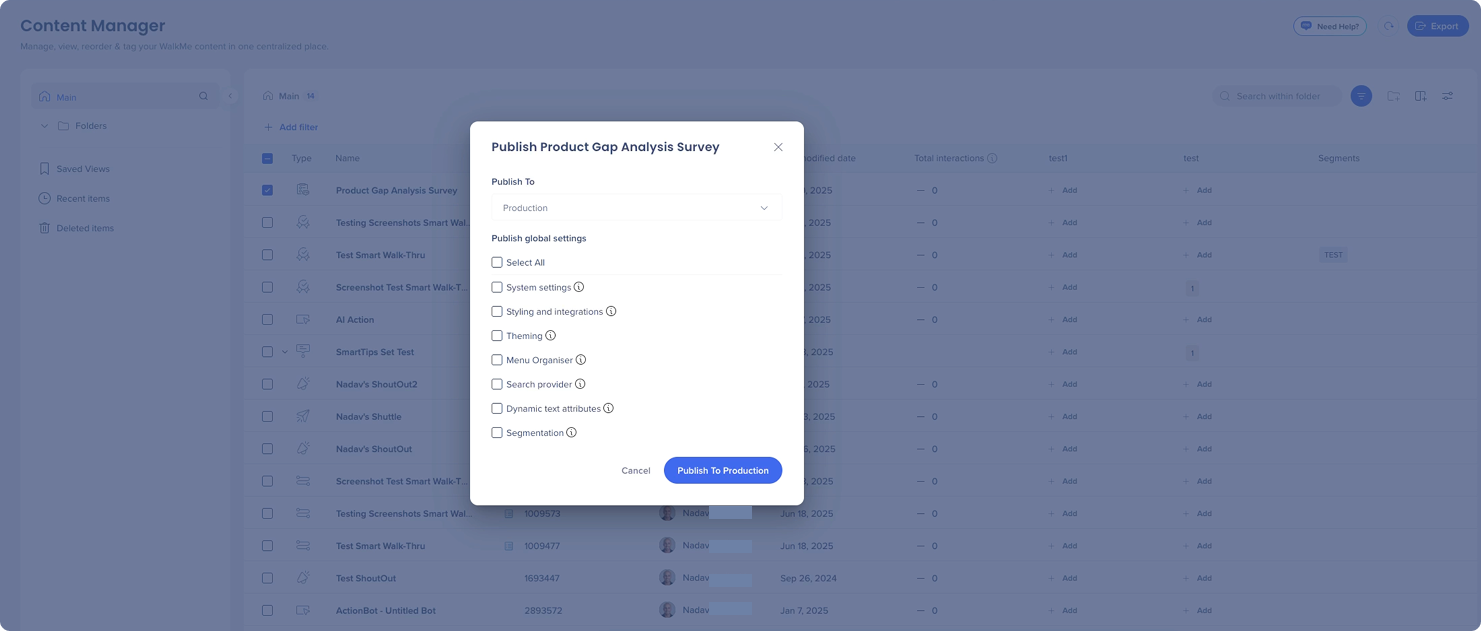
Publish content
Select one or multiple items
Select Publish
Select the environment you want to publish to
Select the settings you want to publish
Select Publish to [Env]
Preview, Collaborate, and Track Changes
Item preview
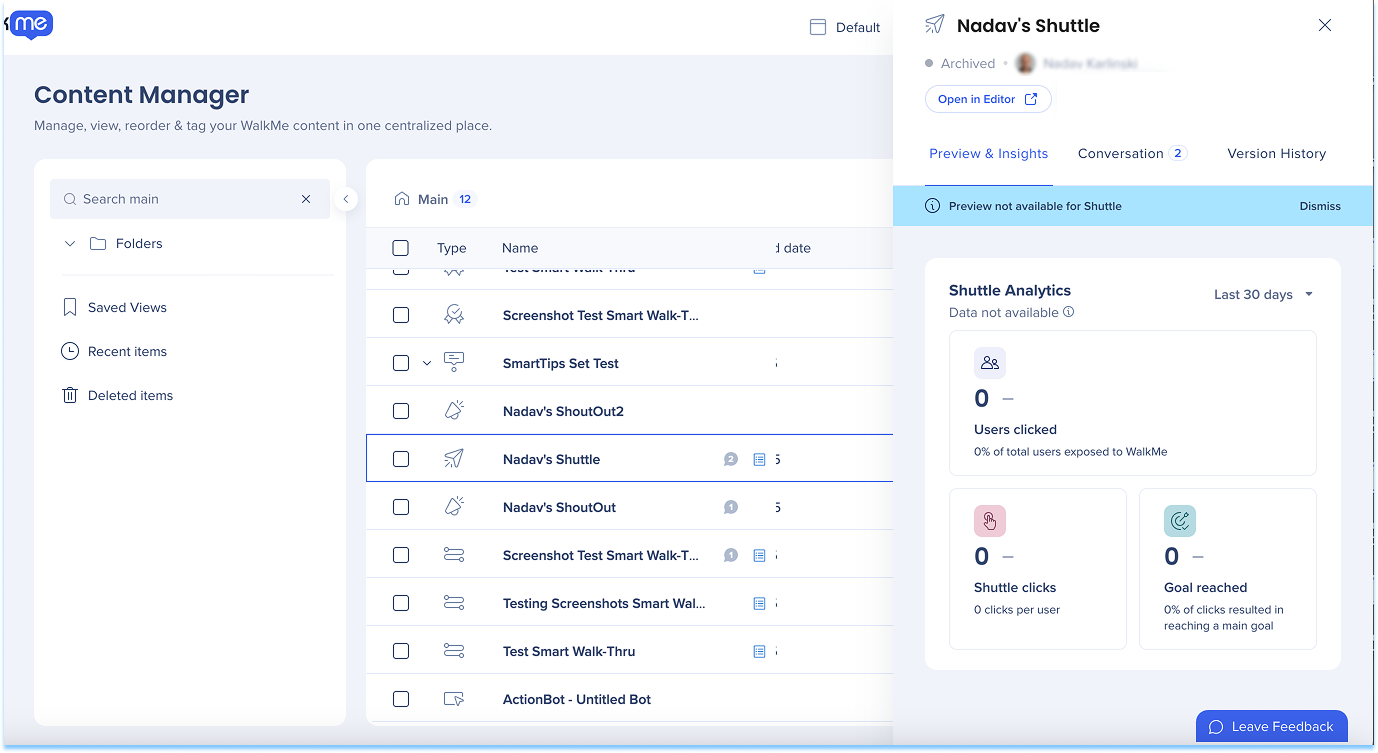
Select an item in the table to open the item drawer, which includes:
Preview & Insights : Preview the item, review Insights data from the last 30 days, and view related StoriesConversations : View and leave comments, and tag collaboratorsVersion history : Review previous edit versions of the item
Preview & Insights
Use Preview & Insights to view item screenshots and analytics.
Preview item screenshots
Hover over the preview
Select the Slides preview icon
Expand the preview
Hover over the preview
Select the Expand icon
注
The preview shows an image of the balloon as it appears to users
Smart Walk-Thrus show the entire play sequence
Shuttles, resources (videos and articles), and onboarding tasks don't have a preview
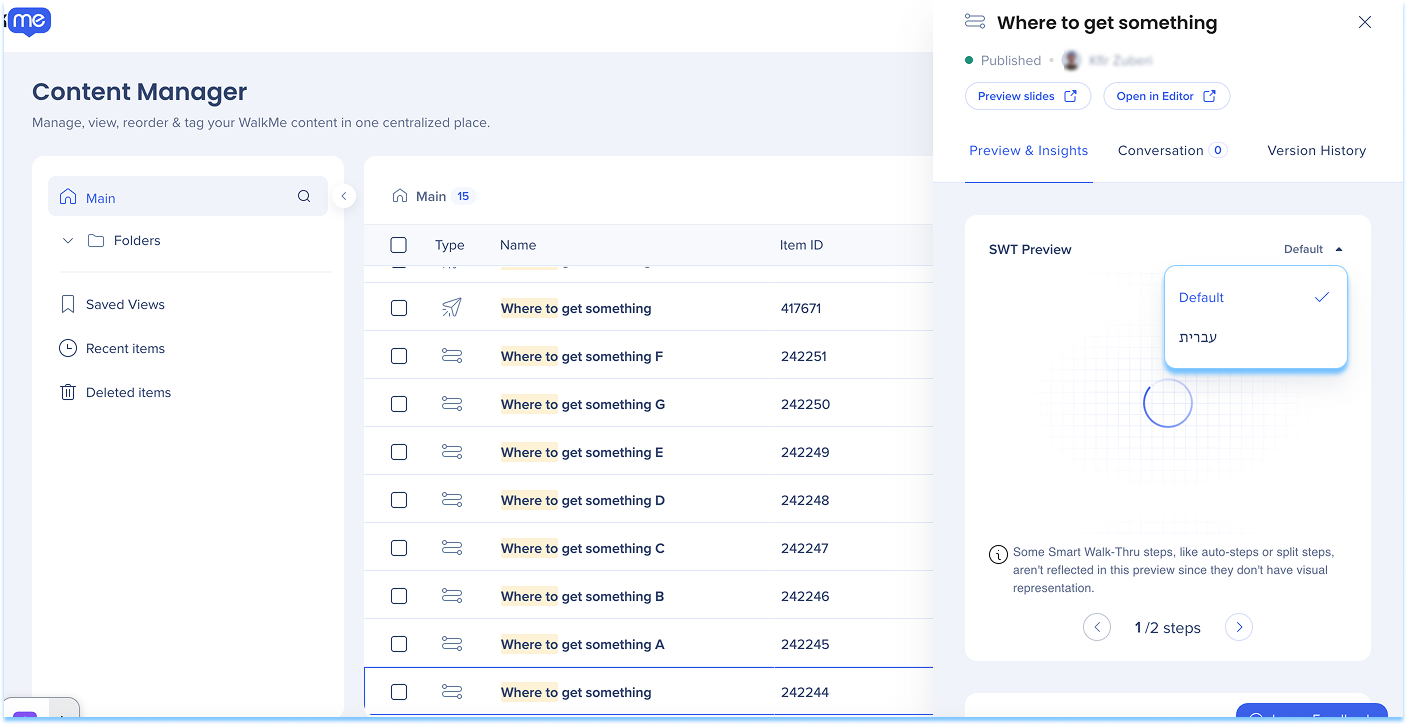
Translated preview
Preview translated versions of your content directly in the preview window.
Select the Language dropdown to view the item in each translated language
Conversations
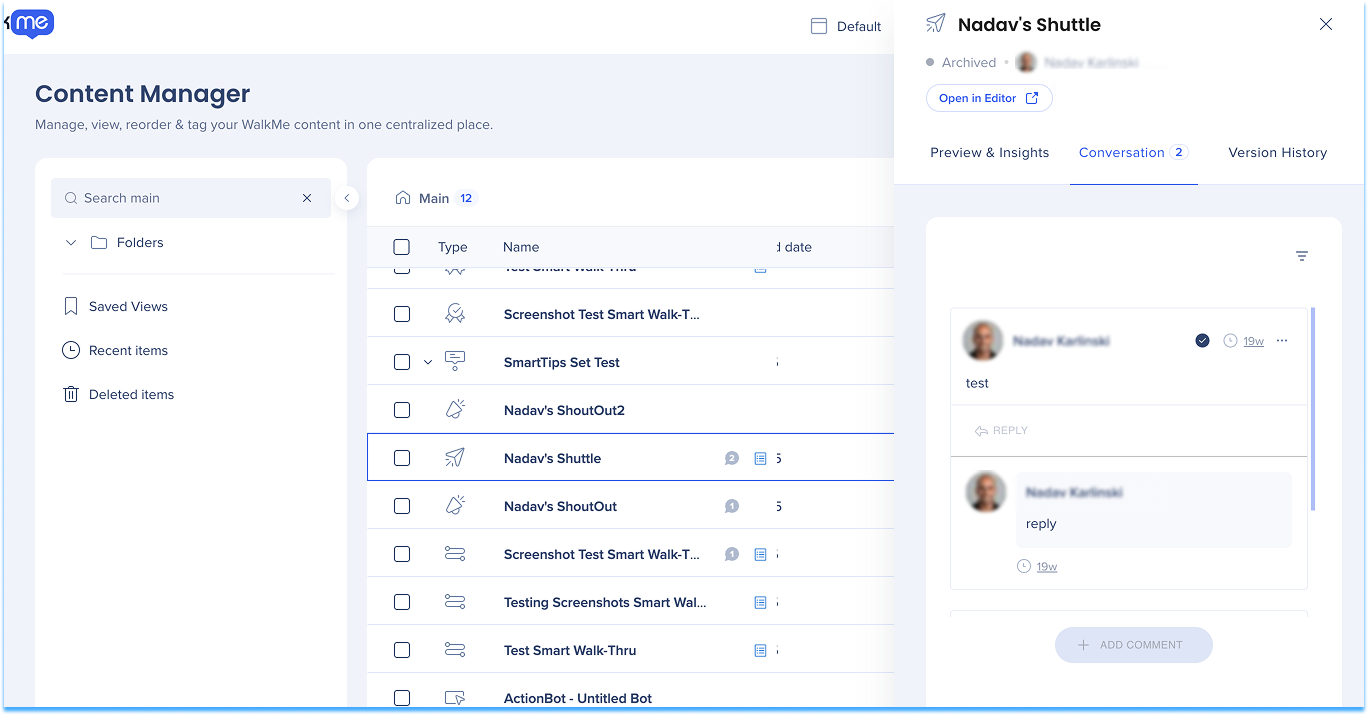
Use Conversations to view and leave comments on items or preview slides, and tag collaborators. When a user is tagged, they receive a notification.
A message indicator will appear next to each item's name in the table showing the number of messages.
A blue indicator means there are unread messages
A gray indicator means all messages have been read
View comments
Select the message Indicator to open the Conversations tab
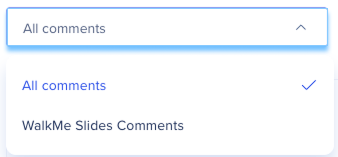
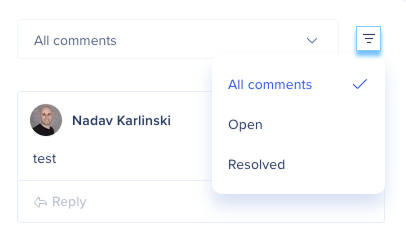
Optional : Use the All comments dropdown to filter by comment typeOptional : Select the Filter icon to filter comments by status
Resolve comments
Select the Check icon at the top of the comment
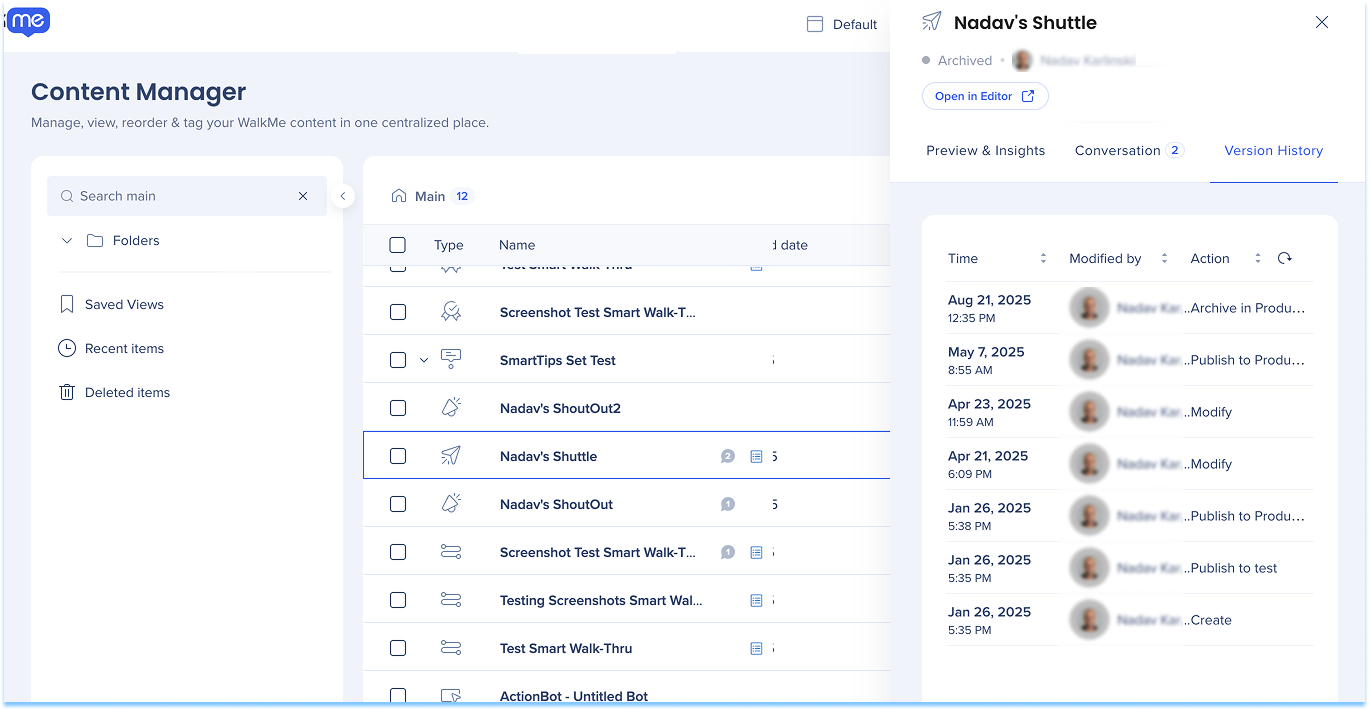
Version history
The Version History tab shows all previous edit versions of the item.
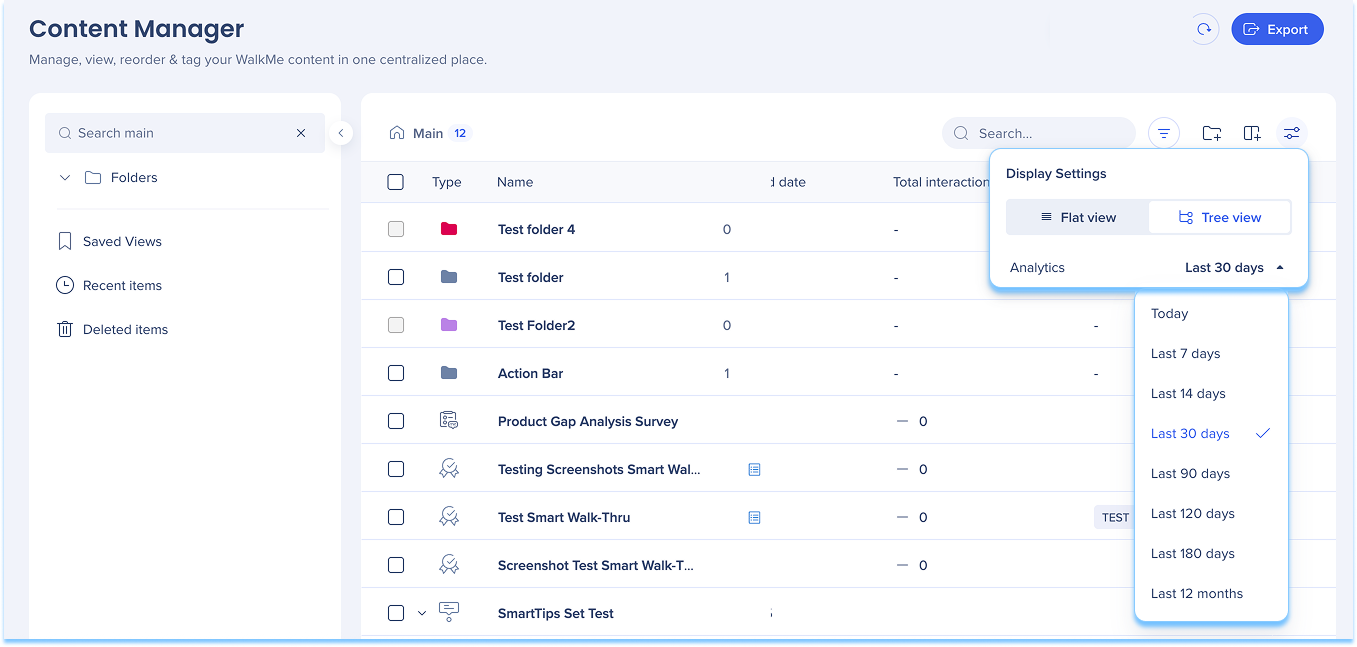
Display settings
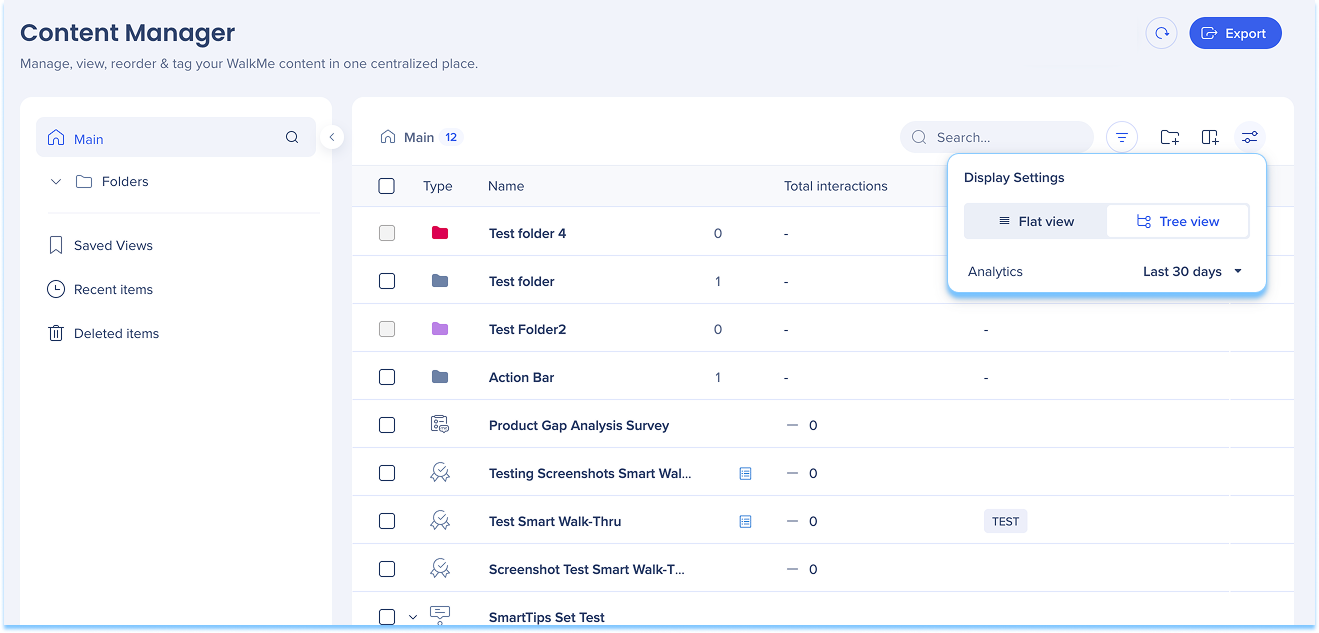
Use display settings to switch between:
Flat view : Displays content in a single list without hierarchyTree view : Displays content in a hierarchical structure with categories and subcategories
Inline trend indicators
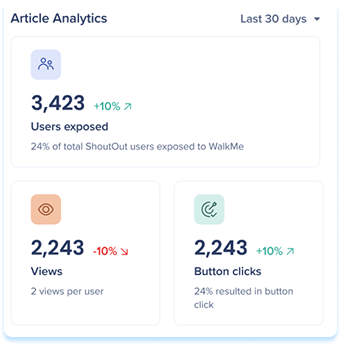
Inline trend indicators show performance changes directly in the table and item drawer, without switching to Insights.
Trend indicators appear next to:
Unique users
Interactions
Goal completions
Each metric includes a visual indicator:
Green arrow indicates an increaseRed arrow indicates a decreaseNo arrow indicates no trend when the previous period value was zero
Trend calculations are based on the selected date range and update dynamically.
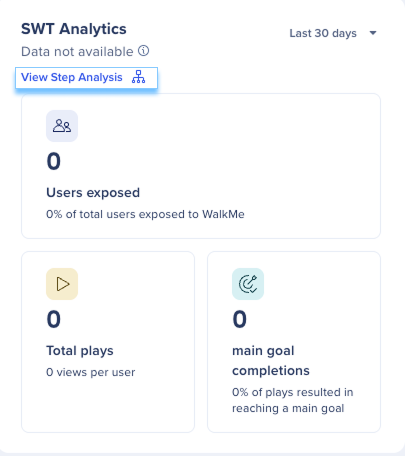
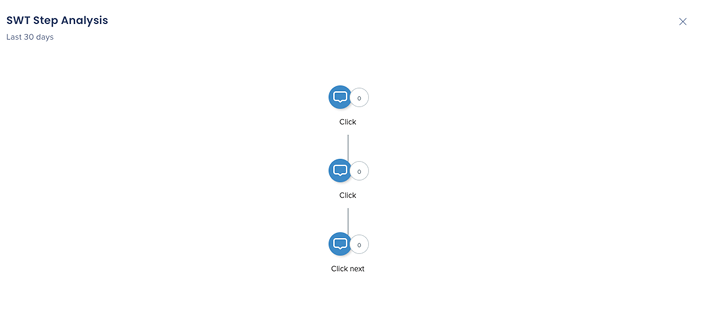
Smart Walk-Thru step analysis View drop-offs, user paths, and step-level performance directly within the Smart Walk-Thru drawer.
Open the step analysis map
Select View Step Analysis
Review the Smart Walk-Thru analysis map
Interaction data date filter
Use the interaction data date filter to view analytics for a specific time range. You can access the date range filter in two ways:
From Display settings
Select the Display Settings icon
Select the dropdown next to the analytics label
Choose a time range
From an individual item
Select an item to open its detail panel
In Preview & Insights , select the dropdown next to the analytics label
Choose a time range
Analytics filters require at least one analytics column, such as unique users, total interactions, or goals reached.
Use Views to Monitor Content
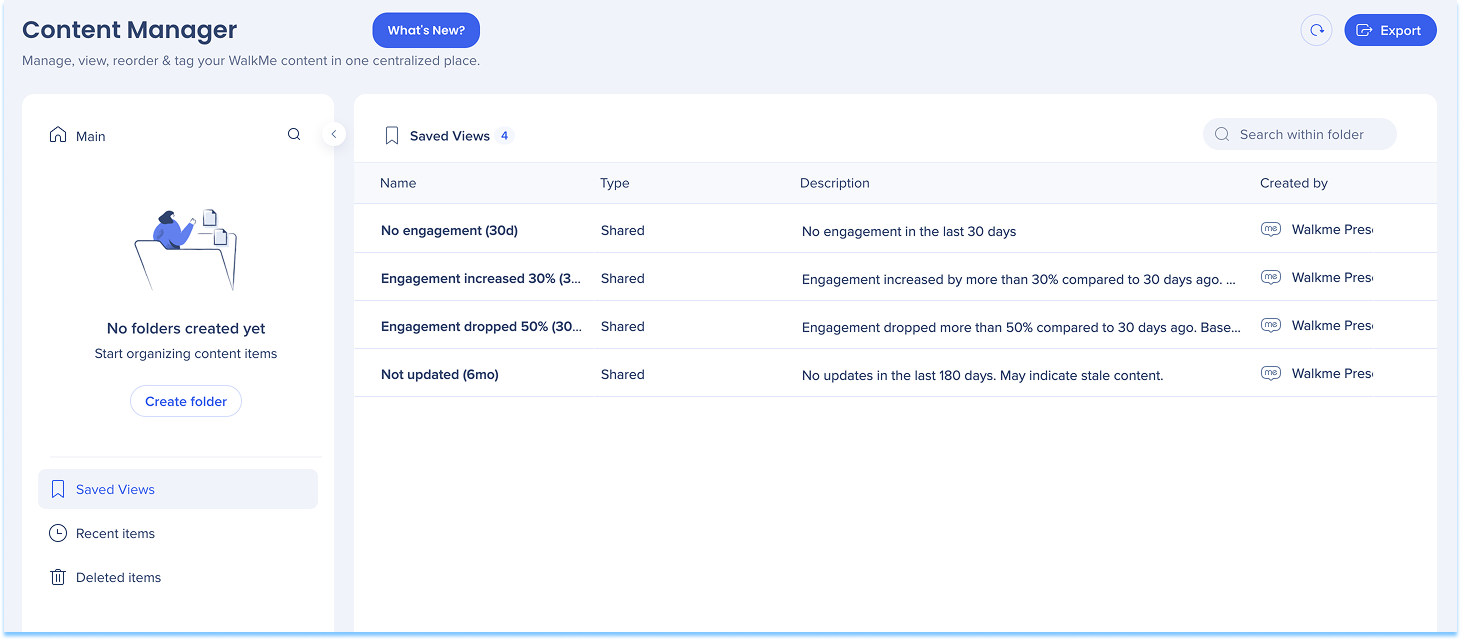
Saved views
Saved views let you save and reuse table configurations to monitor content more efficiently. Saved views can include:
Column selections
Filters
Sorting preferences
Saved views appear in the left panel and update automatically as items change.
Create and manage views
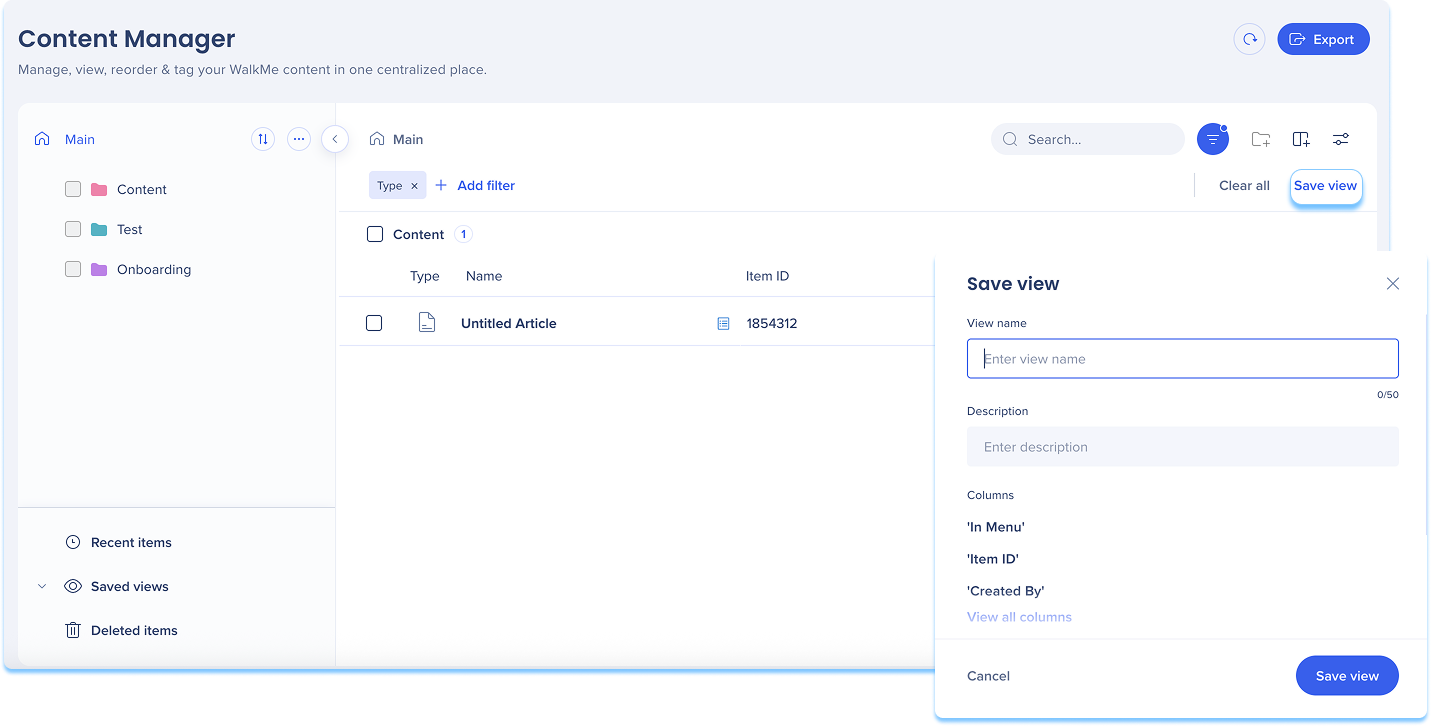
Create a view
Apply filters to the table
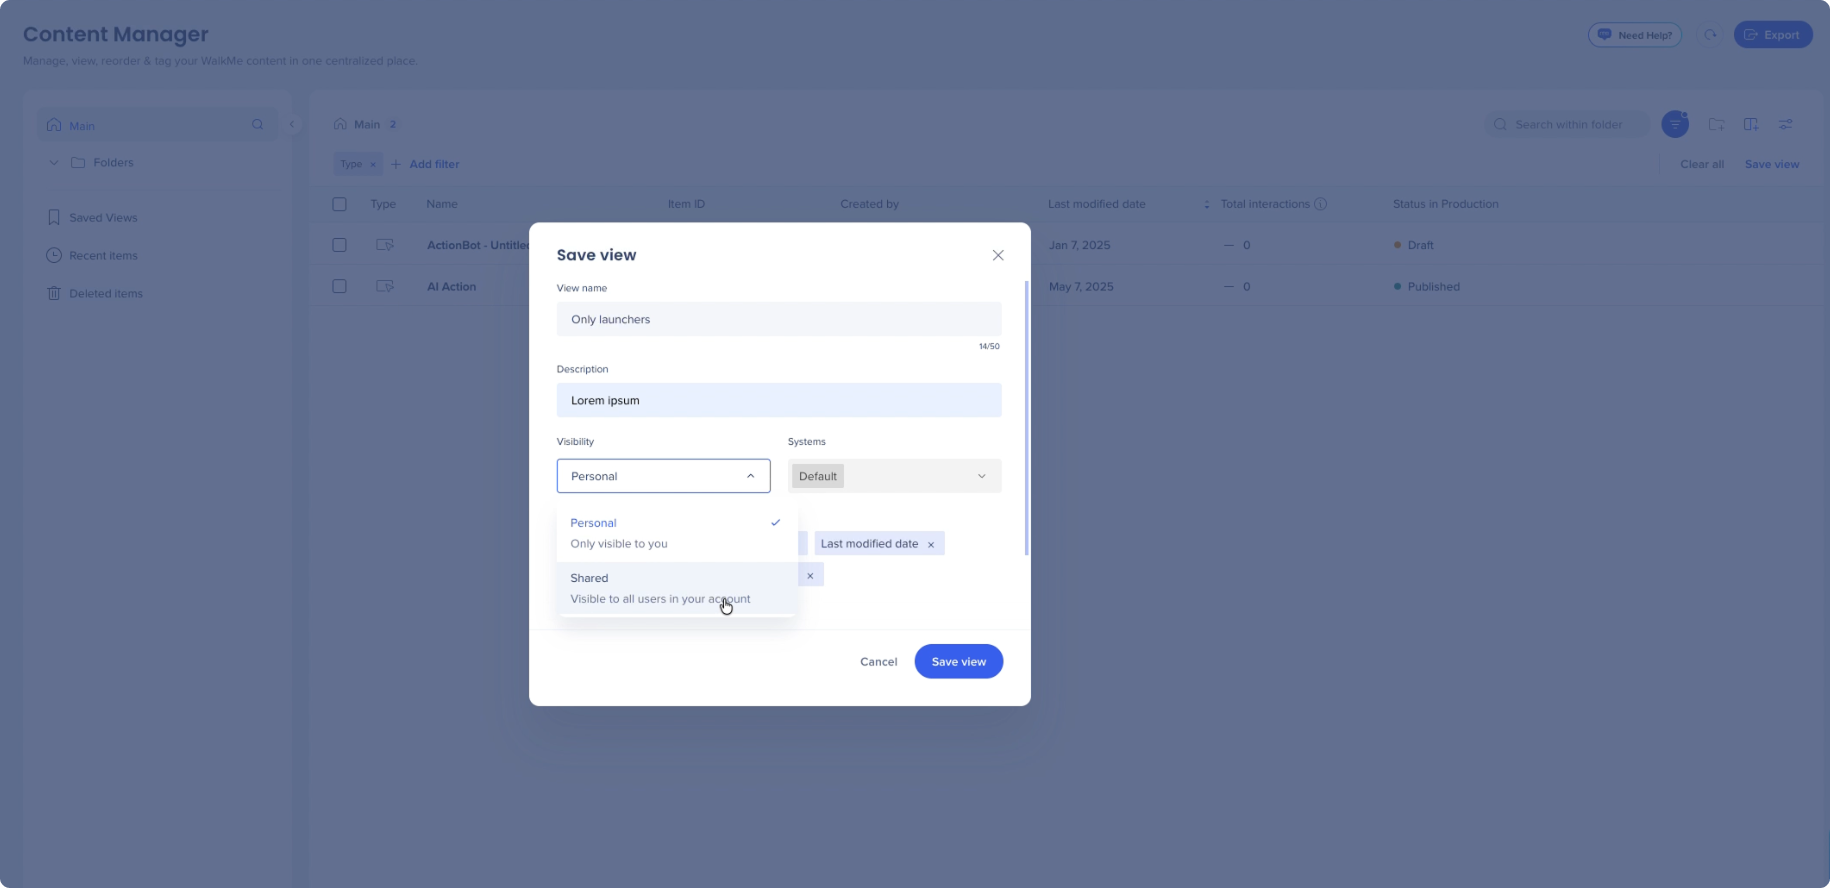
Select Save View
Enter a view name and description
Select Save View
Saved views are dynamic, so new items that match the filters appear automatically, and archived items are removed.
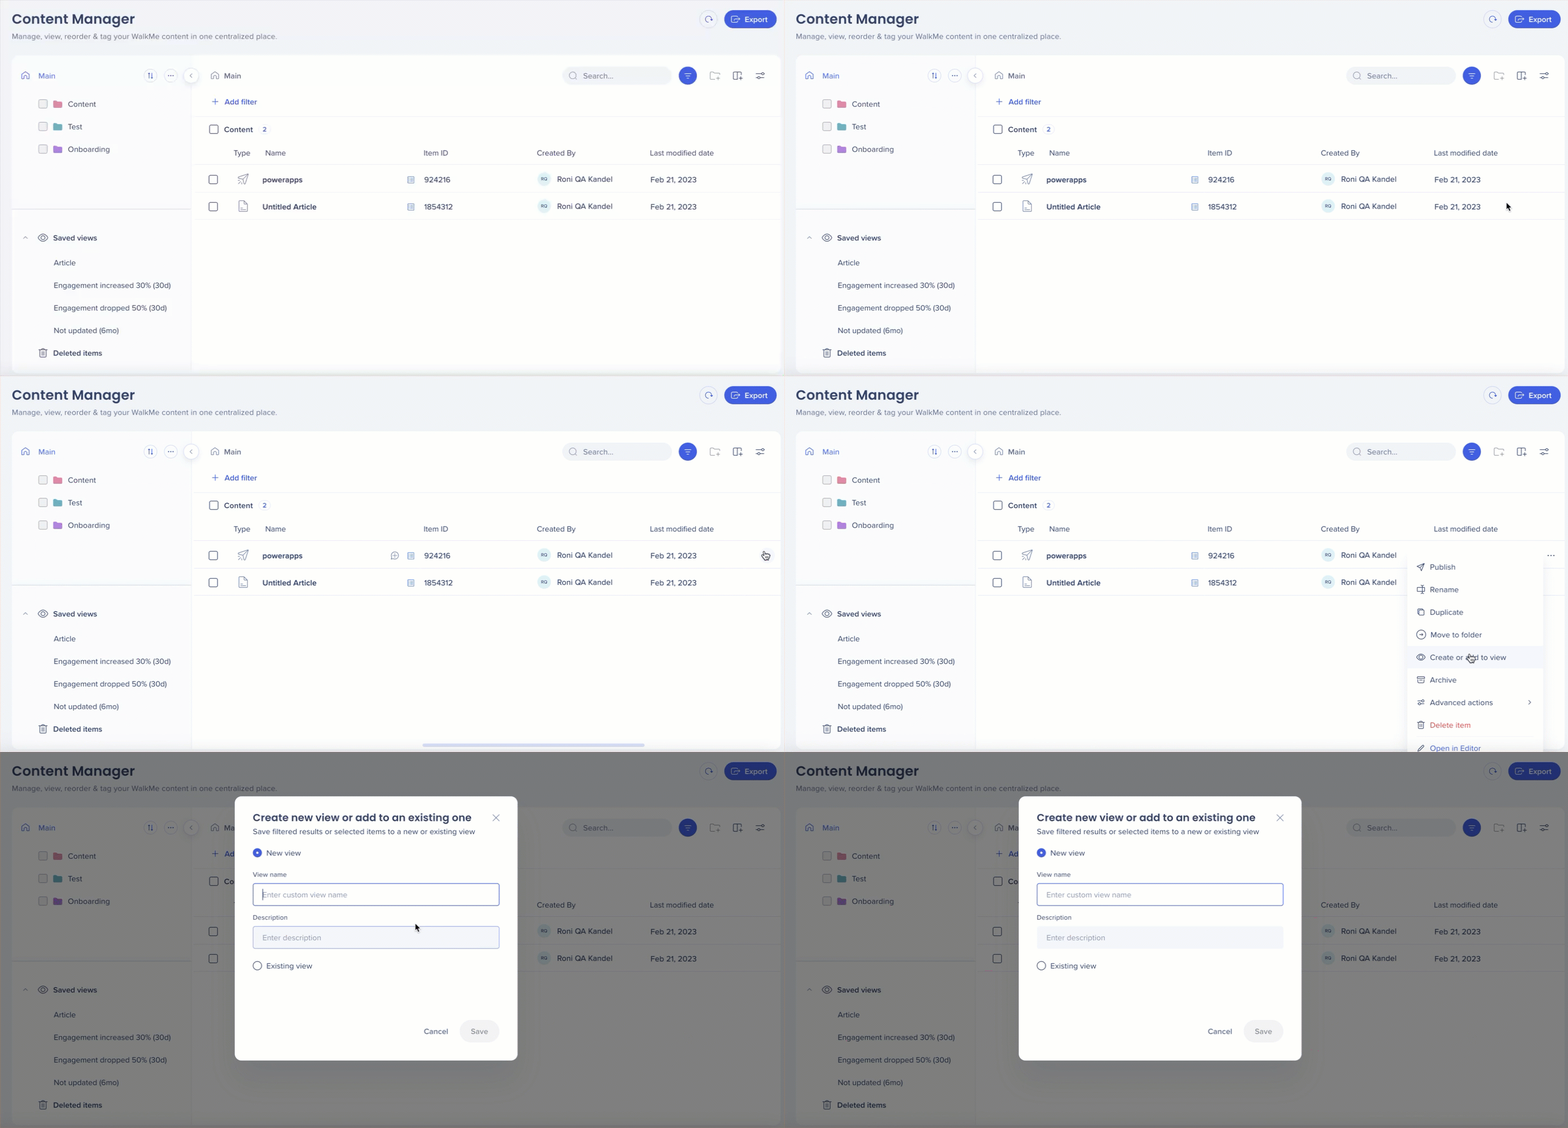
Add items to a view
To add a single item, open the item Options menu and select Create or add to view
Choose a new or existing view
Select Save
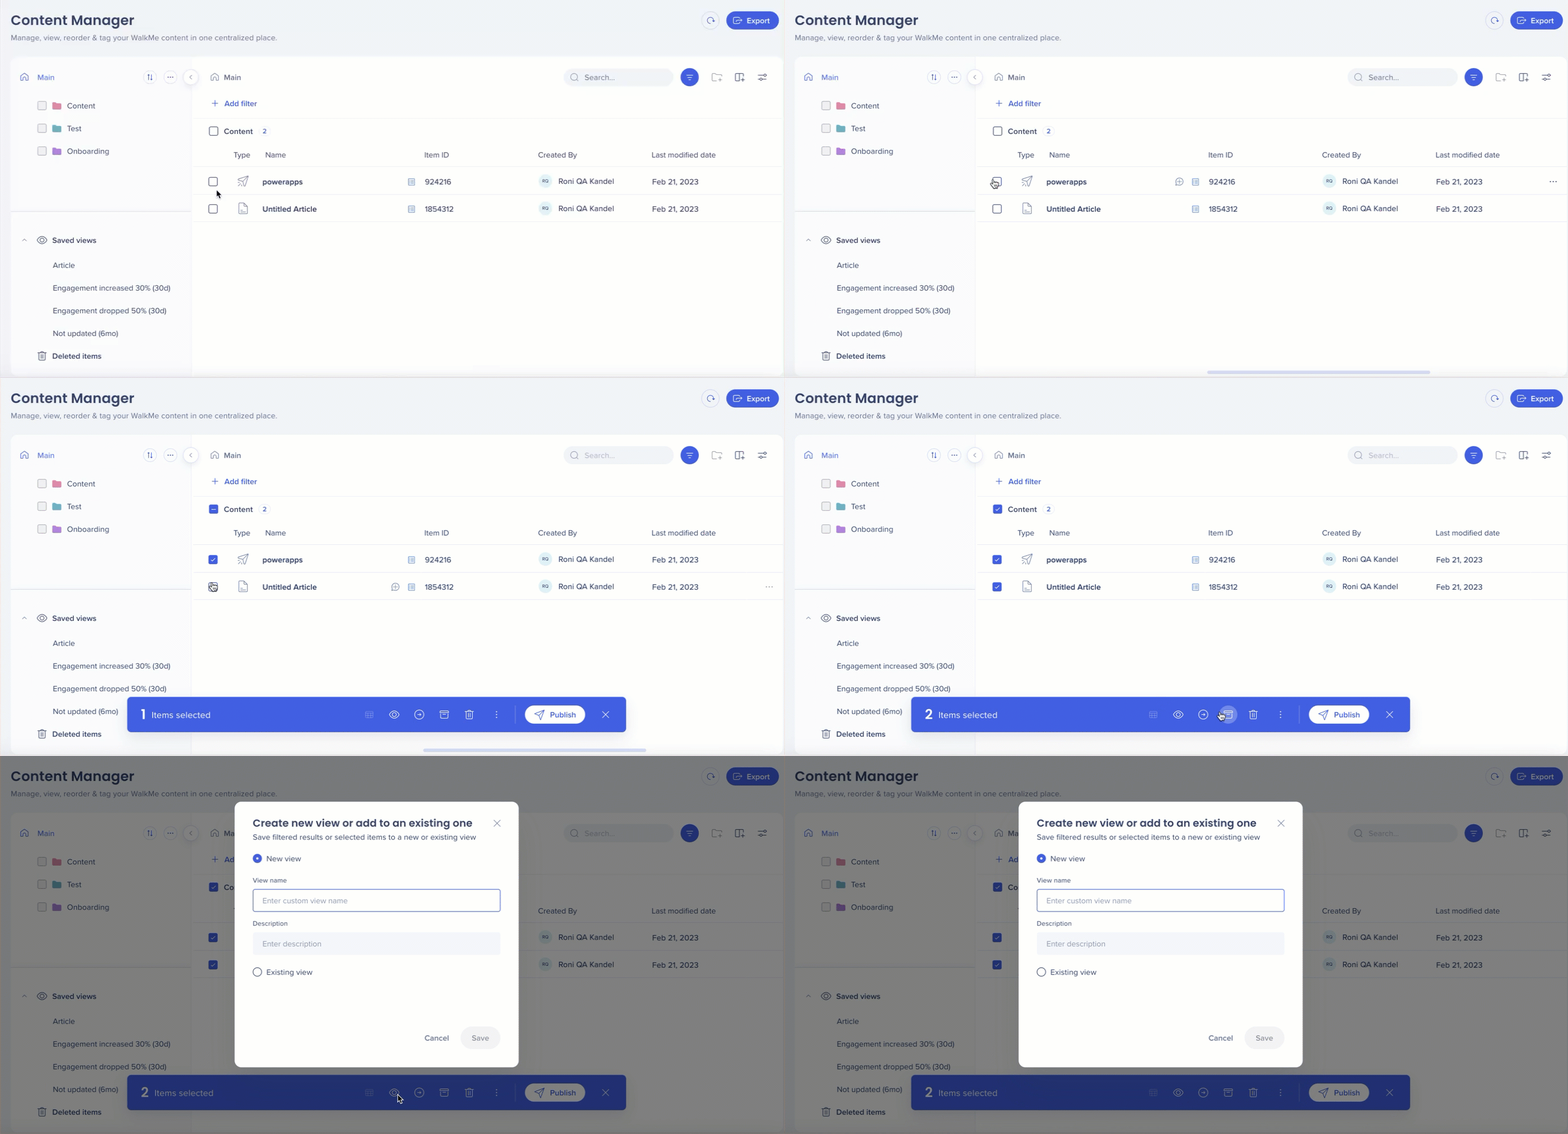
Add multiple items to a view
To add multiple items, select items using the checkbox, then select the Eye icon
Choose a new or existing view
Select Save
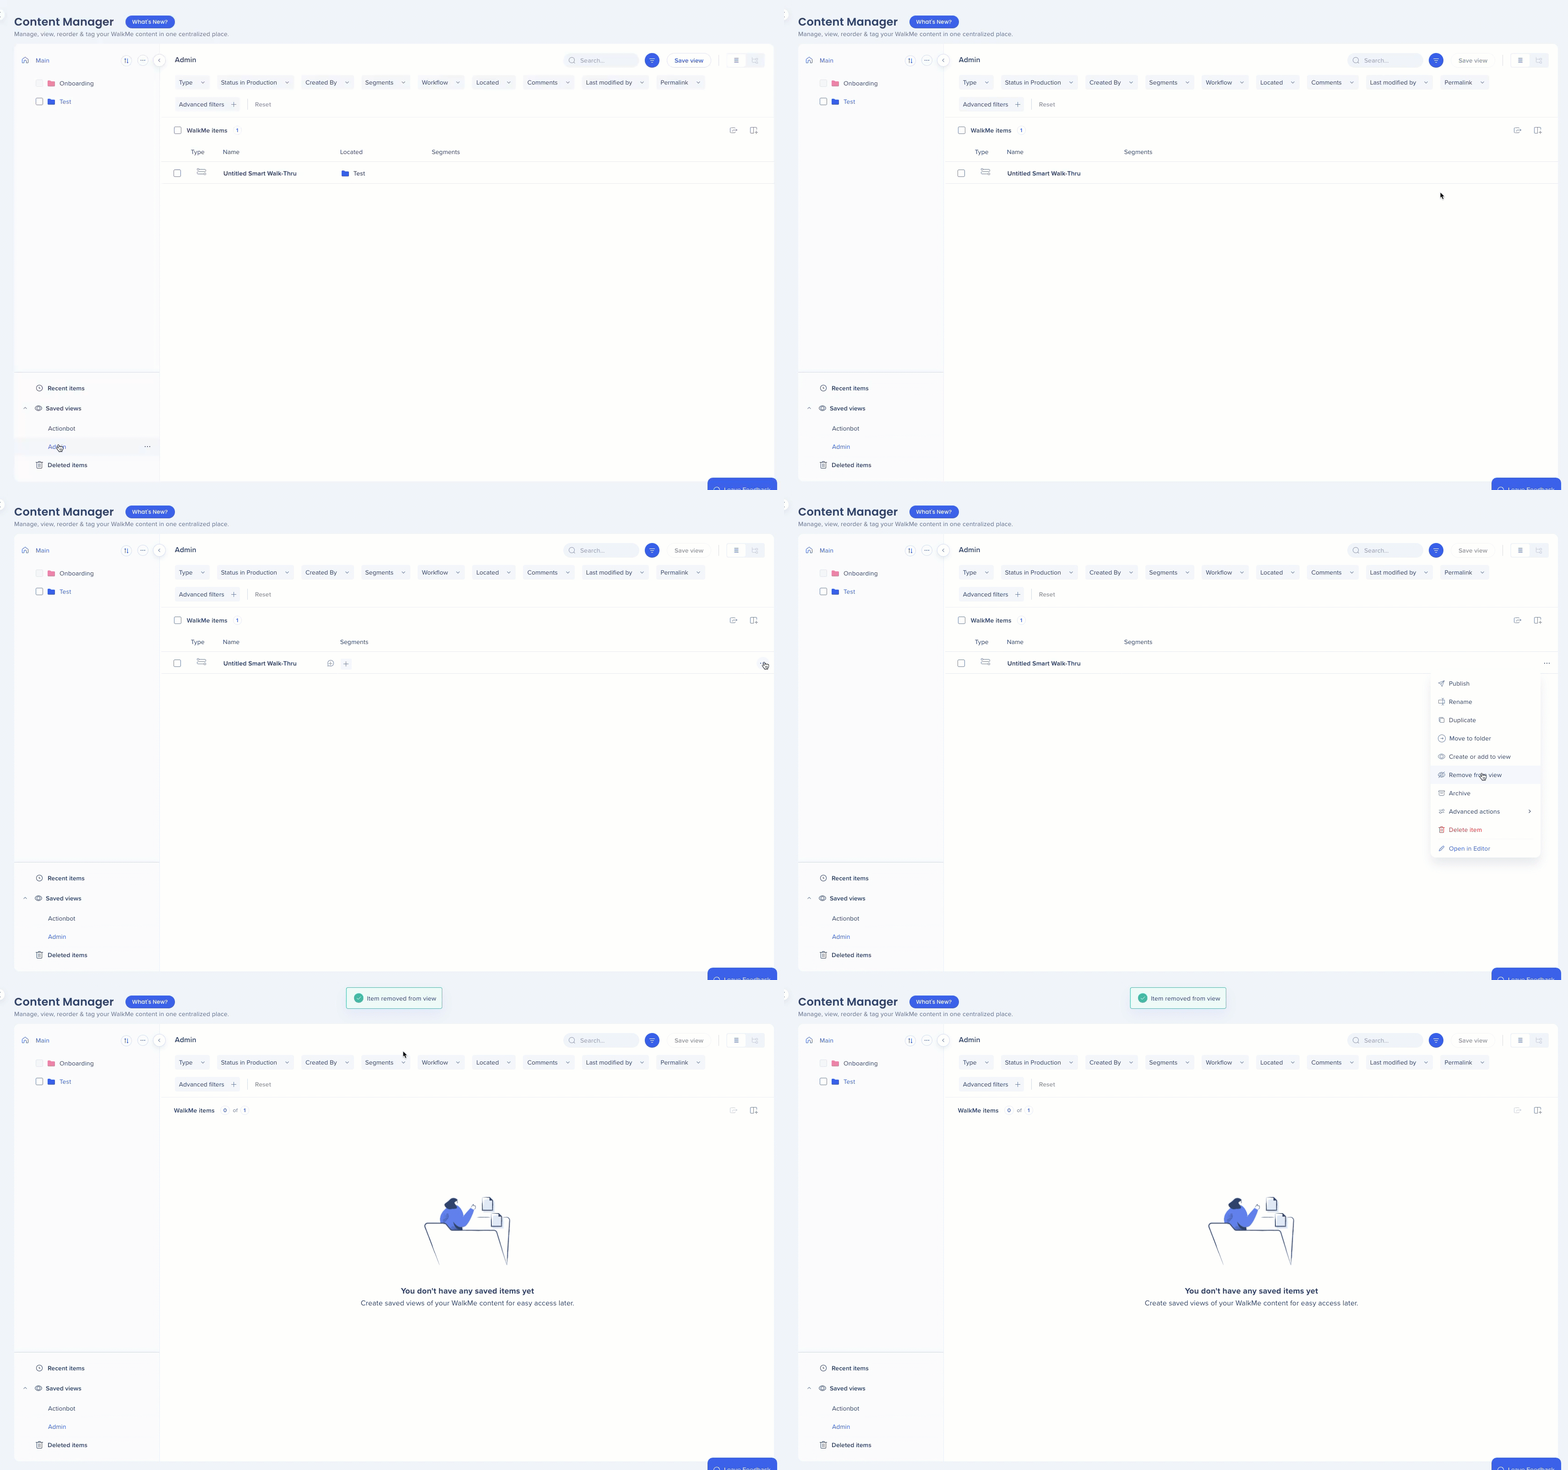
Remove items from views
Remove a single item
Open the Saved views dropdown
Open the Options menu for the view
Select Remove from view
注
Remove from view is not relevant for filters, only items added manually.
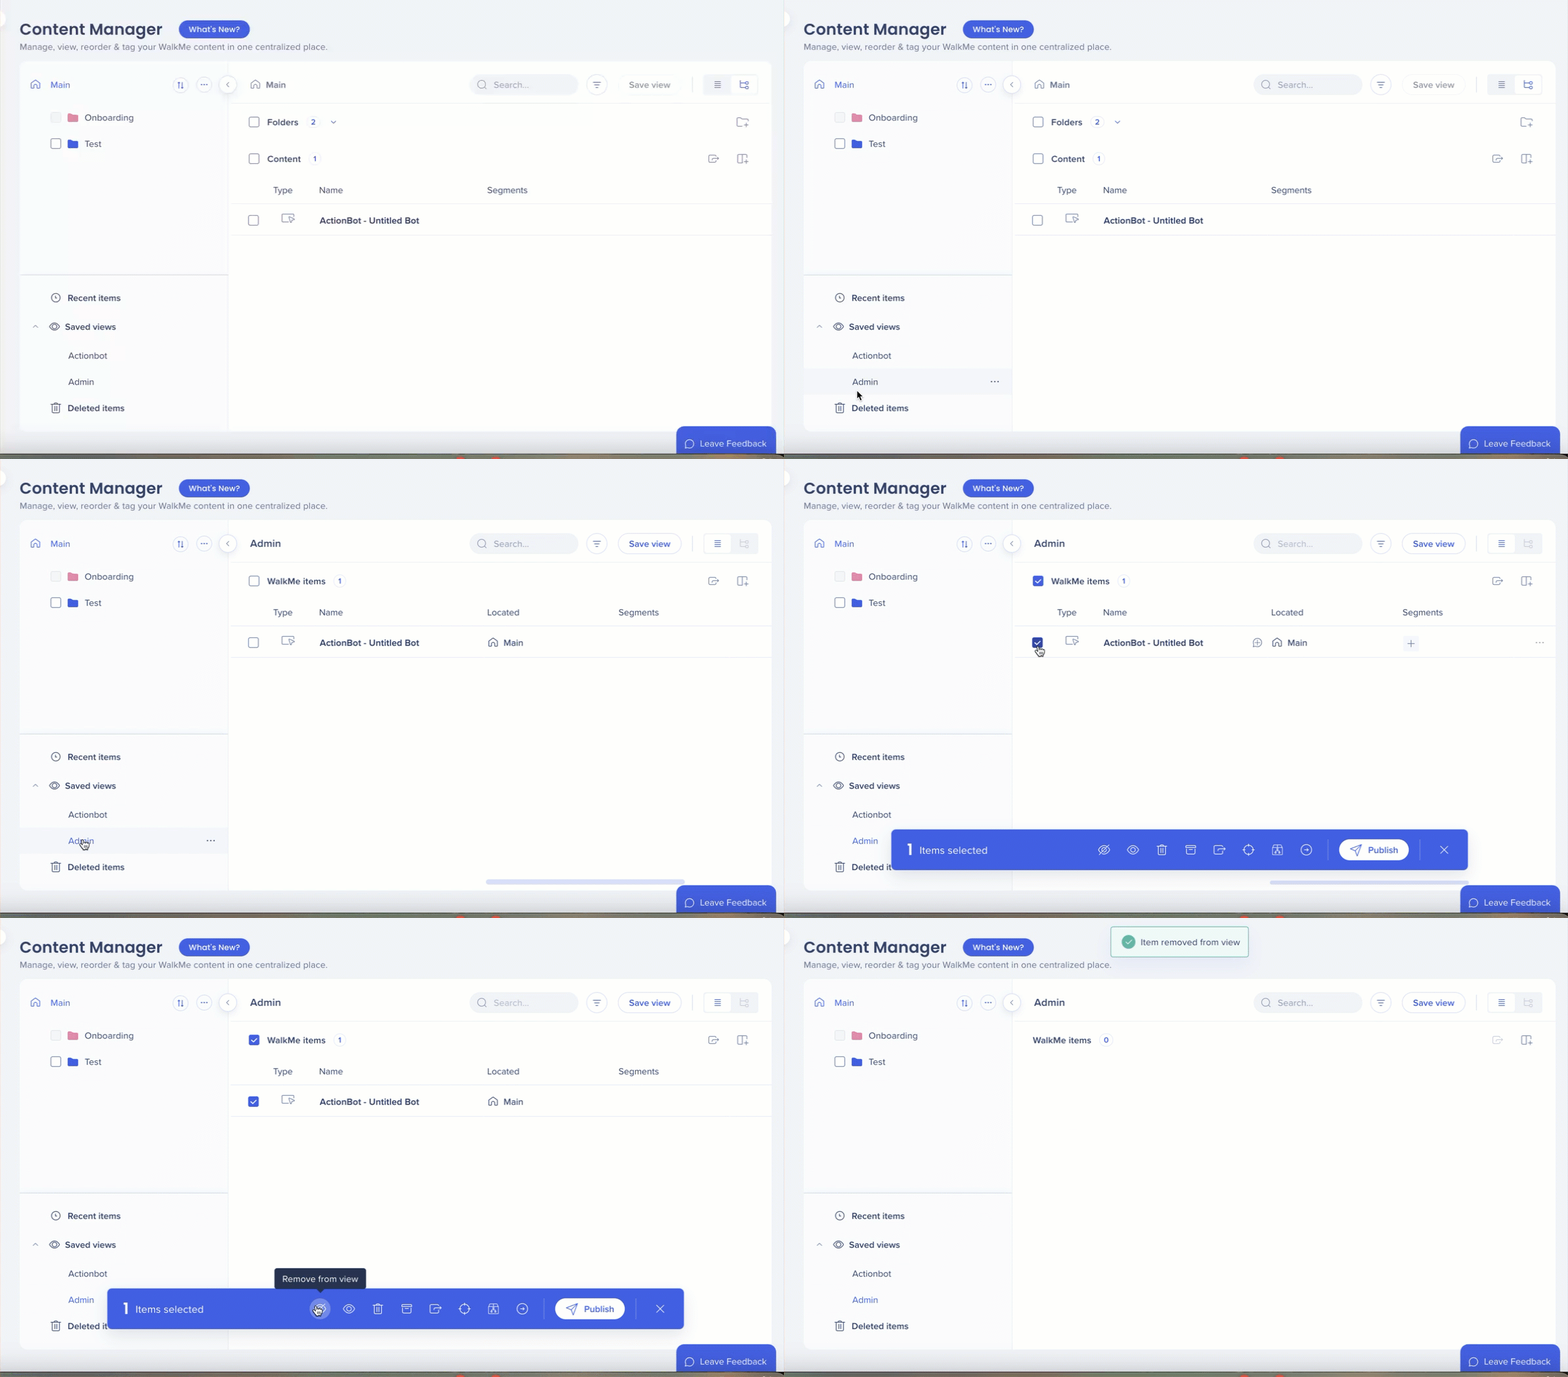
複数のアイテムを削除します
保存された表示 ドロップダウンを開き、表示を選択します。複数のアイテムを選択します
「ビューから削除 」アイコンを選択します。
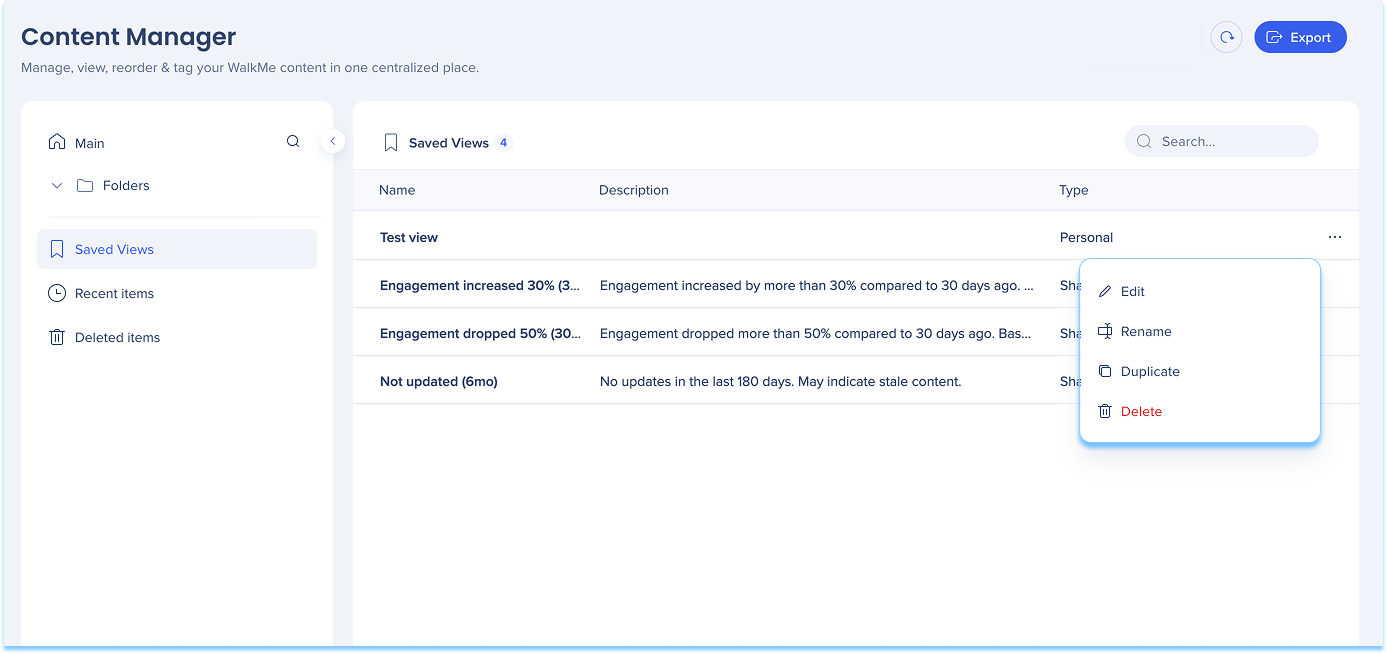
表示オプション 保存された各ビューには、追加アクションが含まれます。
「保存されたビュー」 のドロップダウンからこれらのオプションにアクセスします。
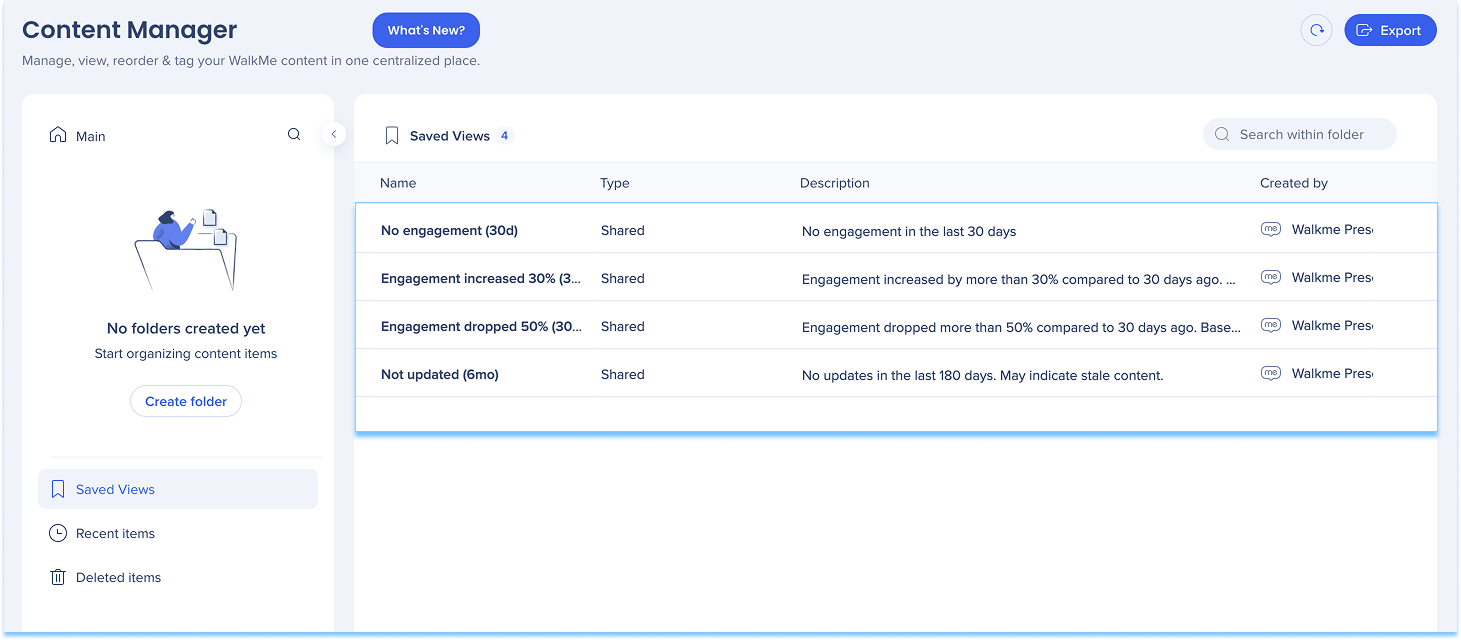
高度なエンゲージメントフィルター
高度なエンゲージメントフィルターは、注意を必要とするコンテンツを特定するのに役立つ事前定義された読み取り専用ビューです。
基準を調整する必要がある場合、フィルターを使用して手動で再作成することができます。
共有された保存されたビュー
保存されたビューを作成し、他のユーザーとシェアします:
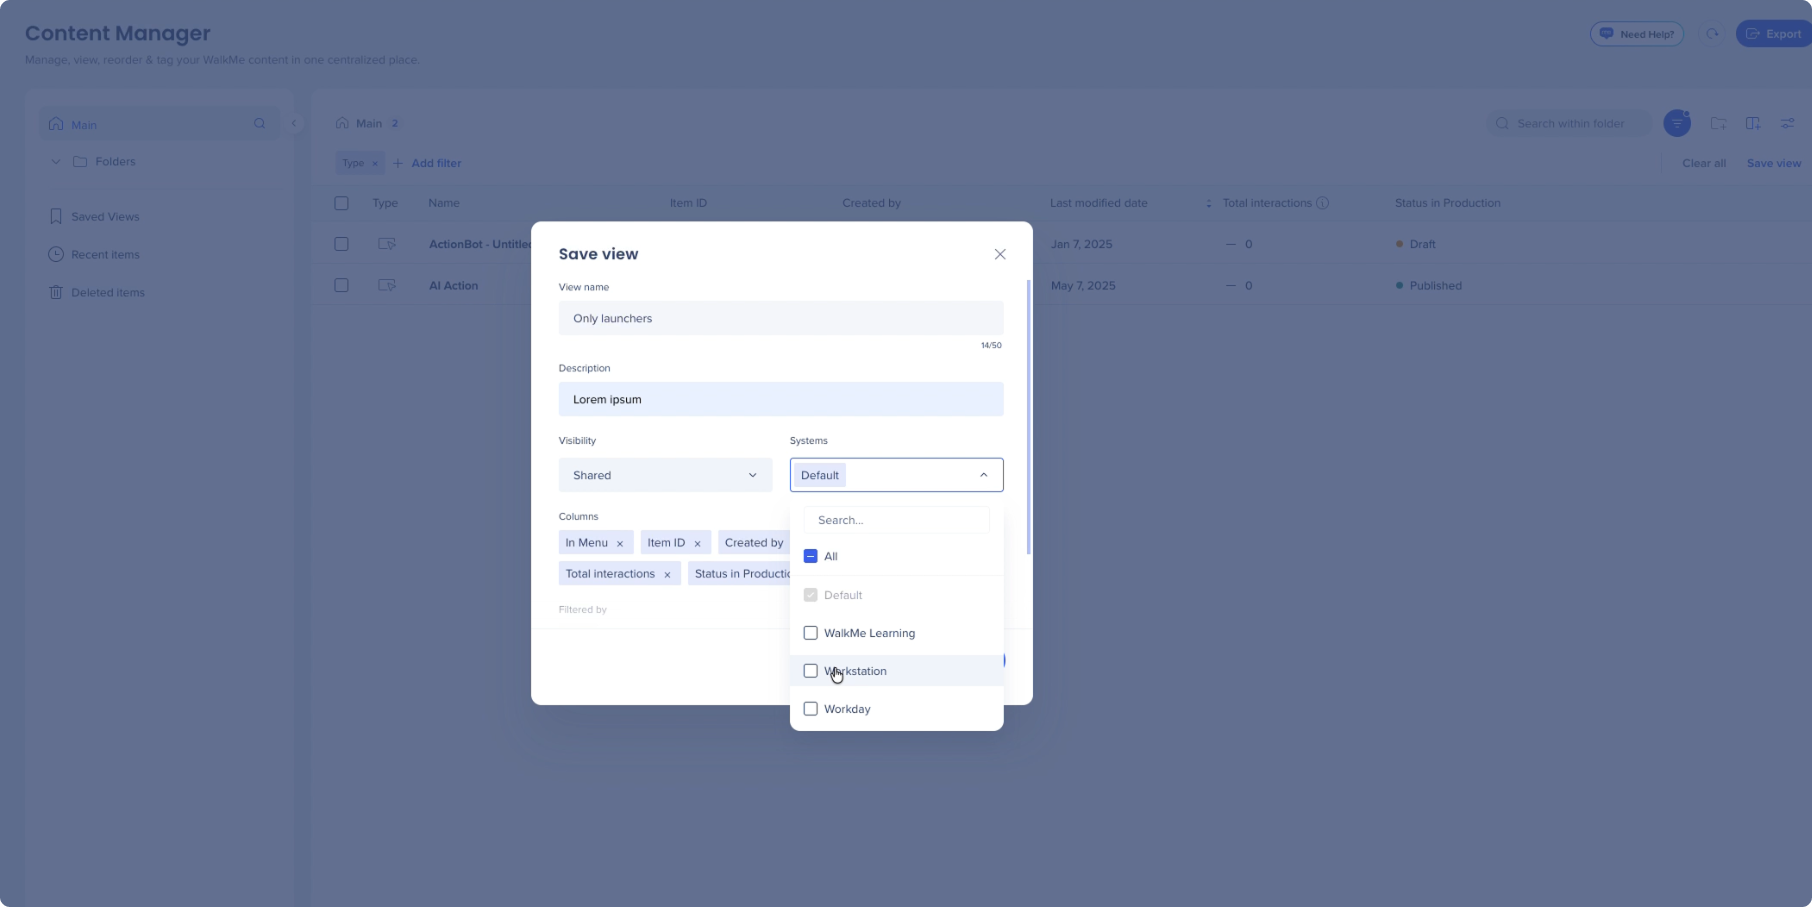
「保存」ビューを選択します 表示ドロップダウンで、[共有] を選択します
ビューを保存するシステムを選択します
「保存」ビュー
を選択します
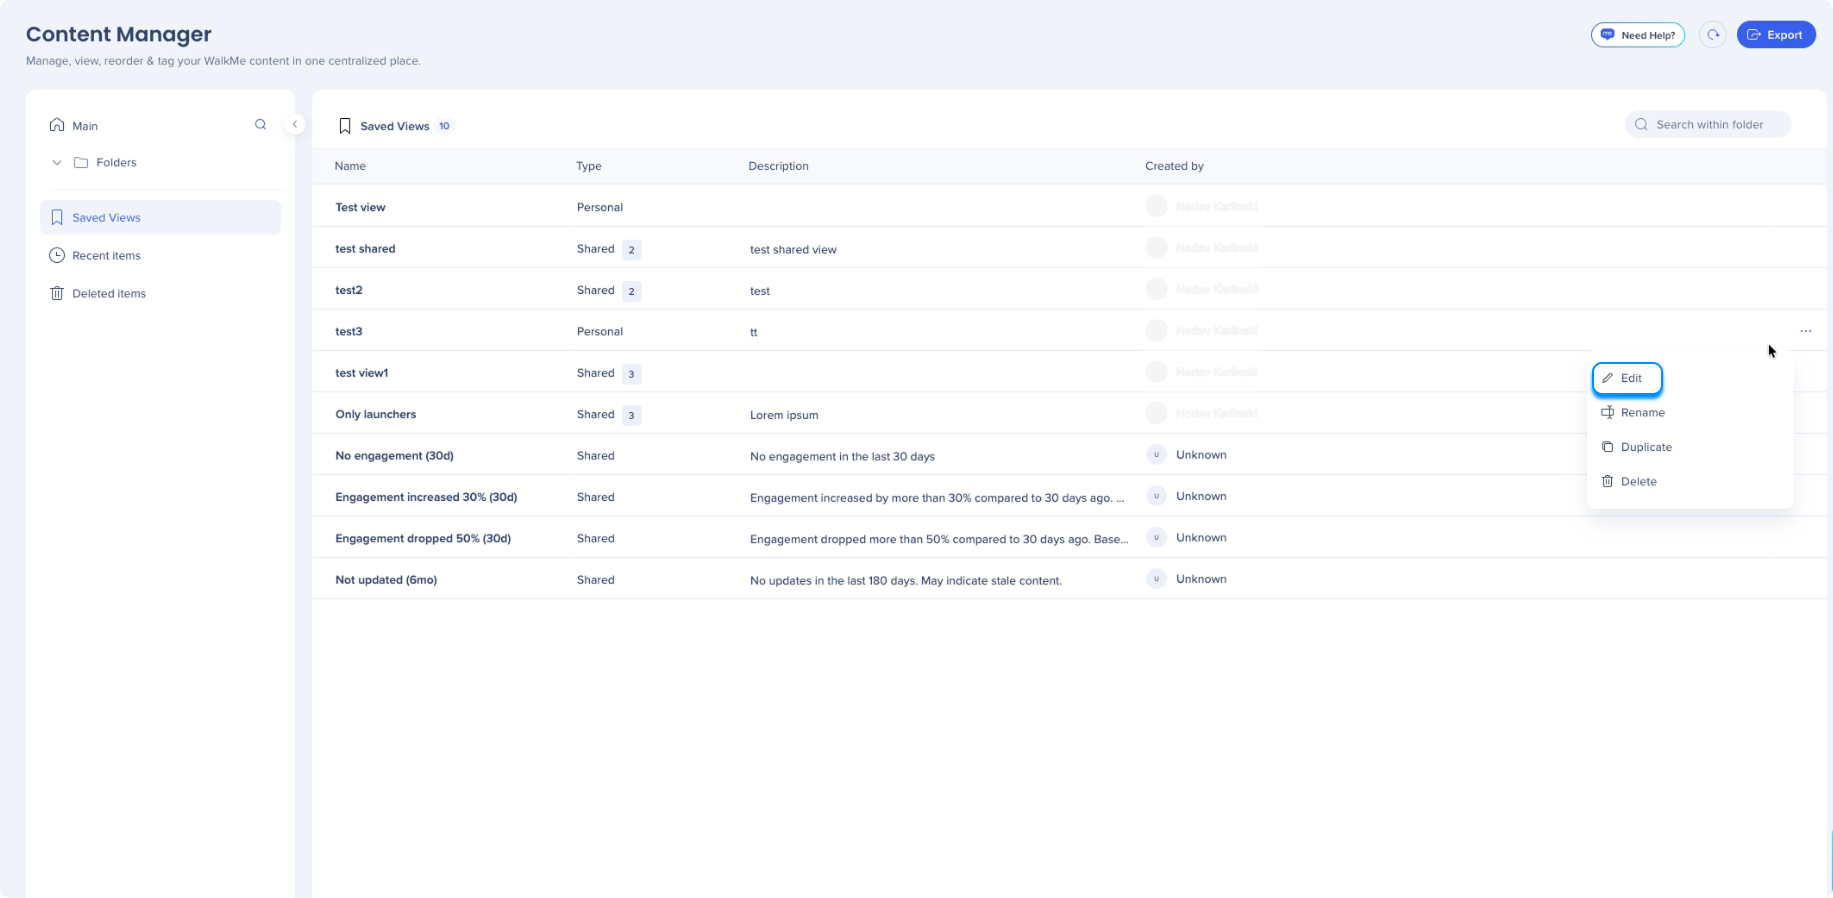
既存の保存されたビューをシェアするには:
保存されたビューの次へメニュー を選択します
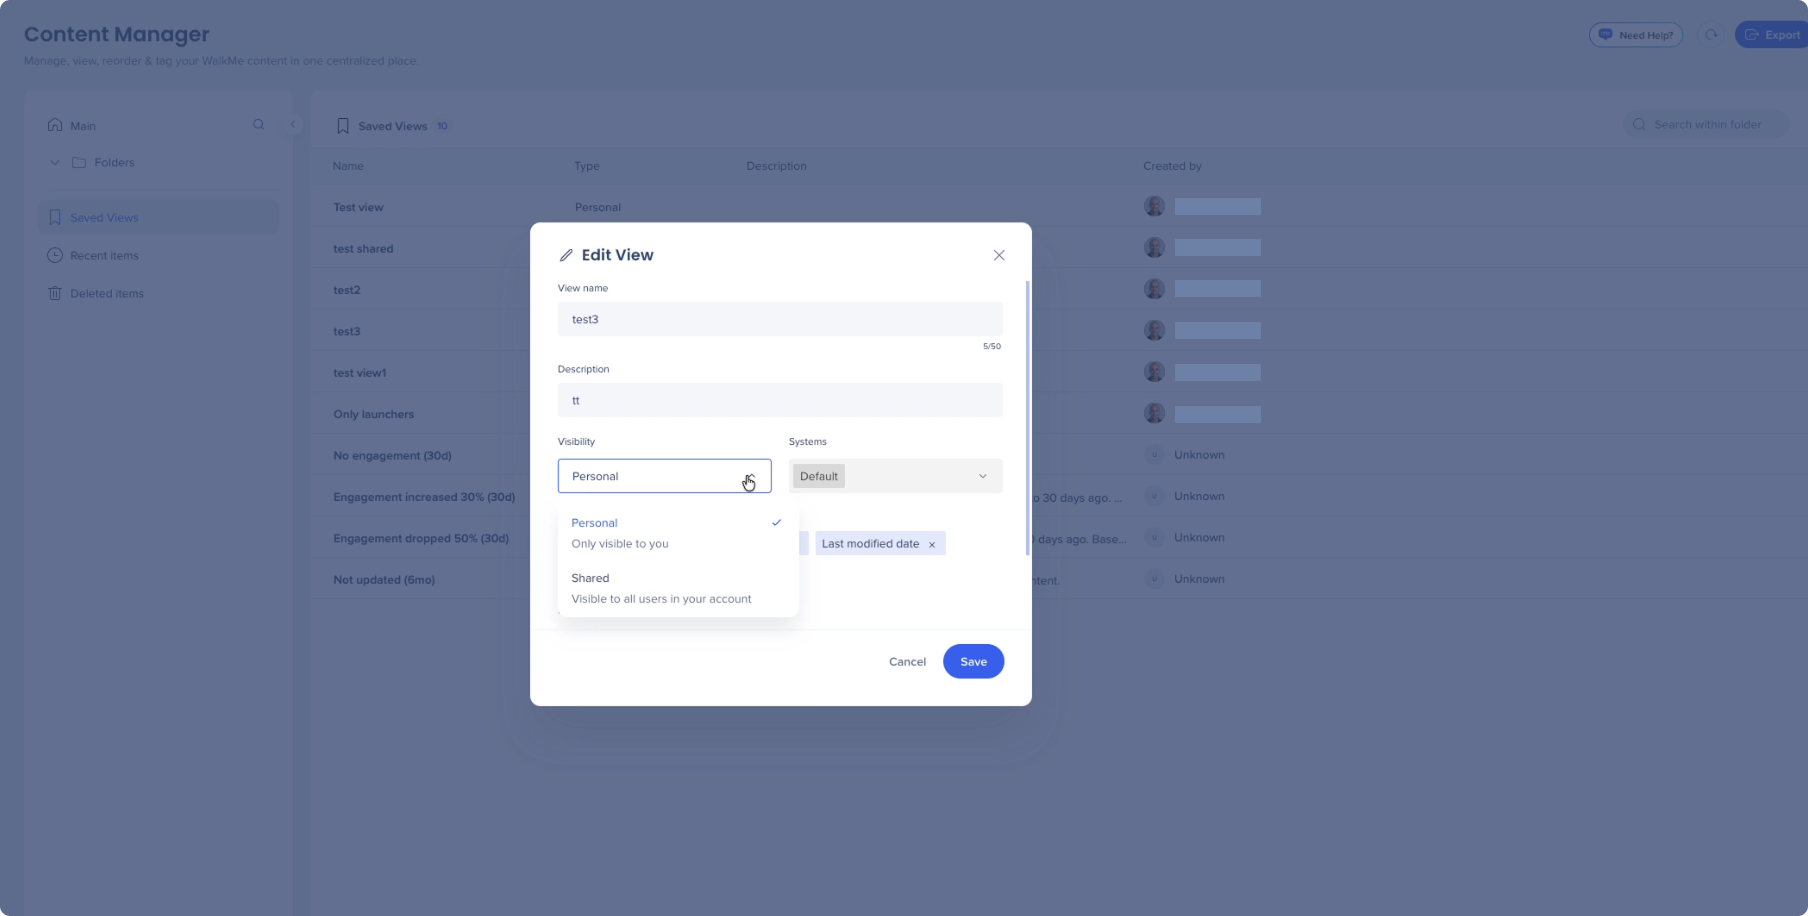
[編集] を選択します表示を共有 に変更します
Save(保存)
を選択します
最近のアイテム
「最近のアイテム」を使って、ワークスペースに最近追加されたコンテンツにすばやくアクセスします。
スマートチップセット表示
スマートチップセットを選択すると、そのセットに含まれるすべてのスマートチップが表示されます。
メタデータと列の操作
キーワード
キーワードを使用して、コンテンツの検索、フィルター、整理を支援します。
キーワード追加 :
[列を管理する] を選択して、キーワード列を表示しますアイテムのキーワード列で「+ 」アイコンを選択します。
キーワードを入力し、Enter キーを押します。
Sav e(保存)を選択します
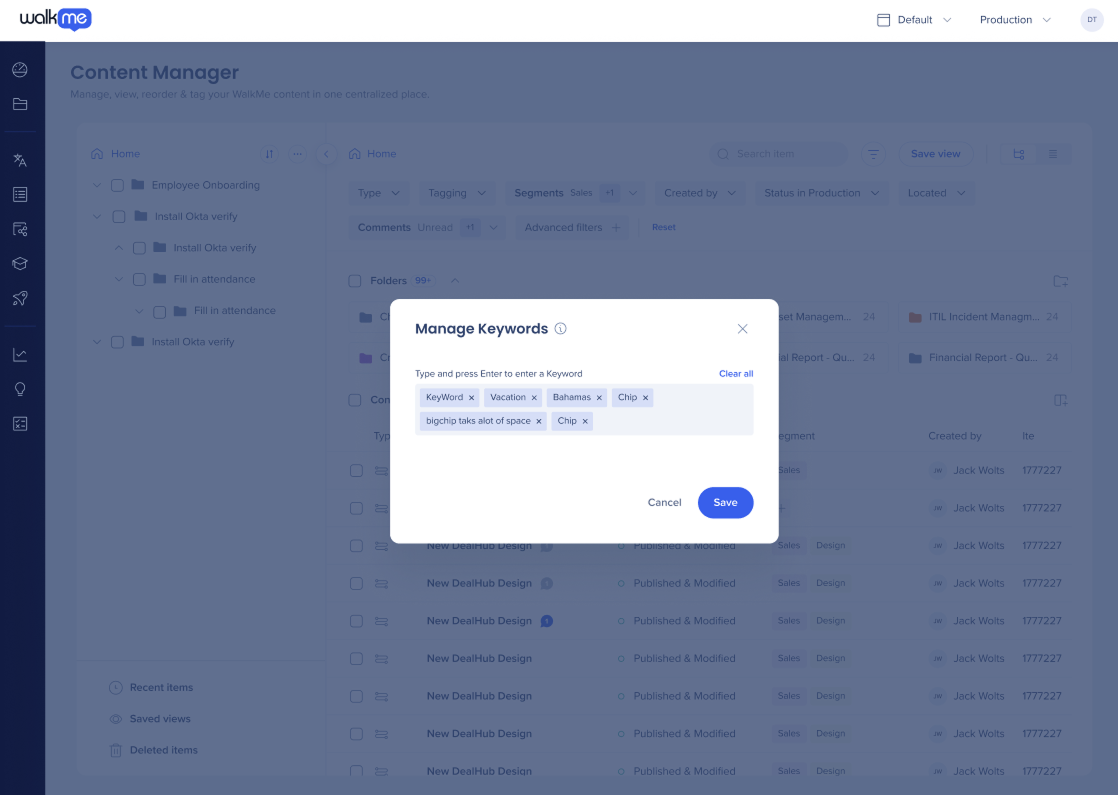
キーワード管理 :
キーワード列でキーワードを選択します。
「キーワードの管理」ウィンドウで、次の操作を行います。
x を選択してキーワードを削除します新しいキーワードを入力し、Enter キーを押して追加します。
Sav e(保存)を選択します
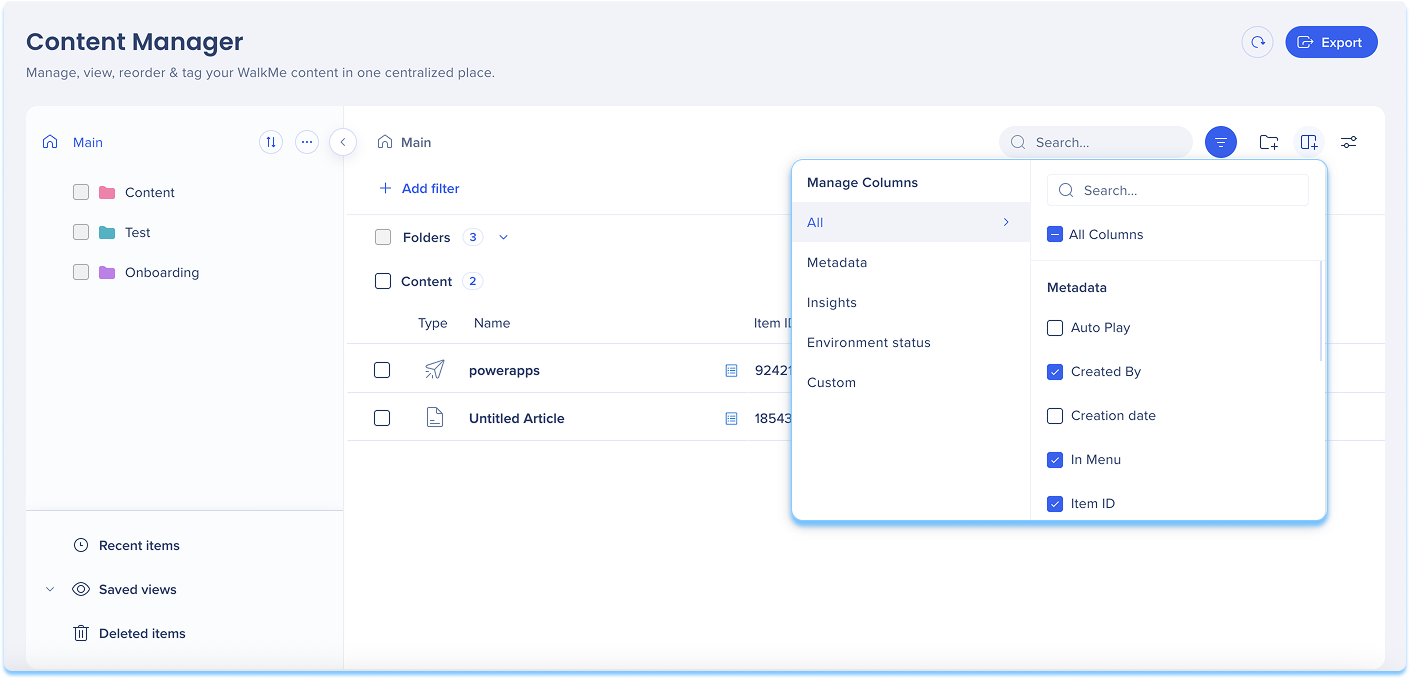
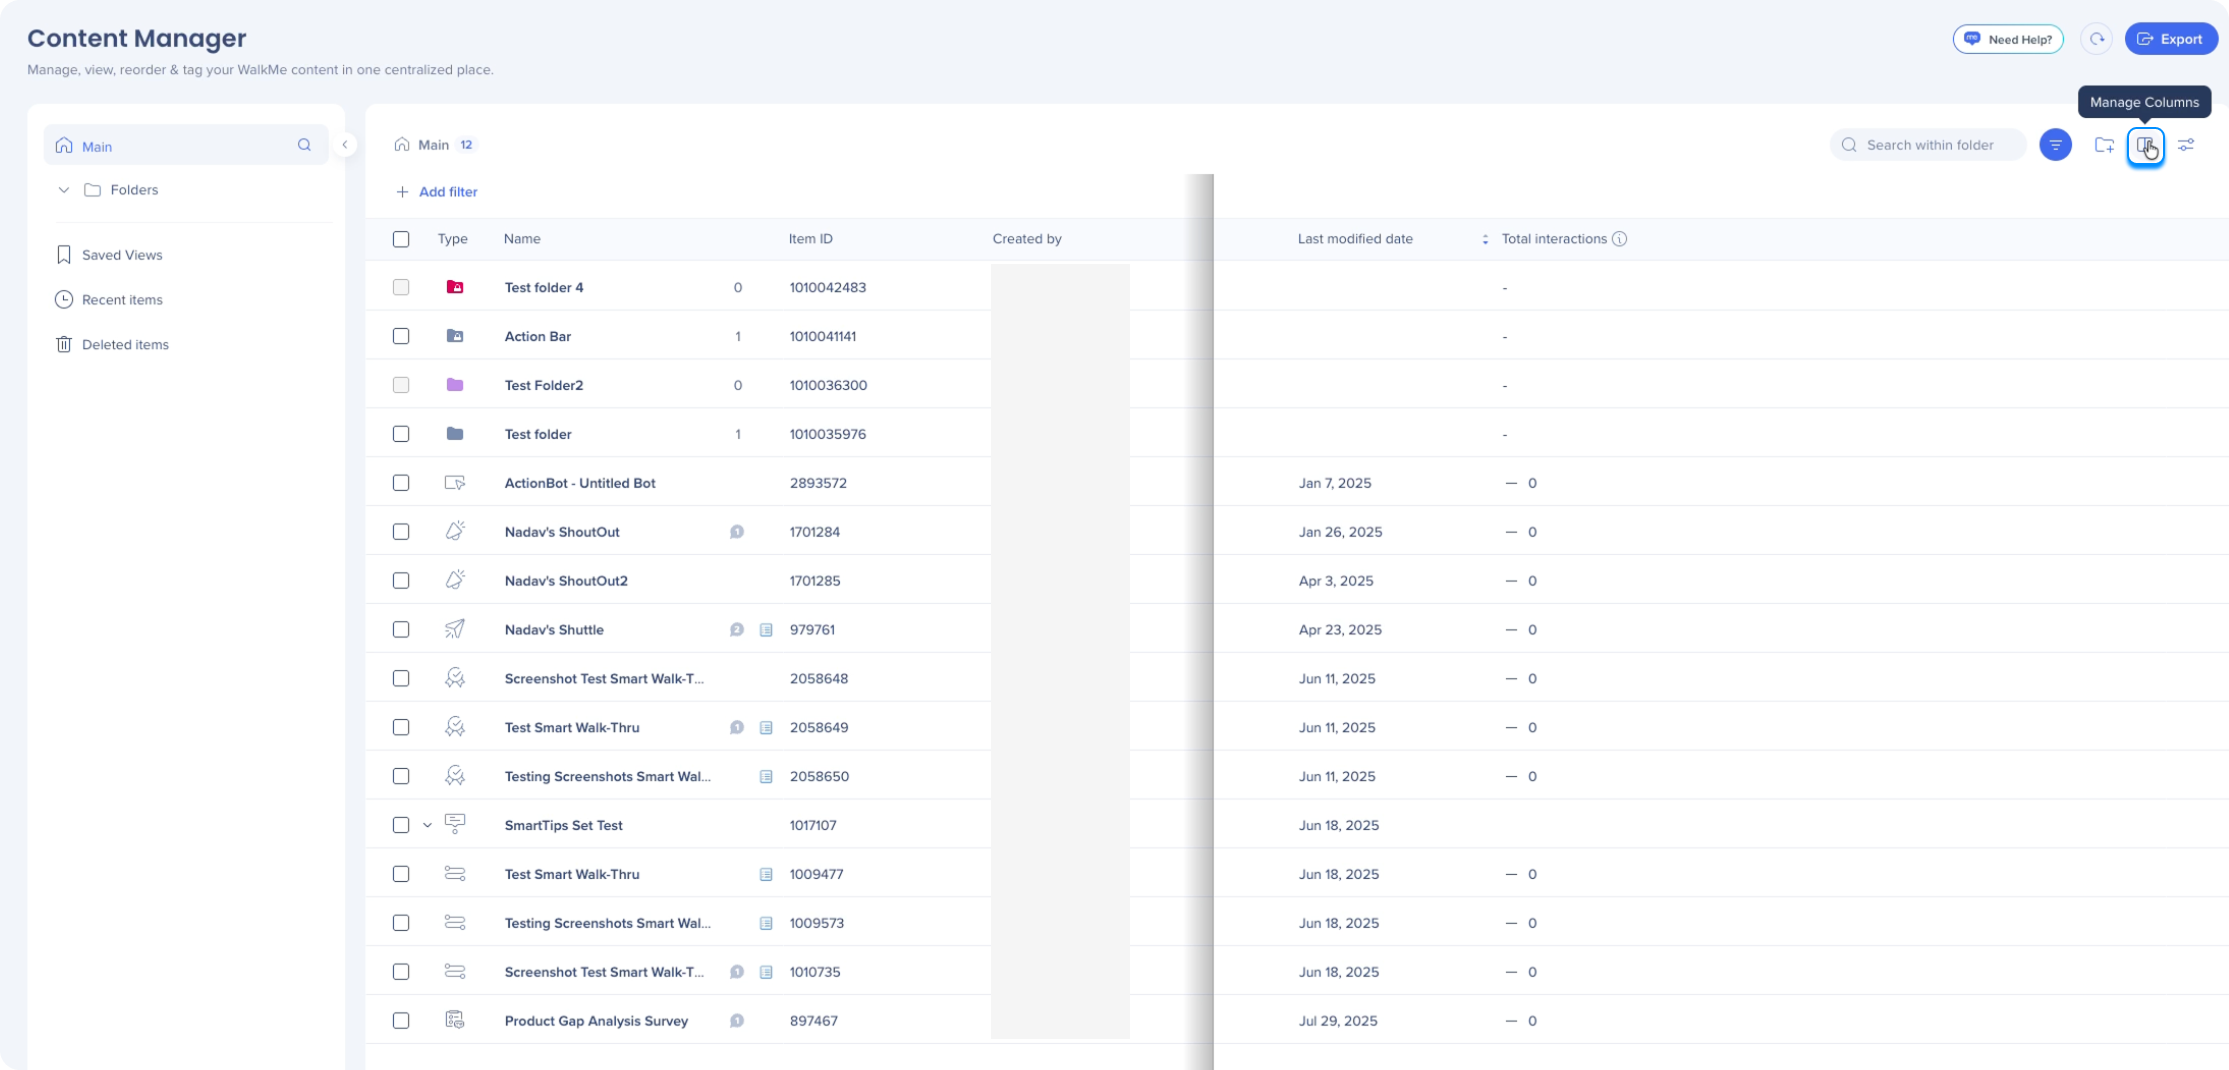
列管理 列管理を使用して、表に表示されるデータを制御します。
[列を管理する] を選択します表示または非表示にしたい列を選択します。
タイプ と名前 列は常に表示されます。
最終変更日列
The Last Modified Date column reflects content changes.
It shows past data on all items
It does not include modifications to:
Global CSS
Segment rules connected to the item
Shared assets, such as images
Status changes, such as publishing or archiving
注
The editor description field is synced with the Content Manager, letting you view, edit, filter, and export descriptions without switching tools
Descriptions for Smart Walk-Thrus are not yet supported in the Content Manager
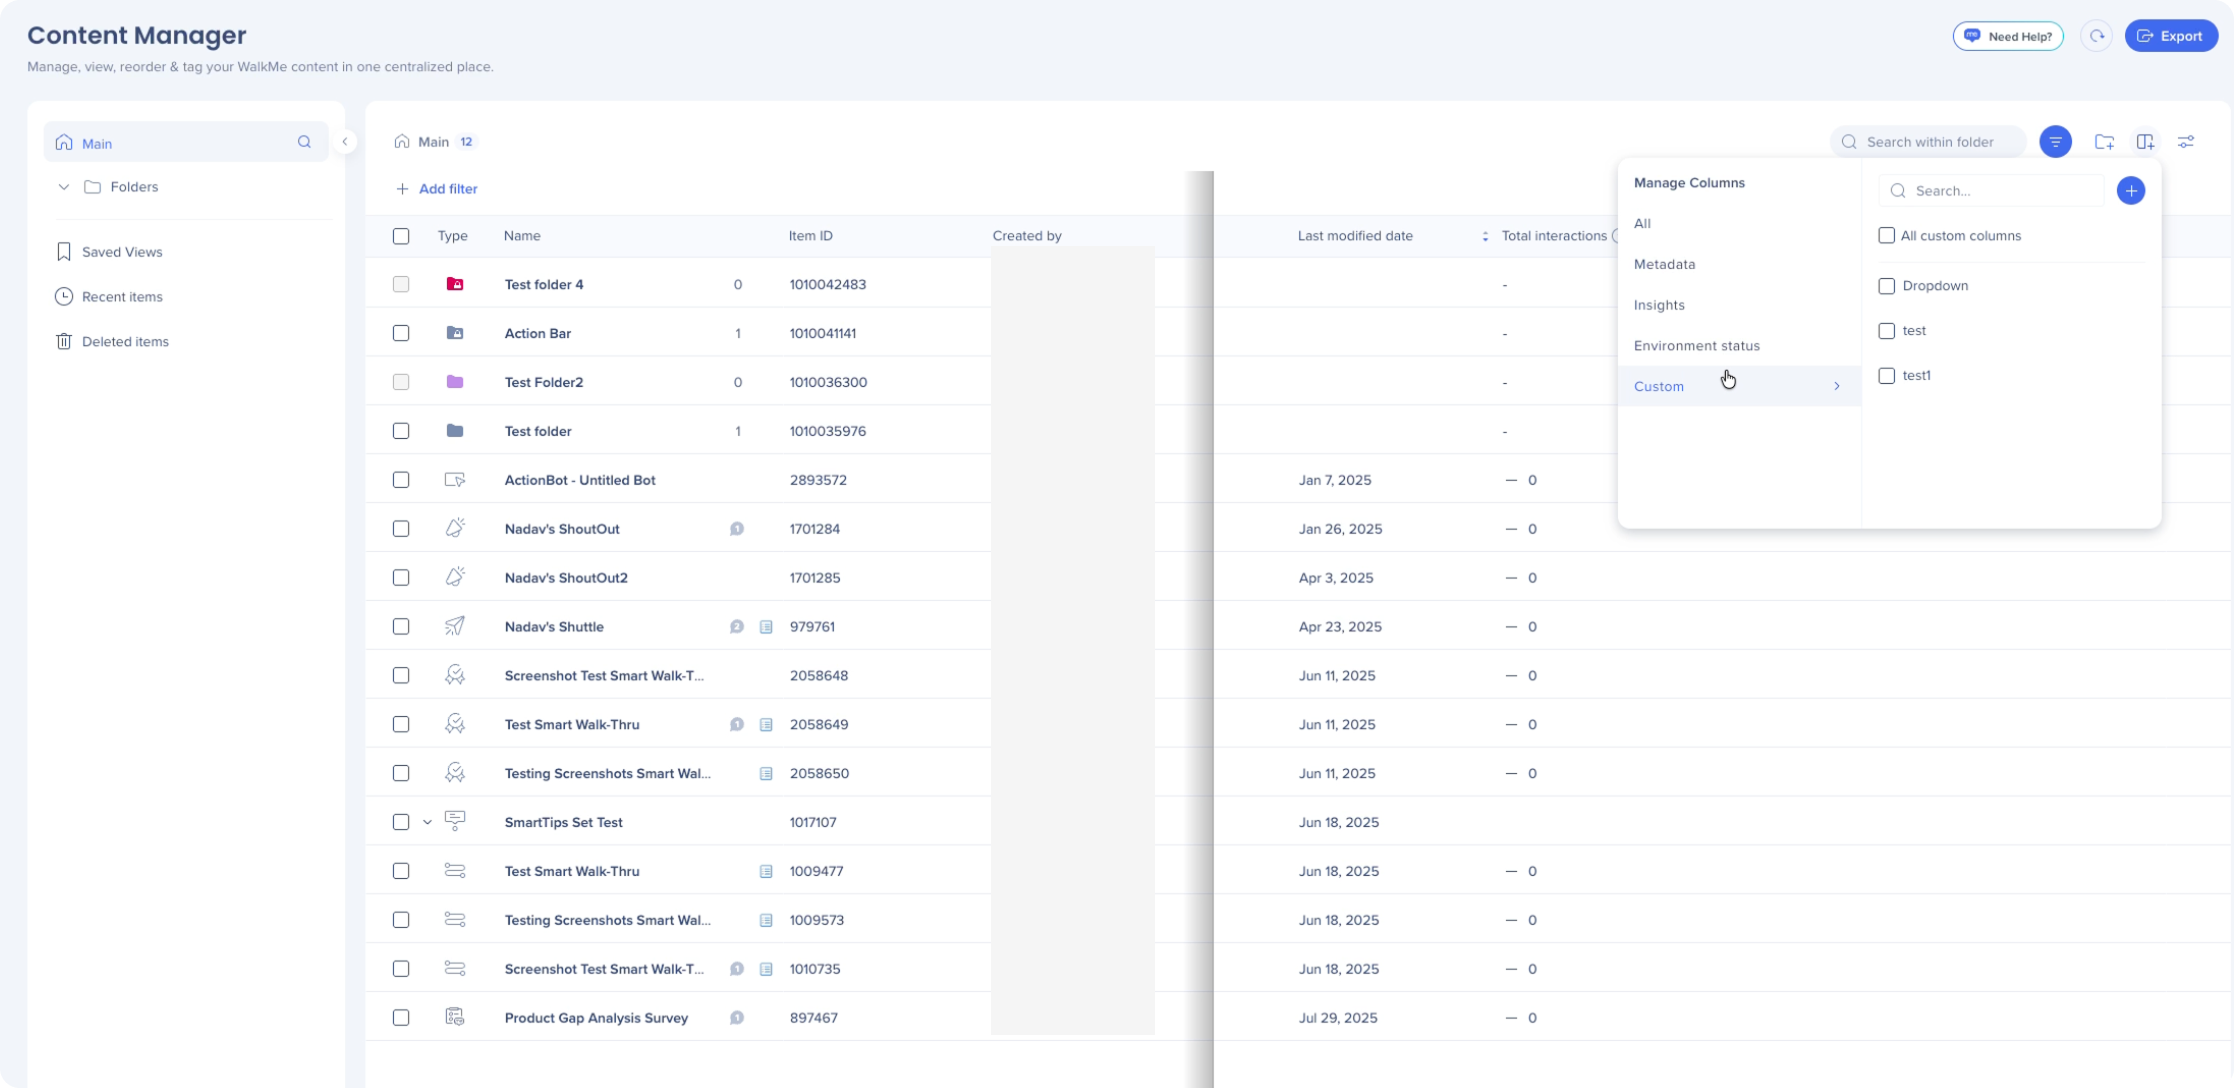
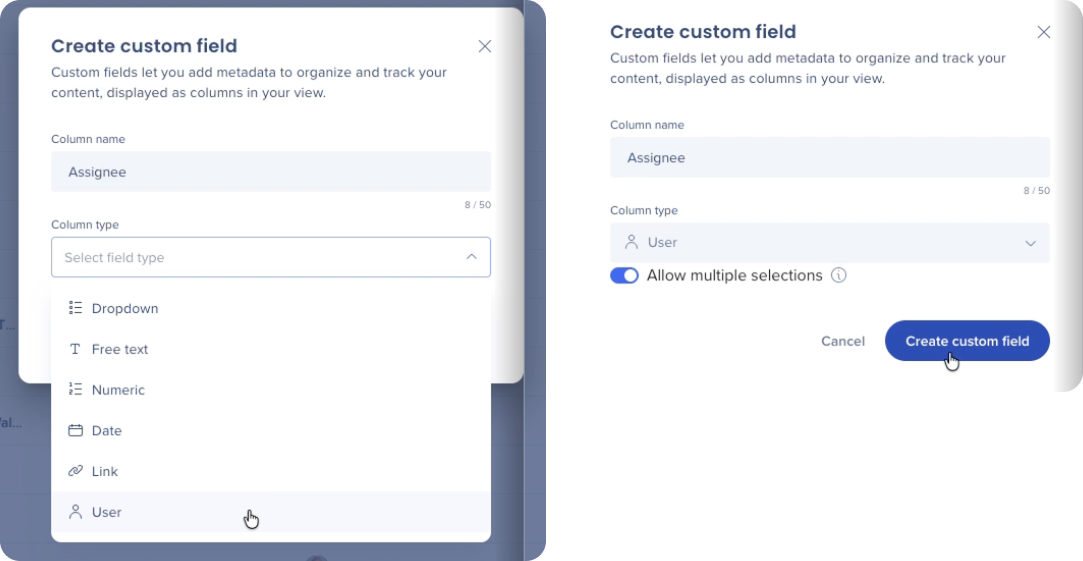
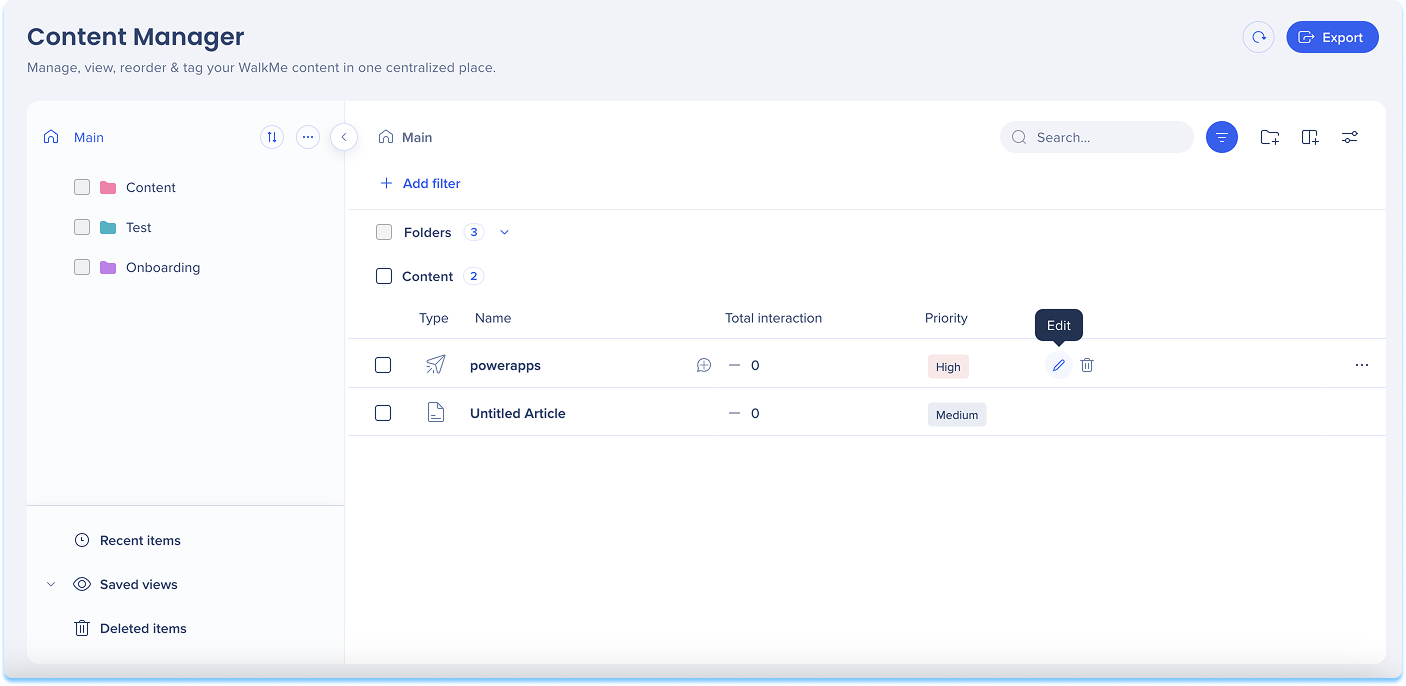
カスタムメタデータフィールド カスタムメタデータフィールドを使用すると、アイテムの追加情報を追跡および管理することができます。 メタデータは、テーブルとアイテムのドロワーに表示され、ソート、フィルター、一括更新に使用することができます。
カスタムフィールドを作成します
[列を管理する ]を選択します
カスタム にカーソルを合わせます「列を管理」パネルで「 + 追加 」アイコンを選択します
列名を入力してください。
列タイプを選択してください。
フリーテキスト
ドロップダウン
Date(日付)
リンク
数値
User(ユーザー)
オプション :すべてのシステムに適用をオン にすると、環境全体でフィールドが表示されます。オプション :複数のインスタンス(アカウントのユーザーなど)を選択できるようにしたい場合は、[複数の選択を許可 ]をオンにします [カスタムフィールドを作成する] を選択します
注
Only admins can create custom metadata fields
Each account can have up to 100 custom metadata fields
メタデータ値を編集します
単一のアイテムを編集します
表でアイテムを検索します。
メタデータフィールドを選択します。
値を入力または選択します
Sav e(保存)を選択します
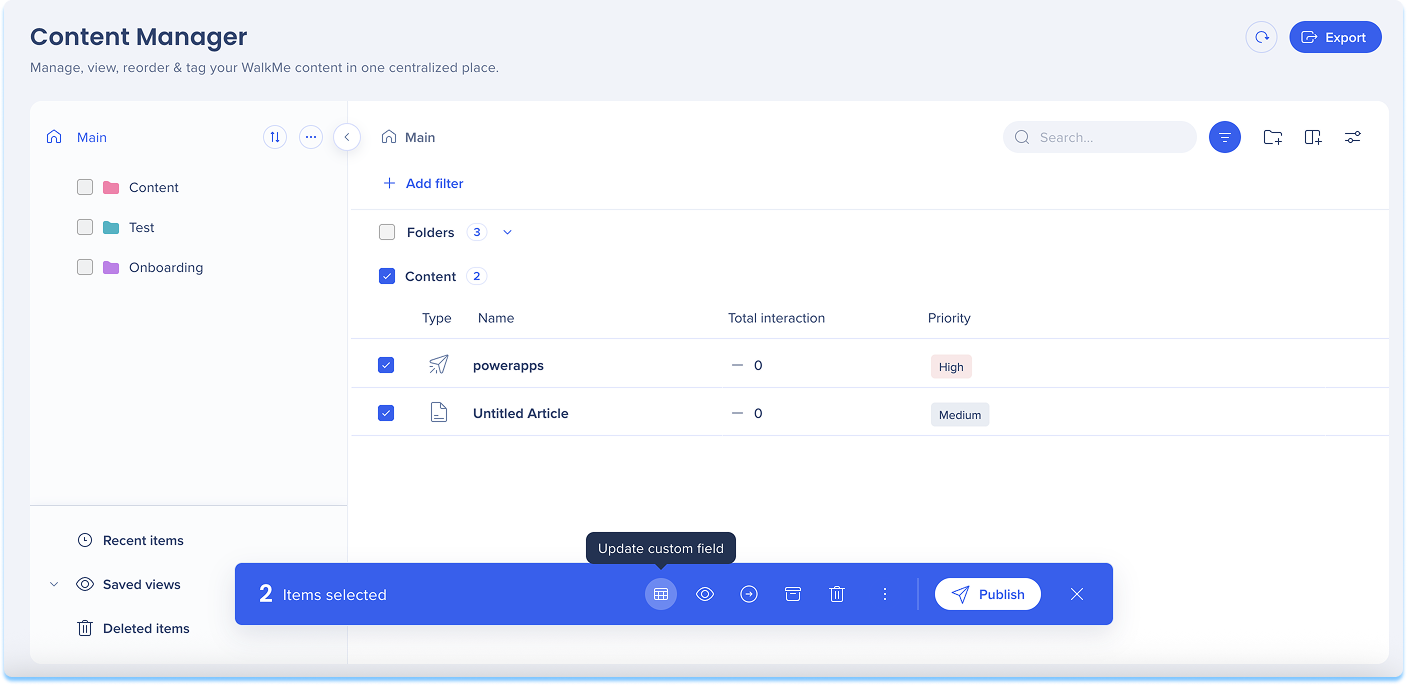
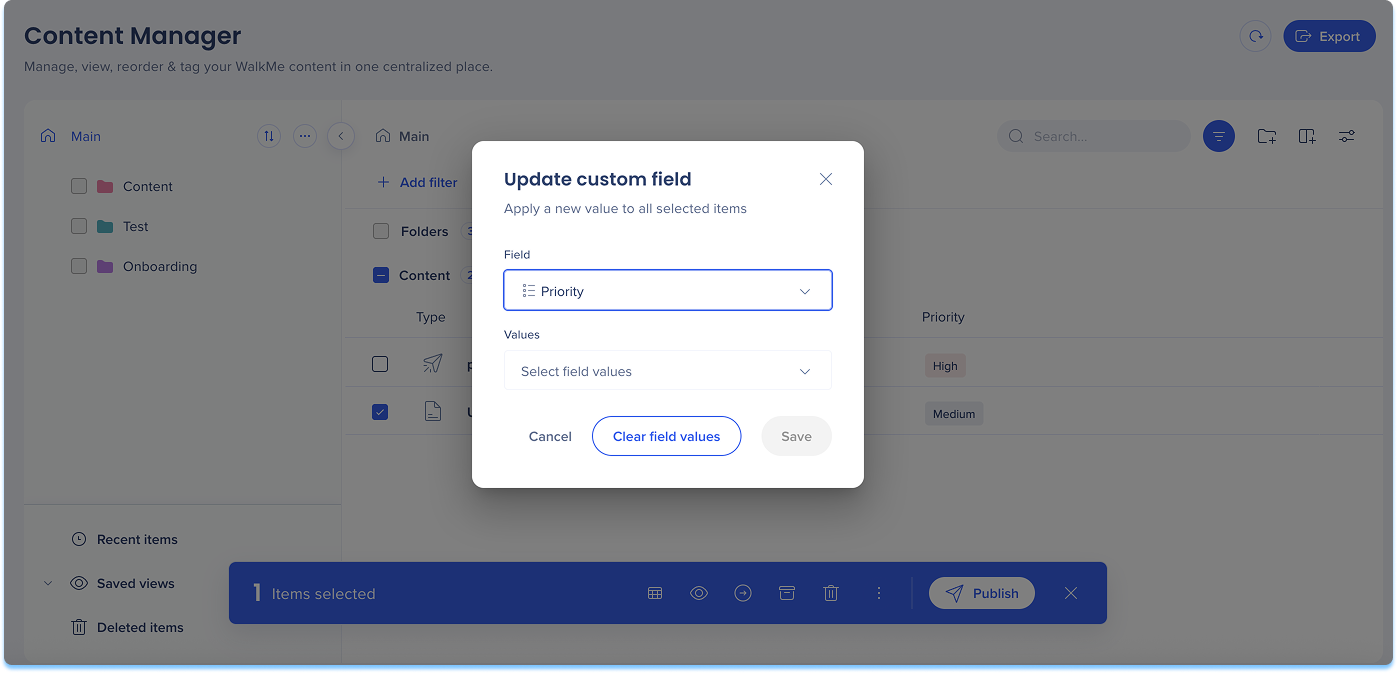
複数のアイテムを編集します
複数のアイテムを選択します
カスタムフィールドを編集する アイコンを選択します。フィールドを選択し、値を入力します。
Save( 保存)を選択します
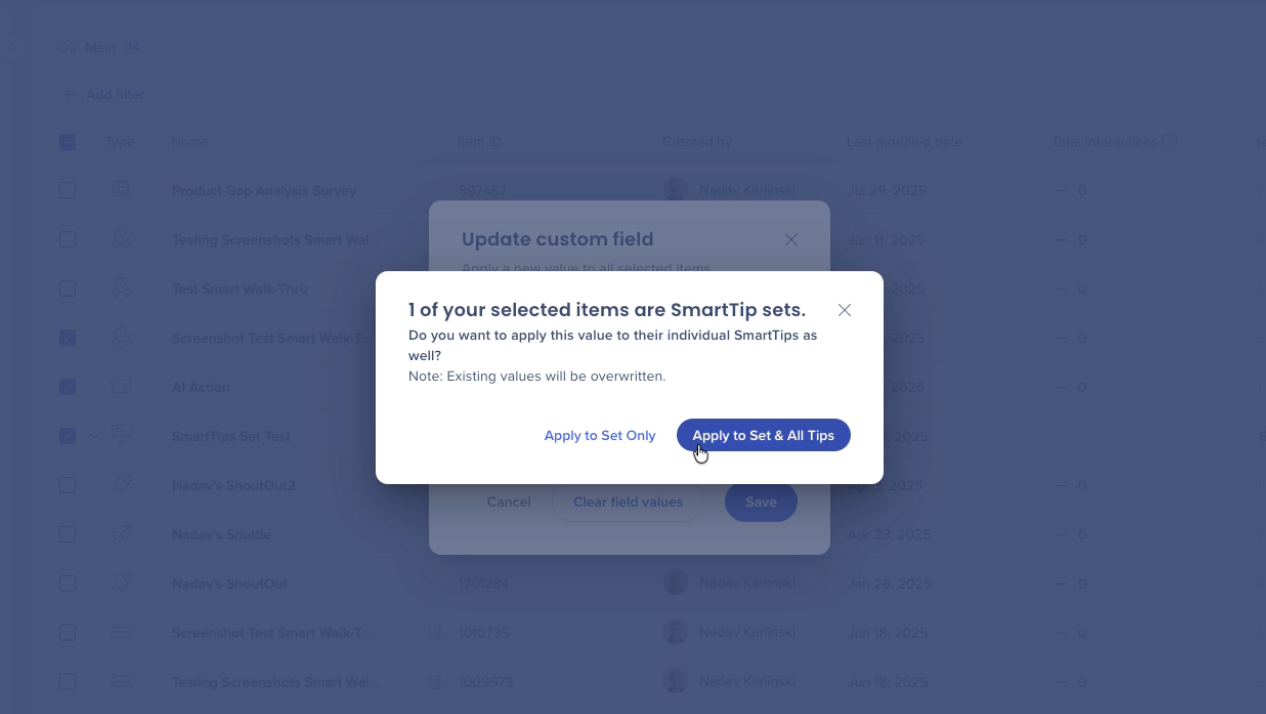
スマートチップセットを編集します:
更新したいセットの横にあるチェックボックスを選択します。
フローティングツールバーの「カスタムフィールドの更新 」アイコンをクリックします。
値を入力または選択してください。
値をセット内のすべてのスマートチップに適用するのか、セットのみに適用するのかを選択します。
メタデータ値を消去します
削除したい値を含むアイテムを選択します。
カスタムフィールドを編集する アイコンを選択します。フィールドを選択します
「フィールド値のクリア」 を選択します。
注
This will remove the data for all selected items. This action cannot be undone.
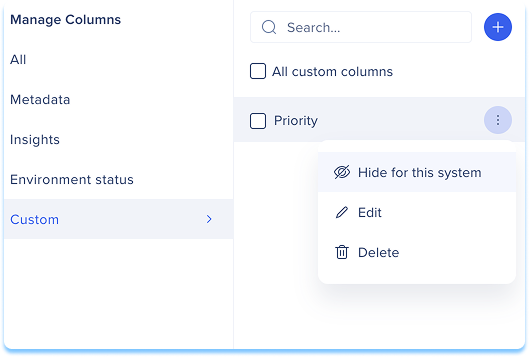
Show or hide custom fields
Select Manage Columns
Scroll to the Custom section
Select Hide for this system or Show for this system
注
列を非表示にすると、画面上で表示されません。 データやアイテムから値が削除されることはありません。
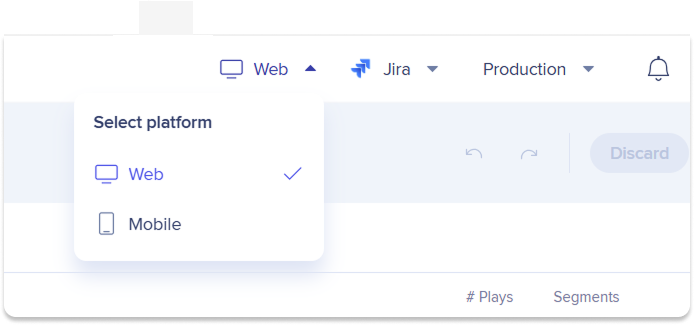
If your account includes both web and mobile platforms, you can switch between them to manage platform-specific items.
Use the platform selector to:
View items created for a specific platform
Manage content without leaving Content Manager
Surveys
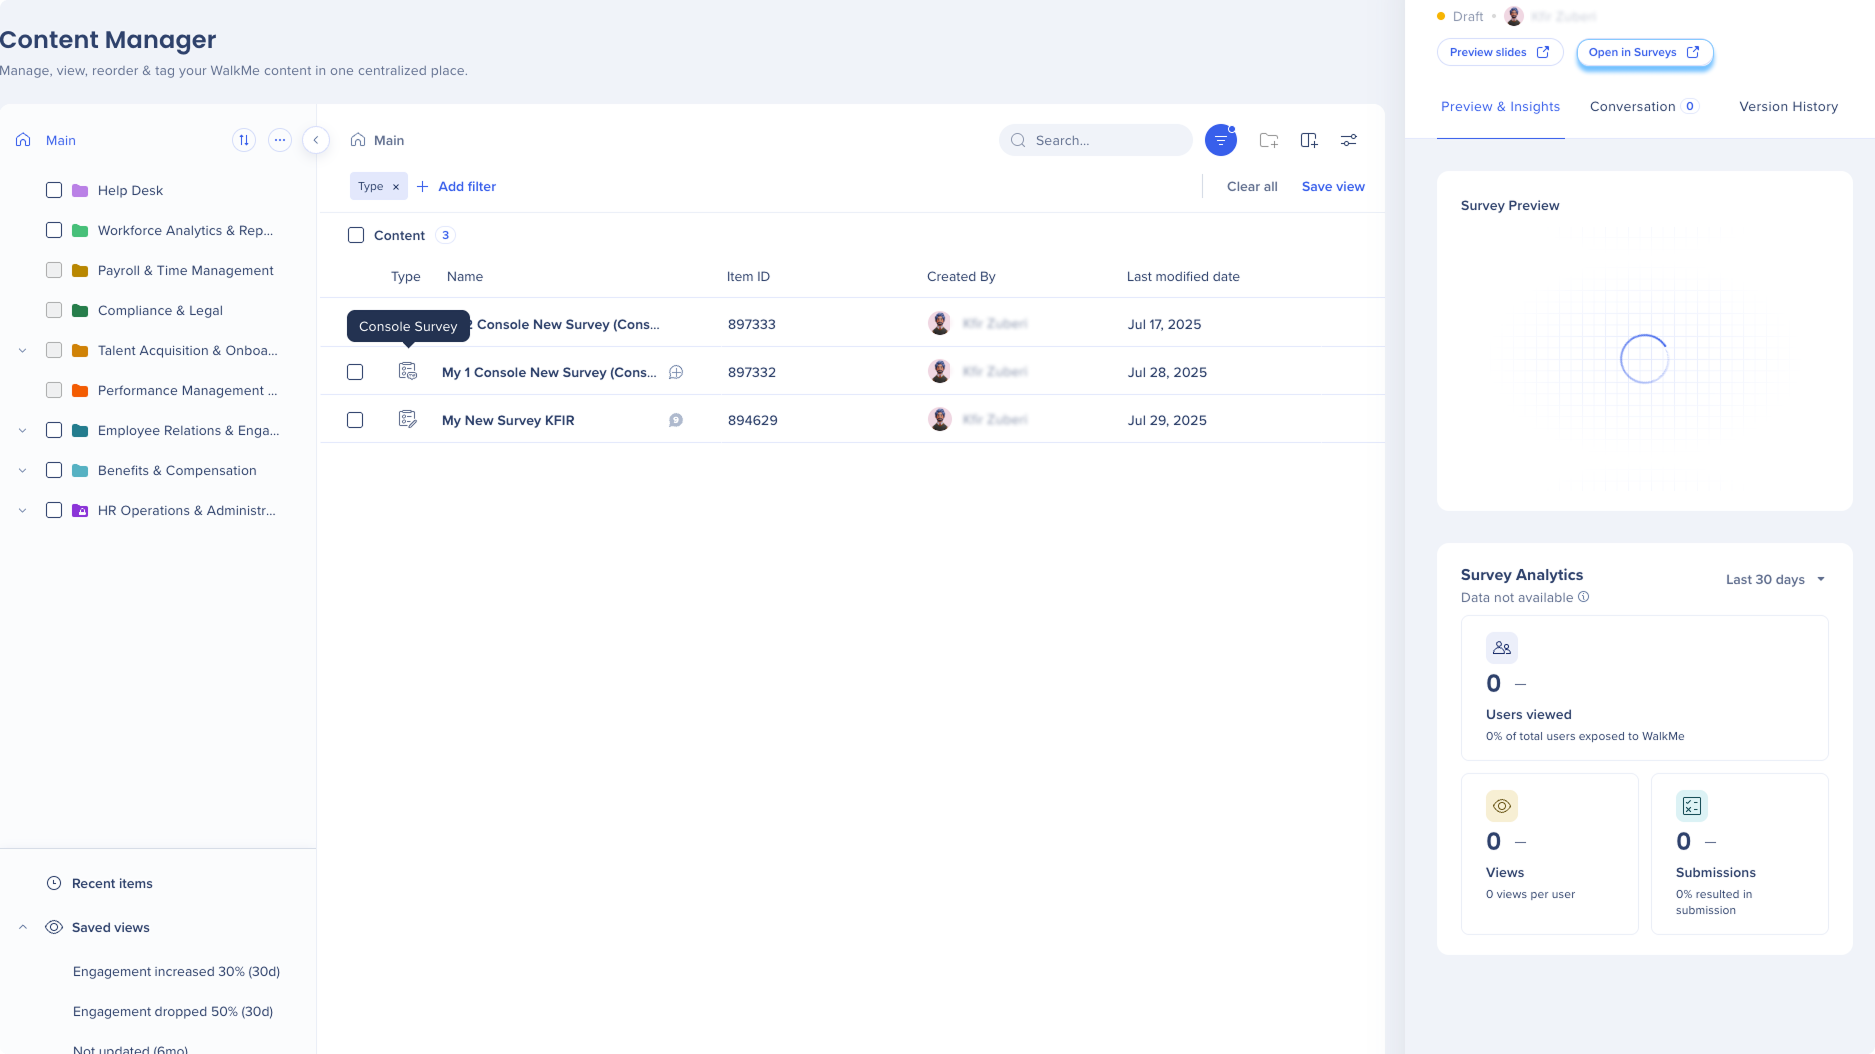
You can open Console Survey items directly in the Surveys console app from Content Manager.
Select Open in Surveys to open the item in the Surveys console
Tip Tuesday Videos
The Console Content Manager
Using Advanced Filters in Content Manager
Technical Notes
Permission changes made in Content Manager are reflected in the editor, and vice versa
Editing a segment resets saved segment data and may affect delivery for items connected to the segment
Remove from view applies only to items added manually, not filtered content
Only admins can create custom metadata fields
Each account can have up to 100 custom metadata fields
Clearing metadata values permanently removes data and cannot be undone
The platform selector is available only for accounts with both web and mobile platforms enabled