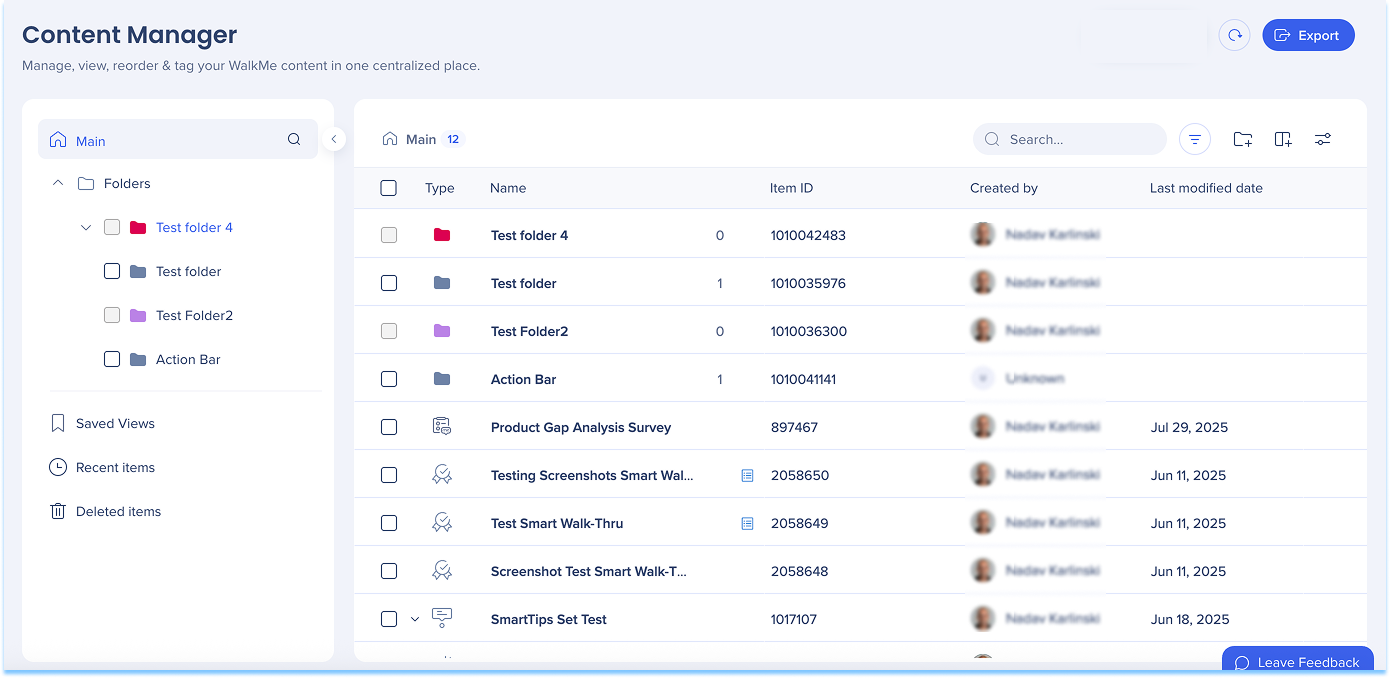
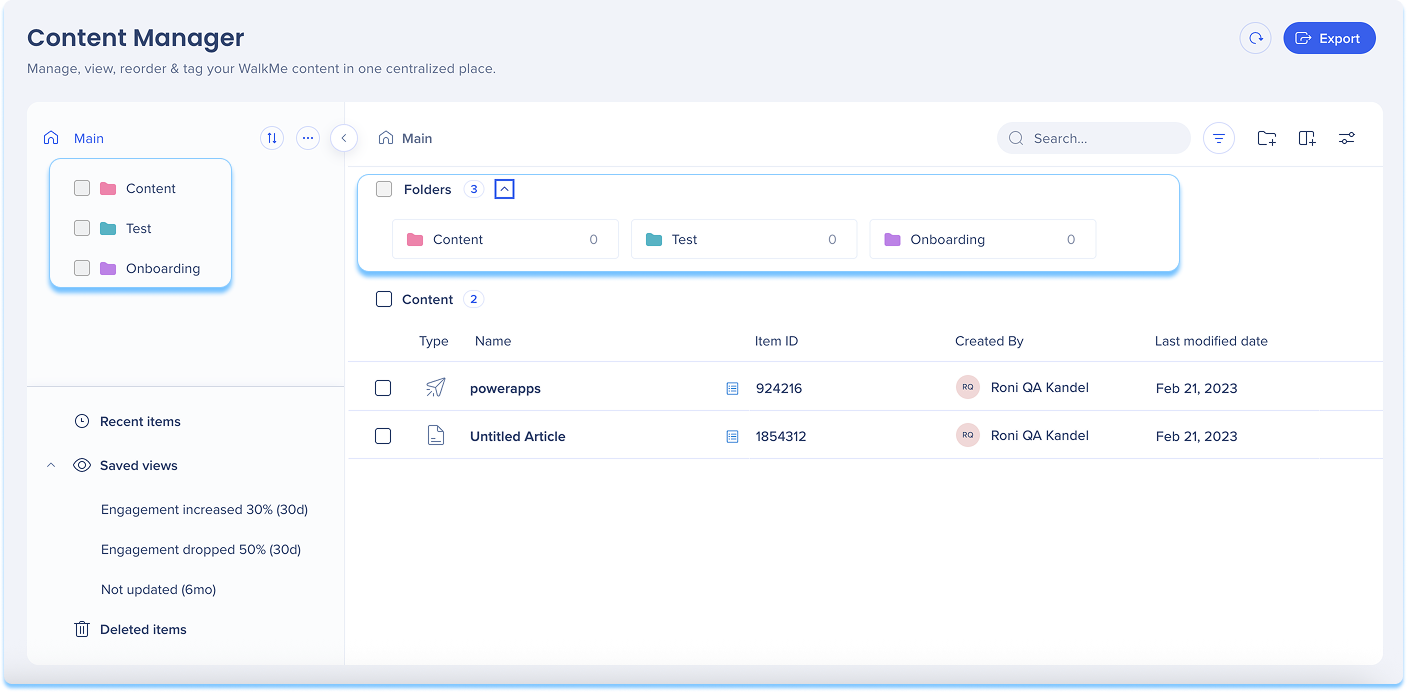
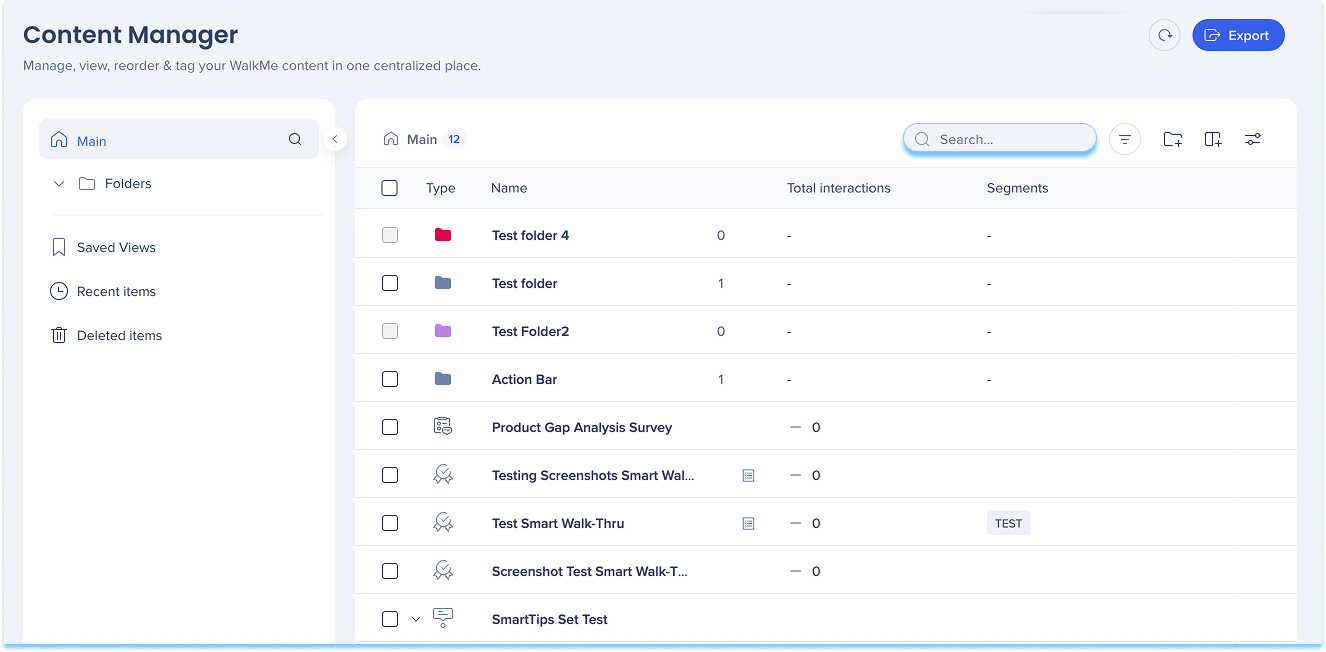
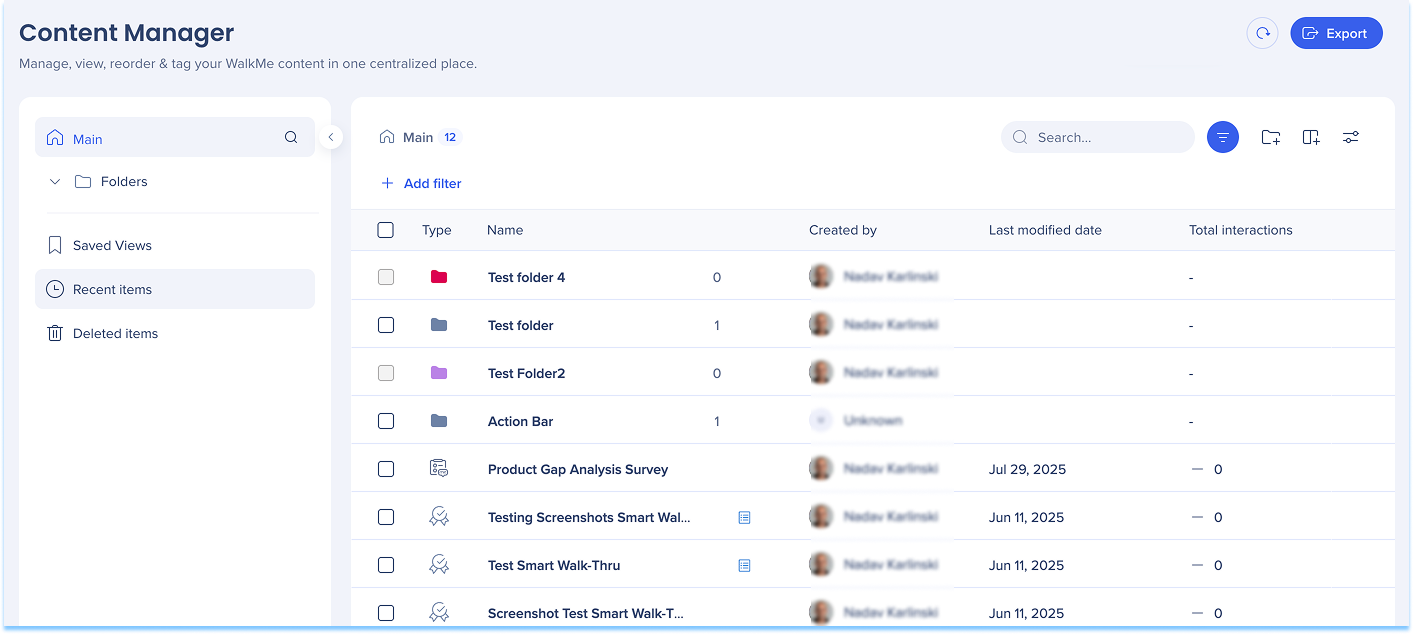
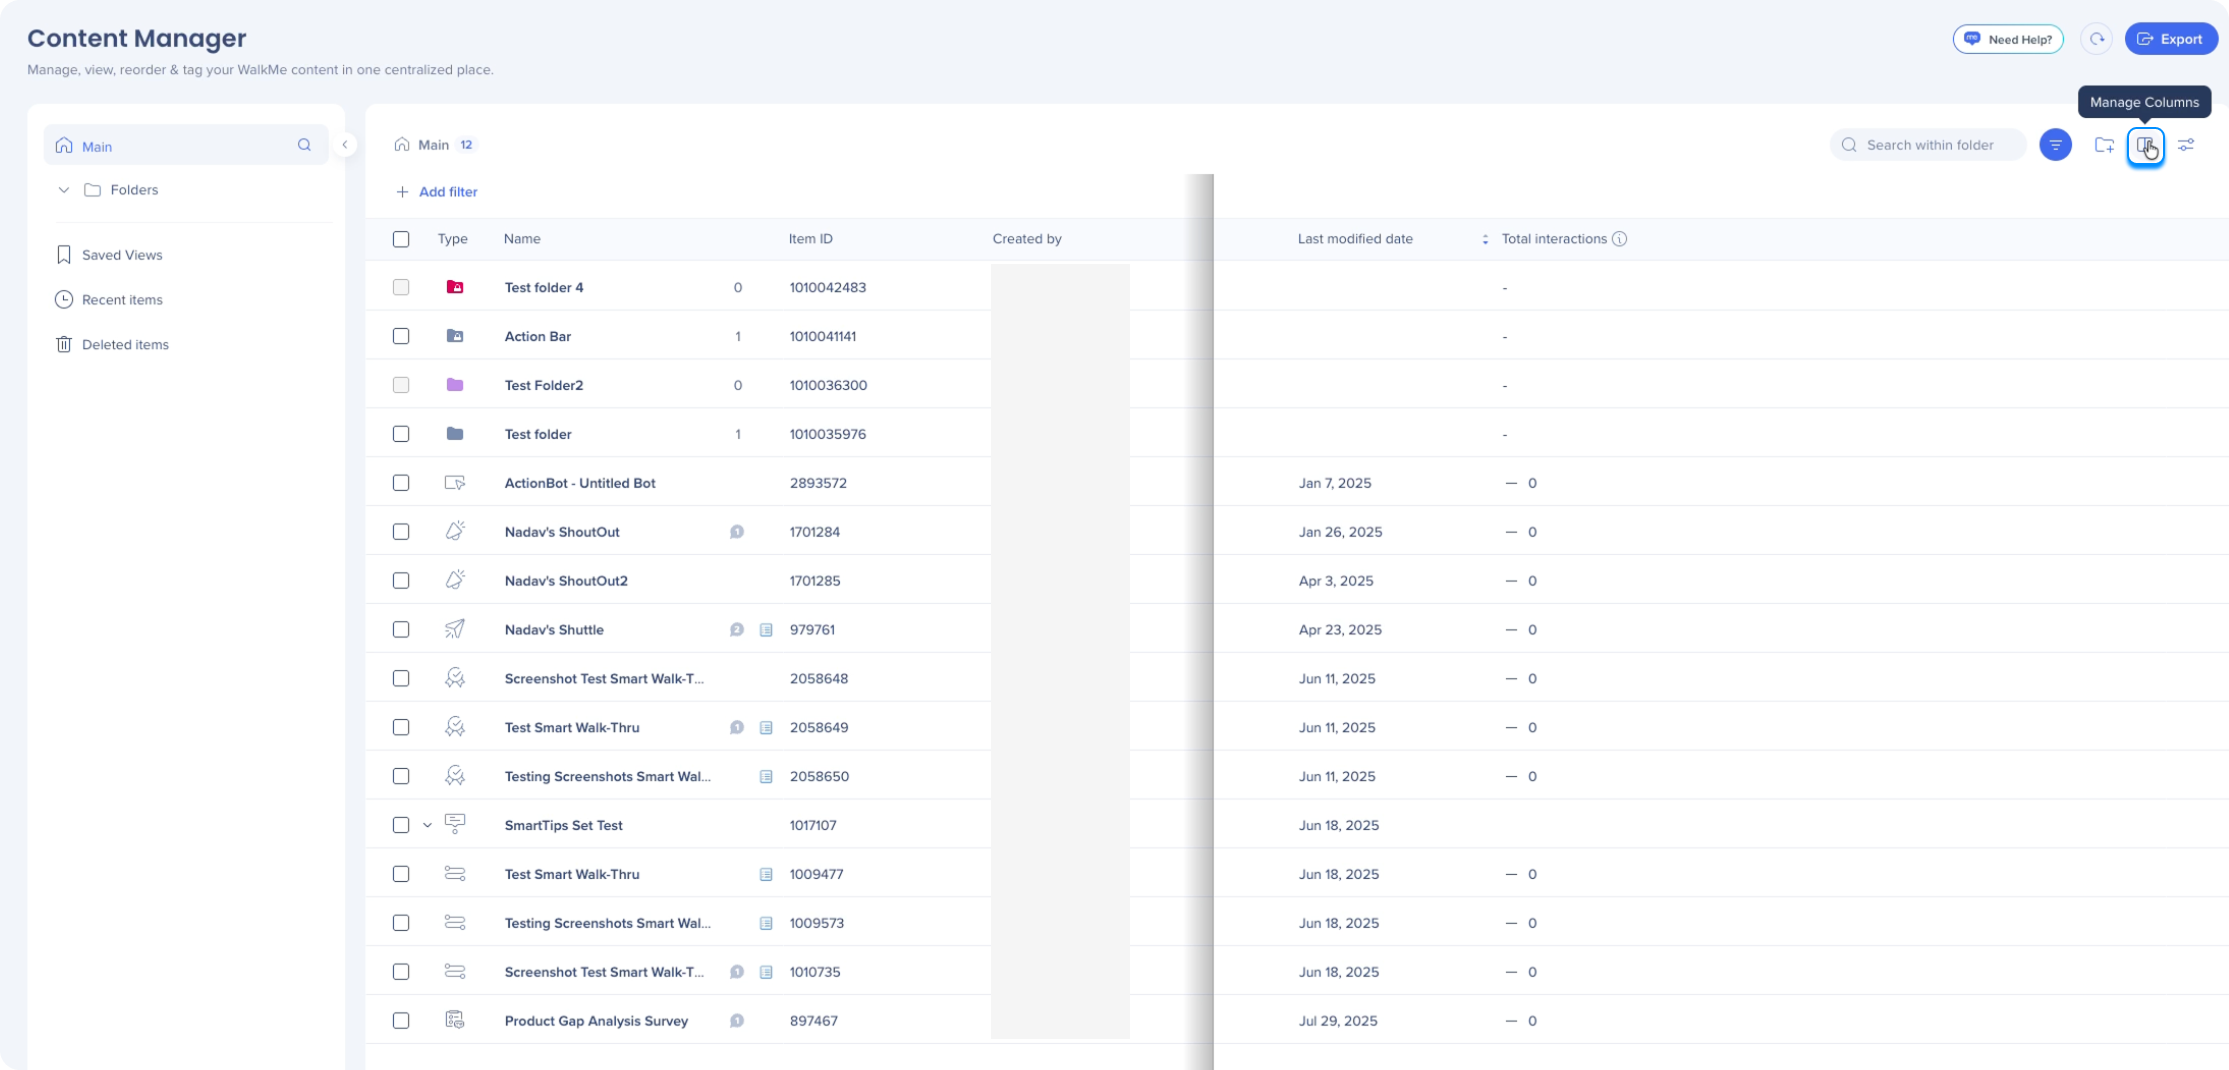
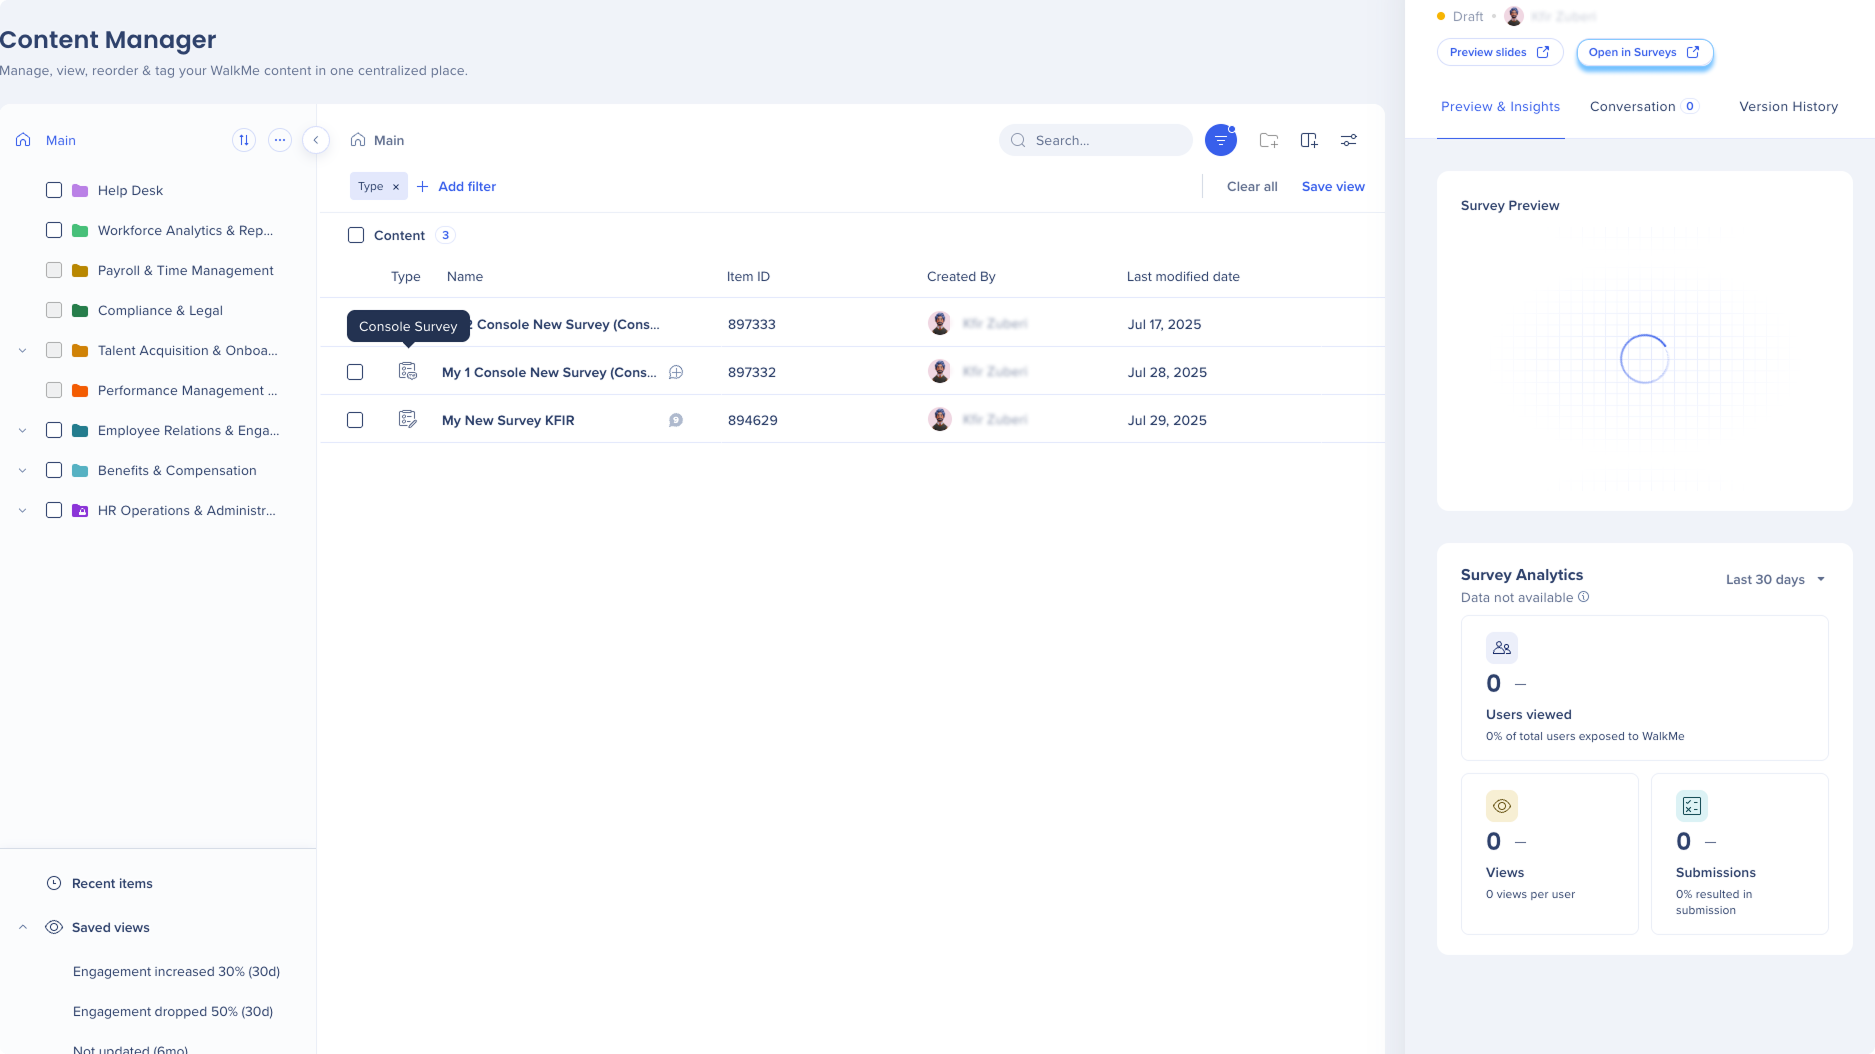
Content Manager provides a centralized workspace for managing WalkMe items. It includes a table-based interface that supports flexible views for organizing content, collaborating with teammates, and opening items in the editor.
Folders appear in the left panel and organize items hierarchically. Select a folder to view its contents in the main list. In Tree view, folders also appear directly in the list.
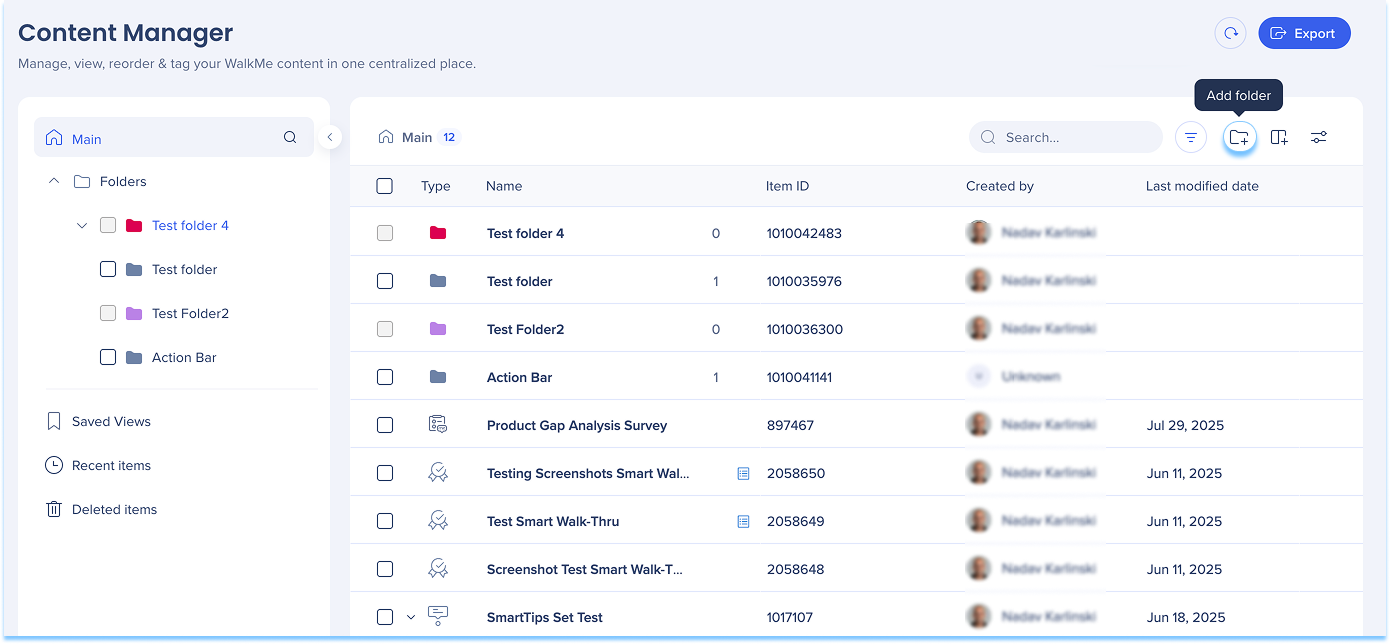
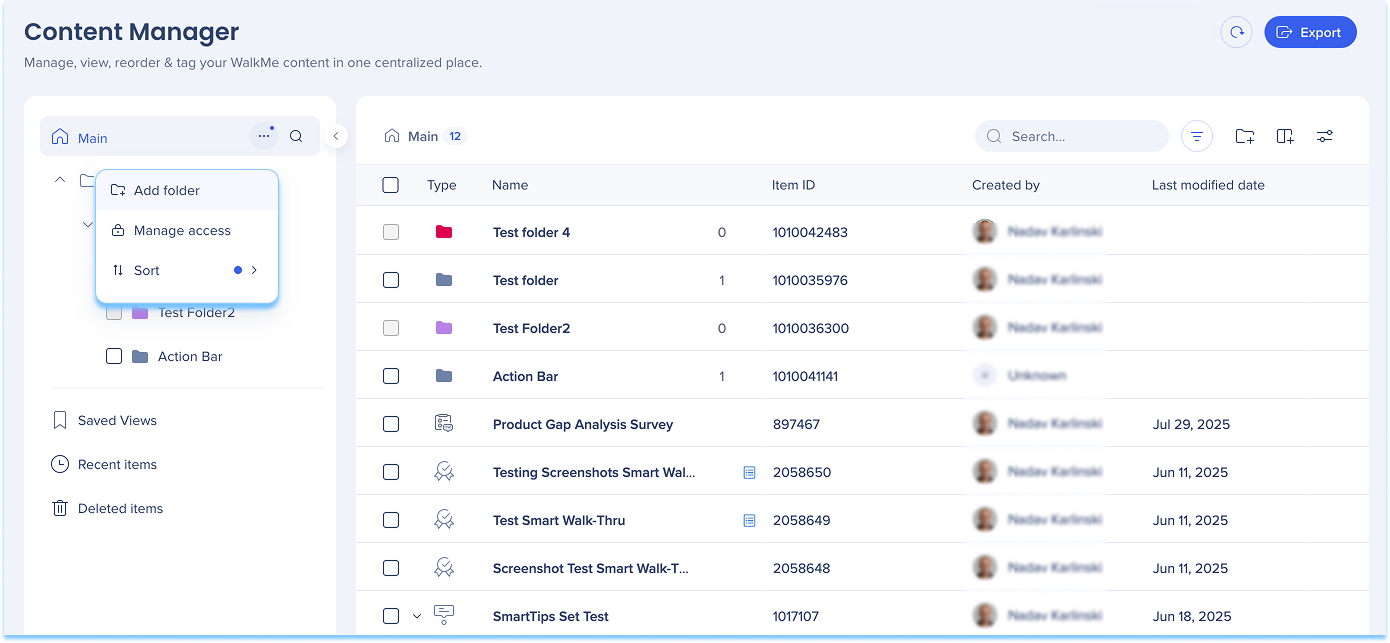
Creating a folder
Select Folder +, or
Open the Options menu and select Add Folder
Enter a folder name and select a color
Select Add folder
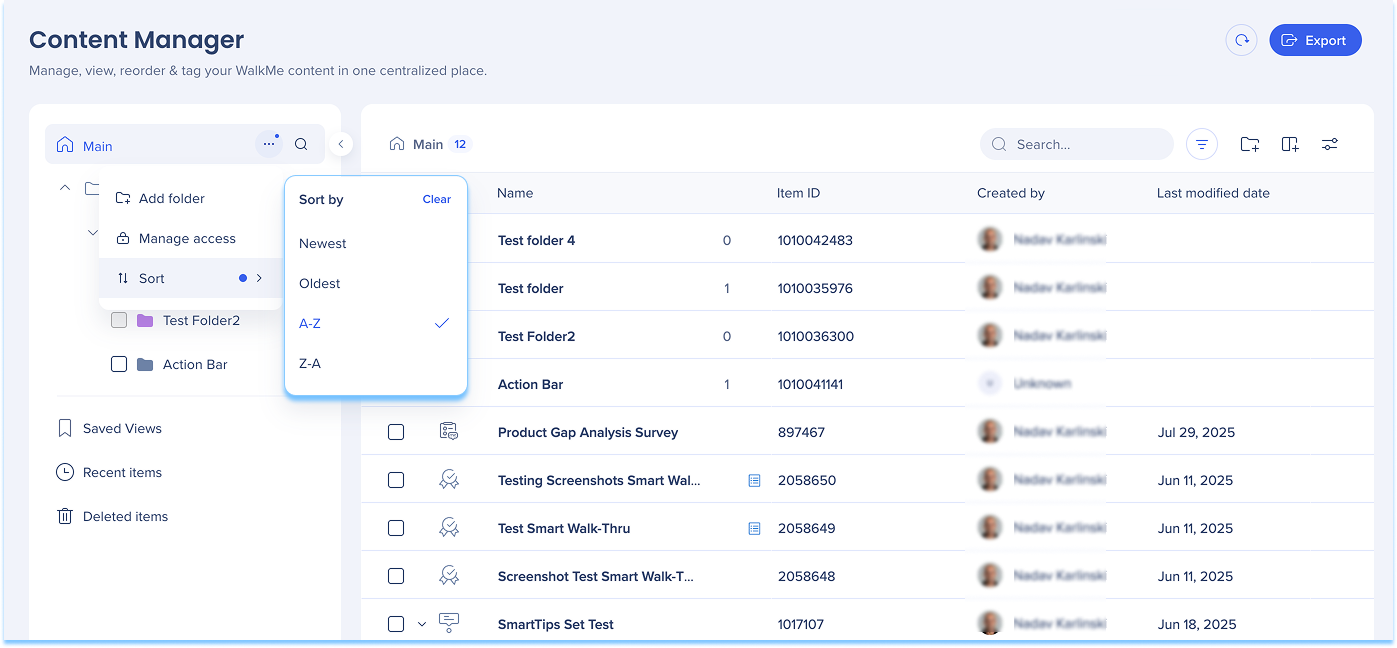
Sort folders
Select the Sort icon
Choose a sort order:
Newest
Oldest
A-Z
Z-A
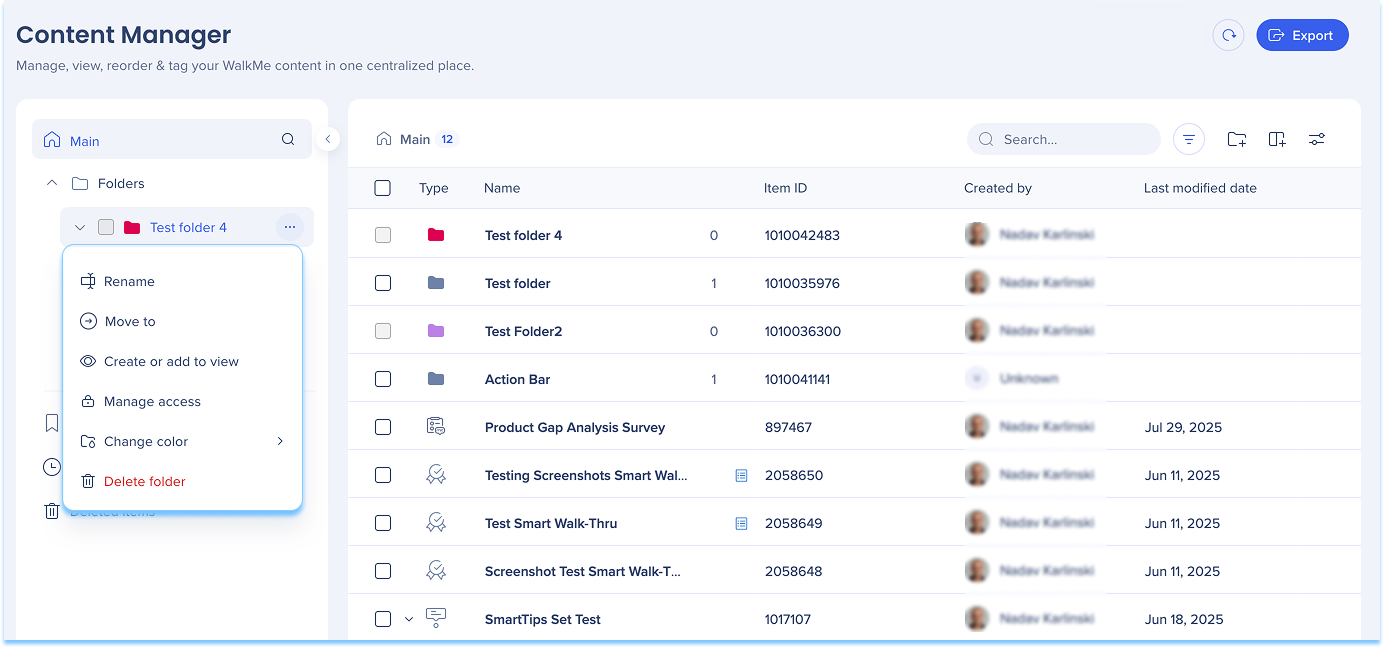
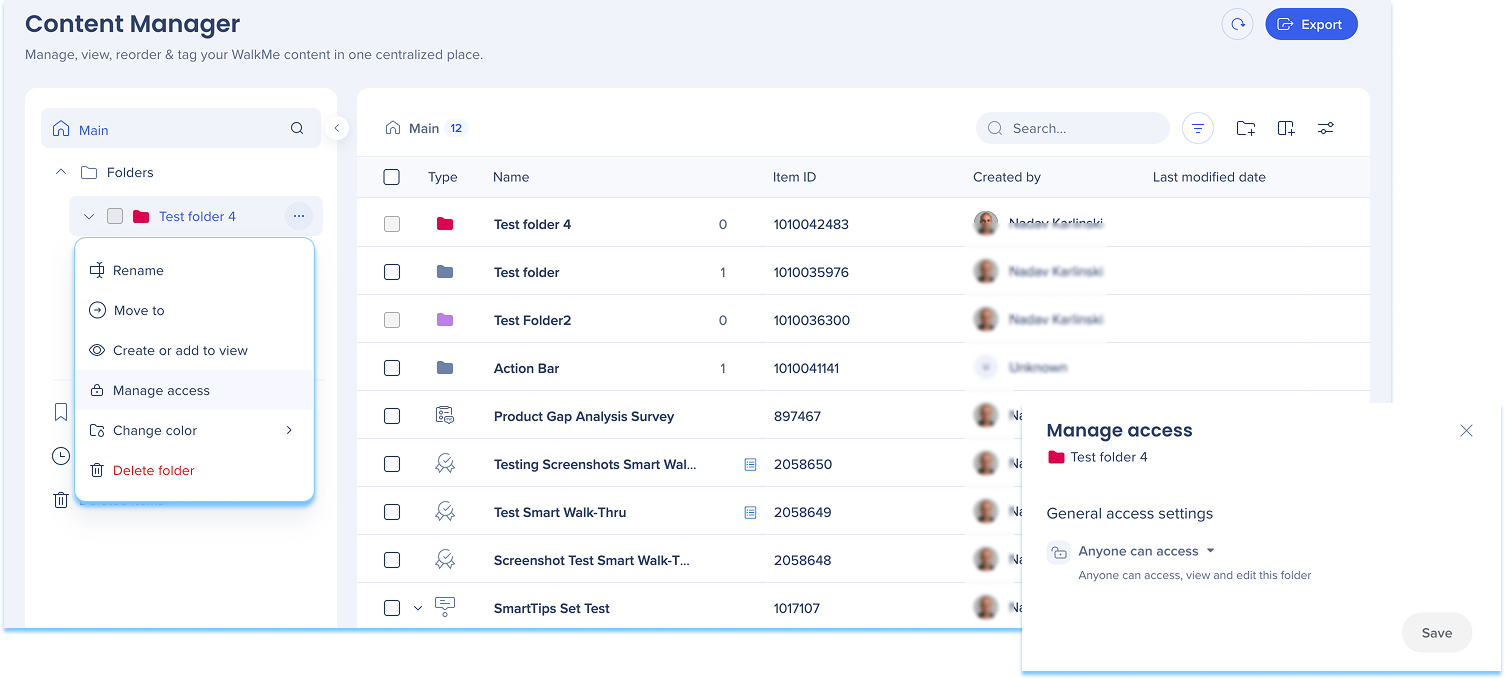
Folder actions
Select the Options menu next to a folder to manage it:
Use search and filters to quickly locate items across folders, views, and environments.
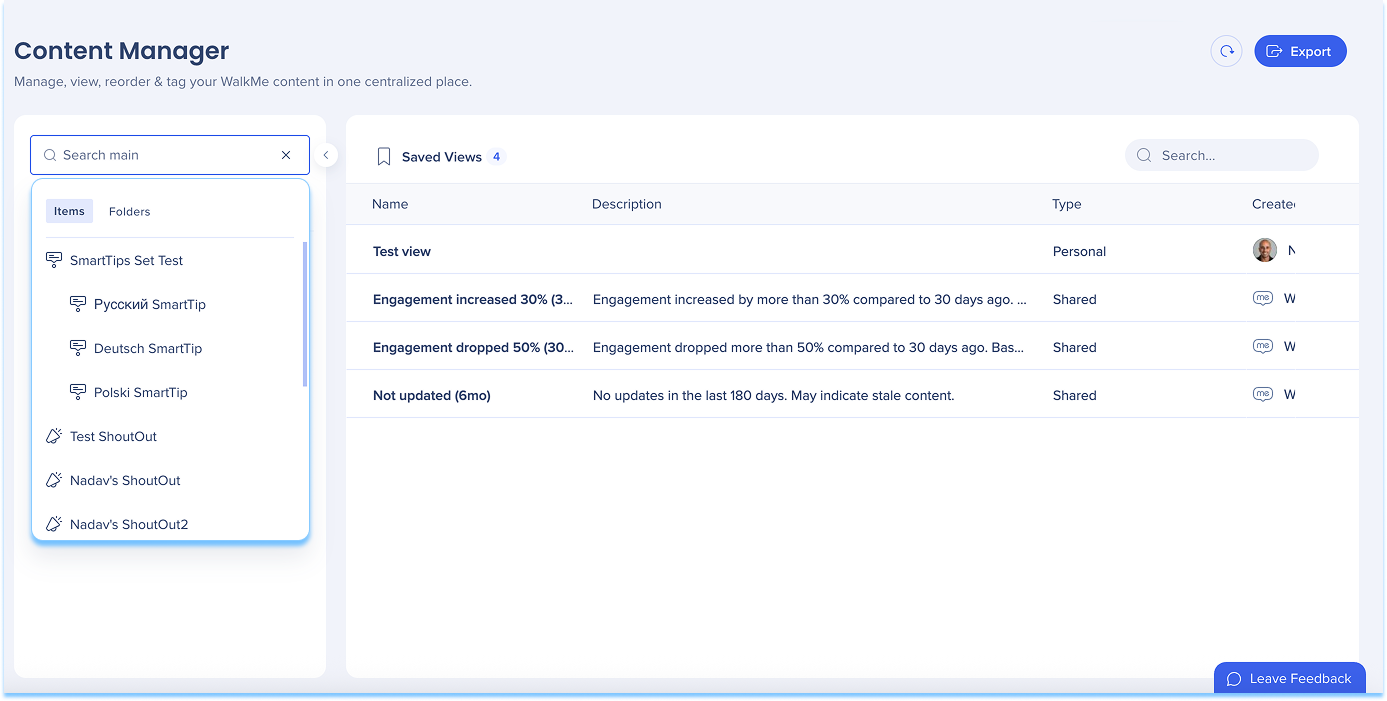
Global search
Use the search bar in the left panel to find items and folders.
To refine results:
Switch between Items and Folders
Enter a full or partial name
Filters
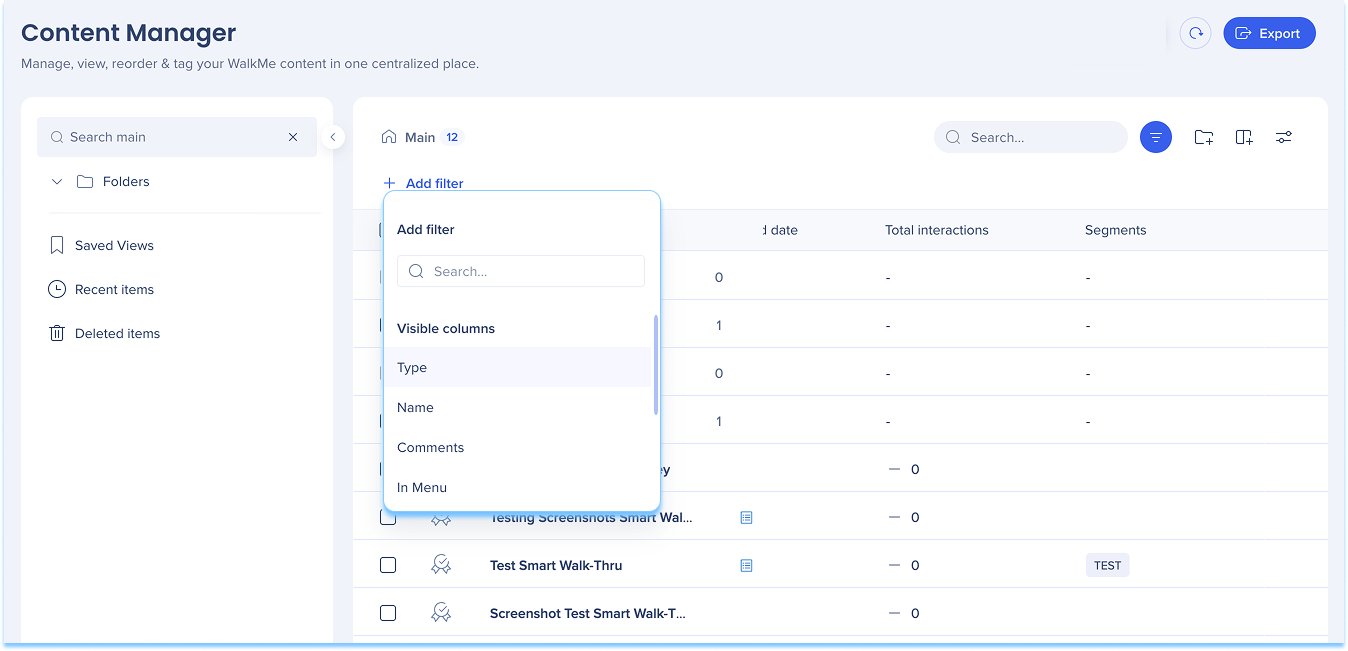
Filter content by:
Content attributes, such as item type, workflow tag, location, and keywords
Ownership and status, such as creator, publish status, and last modified by
Delivery and visibility, such as segment, status by environment, and in-menu status
Collaboration, such as comment status and permalink availability
Nota
Los filtros se organizan por columnas visibles y ocultas.
In menu filter
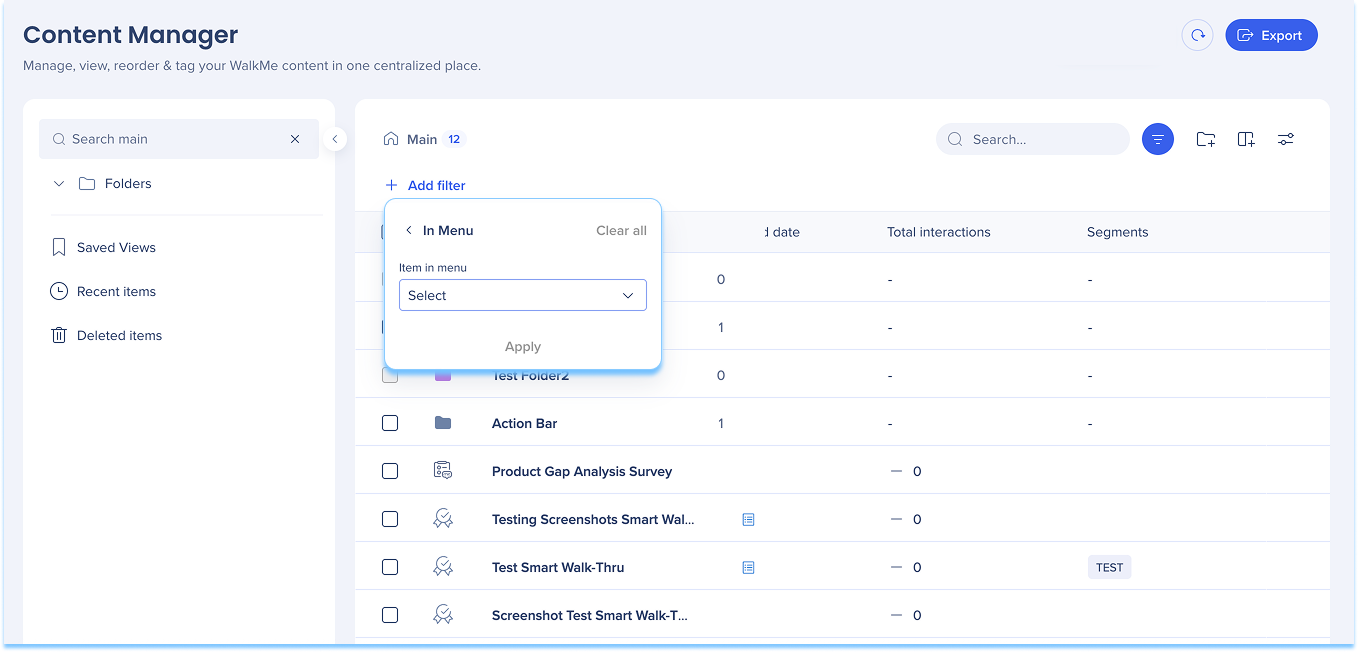
Filter content based on whether it appears in the WalkMe Menu.
Select the In Menu filter
Select Yes (appears in the menu) or No (doesn't appear in the menu)
Select Apply
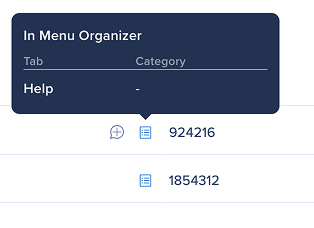
Items that appear in the menu show an icon in the Type column.
Add filters
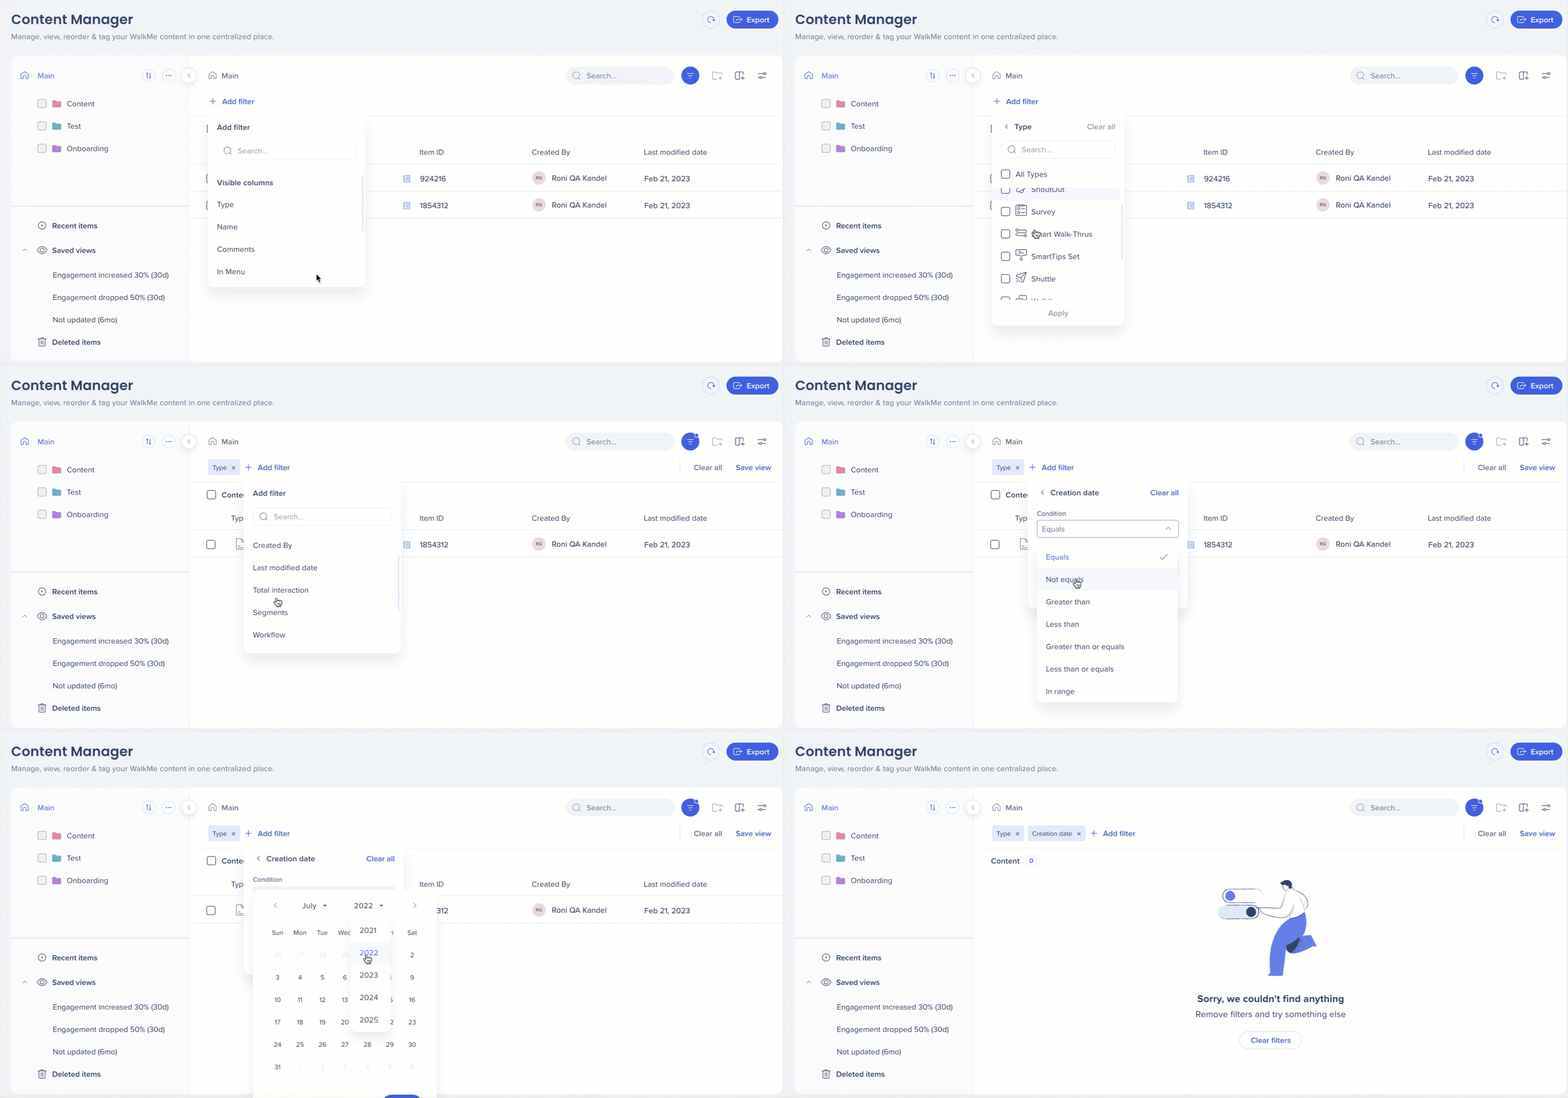
To narrow your results:
Select the Filter icon
Select + Add Filter
Choose a column
Set the condition and value
Select Apply
Contextual search
Use contextual search to find items by:
Item name
Item ID
Item type
Example: Type Launcher to view launcher results.
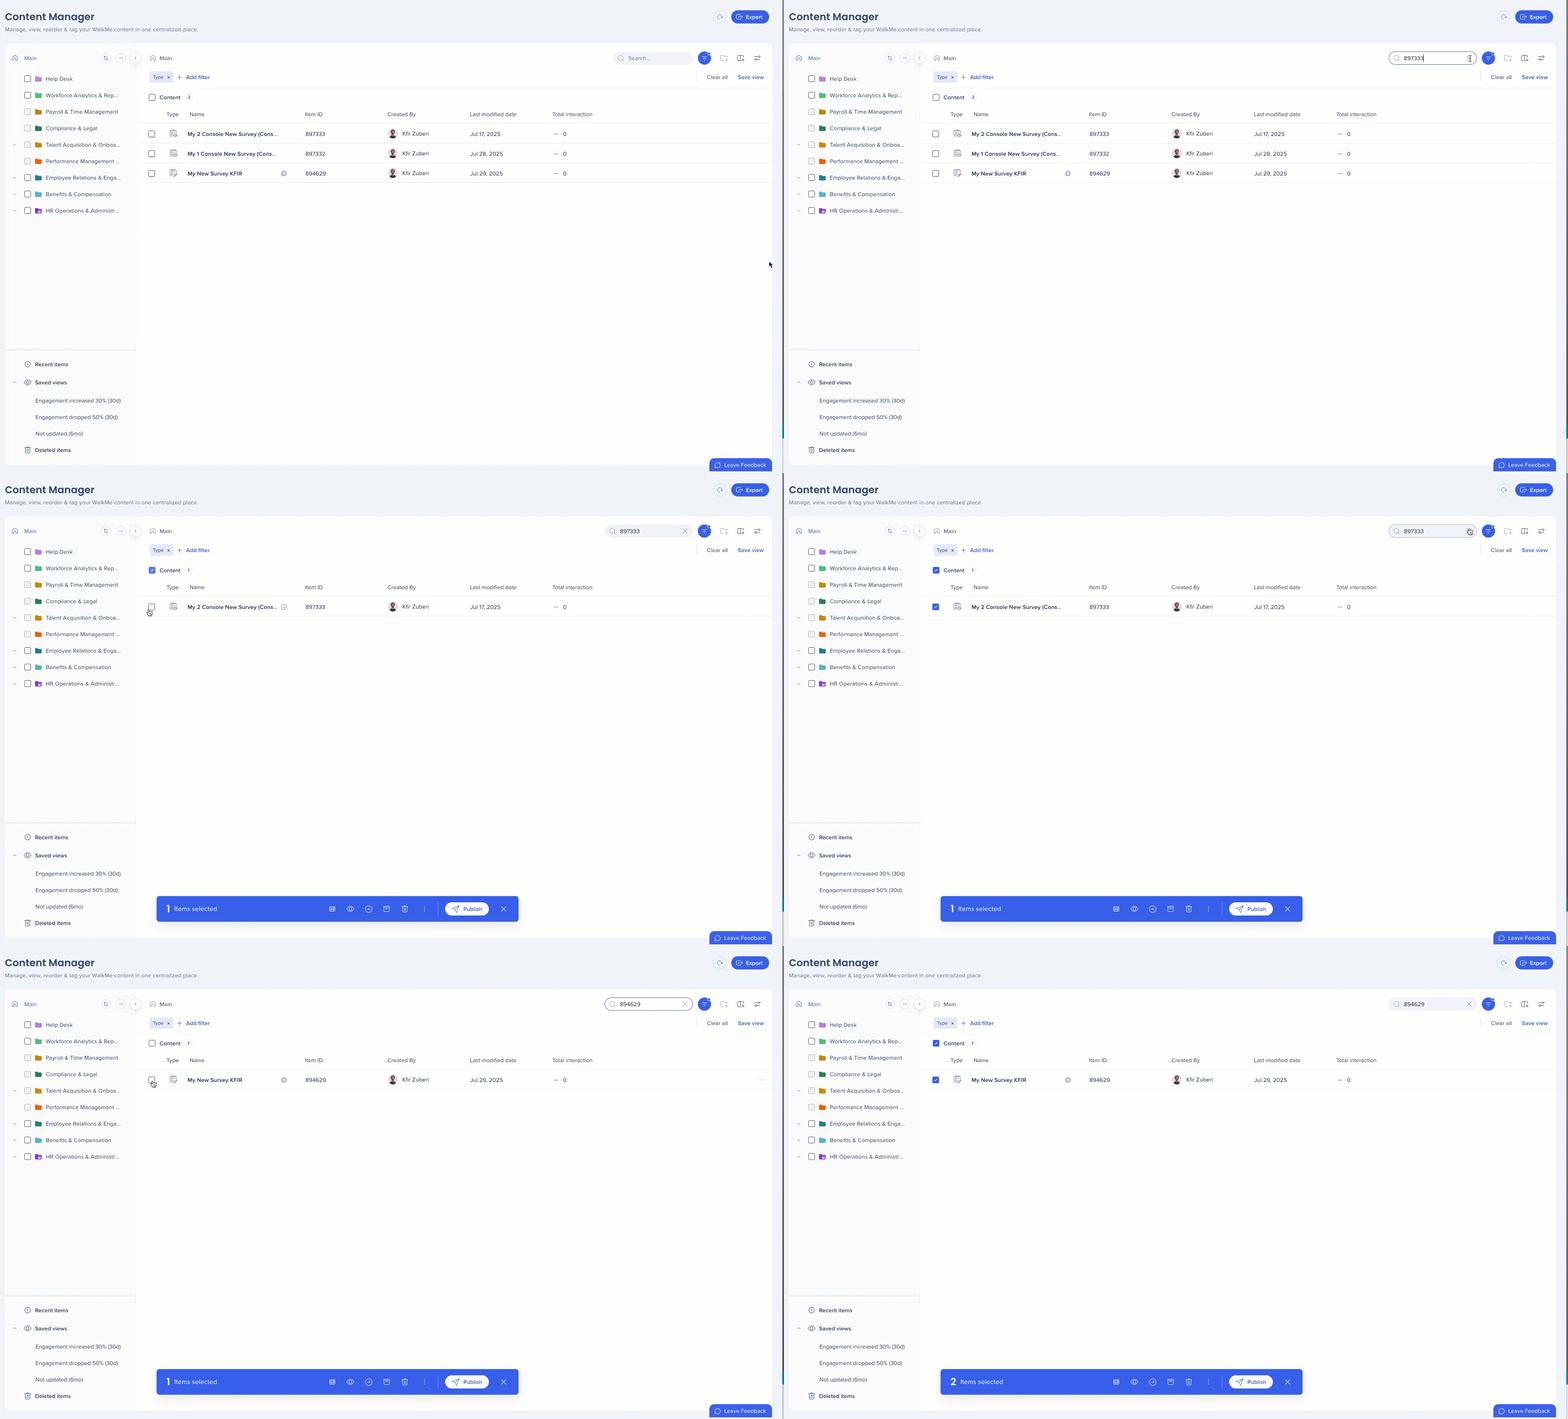
Bulk selection across searches
Keep selected items while running new searches, then apply a single bulk action to all selected items.
Segments
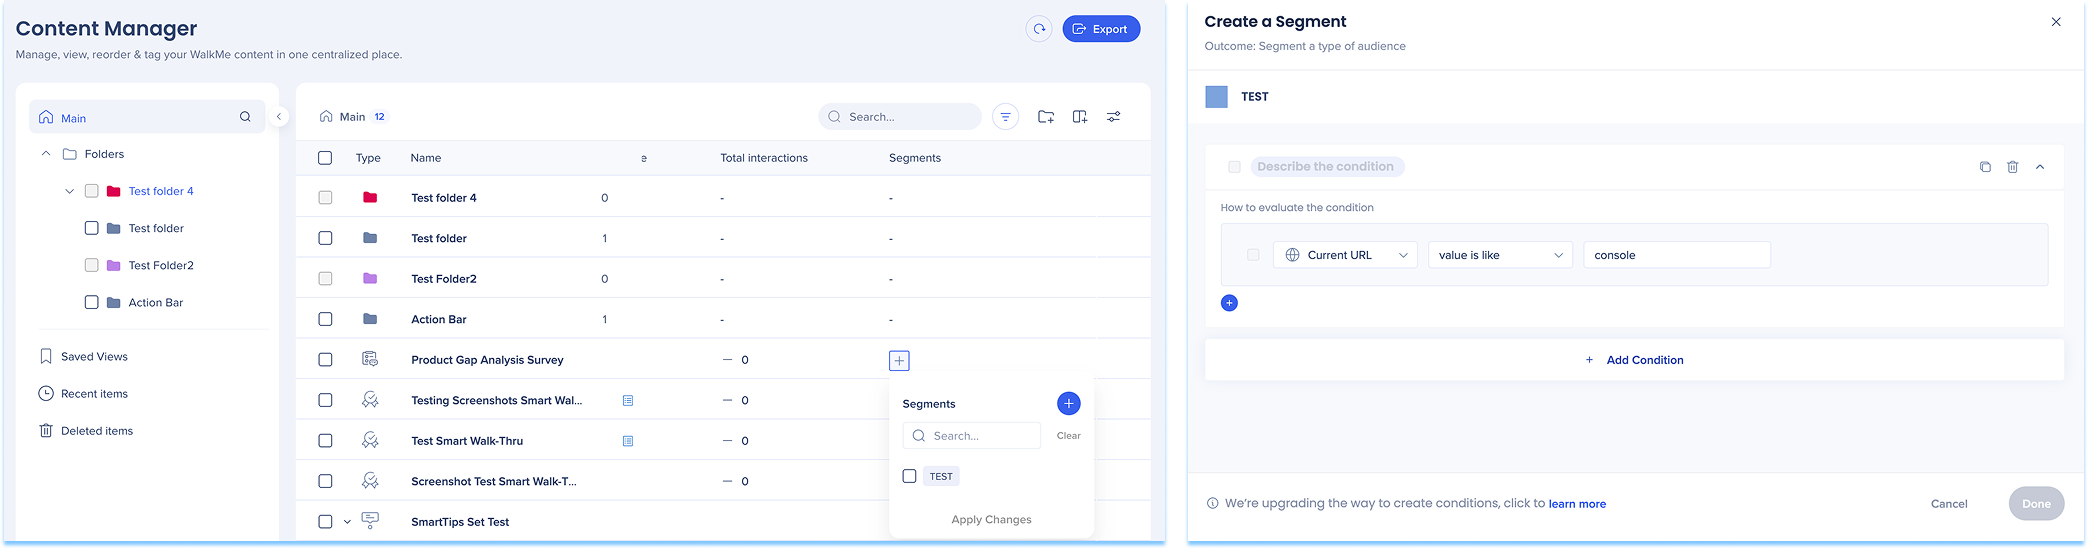
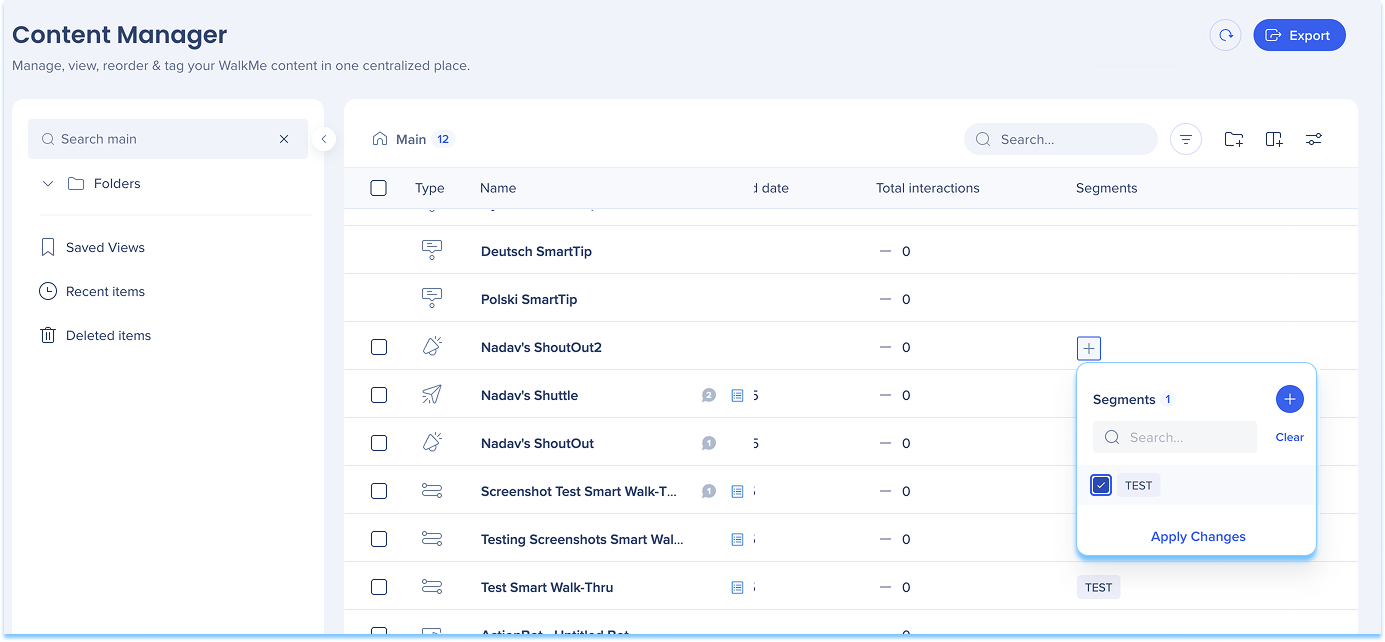
Create, define, apply, and manage segments directly within the Content Manager. This functionality mirrors the capabilities available in the editor, enabling users to streamline their segmentation workflows.
To create a segment:
Select the + icon in the Segment column of the item line
Click on + icon in the Segment column of the item line
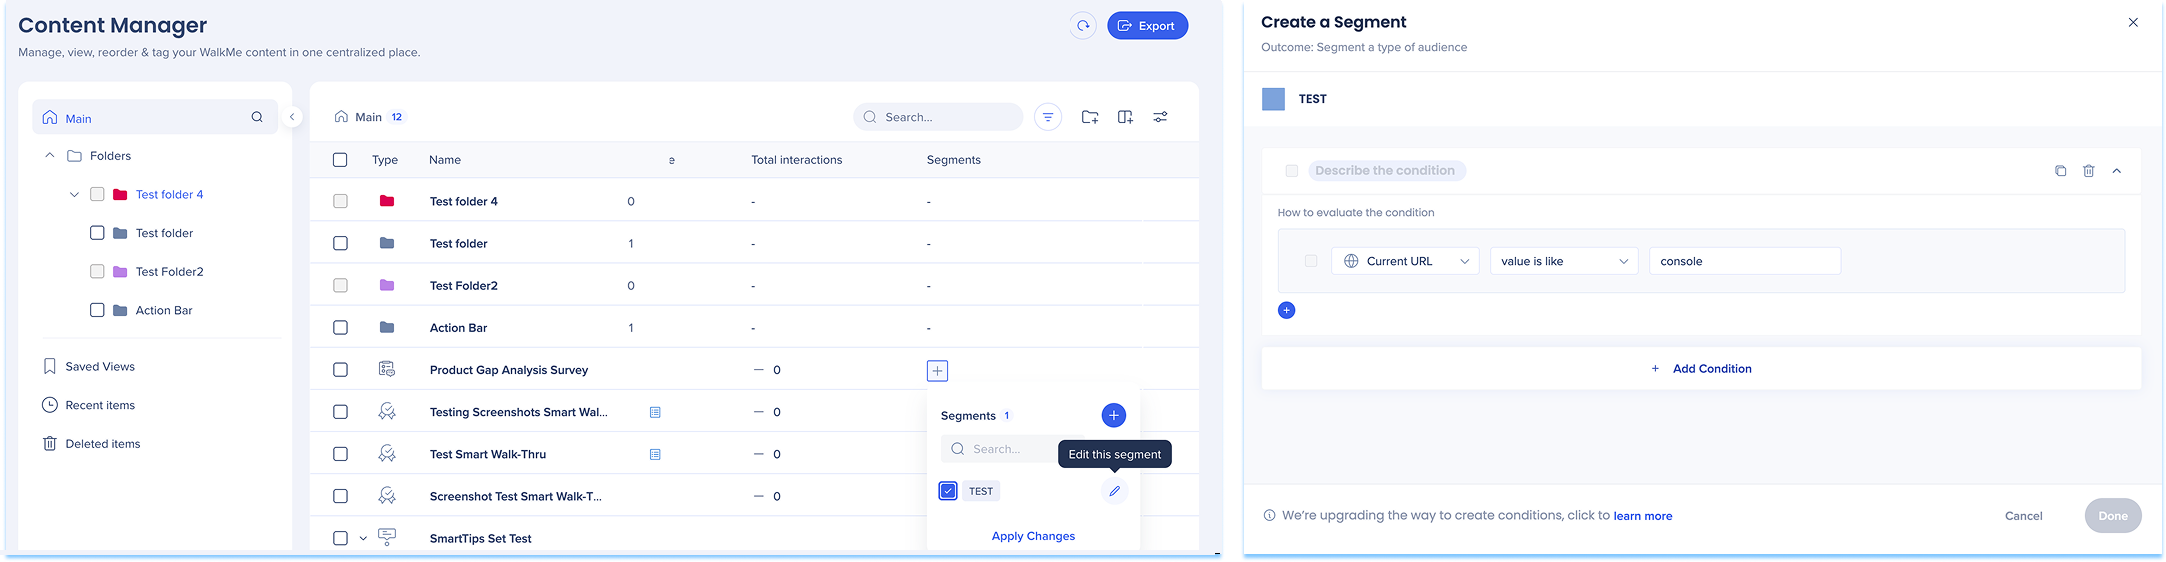
Click the Edit icon
Click Continue
The Edit Segment condition builder will appear
Click Done
Nota
Cuando se edita un segmento, se restablecen todos los datos guardados, lo que puede interrumpir la entrega de los elementos de WalkMe que están conectados al segmento.
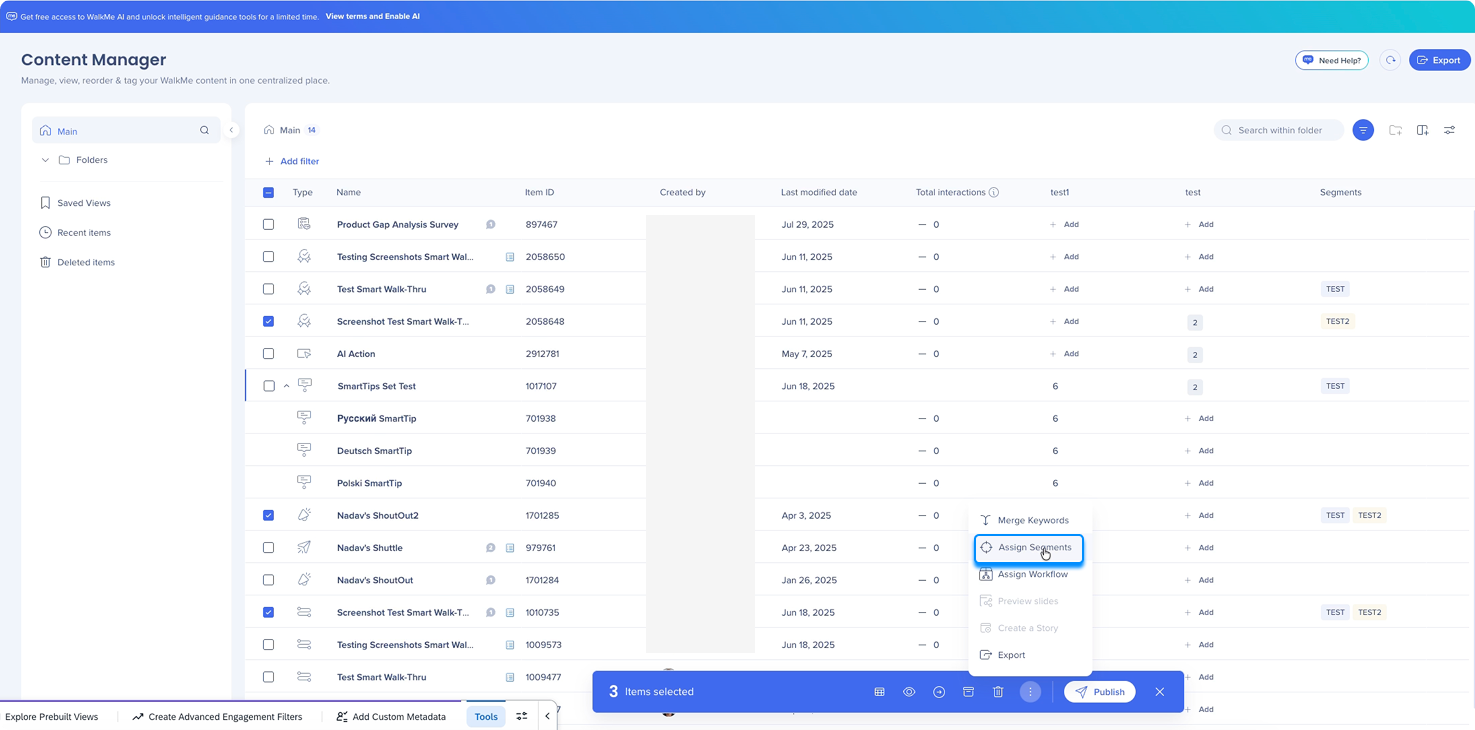
Para asignar segmentos a un elemento, haz clic en la información de los segmentos del elemento
O
Selecciona el elemento o elementos
En la barra de opciones, selecciona Asignar segmentos
Selecciona los segmentos
Selecciona Asignar segmentos
Para eliminar segmentos, desmarca las casillas que tienen segmentos asignados
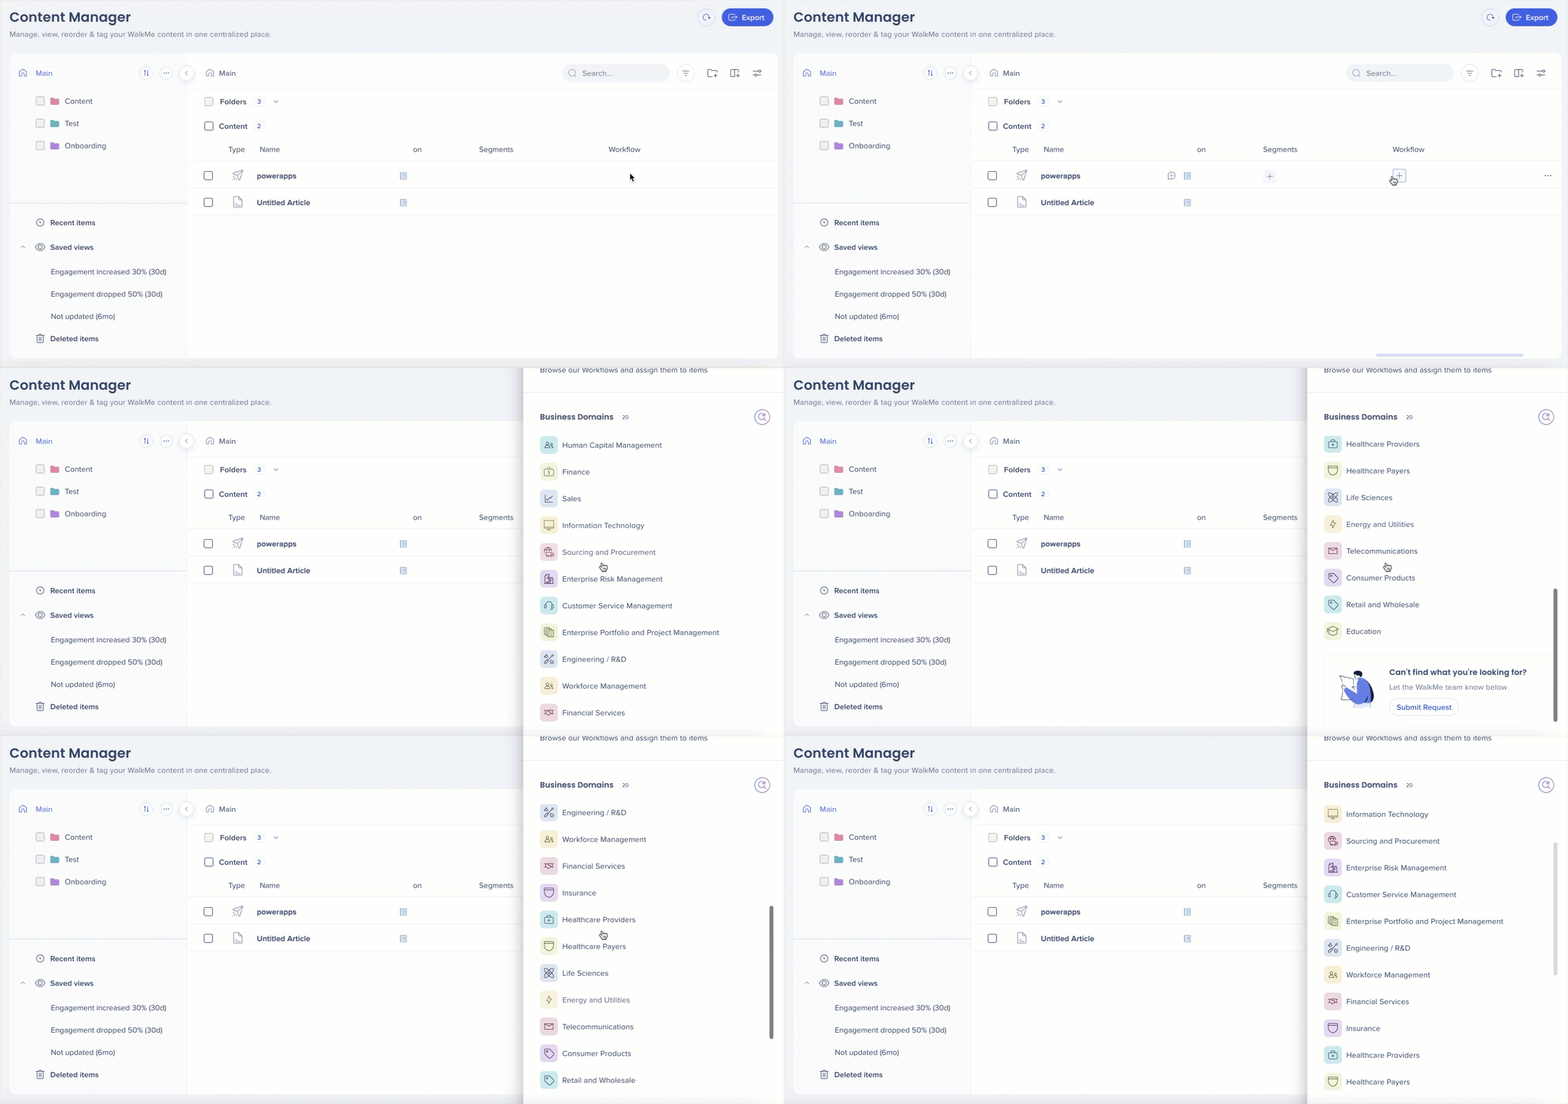
Haz clic en la columna Flujo de trabajo de la información del elemento para asignarle o reasignarle un flujo de trabajo
Administrar elementos
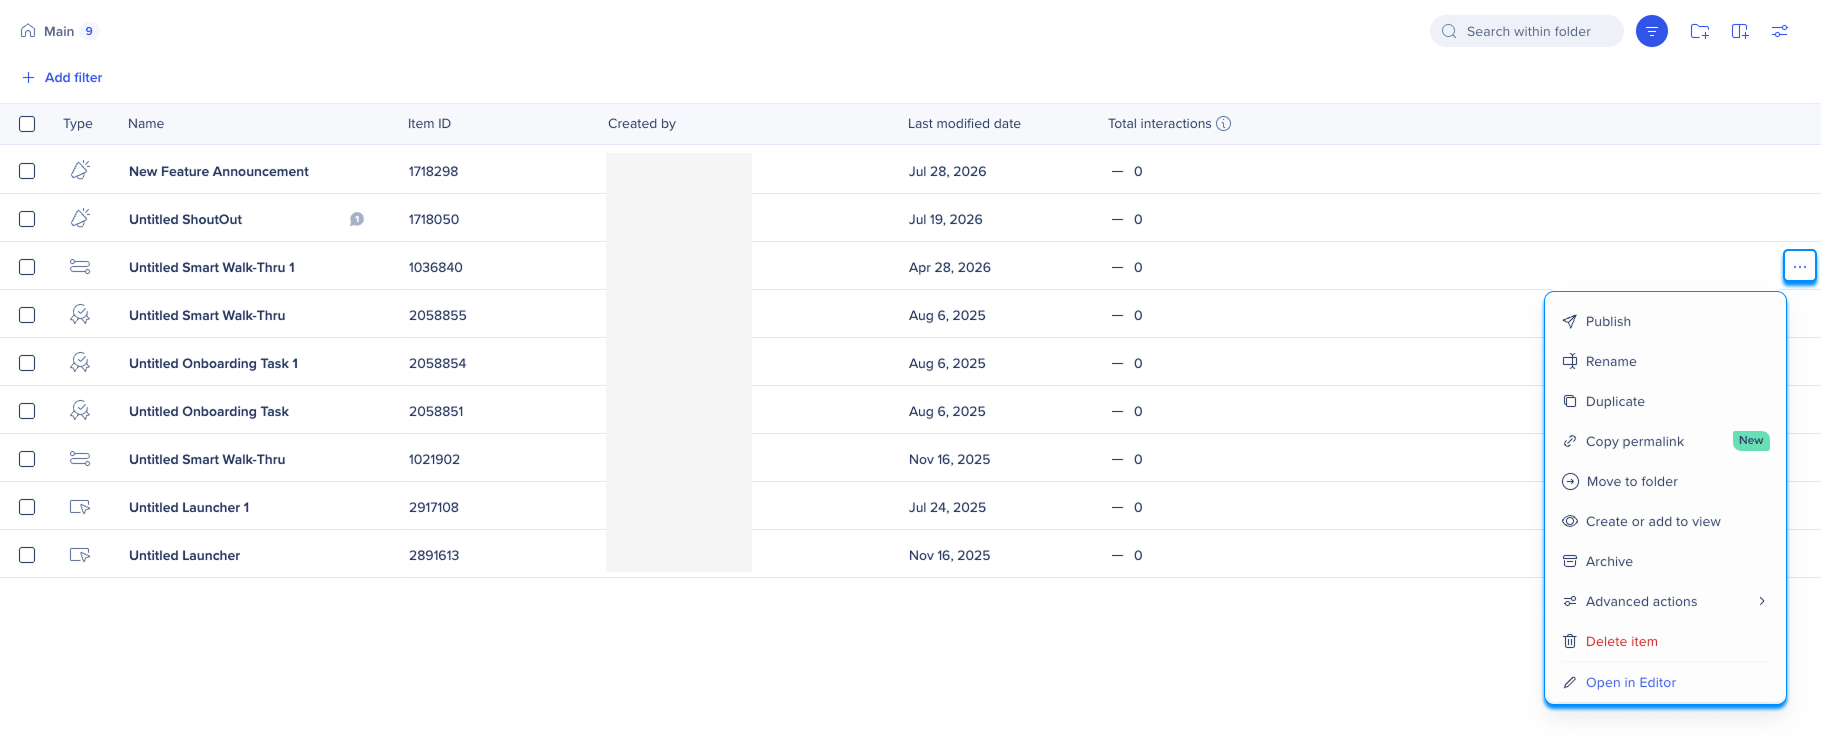
Acciones de elementos
Selecciona el menú Opciones en una fila de elemento para administrar el elemento. Las acciones disponibles incluyen:
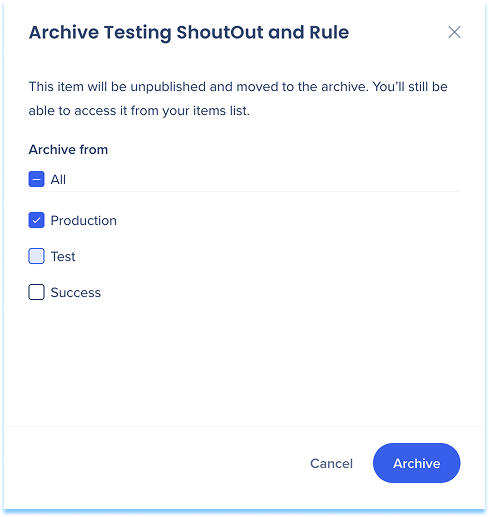
Puedes archivar un elemento en varios entornos a la vez, por lo que no necesitas repetir la acción de archivar en cada entorno por separado.
Acciones masivas
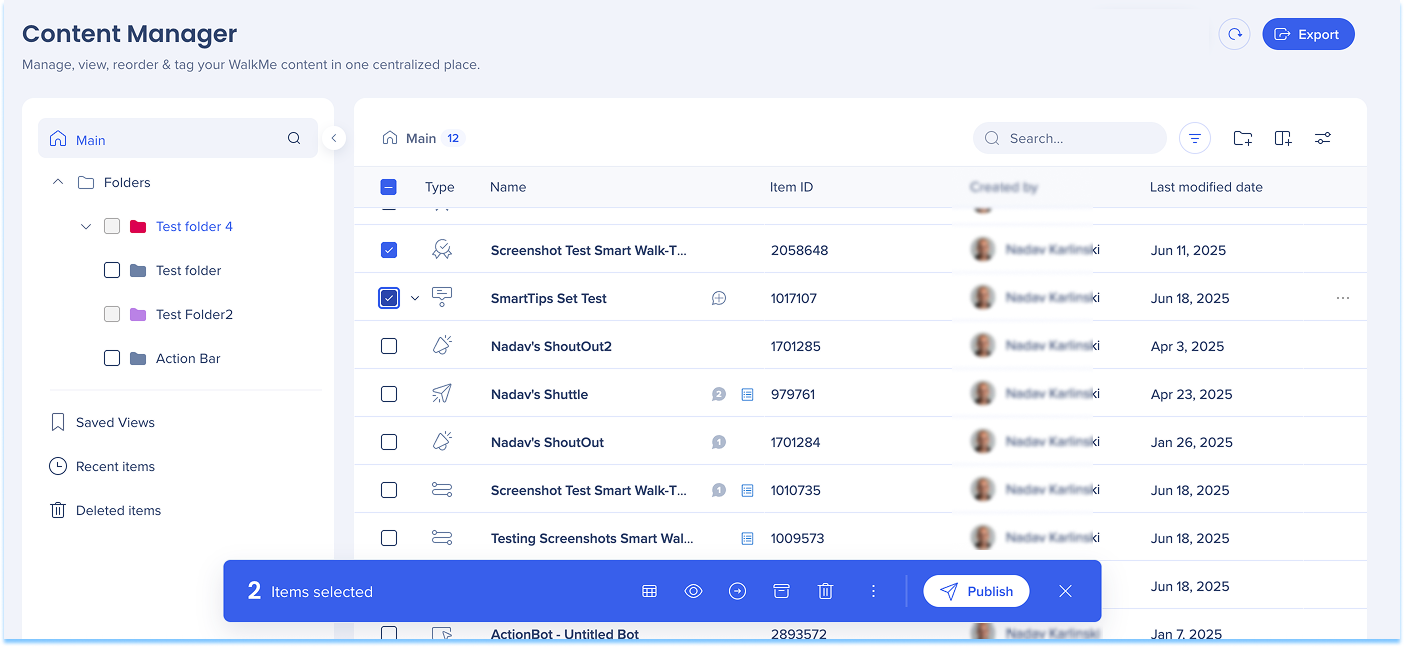
Selecciona uno o más elementos utilizando la casilla de verificación
Selecciona una acción de la barra de herramientas de acciones masivas, como:
Asignar segmentos o flujo de trabajo
Mover o archivar elementos
Publicar o eliminar elementos
Crear o añadir a vistas
Combinar palabras clave o actualizar campos personalizados
Exportar contenido
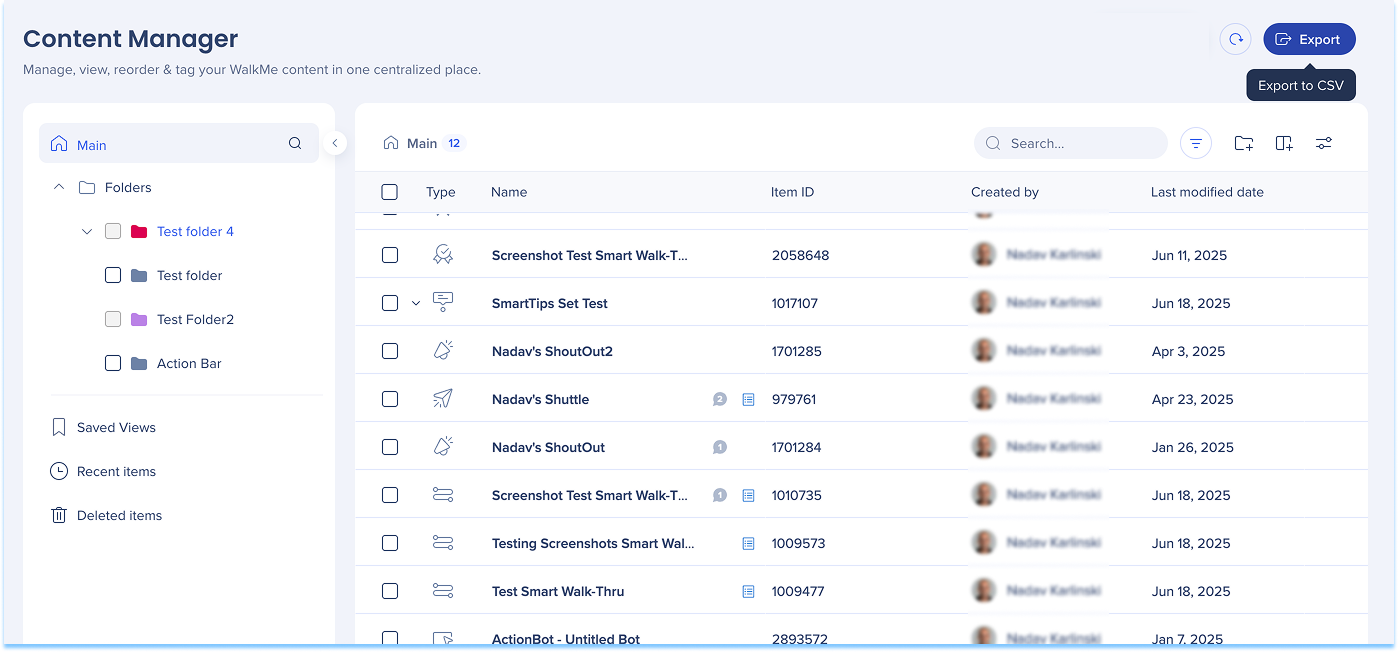
Exporta datos de contenido de cualquier vista a un archivo CSV.
Selecciona el icono Exportar
Descarga el archivo CSV
El CSV refleja la vista actual, incluidas las columnas visibles y el orden de columnas.
Nota
La Exportar de CSV no incluye comentarios.
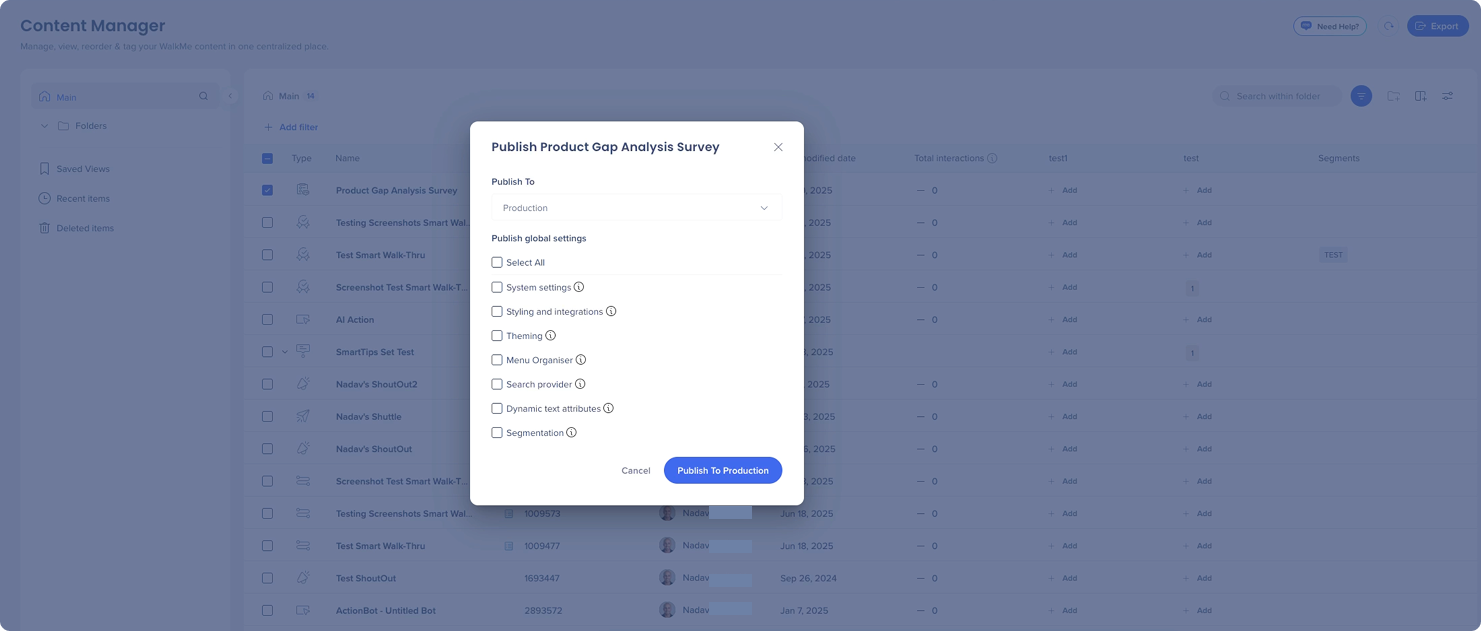
Publish content
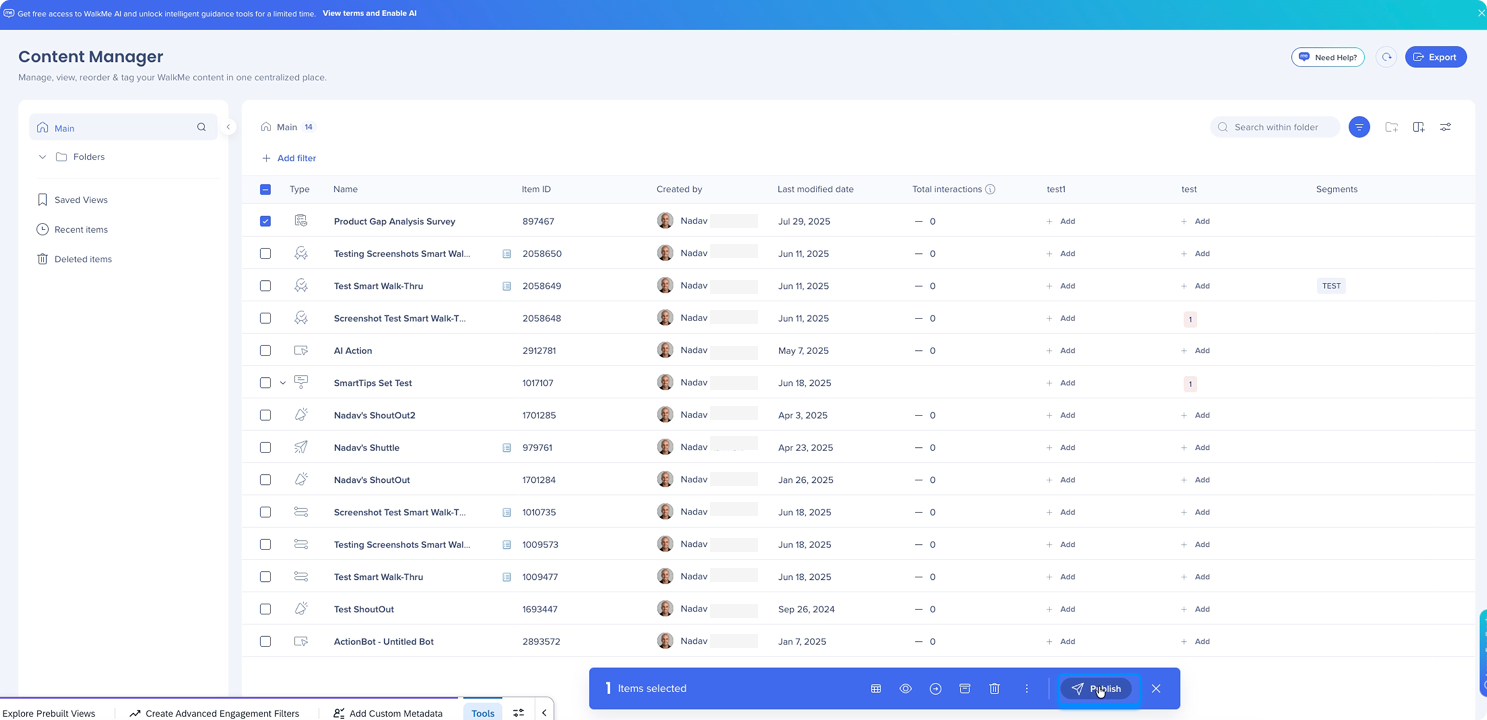
Select one or multiple items
Select Publish
Select the environment you want to publish to
Select the settings you want to publish
Select Publish to [Env]
Preview, Collaborate, and Track Changes
Item preview
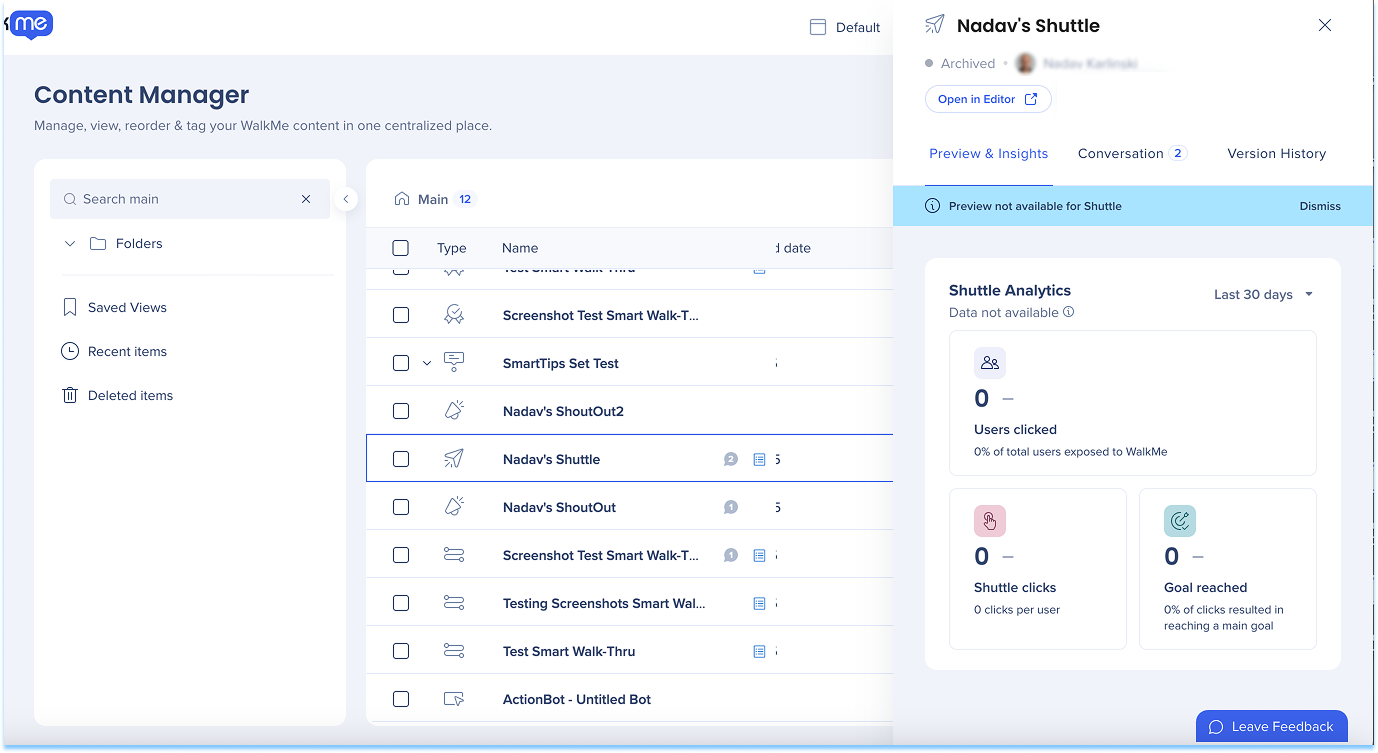
Select an item in the table to open the item drawer, which includes:
Preview & Insights: Preview the item, review Insights data from the last 30 days, and view related Stories
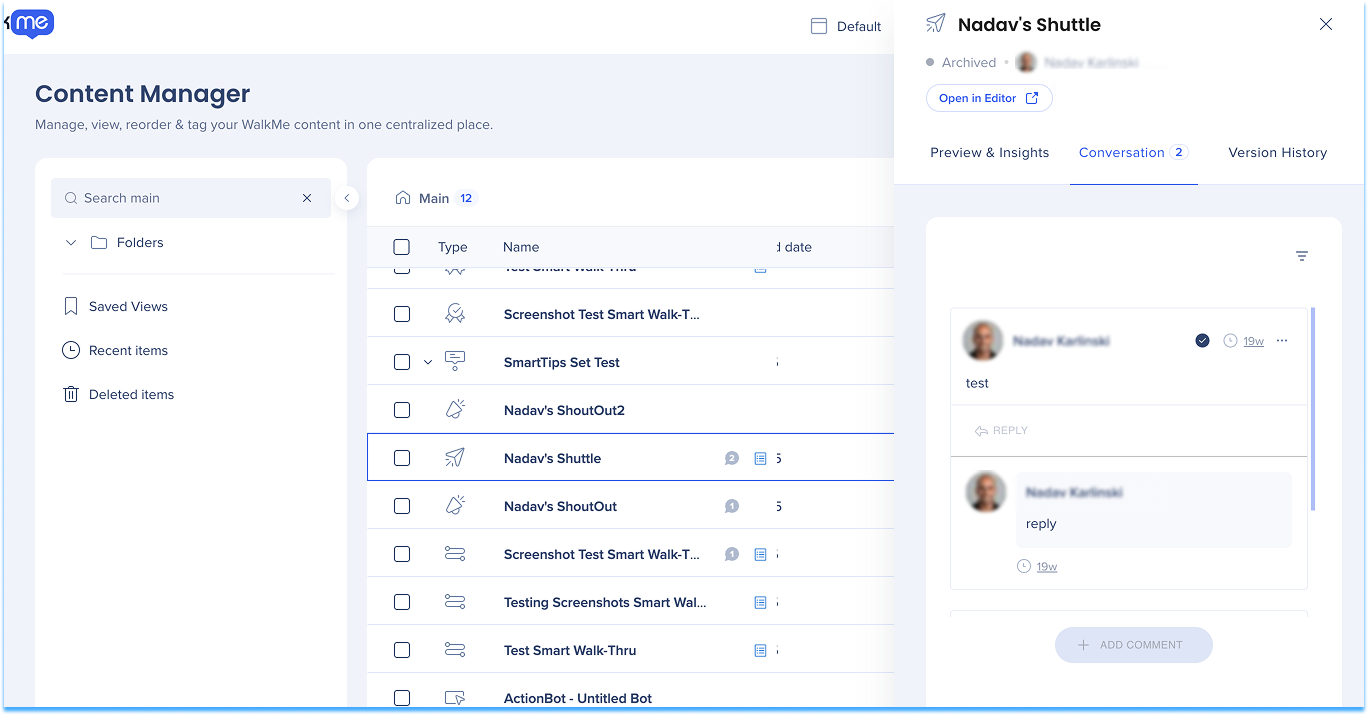
Conversations: View and leave comments, and tag collaborators
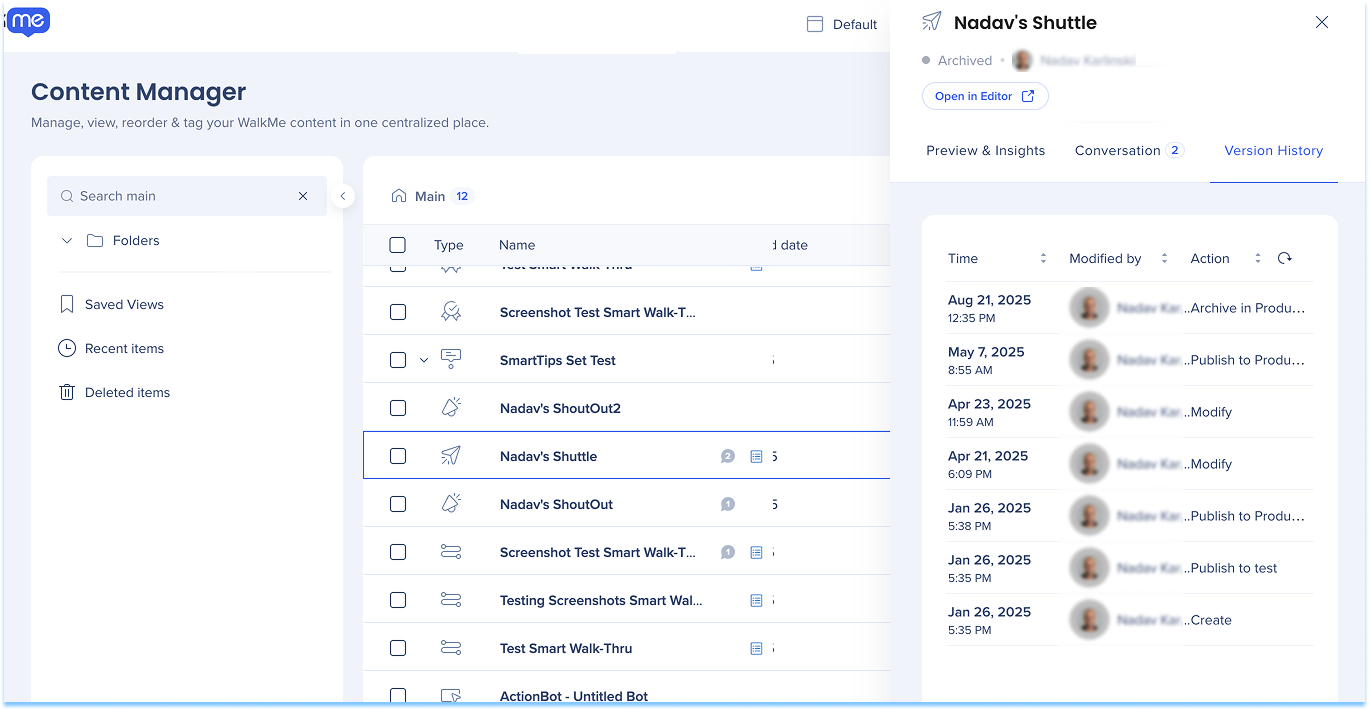
Version history: Review previous edit versions of the item
Preview & Insights
Use Preview & Insights to view item screenshots and analytics.
Preview item screenshots
Hover over the preview
Select the Slides preview icon
Expand the preview
Hover over the preview
Select the Expand icon
Nota
The preview shows an image of the balloon as it appears to users
Smart Walk-Thrus show the entire play sequence
Shuttles, resources (videos and articles), and onboarding tasks don't have a preview
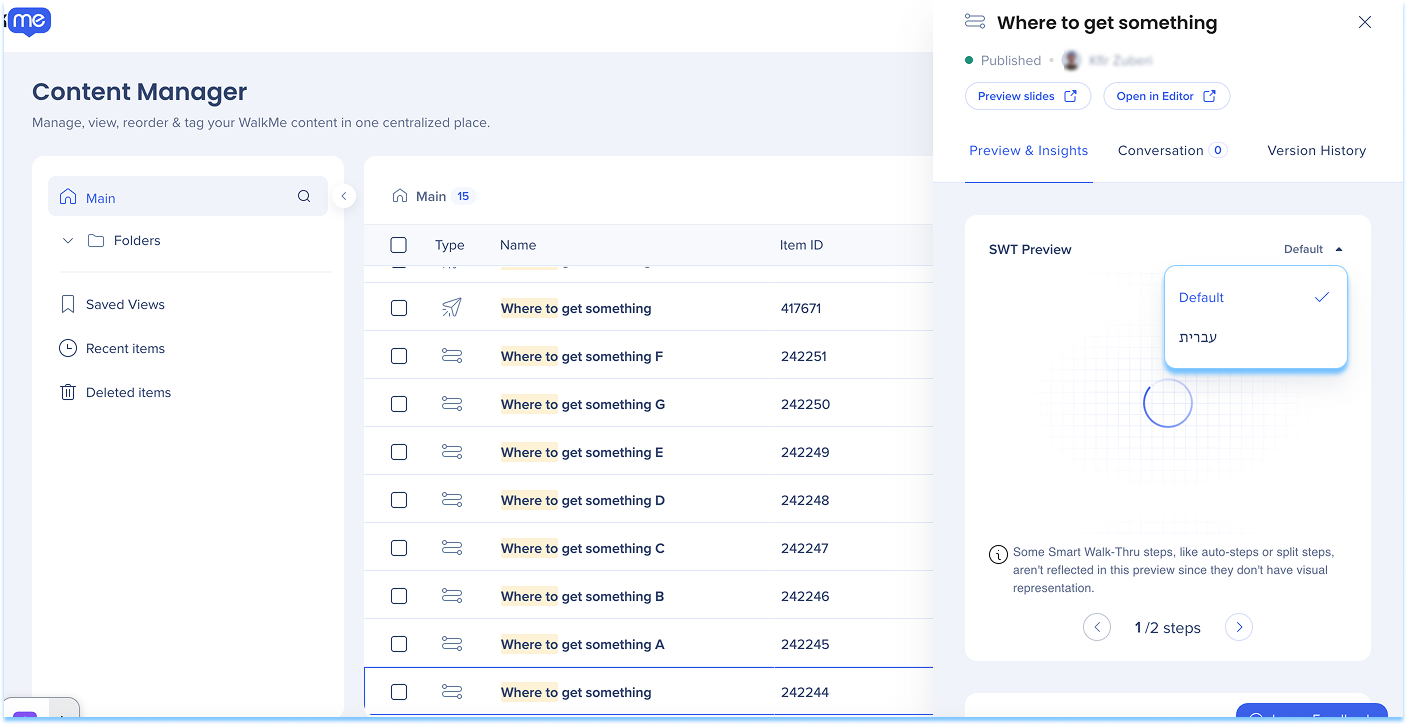
Translated preview
Preview translated versions of your content directly in the preview window.
Select the Language dropdown to view the item in each translated language
Conversations
Use Conversations to view and leave comments on items or preview slides, and tag collaborators. When a user is tagged, they receive a notification.
A message indicator will appear next to each item's name in the table showing the number of messages.
A blue indicator means there are unread messages
A gray indicator means all messages have been read
Comments
View comments
Select the message Indicator to open the Conversations tab
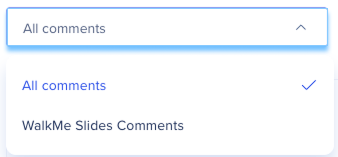
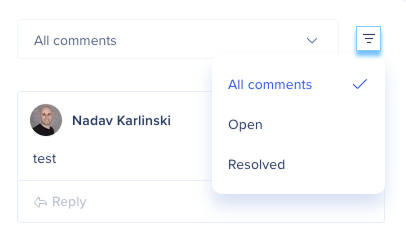
Optional: Use the All comments dropdown to filter by comment type
Optional: Select the Filter icon to filter comments by status
Resolve comments
Select the Check icon at the top of the comment
Version history
The Version History tab shows all previous edit versions of the item.
Display settings
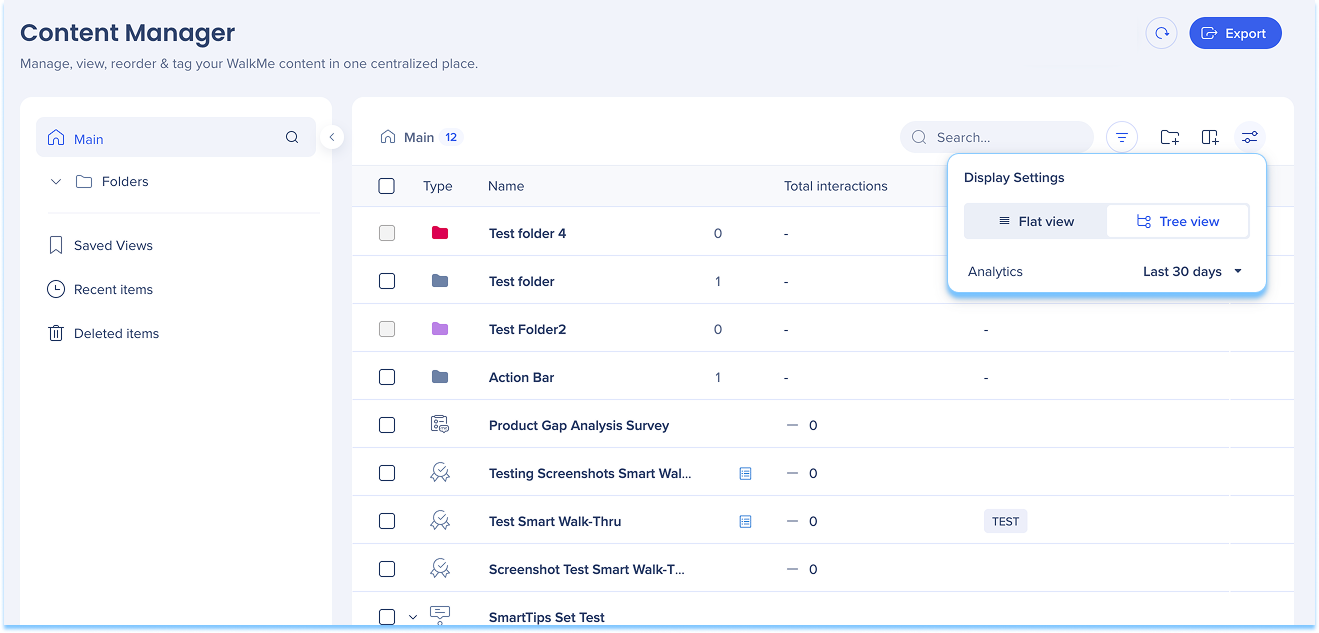
Use display settings to switch between:
Flat view: Displays content in a single list without hierarchy
Tree view: Displays content in a hierarchical structure with categories and subcategories
Analyze Engagement and Performance
Inline trend indicators
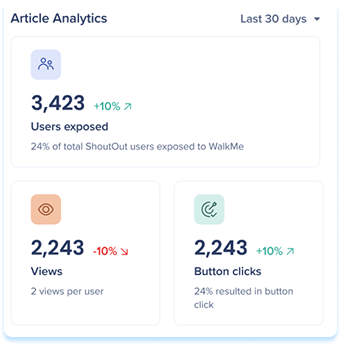
Inline trend indicators show performance changes directly in the table and item drawer, without switching to Insights.
Trend indicators appear next to:
Unique users
Interactions
Goal completions
Each metric includes a visual indicator:
Green arrow indicates an increase
Red arrow indicates a decrease
No arrow indicates no trend when the previous period value was zero
Trend calculations are based on the selected date range and update dynamically.
Smart Walk-Thru step analysis
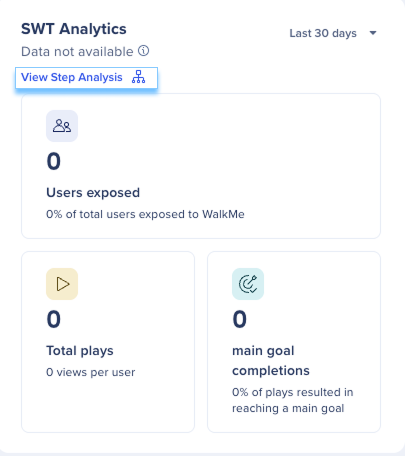
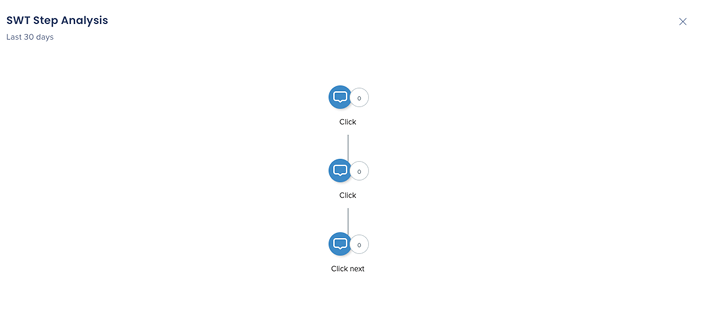
View drop-offs, user paths, and step-level performance directly within the Smart Walk-Thru drawer.
Open the step analysis map
Select View Step Analysis
Review the Smart Walk-Thru analysis map
Interaction data date filter
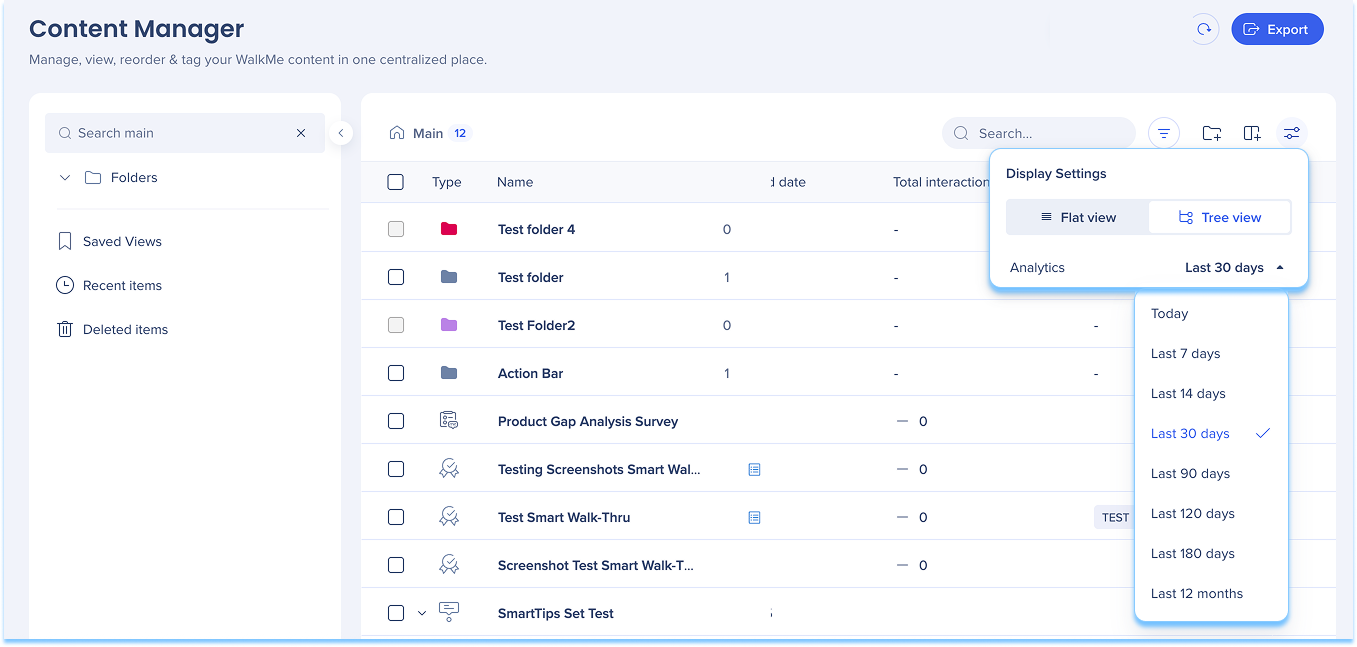
Use the interaction data date filter to view analytics for a specific time range. You can access the date range filter in two ways:
From Display settings
Select the Display Settings icon
Select the dropdown next to the analytics label
Choose a time range
From an individual item
Select an item to open its detail panel
In Preview & Insights, select the dropdown next to the analytics label
Choose a time range
Analytics filters require at least one analytics column, such as unique users, total interactions, or goals reached.
Use Views to Monitor Content
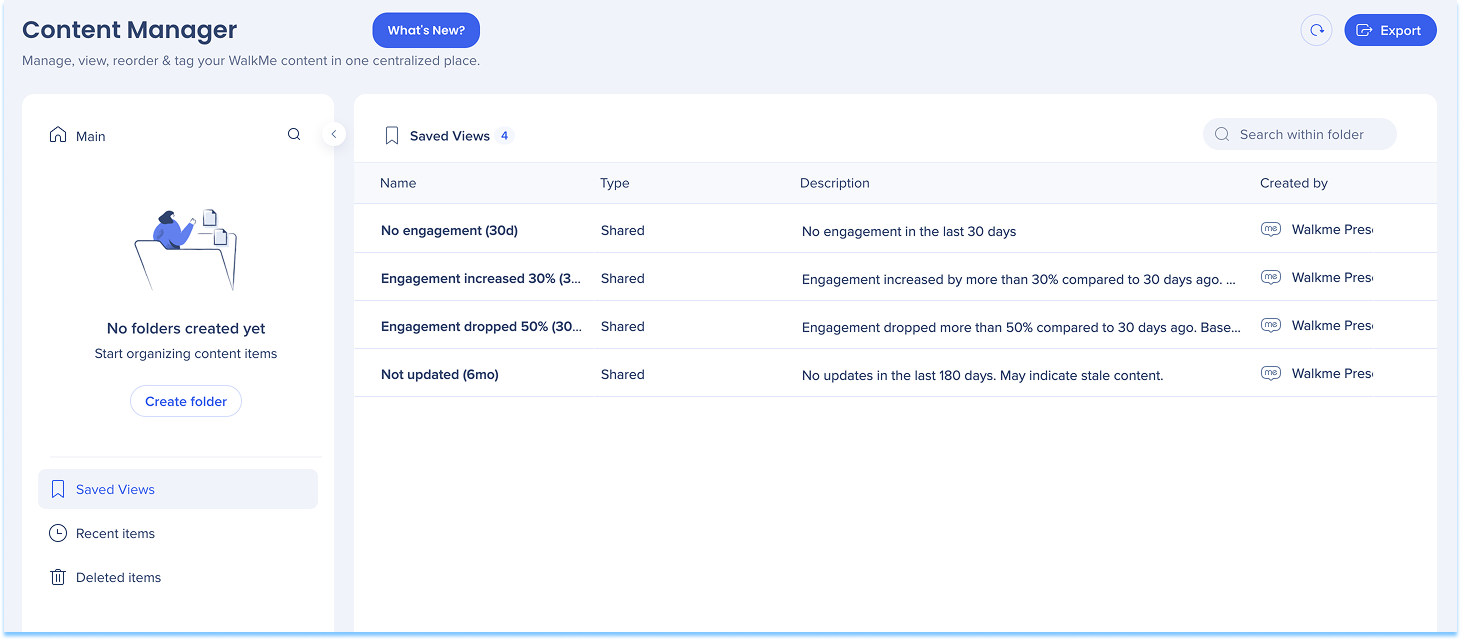
Saved views
Saved views let you save and reuse table configurations to monitor content more efficiently. Saved views can include:
Column selections
Filters
Sorting preferences
Saved views appear in the left panel and update automatically as items change.
Create and manage views
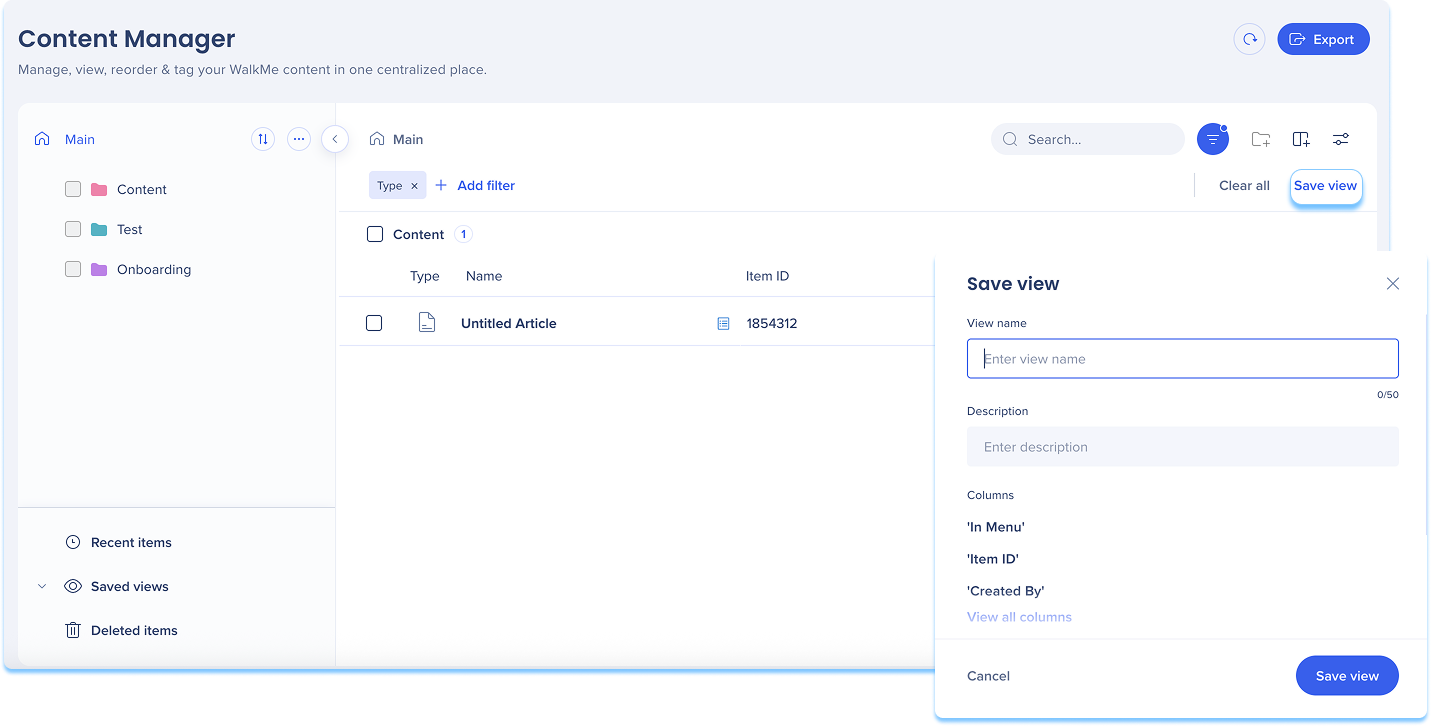
Create a view
Apply filters to the table
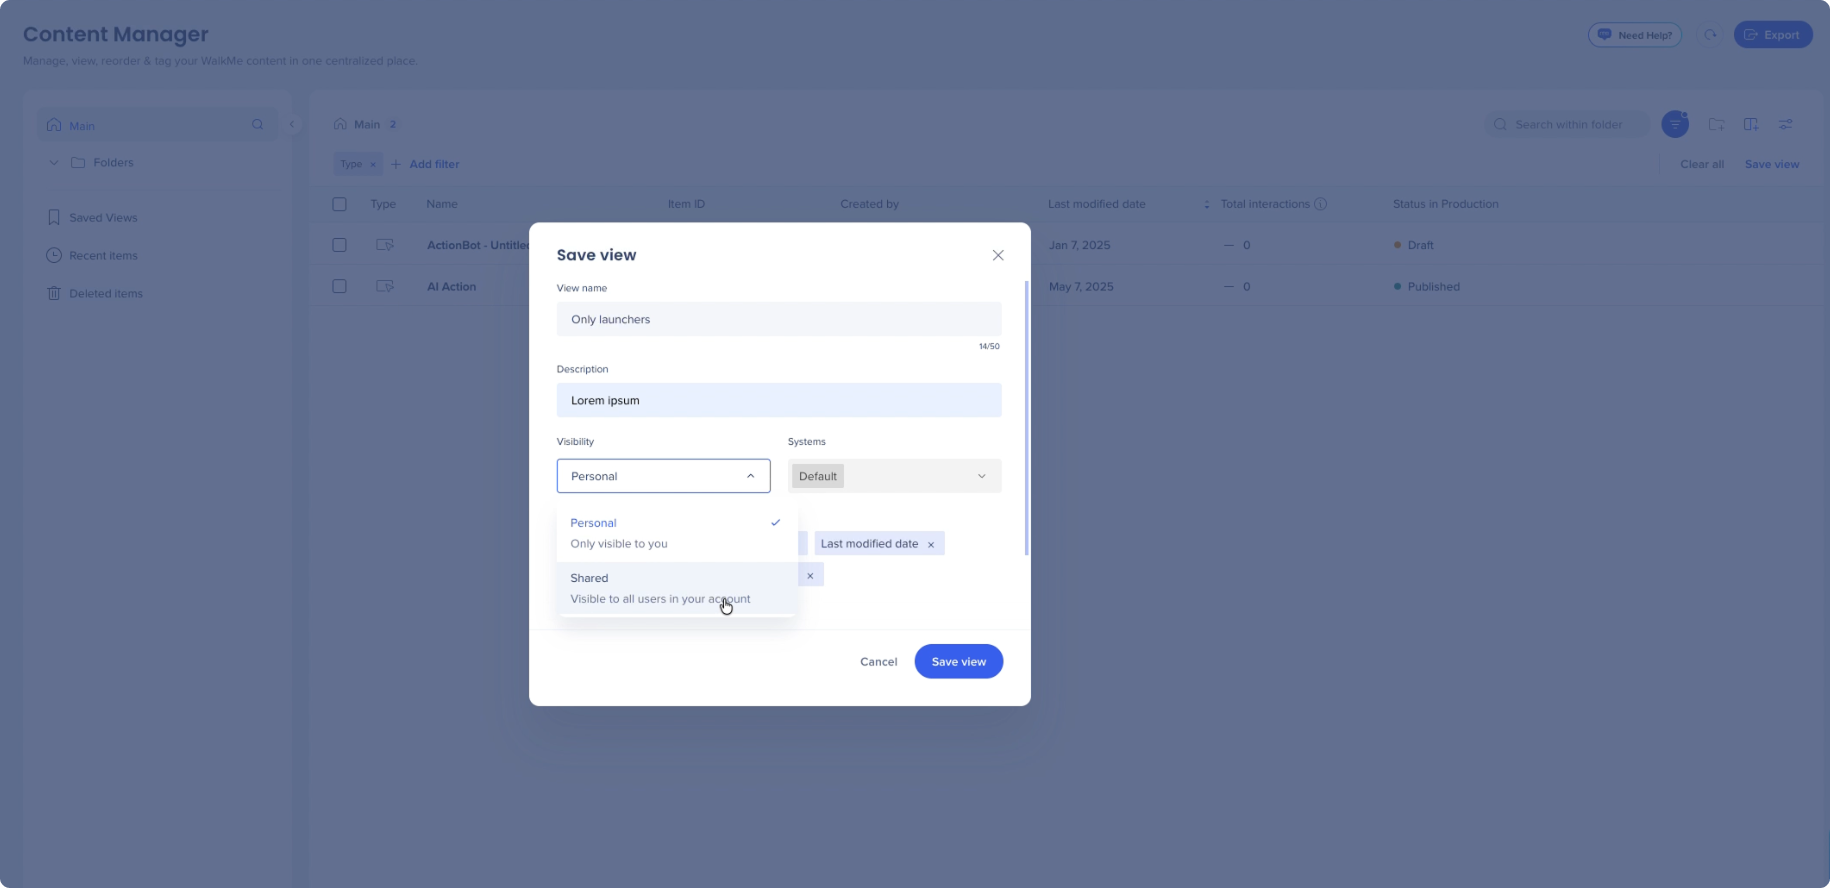
Select Save View
Enter a view name and description
Select Save View
Saved views are dynamic, so new items that match the filters appear automatically, and archived items are removed.
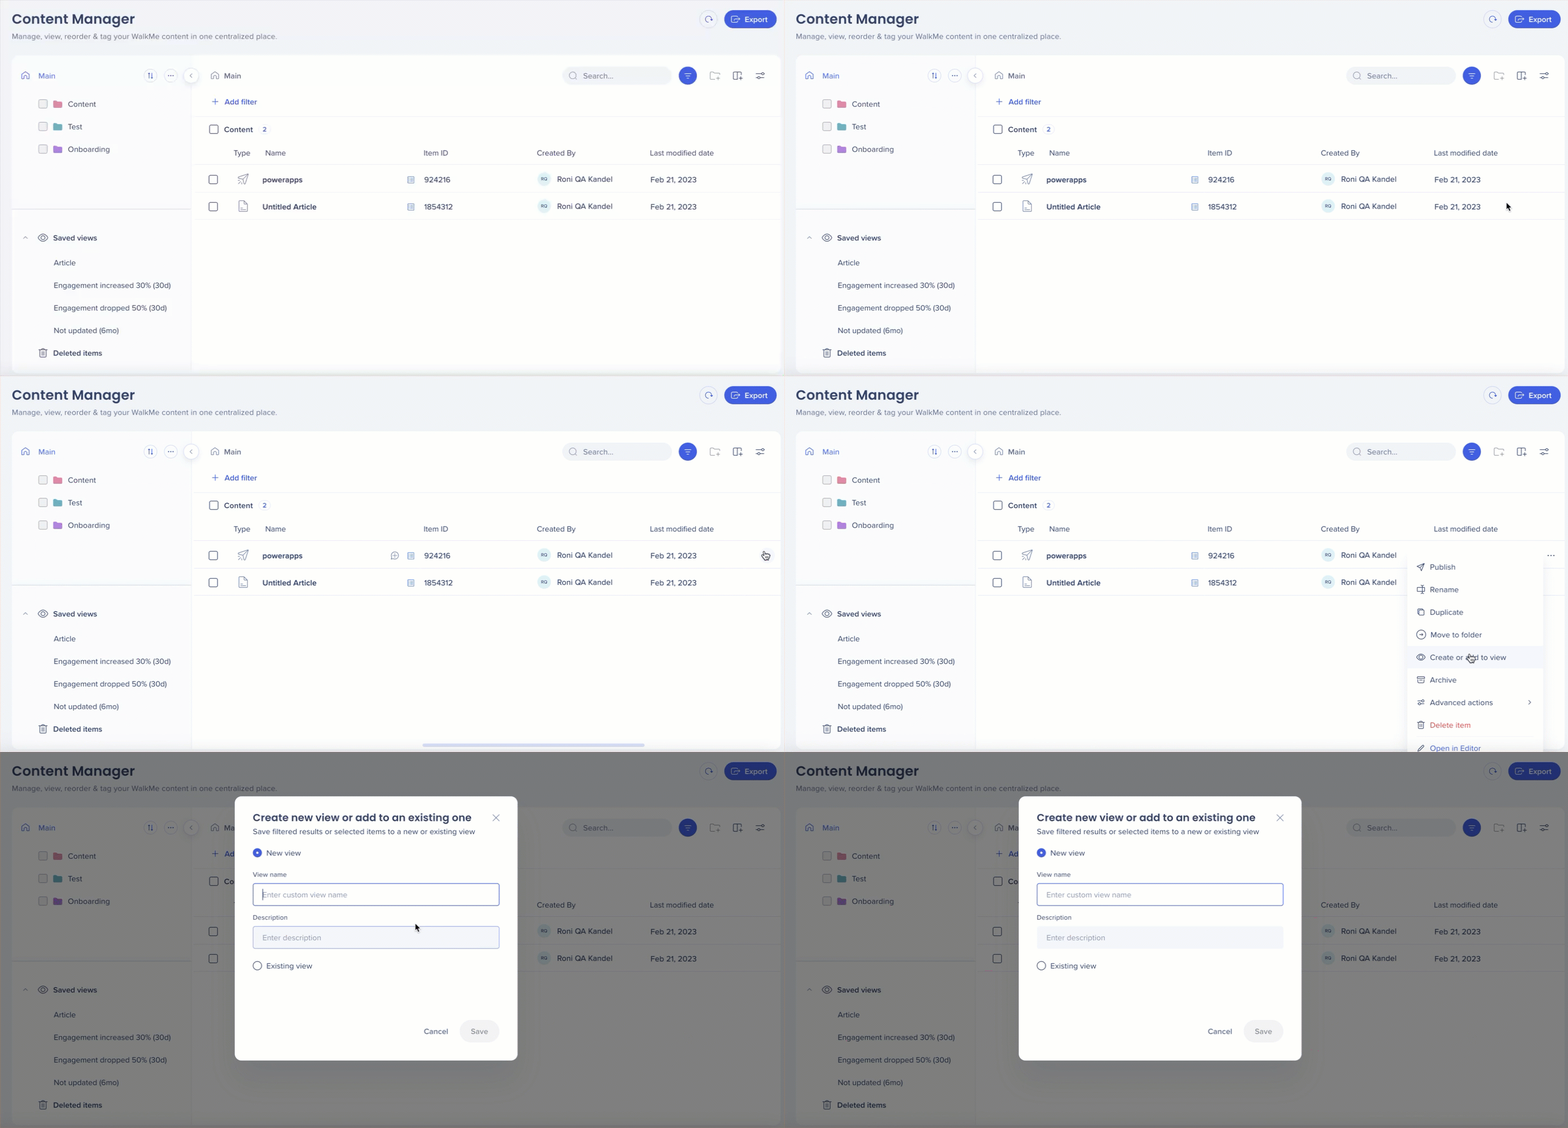
Add items to a view
To add a single item, open the item Options menu and select Create or add to view
Choose a new or existing view
Select Save
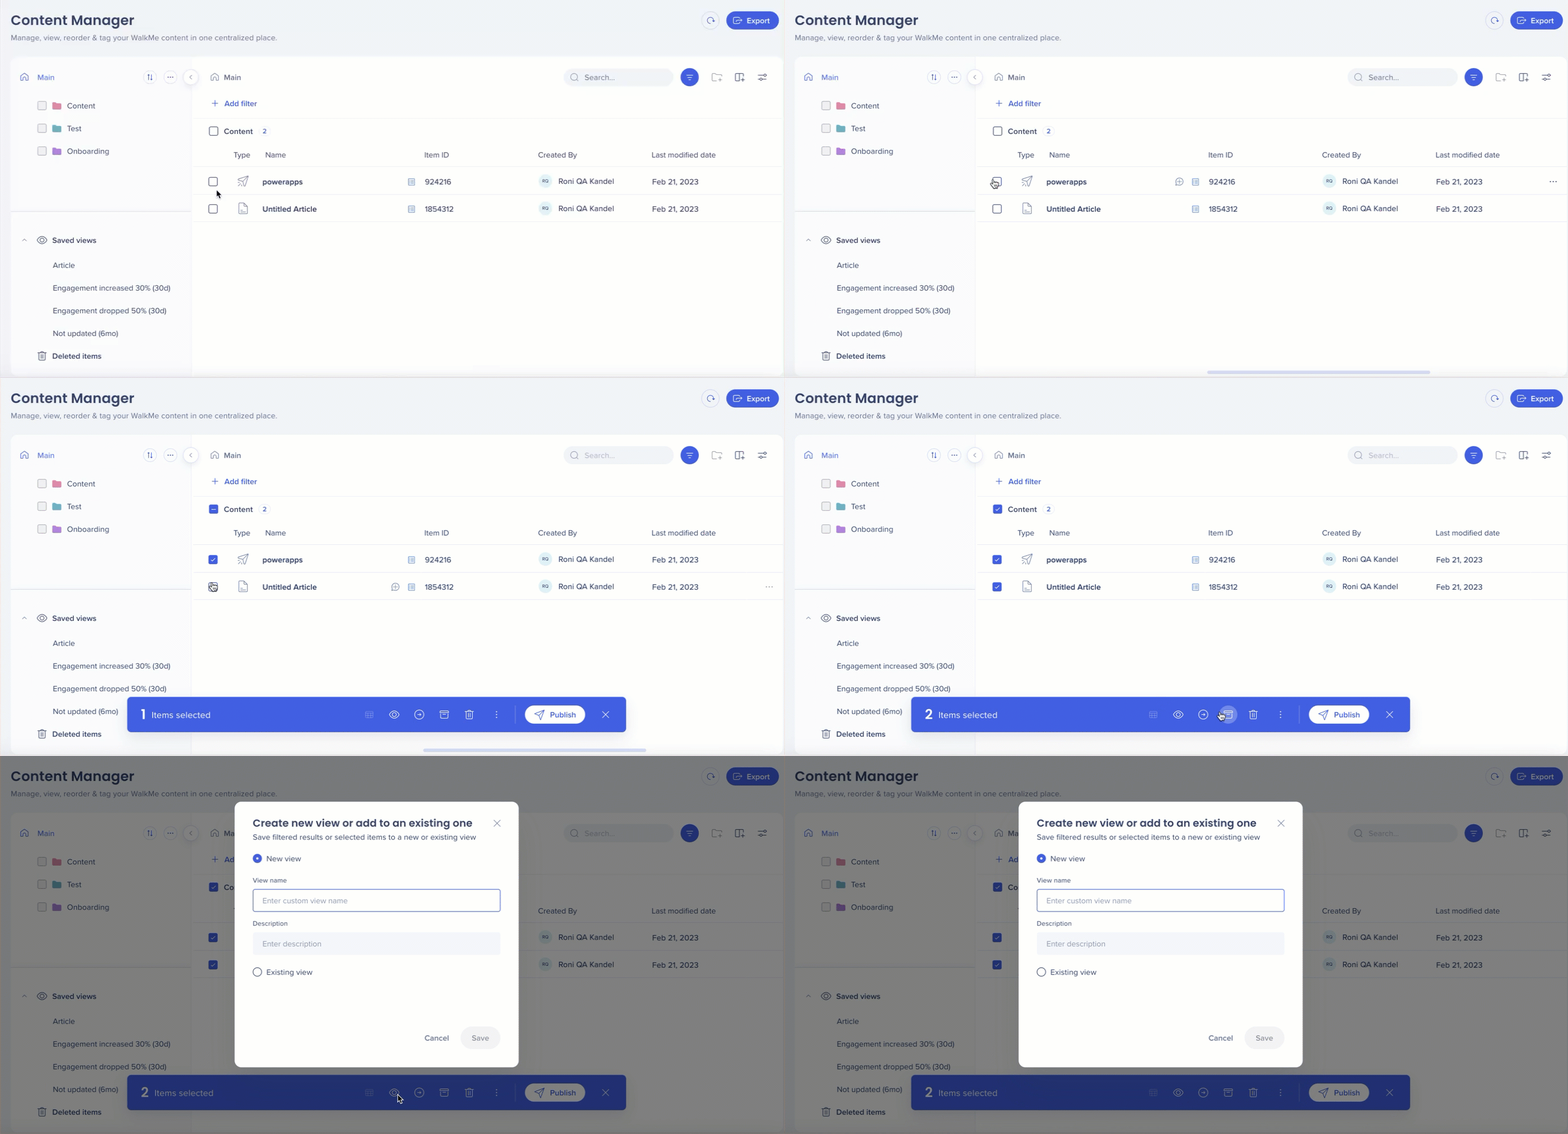
Add multiple items to a view
To add multiple items, select items using the checkbox, then select the Eye icon
Choose a new or existing view
Select Save
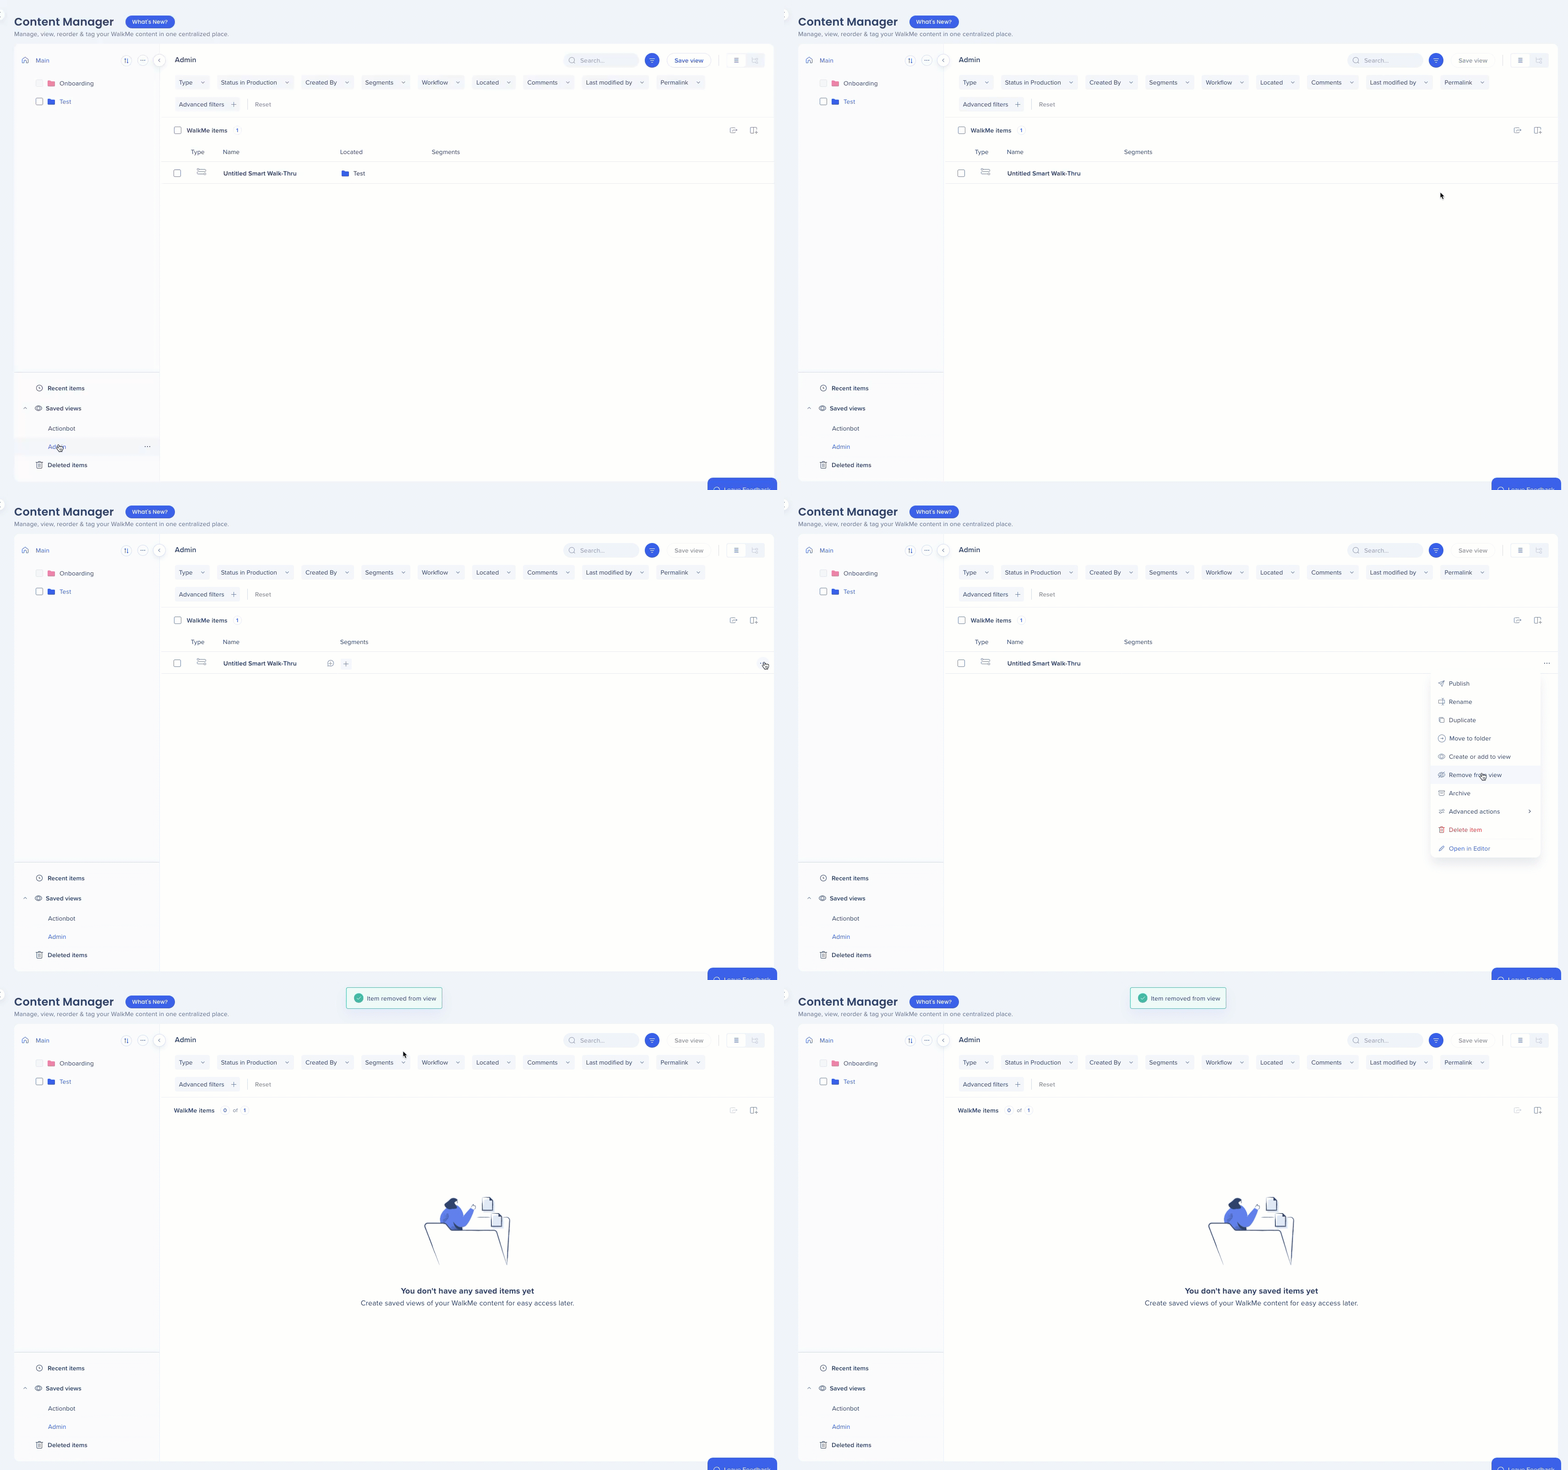
Remove items from views
Remove a single item
Open the Saved views dropdown
Open the Options menu for the view
Select Remove from view
Nota
Remove from view is not relevant for filters, only items added manually.
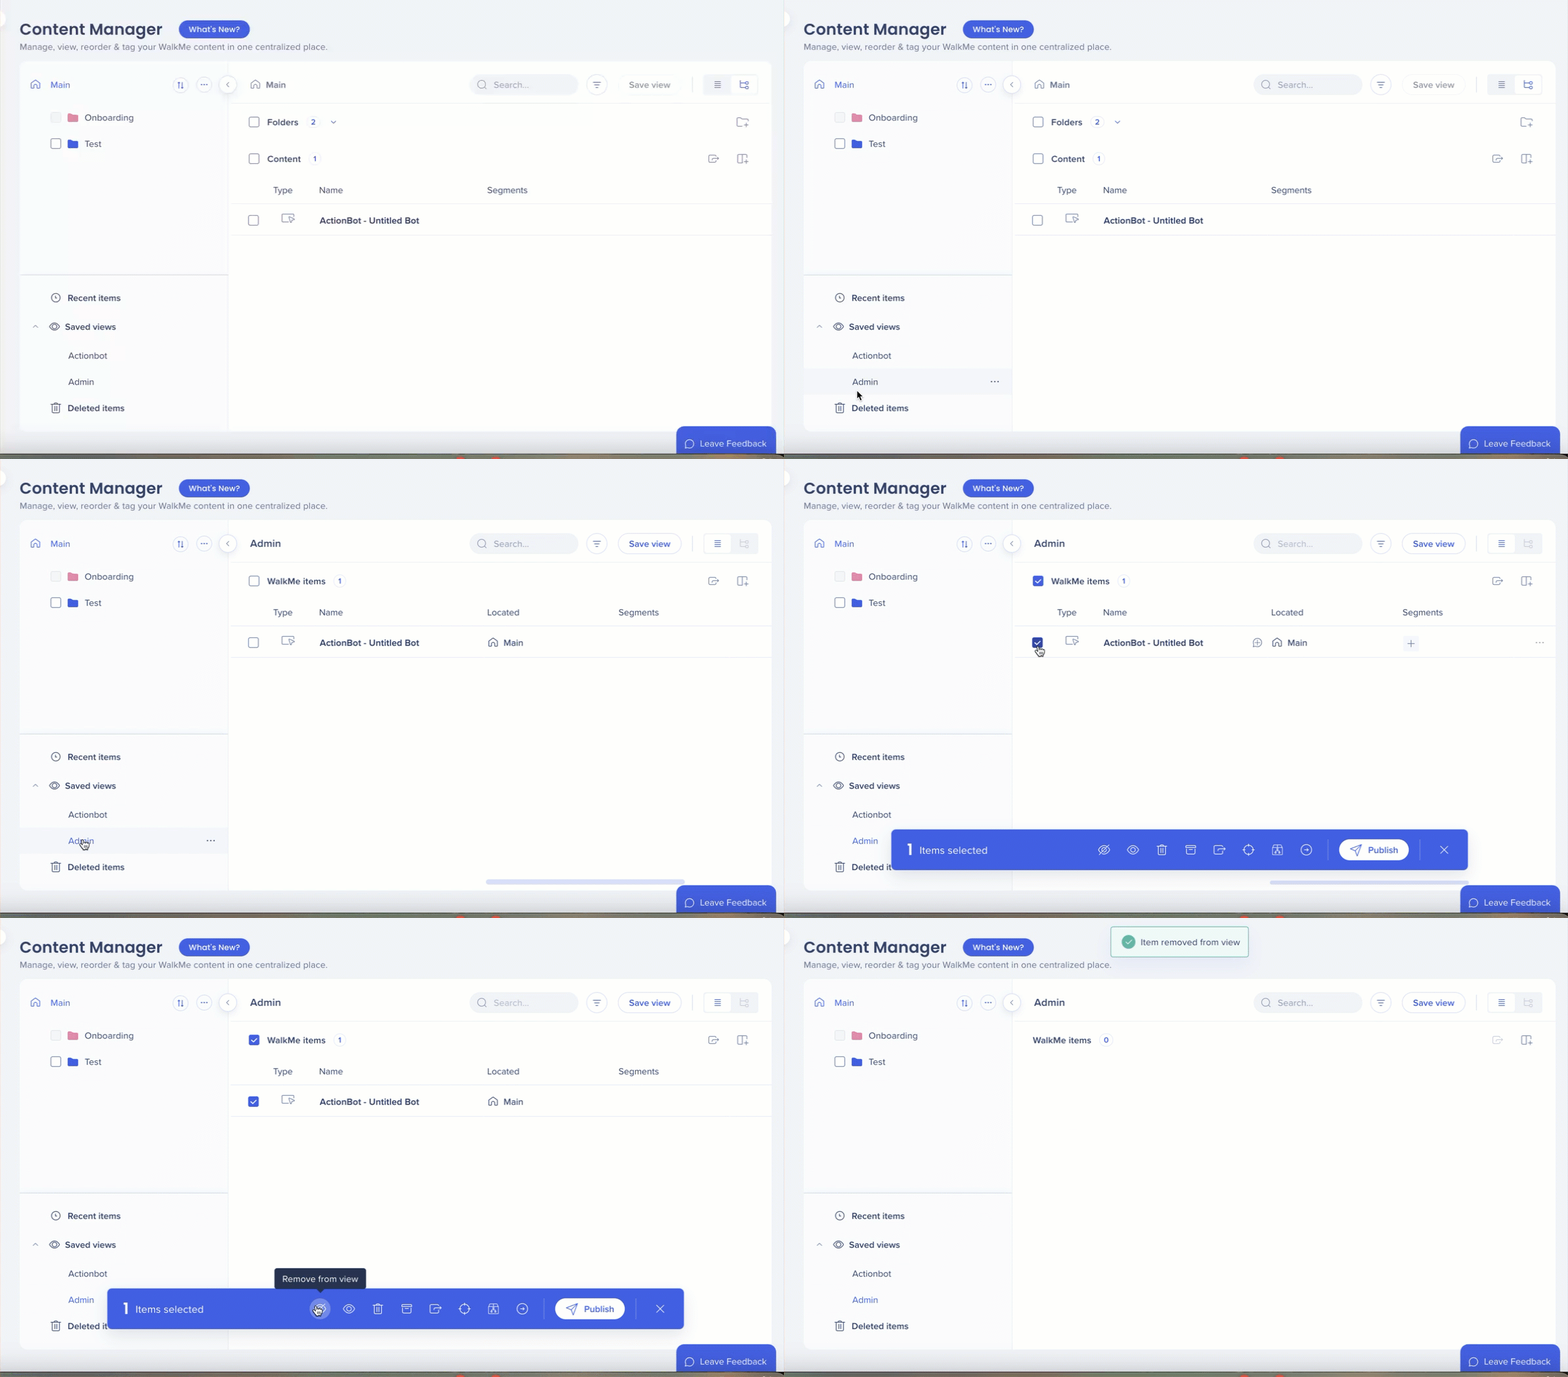
Eliminar varios elementos
Abre el menú desplegable Vistas guardadas y selecciona una vista
Selecciona varios elementos
Selecciona el icono Eliminar de la vista
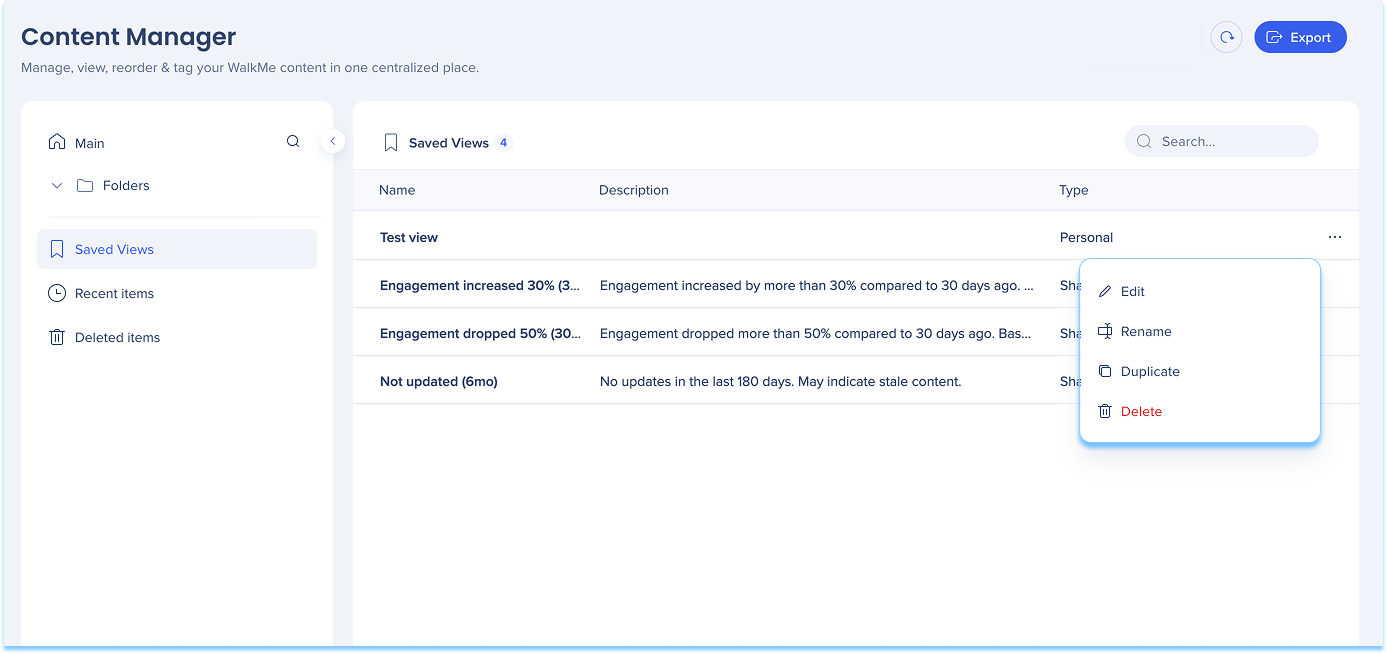
Opciones de vista
Cada vista guardada incluye acciones adicionales:
Cambiar nombre
Duplicar
Eliminar
Accede a estas opciones desde el menú desplegable Vistas guardadas.
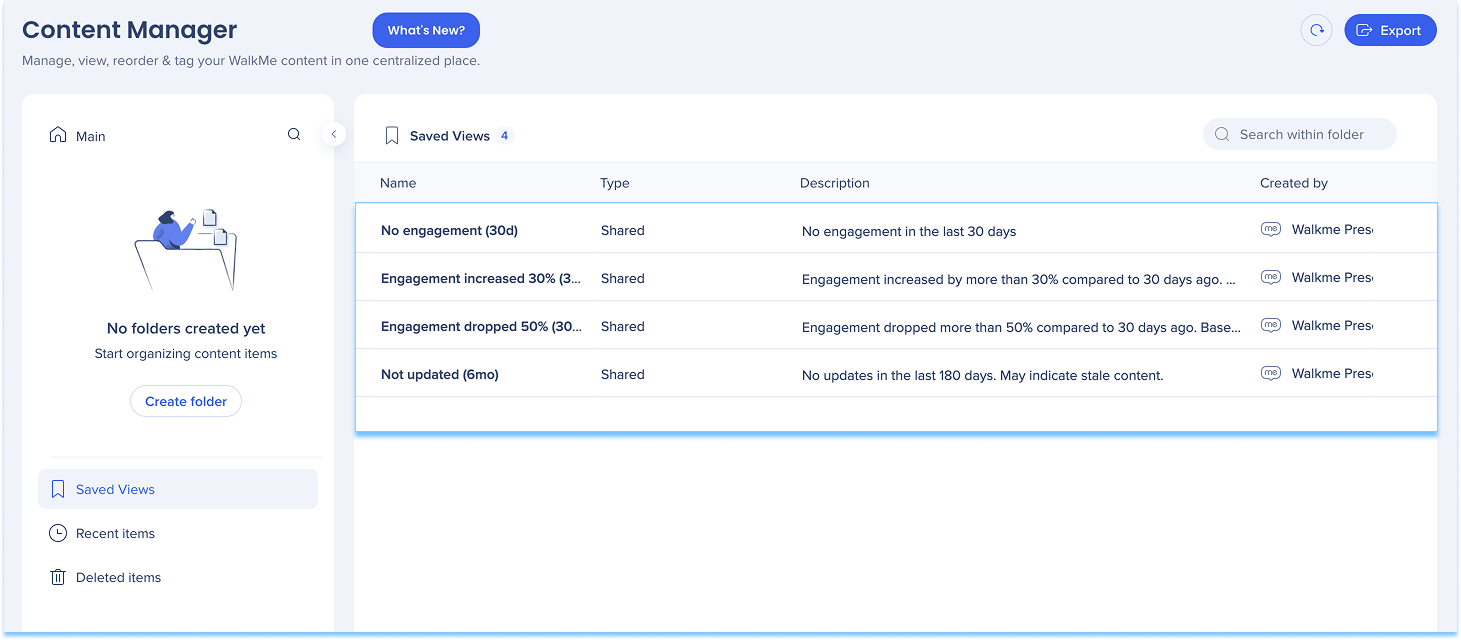
Filtros de interacción avanzados
Los filtros de interacción avanzados están predefinidos, vistas de solo lectura que ayudan a identificar el contenido que requiere atención.
La interacción ha aumentado un 30% (30d): muestra contenido con un aumento significativo en la interacción en los últimos 30 días
La interacción ha disminuido un 50% (30d): resalta el contenido con una caída pronunciada en la interacción en los últimos 30 días
No actualizado (6mo): enumera los elementos que no se han actualizado en los últimos seis meses
Sin interacción (30d): resalta contenido sin interacción en los últimos 30 días
Estas vistas se pueden recrear manualmente utilizando filtros si necesitas ajustar los criterios.
Vistas guardadas compartidas
Crea una vista guardada y compártela con otros Usuarios:
Selecciona Guardar vista
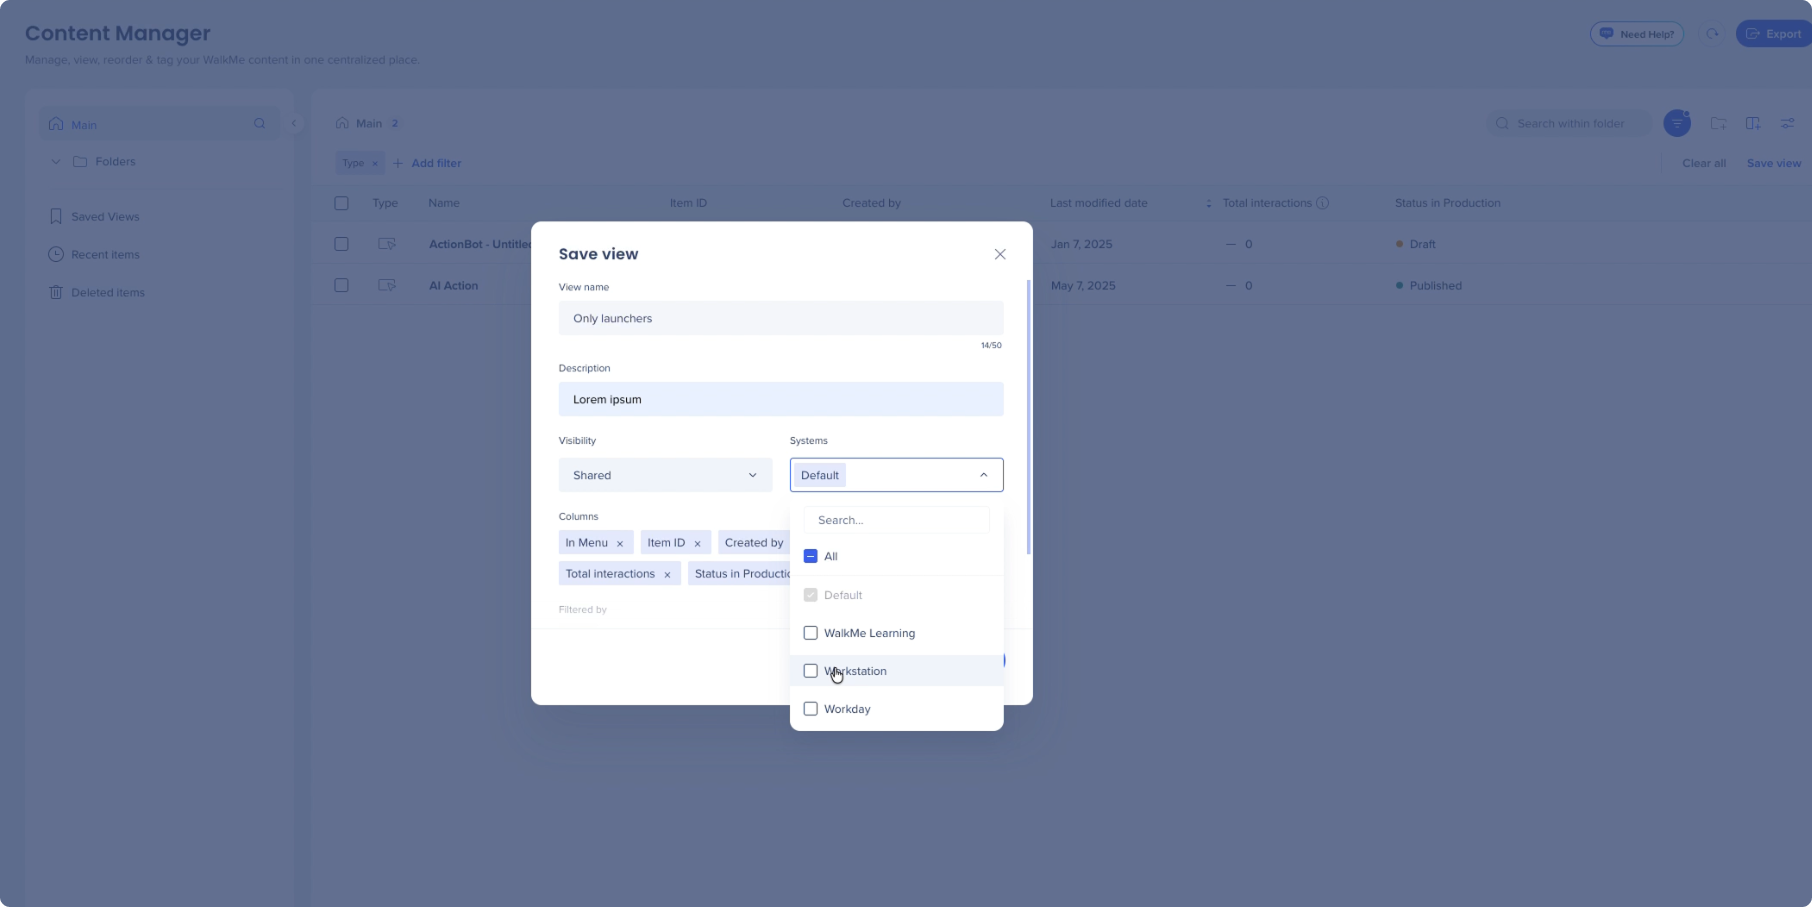
En el menú desplegable de Visibilidad, selecciona Compartido
Selecciona los sistemas en los que deseas guardar la vista
Selecciona Guardar vista
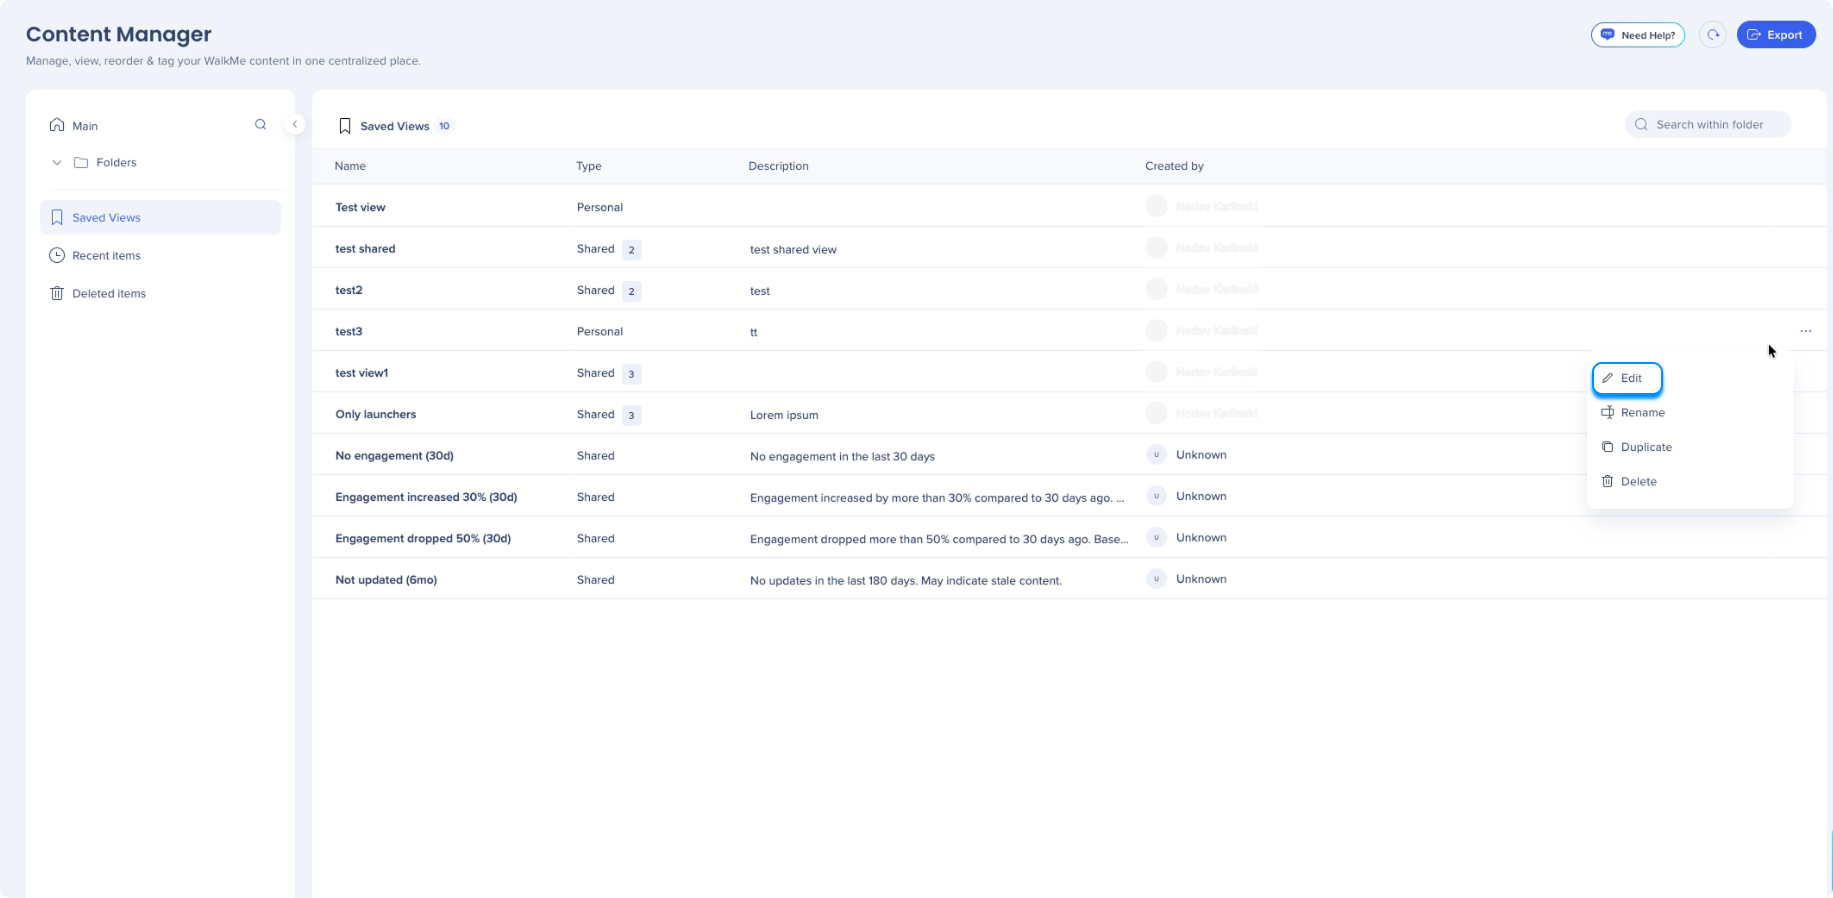
Para compartir una vista guardada existente:
Selecciona el Menú Opciones Siguiente a la vista guardada
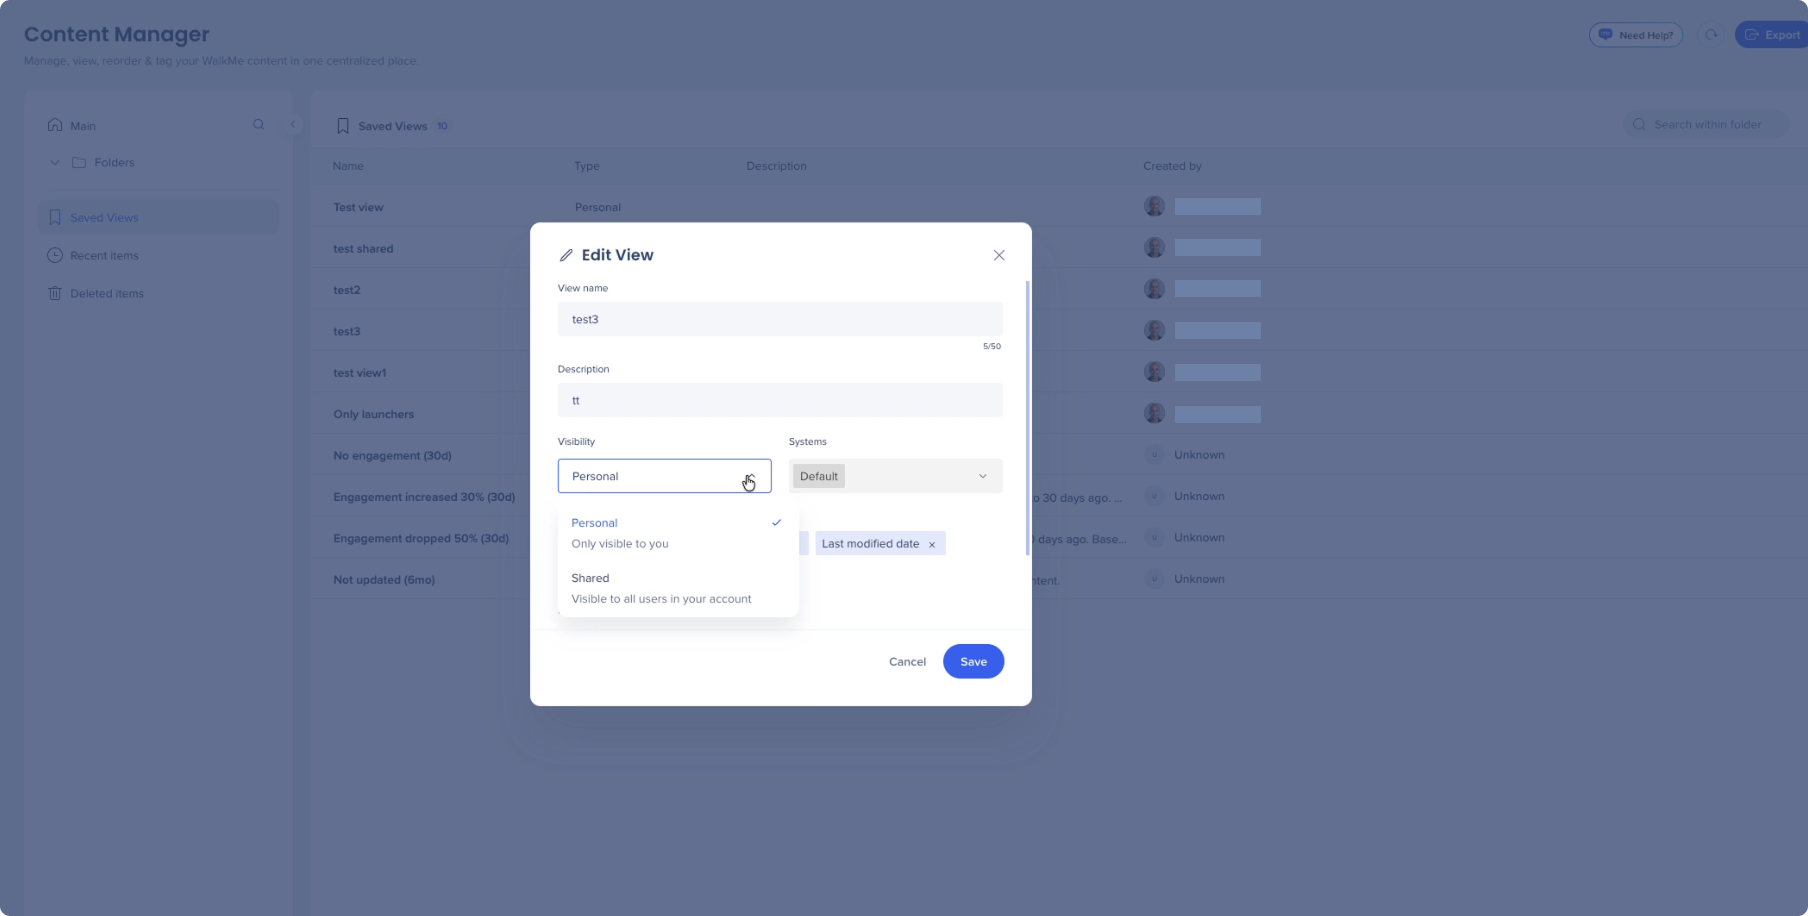
Selecciona Editar
Cambia la visibilidad a Compartido
Selecciona Guardar
Elementos recientes
Utiliza Elementos recientes para acceder rápidamente al contenido que se añadió recientemente al espacio de trabajo.
Visualización de SmartTip
Selecciona un conjunto de SmartTip para ver todos los SmartTips incluidos en ese conjunto.
Trabaja con metadatos y columnas
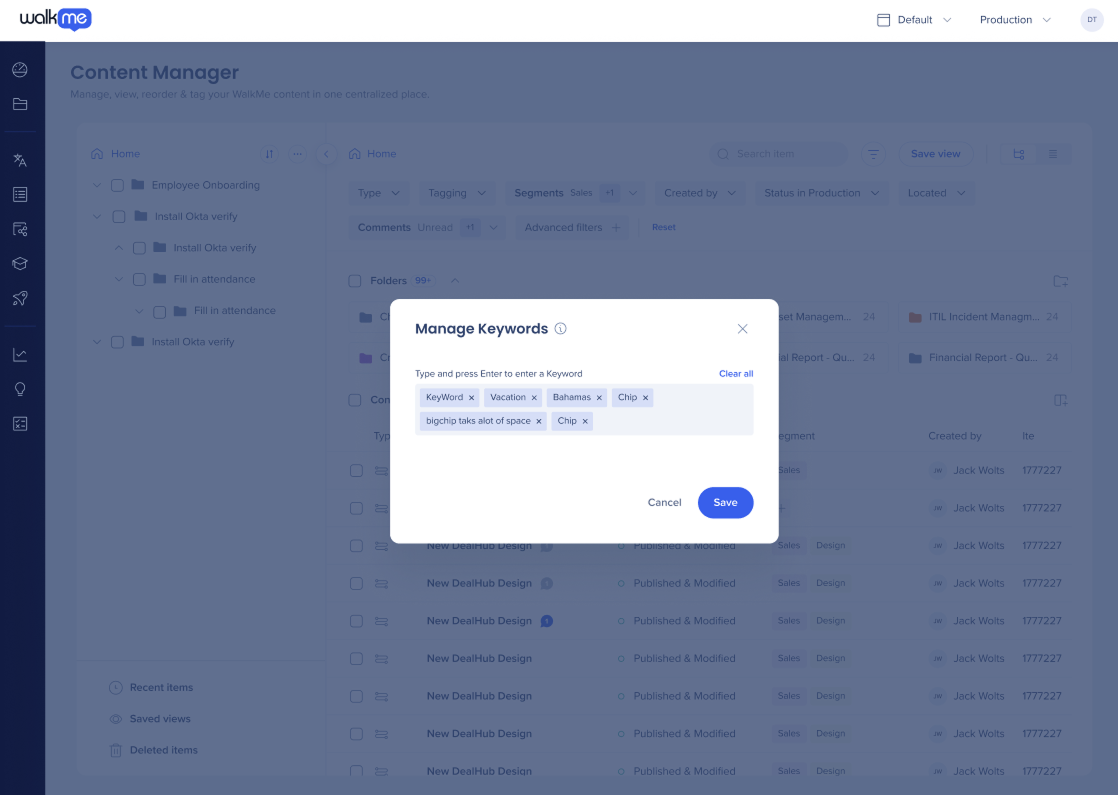
Palabras clave
Utiliza palabras clave para ayudar a buscar, filtrar y organizar contenido.
Añade palabras clave:
Selecciona Administrar columnas para mostrar la columna de palabras clave
Selecciona el icono + en la columna Palabra clave de un elemento
Introduce una palabra clave y presiona Intro
Selecciona Guardar
Administrar palabras clave:
Selecciona una palabra clave en la columna Palabra clave
En la ventana Administrar palabras clave:
Selecciona x para eliminar una palabra clave
Introduce una nueva palabra clave y presiona Intro para añadir una
Selecciona Guardar
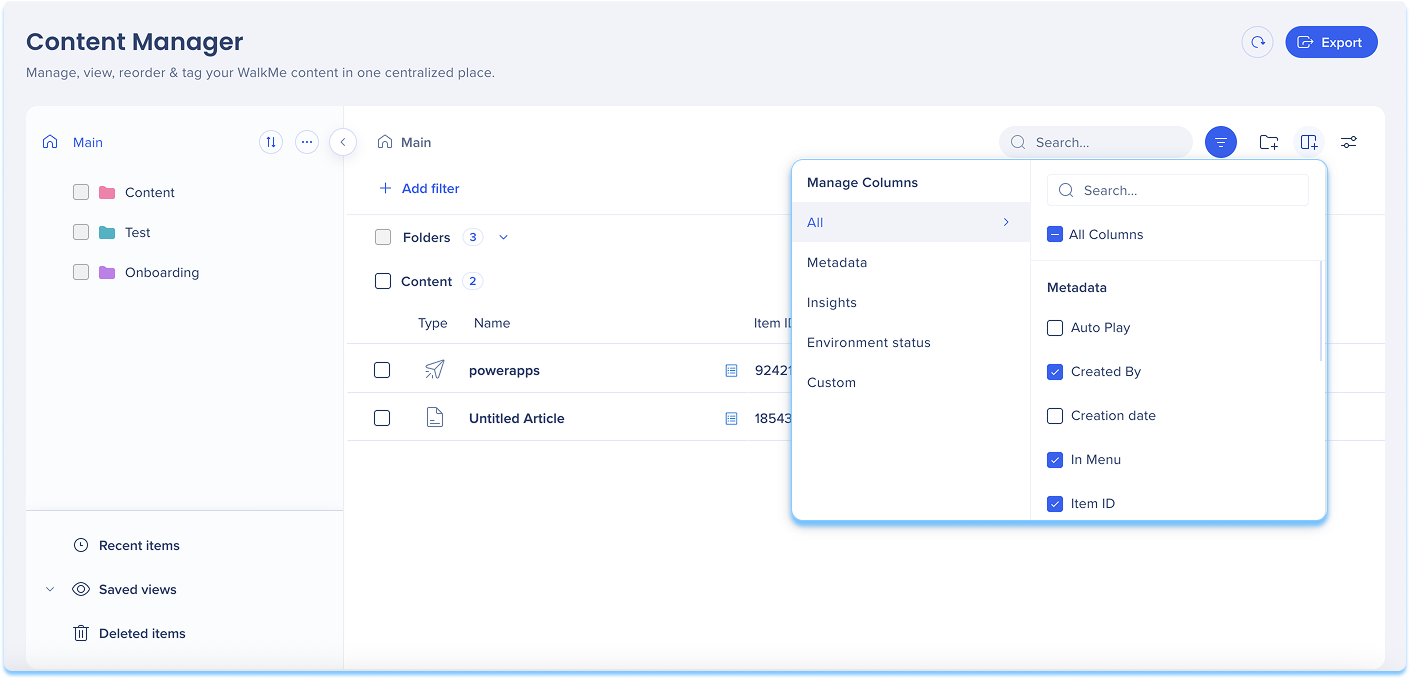
Administrar columnas
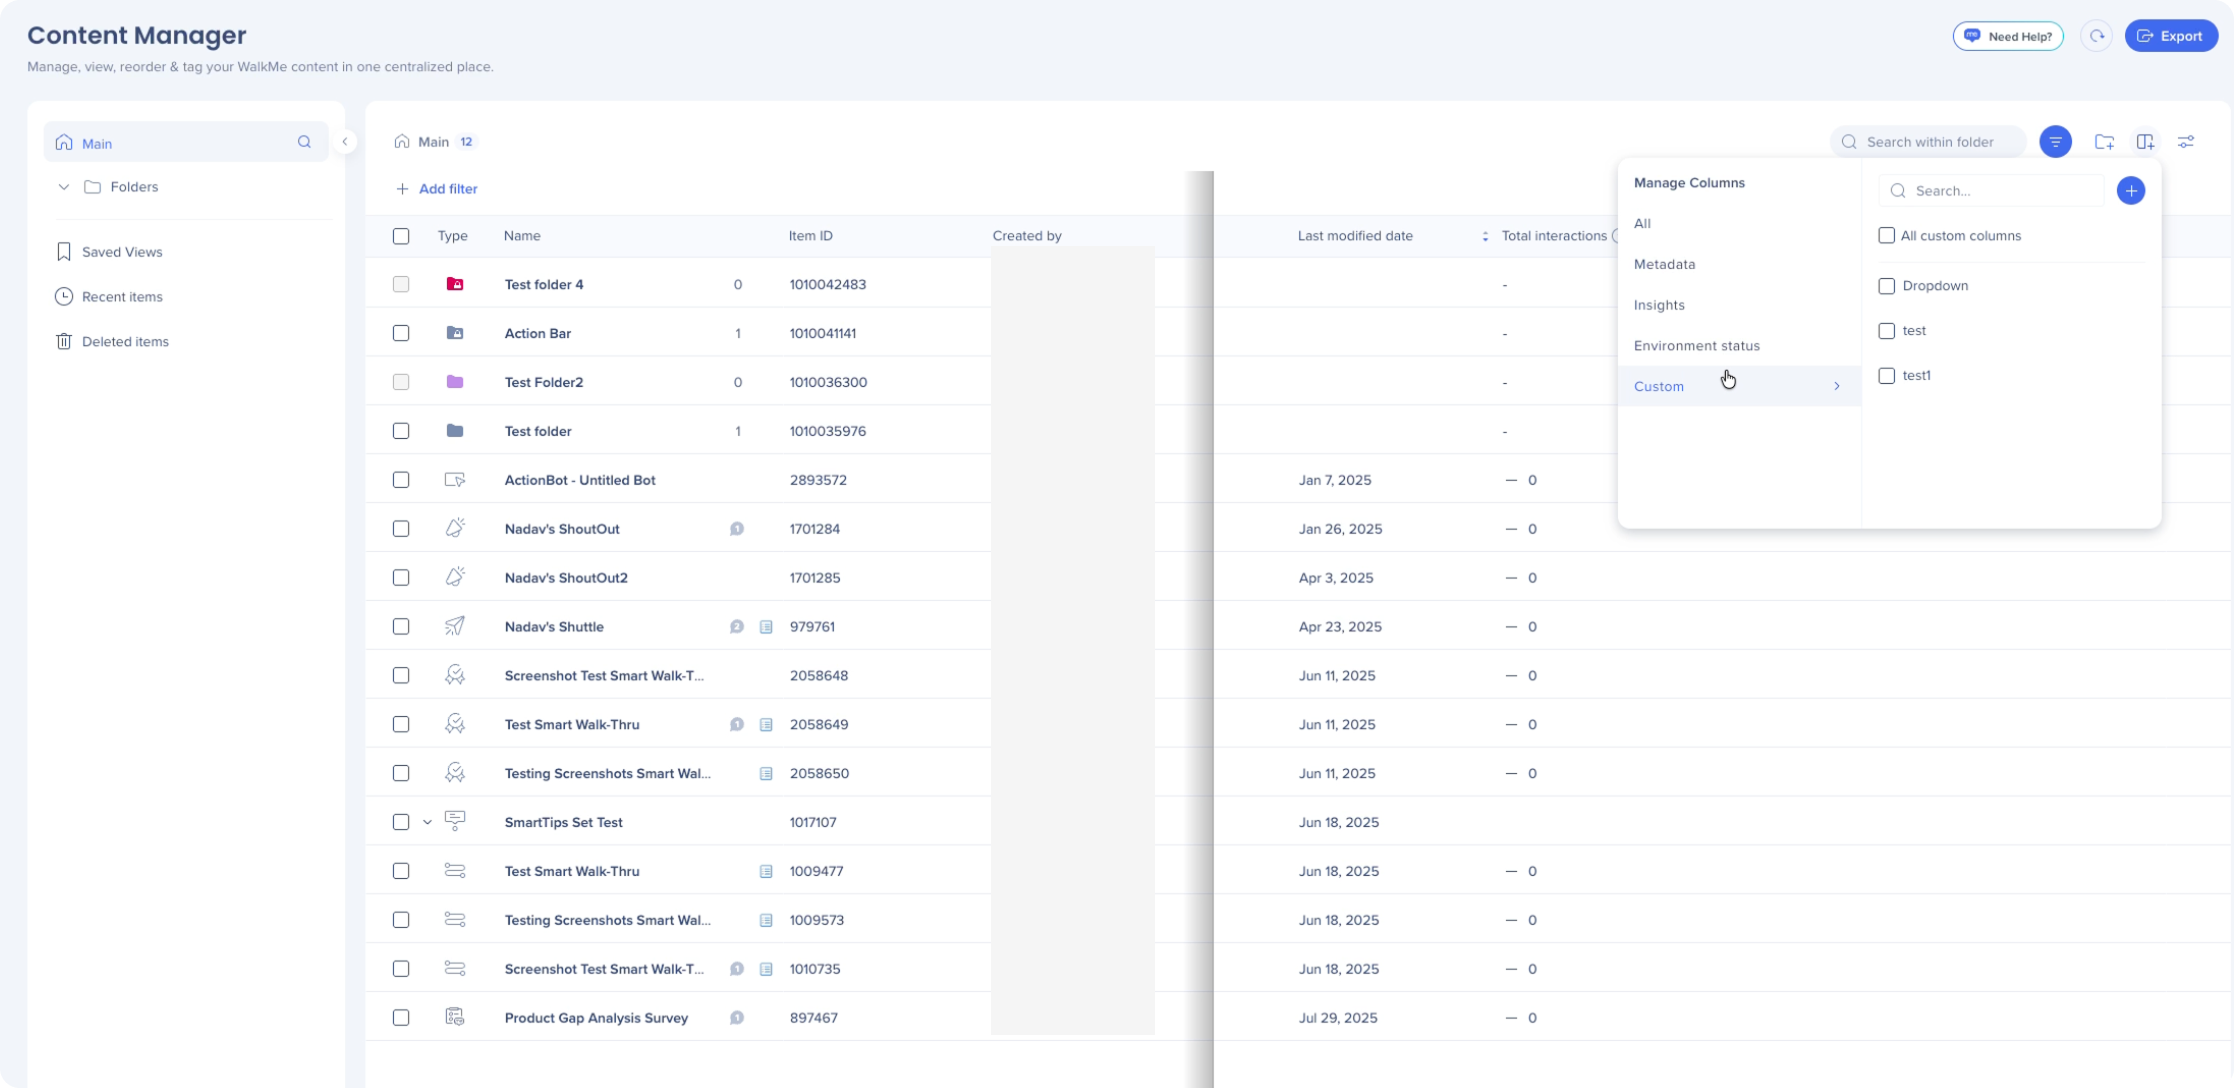
Utiliza la gestión de columnas para controlar qué datos aparecen en la tabla.
Selecciona Administrar columnas
Selecciona las columnas que deseas mostrar u ocultar
Las columnas Tipo y Nombre son siempre visibles.
Columna de fecha de última modificación
The Last Modified Date column reflects content changes.
It shows past data on all items
It does not include modifications to:
Global CSS
Segment rules connected to the item
Shared assets, such as images
Status changes, such as publishing or archiving
Nota
The editor description field is synced with the Content Manager, letting you view, edit, filter, and export descriptions without switching tools
Descriptions for Smart Walk-Thrus are not yet supported in the Content Manager
Campos de metadatos personalizados
Los campos de metadatos personalizados te permiten realizar un seguimiento y administrar información adicional para elementos. Los metadatos aparecen en la tabla y el cajón de elementos y se pueden utilizar para clasificar, filtrar y actualizar masivamente.
Crear un campo personalizado
Selecciona Administrar columnas
Pasa el cursor sobre Personalizado
Selecciona el icono +Añadir en el panel Administrar columnas
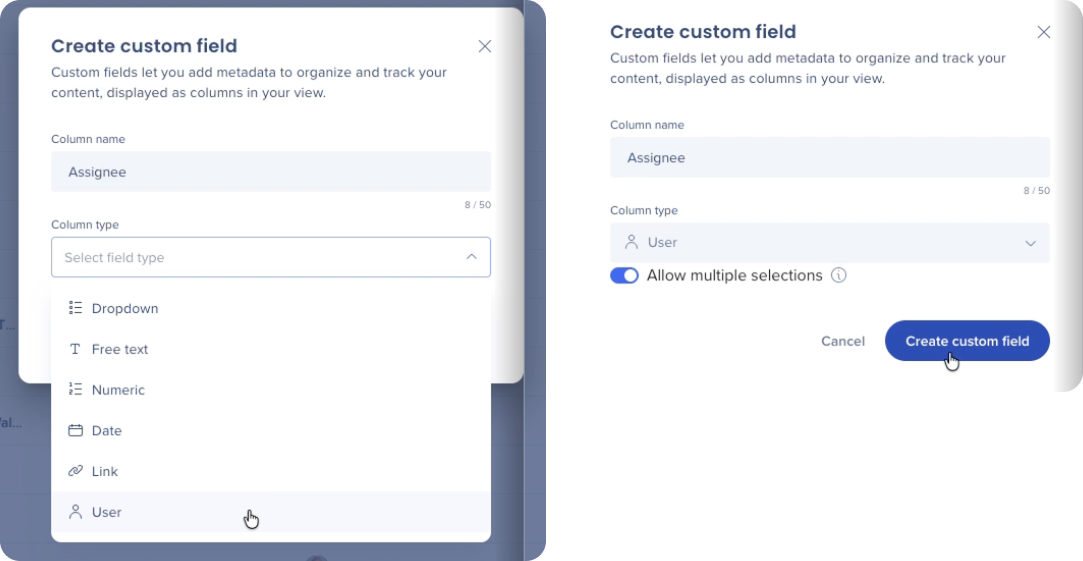
Introduce un nombre de columna
Elige un tipo de columna:
Texto libre
Menú desplegable
Fecha
Enlace
Numérico
Usuario
Opcional: activa Aplicar a todos los sistemas para que el campo sea visible en todos los entornos
Opcional: activa Permitir selecciones múltiples si deseas poder seleccionar varias instancias, por ejemplo, Usuarios en la cuenta
Selecciona Crear campo personalizado
Nota
Only admins can create custom metadata fields
Each account can have up to 100 custom metadata fields
Editar valores de metadatos
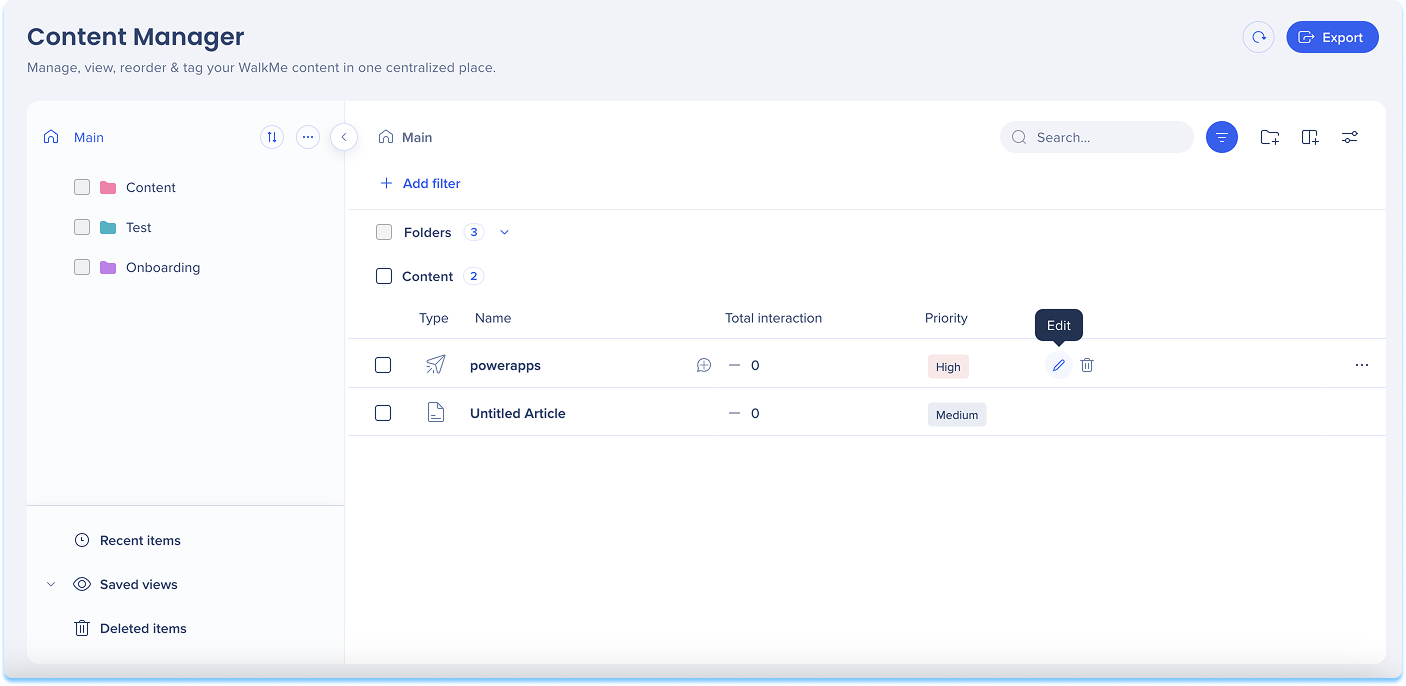
Editar un solo elemento
Localiza el elemento en la tabla
Selecciona el campo de metadatos
Introduce o selecciona un valor
Selecciona Guardar
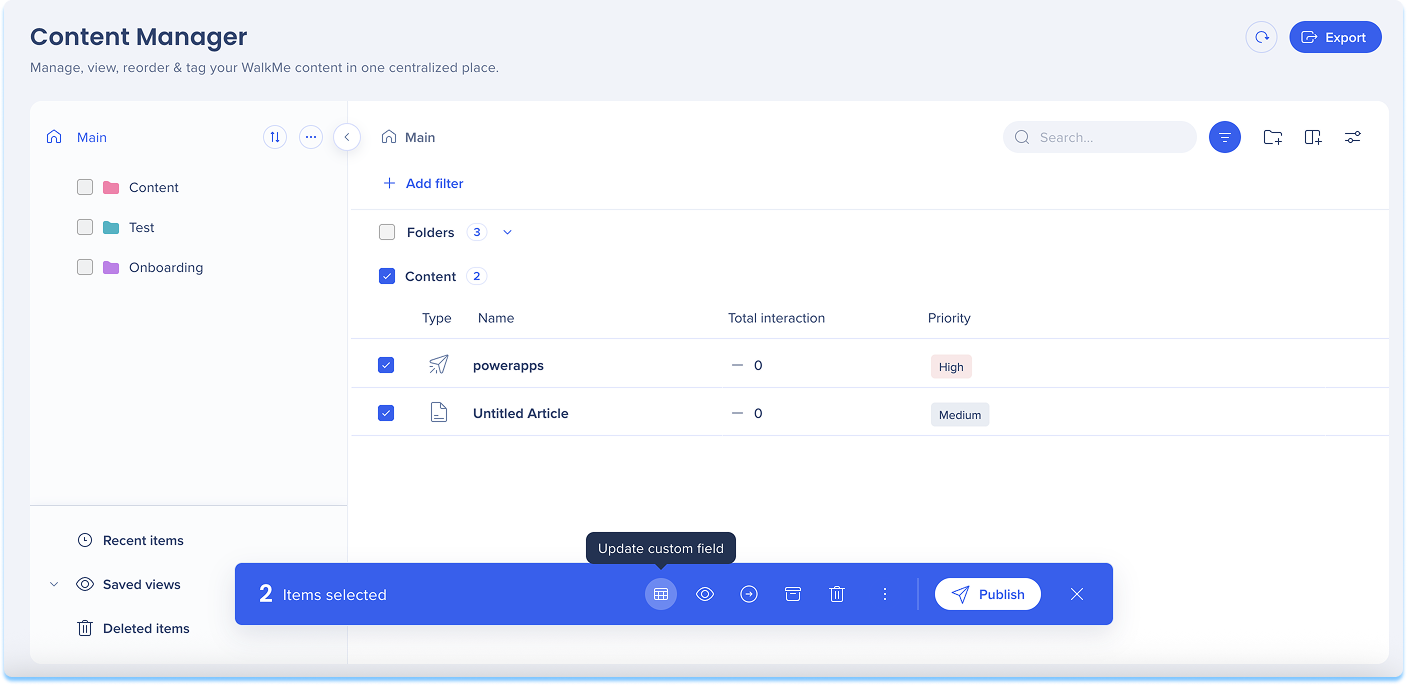
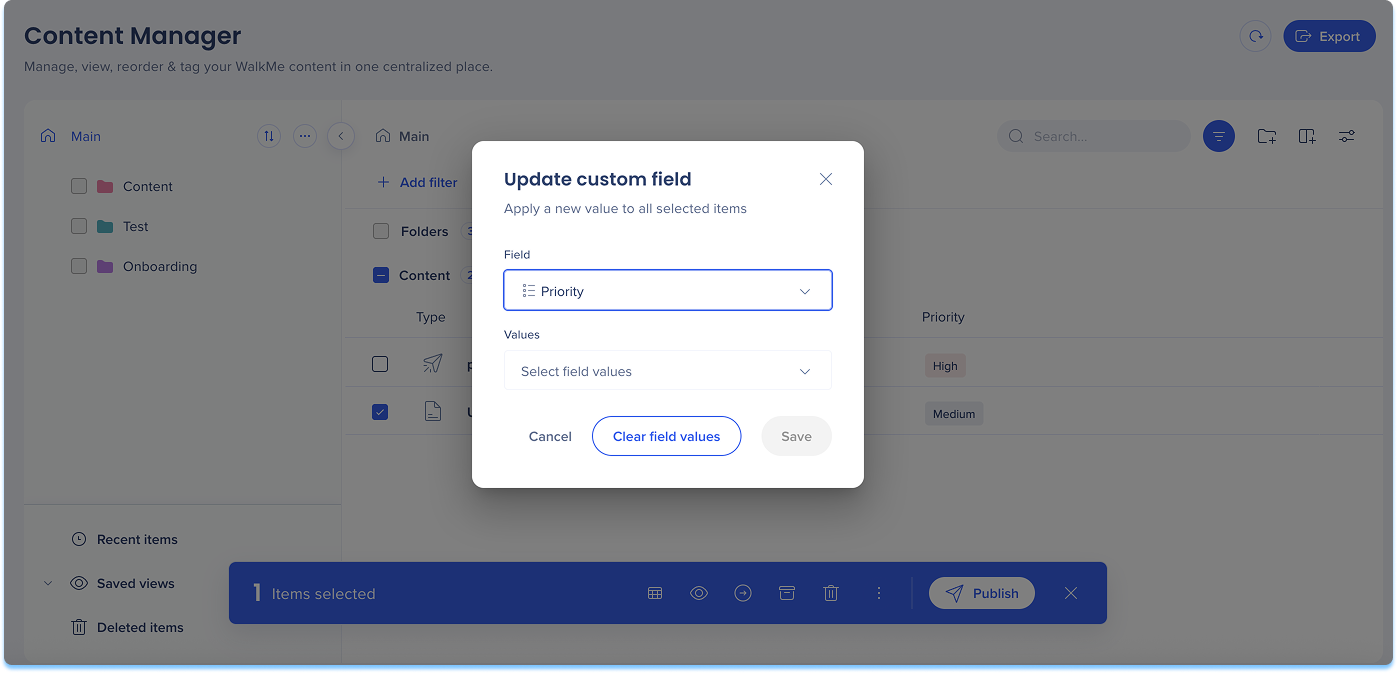
Editar varios elementos
Selecciona varios elementos
Selecciona el icono Editar campo personalizado
Elige un campo e introduce un valor
Selecciona Guardar
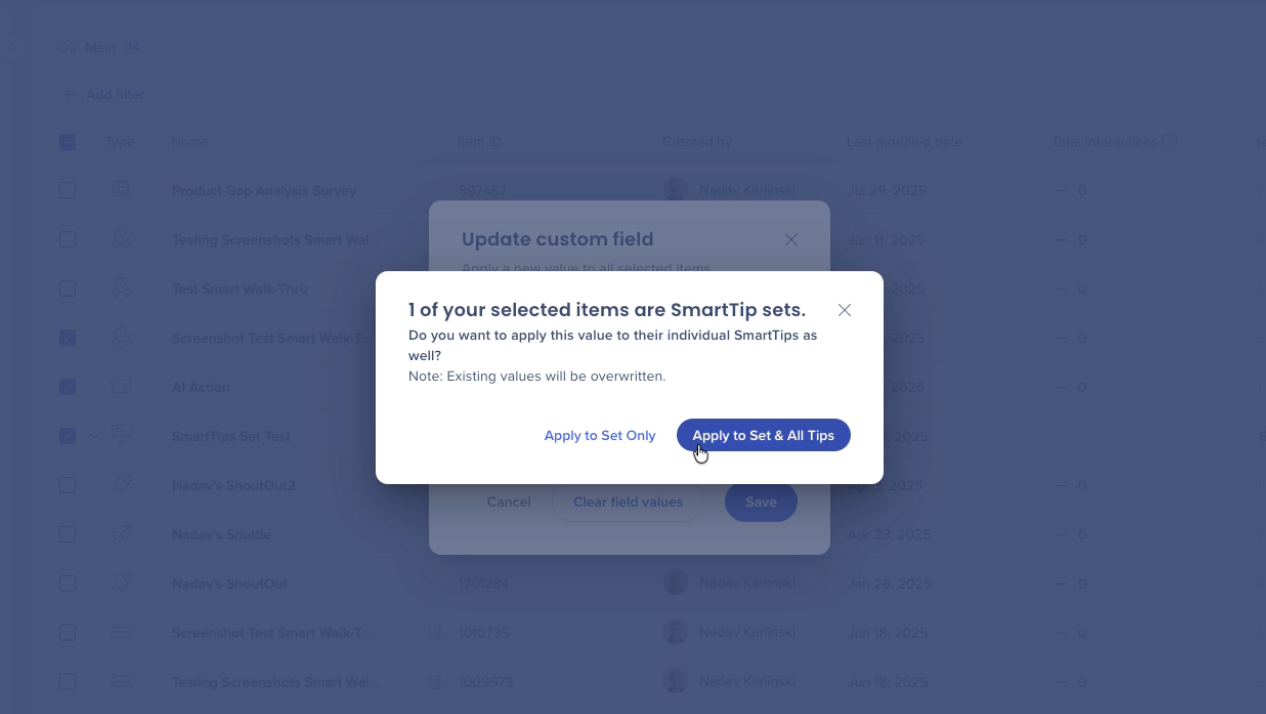
Edita un conjunto de SmartTip:
Selecciona la casilla de verificación junto al conjunto que deseas actualizar
Haz clic en el icono Actualizar campo personalizado en la barra de herramientas flotante
Introduce o selecciona el valor
Elige si deseas aplicar el valor a todos los SmartTips del conjunto o solo al conjunto
Borrar valores de metadatos
Selecciona los elementos que contienen los valores que deseas eliminar
Selecciona el icono Editar campo personalizado
Elige el campo
Selecciona Borrar valores de campo
Nota
This will remove the data for all selected items. This action cannot be undone.
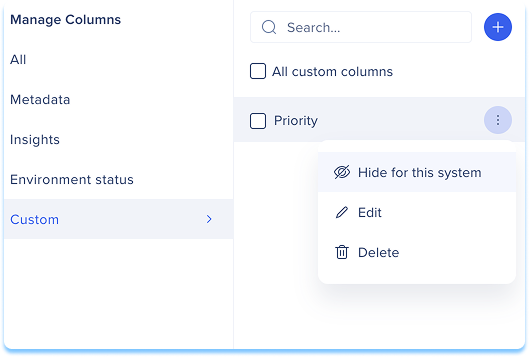
Show or hide custom fields
Select Manage Columns
Scroll to the Custom section
Select Hide for this system or Show for this system
Nota
Ocultar una columna solo la elimina de la vista. No elimina datos ni valores de los elementos.
Platform-Specific and Advanced Features
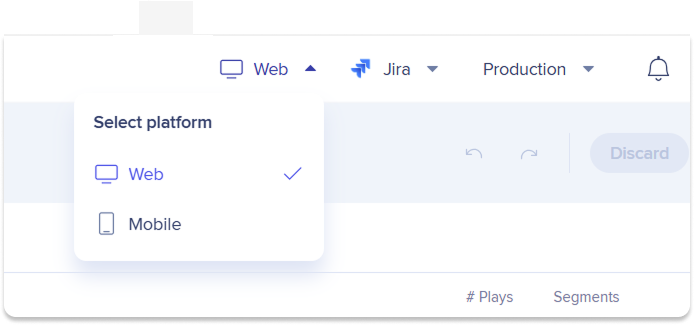
Switch platforms
If your account includes both web and mobile platforms, you can switch between them to manage platform-specific items.
Use the platform selector to:
View items created for a specific platform
Manage content without leaving Content Manager
Surveys
You can open Console Survey items directly in the Surveys console app from Content Manager.
Select Open in Surveys to open the item in the Surveys console