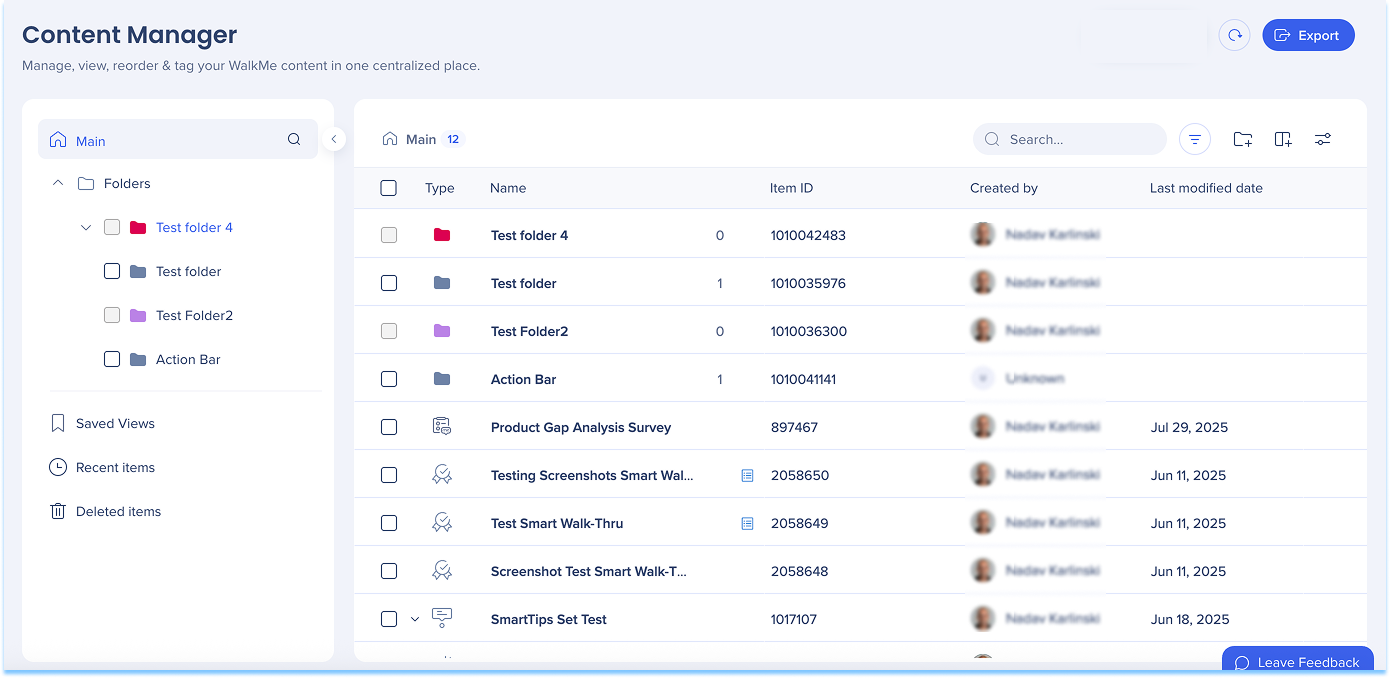
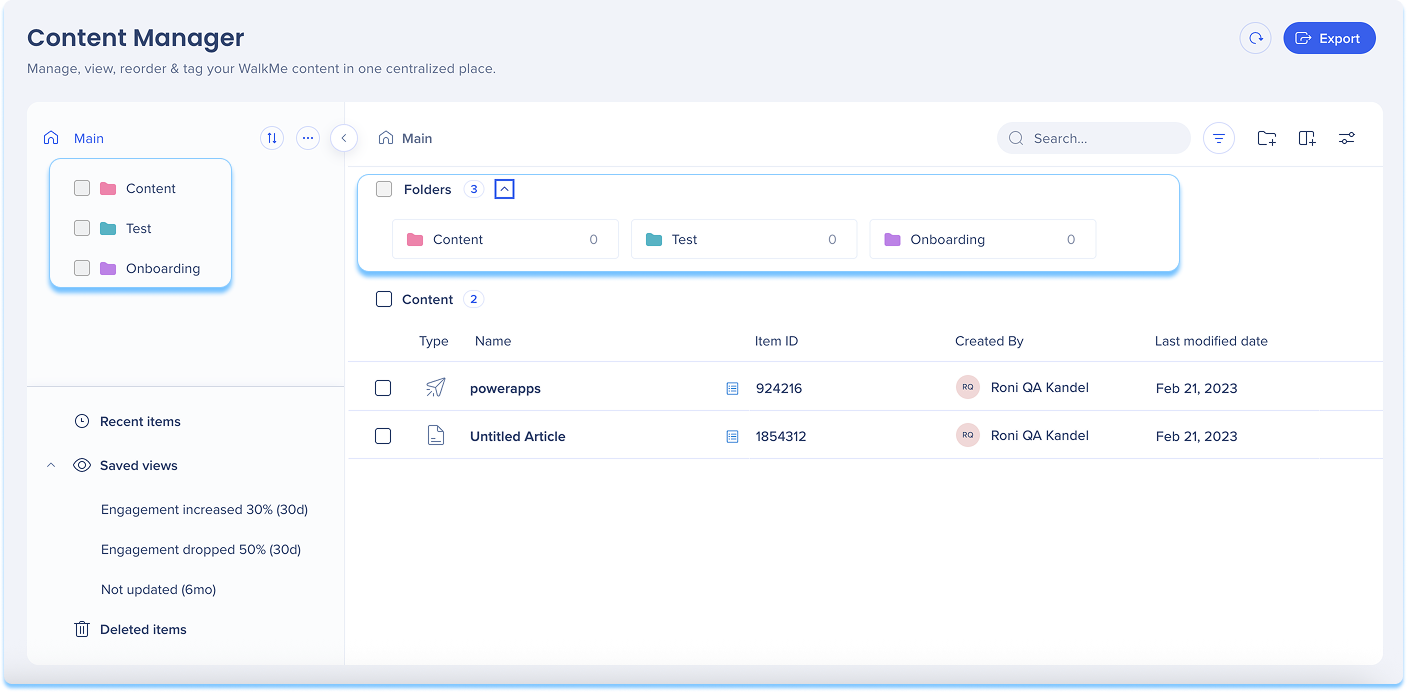
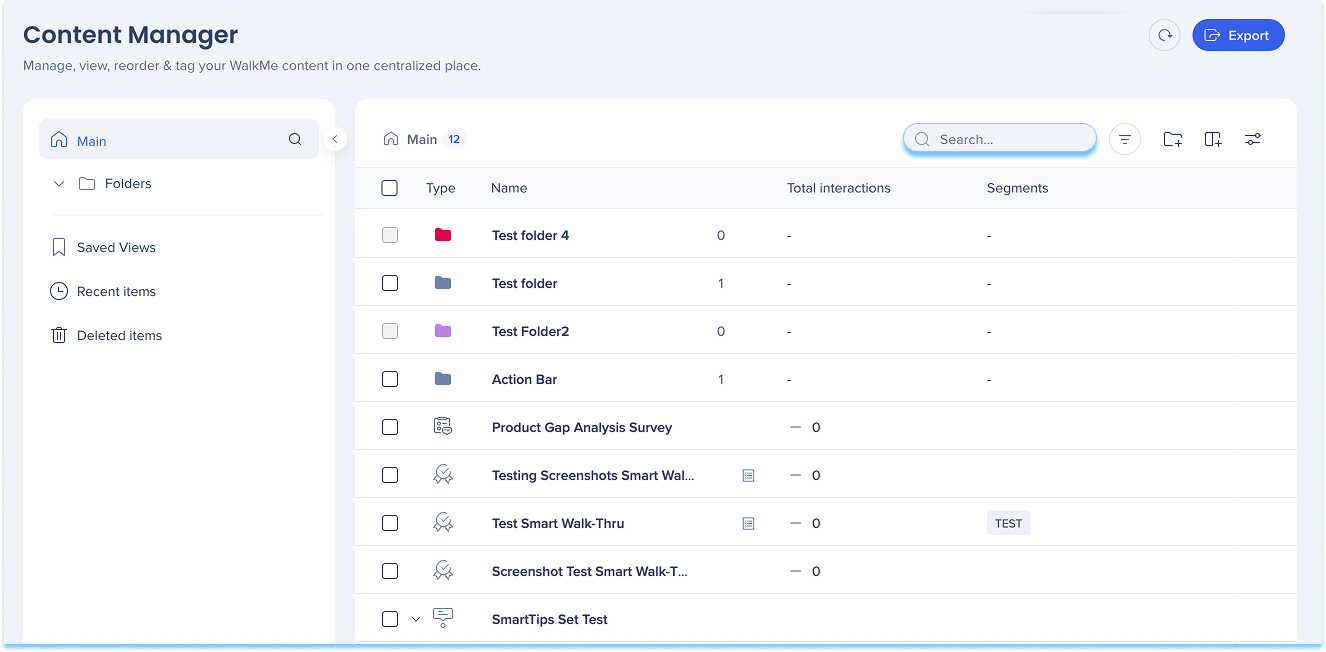
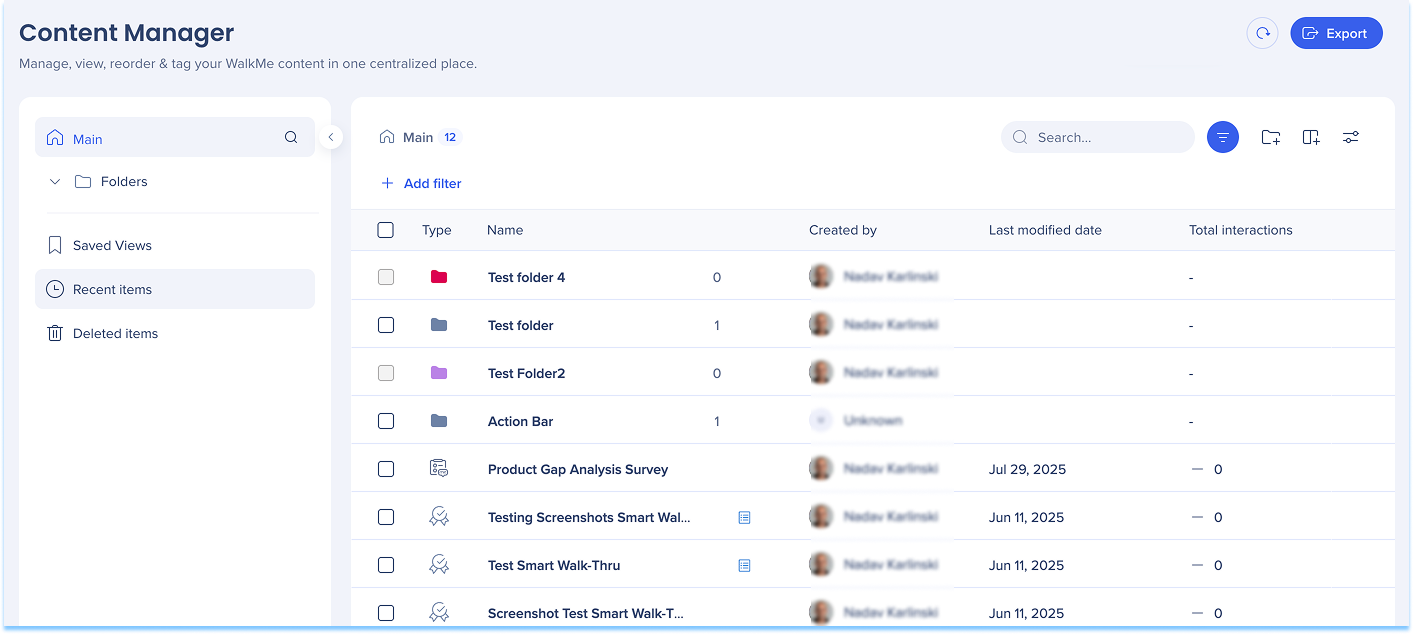
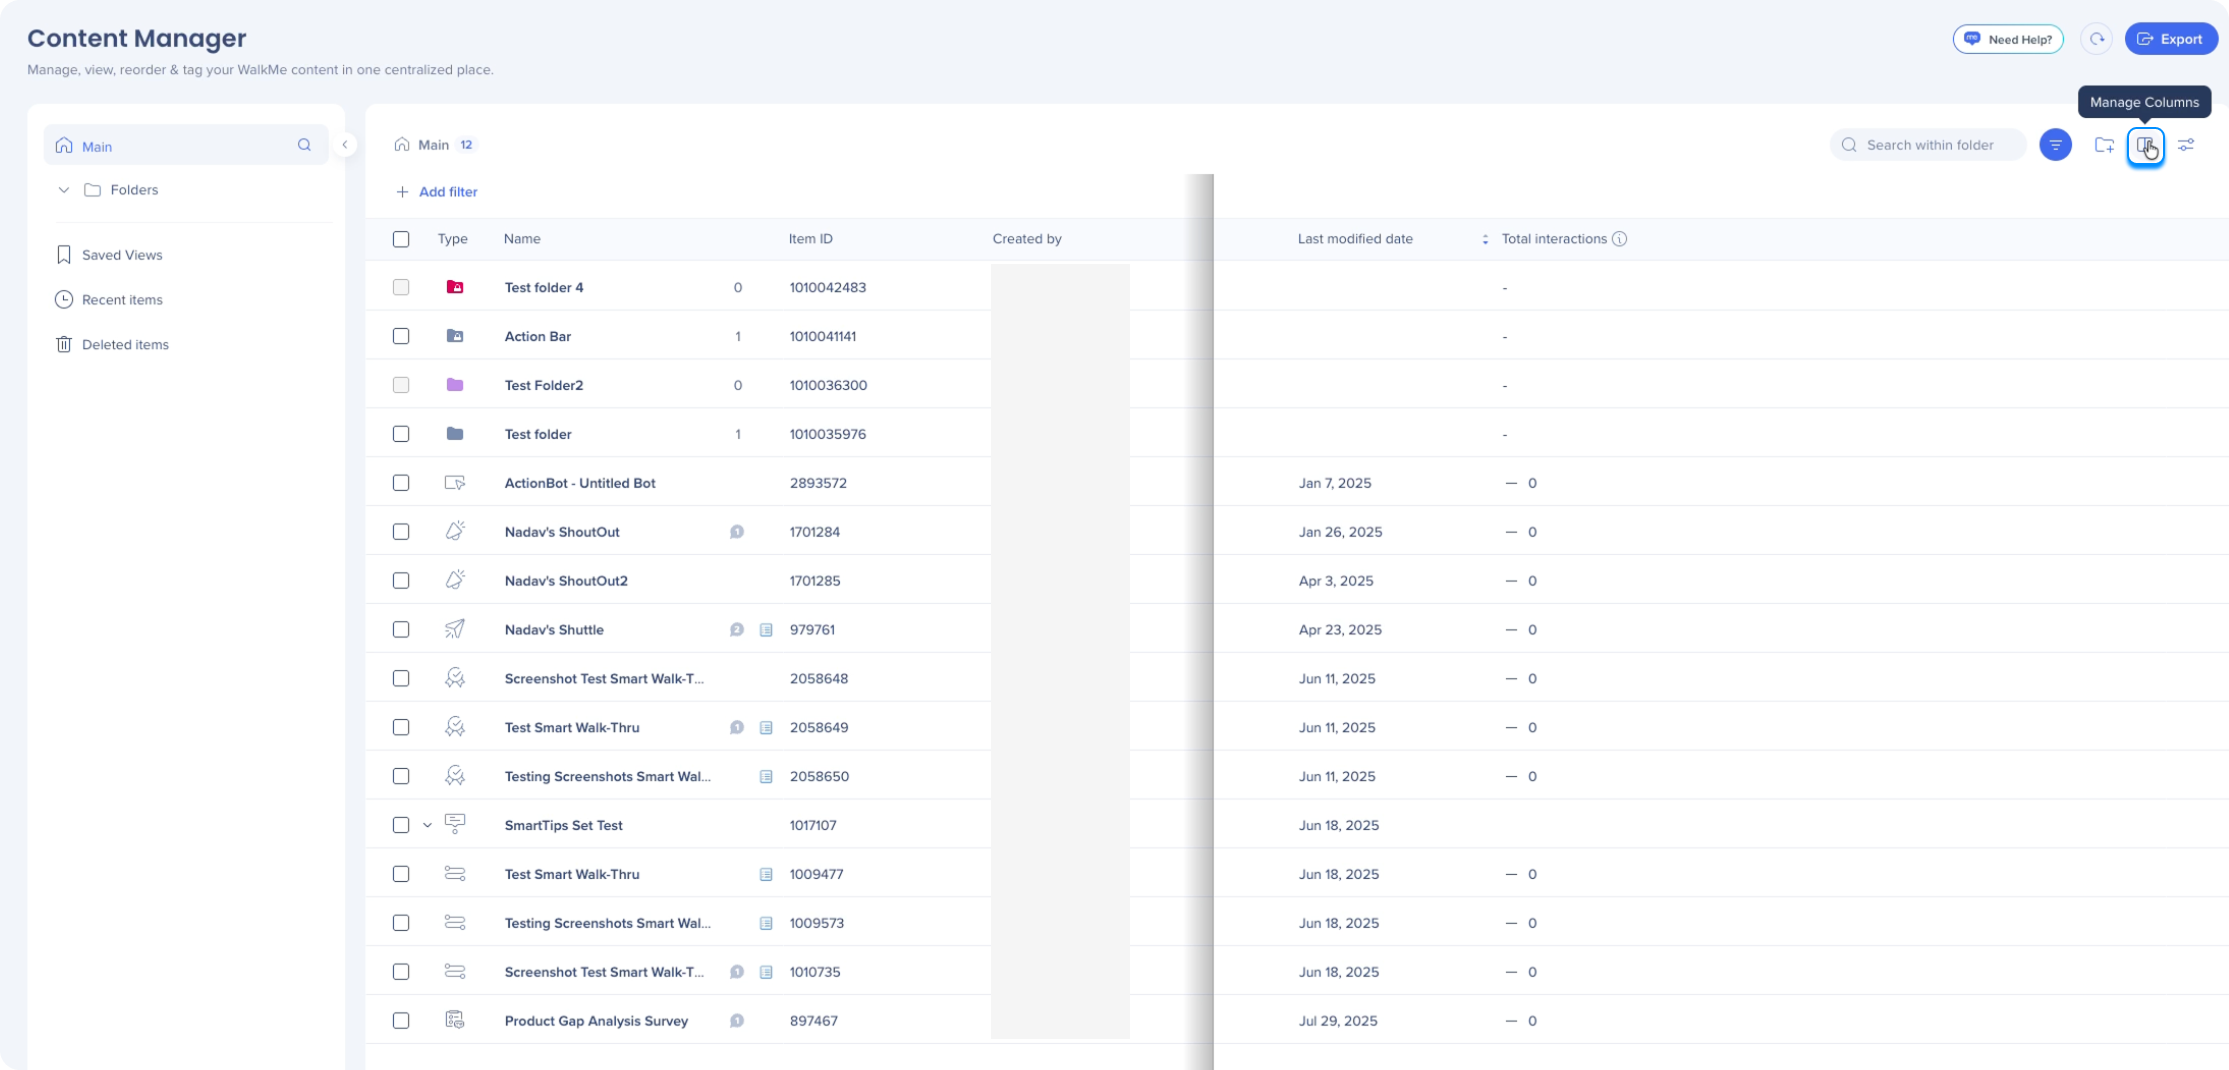
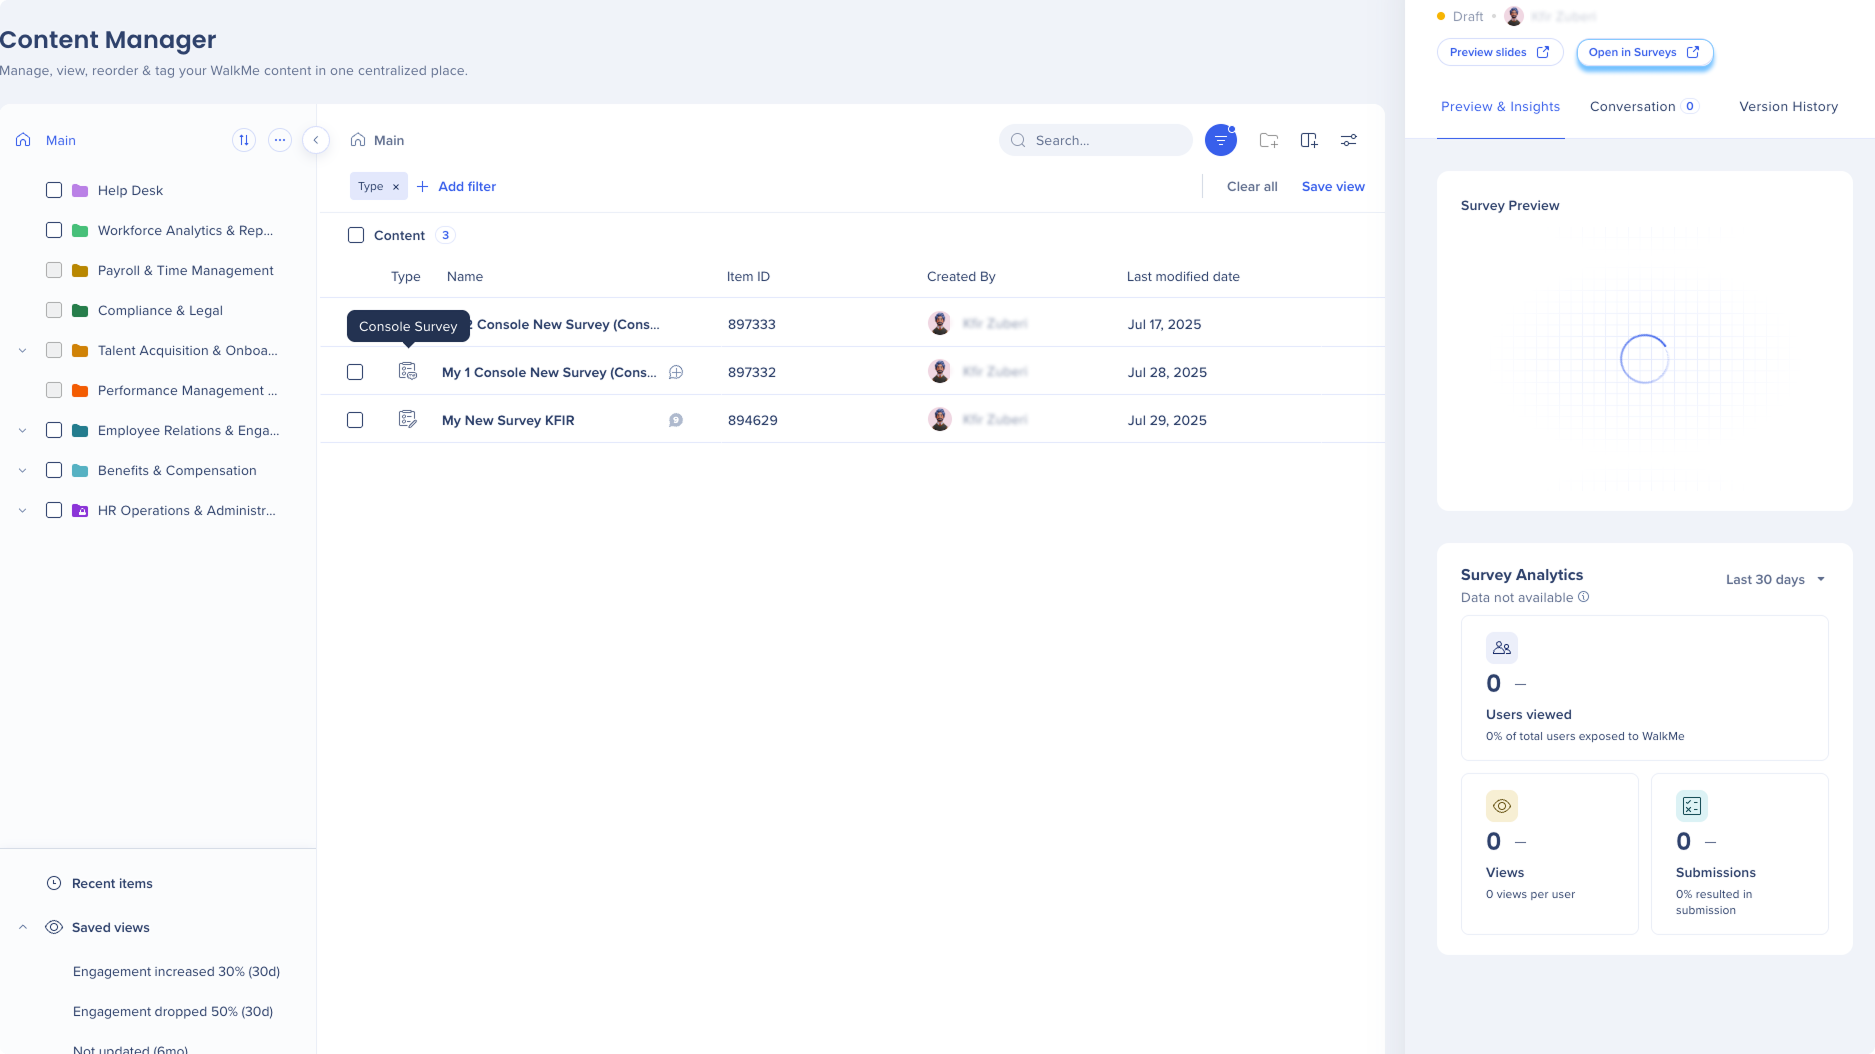
Content Manager provides a centralized workspace for managing WalkMe items. It includes a table-based interface that supports flexible views for organizing content, collaborating with teammates, and opening items in the editor.
Folders appear in the left panel and organize items hierarchically. Select a folder to view its contents in the main list. In Tree view, folders also appear directly in the list.
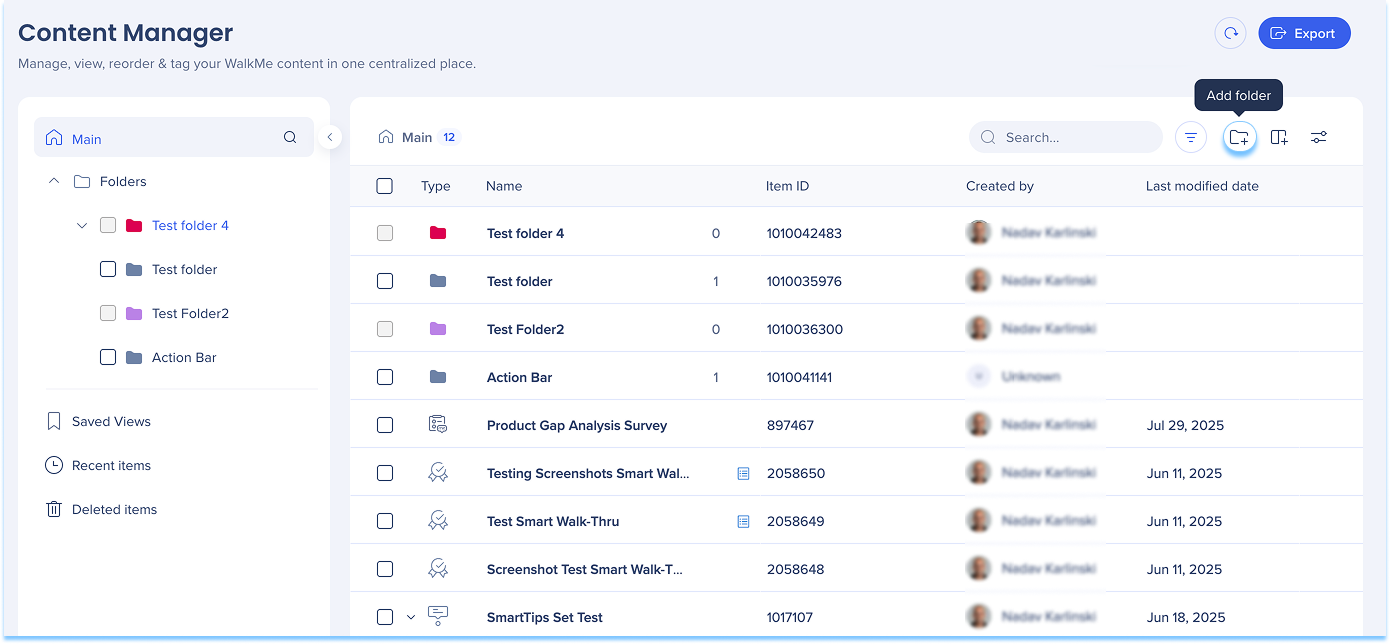
Creating a folder
Select Folder +, or
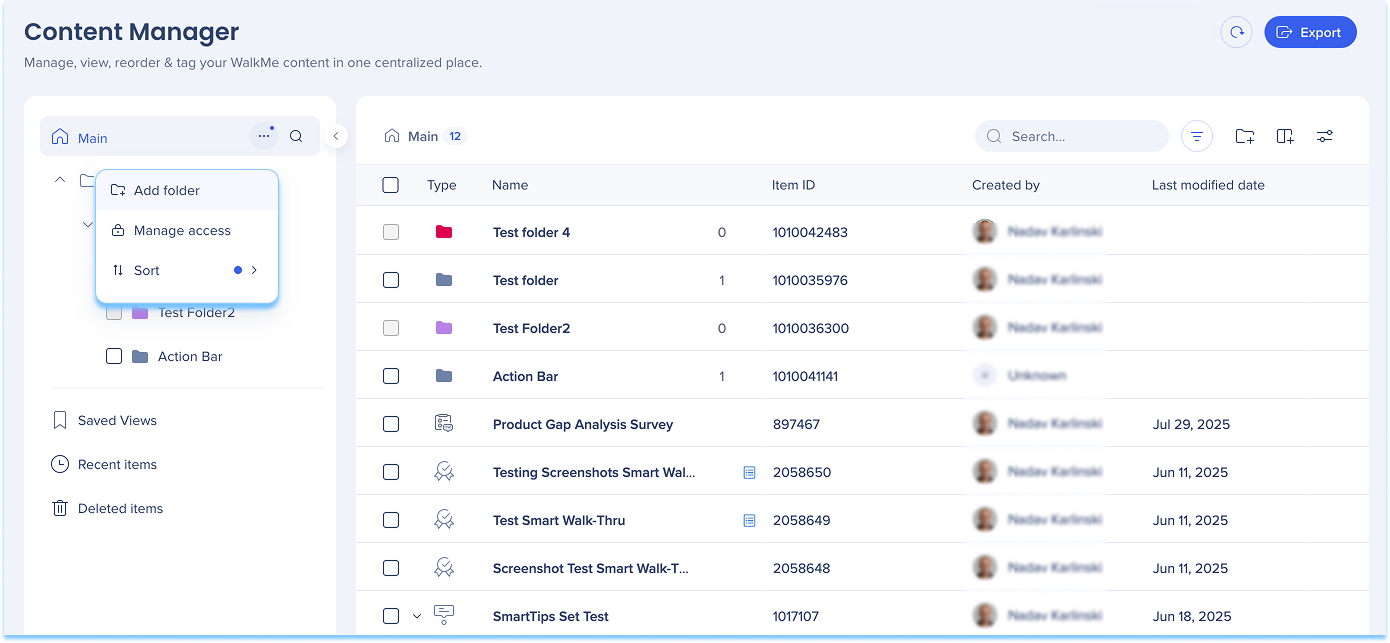
Open the Options menu and select Add Folder
Enter a folder name and select a color
Select Add folder
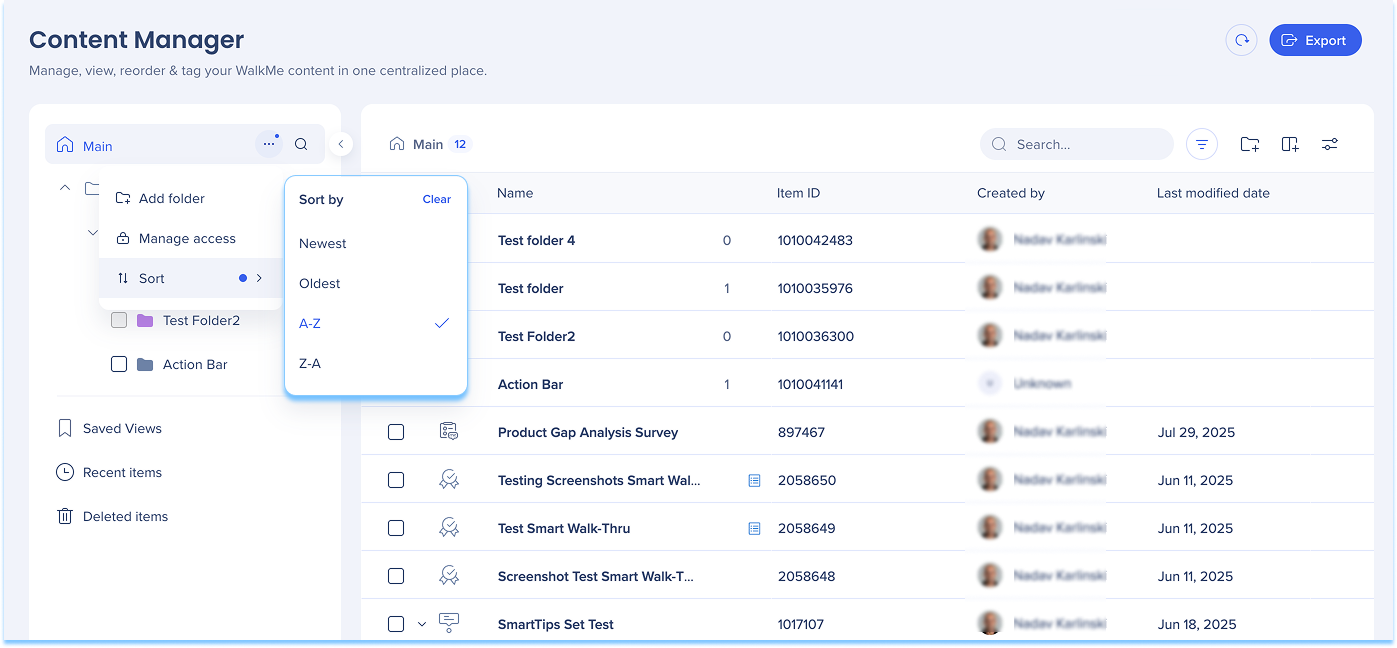
Sort folders
Select the Sort icon
Choose a sort order:
Newest
Oldest
A-Z
Z-A
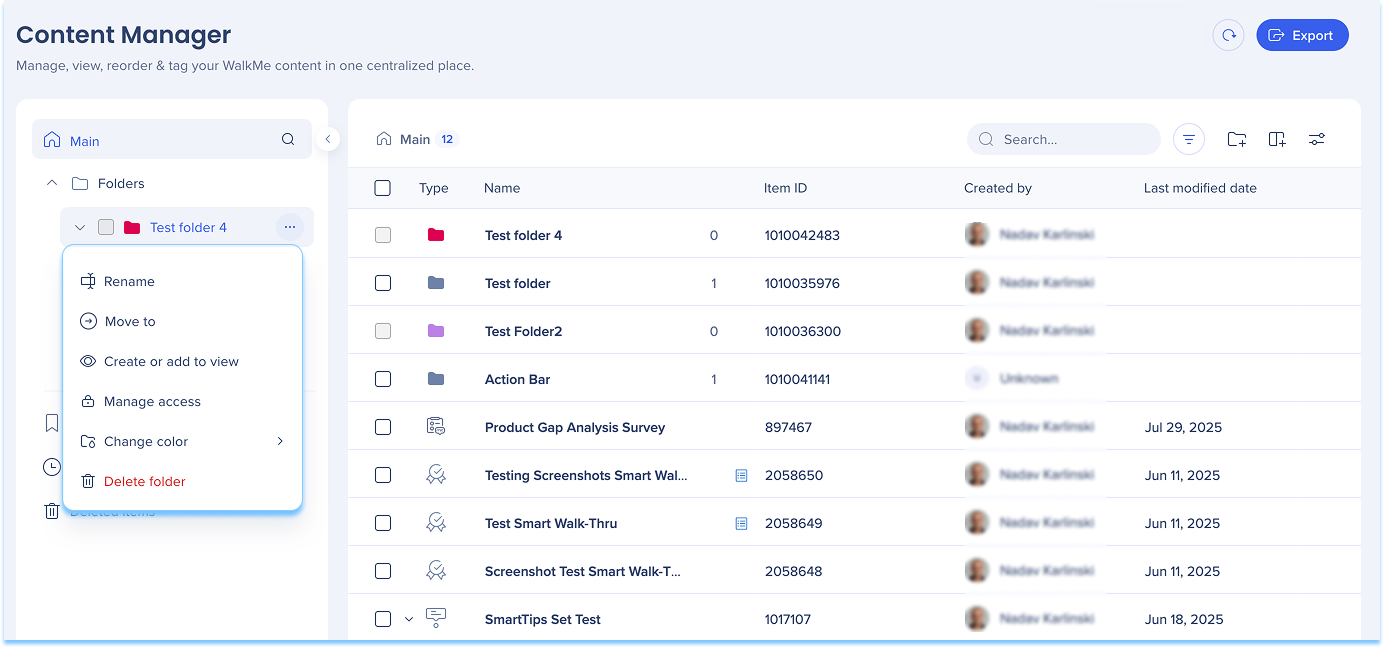
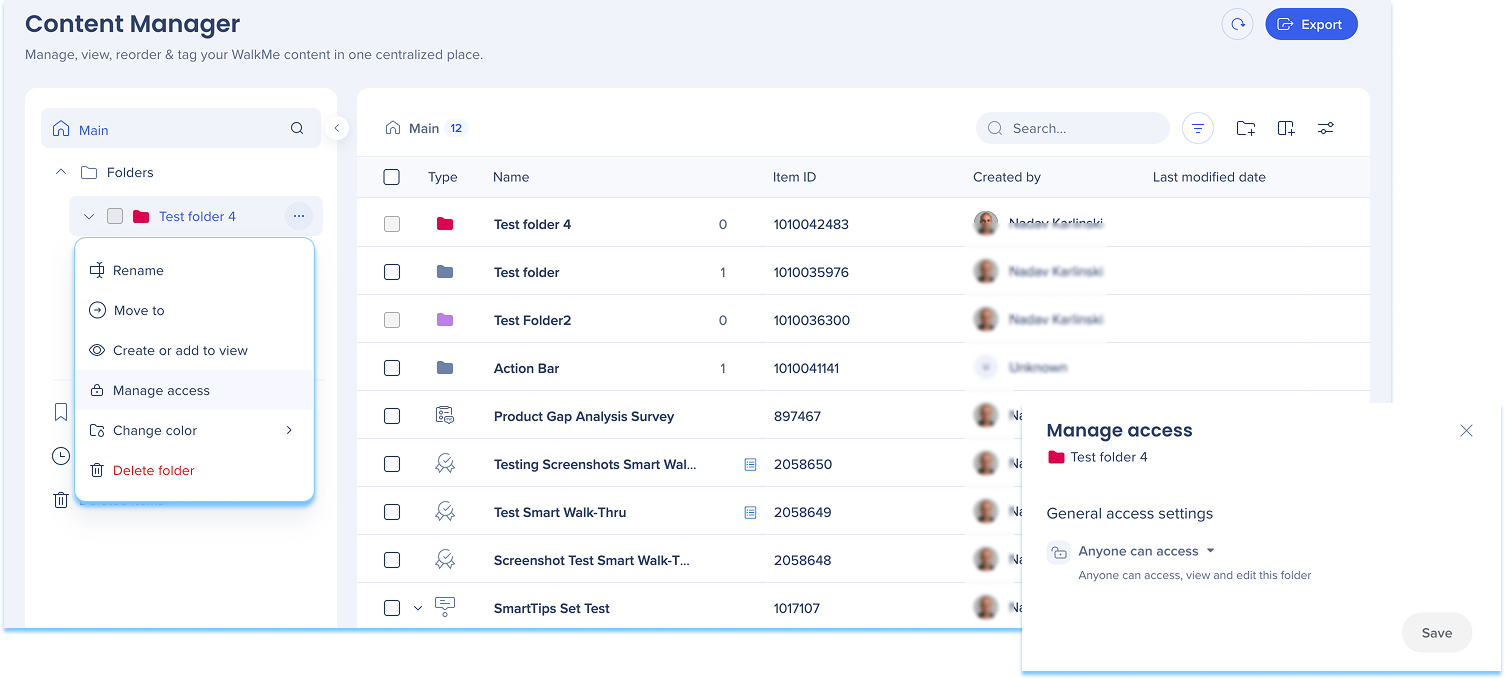
Folder actions
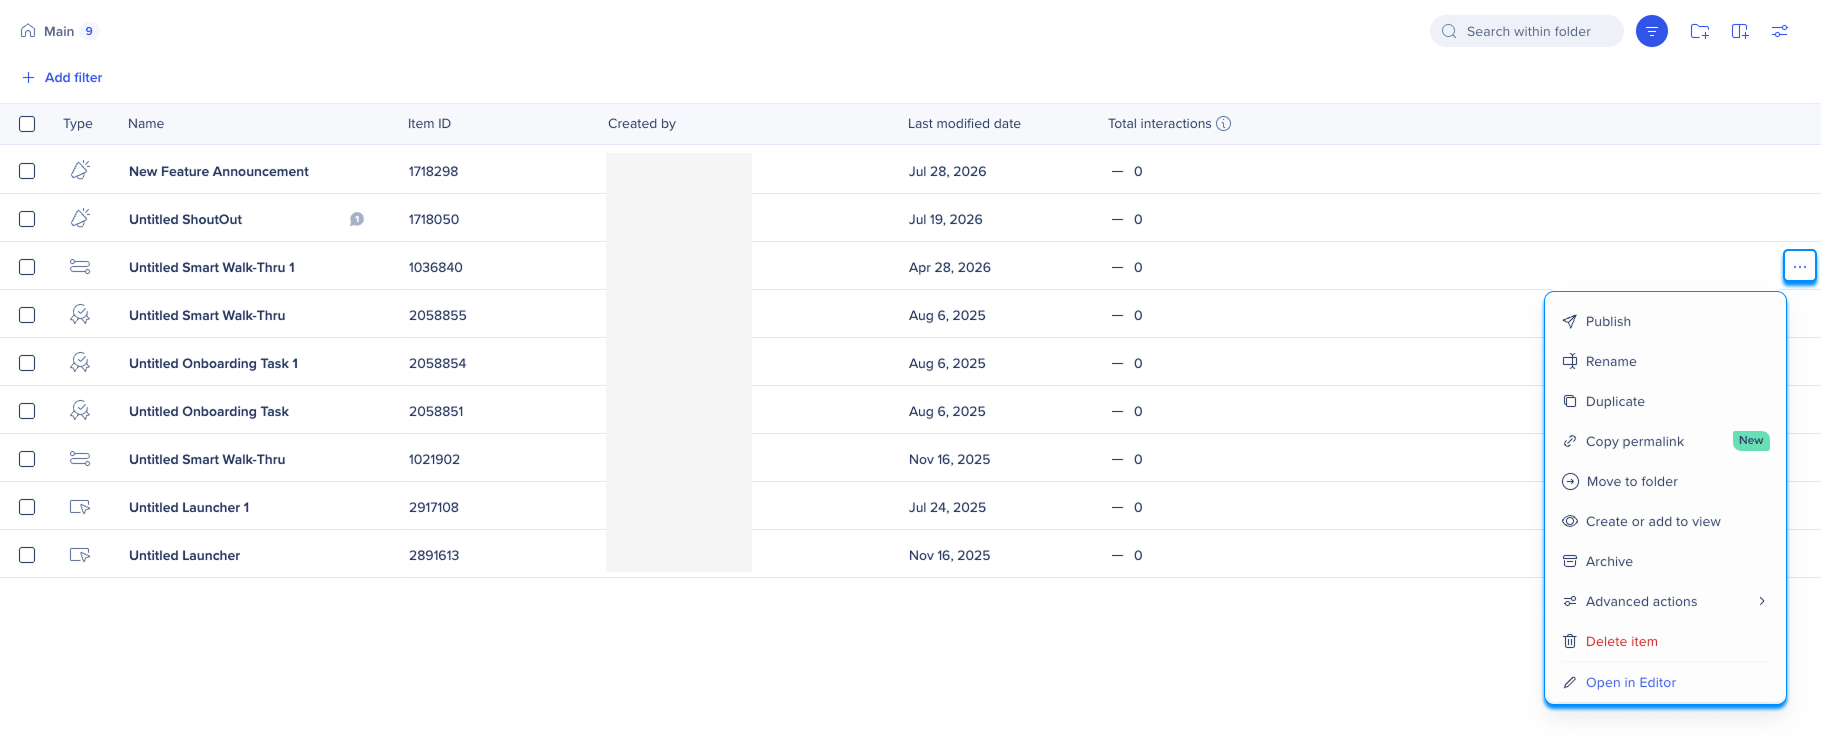
Select the Options menu next to a folder to manage it:
Use search and filters to quickly locate items across folders, views, and environments.
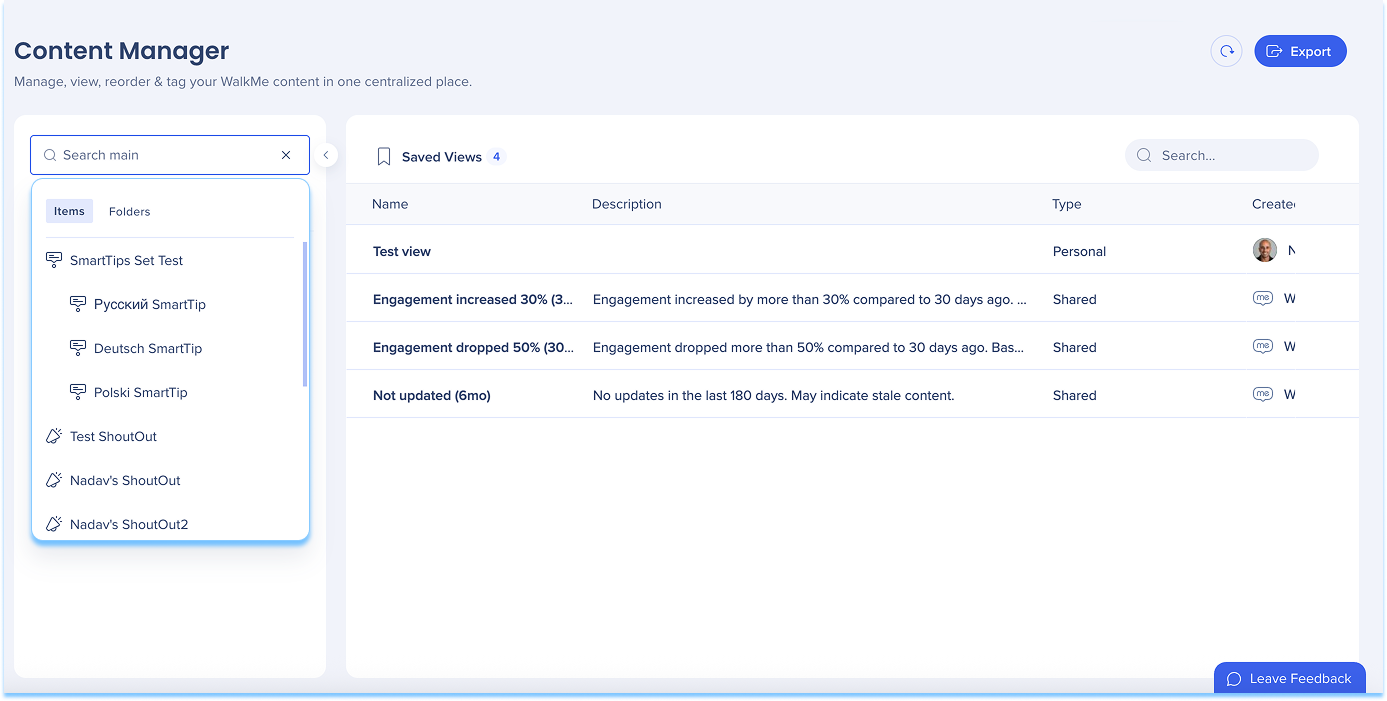
Global search
Use the search bar in the left panel to find items and folders.
To refine results:
Switch between Items and Folders
Enter a full or partial name
Filters
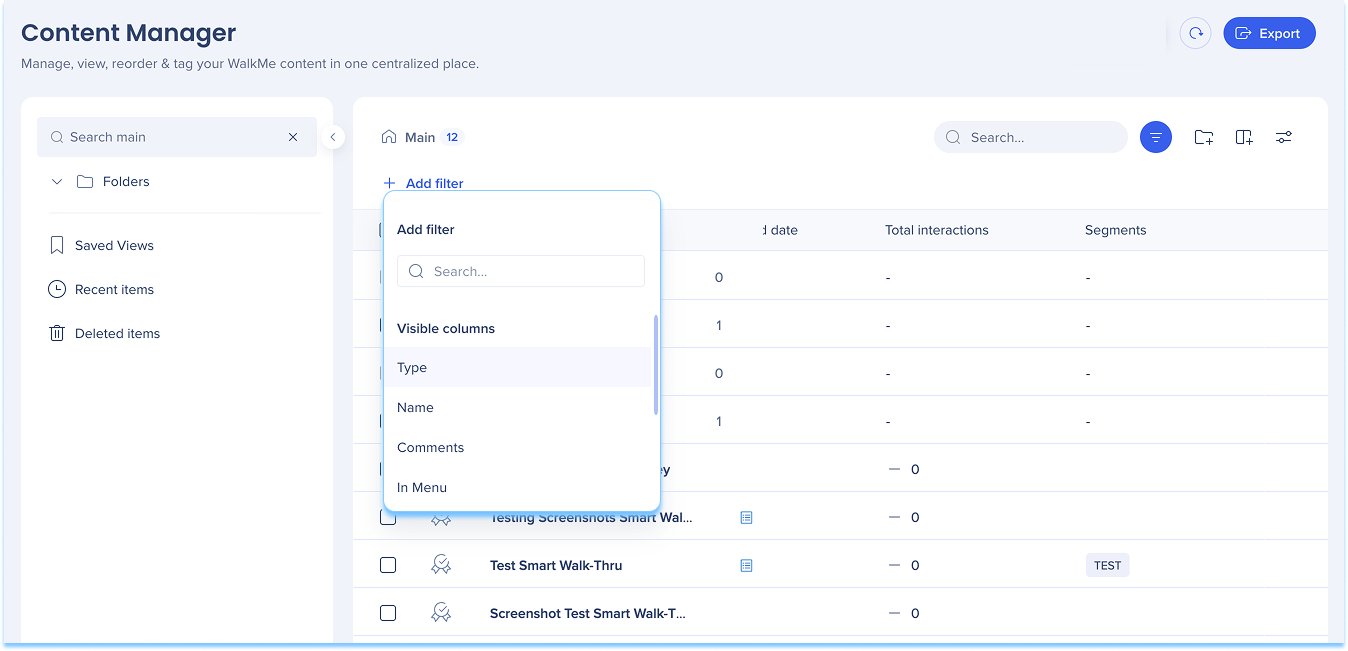
Filter content by:
Content attributes, such as item type, workflow tag, location, and keywords
Ownership and status, such as creator, publish status, and last modified by
Delivery and visibility, such as segment, status by environment, and in-menu status
Collaboration, such as comment status and permalink availability
Observação
Os filtros são organizados por colunas visíveis e ocultas.
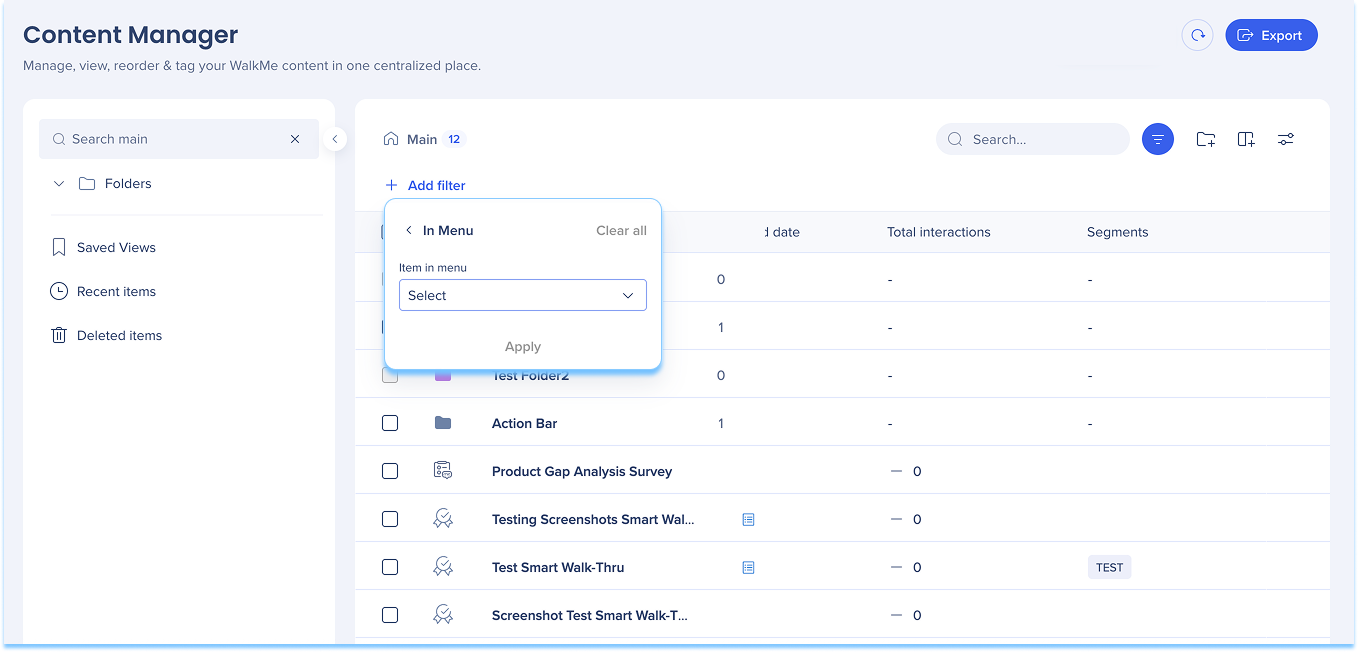
In menu filter
Filter content based on whether it appears in the WalkMe Menu.
Select the In Menu filter
Select Yes (appears in the menu) or No (doesn't appear in the menu)
Select Apply
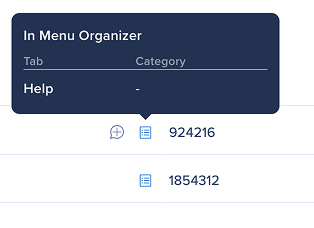
Items that appear in the menu show an icon in the Type column.
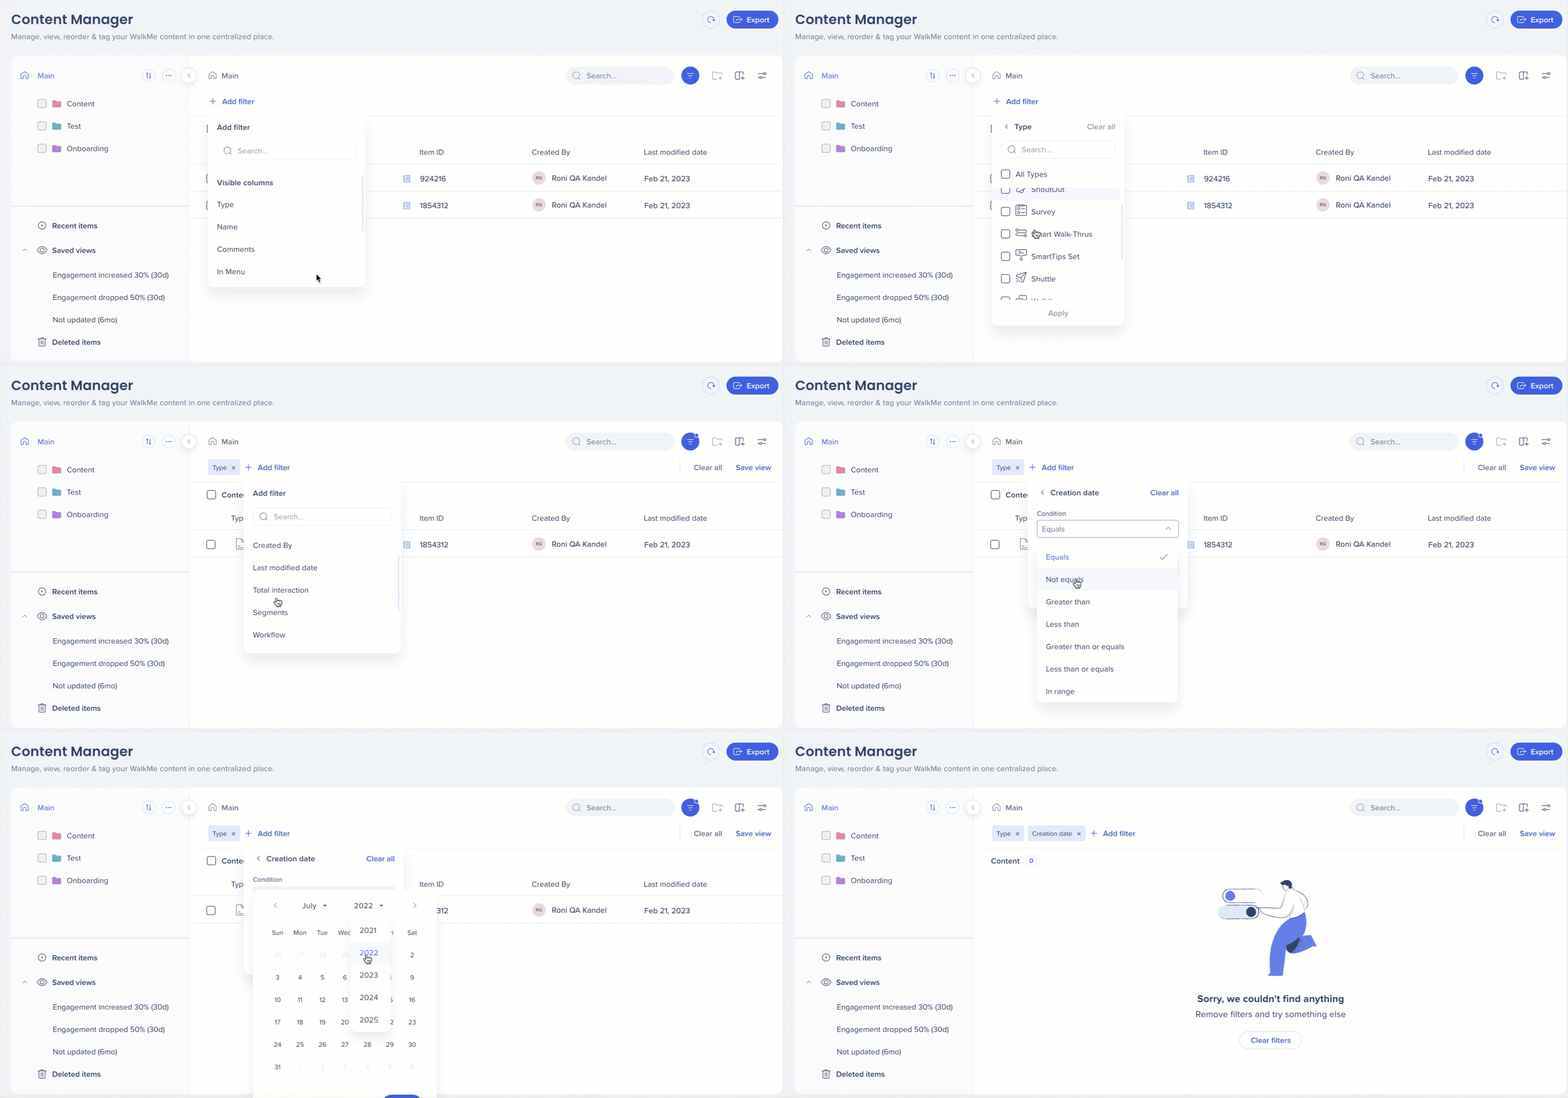
Add filters
To narrow your results:
Select the Filter icon
Select + Add Filter
Choose a column
Set the condition and value
Select Apply
Contextual search
Use contextual search to find items by:
Item name
Item ID
Item type
Example: Type Launcher to view launcher results.
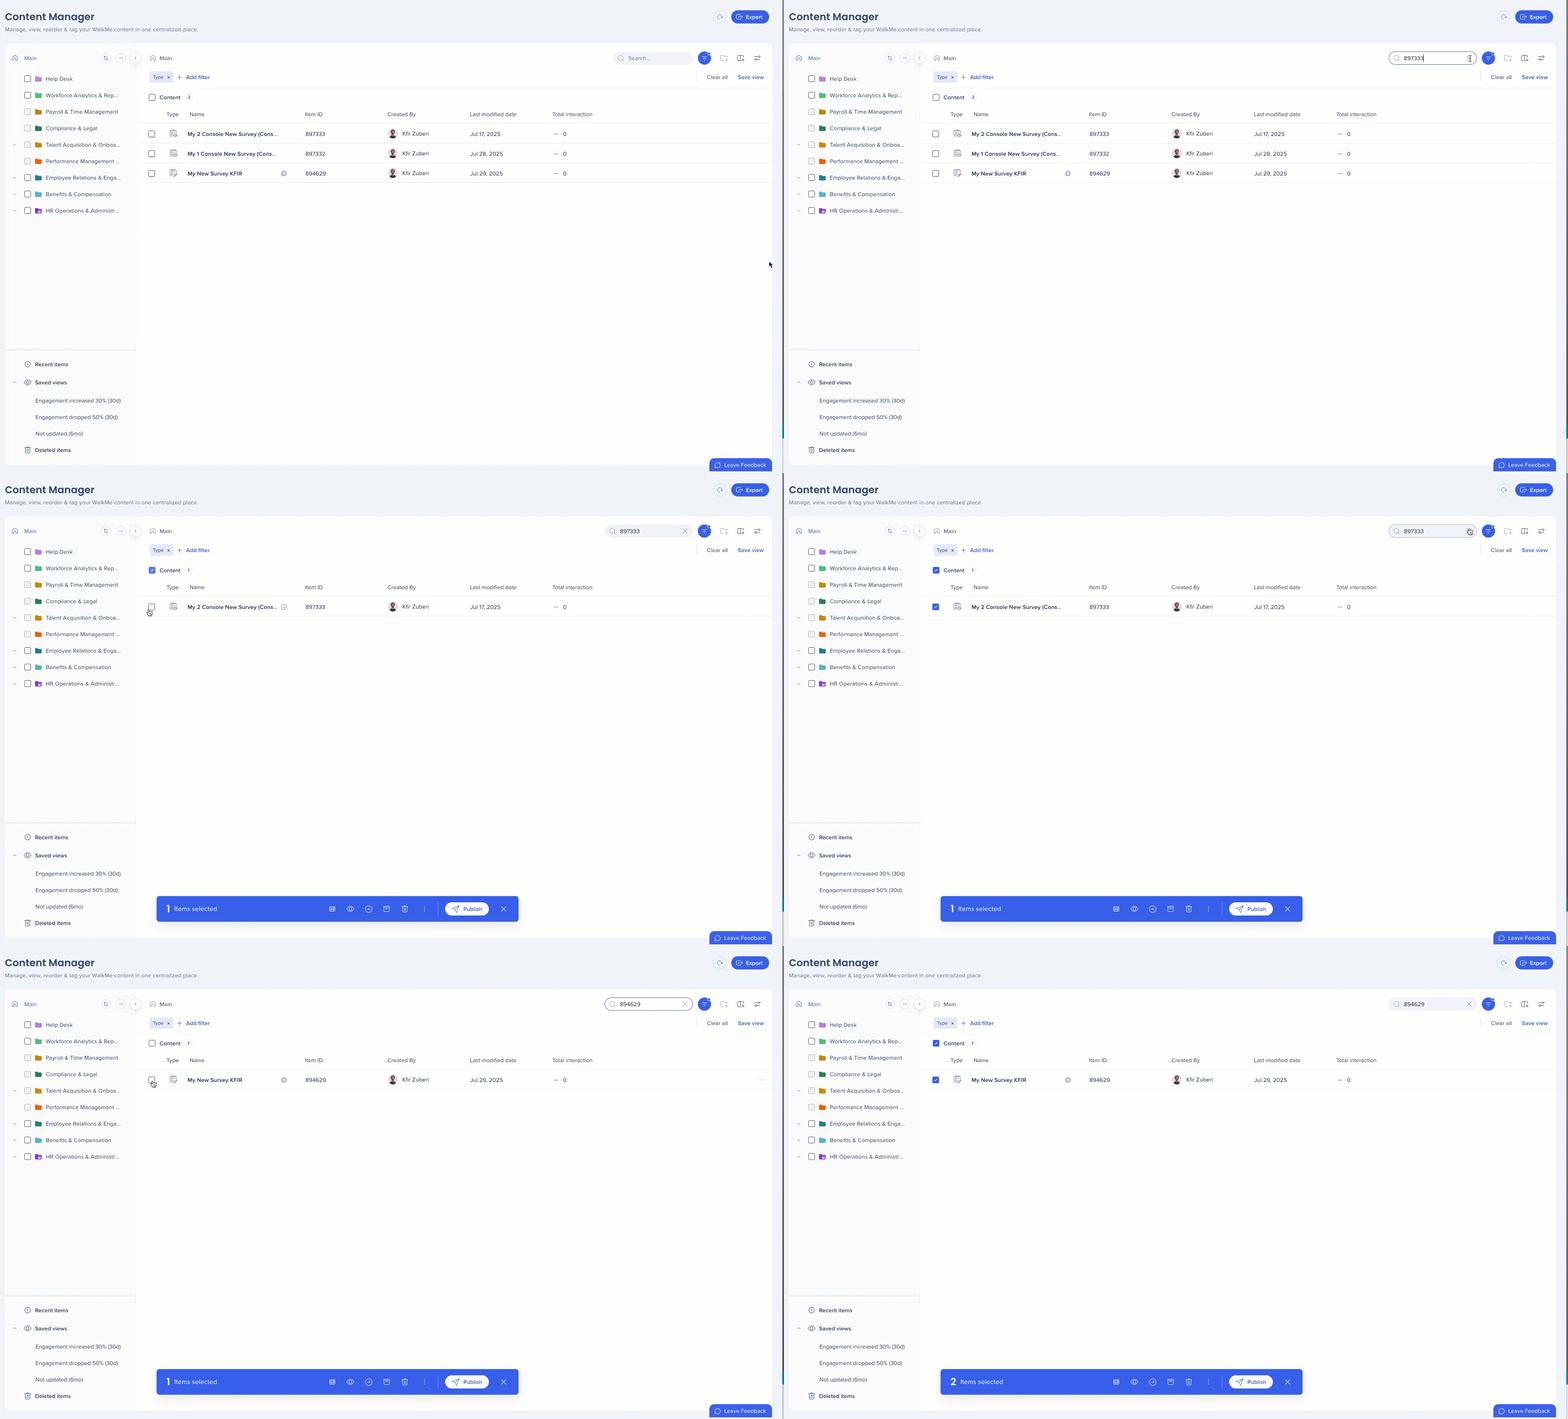
Bulk selection across searches
Keep selected items while running new searches, then apply a single bulk action to all selected items.
Segments
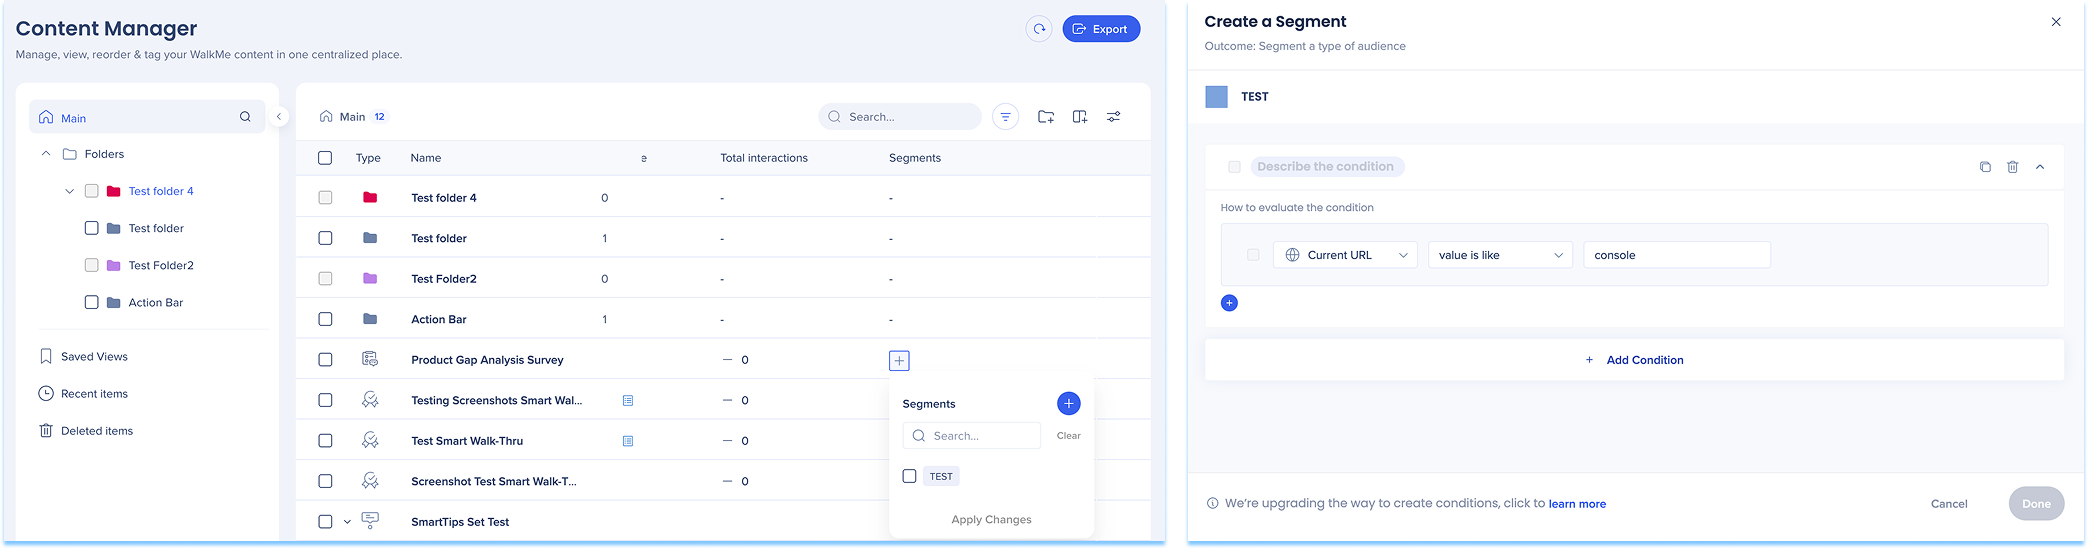
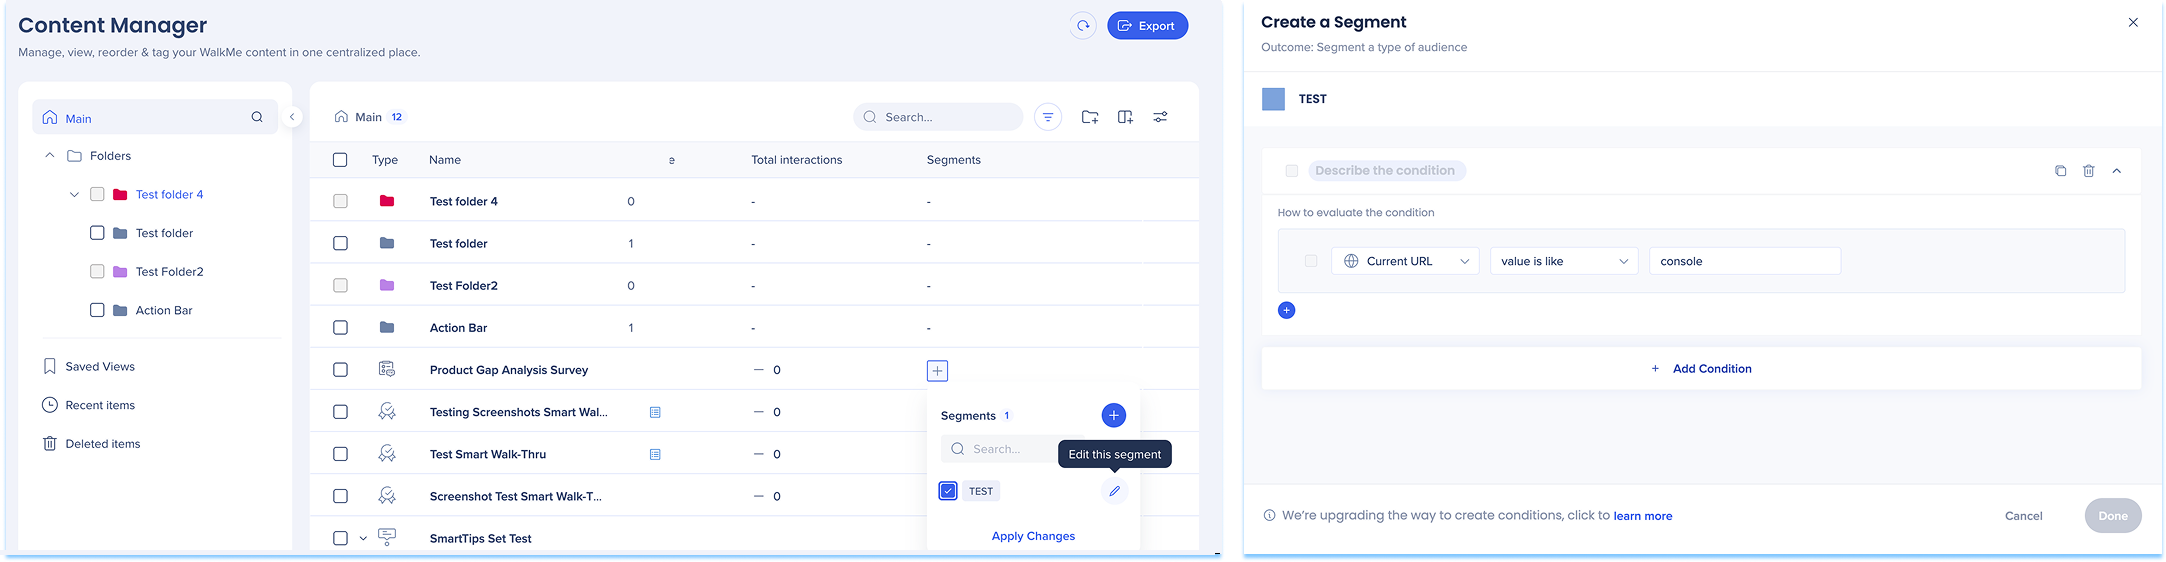
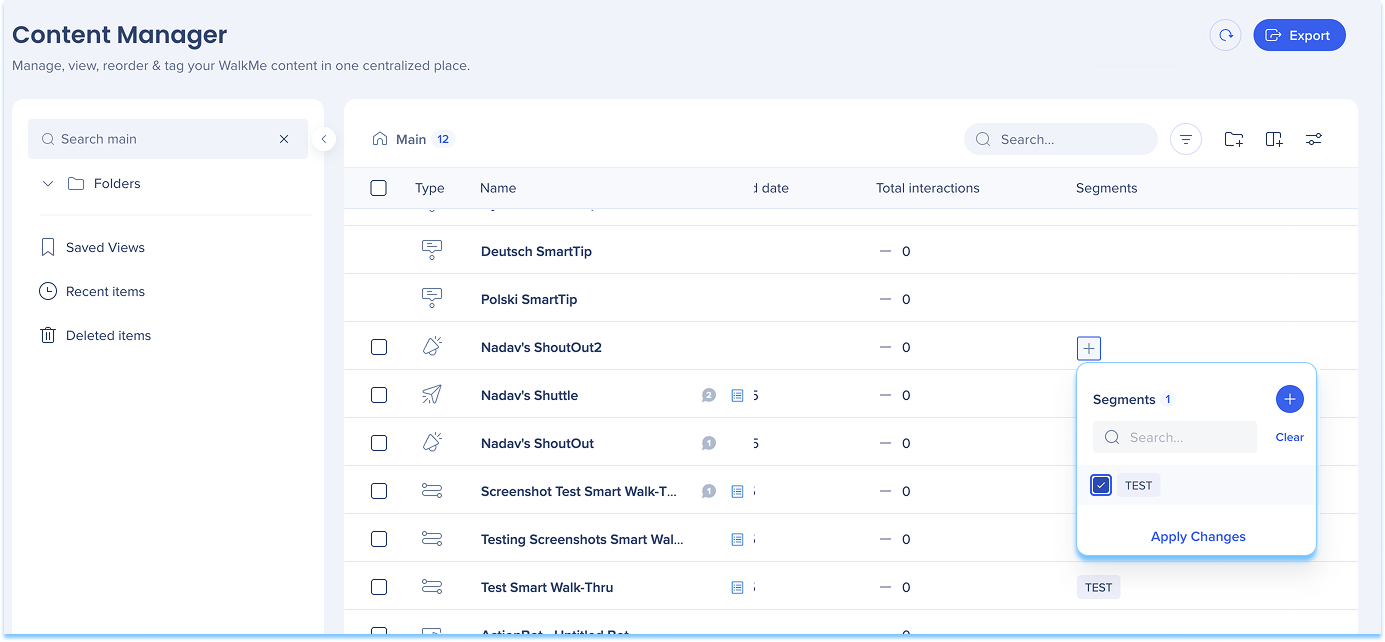
Create, define, apply, and manage segments directly within the Content Manager. This functionality mirrors the capabilities available in the editor, enabling users to streamline their segmentation workflows.
To create a segment:
Select the + icon in the Segment column of the item line
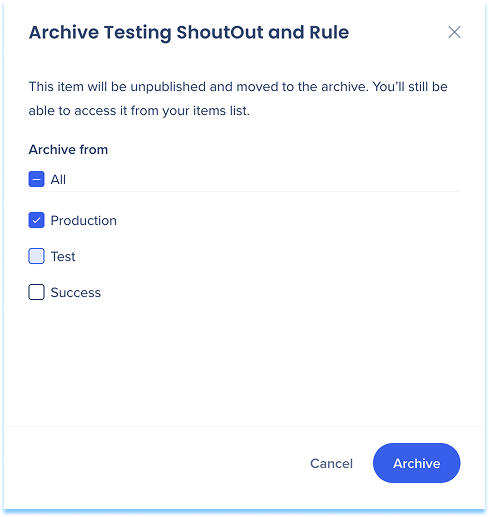
Você pode arquivar um item em vários ambientes ao mesmo tempo, portanto, não é necessário repetir a ação de arquivamento em cada ambiente separadamente.
Ações em massa
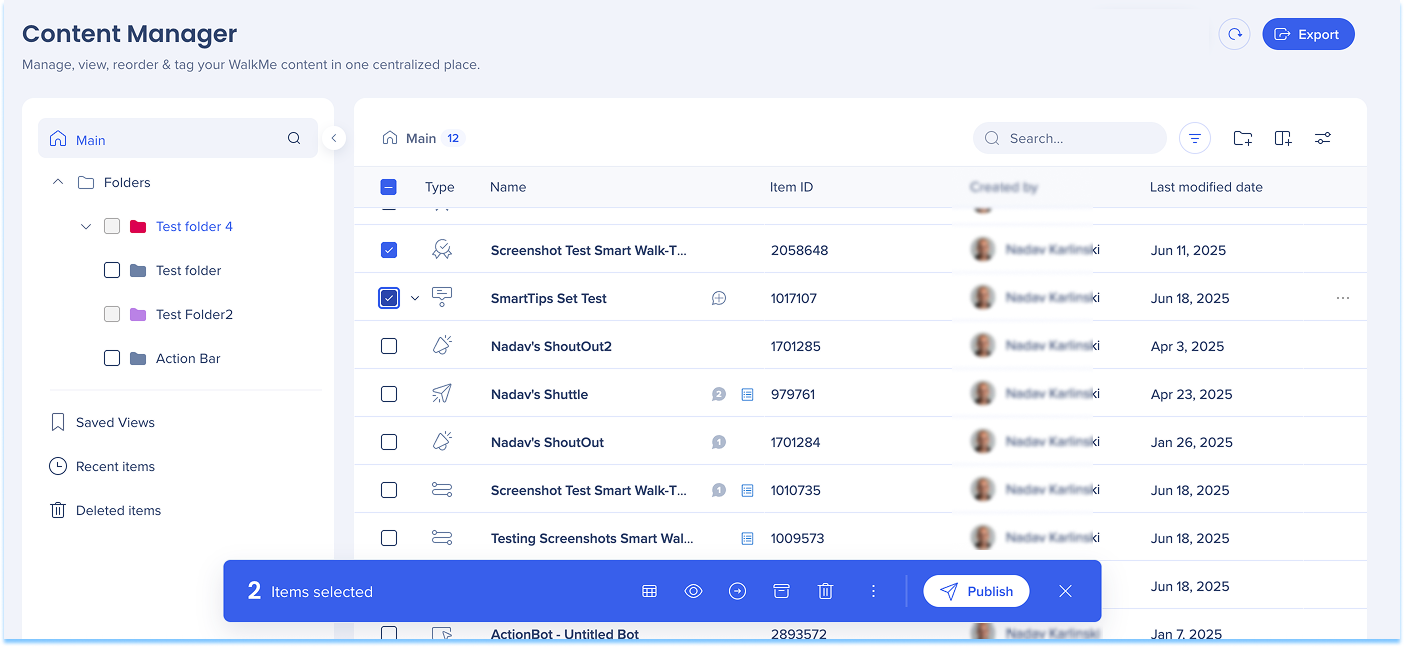
Selecione um ou mais itens usando a caixa de seleção
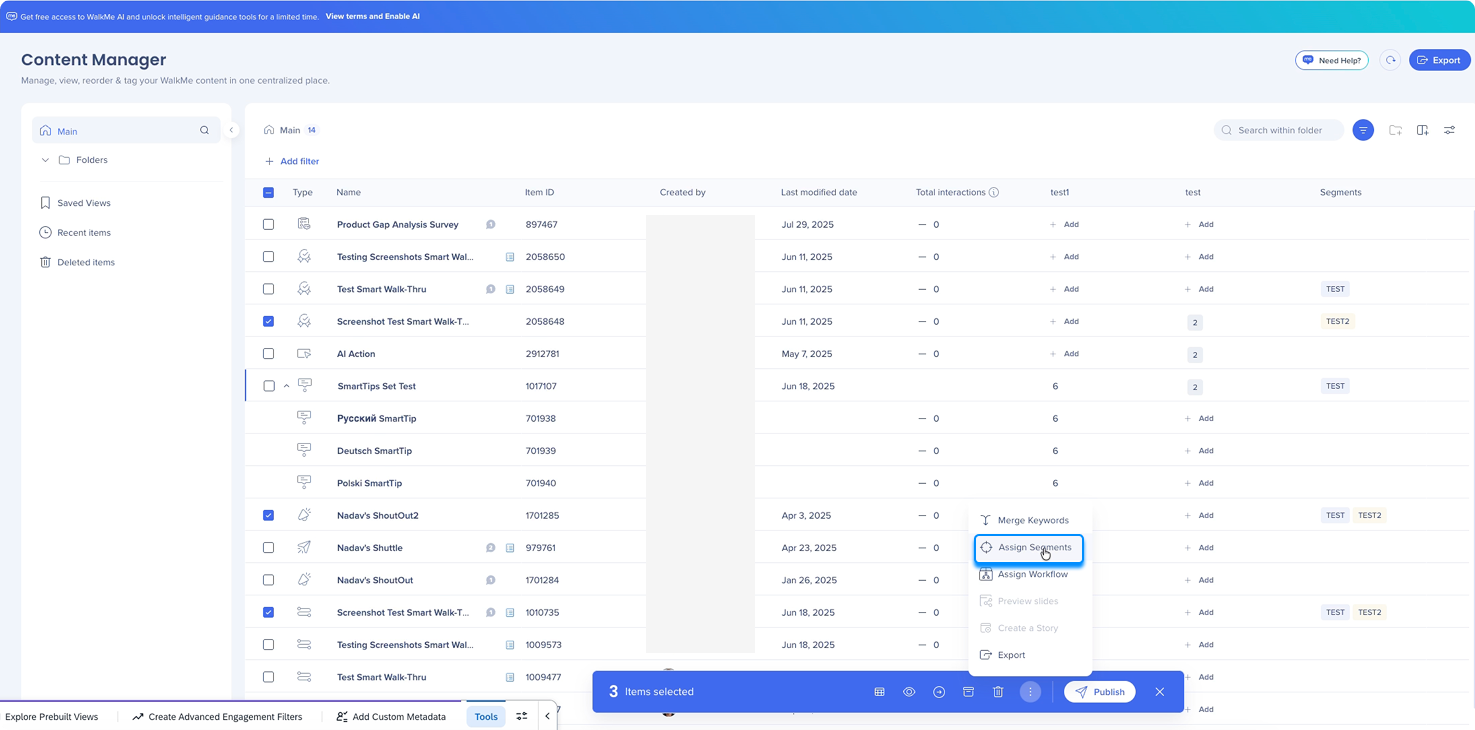
Selecione uma ação na barra de ferramentas de ações em massa, como:
Atribuir segmentos ou fluxo de trabalho
Mover ou arquivar itens
Publicar ou excluir itens
Criar ou adicionar às visualizações
Mesclar palavras-chave ou atualizar campos personalizados
Exportar conteúdo
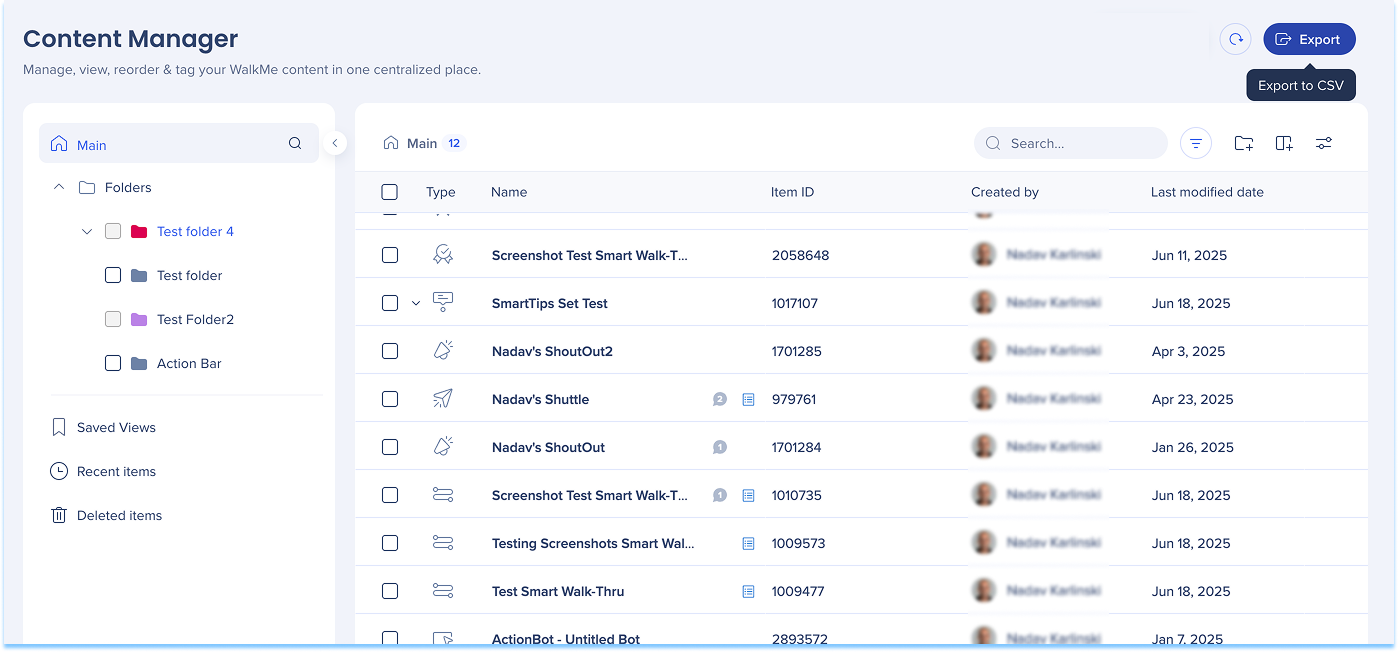
Exporte dados de conteúdo de qualquer visualização para um arquivo CSV.
Selecione o ícone Exportar
Baixe o arquivo CSV
O CSV reflete a visualização atual, incluindo as colunas visíveis e a ordem das colunas.
Observação
A Exportar CSV não inclui comentários.
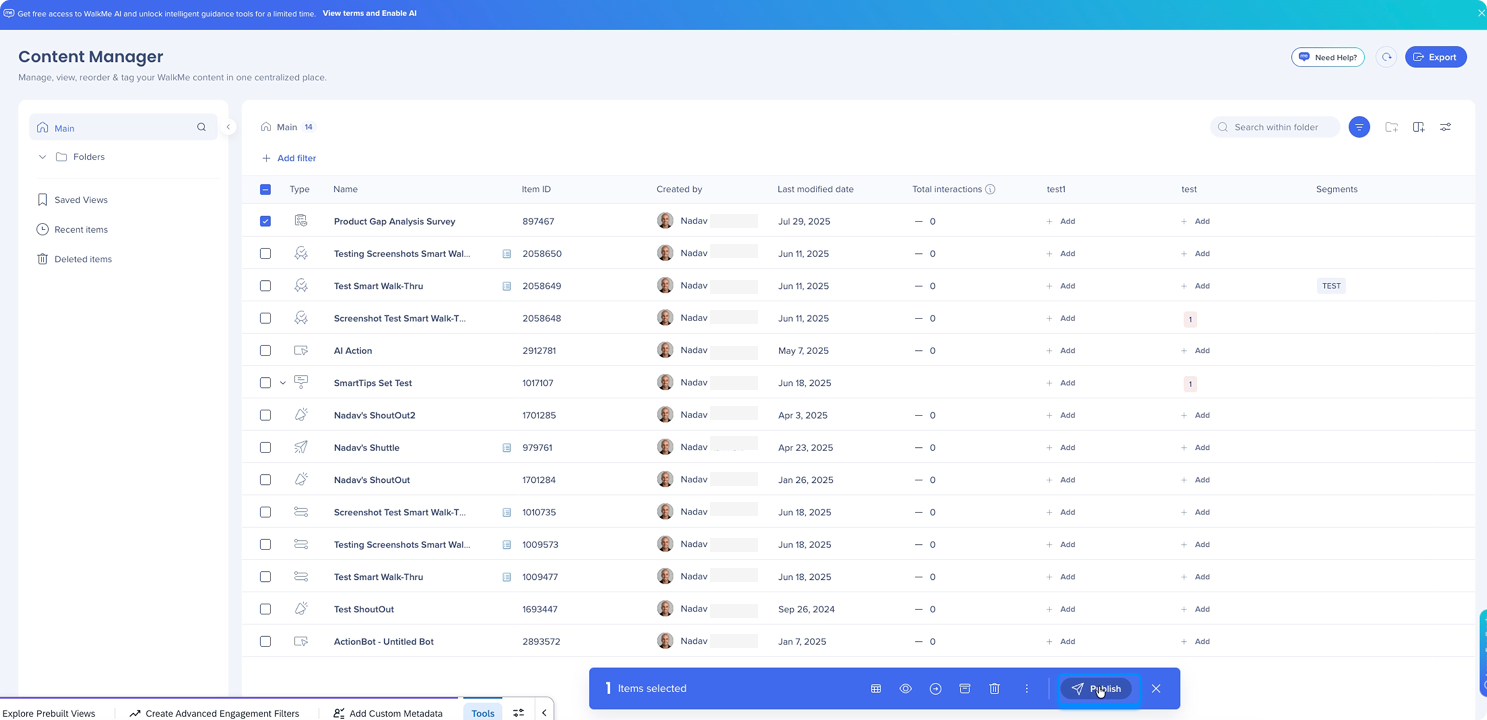
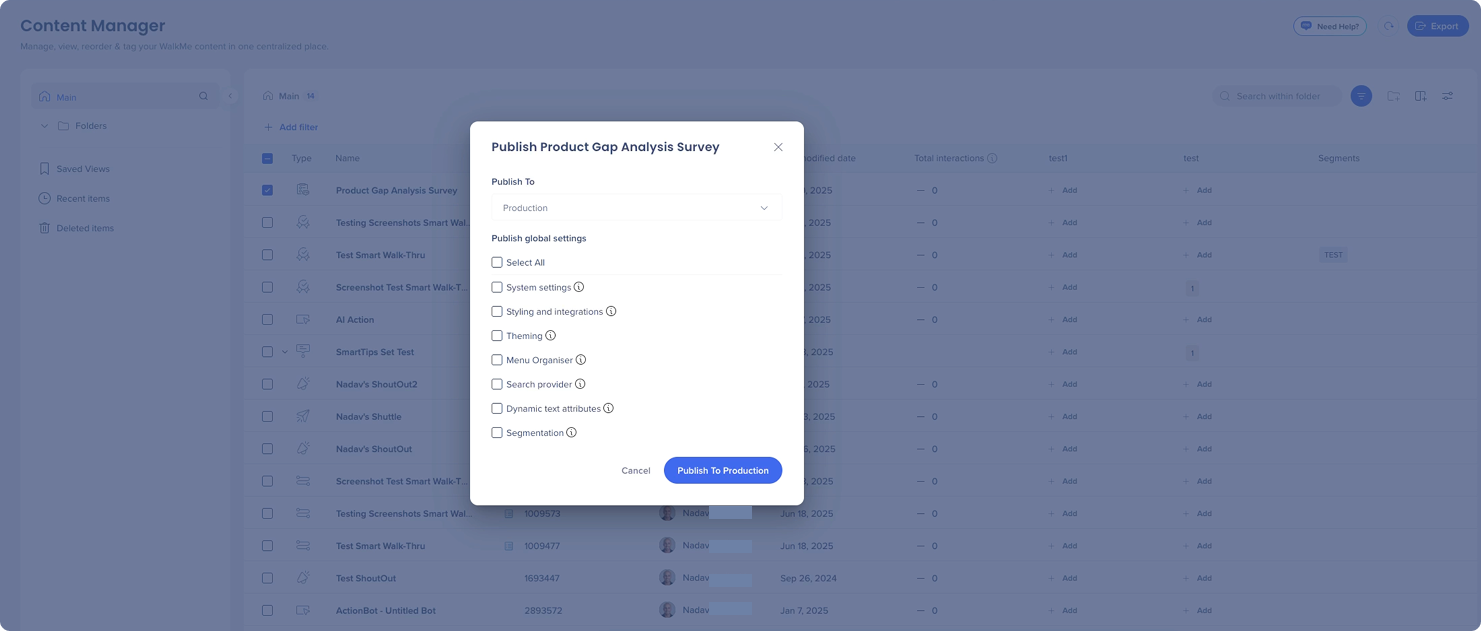
Publish content
Select one or multiple items
Select Publish
Select the environment you want to publish to
Select the settings you want to publish
Select Publish to [Env]
Preview, Collaborate, and Track Changes
Item preview
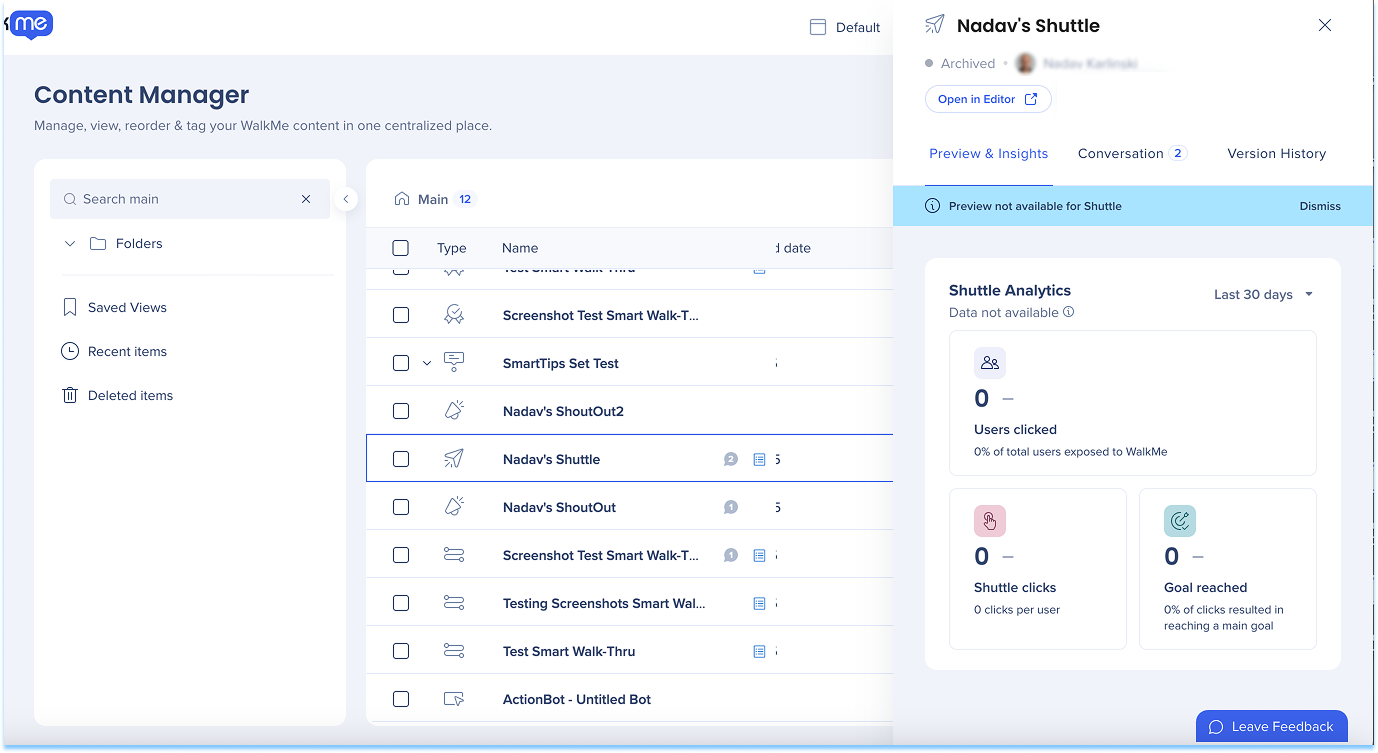
Select an item in the table to open the item drawer, which includes:
Preview & Insights: Preview the item, review Insights data from the last 30 days, and view related Stories
Conversations: View and leave comments, and tag collaborators
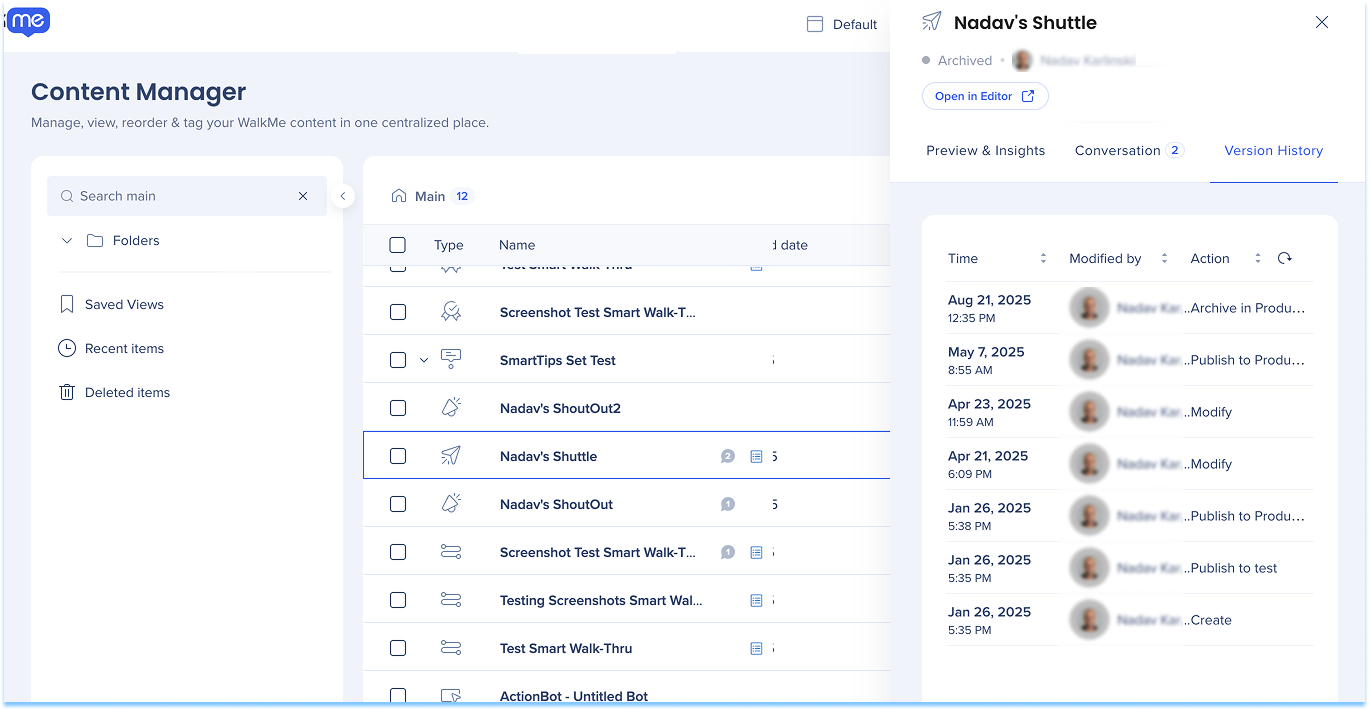
Version history: Review previous edit versions of the item
Preview & Insights
Use Preview & Insights to view item screenshots and analytics.
Preview item screenshots
Hover over the preview
Select the Slides preview icon
Expand the preview
Hover over the preview
Select the Expand icon
Observação
The preview shows an image of the balloon as it appears to users
Smart Walk-Thrus show the entire play sequence
Shuttles, resources (videos and articles), and onboarding tasks don't have a preview
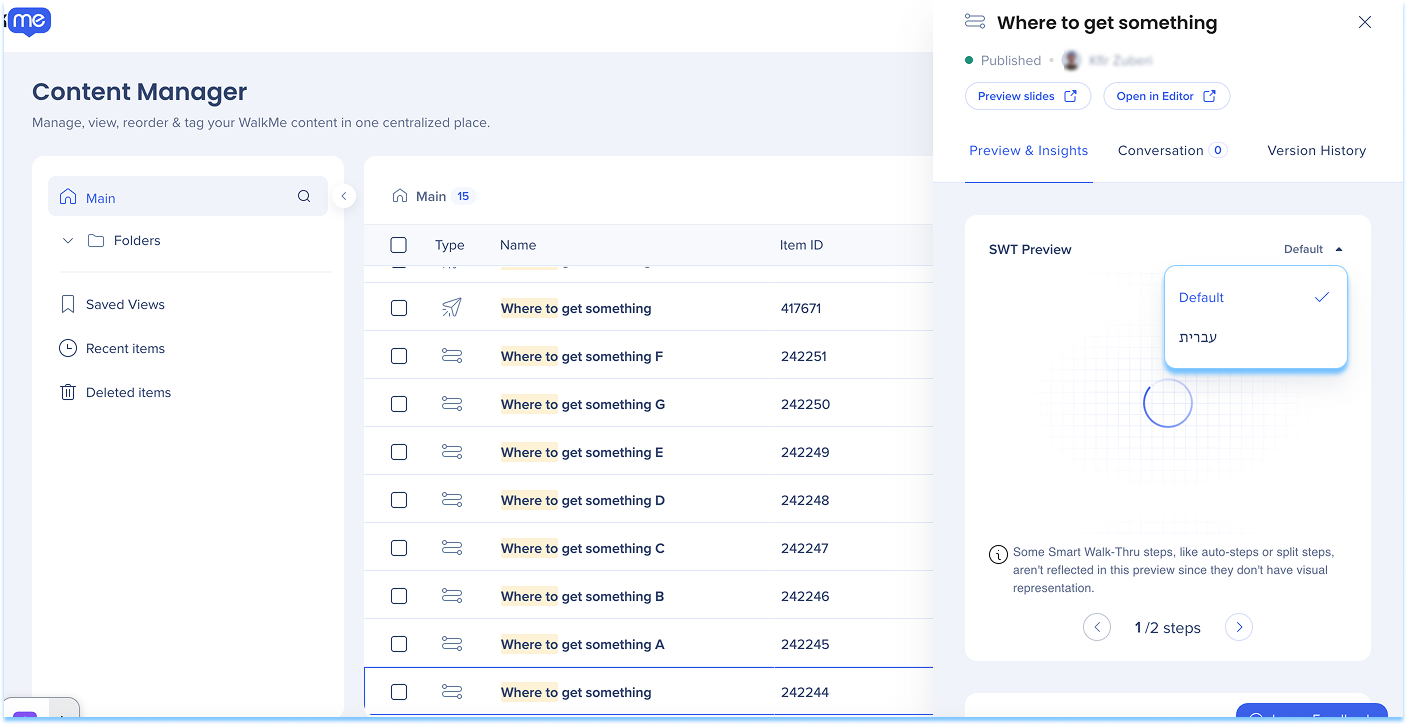
Translated preview
Preview translated versions of your content directly in the preview window.
Select the Language dropdown to view the item in each translated language
Conversations
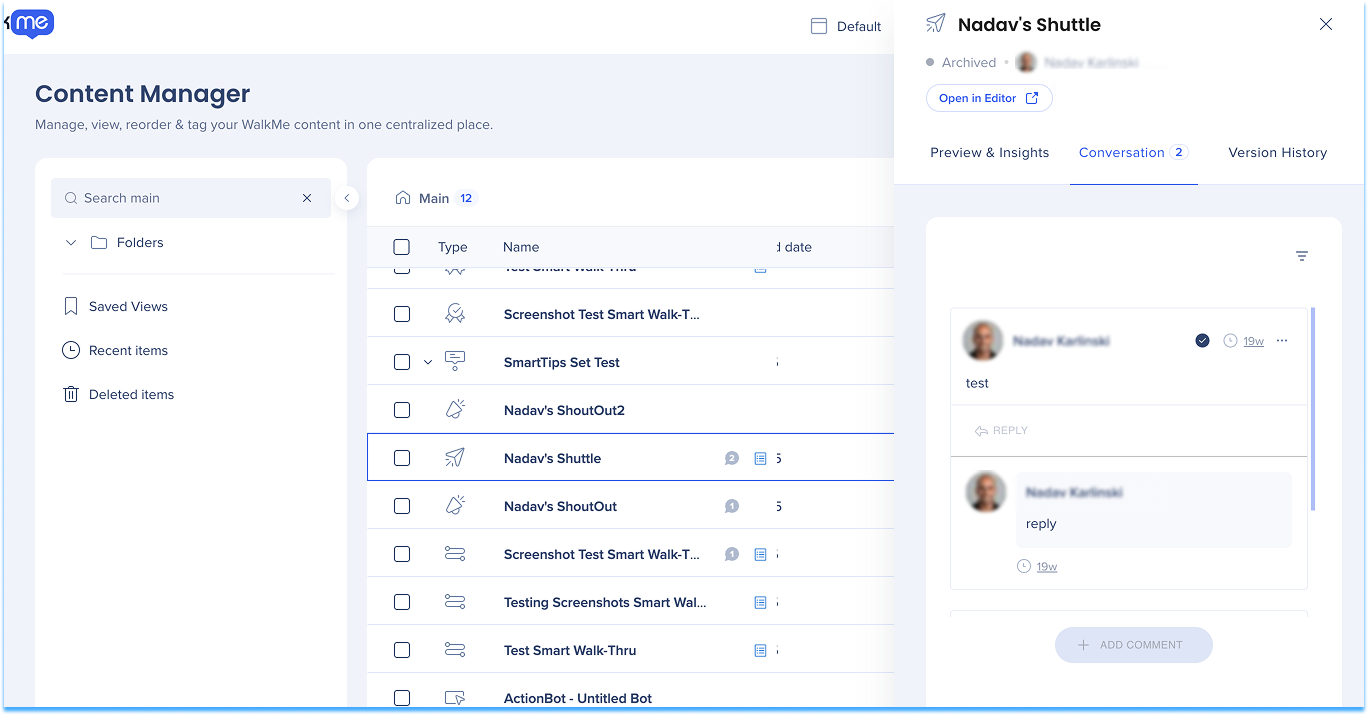
Use Conversations to view and leave comments on items or preview slides, and tag collaborators. When a user is tagged, they receive a notification.
A message indicator will appear next to each item's name in the table showing the number of messages.
A blue indicator means there are unread messages
A gray indicator means all messages have been read
Comments
View comments
Select the message Indicator to open the Conversations tab
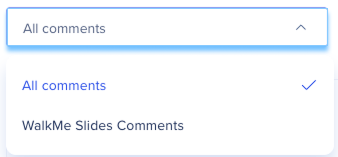
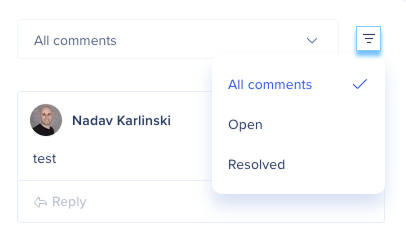
Optional: Use the All comments dropdown to filter by comment type
Optional: Select the Filter icon to filter comments by status
Resolve comments
Select the Check icon at the top of the comment
Version history
The Version History tab shows all previous edit versions of the item.
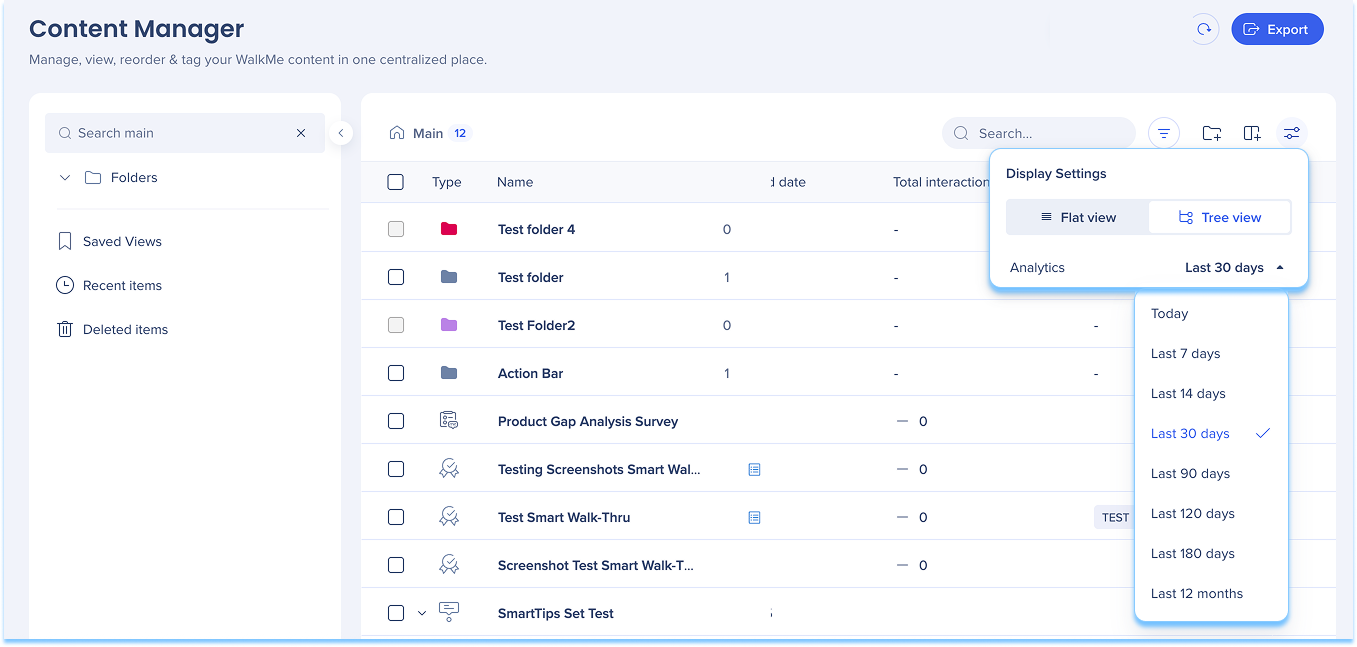
Display settings
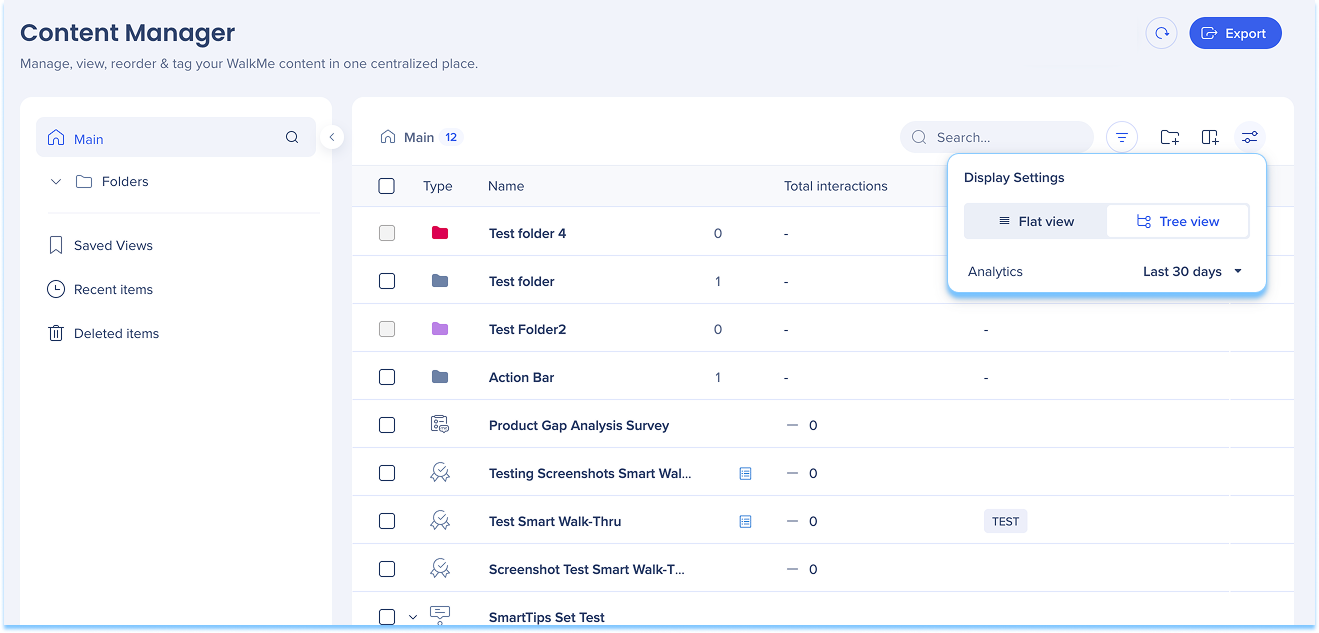
Use display settings to switch between:
Flat view: Displays content in a single list without hierarchy
Tree view: Displays content in a hierarchical structure with categories and subcategories
Analyze Engagement and Performance
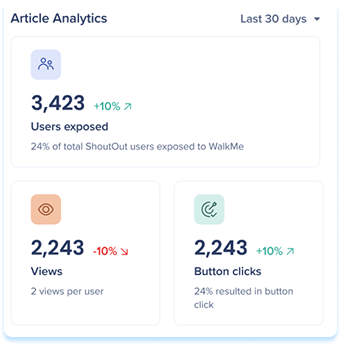
Inline trend indicators
Inline trend indicators show performance changes directly in the table and item drawer, without switching to Insights.
Trend indicators appear next to:
Unique users
Interactions
Goal completions
Each metric includes a visual indicator:
Green arrow indicates an increase
Red arrow indicates a decrease
No arrow indicates no trend when the previous period value was zero
Trend calculations are based on the selected date range and update dynamically.
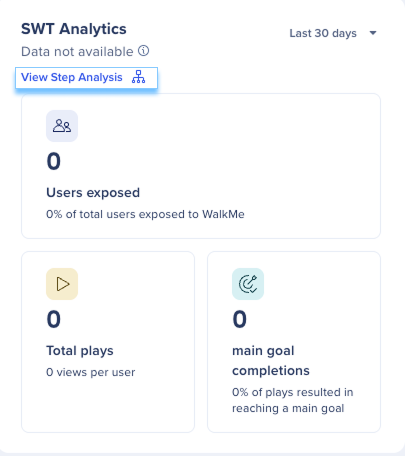
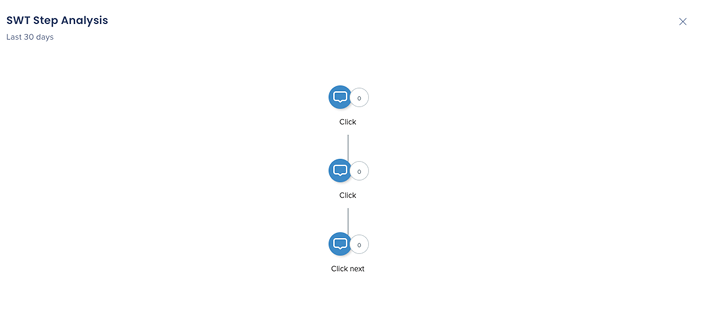
Smart Walk-Thru step analysis
View drop-offs, user paths, and step-level performance directly within the Smart Walk-Thru drawer.
Open the step analysis map
Select View Step Analysis
Review the Smart Walk-Thru analysis map
Interaction data date filter
Use the interaction data date filter to view analytics for a specific time range. You can access the date range filter in two ways:
From Display settings
Select the Display Settings icon
Select the dropdown next to the analytics label
Choose a time range
From an individual item
Select an item to open its detail panel
In Preview & Insights, select the dropdown next to the analytics label
Choose a time range
Analytics filters require at least one analytics column, such as unique users, total interactions, or goals reached.
Use Views to Monitor Content
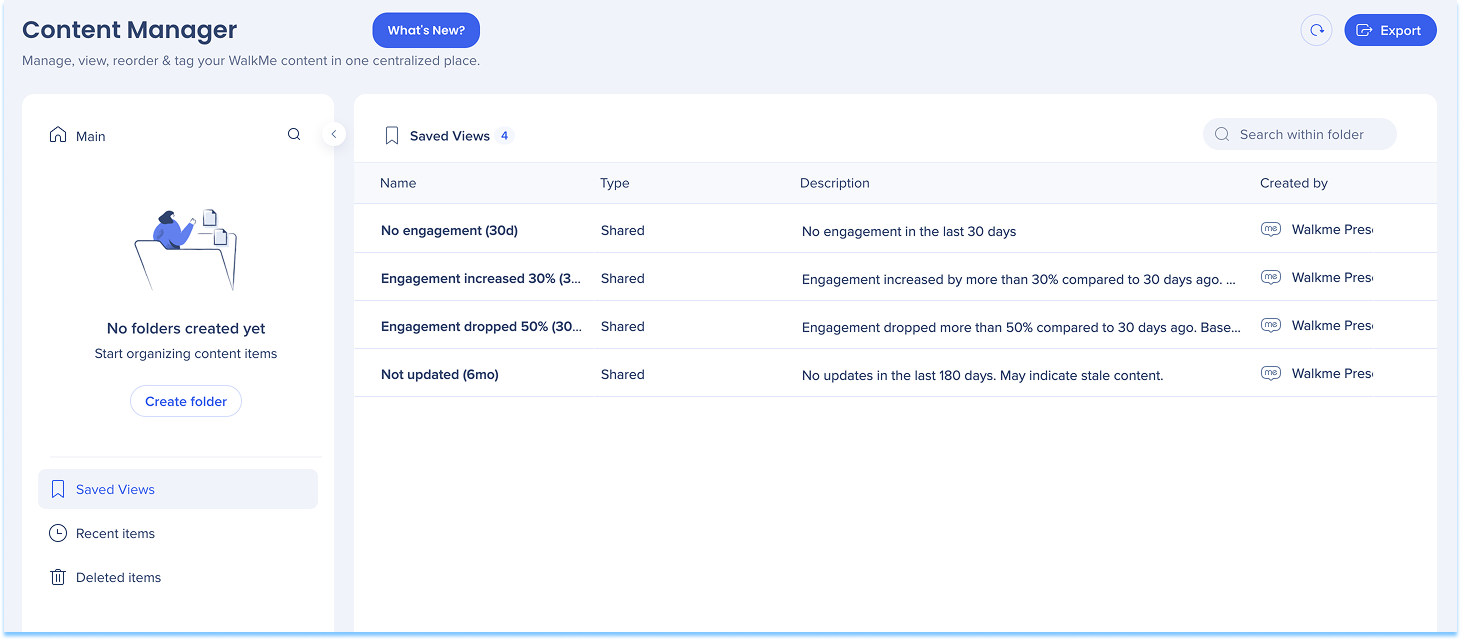
Saved views
Saved views let you save and reuse table configurations to monitor content more efficiently. Saved views can include:
Column selections
Filters
Sorting preferences
Saved views appear in the left panel and update automatically as items change.
Create and manage views
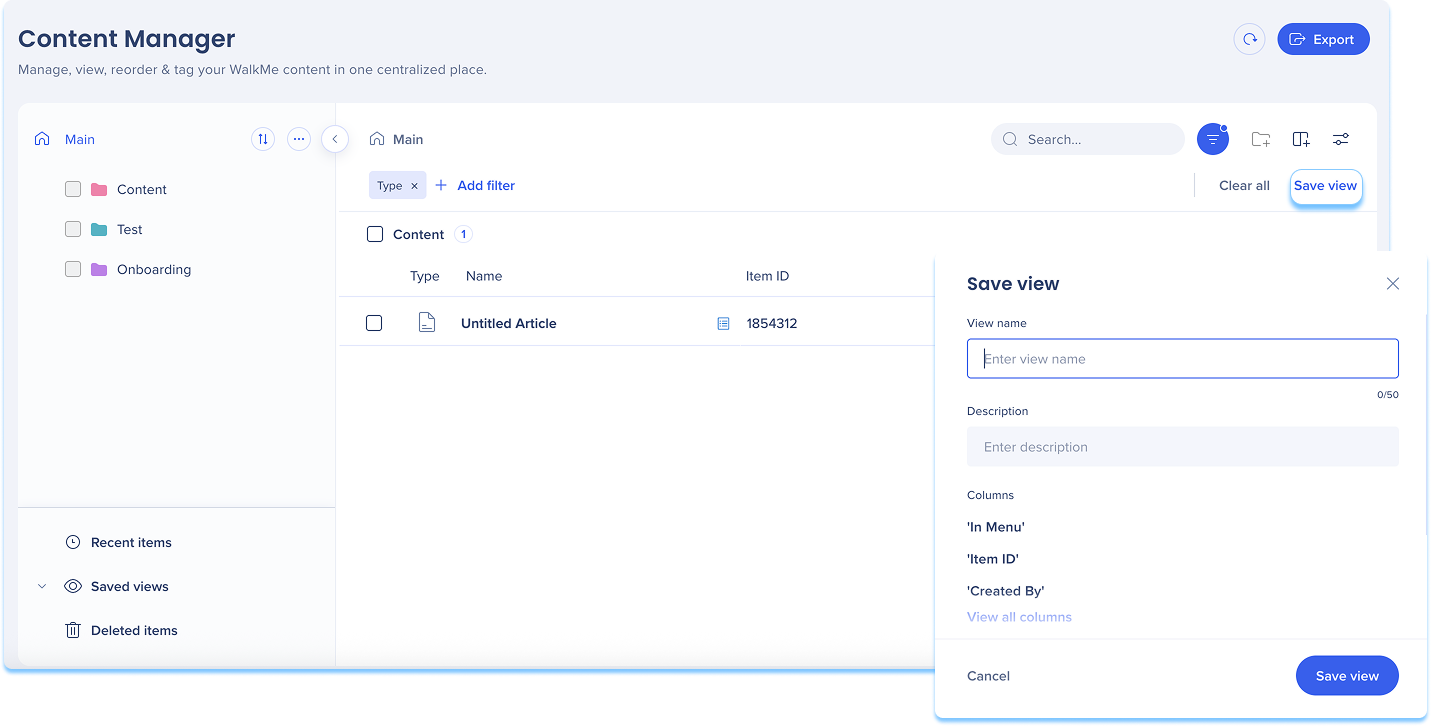
Create a view
Apply filters to the table
Select Save View
Enter a view name and description
Select Save View
Saved views are dynamic, so new items that match the filters appear automatically, and archived items are removed.
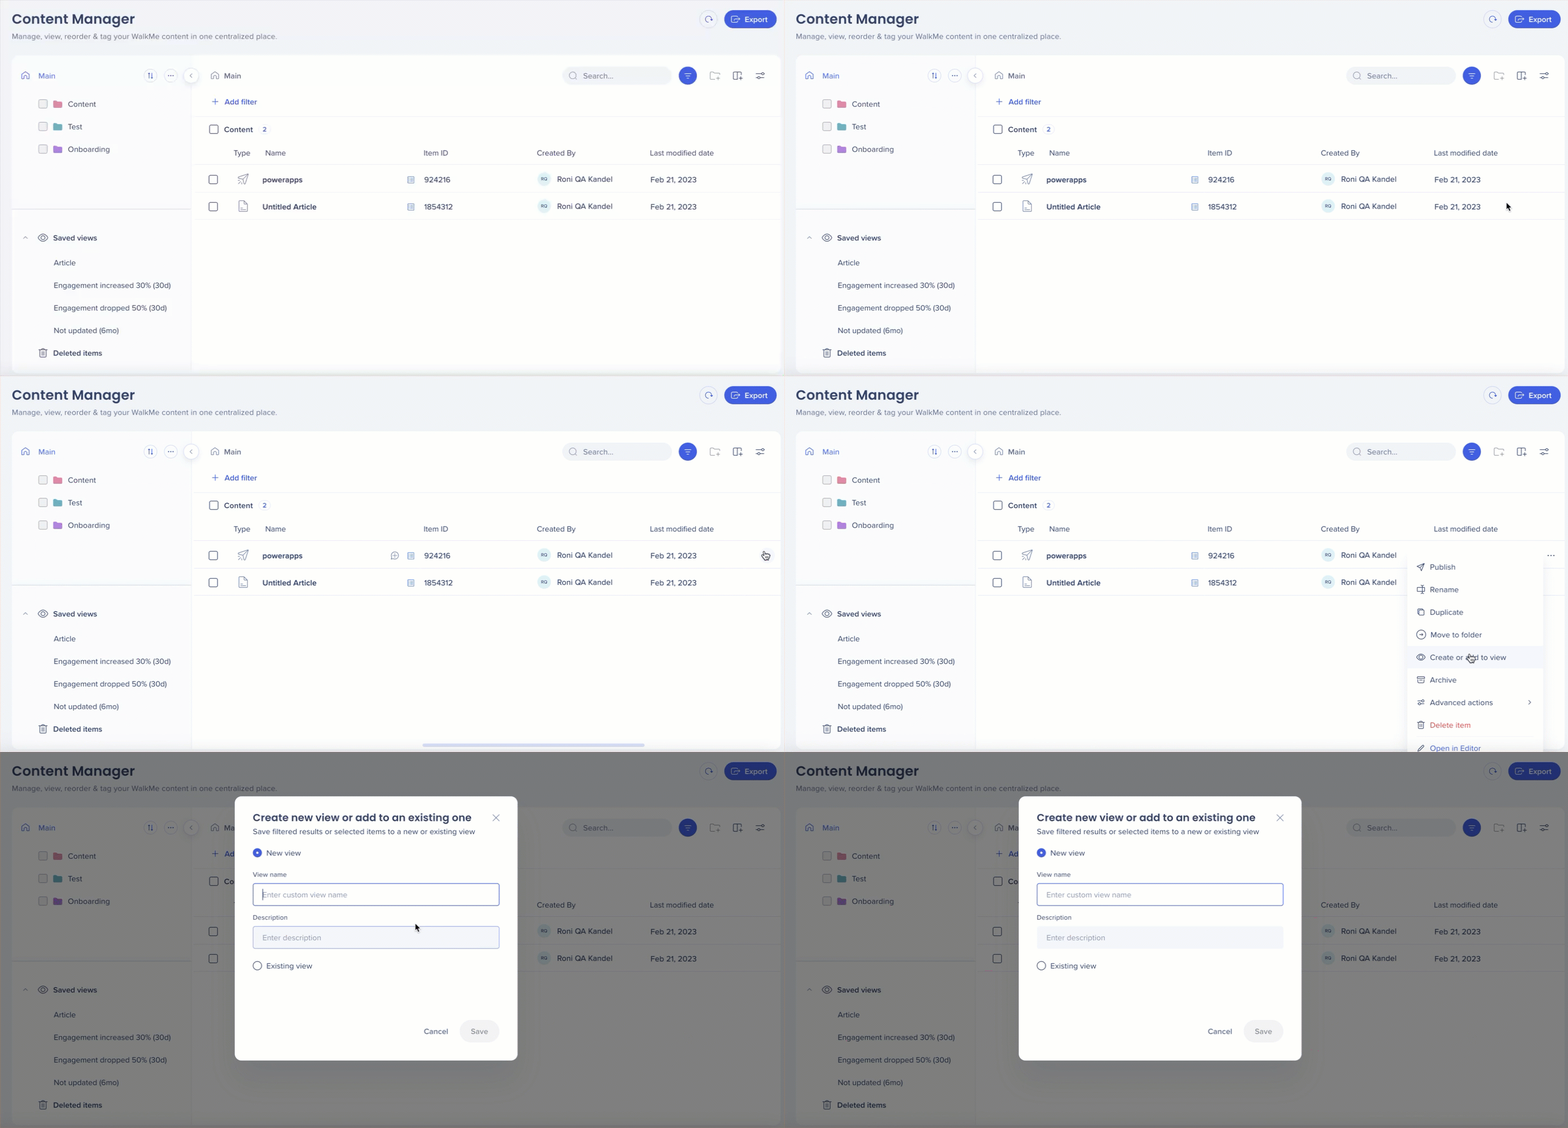
Add items to a view
To add a single item, open the item Options menu and select Create or add to view
Choose a new or existing view
Select Save
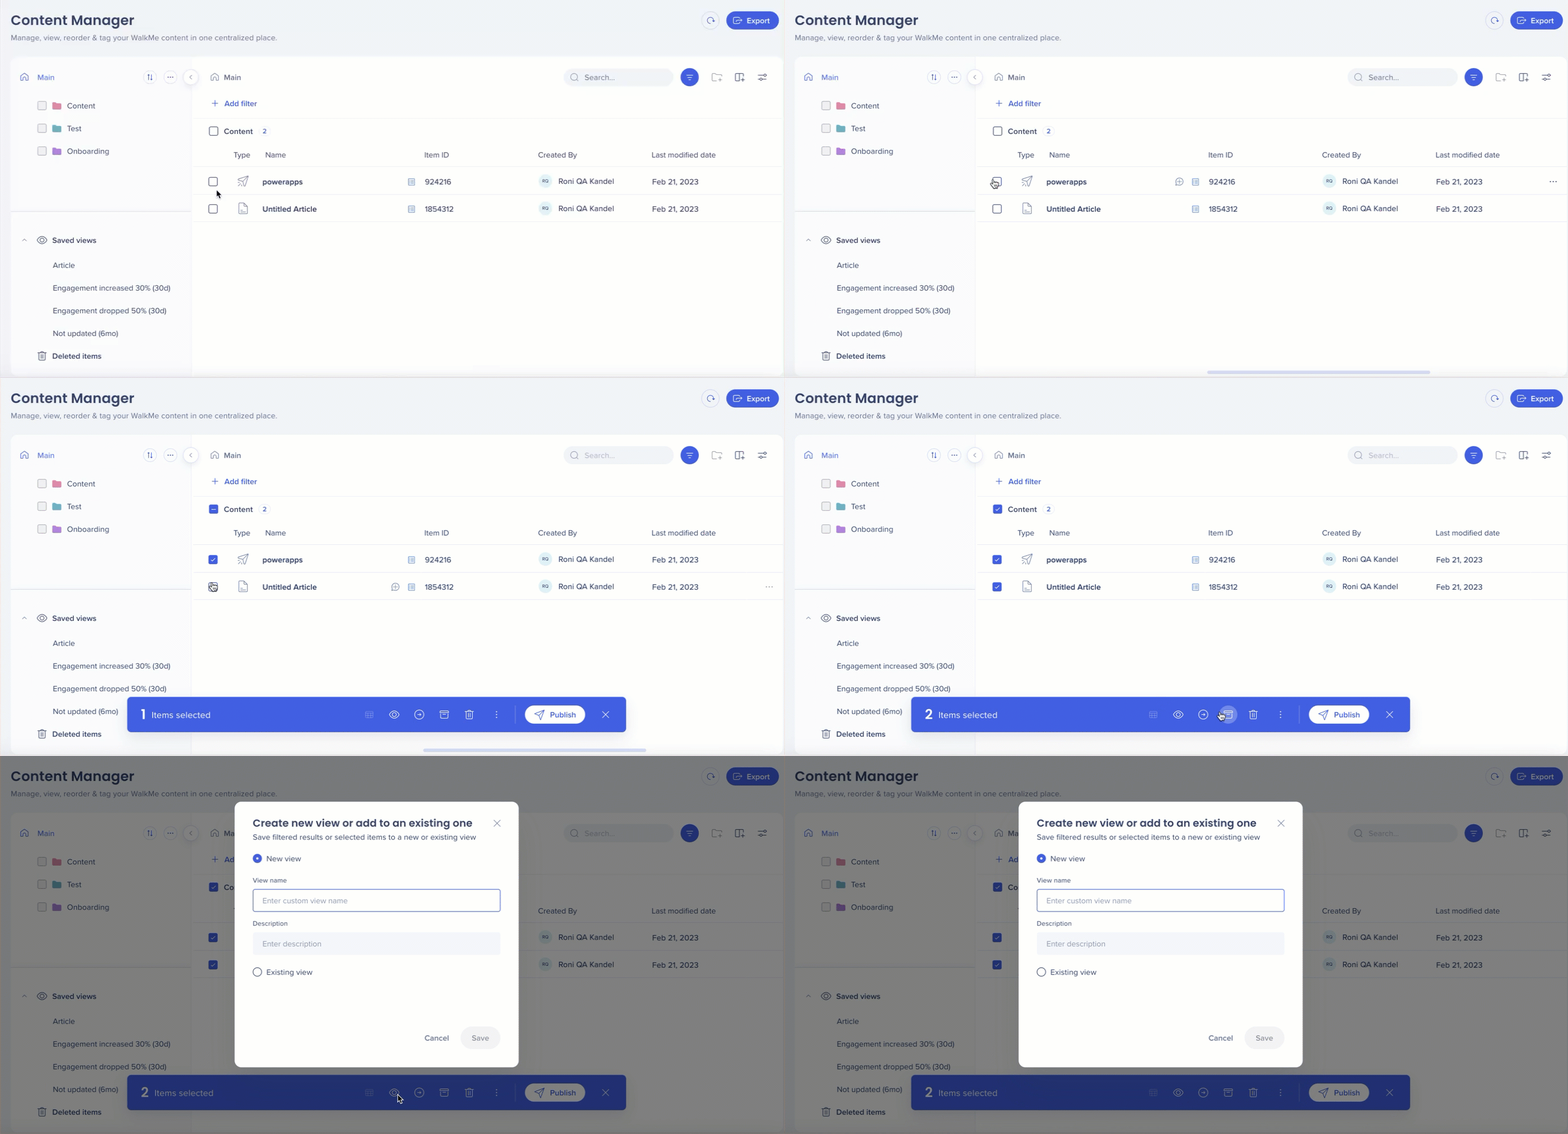
Add multiple items to a view
To add multiple items, select items using the checkbox, then select the Eye icon
Choose a new or existing view
Select Save
Remove items from views
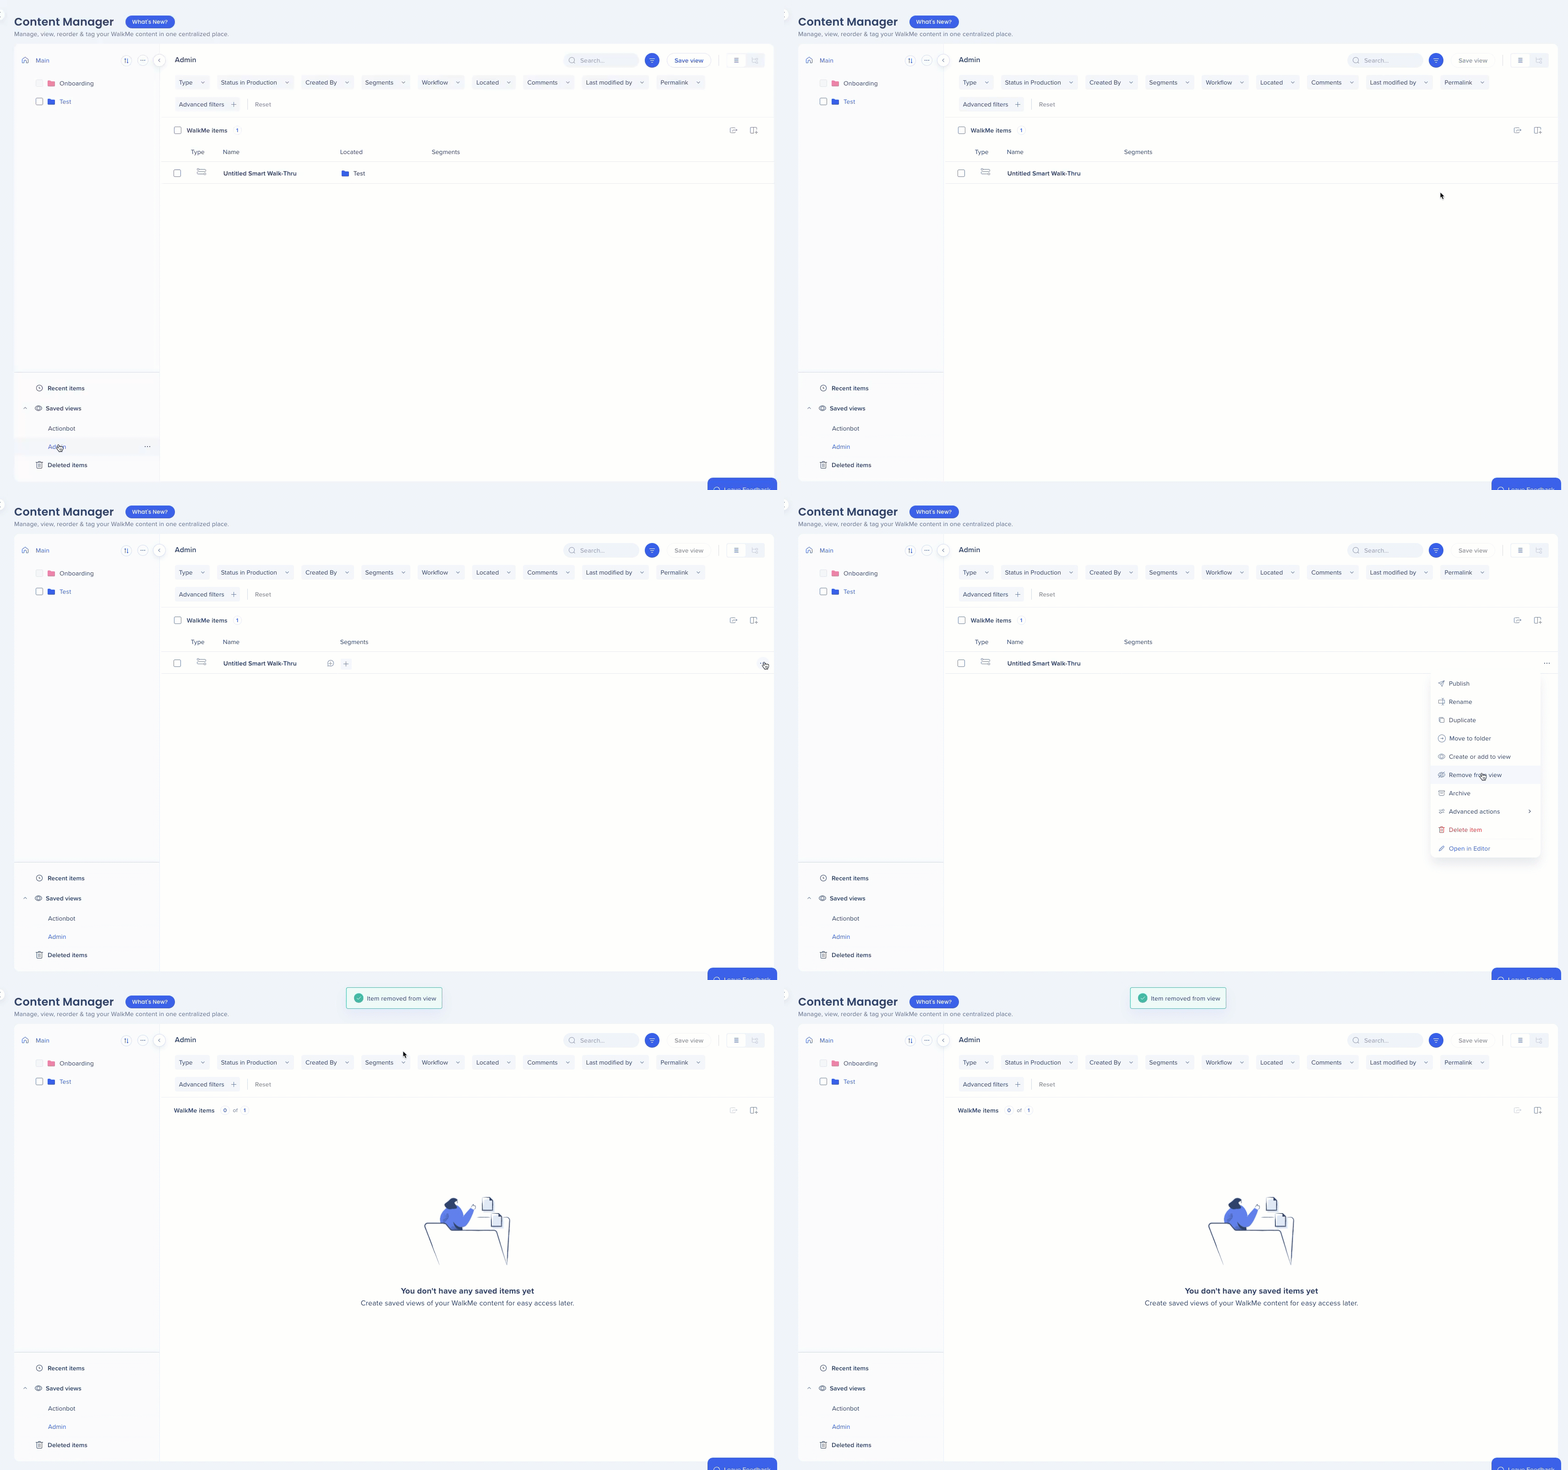
Remove a single item
Open the Saved views dropdown
Open the Options menu for the view
Select Remove from view
Observação
Remove from view is not relevant for filters, only items added manually.
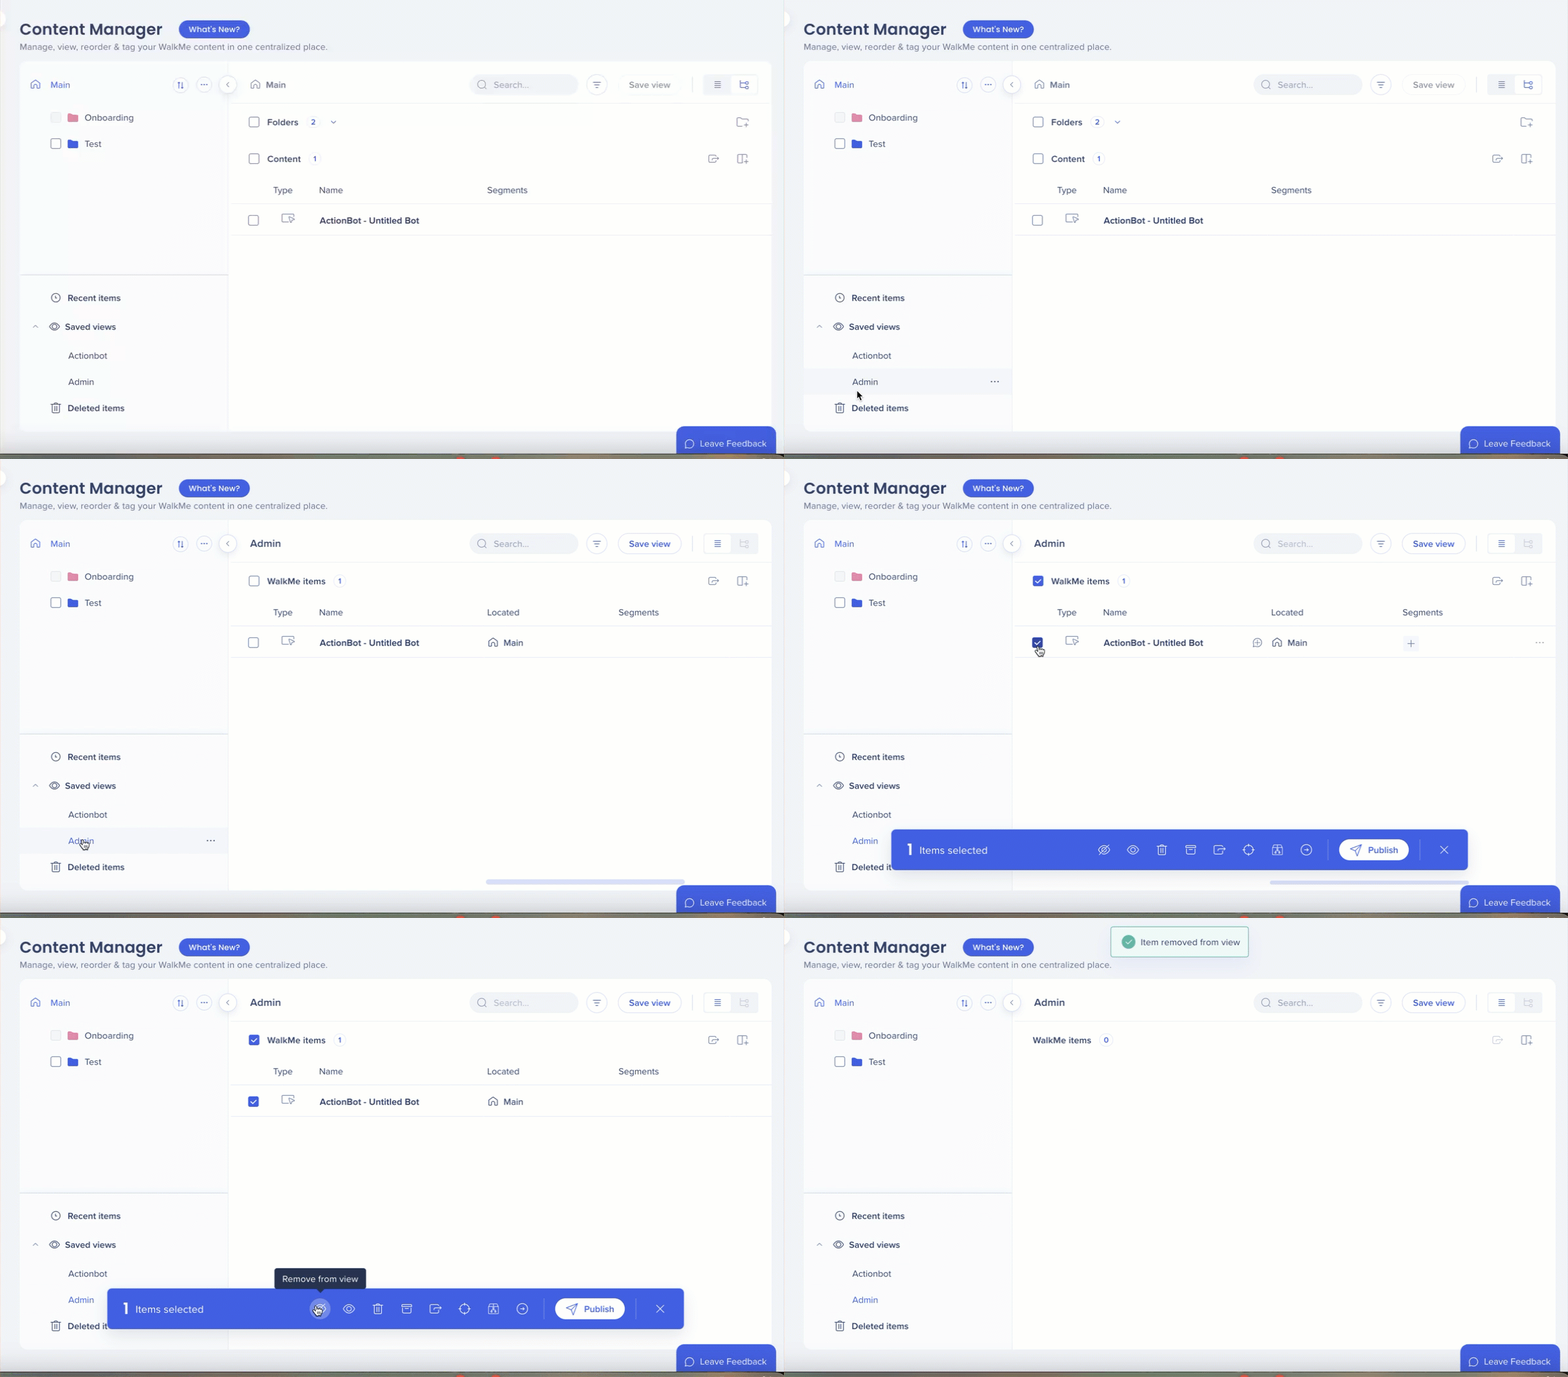
Remover vários itens
Abra o menu suspenso Visualizações salvas e selecione uma visualização
Selecione vários itens
Selecione o ícone Remover da visualização
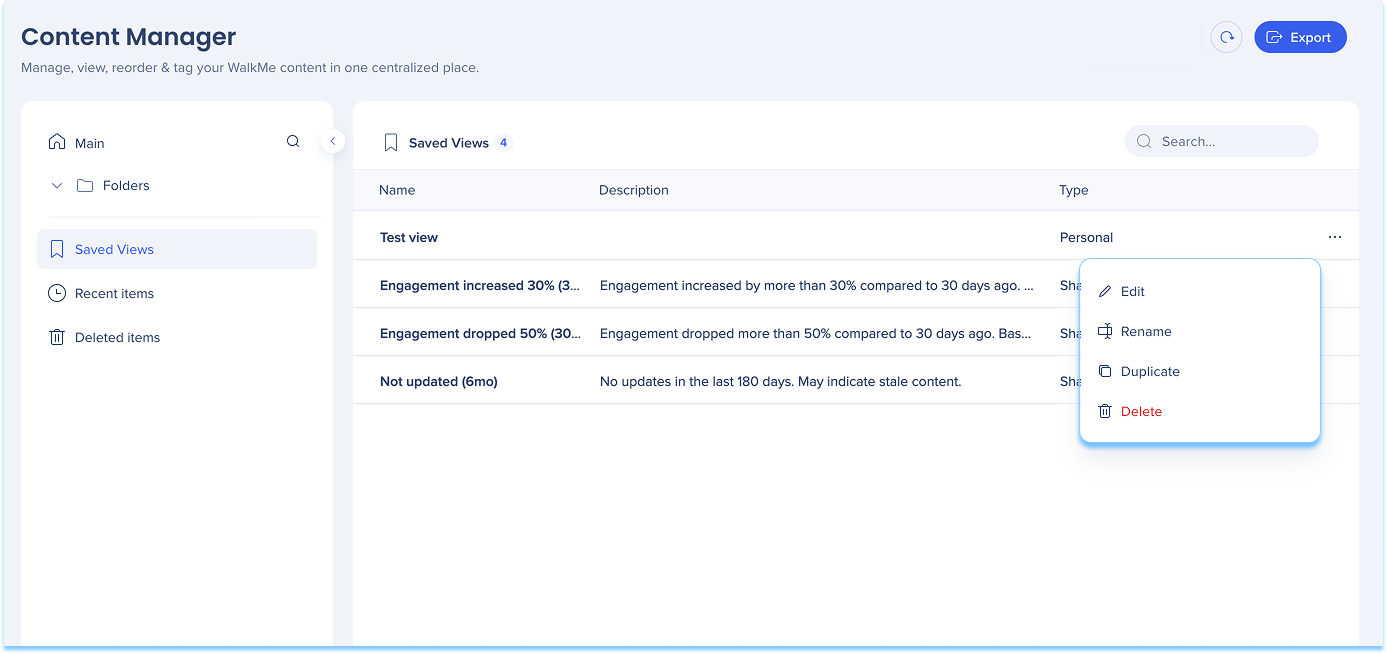
Opções de visualização
Cada visualização salva inclui ações adicionais:
Renomear
Duplicate
Excluir
Acesse essas opções no menu suspenso Visualizações salvas.
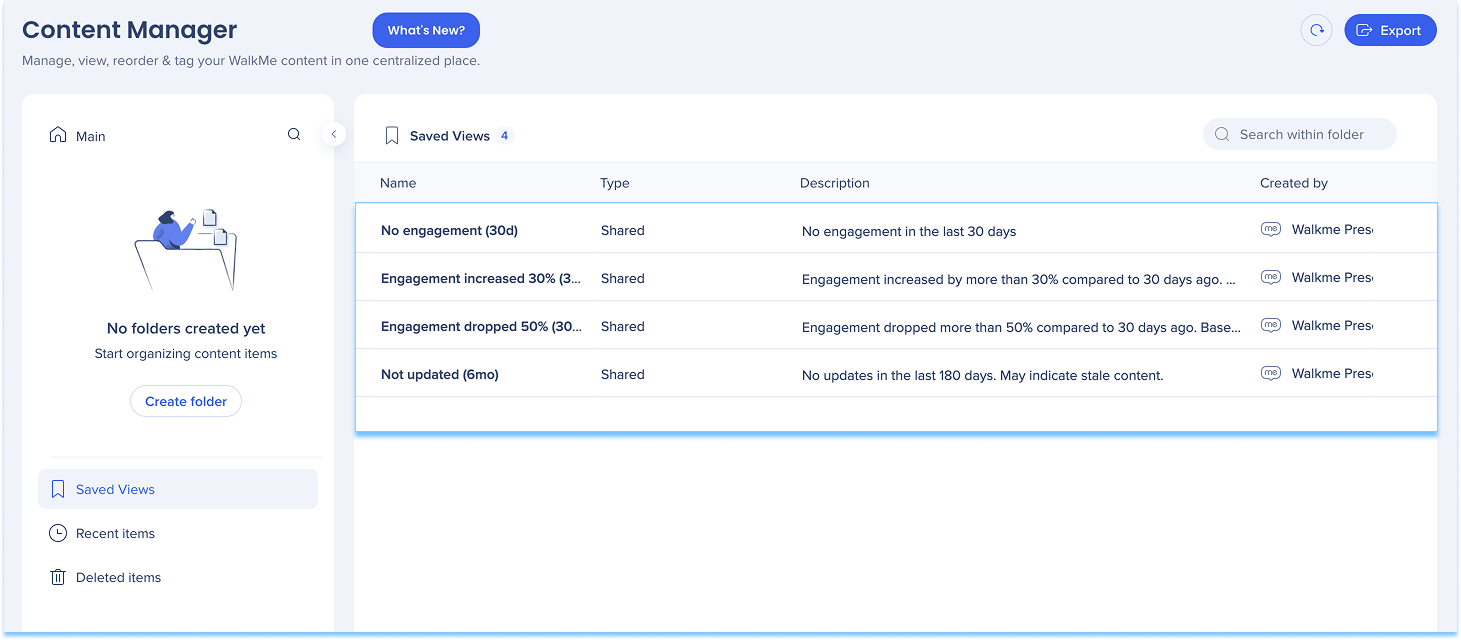
Filtros avançados de engajamento
Os filtros de engajamento avançados são visualizações predefinidas somente para leitura que ajudam a identificar o conteúdo que requer atenção.
Engajamento aumentado 30% (30d): mostra conteúdo com um aumento significativo no engajamento nos últimos 30 dias
Engajamento caiu 50% (30 dias): destaca o conteúdo com queda acentuada no engajamento nos últimos 30 dias
Não atualizado (6 meses): lista itens que não foram atualizados nos últimos seis meses
Sem engajamento (30d): destaca o conteúdo sem engajamento nos últimos 30 dias
Essas visualizações podem ser recriadas manualmente usando filtros, se precisar ajustar os critérios.
Visualizações salvas compartilhadas
Crie uma visualização salva e compartilhe-a com outros Usuários:
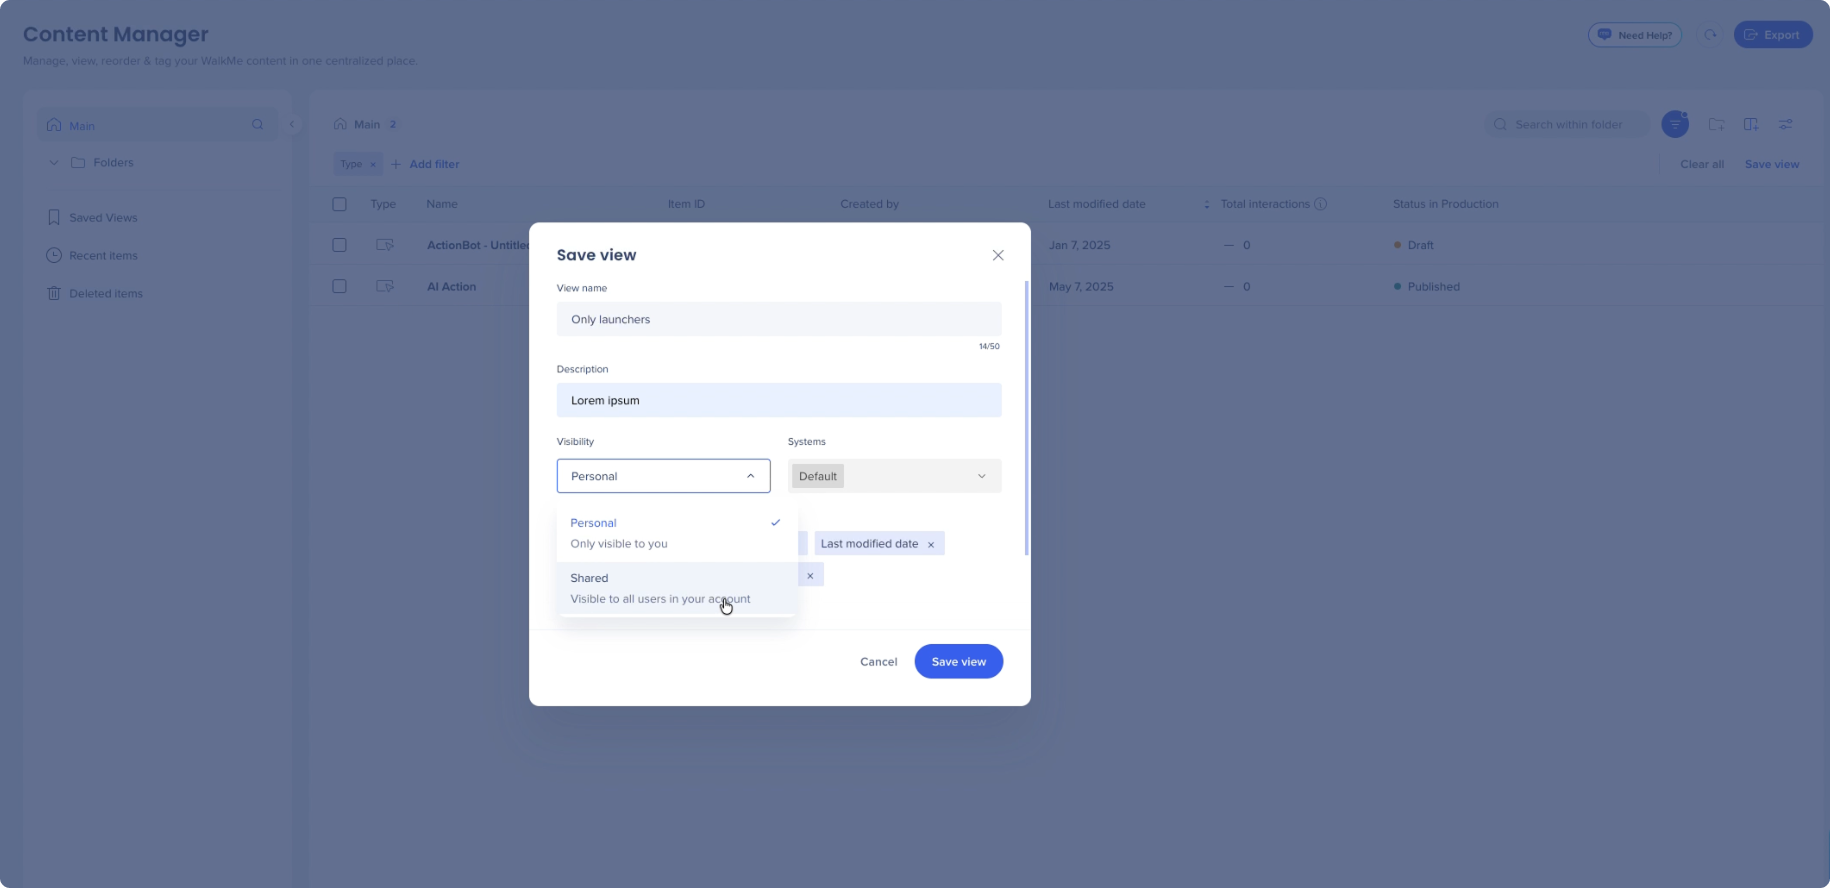
Selecione Salvar visualização
No menu suspenso Visibilidade, selecione Compartilhado
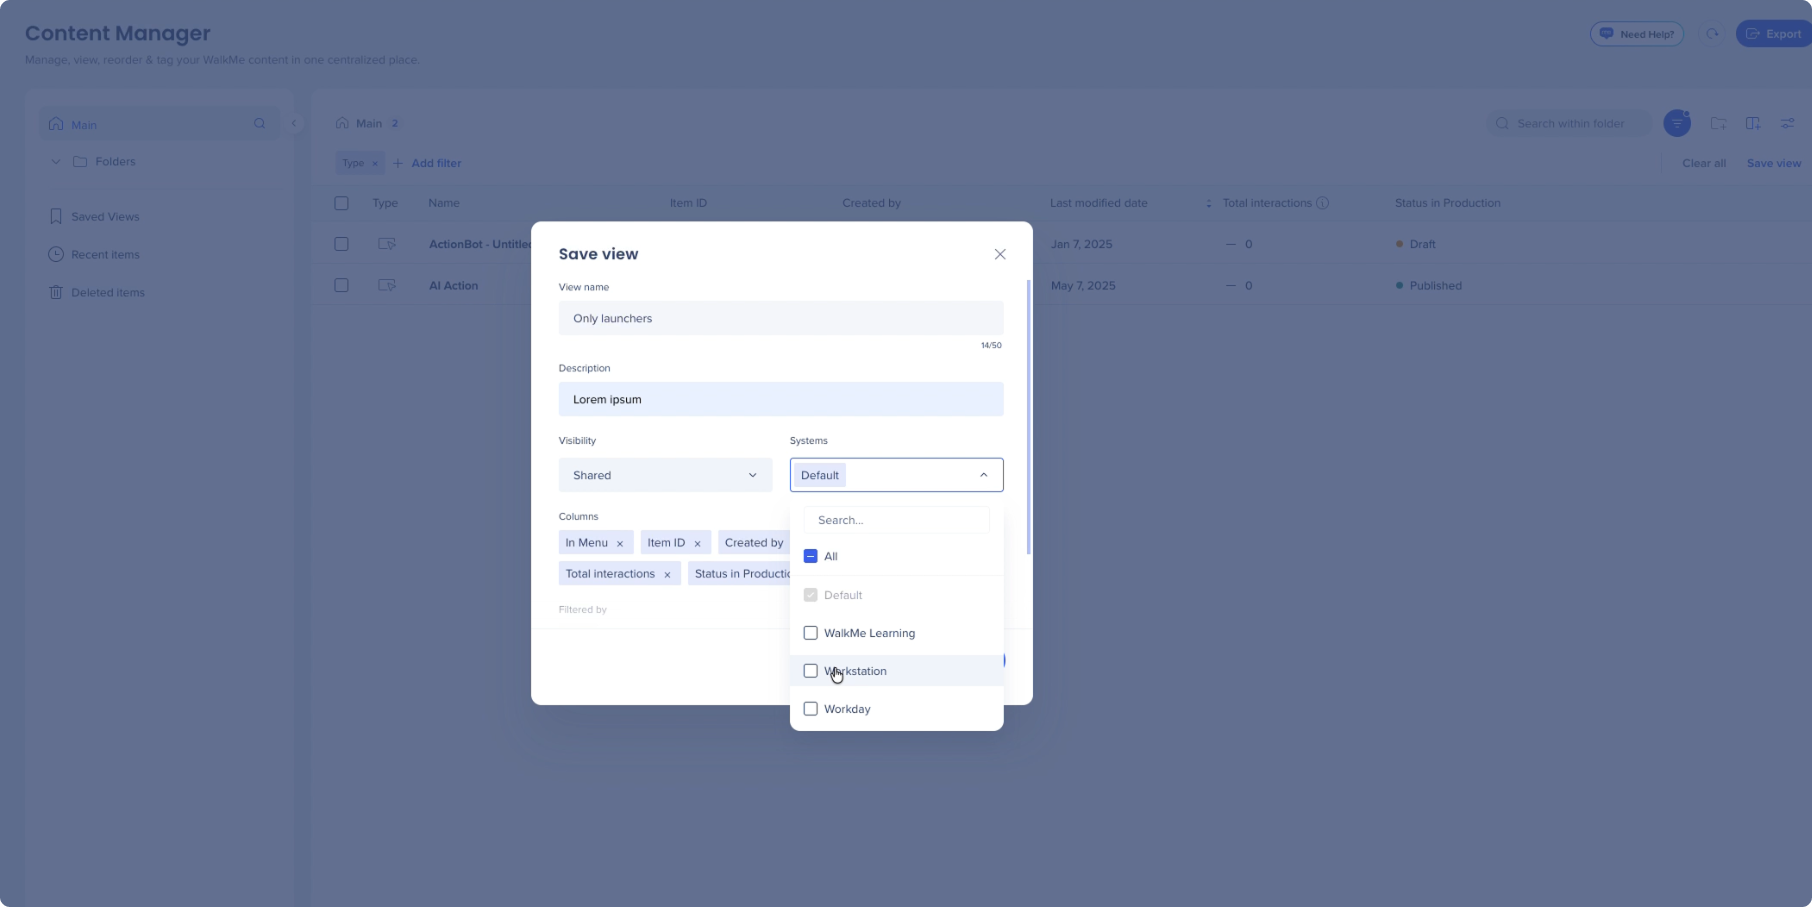
Selecione os sistemas nos quais deseja salvar a visualização
Selecione Salvar visualização
Para compartilhar uma visualização salva existente:
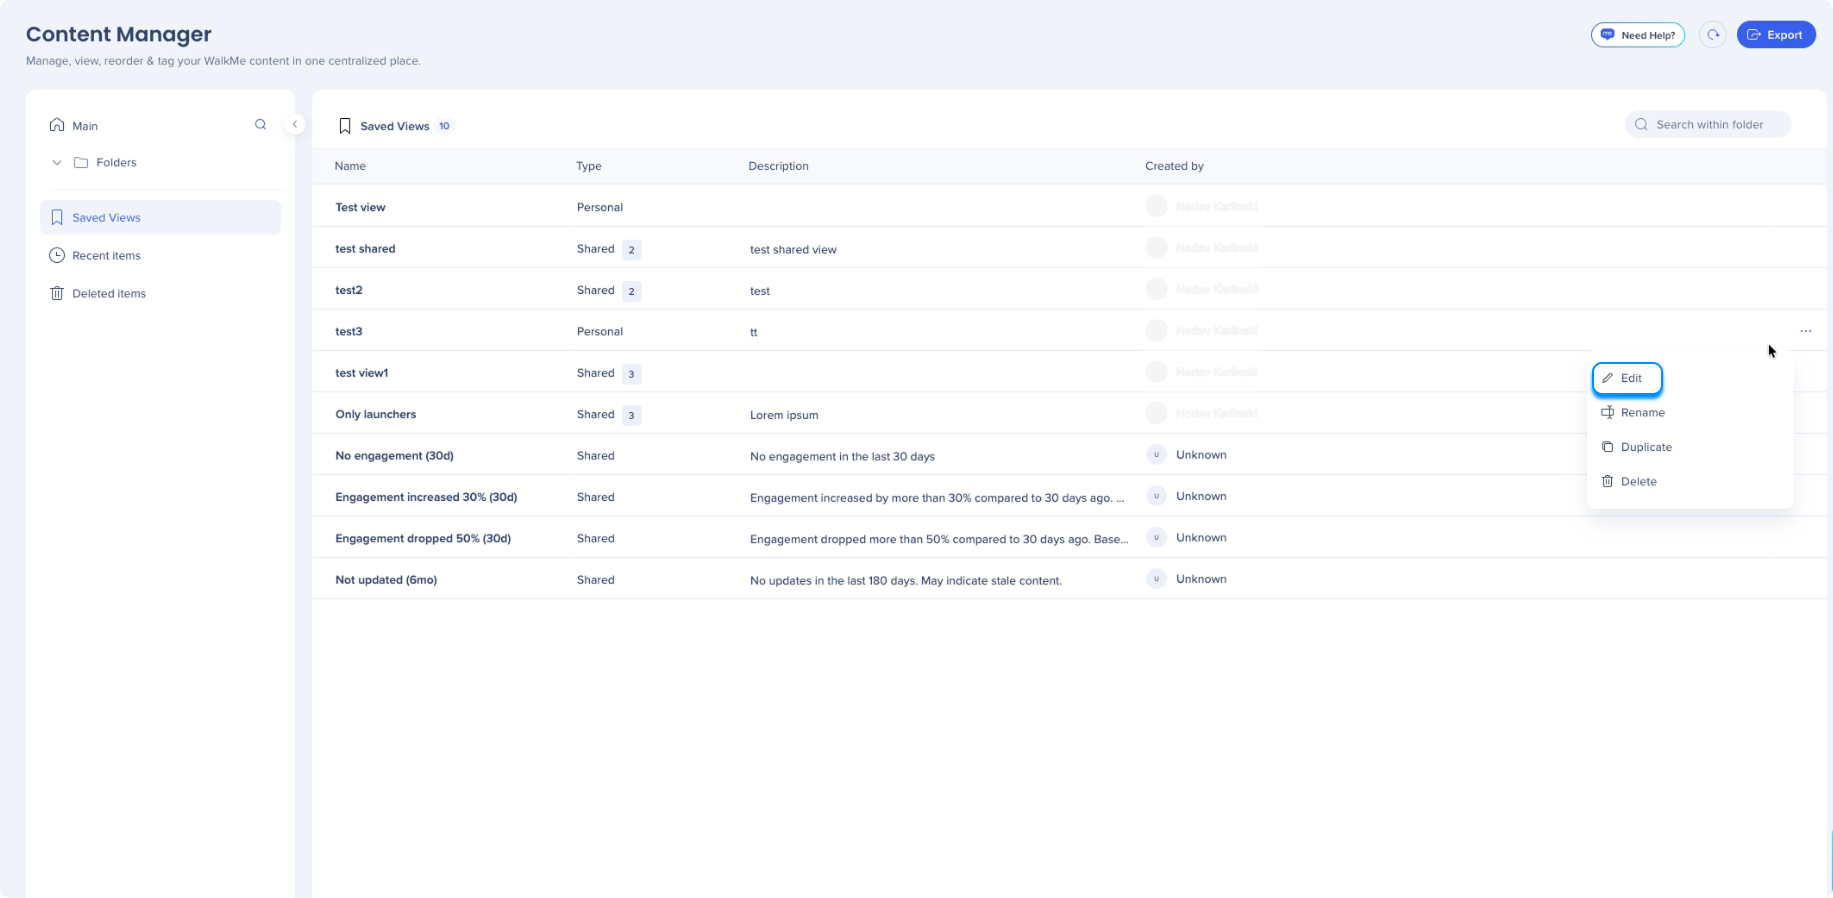
Selecione o Menu Opções ao lado da visualização salva
Selecione Editar
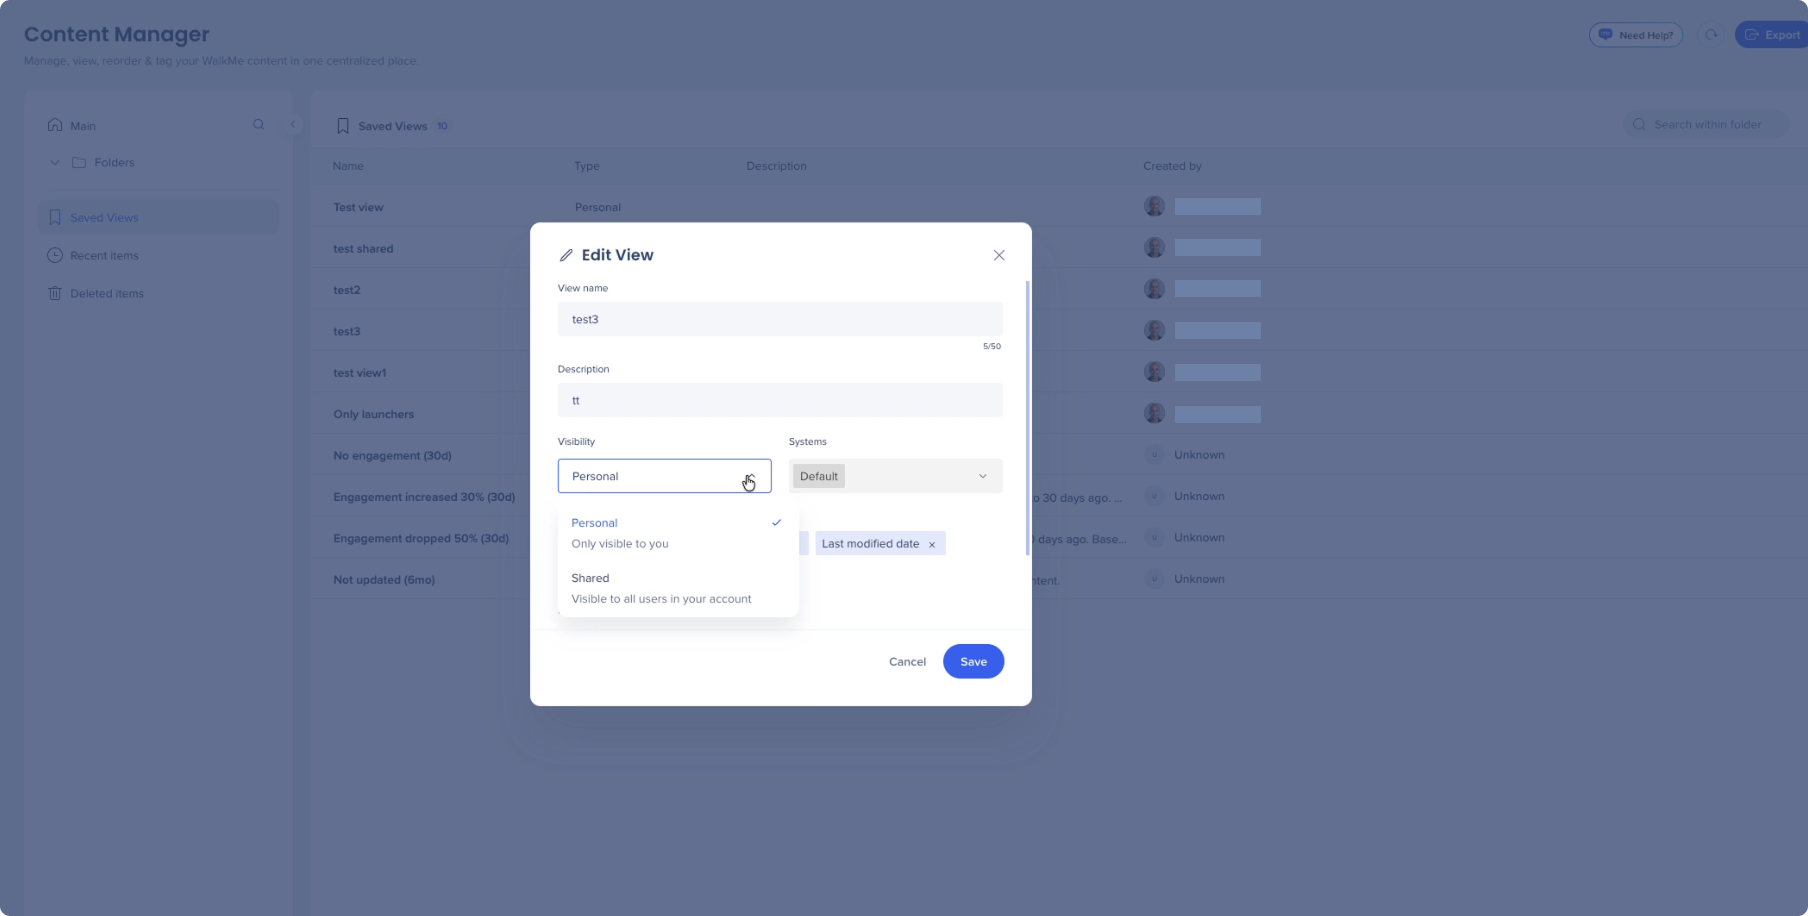
Altere a visibilidade para Compartilhada
Selecione Salvar
Itens recentes
Use Itens recentes para acessar rapidamente o conteúdo adicionado recentemente ao espaço de trabalho.
Visor do conjunto SmartTip
Selecione um conjunto de SmartTips para visualizar todas as SmartTips incluídas nesse conjunto.
Trabalhe com Metadados e Colunas
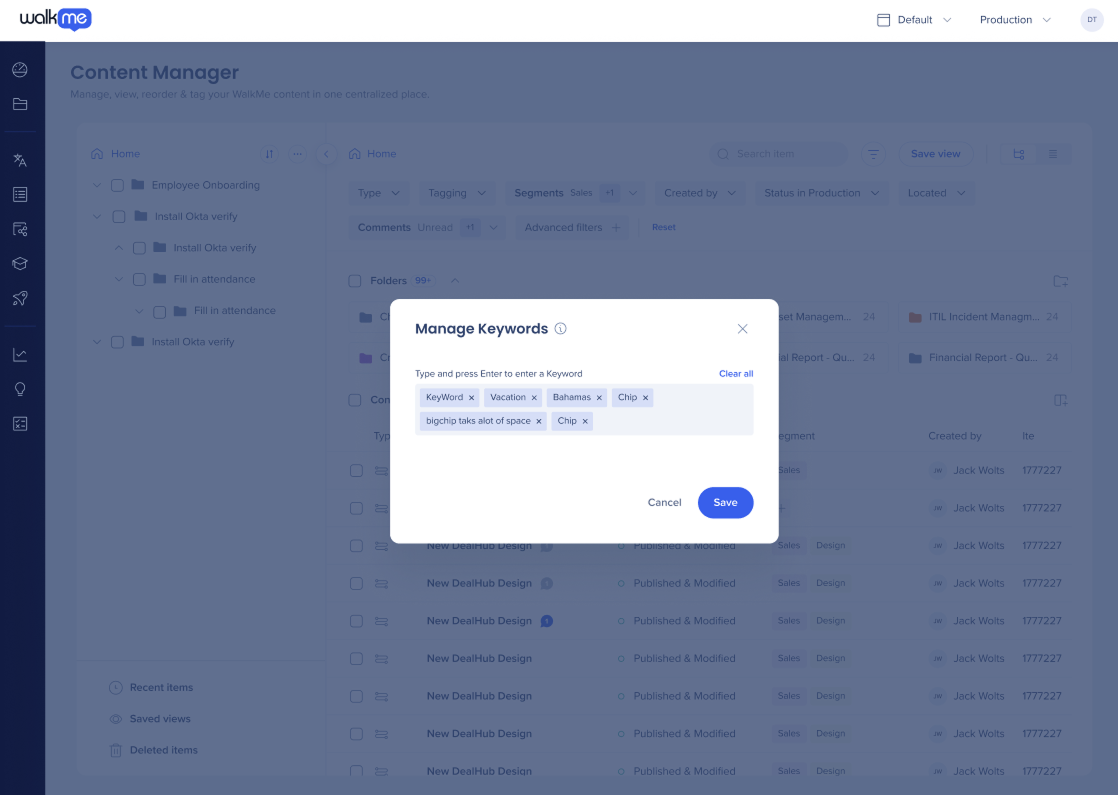
Palavras-chave
Use palavras-chave para ajudar a pesquisar, filtrar e organizar o conteúdo.
Adicionar palavras-chave:
Selecione Gerenciar Colunas para exibir a coluna de palavras-chave
Selecione o ícone + na coluna Palavra-chave para um item
Digite uma palavra-chave e pressione Enter
Selecione Salvar
Gerenciar palavras-chave:
Selecione uma palavra-chave na coluna Palavra-chave
Na janela Gerenciar palavras-chave:
Selecione x para remover uma palavra-chave
Insira uma nova palavra-chave e pressione Enter para adicionar uma
Selecione Salvar
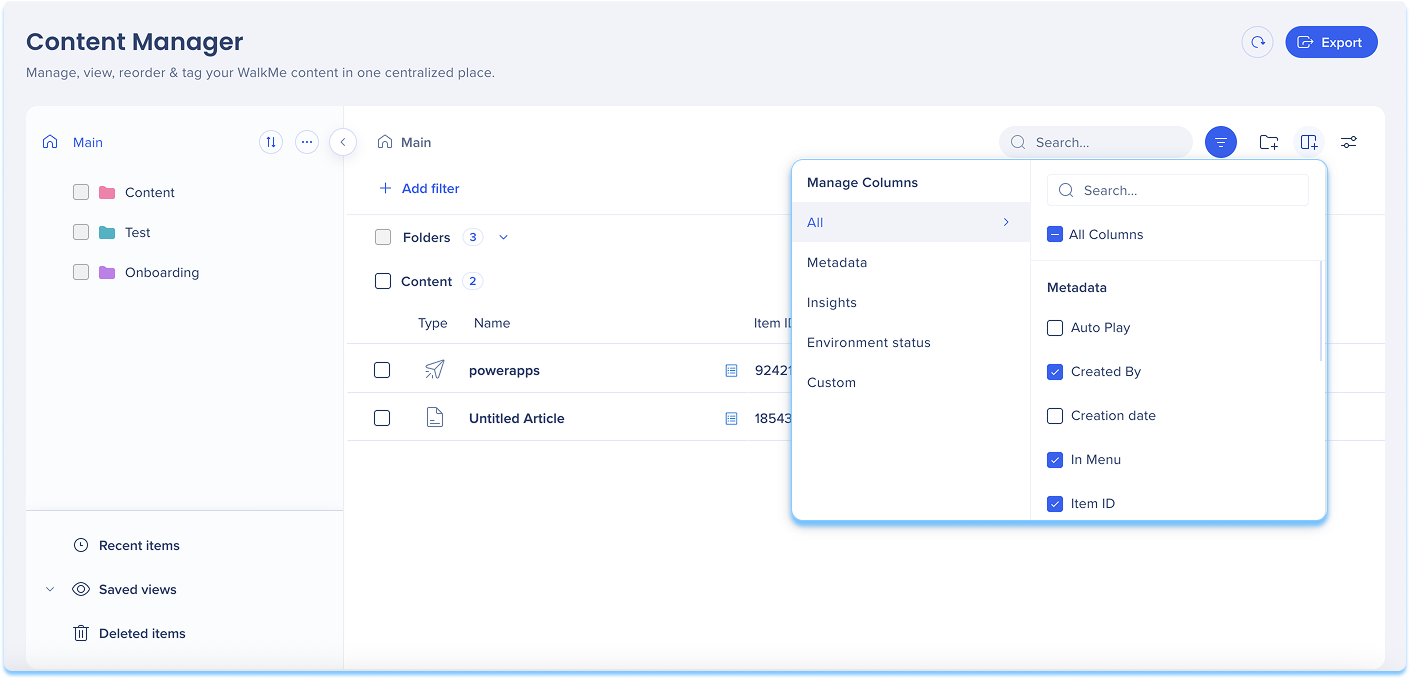
Gestão de colunas
Use o gerenciamento de colunas para controlar quais dados aparecem na tabela.
Selecione Gerenciar Colunas
Selecione as colunas que deseja mostrar ou ocultar
As colunas Tipo e Nome estão sempre visíveis.
Coluna da data da última modificação
The Last Modified Date column reflects content changes.
It shows past data on all items
It does not include modifications to:
Global CSS
Segment rules connected to the item
Shared assets, such as images
Status changes, such as publishing or archiving
Observação
The editor description field is synced with the Content Manager, letting you view, edit, filter, and export descriptions without switching tools
Descriptions for Smart Walk-Thrus are not yet supported in the Content Manager
Campos de metadados personalizados
Campos de metadados personalizados permitem rastrear e gerenciar informações adicionais para itens. Os metadados aparecem na tabela e na gaveta de itens e podem ser usados para classificação, filtragem e atualizações em massa.
Criar um campo personalizado
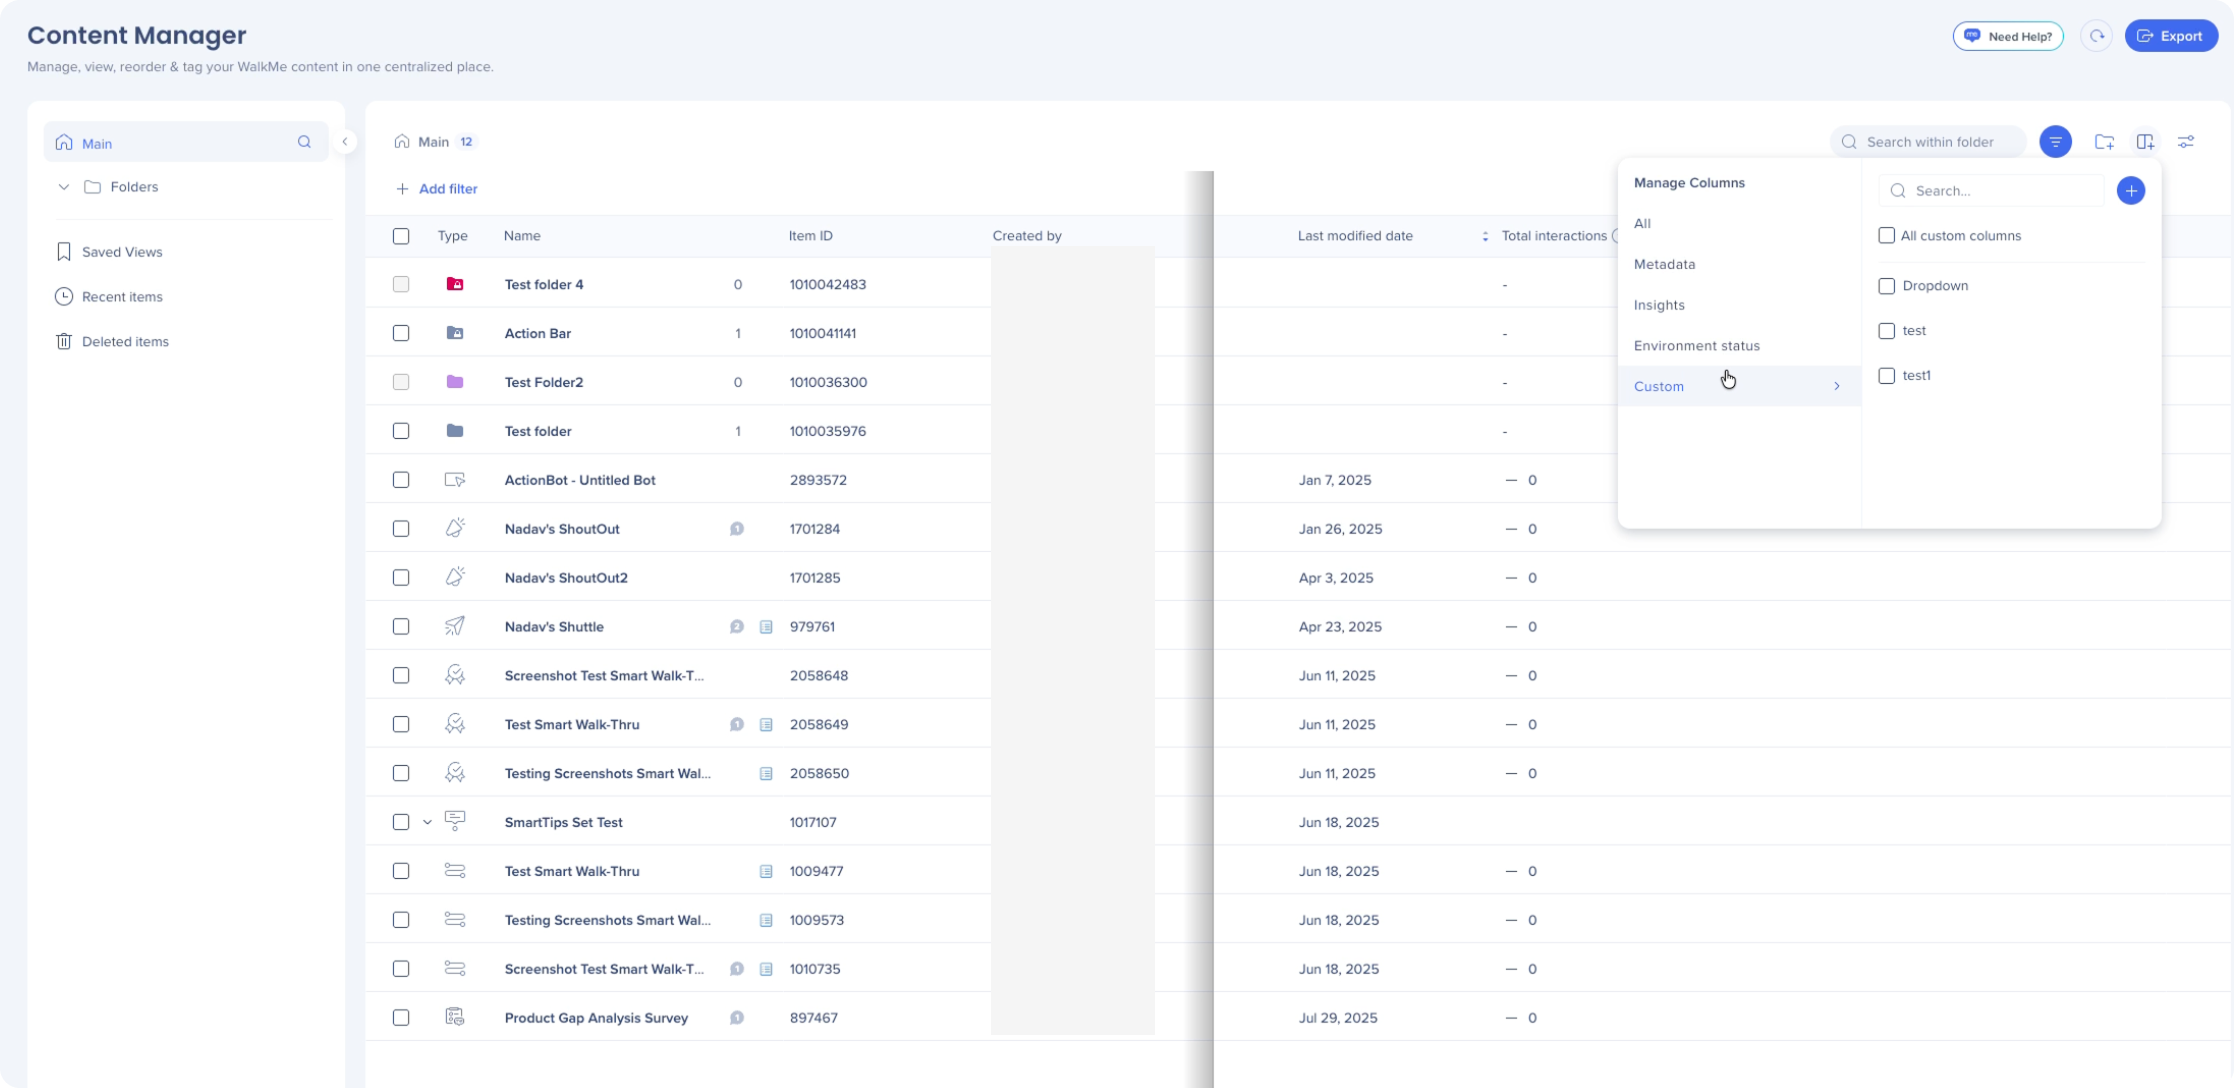
Selecione Gerenciar Colunas
Passe o mouse sobre Personalizado
Selecione o ícone +Adicionar no painel Gerenciar Colunas
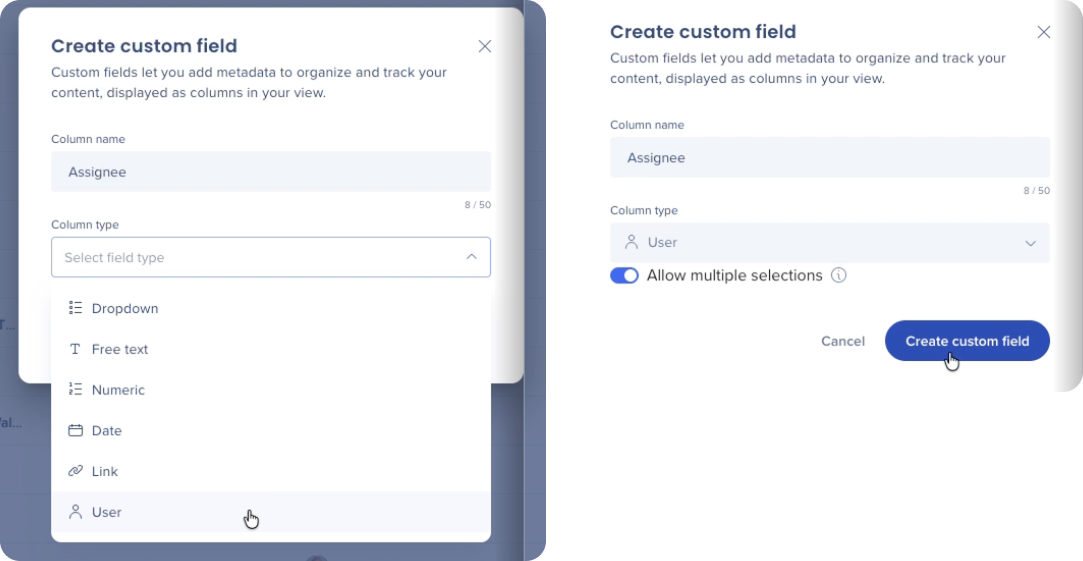
Insira um nome de coluna
Escolha um tipo de coluna:
Texto livre
Lista suspensa
Data
Link
Numérico
Usuário
Opcional: ative Aplicar a todos os sistemas para tornar o campo visível em todos os ambientes
Opcional: ative Permitir várias seleções se quiser selecionar várias instâncias, por exemplo, Usuários na conta
Selecione Criar Campo Personalizado
Observação
Only admins can create custom metadata fields
Each account can have up to 100 custom metadata fields
Editar valores de metadados
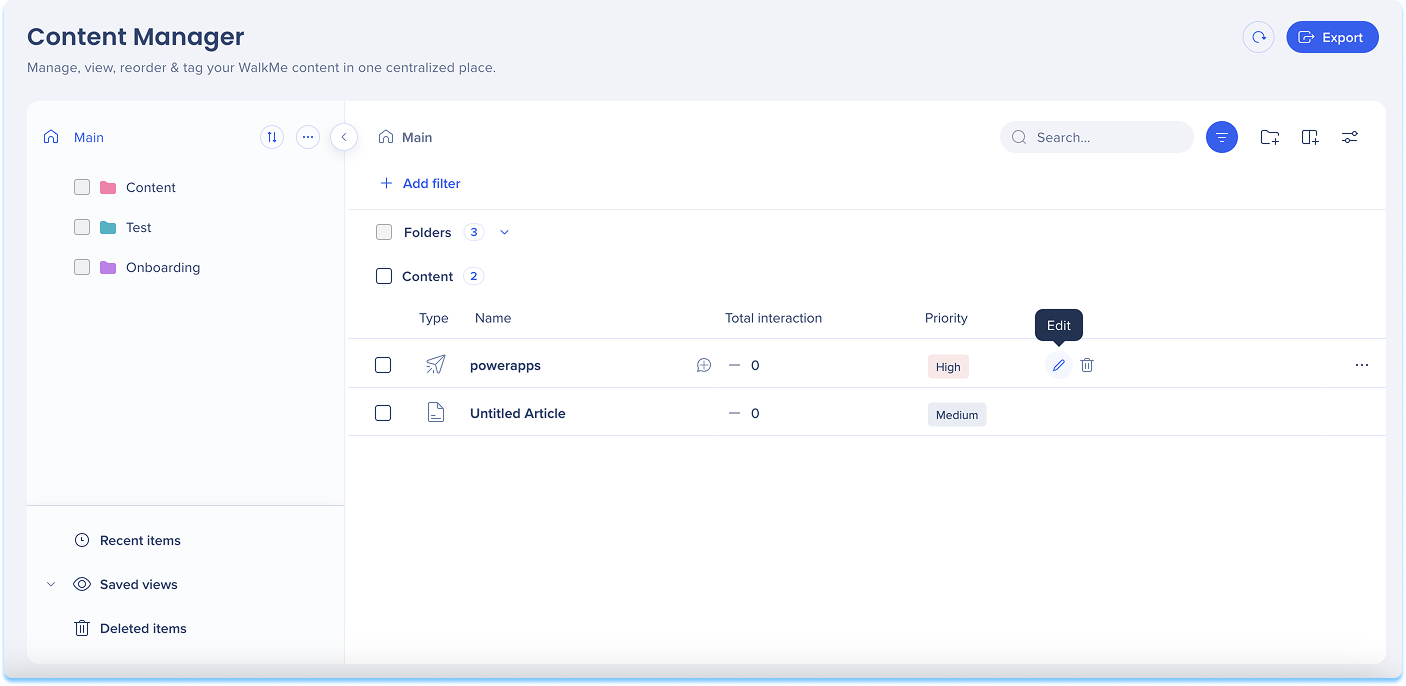
Editar um único item
Localize o item na tabela
Selecione o campo de metadados
Insira ou selecione um valor
Selecione Salvar
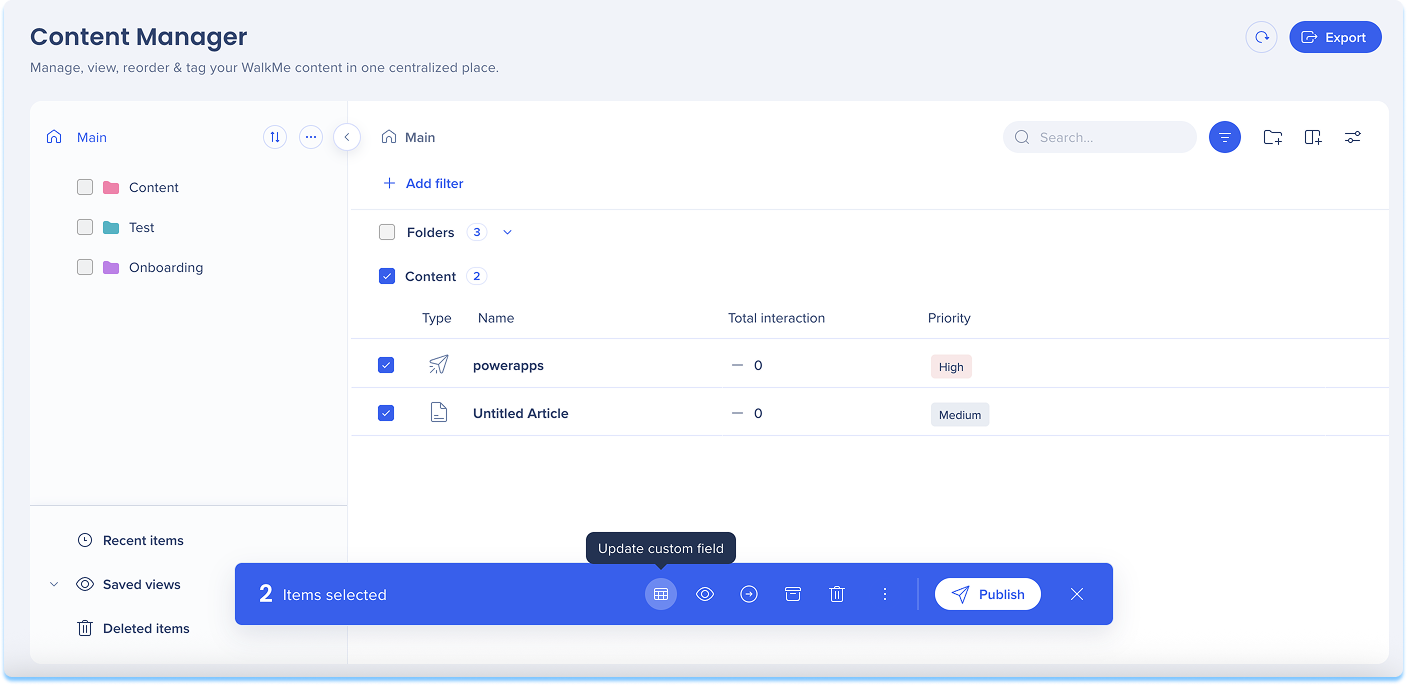
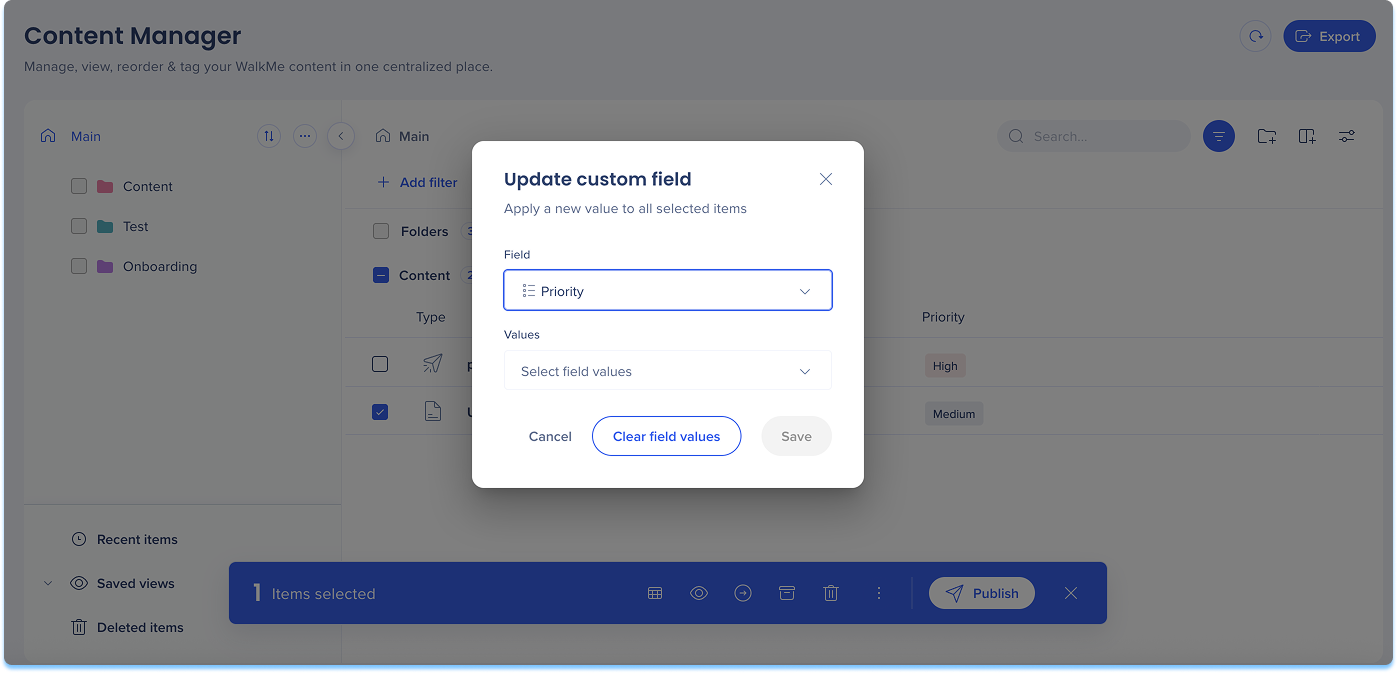
Editar vários itens
Selecione vários itens
Selecione o ícone Editar campo personalizado
Escolha um campo e insira um valor
Selecione Salvar
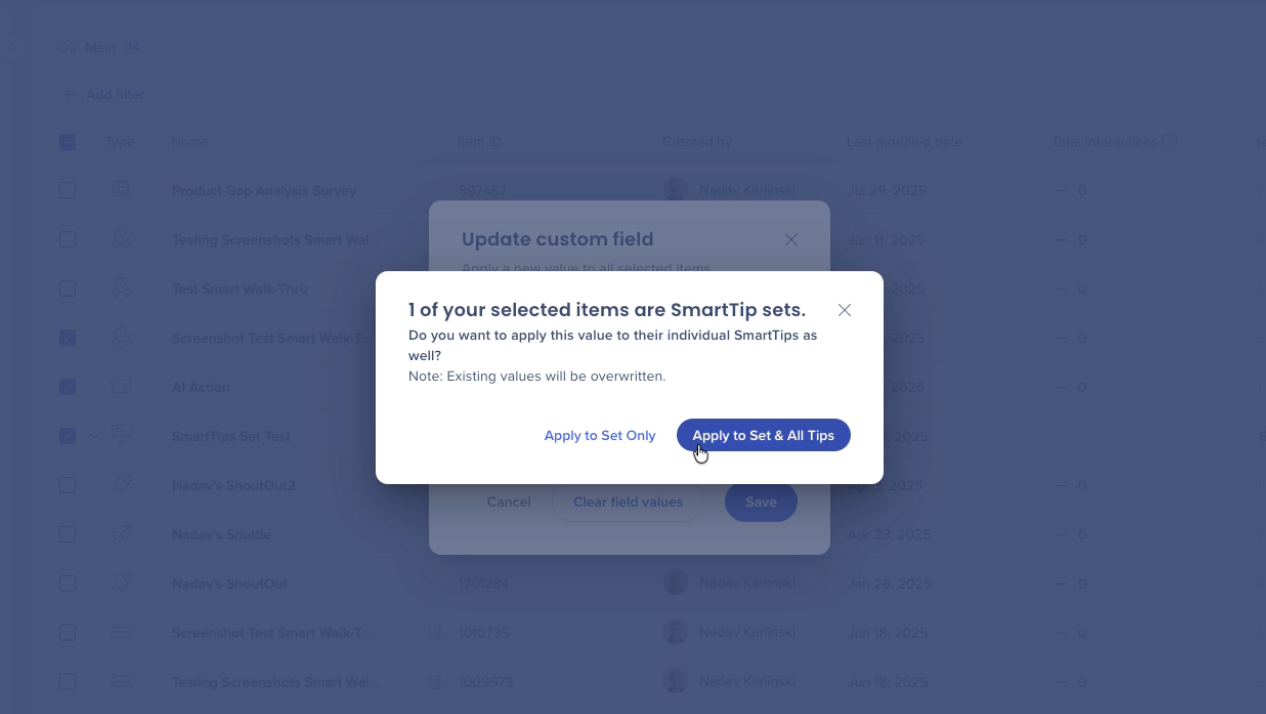
Editar um conjunto SmartTip:
Selecione a caixa de seleção ao lado do conjunto que deseja atualizar
Clique no ícone Atualizar campo personalizado na barra de ferramentas flutuante
Insira ou selecione o valor
Escolha se deseja aplicar o valor a todas as SmartTips no conjunto ou apenas ao conjunto
Limpar valores de metadados
Selecione os itens que contêm os valores que deseja remover
Selecione o ícone Editar campo personalizado
Escolha o campo
Selecione Limpar Valores de Campo
Observação
This will remove the data for all selected items. This action cannot be undone.
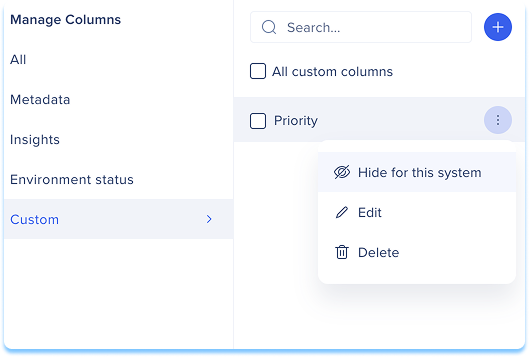
Show or hide custom fields
Select Manage Columns
Scroll to the Custom section
Select Hide for this system or Show for this system
Observação
Ocultar uma coluna apenas a remove da visualização. Não exclui dados nem remove valores de itens.
Platform-Specific and Advanced Features
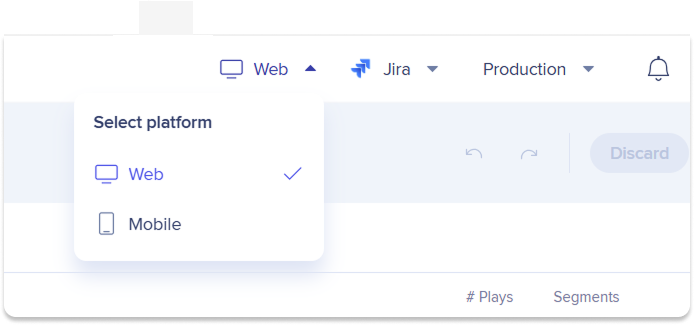
Switch platforms
If your account includes both web and mobile platforms, you can switch between them to manage platform-specific items.
Use the platform selector to:
View items created for a specific platform
Manage content without leaving Content Manager
Surveys
You can open Console Survey items directly in the Surveys console app from Content Manager.
Select Open in Surveys to open the item in the Surveys console