Elements in WalkMe Learning Arc
Brief Overview
This article explains the elements you can add when creating lessons in WalkMe Learning Arc. Elements include text, images, videos, screen recordings, articles, simulations, self-checks, and attachments. Each element has a specific role in presenting information and supporting different learning needs.
How It Works
Each course or lesson can include a mix of elements. Drag and drop different content types to add explanations, examples, or practice activities.
Available elements:
-
Text: Add written content to explain ideas, give instructions, or share context
-
Image: Upload or insert an image to support your message visually
-
Video: Use the video element to record yourself and deliver content in a more dynamic way
-
Screen Recording: Show a step-by-step recording of a process or workflow
-
Embedded Content: Insert external resources, such as websites, apps, or tools, directly into your lesson
-
Simulation: Let users practice a process in an interactive, guided environment
-
Self Check: Add a short quiz to help users test their understanding
-
Attachment: Provide downloadable files like PDFs or guides
-
SAP Enable Now: Add transitioned SAP Enable Now content
Add an element
There are two ways to add an element to the page:
-
Drag and drop the element from the elements panel onto:
-
The main canvas
-
A spot in the layers panel
-
-
Click + Add Element in the main canvas
Elements overview
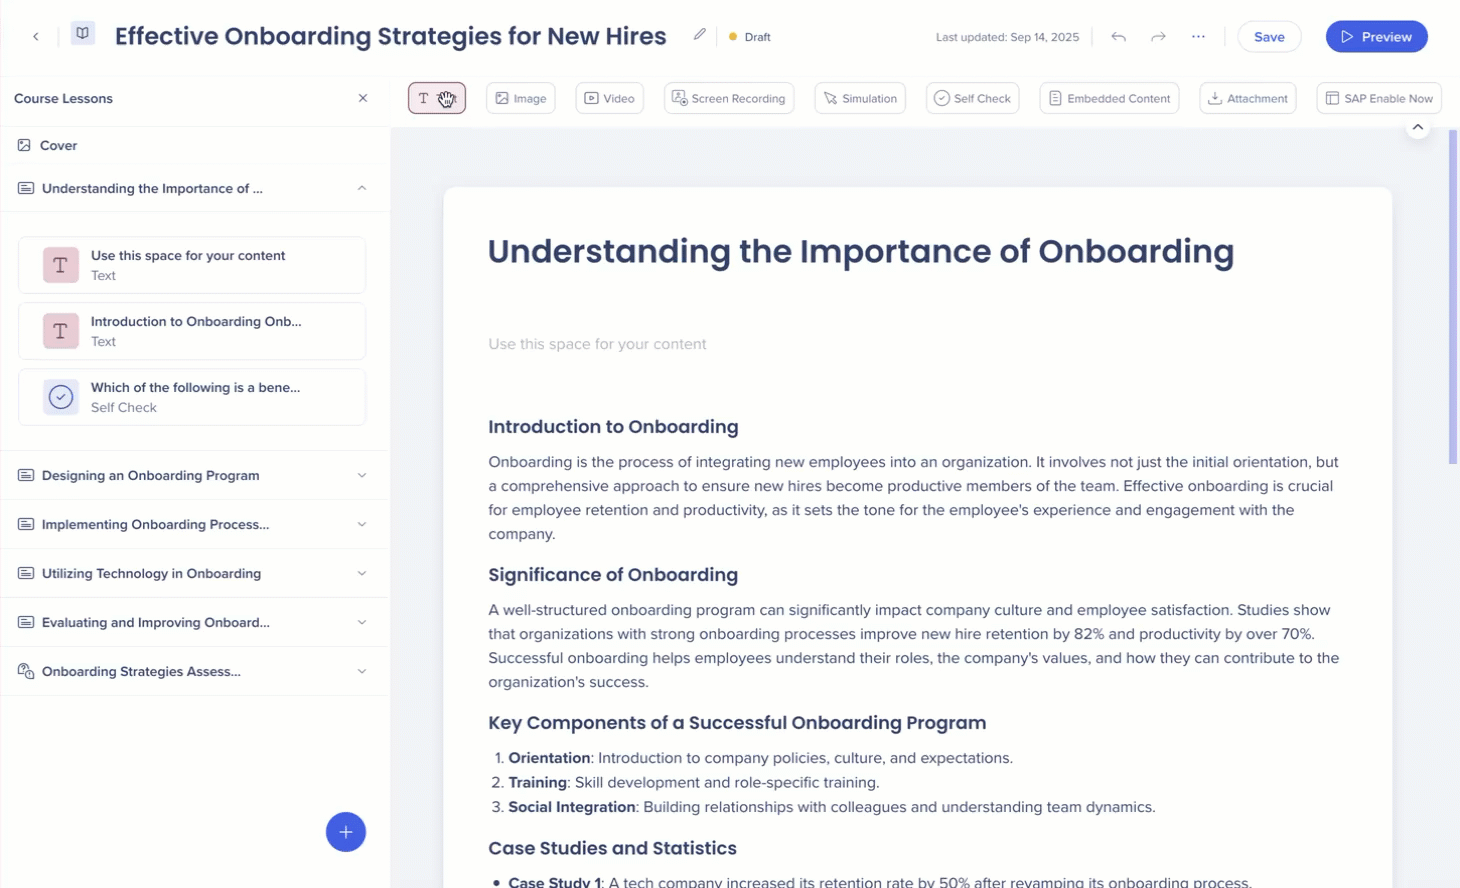
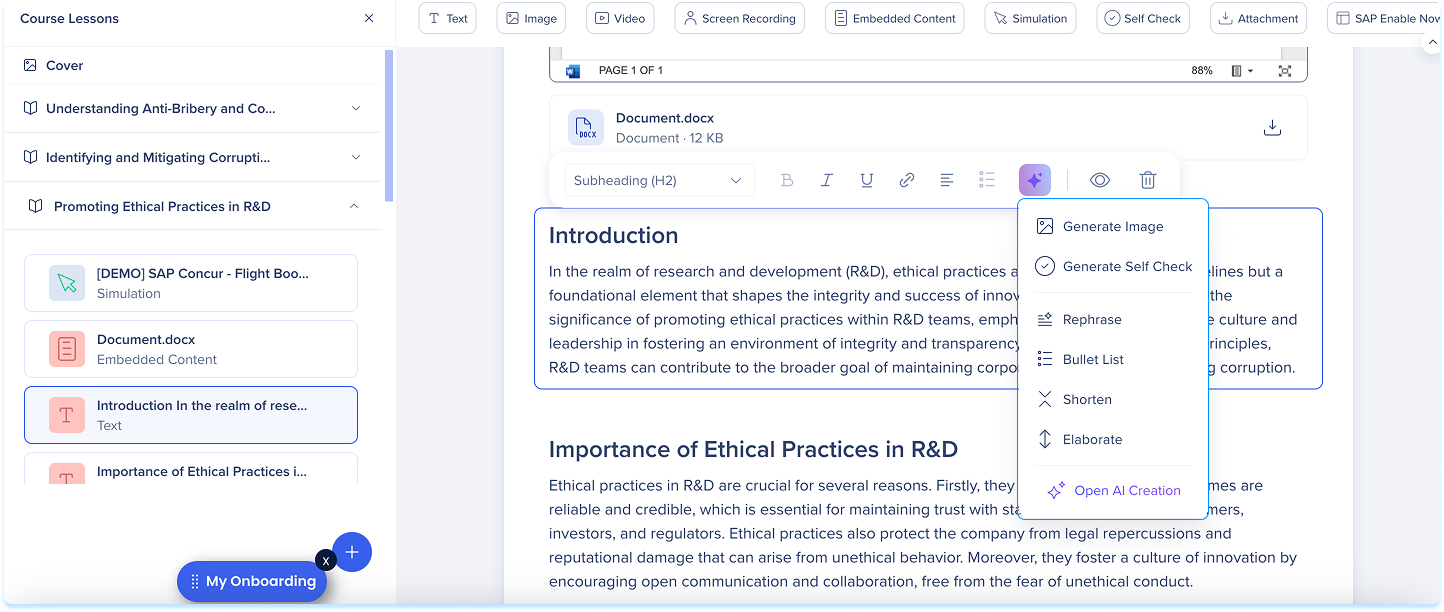
Text
Use the text element for adding headings, paragraphs, lists, and links to your content.

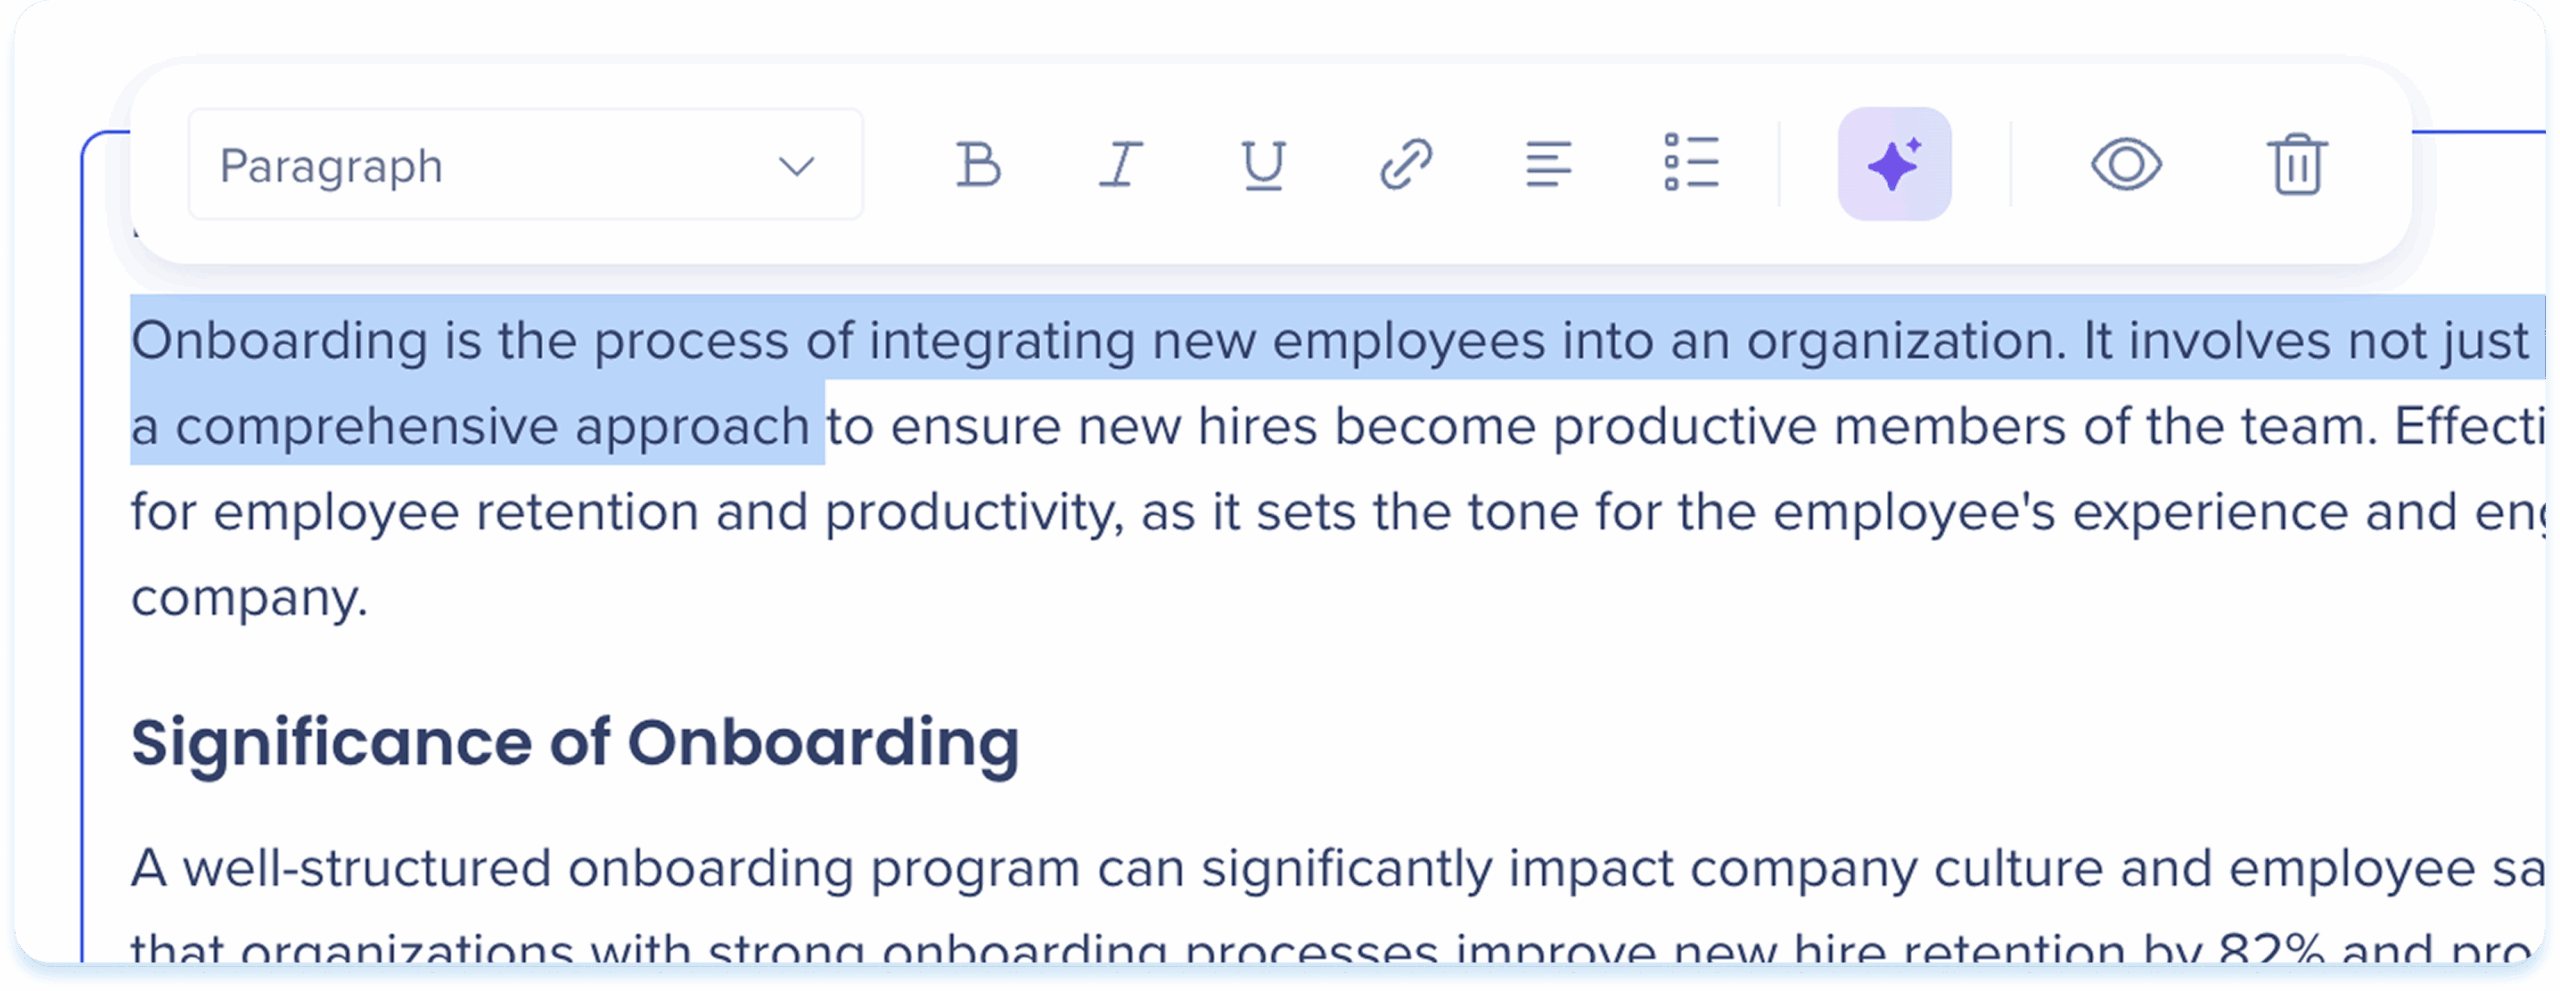
Toolbar actions
After you add the text, use the toolbar to edit and adjust it.
-
Click inside the text field and type your content
-
Use the toolbar to apply the following formats and actions:
-
Text style: Headline, subheading, paragraph, preformatted
-
Format text: Bold (B), Italic (I), Underline (U)
-
Link: Add a hyperlink
-
Lists: Bulleted list or numbered list
-
Alignment: Left, center, right
-
AI creation: Generate other elements from the text
-
Hide: Keep the element invisible to learners
-
Delete: Remove the element
-
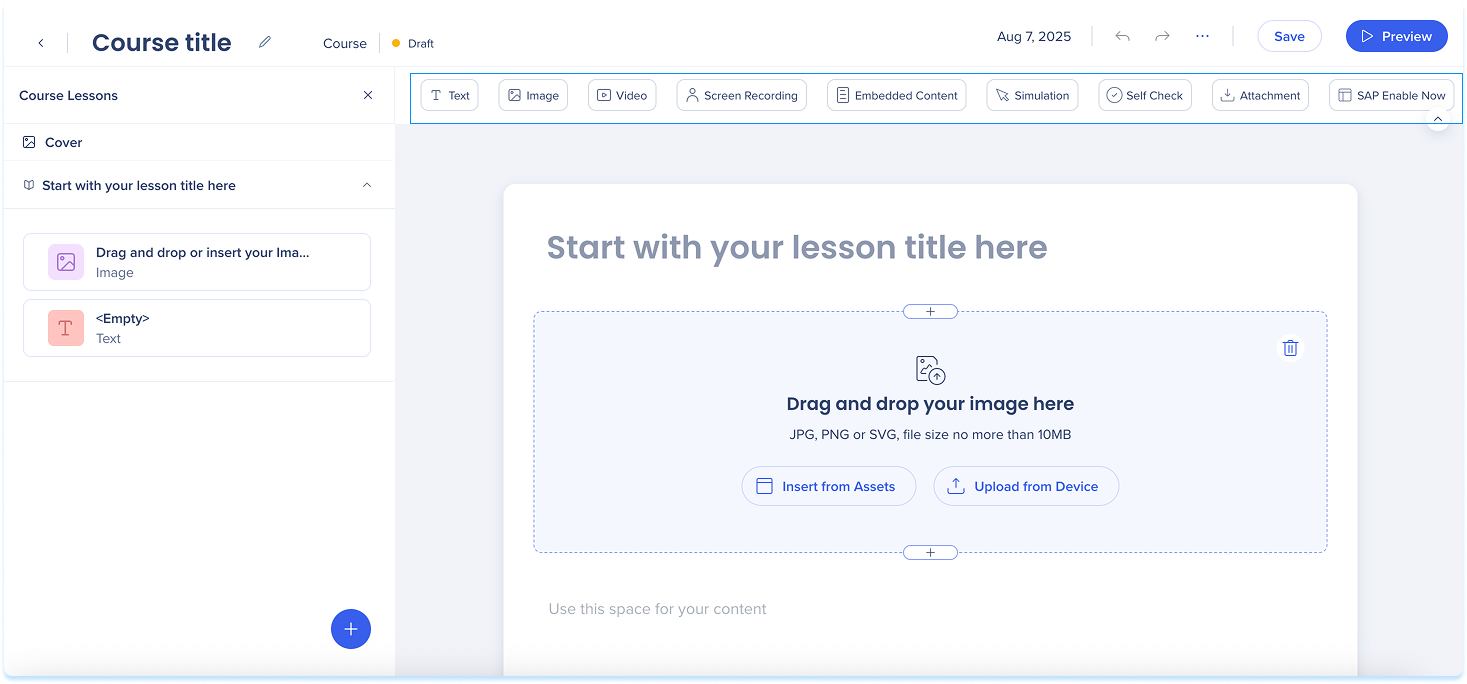
Image
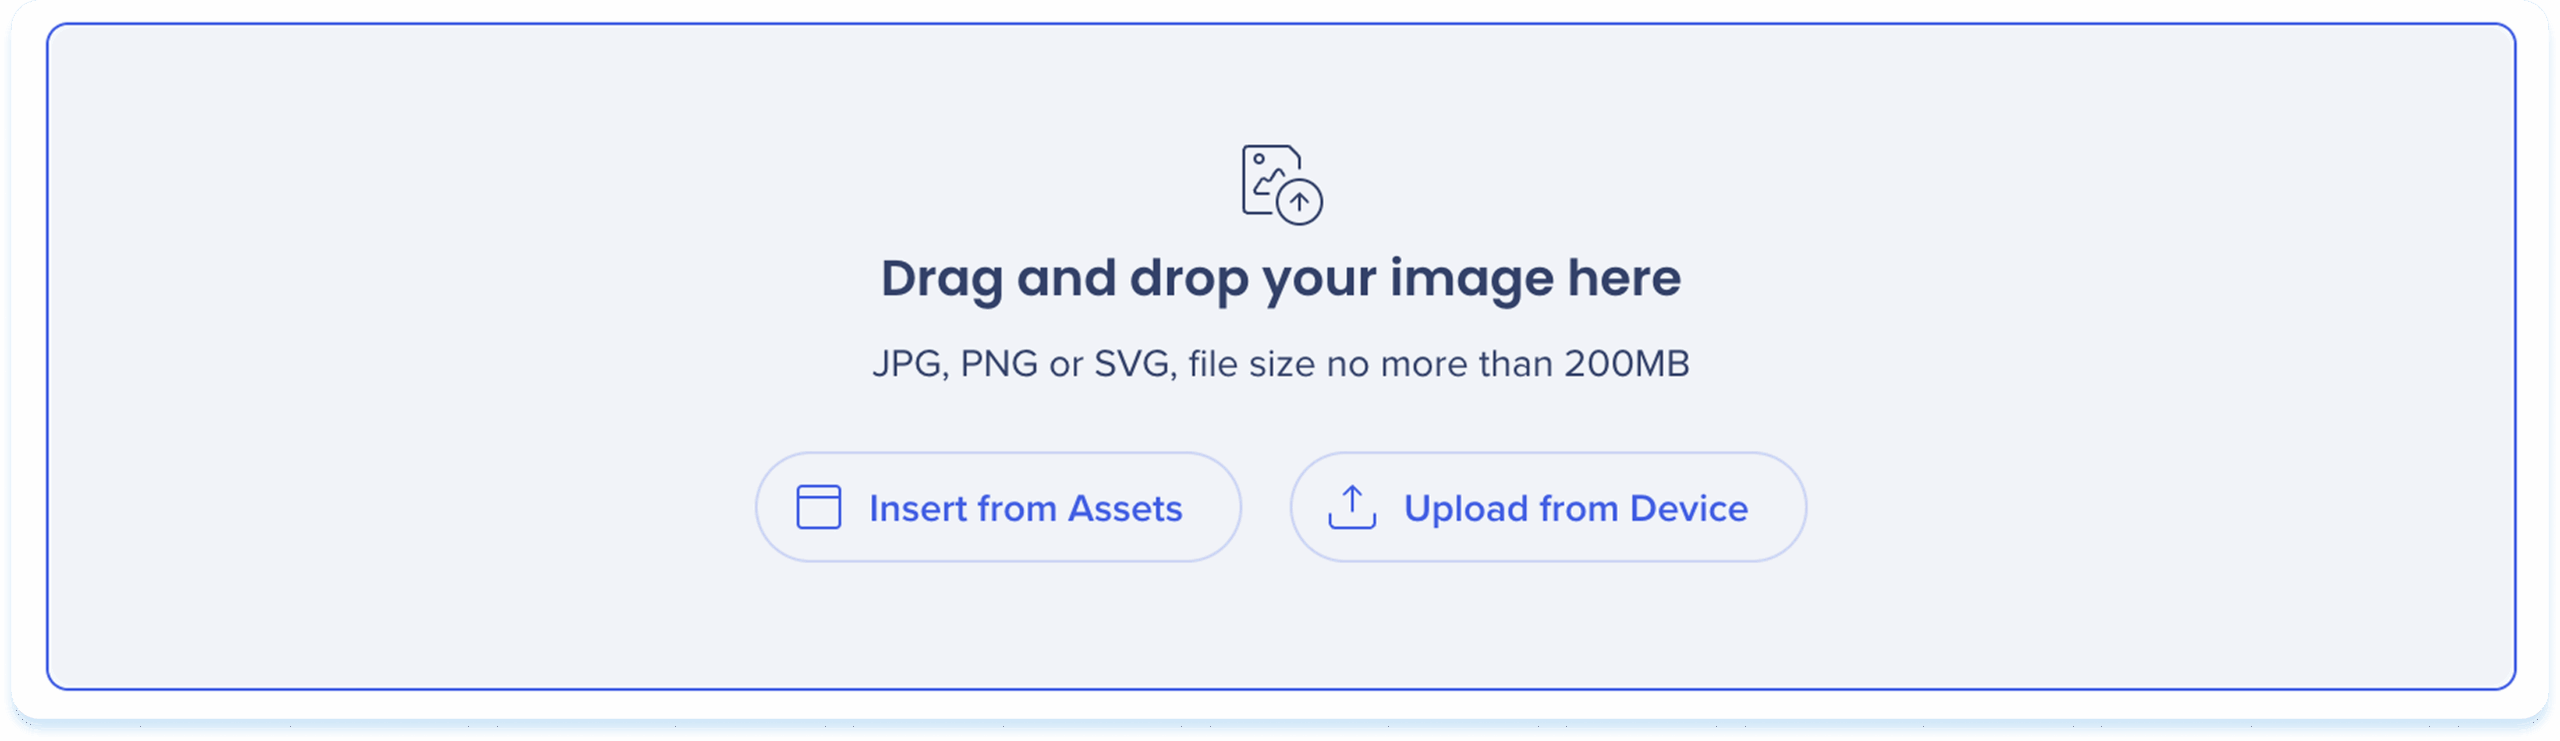
Use the image element to add visual context to your lessons.

Add an image
Choose one of the following options to add an image:
-
Drag & drop the file into the placeholder element
-
Insert from Assets: Select an image from your learning assets
-
Upload from Device: Choose a file from your computer
Toolbar actions
After you add the image, use the toolbar to edit and adjust it.
-
Click the image to show the toolbar
-
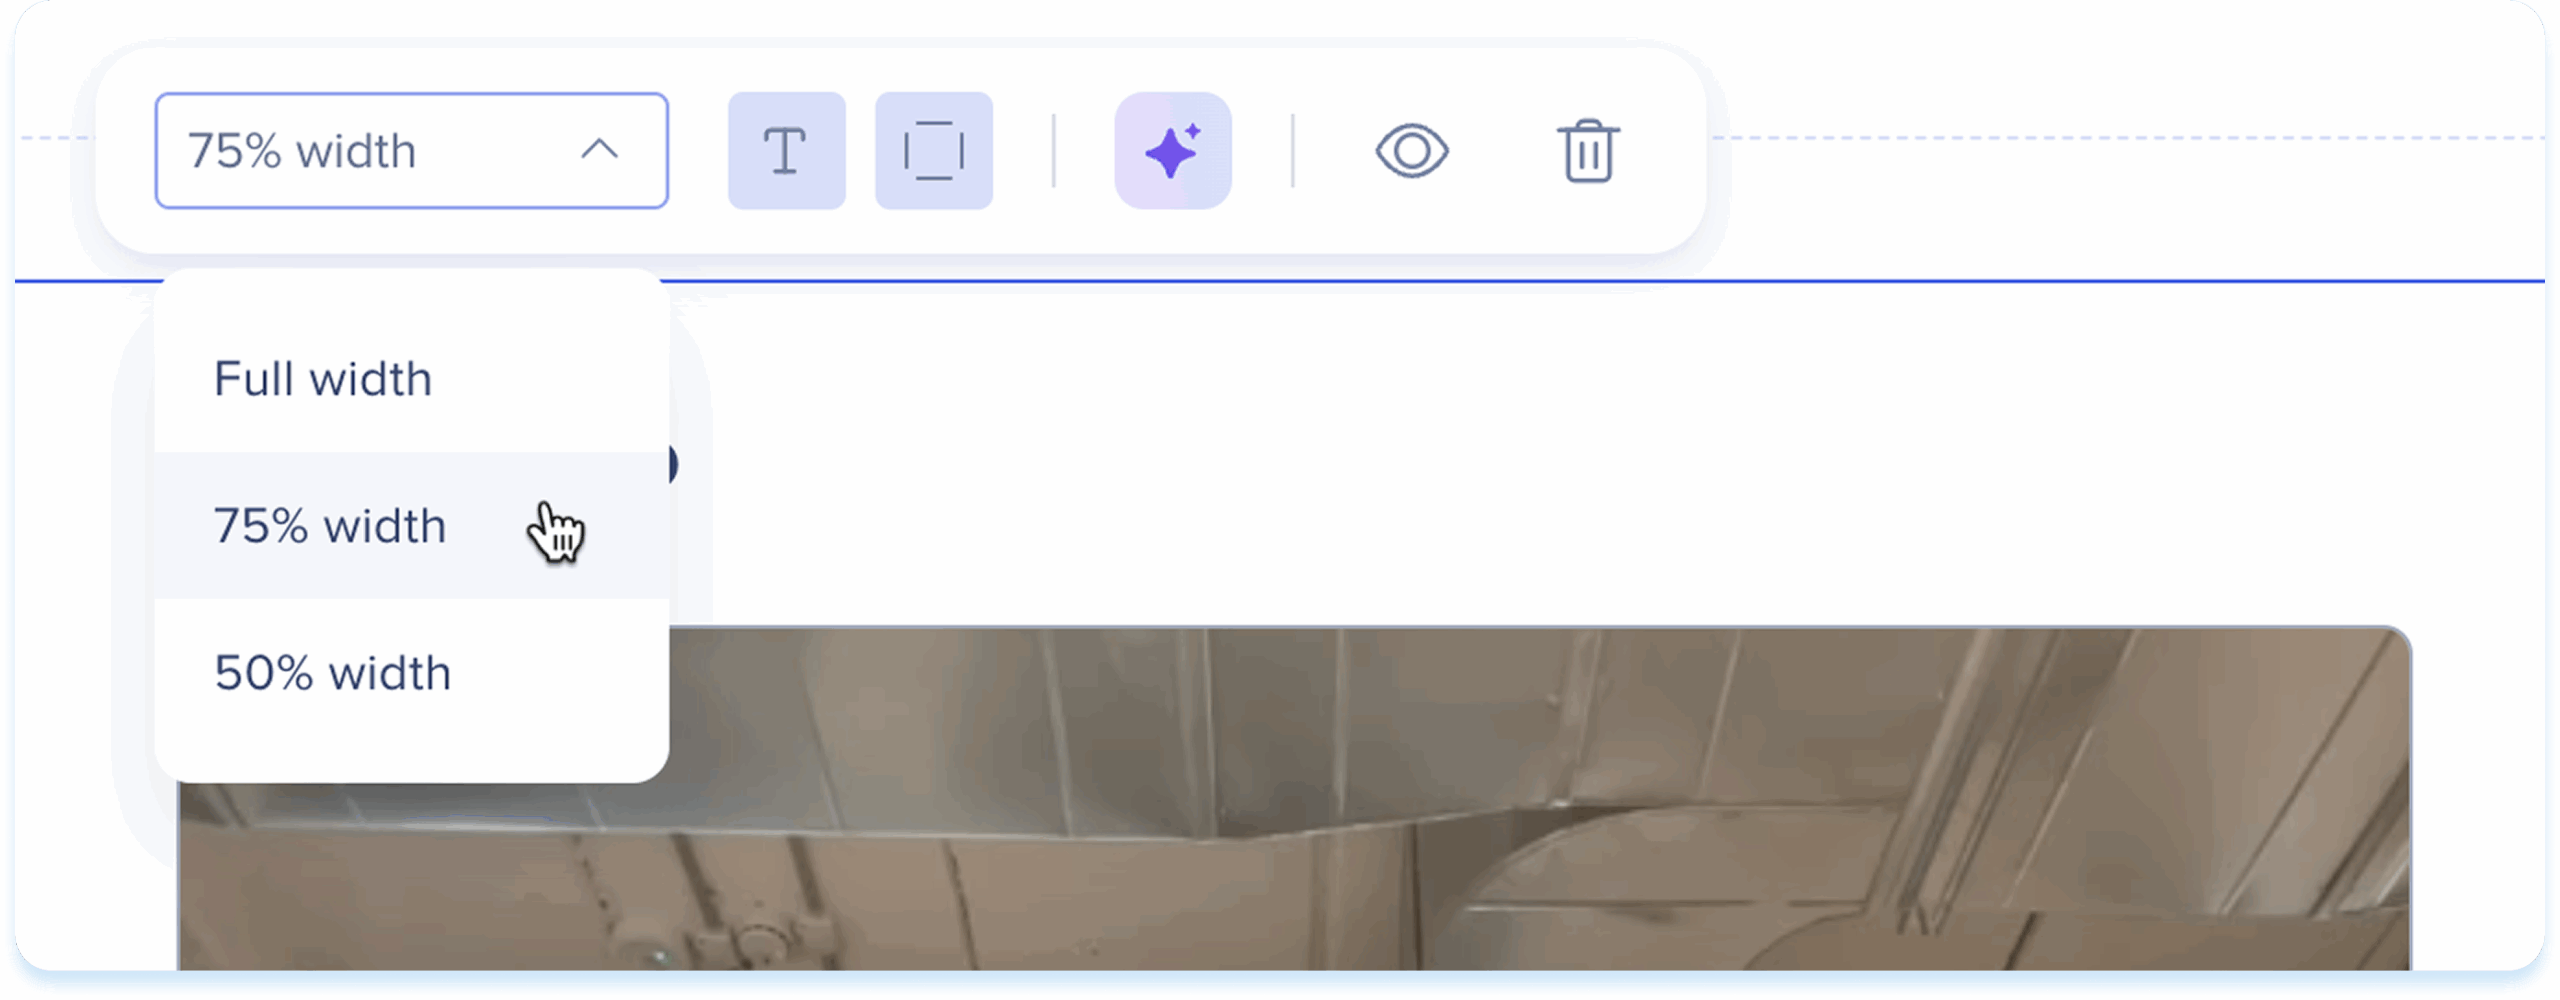
Use the toolbar to adjust:
-
Width: Set the element width
-
Show border: Show an outline around the image
-
Alternative text: Enter short, descriptive alternative text to improve accessibility
-
Hide: Keeps the element hidden from learners but still available in the background
-
Delete: Remove the element from the lesson
-
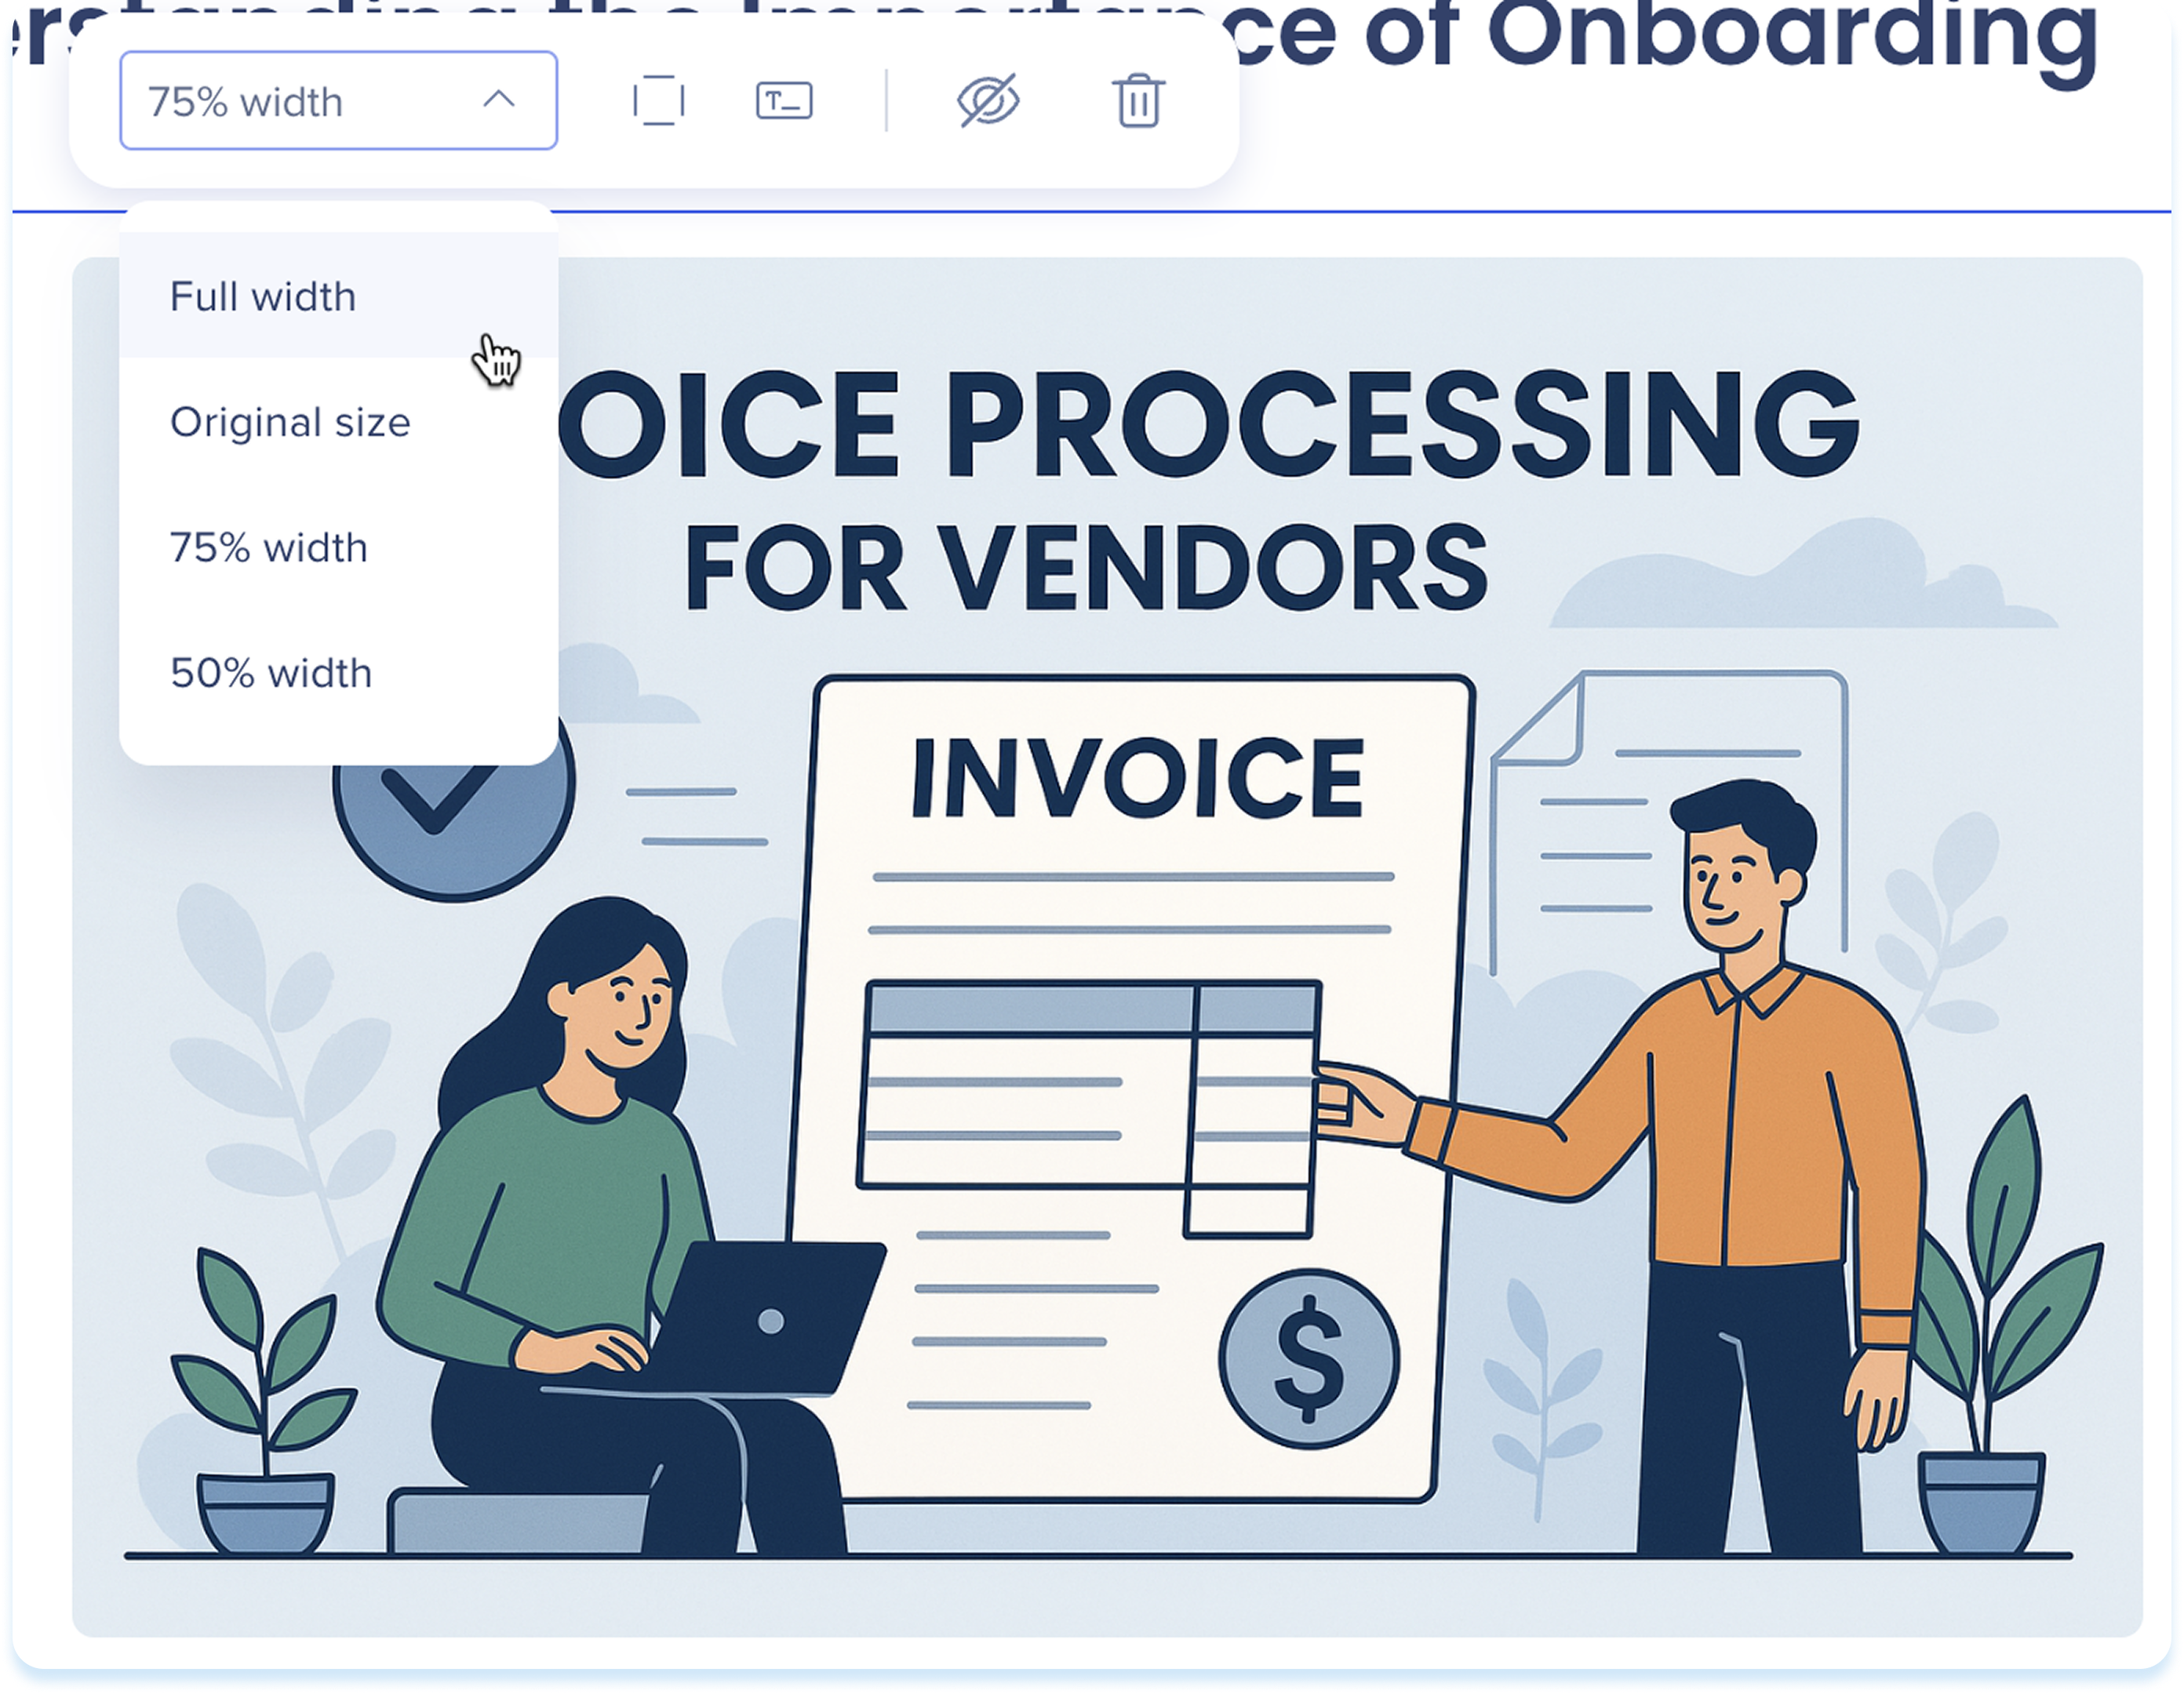
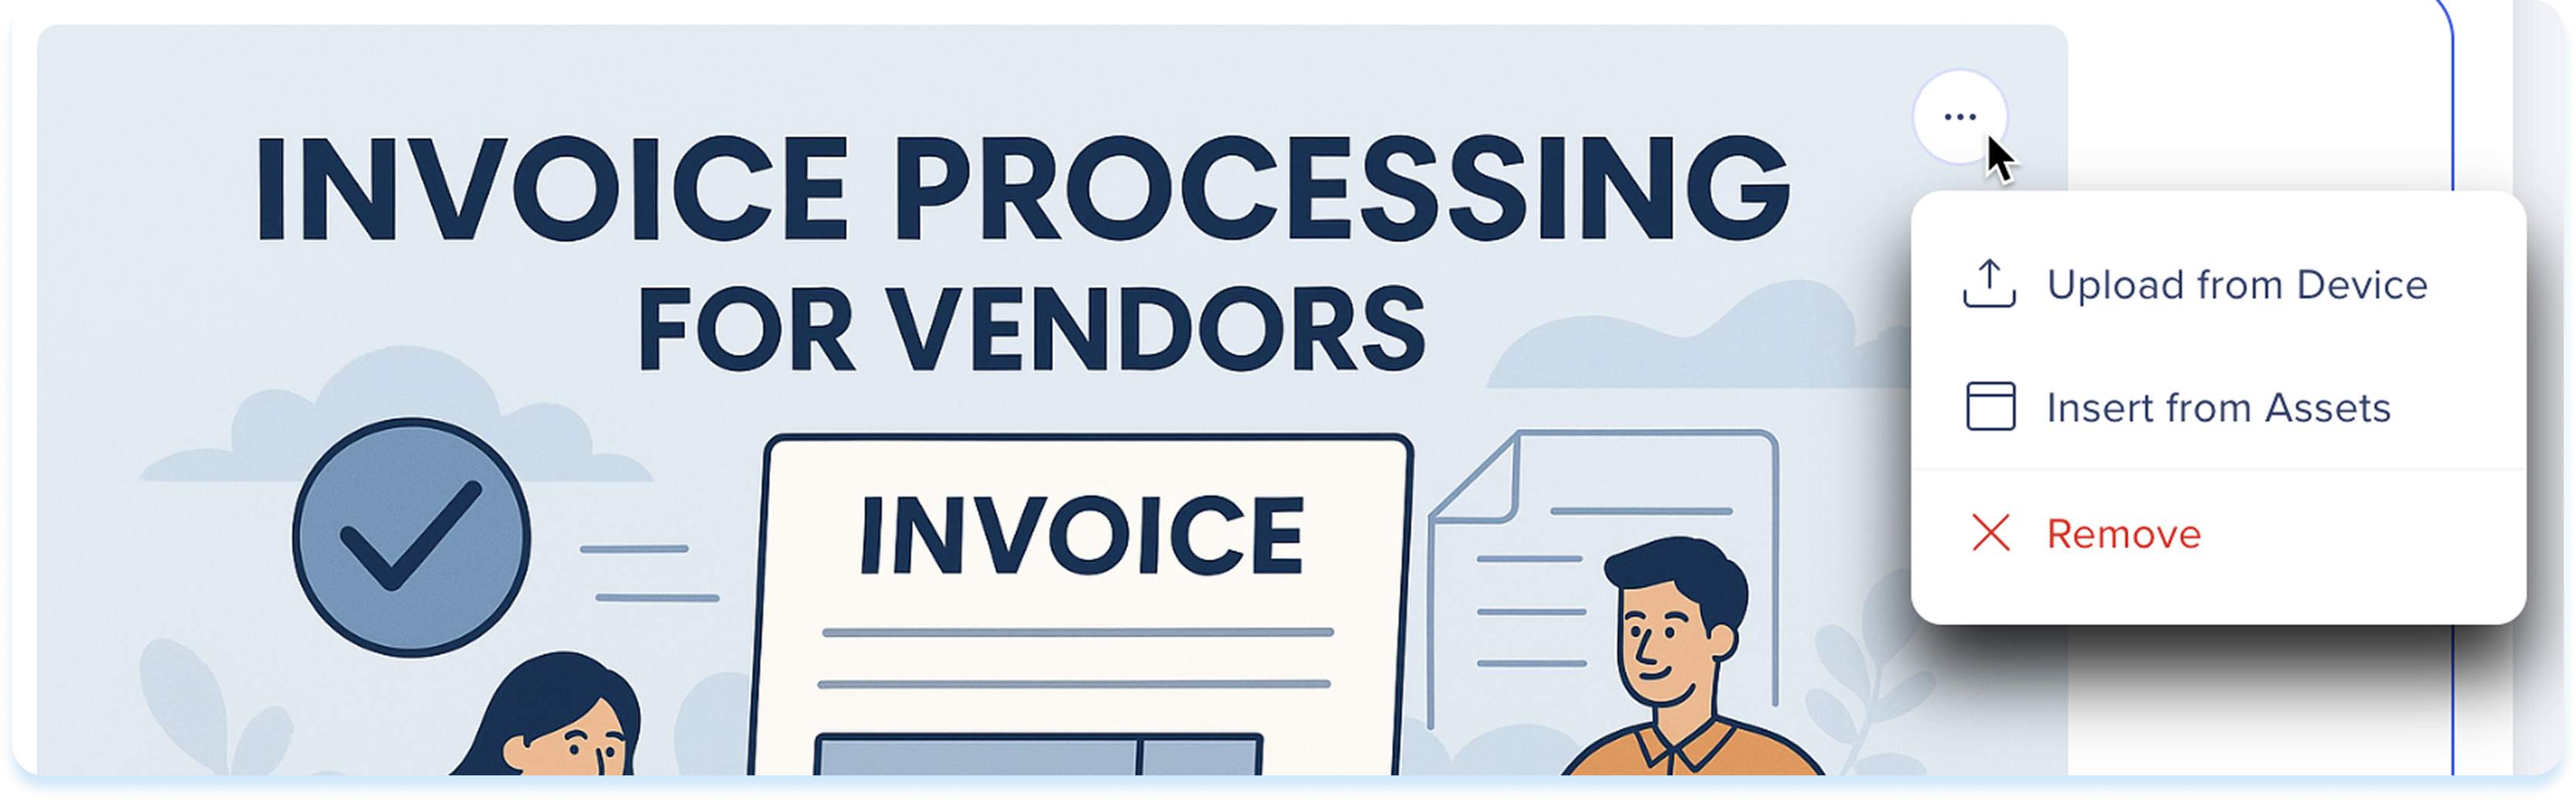
Image options menu
-
Click the Options menu at the top right of the image
-
Select one of the available actions:
-
Upload from Device: Replace the current image with an image from your device
-
Insert from Assets: Replace the current image with one from learning assets
-
Remove: Clear the image from the element
-
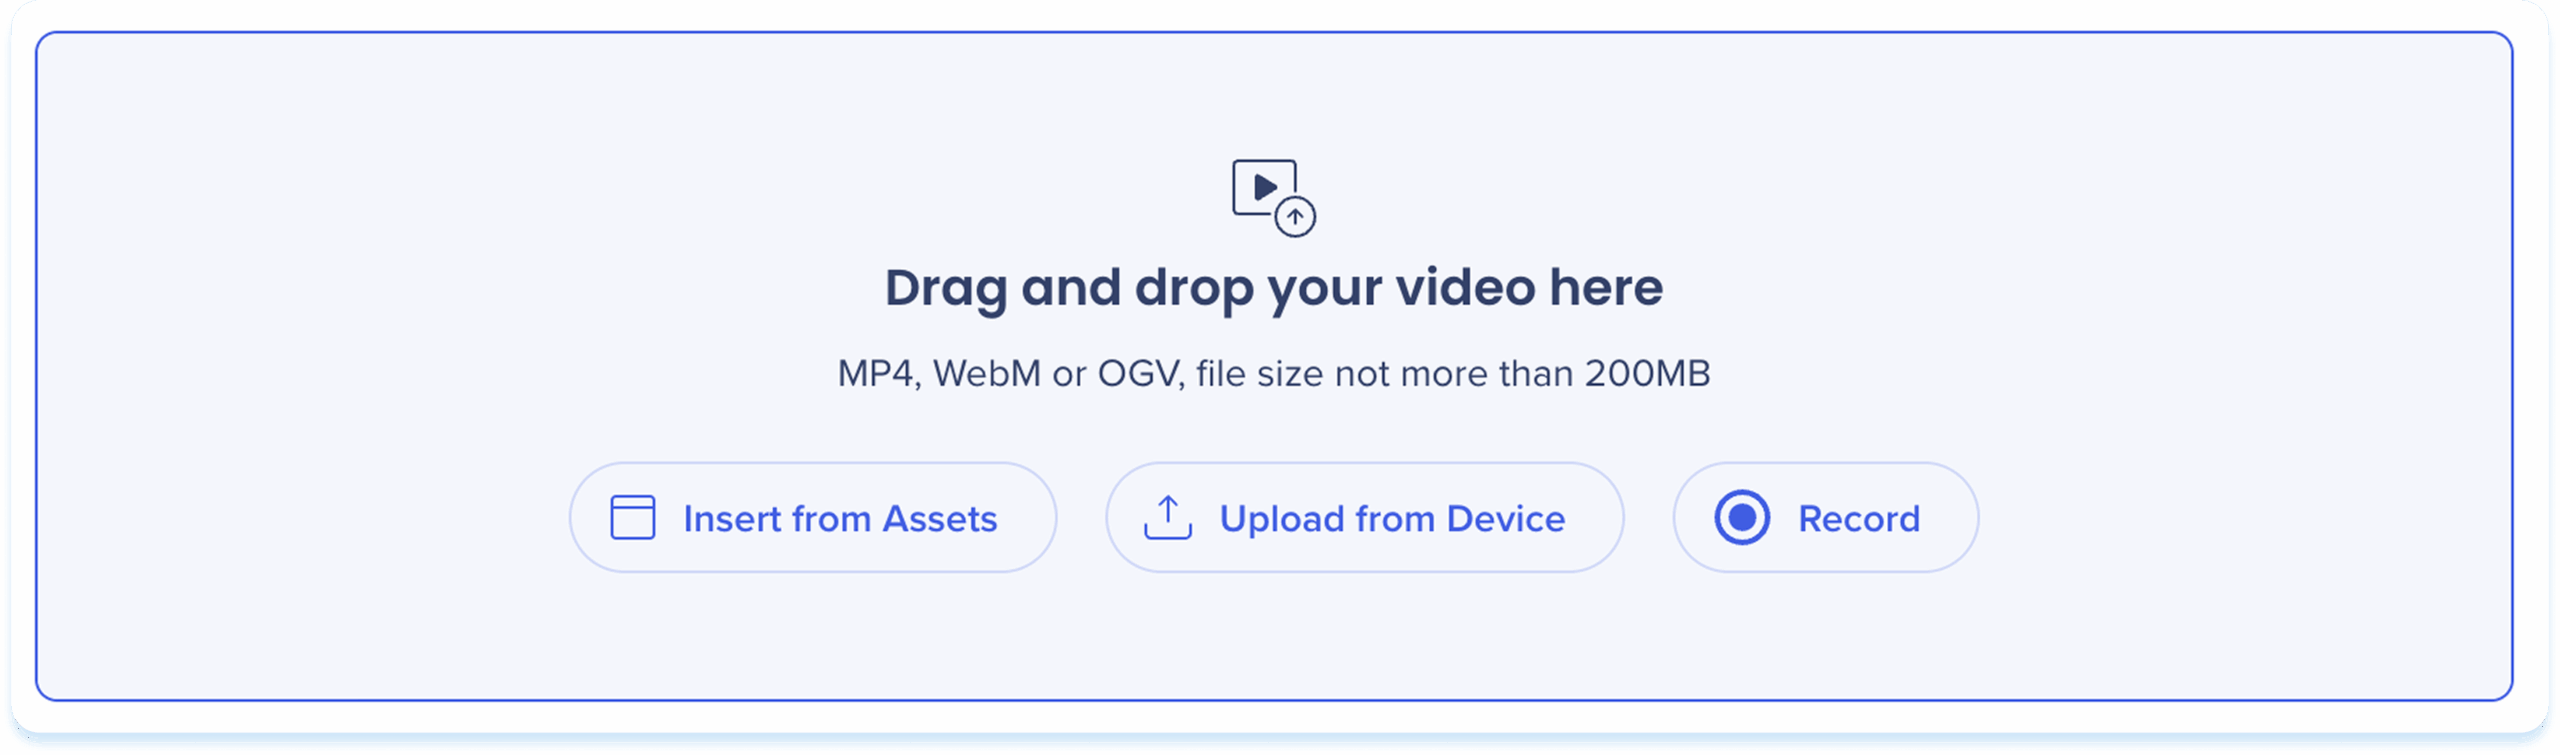
Video
Use the video element to record yourself and deliver content in a more dynamic way.

Add a video
Choose one of the following options to add a video:
-
Drag & drop the file into the video element
-
Insert from Assets: Select a video from your learning assets
-
Upload from Device: Choose a file from your computer
-
Record: Capture a new video
Record a video
-
Click Record
-
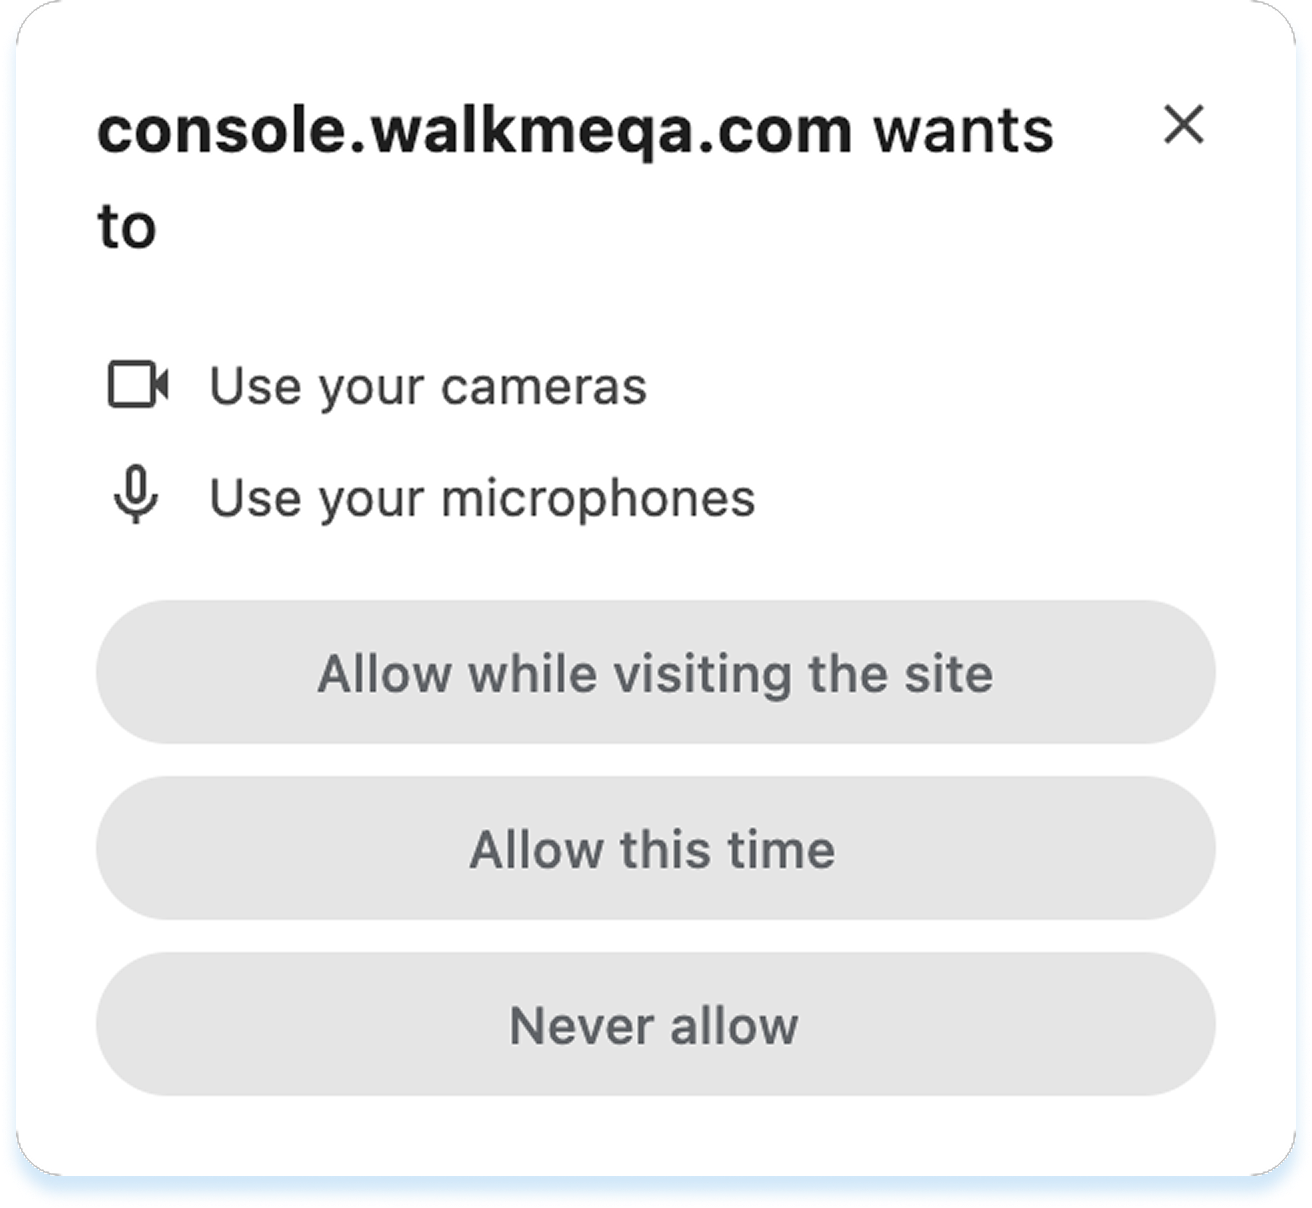
If accessing for the first time, a popup will appear for access to your camera and microphone
-
Allow access by selecting:
-
Allow while visiting the site
-
Allow this time
-
Never allow
-
-
-
The recording screen will open
-
Click the Settings icon to adjust recording options:
-
Select a camera and microphone
-
Click Mirror video preview to flip your camera view (optional)
-
Click Apply

-
-
Click the Record button to start
-
Use the toolbar to:
-
Mute or unmute your microphone
-
Pause recording
-
Stop recording
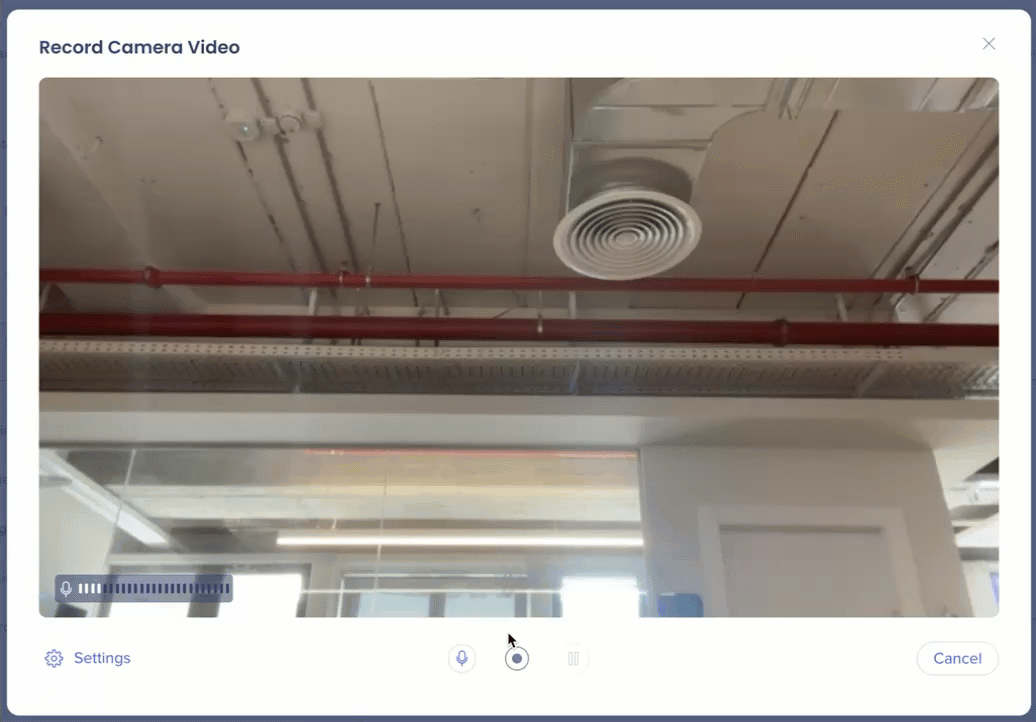
-
-
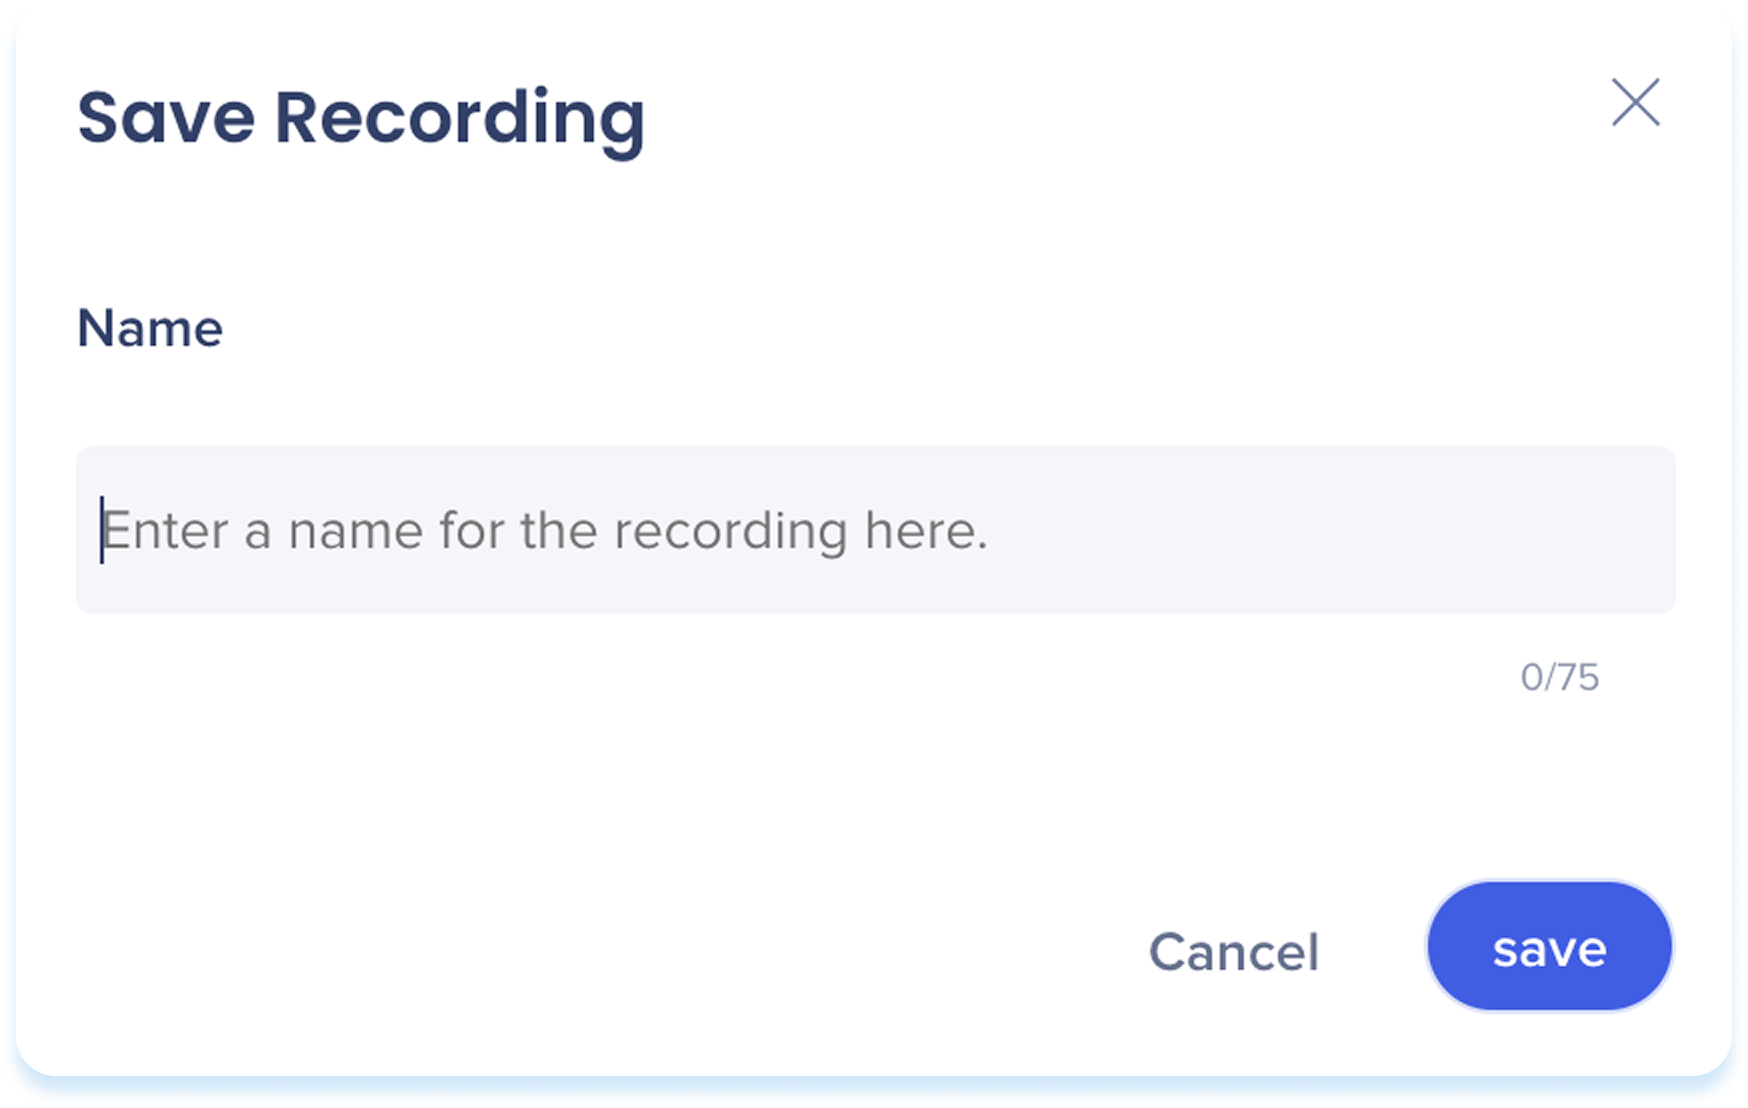
After stopping, the save recording popup appears
-
Enter a recording name
-
Click Save
-
The recording will be added to the element
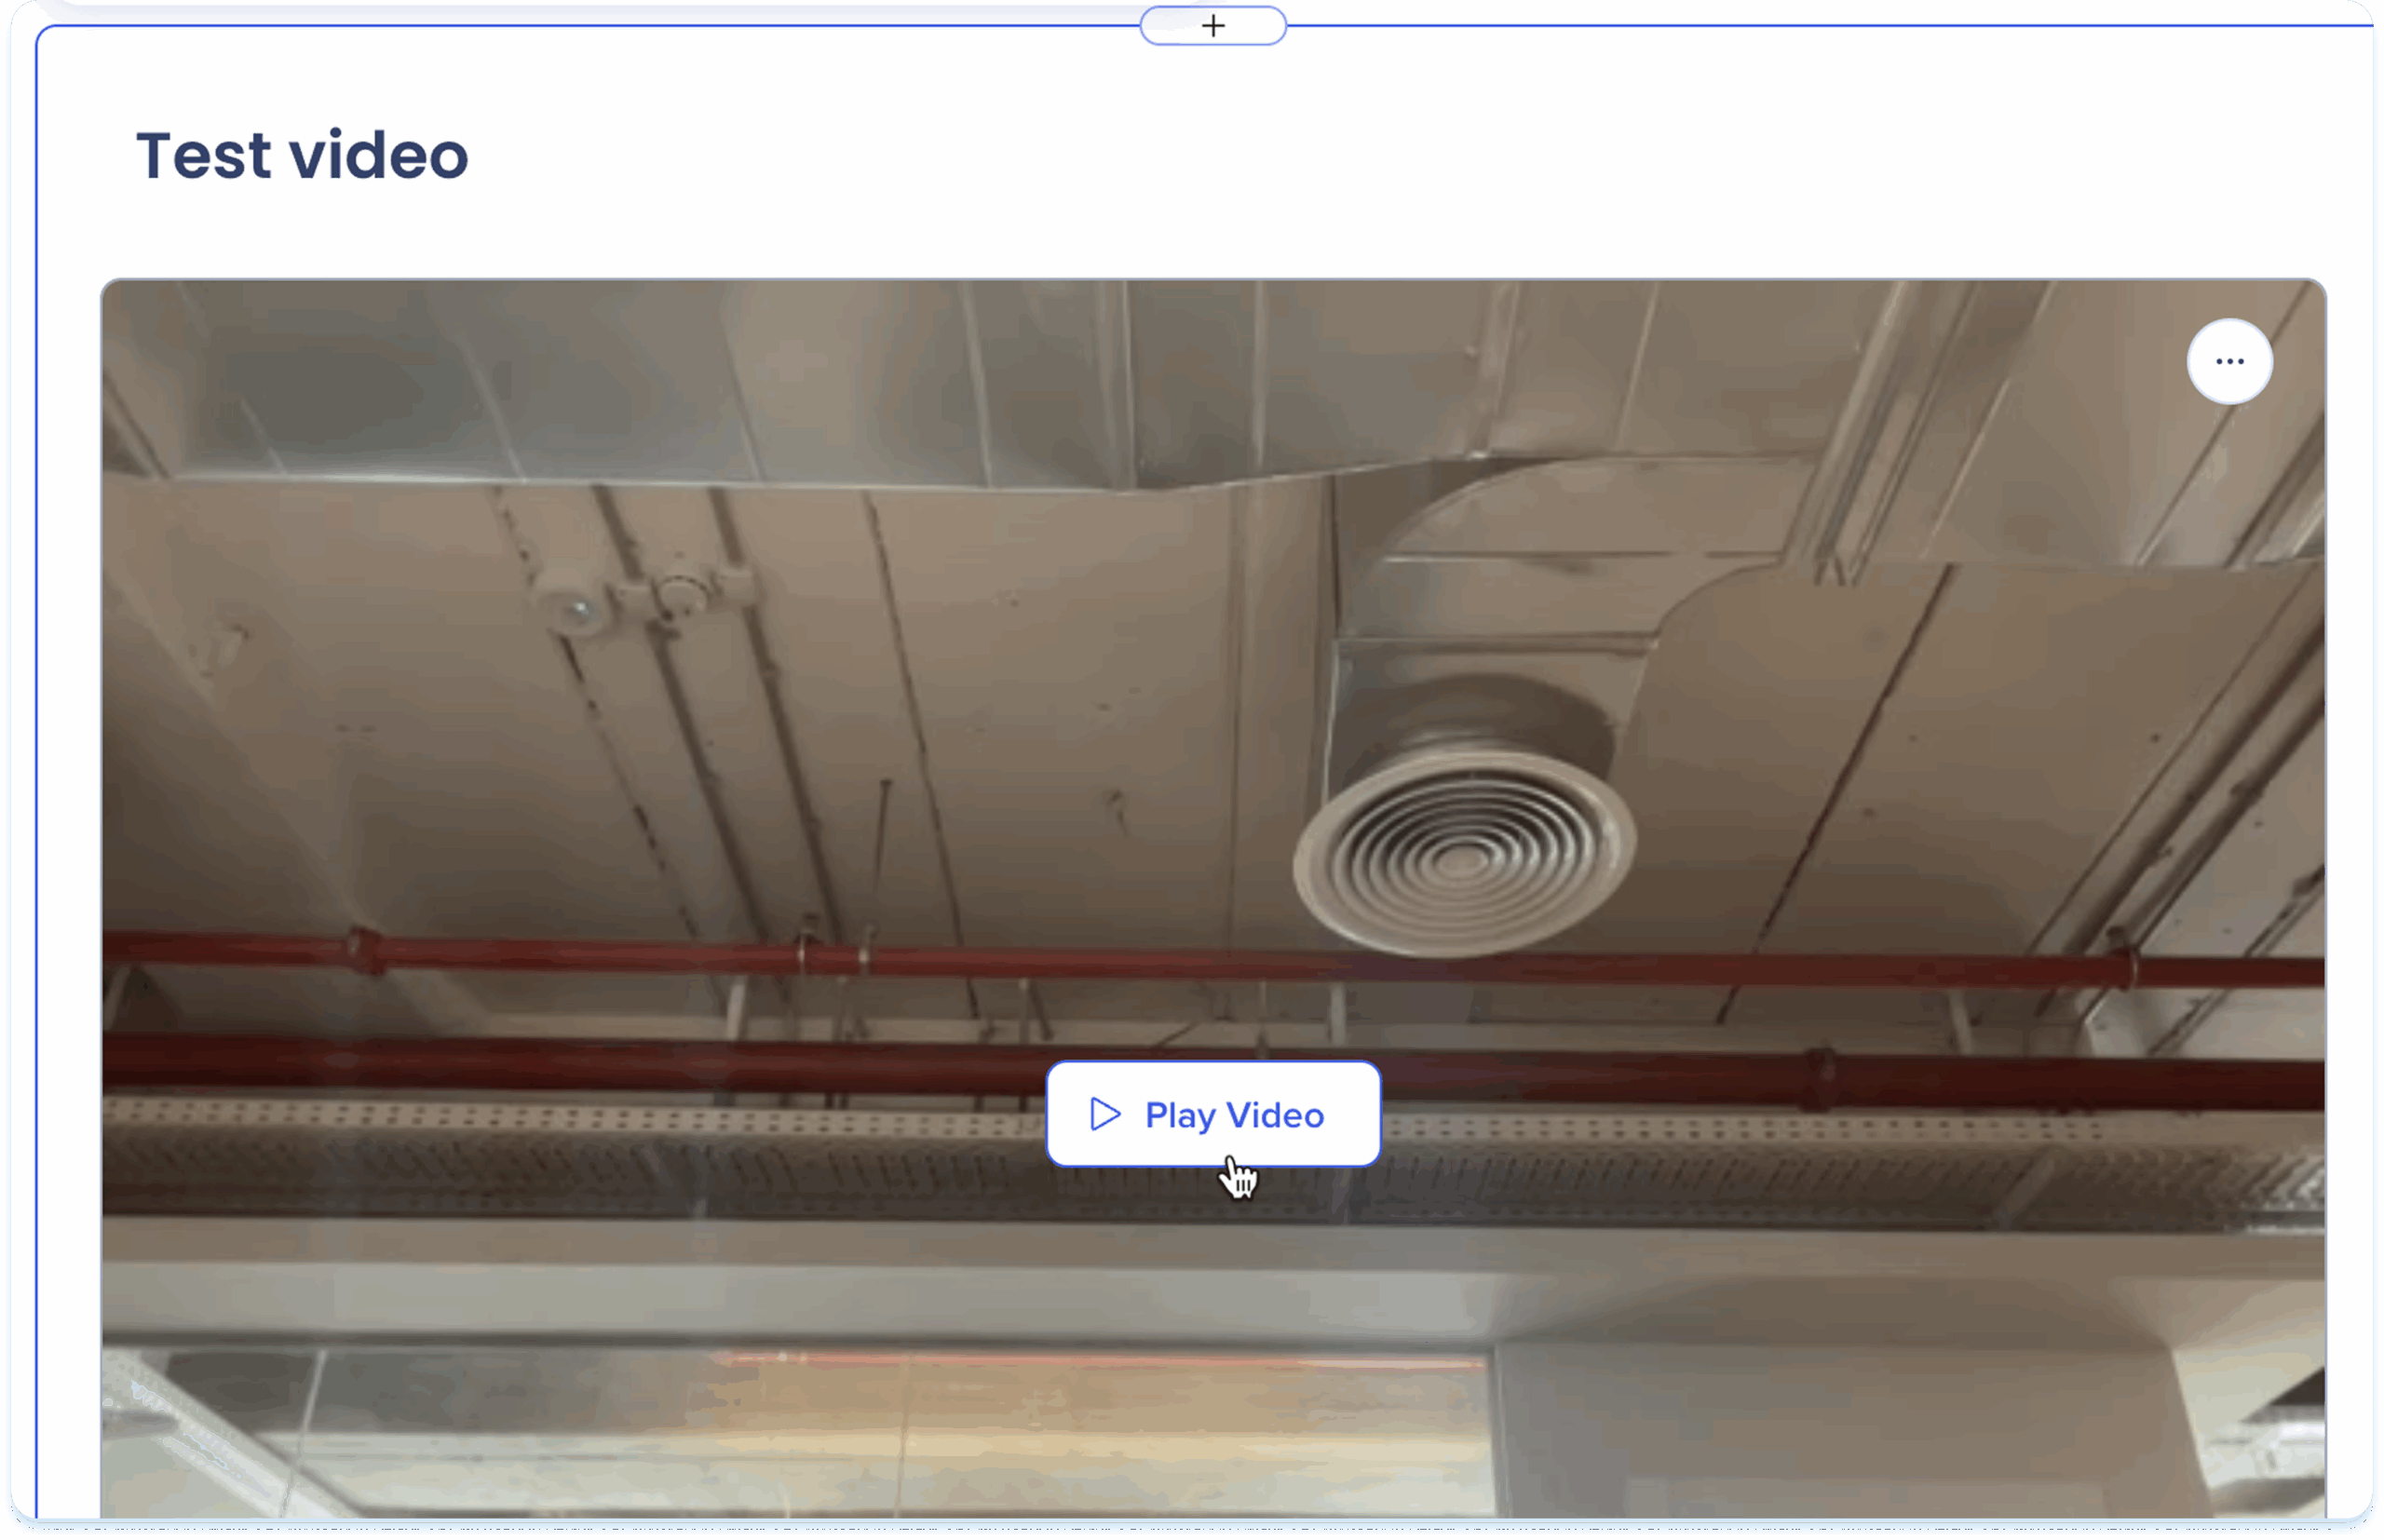
Play video
-
Click Play Video to view the video
-
The video will open in a preview popup
Toolbar actions
After you add the recording, use the toolbar to edit and adjust it.
-
Click the video to show the toolbar
-
Use the toolbar to adjust:
-
Width: Set the element width
-
Show title: Turn the video title on or off
-
Show border: Show an outline around the image
-
AI creation: Generate other elements from the video
-
Hide: Keeps the element hidden from learners but still available in the background
-
Delete: Remove the element from the lesson
-
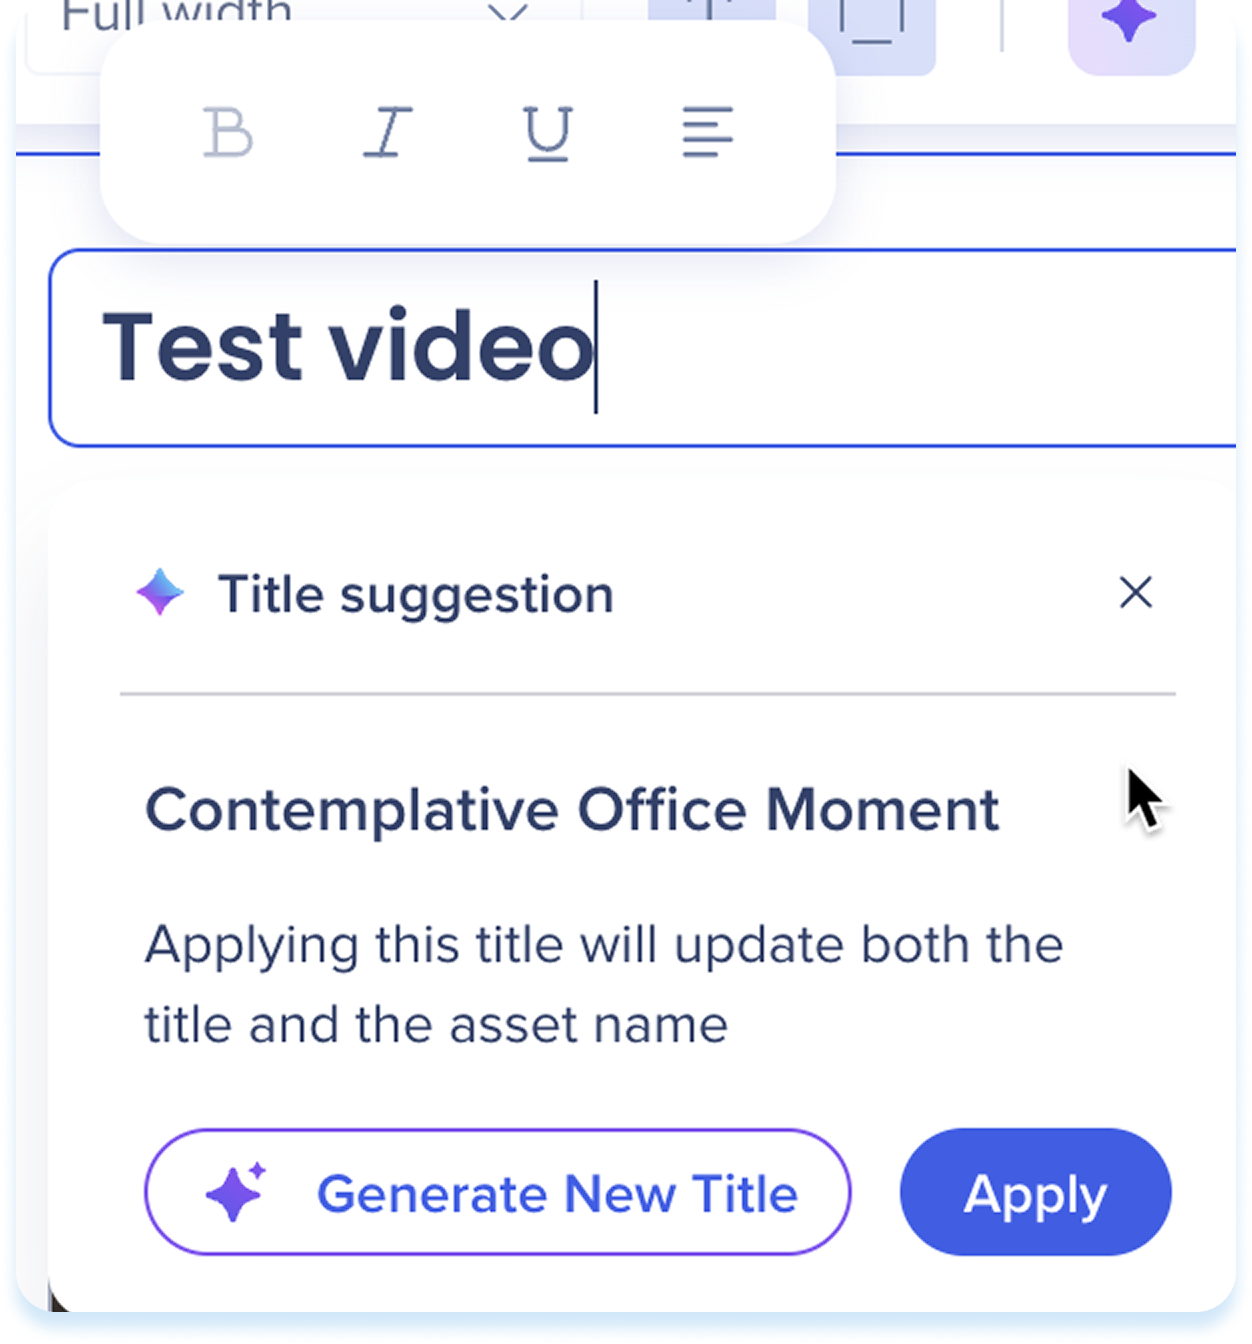
Edit element title
-
Click the title field above the element
-
The following actions are available:
-
Type a new title
-
Use Title suggestion:
-
Select the title suggestion from the panel
-
Click Generate New Title (optional)
-
Click Apply
-
-
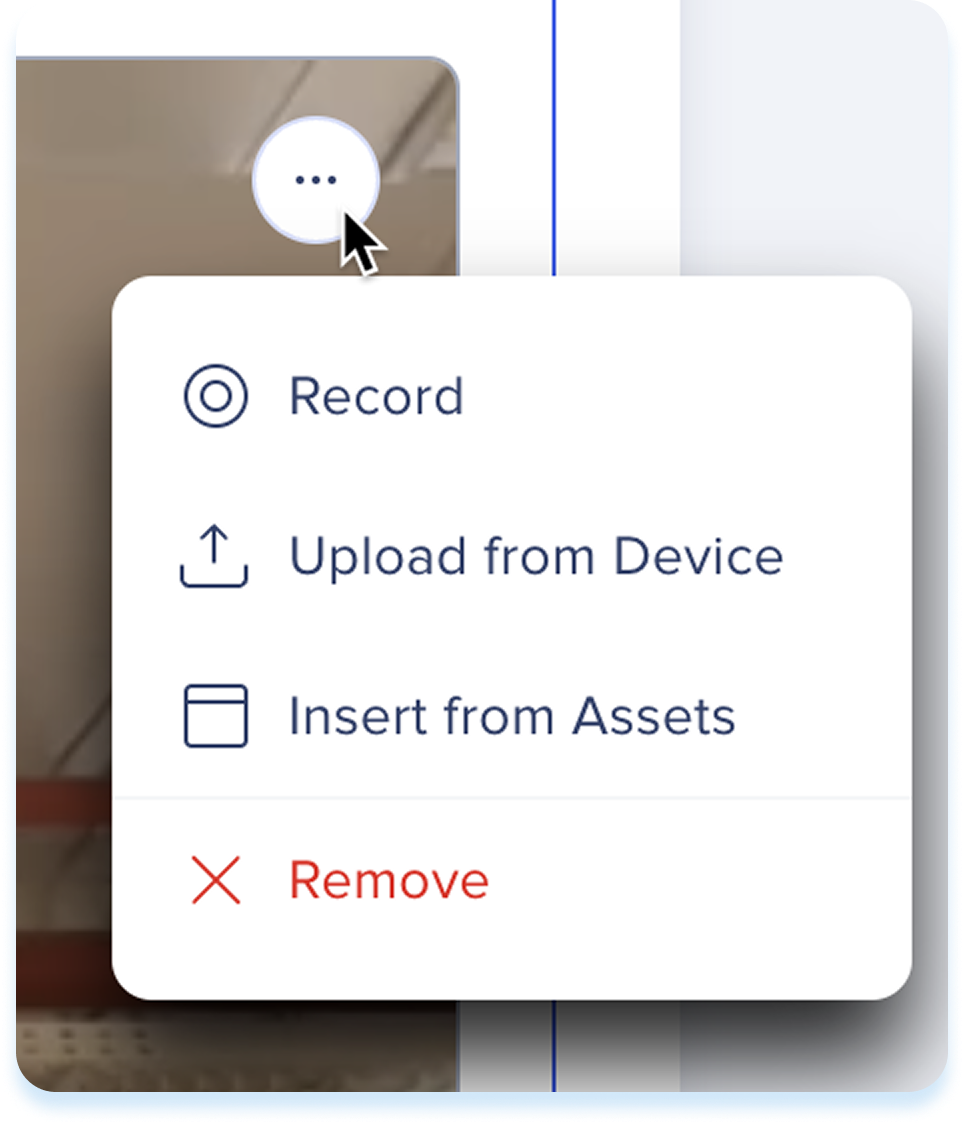
Video options menu
-
Click the Options menu at the top right of the video
-
Select one of the available actions:
-
Record: Replace the current video with a new recording
-
Upload from Device: Replace the current video with a video from your device
-
Insert from Assets: Replace the current video with a file from your learning assets
-
Remove: Clear the video from the element
-
Screen recording
Use the screen recording element to show a step-by-step recording of a process or workflow.

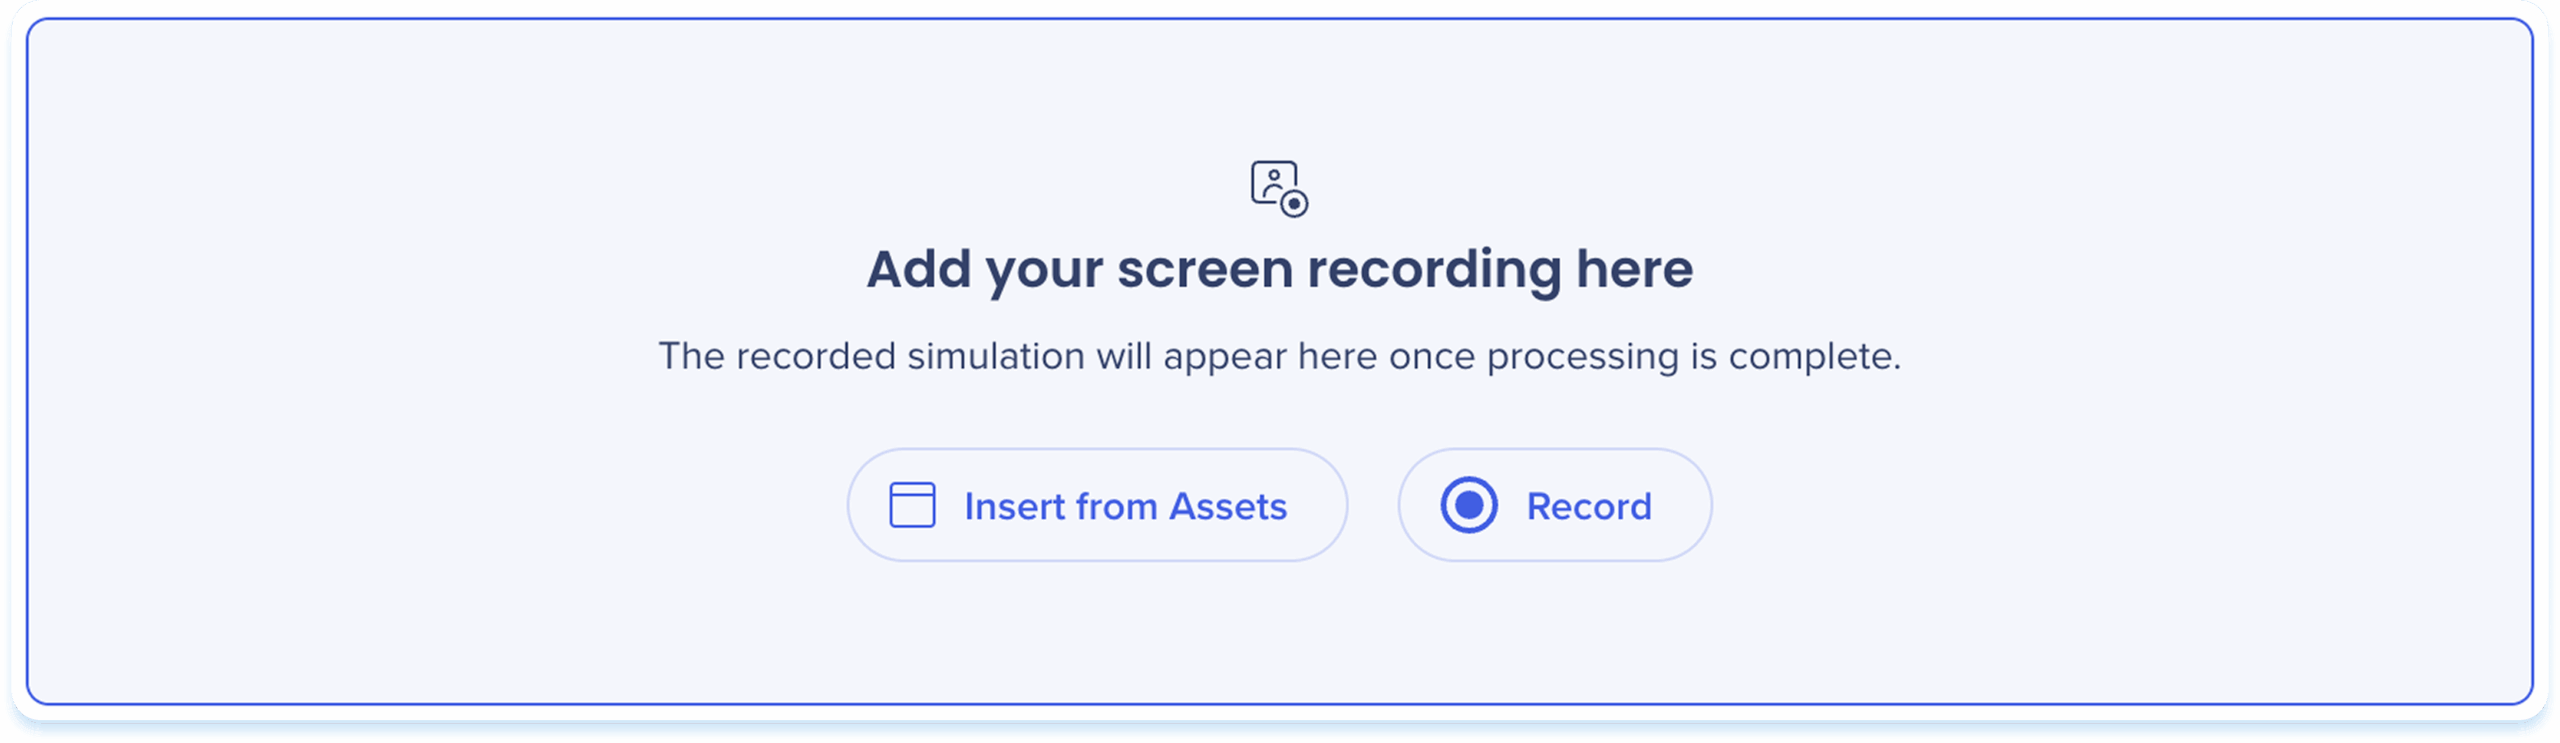
Add a screen recording
-
Choose one of the following options to add a screen recording:
-
Drag & drop the file into the screen recording element
-
Insert from Assets: Select a screen recording from your learning assets
-
Record: Capture a new screen recording
-
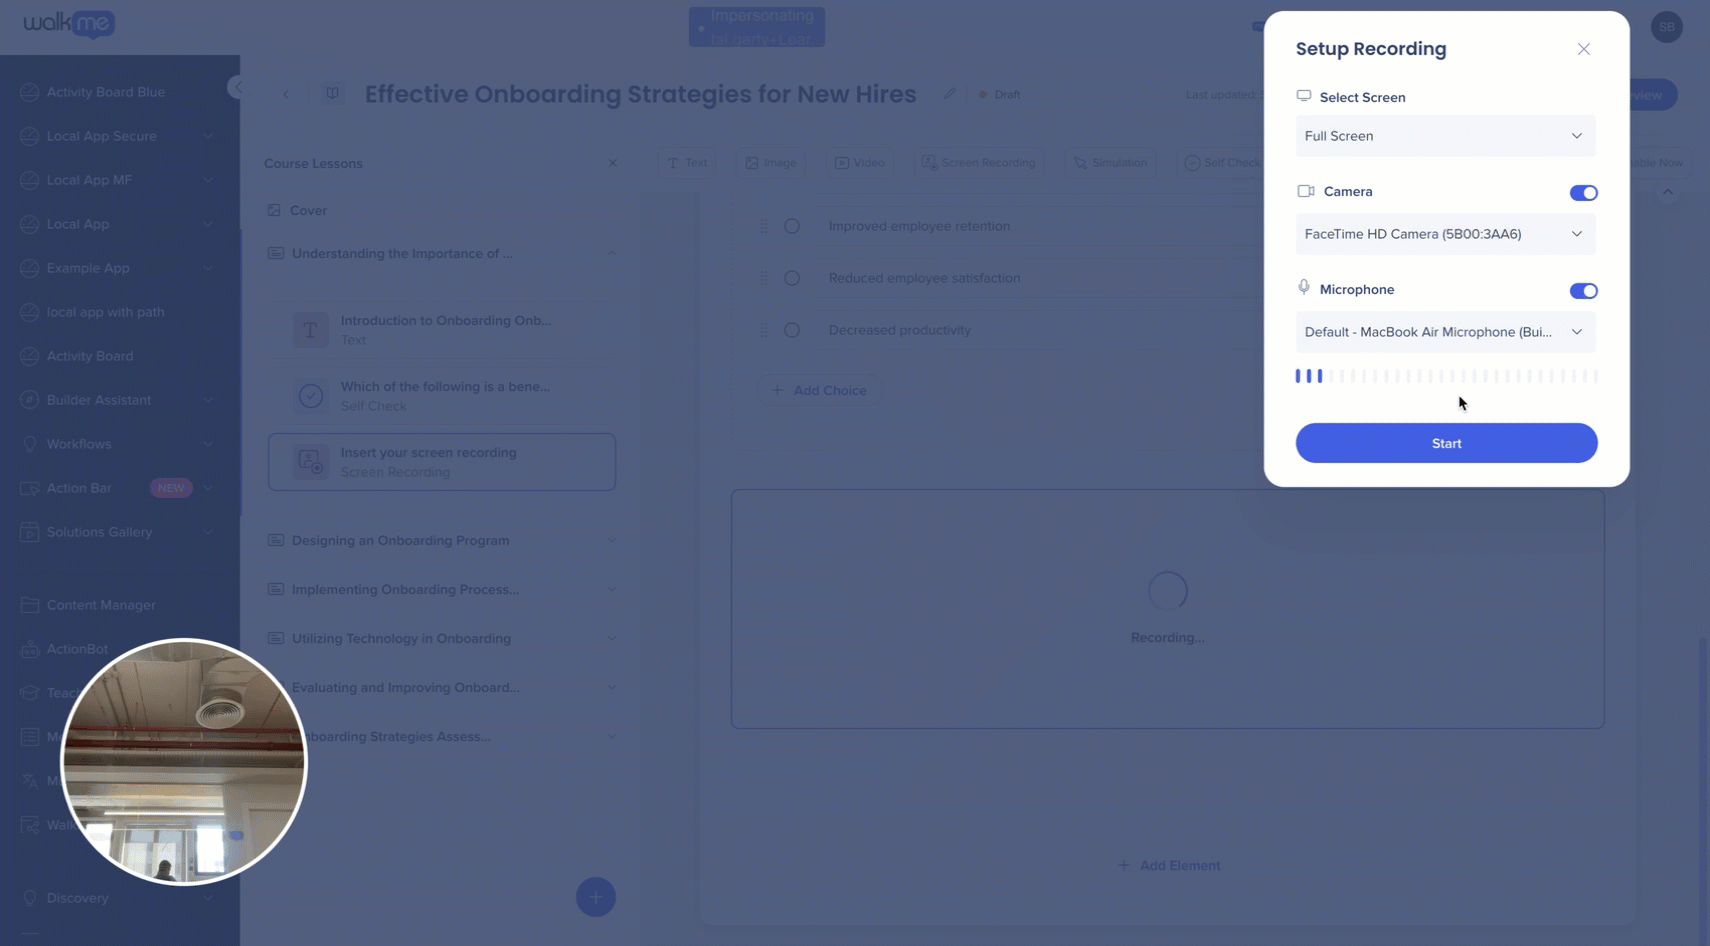
Record a screen recording
-
Click Record
-
The Setup recording popup will open
-
Select a screen to record
-
Turn on the camera and select a camera to record yourself (optional)
-
Turn on the microphone and select a microphone (optional)
-
Click Start
-
A share your screen popup will open
-
Select which screen to share:
-
Chrome Tab: Record a single browser tab
-
Window: Record one application window
-
Entire Screen: Record your full screen
-
-
Click Share to start recording your screen
-
Click Stop Sharing in the floating toolbar when you're done
-
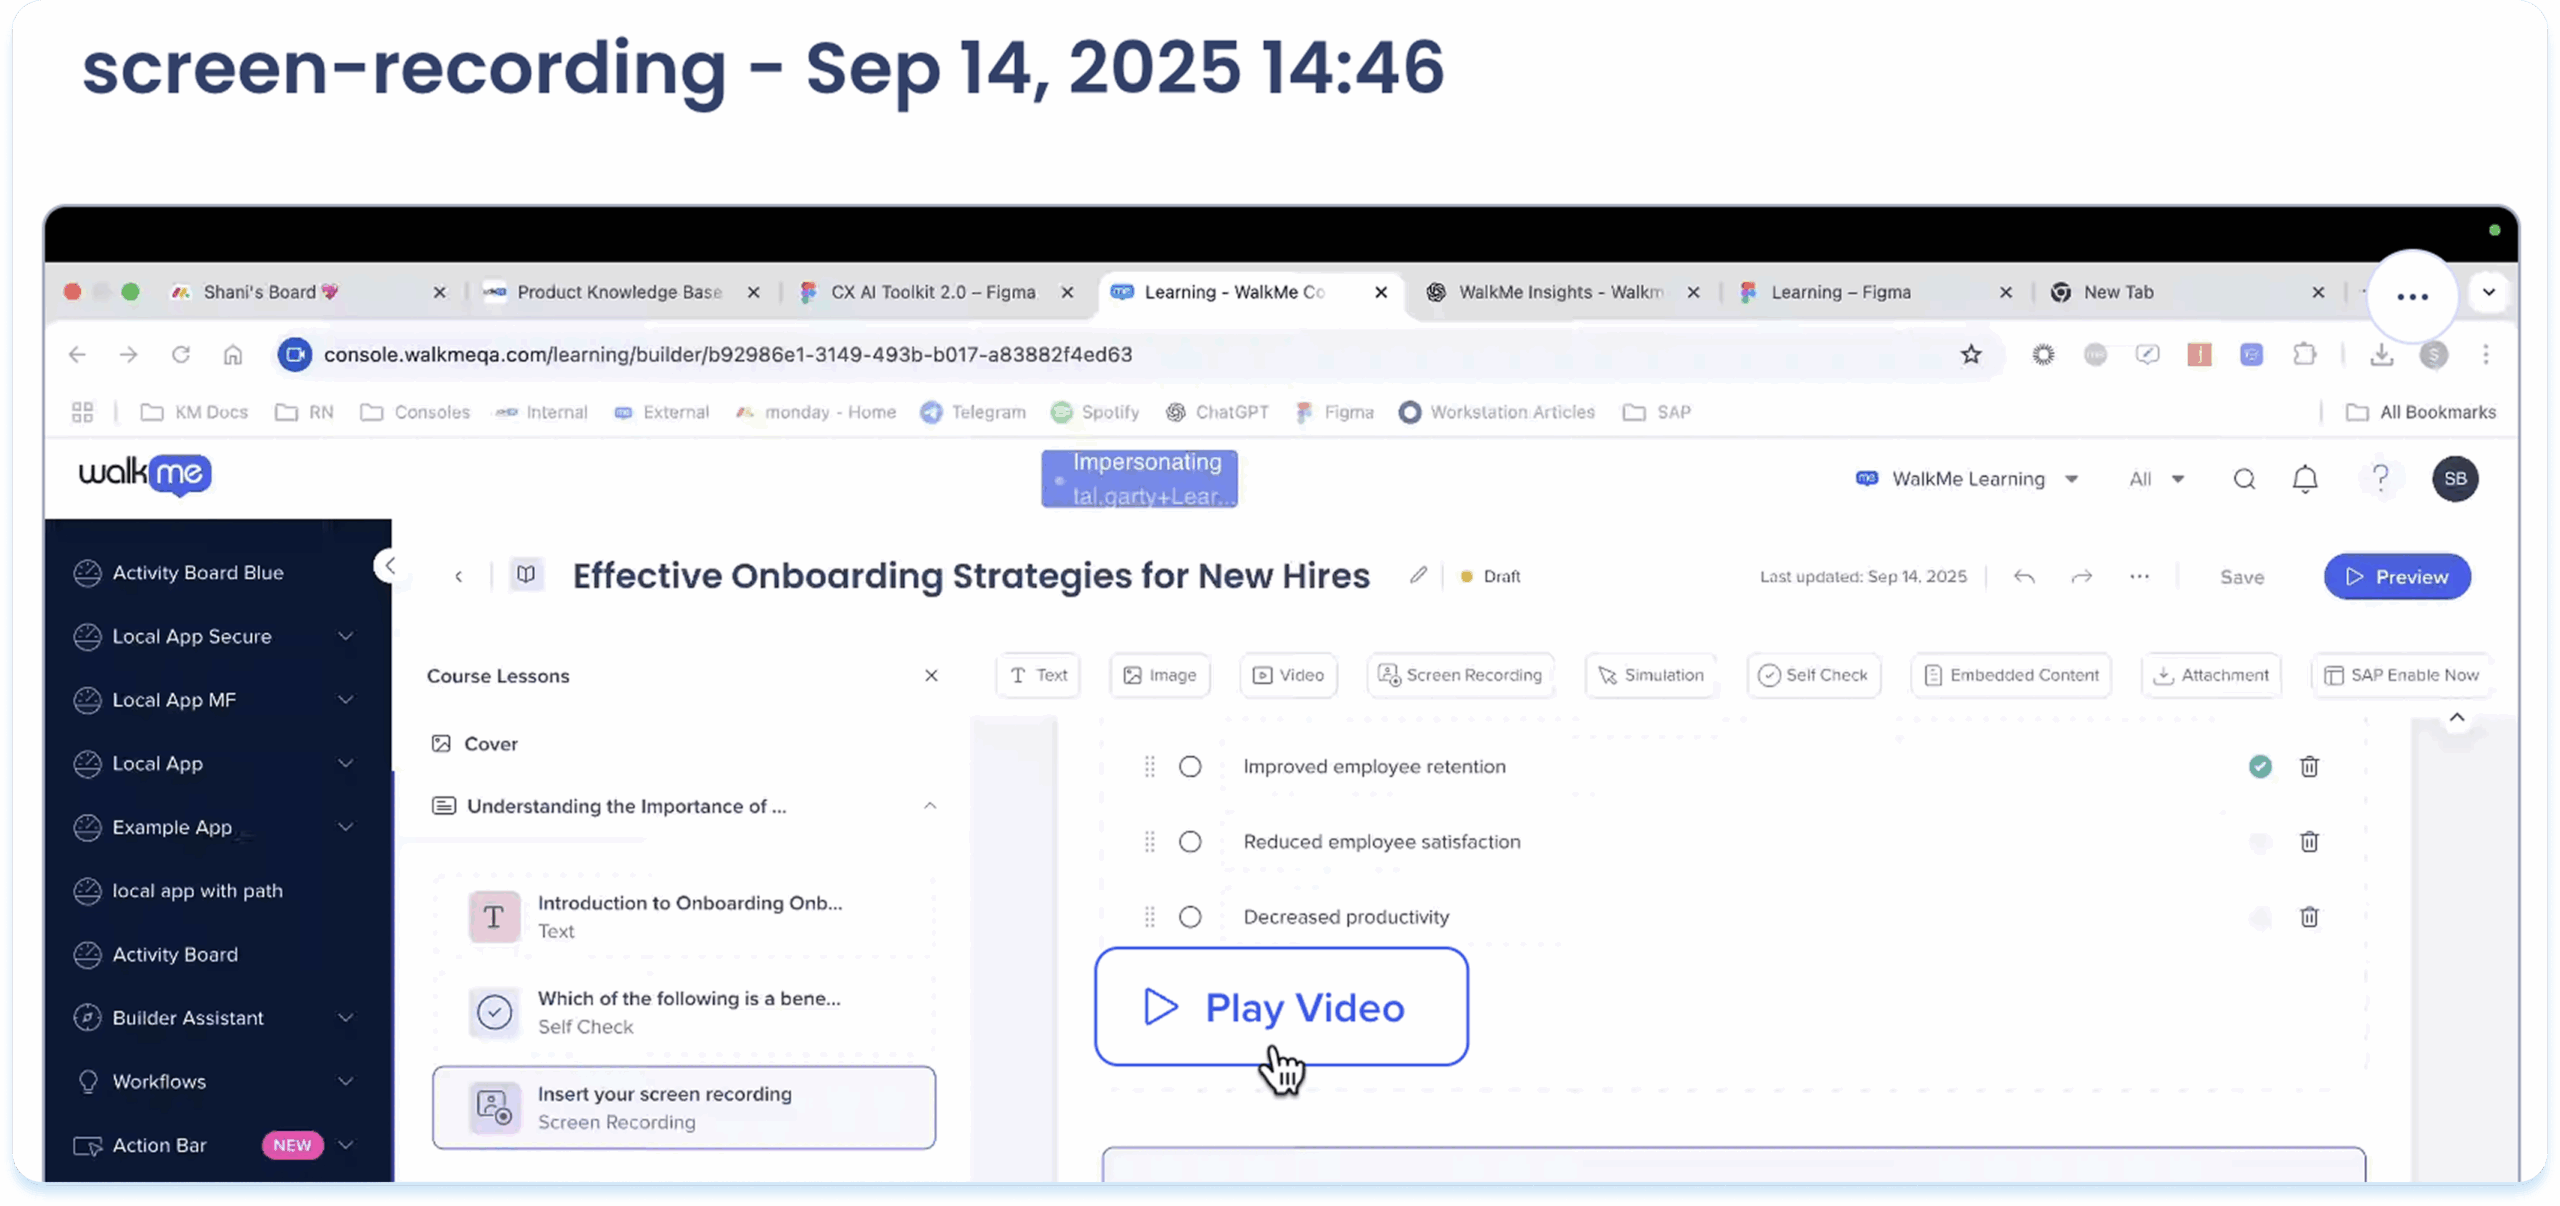
The screen recording will be added to the element
Play screen recording
-
Click Play Video to view the screen recording
-
The screen recording will open in a preview popup
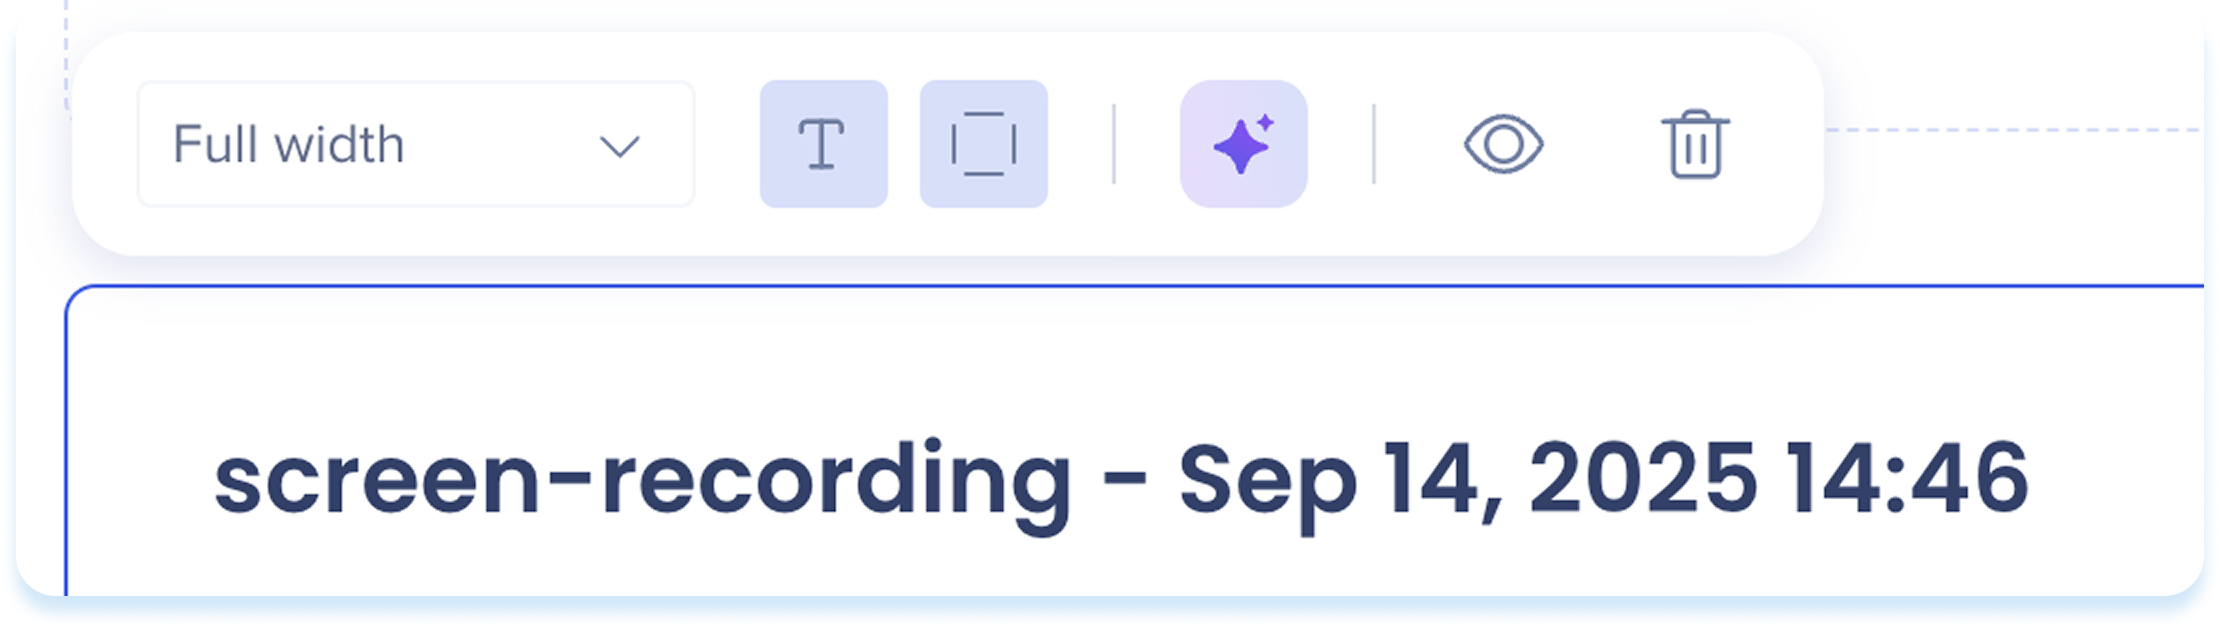
Toolbar actions
After you add the screen recording, use the toolbar to edit and adjust it.
-
Click the screen recording to show the toolbar
-
Use the toolbar to adjust:
-
Width: Set the element width
-
Show title: Turn the video title on or off
-
Show border: Show an outline around the screen recording
-
AI creation: Generate other elements from the screen recording
-
Hide: Keep the element invisible to learners
-
Delete: Remove the element from the lesson
-
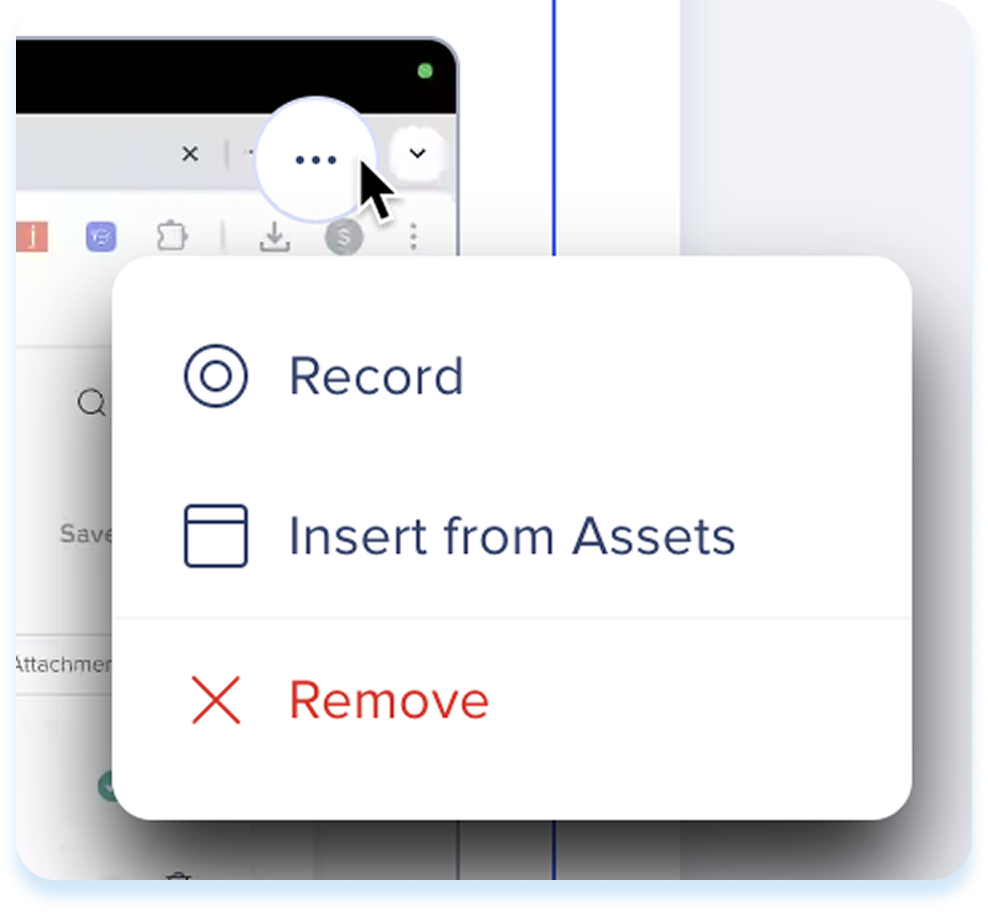
Screen recording options menu
-
Click the Options menu at the top right of the screen recording
-
Select one of the available actions:
-
Record: Replace the current video with a new recording
-
Insert from Assets: Replace the current screen recording with a file from your learning assets
-
Remove: Clear the screen recording from the element
-
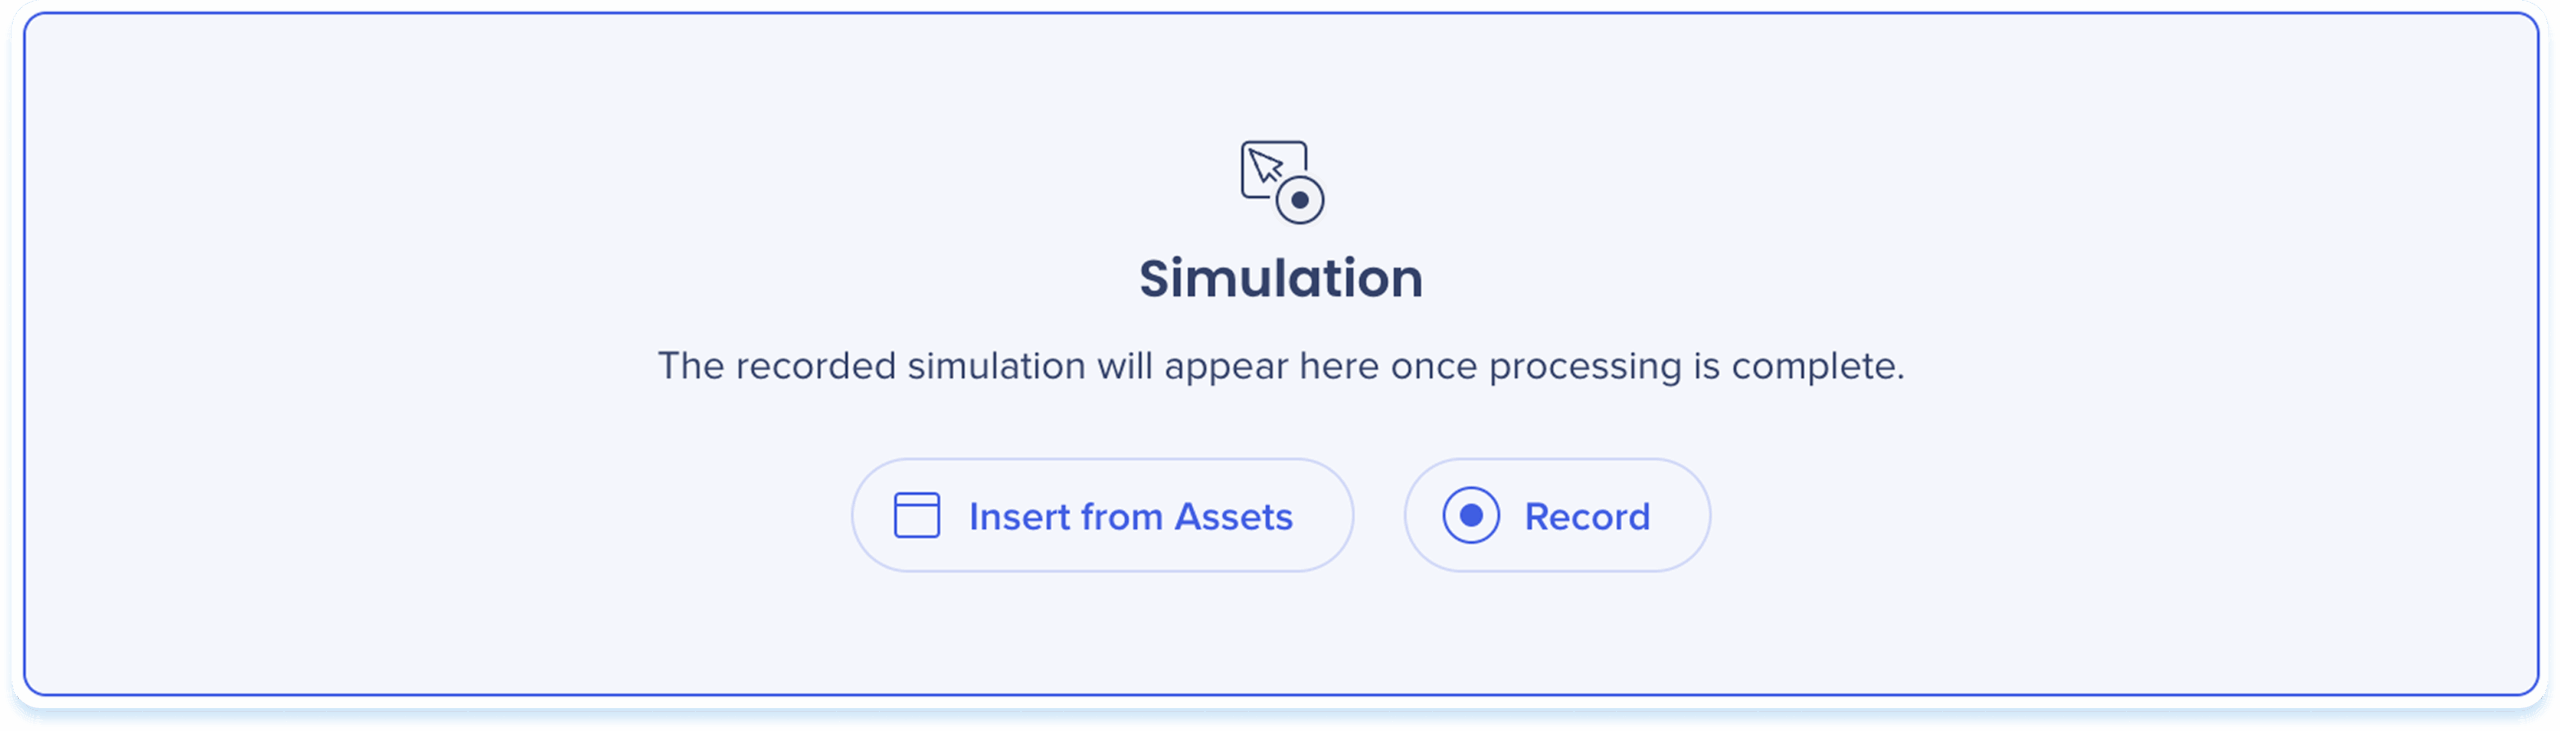
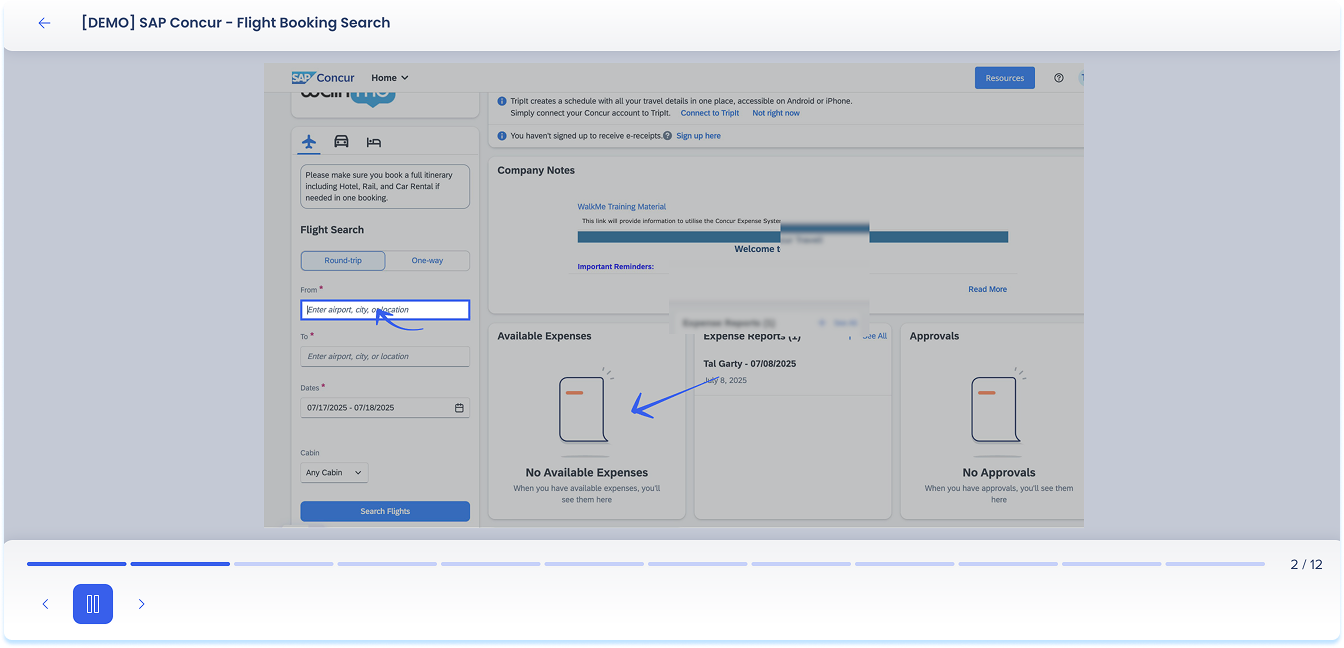
Simulation
Use the simulation element to let users practice a process in an interactive, guided environment. Record a digital workflow and turn it into a hands-on learning experience, where learners can either click through the steps or watch the process.

Add a simulation
You can add a simulation in two ways:
-
Click Upload from assets to use an existing simulation
-
Click Record to create a new one
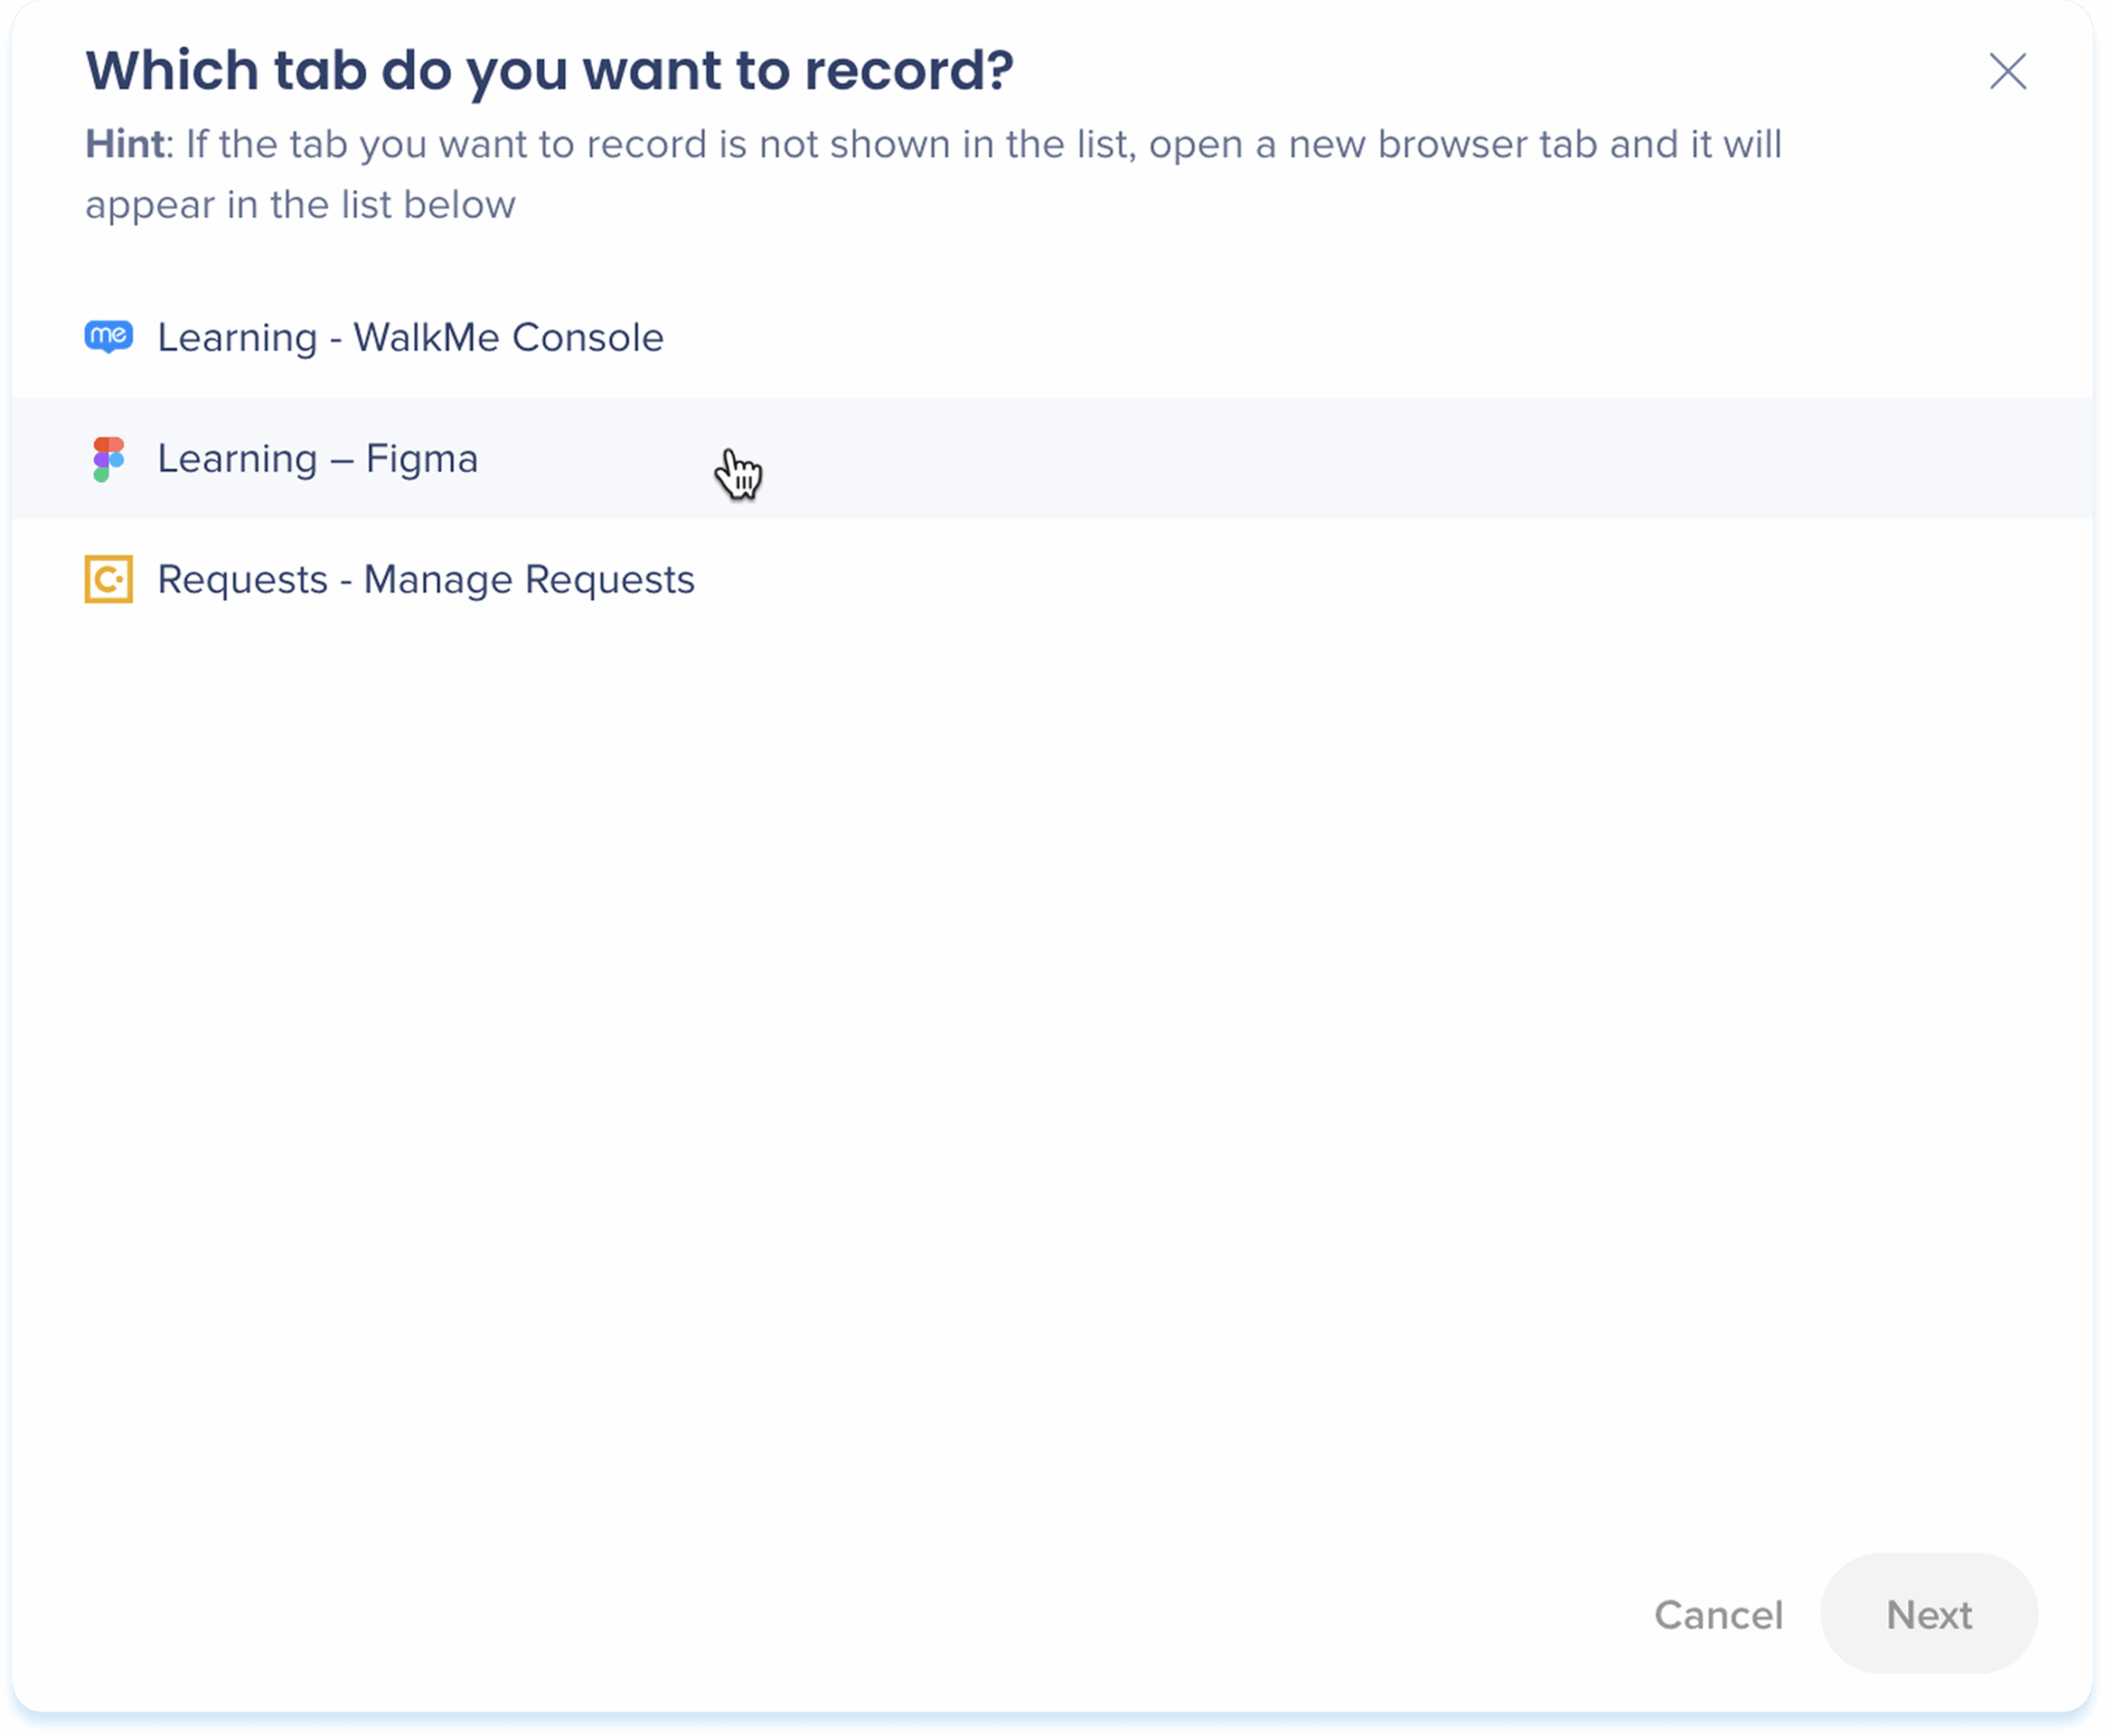
Record a simulation
-
Click Record
-
Select which tab to record
-
If the tab you want to record is not shown on the list, open a new tab and it will appear in the list below
-
-
Click Next
-
Go through the process you want to capture in the simulation
-
While recording, you can:
-
Pause
-
Restart
-
Delete
-
-
When finished, click the Finish recording button
-
The simulation will be added to the element
Toolbar actions
-
Click the simulation to show the toolbar
-
Use the toolbar to adjust:
-
Playback mode: Switch between demo mode or practice mode
-
Demo mode: Plays the simulation in a guided walkthrough format
-
Practice mode: Lets users try the steps themselves, with optional feedback for mistakes
-
-
Width: Set the element width
-
Show title: Turn the simulation title on or off
-
Playback steps: Select to play all steps or a specific range of steps
-
Show border: Show an outline around the simulation
-
AI creation: Generate other elements from the simulation
-
Edit simulation: Open the simulation editor for advanced editing options
-
Hide: Keep the element invisible to learners but available in the background
-
Delete: Remove the element from the lesson
-

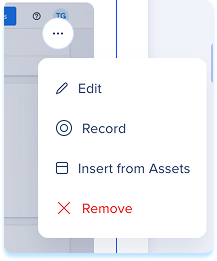
Simulation options menu
-
Click the Options menu at the top right of the element
-
Select one of the available actions:
-
Edit: Open the simulation editor for advanced editing options
-
Record: Replace the current simulation with a new recording
-
Insert from Assets: Replace the current content with a file from your learning assets
-
Remove: Clear the simulation from the element
-
Play simulation
-
Click Play (Demo/Practice/Test)
-
The simulation opens in a preview window and runs based on the mode you selected
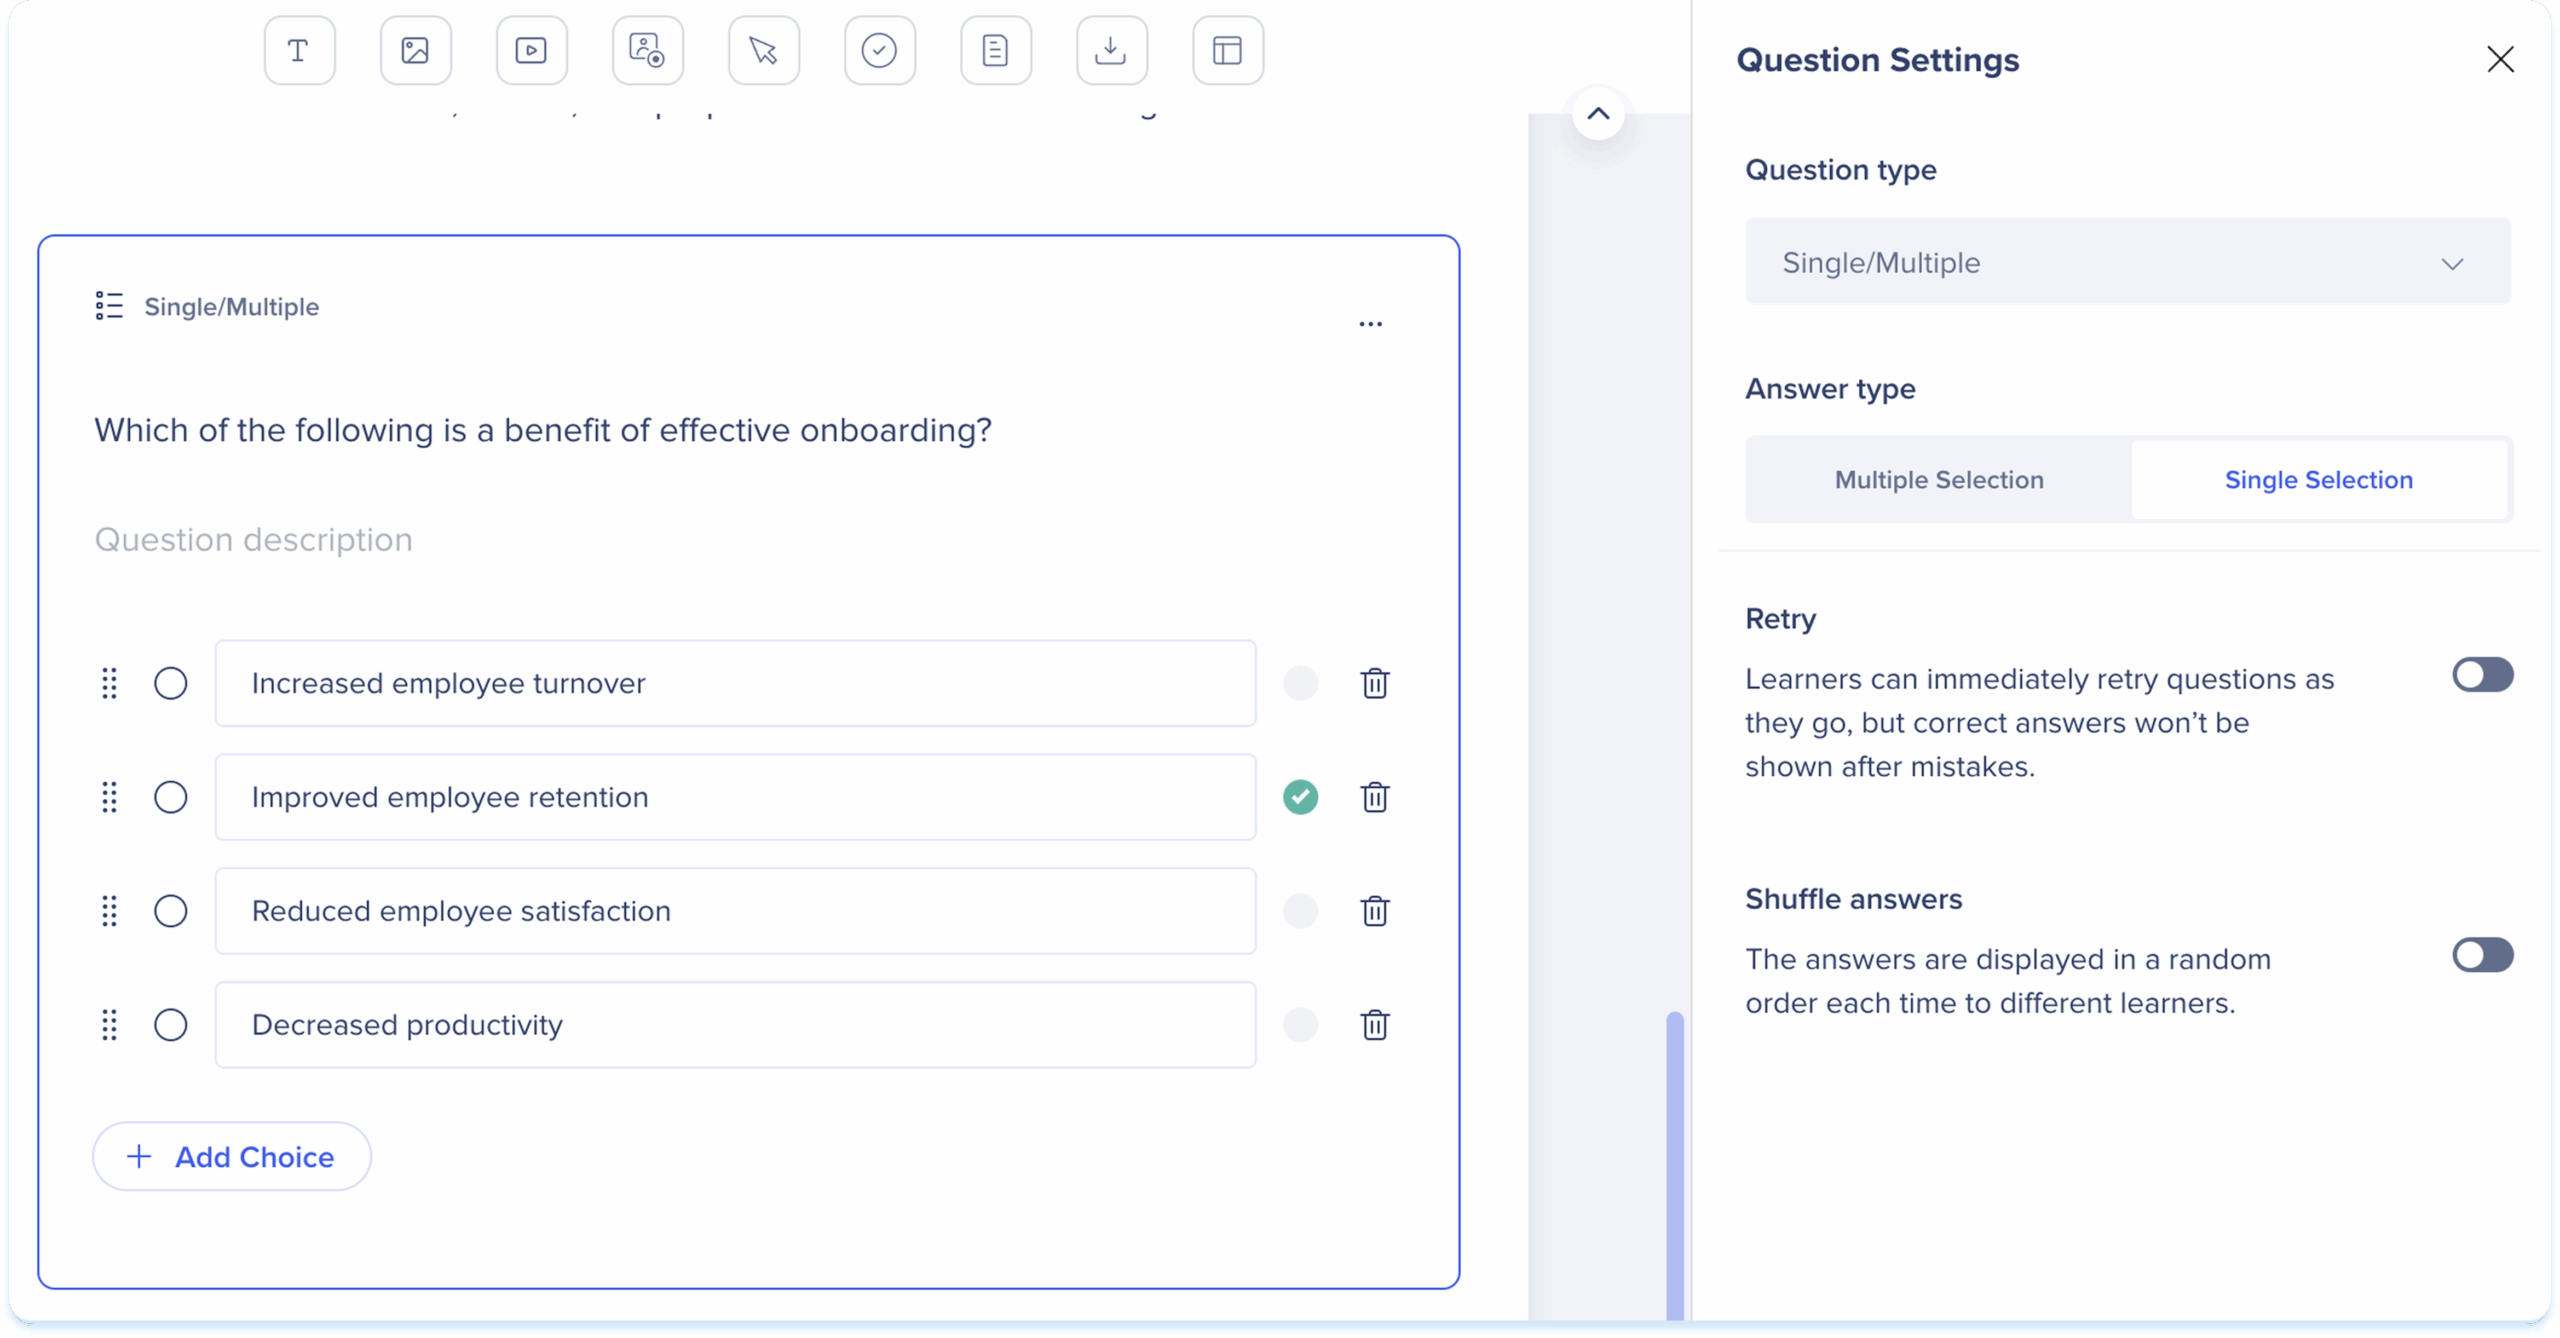
Self check
The Self Check element lets you add a quiz-style question so learners can test their understanding. Self Checks are for practice only and don't need to be passed

Add a self check
-
The default question type in a self check is Single/Multiple
-
Click the Settings icon at the top right of the element
-
In the Question settings panel on the right, select a different Question type
-
Provide the required fields for the selected type
-
Turn on Retry to let learners immediately try again after answering a question, without seeing the correct answer (optional)
https://support.walkme.com/knowledge-base/digital-learning-quizzes/
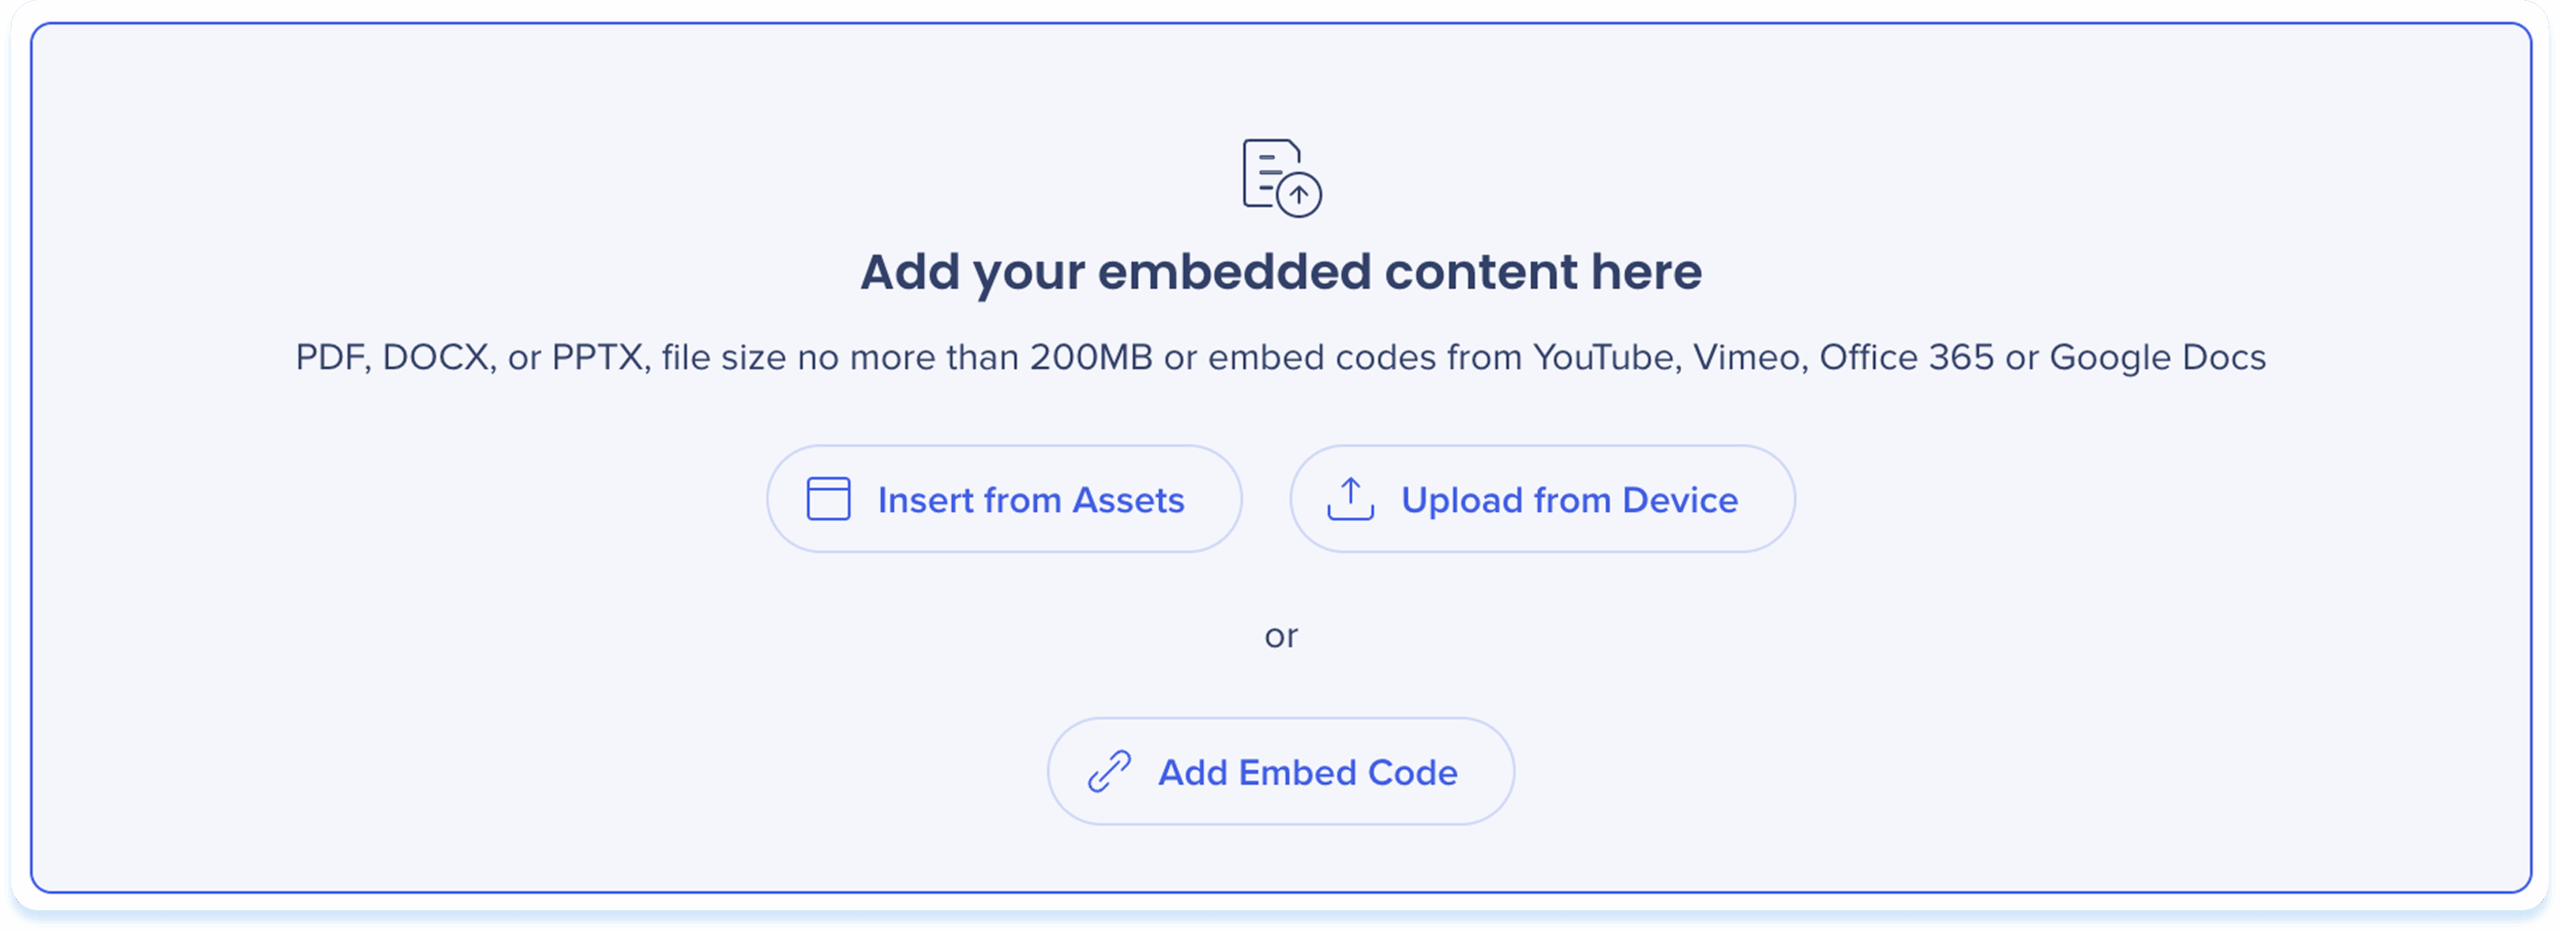
Embedded content
Use the embedded content element to embed documents or third-party content directly in the lesson.

Add embedded content
-
Choose one of the following options to add embedded content:
-
Insert from Assets: Select embedded content from your learning assets
-
Upload from Device: Choose a file from your computer
-
Add Embedded Content: Paste the embed code
-
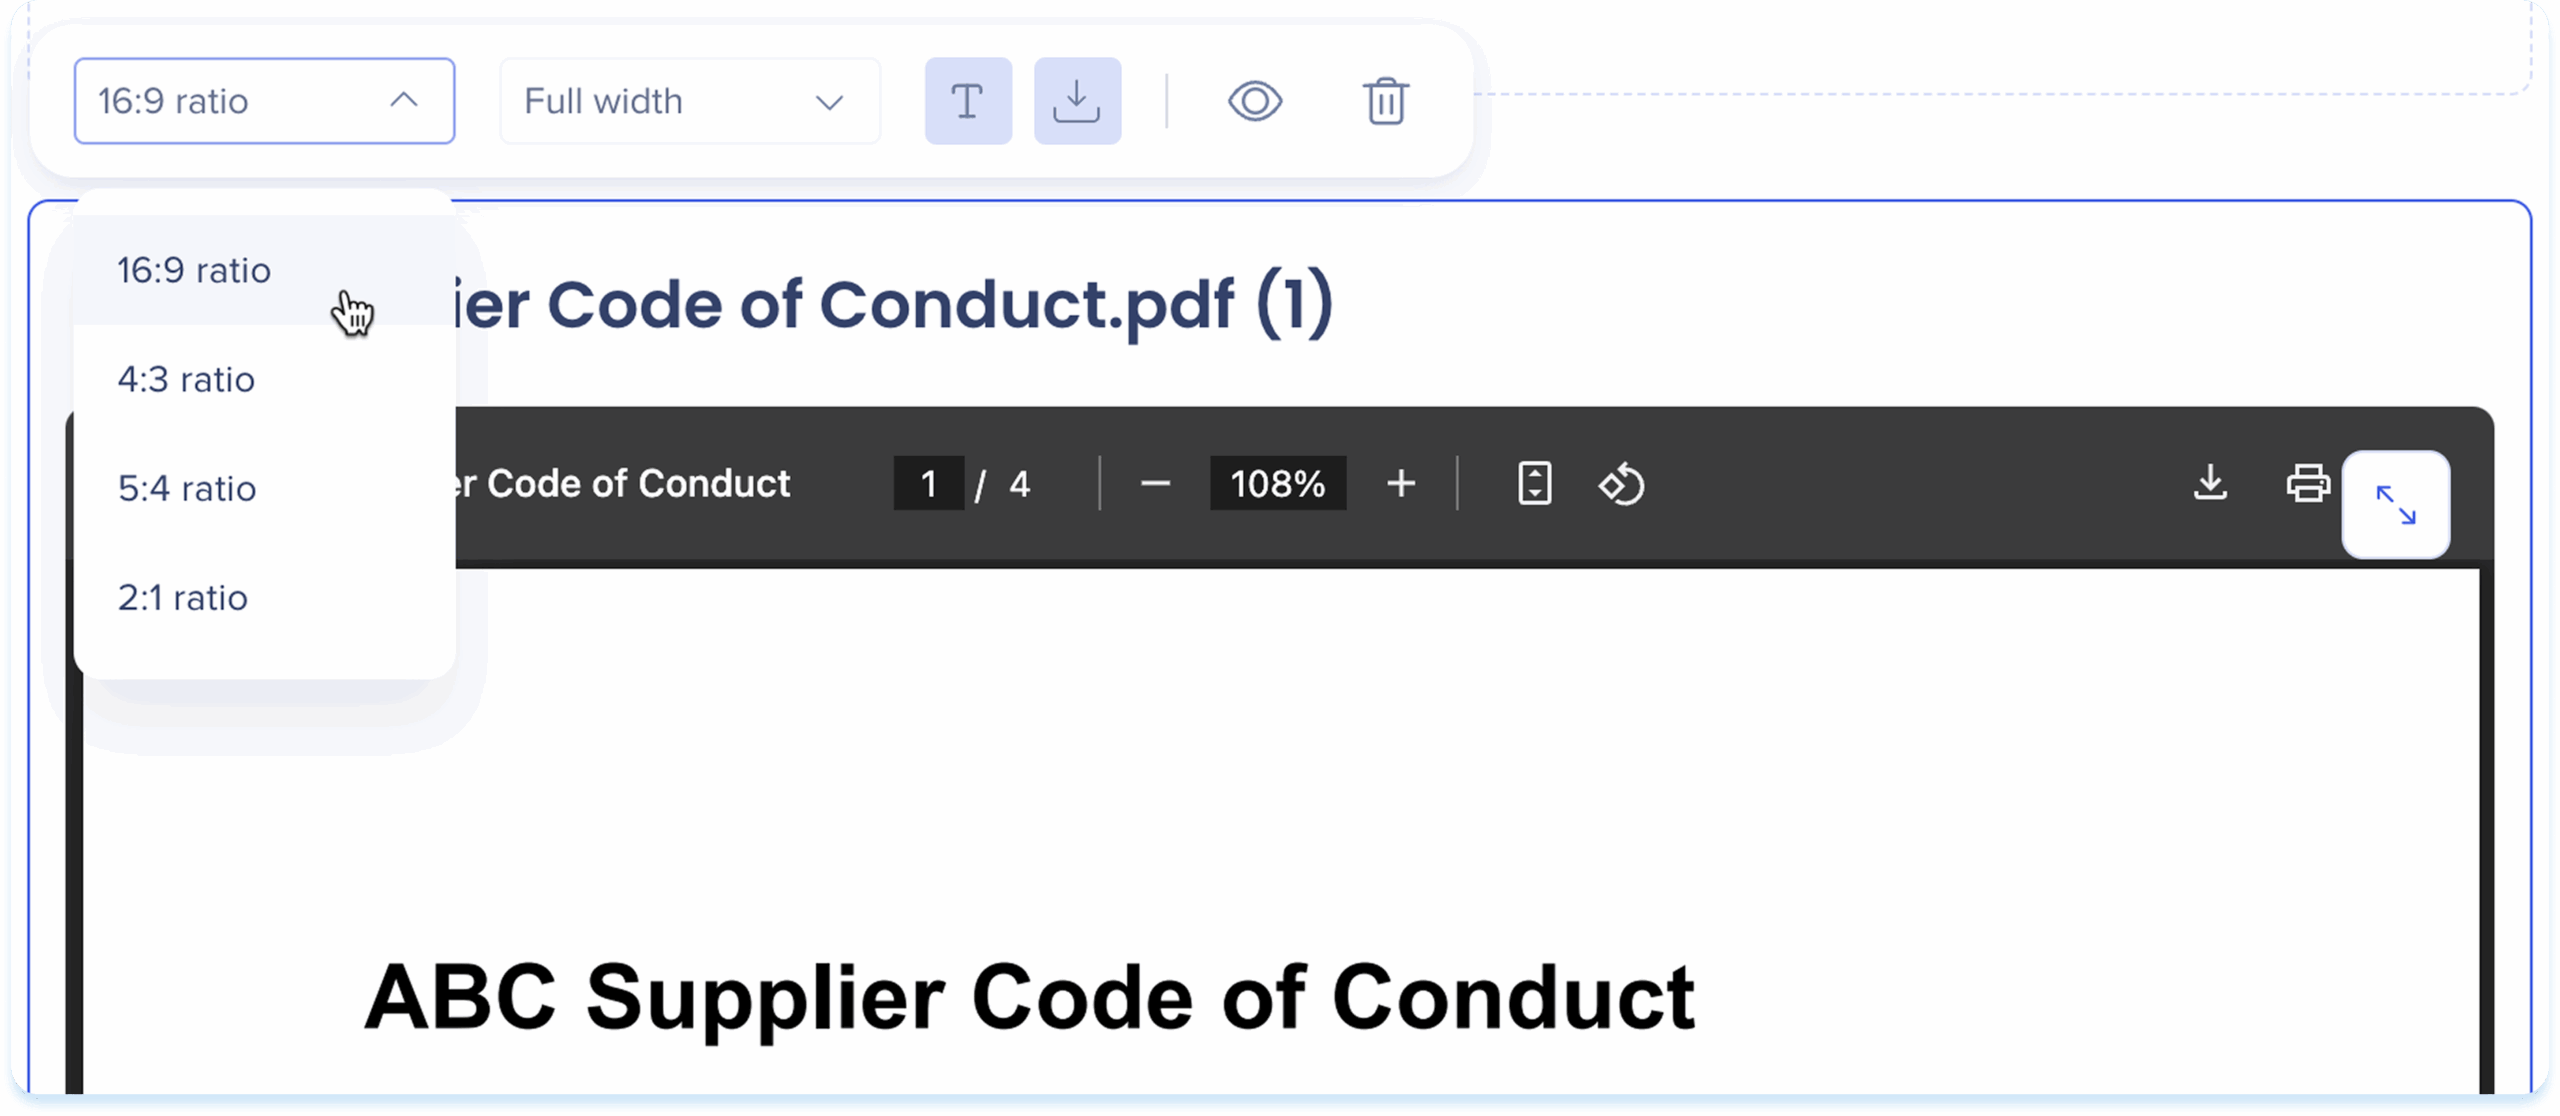
Toolbar actions
After you add the embedded content, use the toolbar to edit and adjust it.
-
Click the embedded content to show the toolbar
-
Use the toolbar to adjust:
-
Ratio: Choose an aspect ratio
-
Width: Set the element width
-
Show title: Turn the embedded content title on or off
-
Hide: Keep the element invisible to learners but still available in the background
-
Delete: Remove the element from the lesson
-
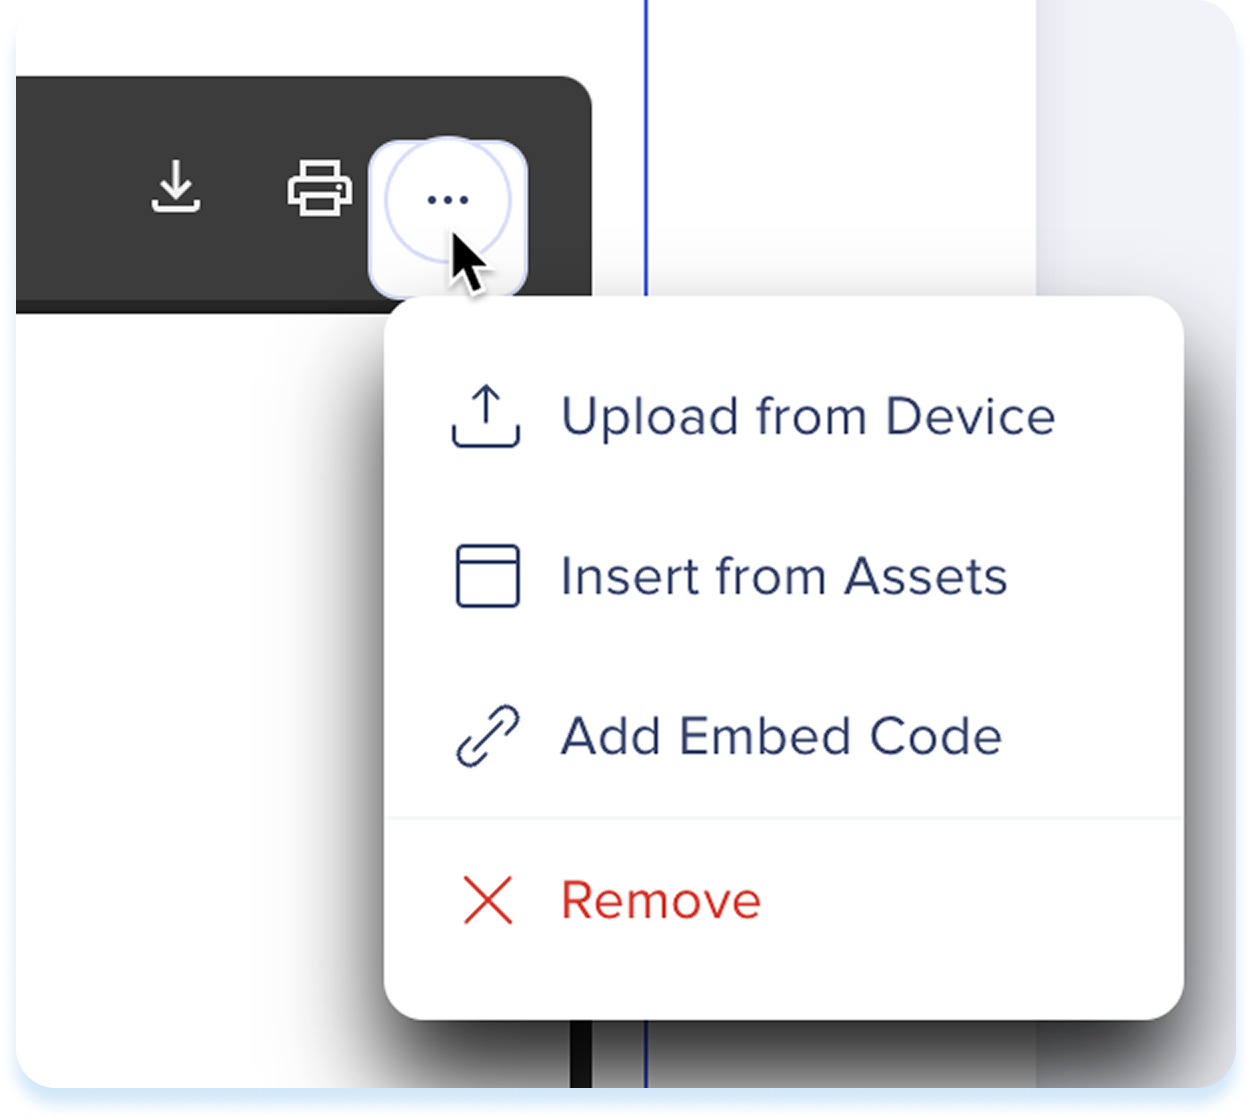
Embedded content options menu
-
Click the Options menu at the top right of the embedded content
-
Select one of the available actions:
-
Upload from Device: Replace the current content with a content from your device
-
Insert from Assets: Replace the current content with a file from your learning assets
-
Add Embedded Code: Update the embedded content
-
Remove: Clear the embedded content from the element
-
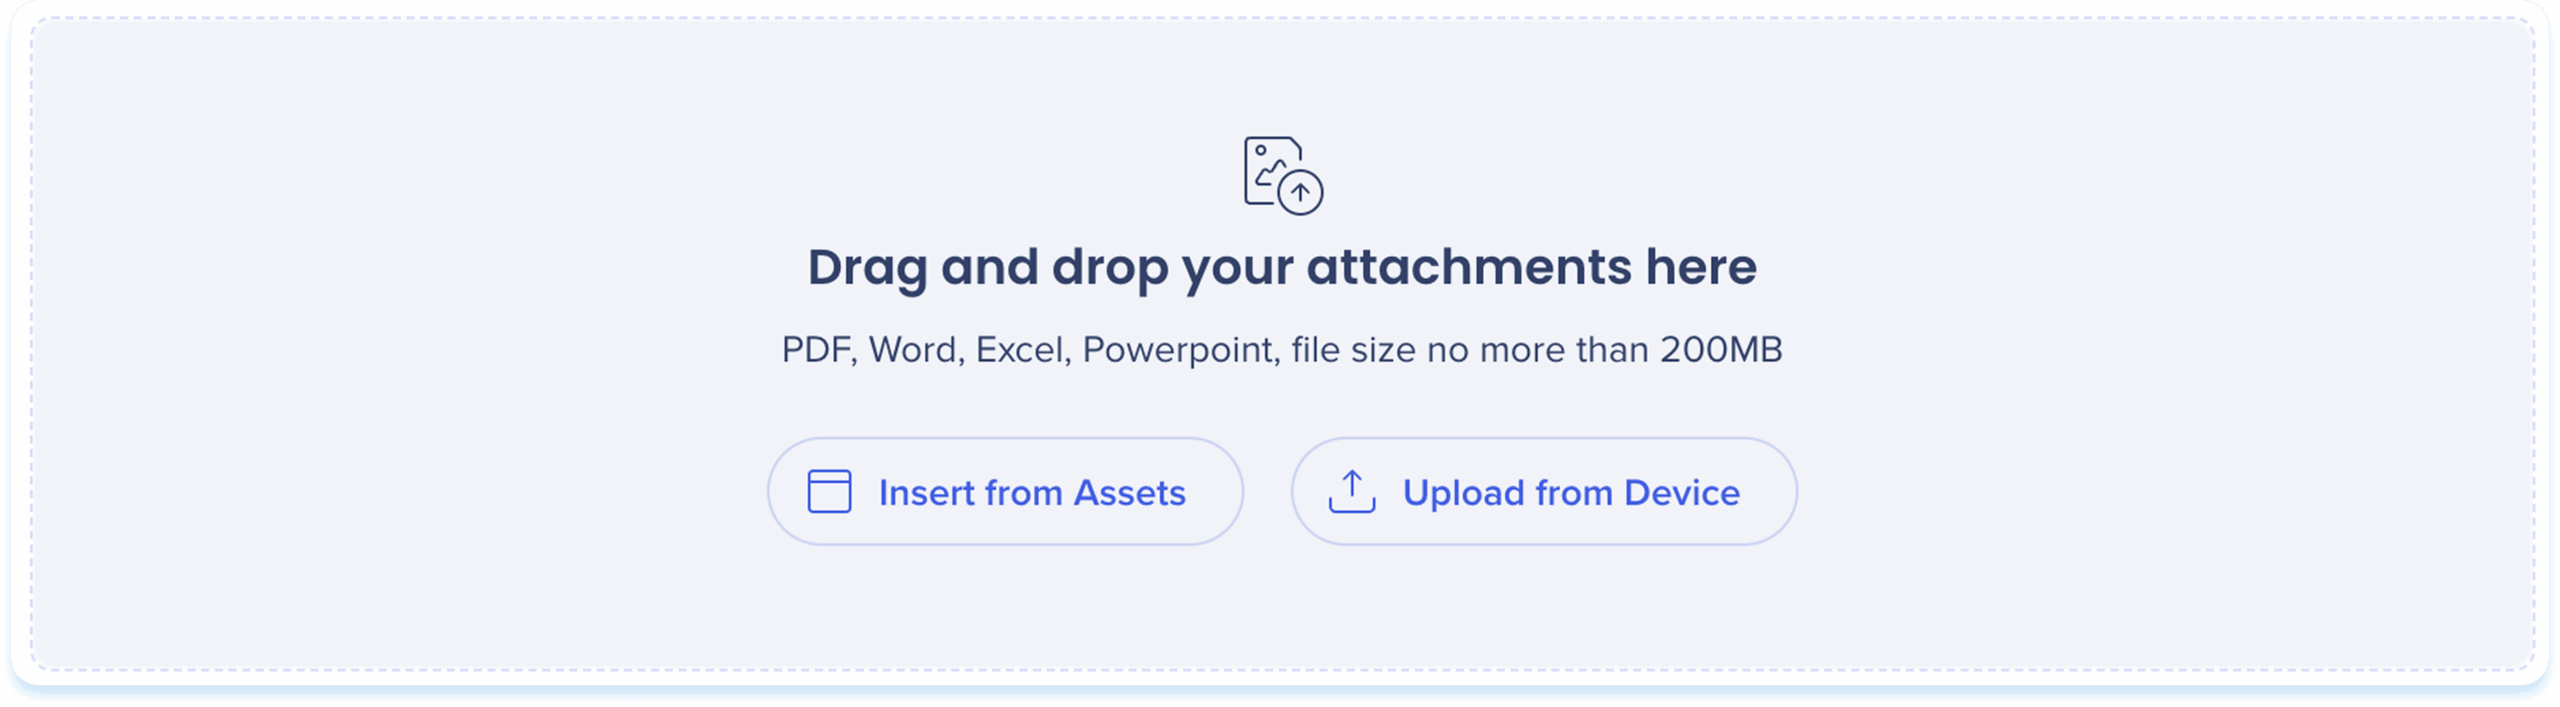
Attachment
Use the attachments element to provide downloadable files like PDFs or guides.

Add an attachment
Choose one of the following options to add attachments:
-
Drag & drop the file into the attachment element
-
Insert from Assets: Select attachments from your learning assets
-
Upload from Device: Choose a file from your computer
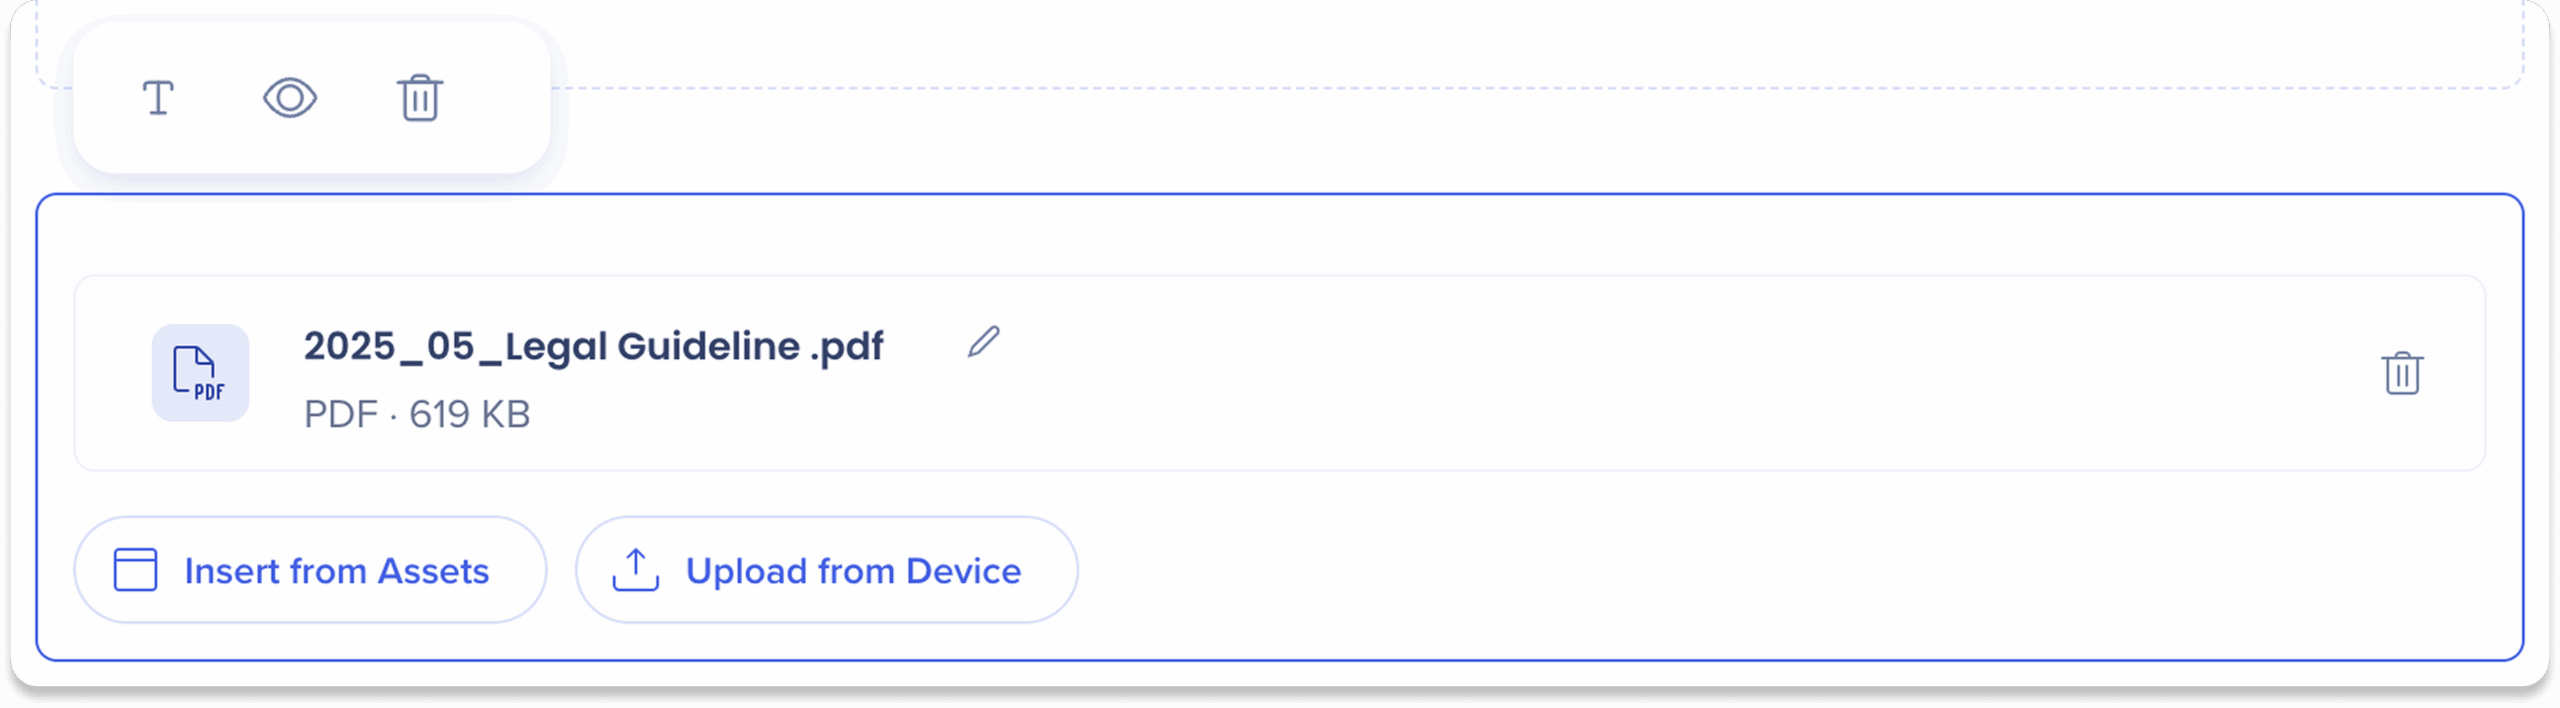
Toolbar actions
After you add the attachment, use the toolbar to edit and adjust it.
-
Click the attachment to show the toolbar
-
Use the toolbar to adjust:
-
Show title: Turn the attachment title on or off
-
Hide: Keep the element invisible to learners but still available in the background
-
Delete: Remove the element from the lesson
-
Additional actions
To replace files select either:
-
Insert from Assets: Replace the current content with a file from your learning assets
-
Upload from Device: Replace the current content with a content from your device
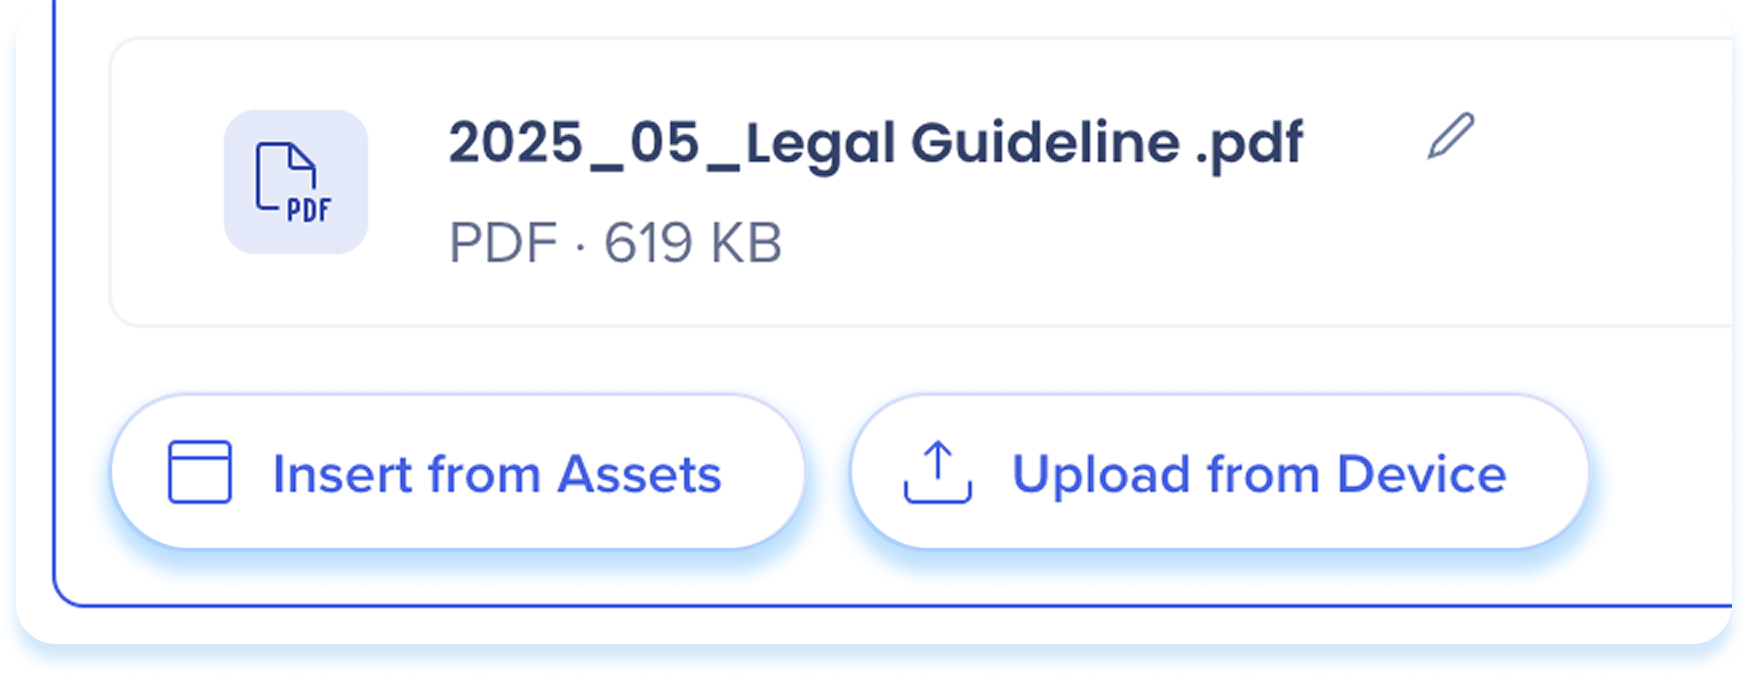
To rename a file:
-
Click Edit next to the file name
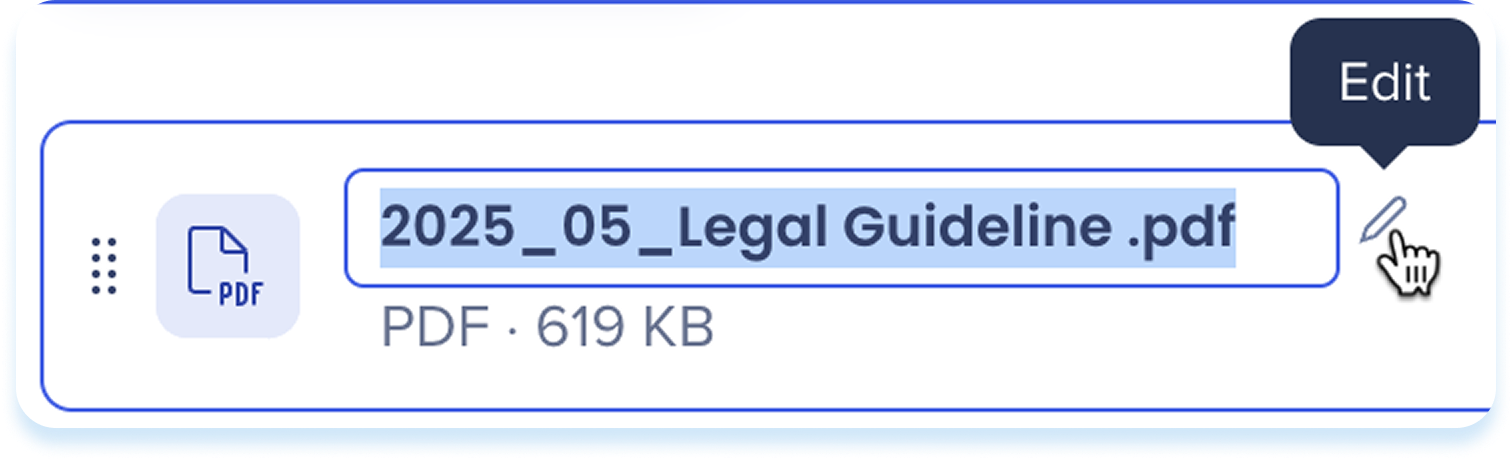
To remove a file:
-
Click the Trash icon on the file row
![]()
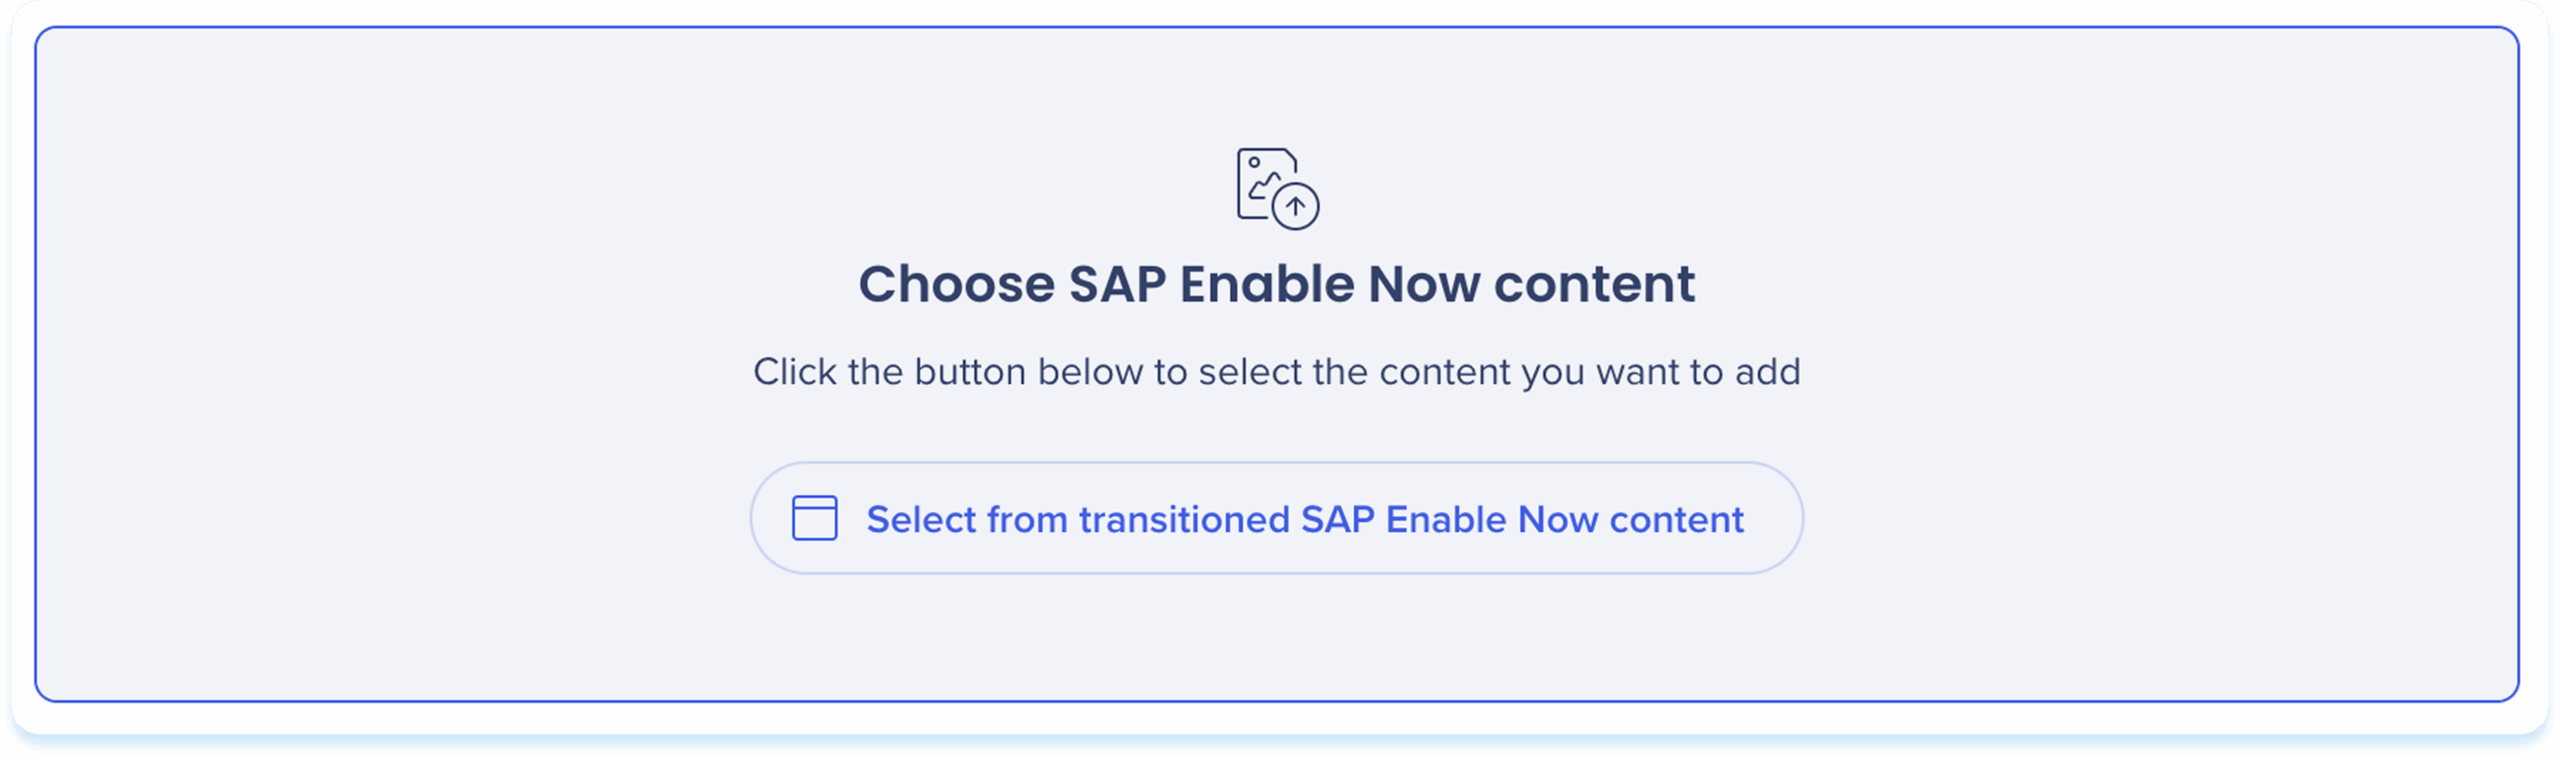
SAP Enable Now

Use the SAP Enable Now content element to insert content transitioned from SAP Enable Now.
Add SAP Enable Now content
-
Click Select from transitioned Enable Now content
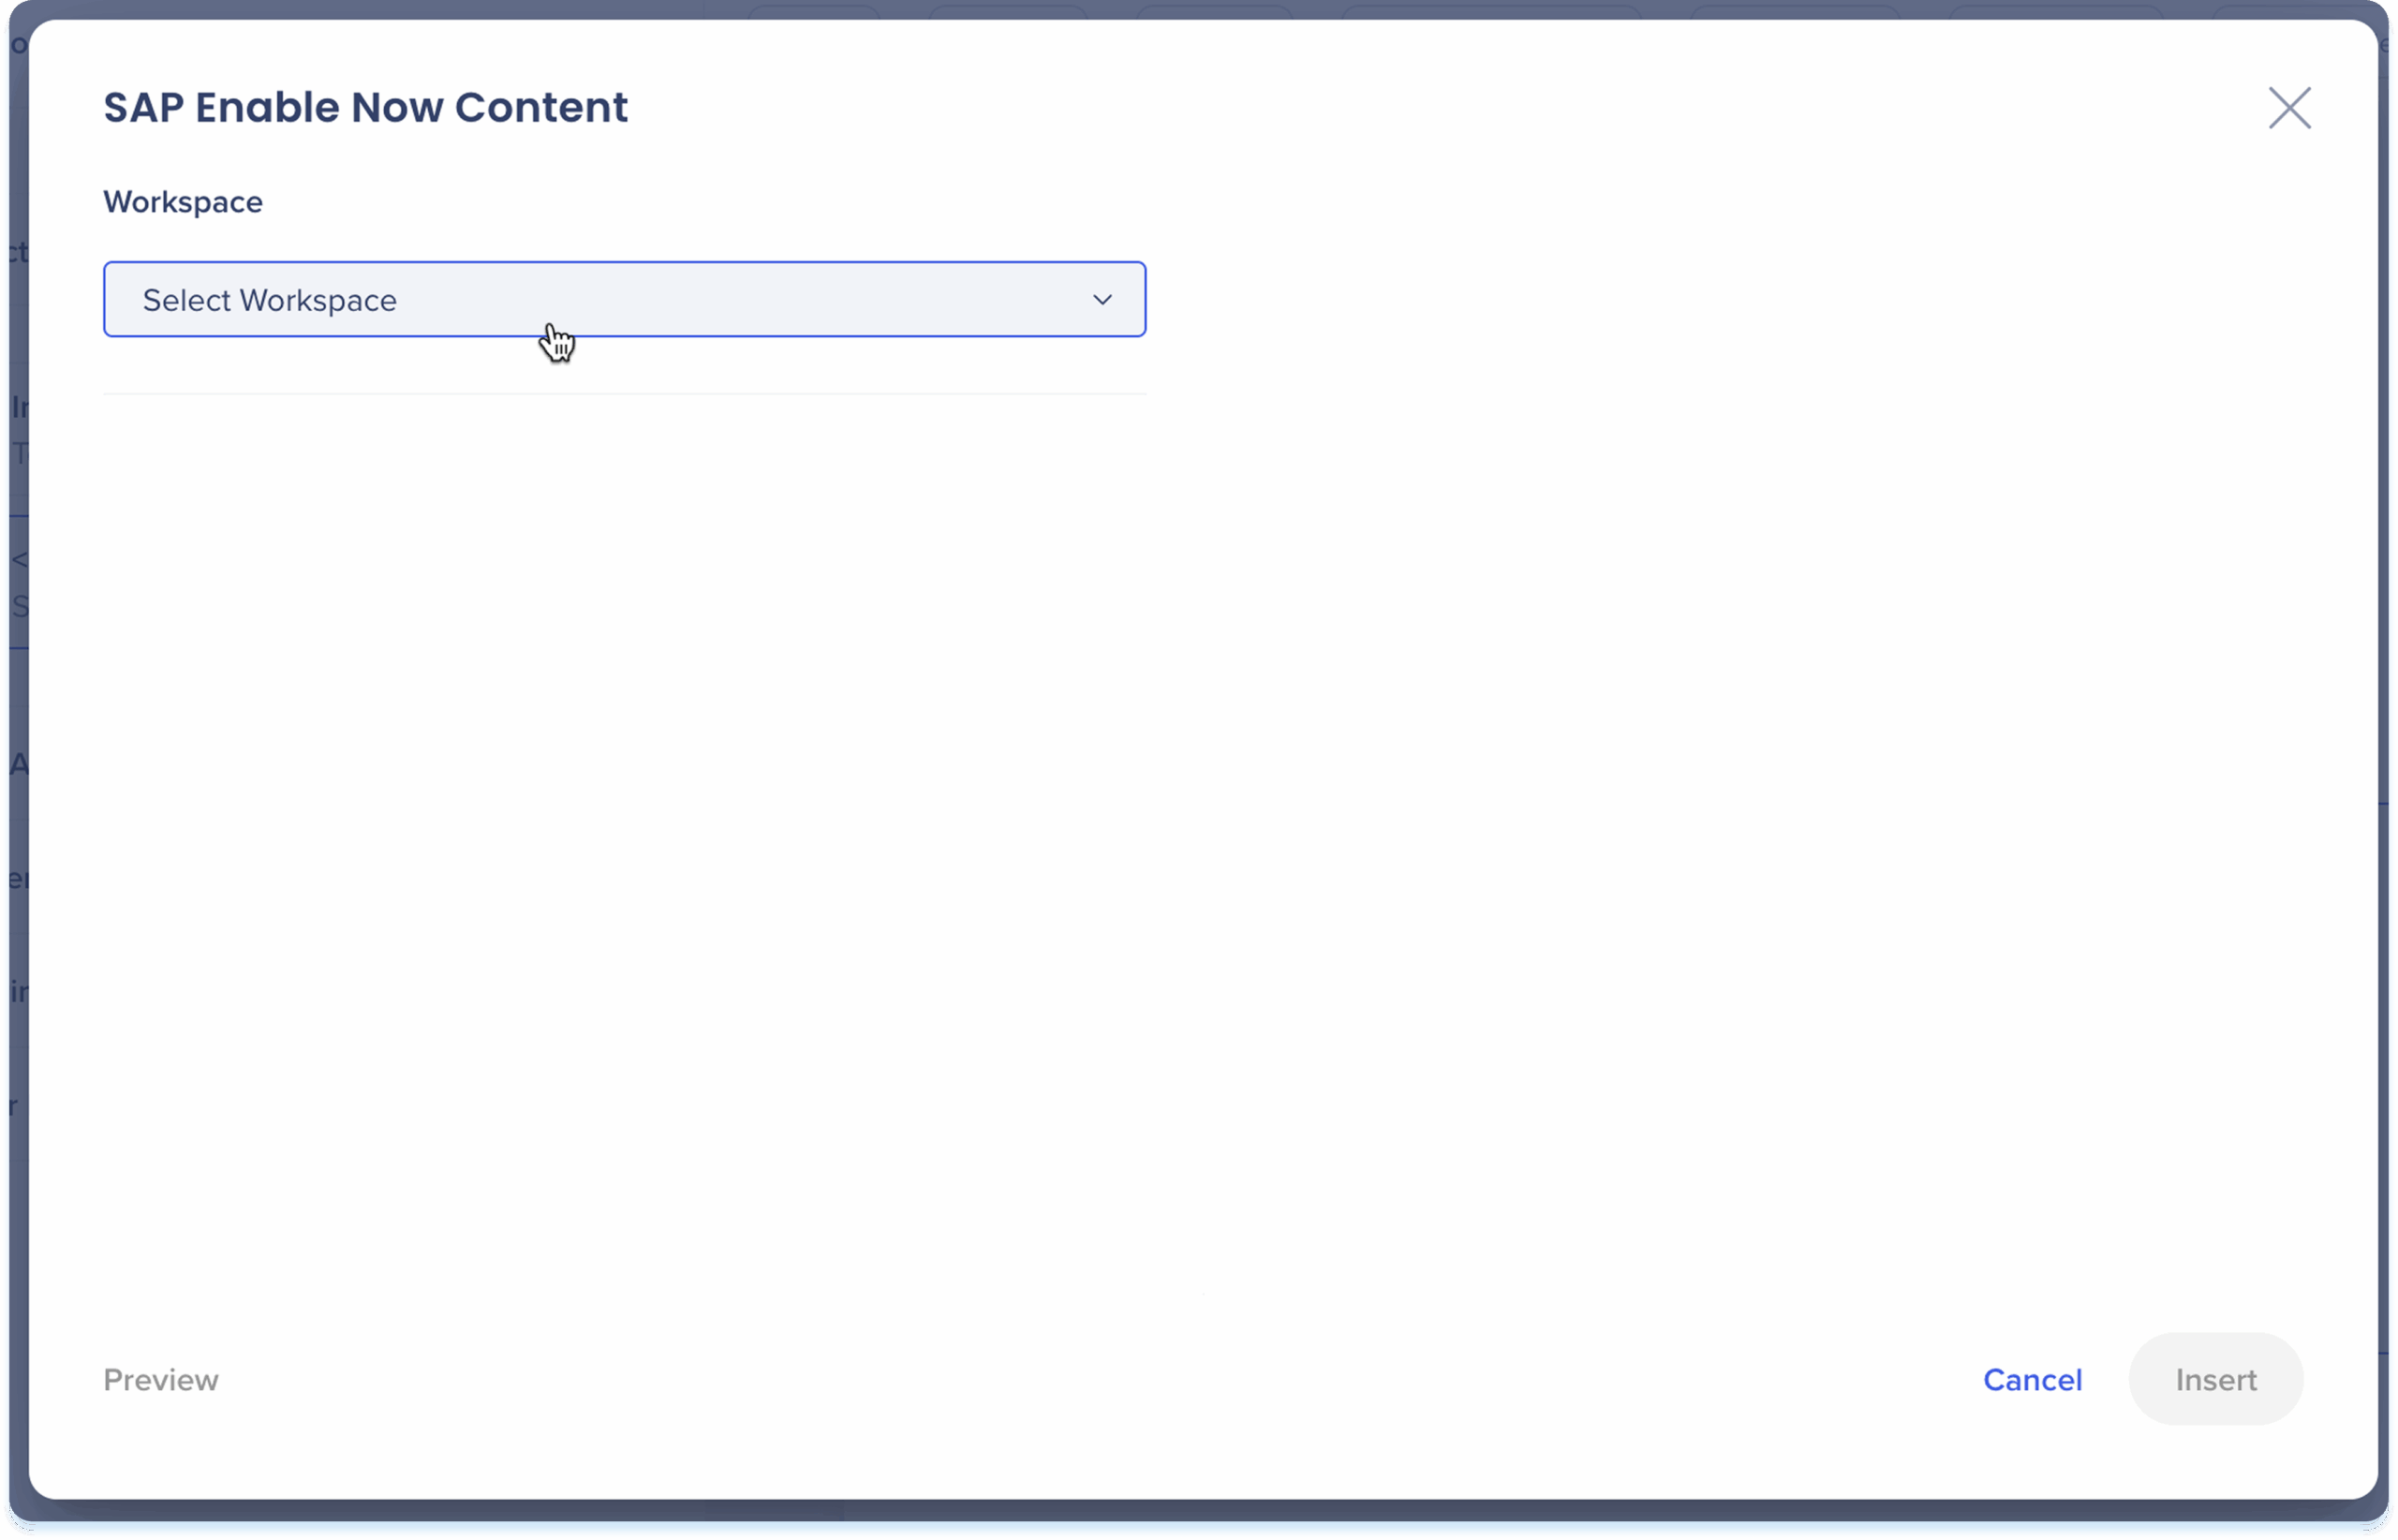
-
The SAP Enable Now content popup will open
-
Select the workspace from the dropdown
-
Choose the content item to insert
-
Click Insert
Toolbar actions
After you add the transitioned content, use the toolbar to edit and adjust it.
- Click the transitioned content to show the toolbar
- Use the toolbar to adjust:
- Width: Set the element width
- Show title: Turn the title for the transitioned content on or off
- Show short description: Turn the short description for transitioned content on or off
- Show description: Turn the description for transitioned content on or off
- Hide: Keep the element hidden from learners but still available in the background
- Delete: Remove the element from the lesson

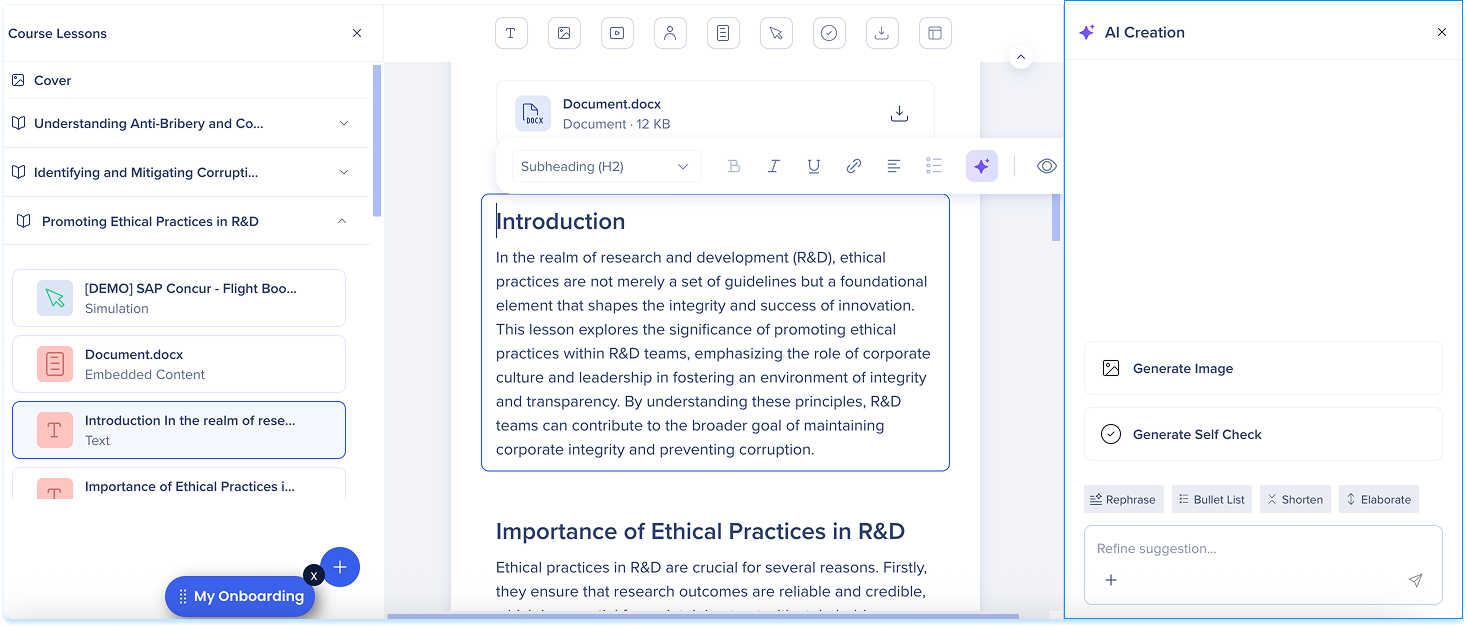
Generate elements with AI
You can use AI to generate new elements based on content you've already added to your lesson. This helps speed up content creation and keeps your lessons consistent.
There are two options to generate content:
- Generate from the element in the toolbar
- Open AI Creation panel
Generate from the element in the toolbar
-
Select an element in the main canvas
-
Click the AI icon that appears
-
Depending on the element, the panel displays the available generation actions:
-
Generate Text
-
Generate Image
-
Generate Video
-
Generate Self Check
-
-
The new element will be added directly below the selected one
Open AI Creation panel
-
Select an existing element in the content area
-
Click the AI icon that appears
-
At the bottom of the AI menu, click Open AI Creation
-
The AI Creation panel opens on the right side of the screen
-
Depending on the element, the panel displays the available AI actions
-
Use the text field to refine your prompt or suggestion
-
Insert the generated content into the main canvas