Brief Overview
This article explains the elements you can add when creating lessons in WalkMe Learning Arc. Each element has a specific role in presenting information and supporting different learning needs.
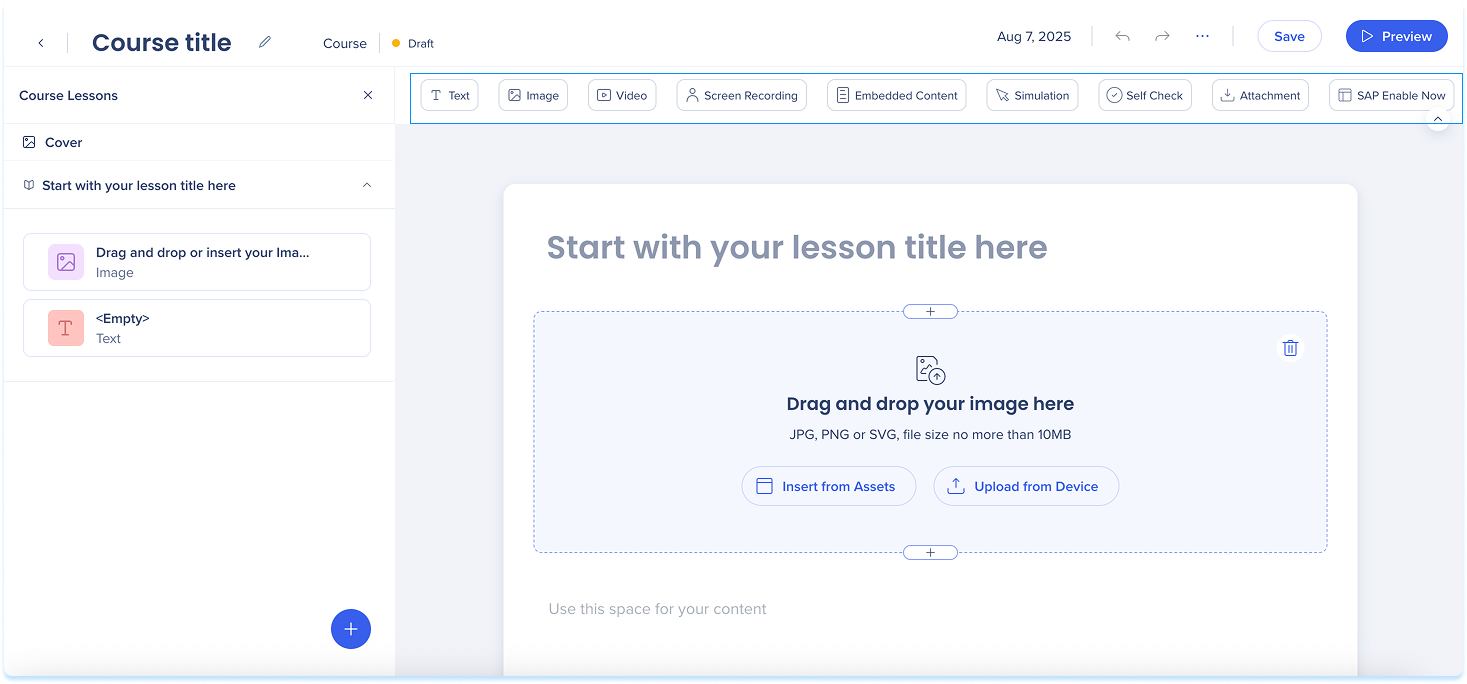
Elements Overview
Each lesson can include a mix of elements. Drag and drop different content types to add explanations, examples, or practice activities.
Available elements:
-
Text: Add written content to explain ideas, give instructions, or share context
-
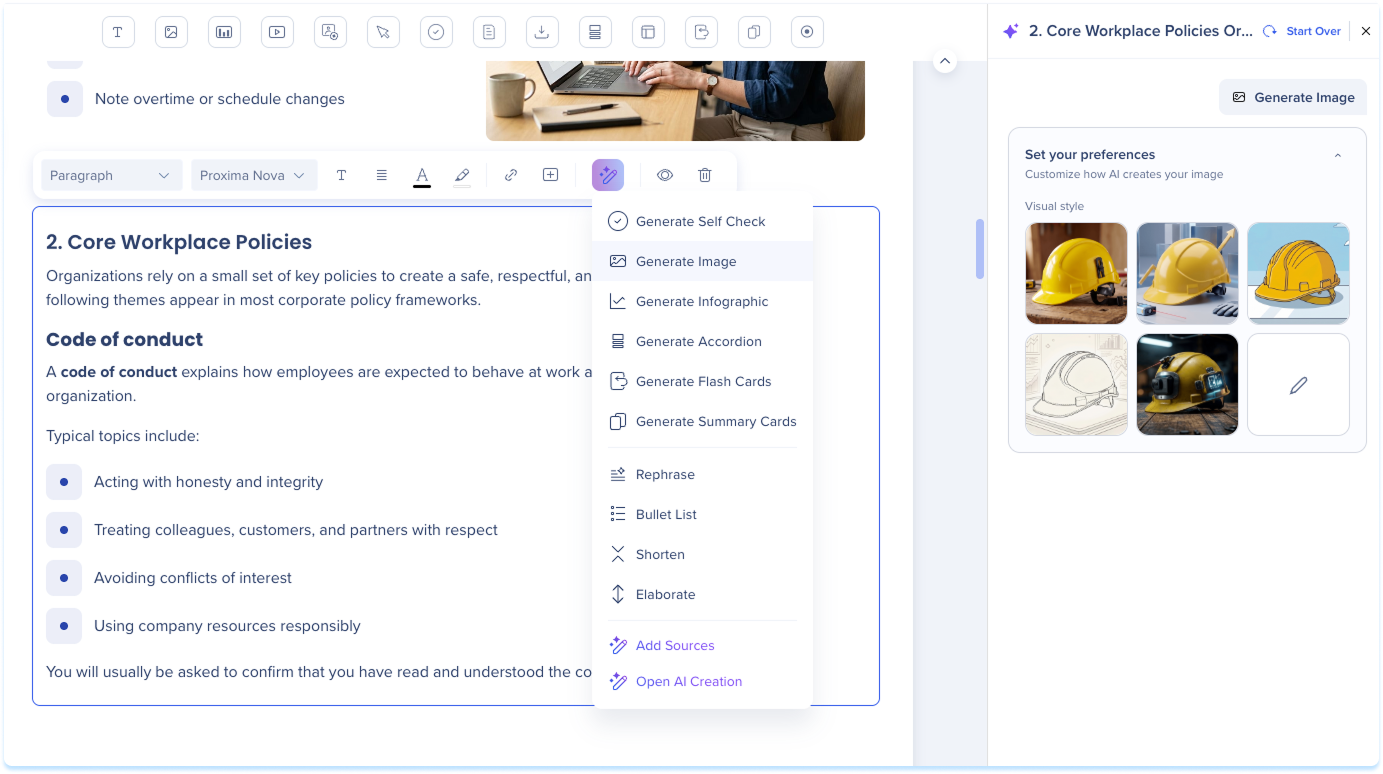
Image: Upload or insert an image to support your message visually
-
Video: Use the video element to record yourself and deliver content in a more dynamic way
-
Screen Recording: Show a step-by-step recording of a process or workflow
-
Embedded Content: Insert external resources, such as websites, apps, or tools, directly into your lesson
-
Simulation: Let users practice a process in an interactive, guided environment
-
Self-Check: Add a short quiz to help users test their understanding
-
Attachment: Provide downloadable files like PDFs or guides
-
SAP Enable Now: Add transitioned SAP Enable Now content
- Infographic: Add a visual summary to a lesson
- Accordion: Organize content into expandable sections learners can open and close
- Hotspot: Add interactive markers to an image that reveal details when selected
- Flashcard & summary card: Present content on cards learners flip or work through
Add an Element
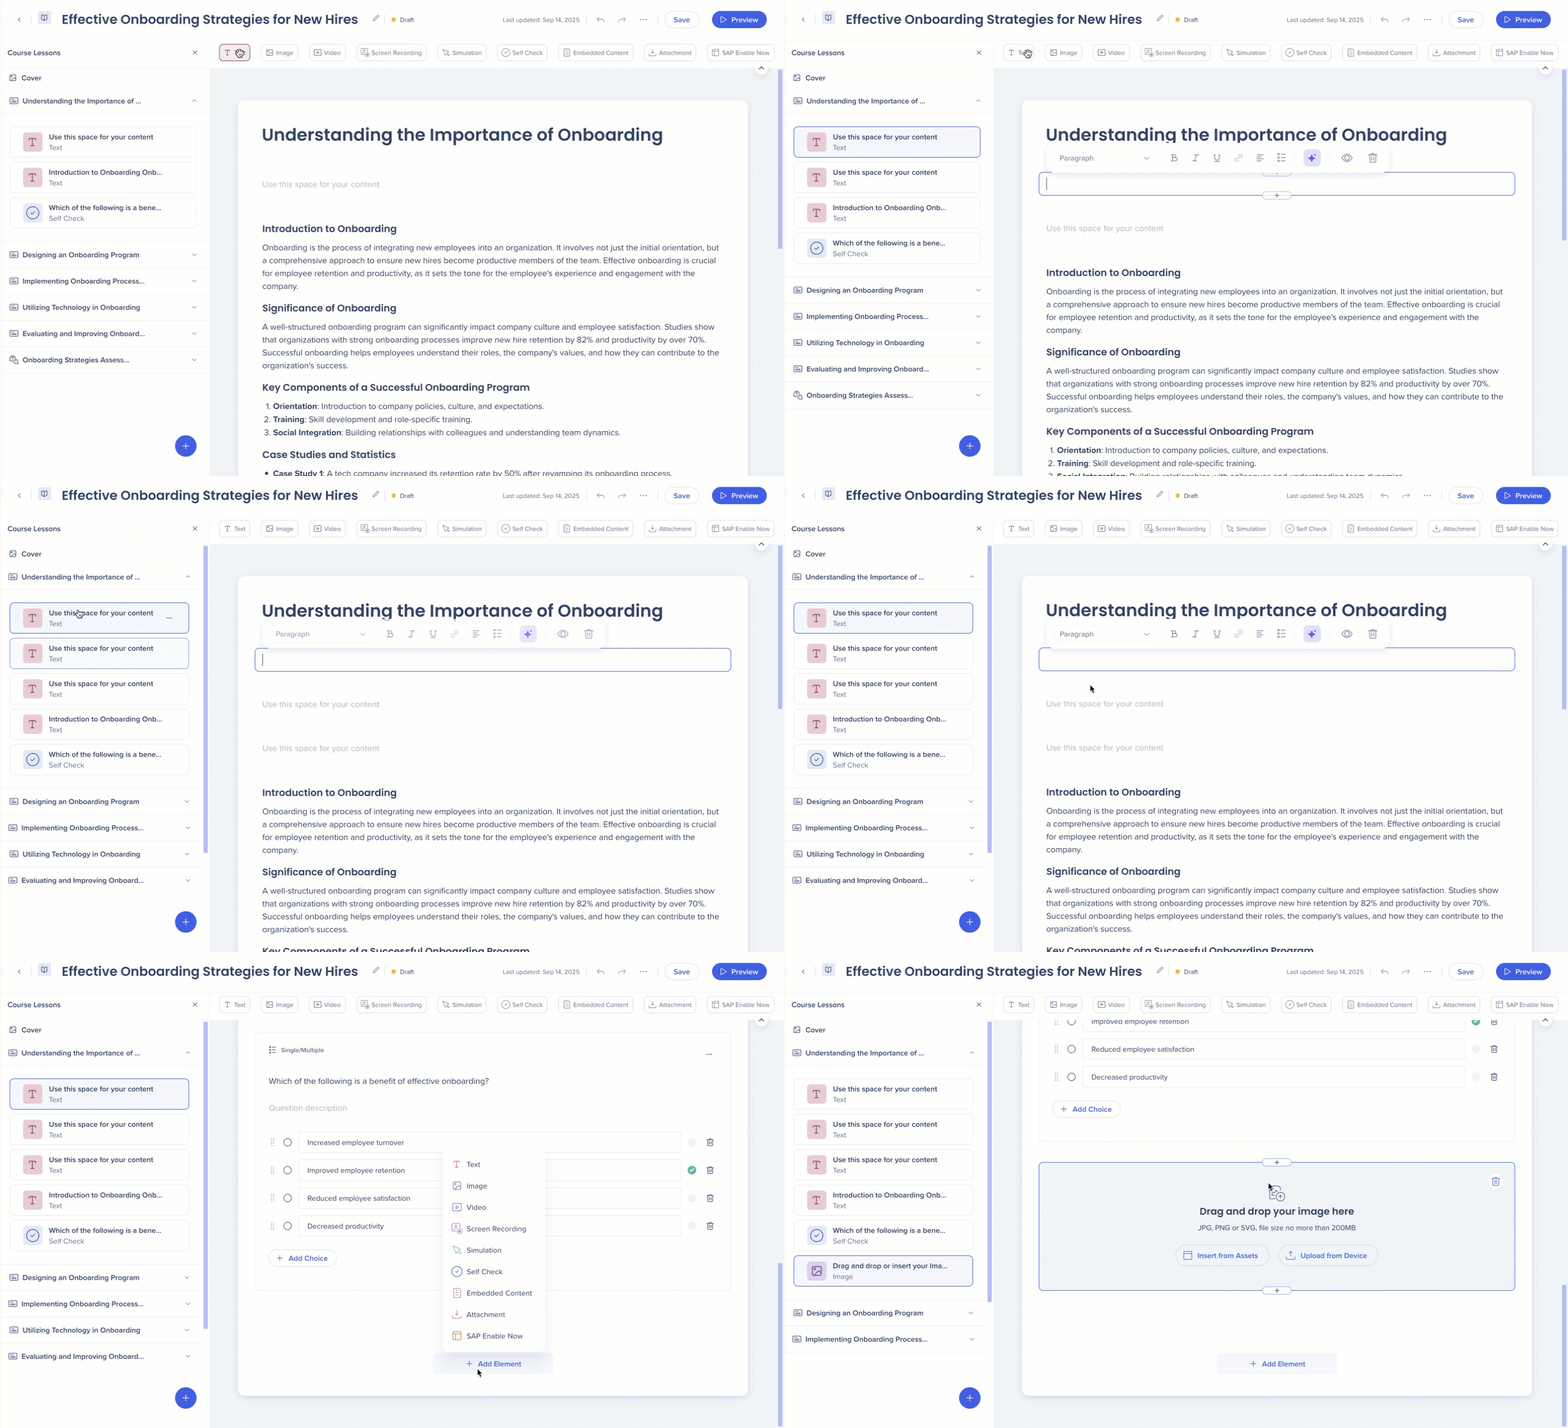
There are two ways to add an element to the page:
- Drag the element from the elements panel onto the main canvas or a spot in the layers panel
- Select + Add Element in the main canvas
Element Actions
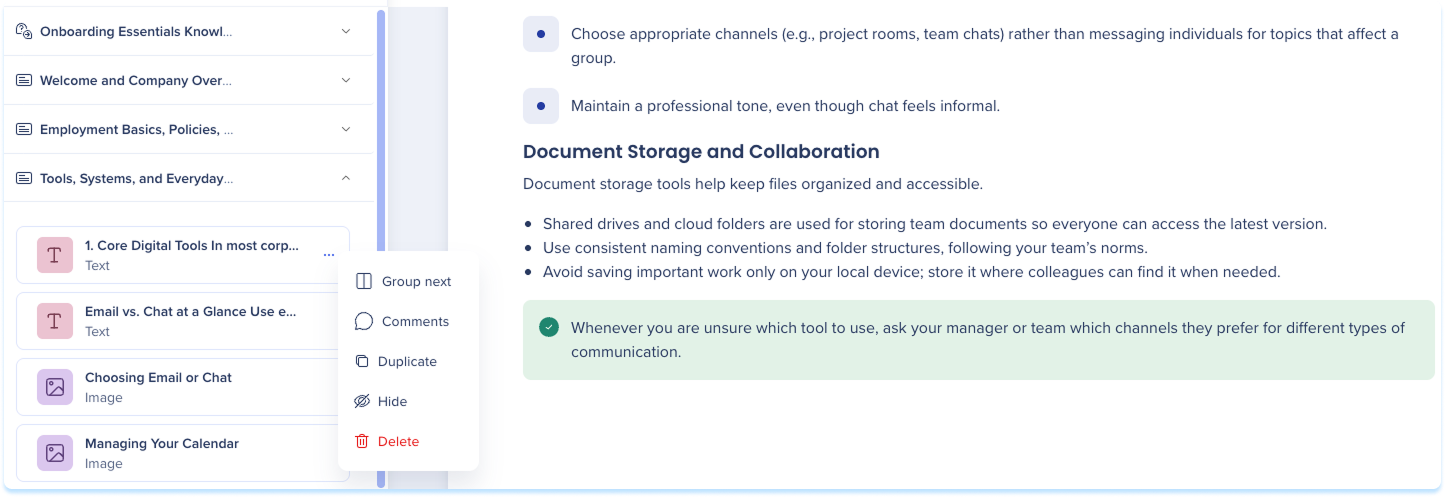
Each element has a set of actions you can take from the lesson editor. To access them, hover over the element in the canvas or select it in the layers panel.
Available actions:
- Comment: Add a comment to leave notes or feedback for collaborators, @ mentions will trigger email notifications
- Duplicate: Create a copy of the element in the same lesson
- Group next: Place the element and the one below it side by side in a two-column layout
- Hide: Keep the element in the lesson but hide it from learners
- Delete: Remove the element from the lesson
Two-column layout (grouping elements)
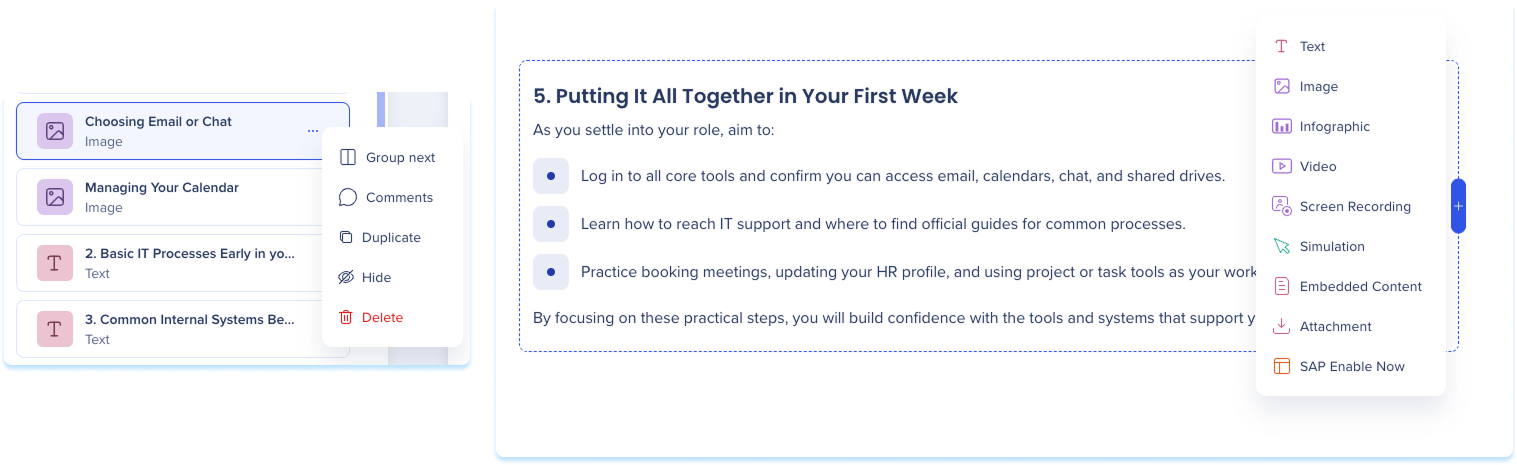
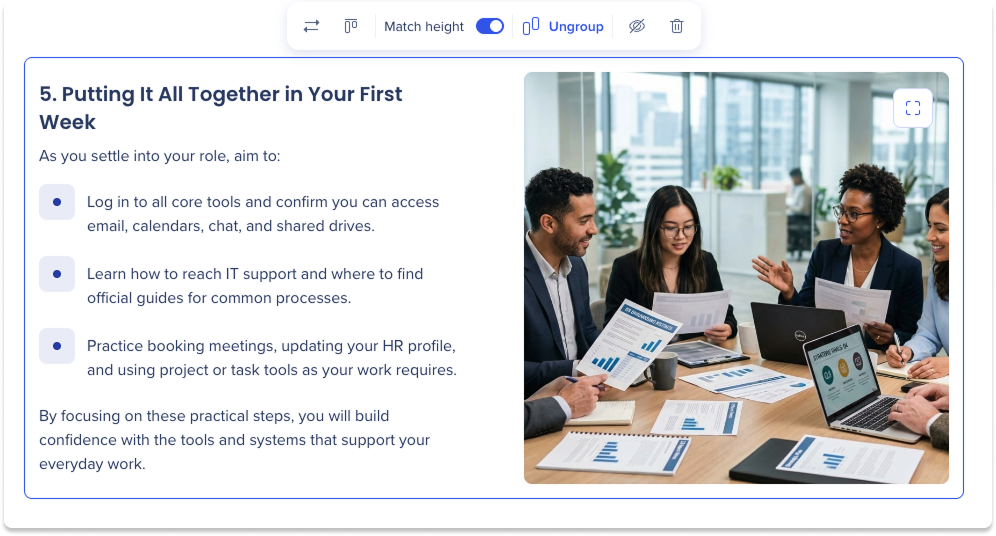
Group two elements to show them side by side. Use it to pair related content, like text with an image or a video with instructions.
There are two ways to group elements:
- Select the + icon on the left or right side of an element, then choose an element to place beside it
- Select an element in the layers panel, open the Options menu, then select Group next to place it beside the element below it
Éléments pris en charge
Vous pouvez regrouper les types d'éléments suivants dans une mise en page à deux colonnes : Texte, Image, Vidéo, Enregistrement d'écran, Simulation, Contenu intégré, Pièce jointe et Contenu SAP Enable Now.
Two-column layout actions
Select a grouped element to open the toolbar, then:
- Direction: Switch which element appears on the left or right
- Alignment: Align both elements to the top, center, or bottom
- Match height: Match the height of both columns
- Ungroup: Return both elements to full-width rows
- Hide group: Hide the group from learners
- Delete: Remove the group and both elements
Video Element
Use the video element to record yourself and deliver content in a more dynamic way.

Add a video
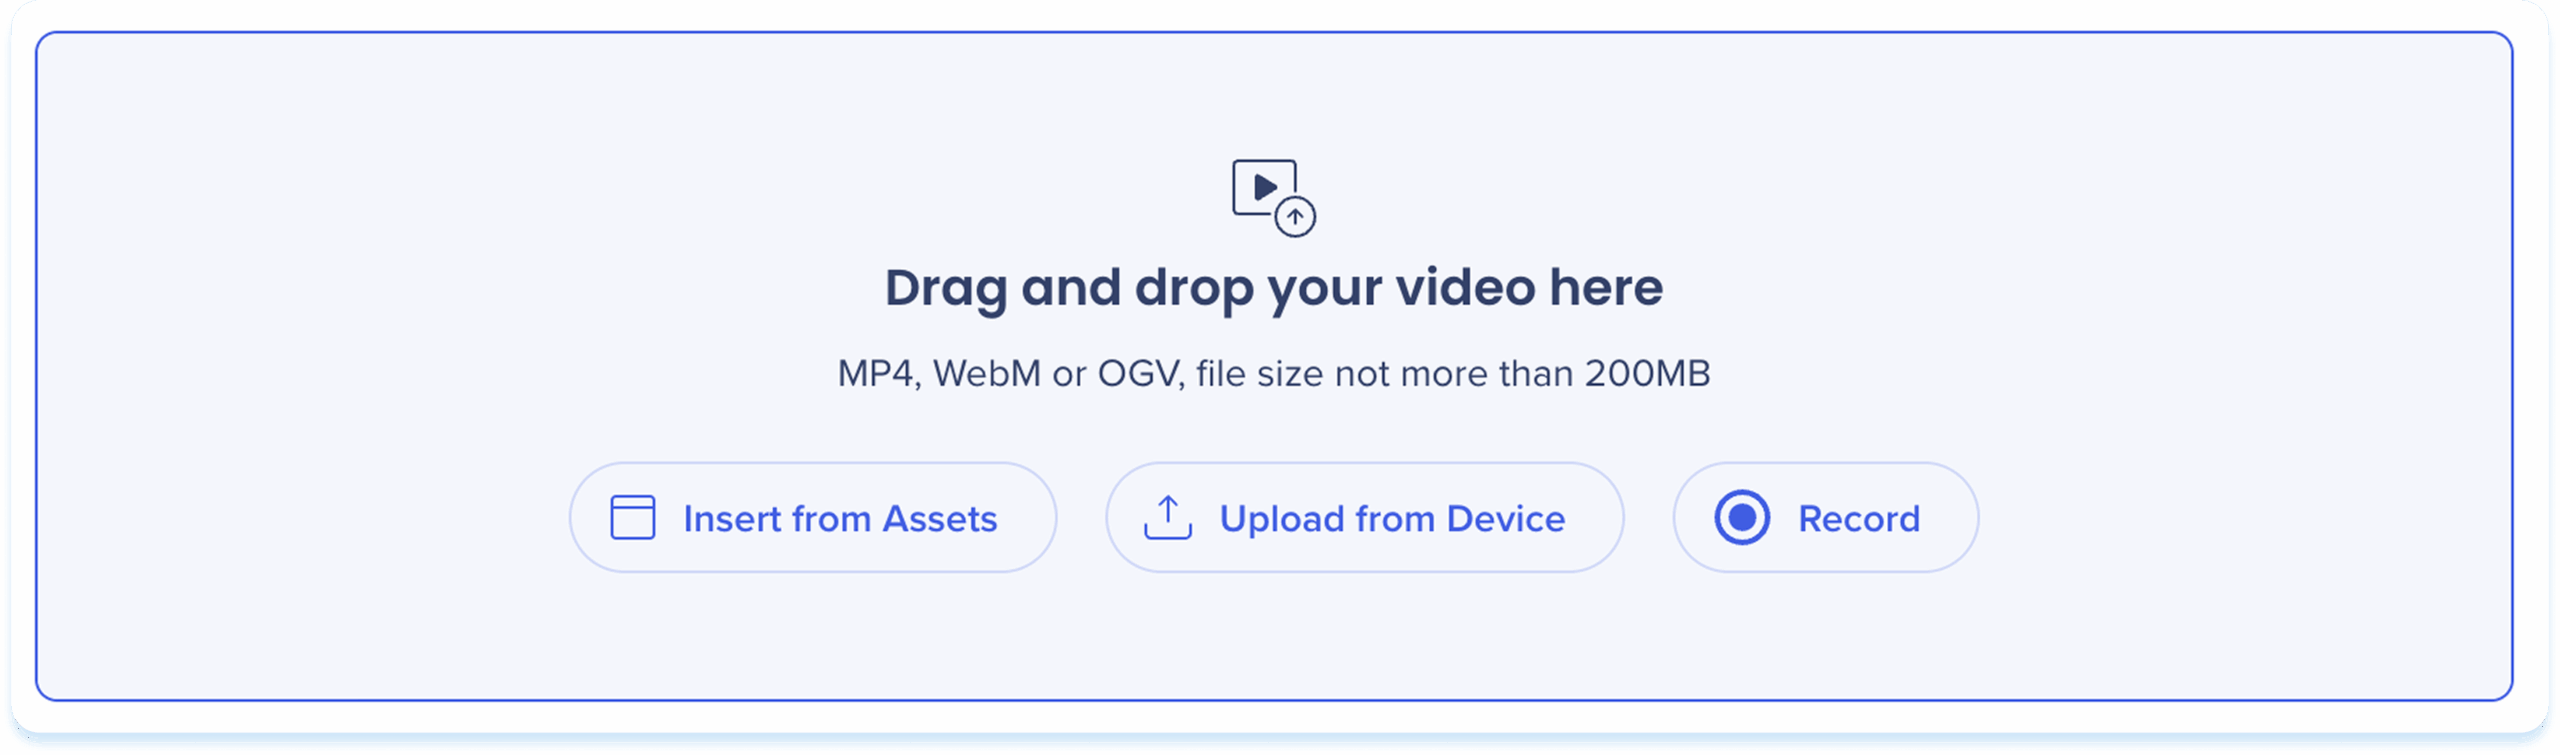
Choose one of the following options to add a video:
-
Drag & drop the file into the video element
-
Insert from Assets: Select a video from your learning assets
-
Upload from Device: Choose a file from your computer
-
Record: Capture a new video
Extension de l'arc d'apprentissage WalkMe
Record a video
-
Click Record
-
If accessing for the first time, a popup will appear for access to your camera and microphone
-
Allow access by selecting:
-
Allow while visiting the site
-
Allow this time
-
Never allow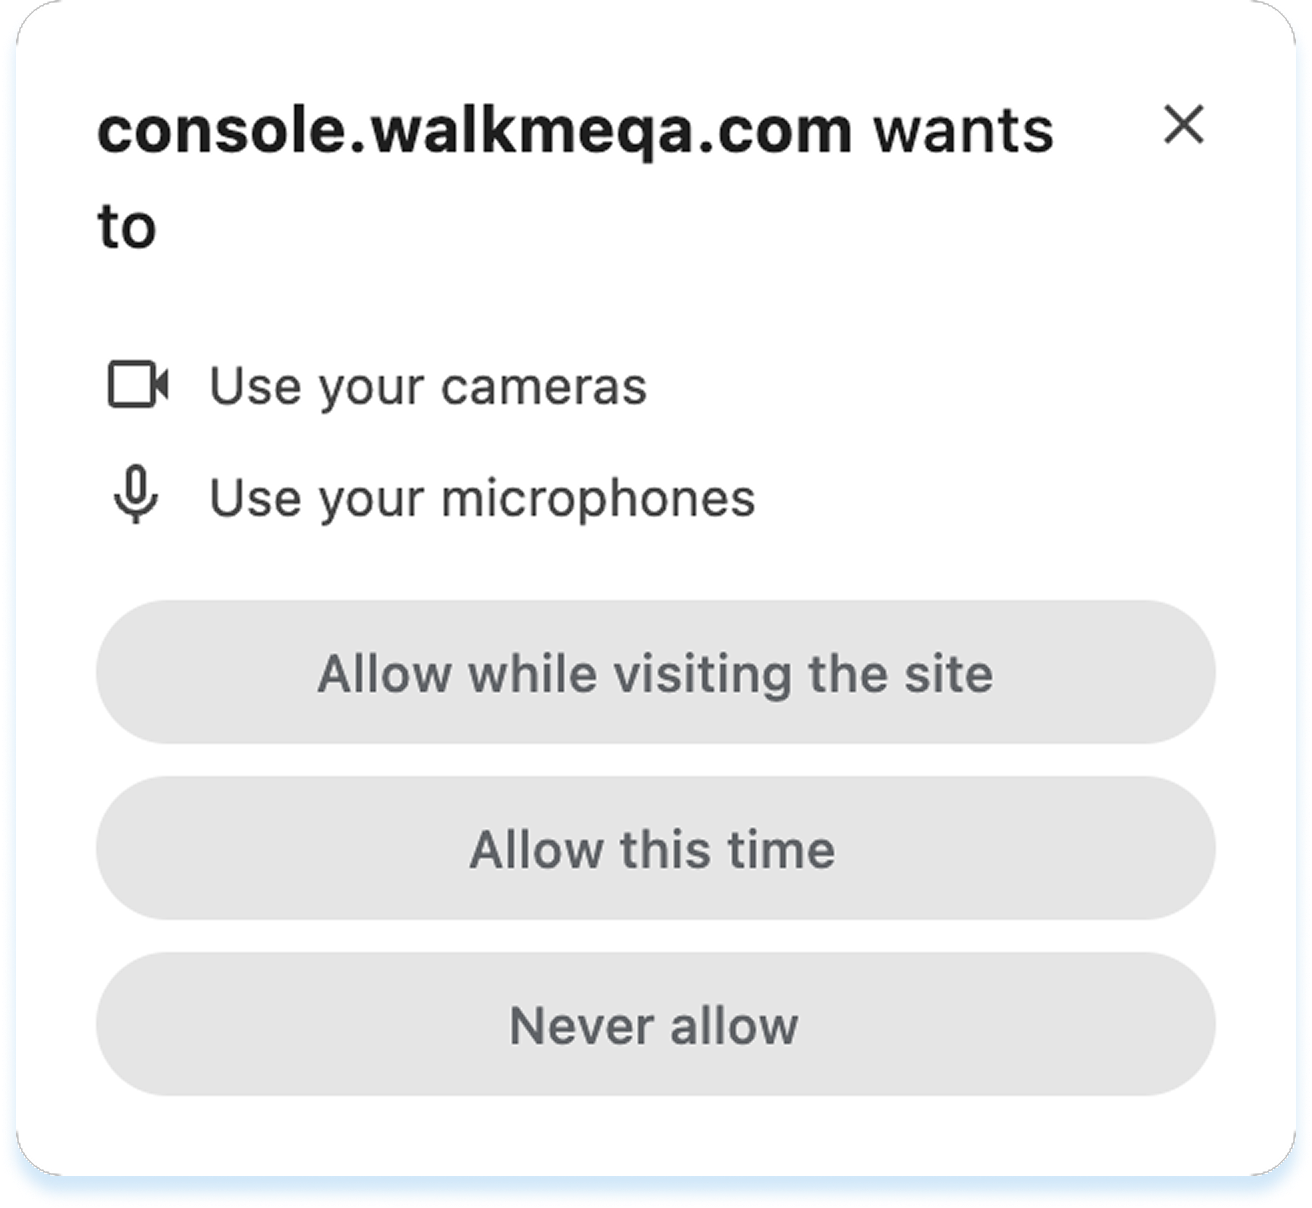
-
The recording screen will open
-
Click the Settings icon to adjust recording options:
-
Select a camera and microphone
-
Click Mirror video preview to flip your camera view (optional)
-
Click Apply
-
Click the Record button to start
-
Use the toolbar to:
-
Mute or unmute your microphone
-
Pause recording
-
Stop recording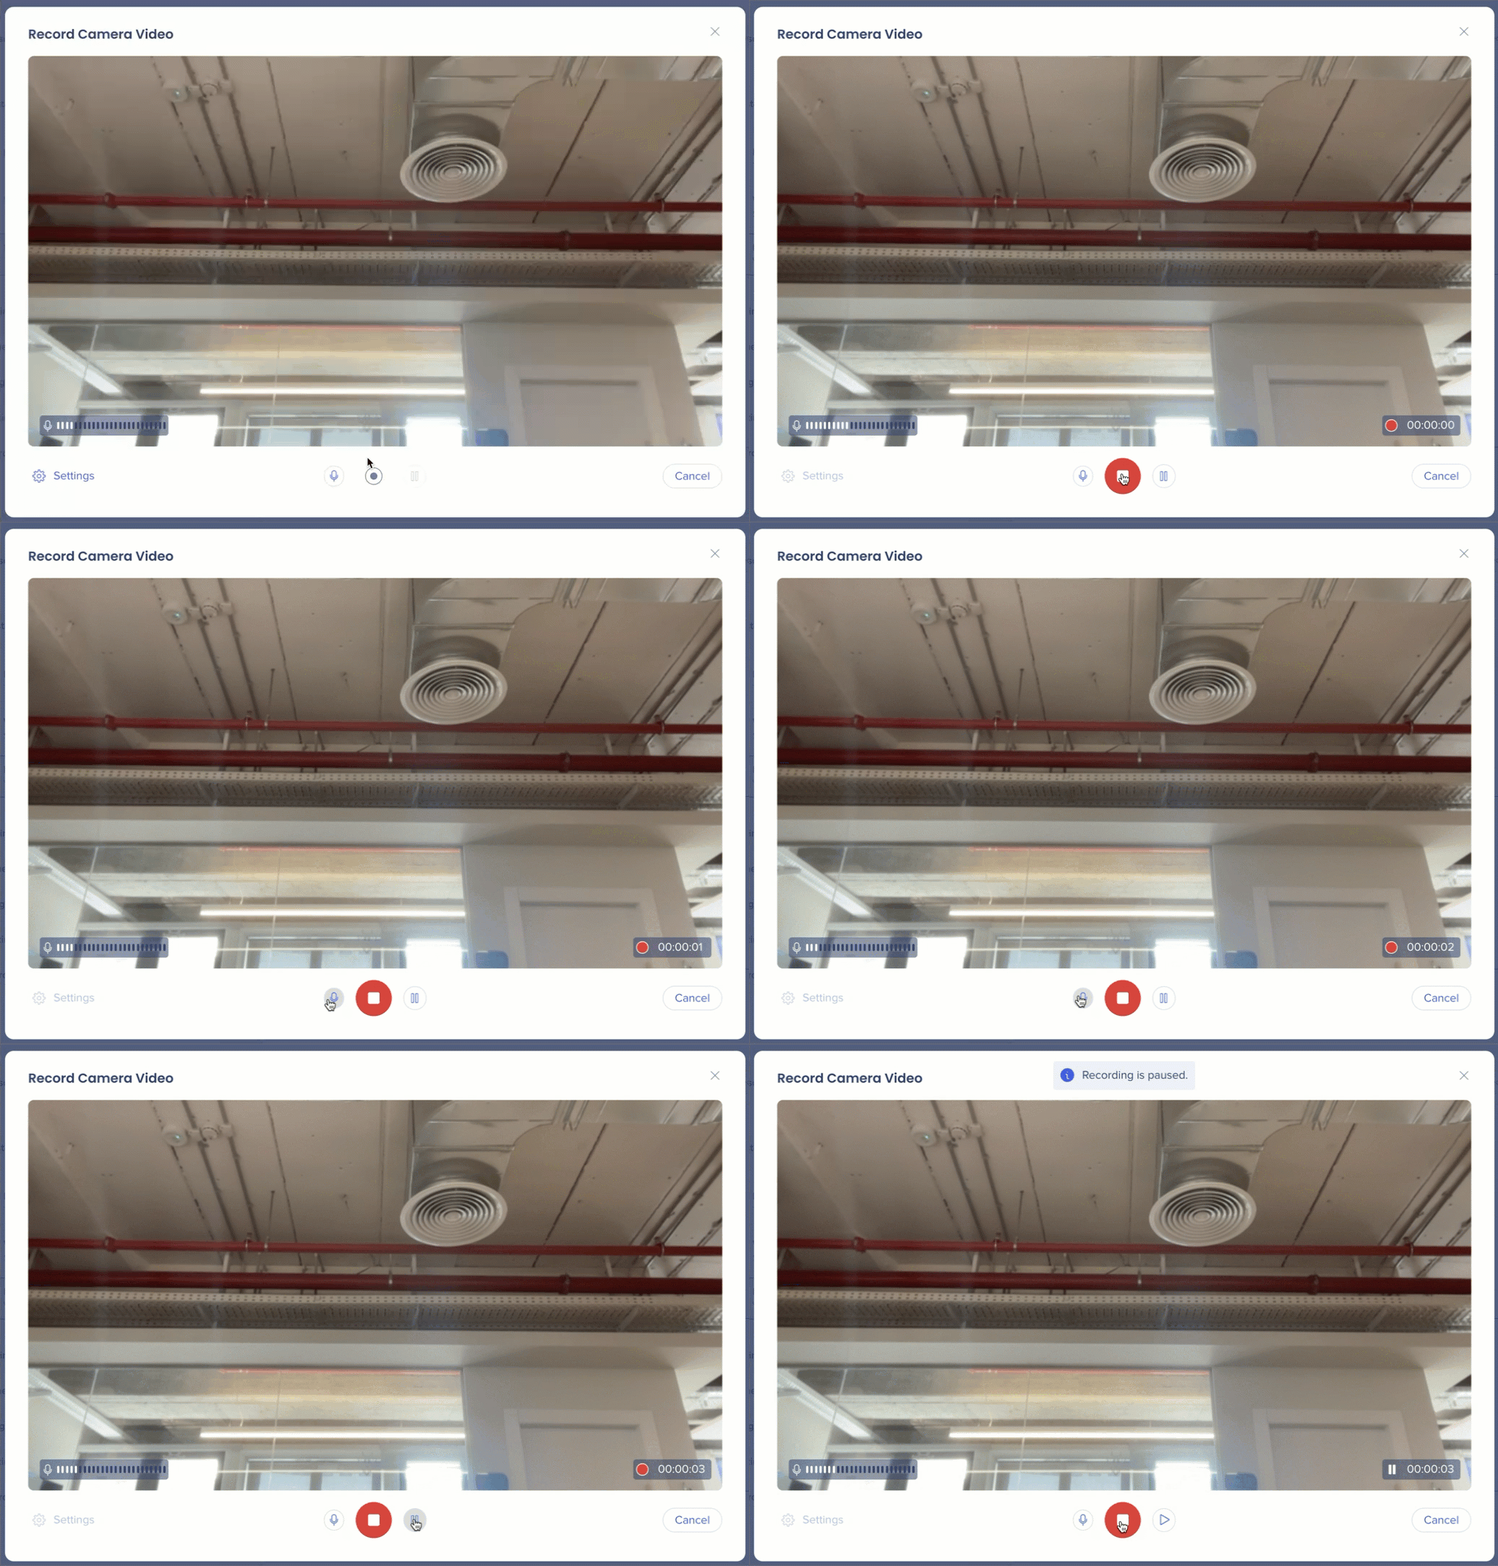
-
After stopping, the save recording popup appears
-
Enter a recording name
-
Click Save
-
The recording will be added to the element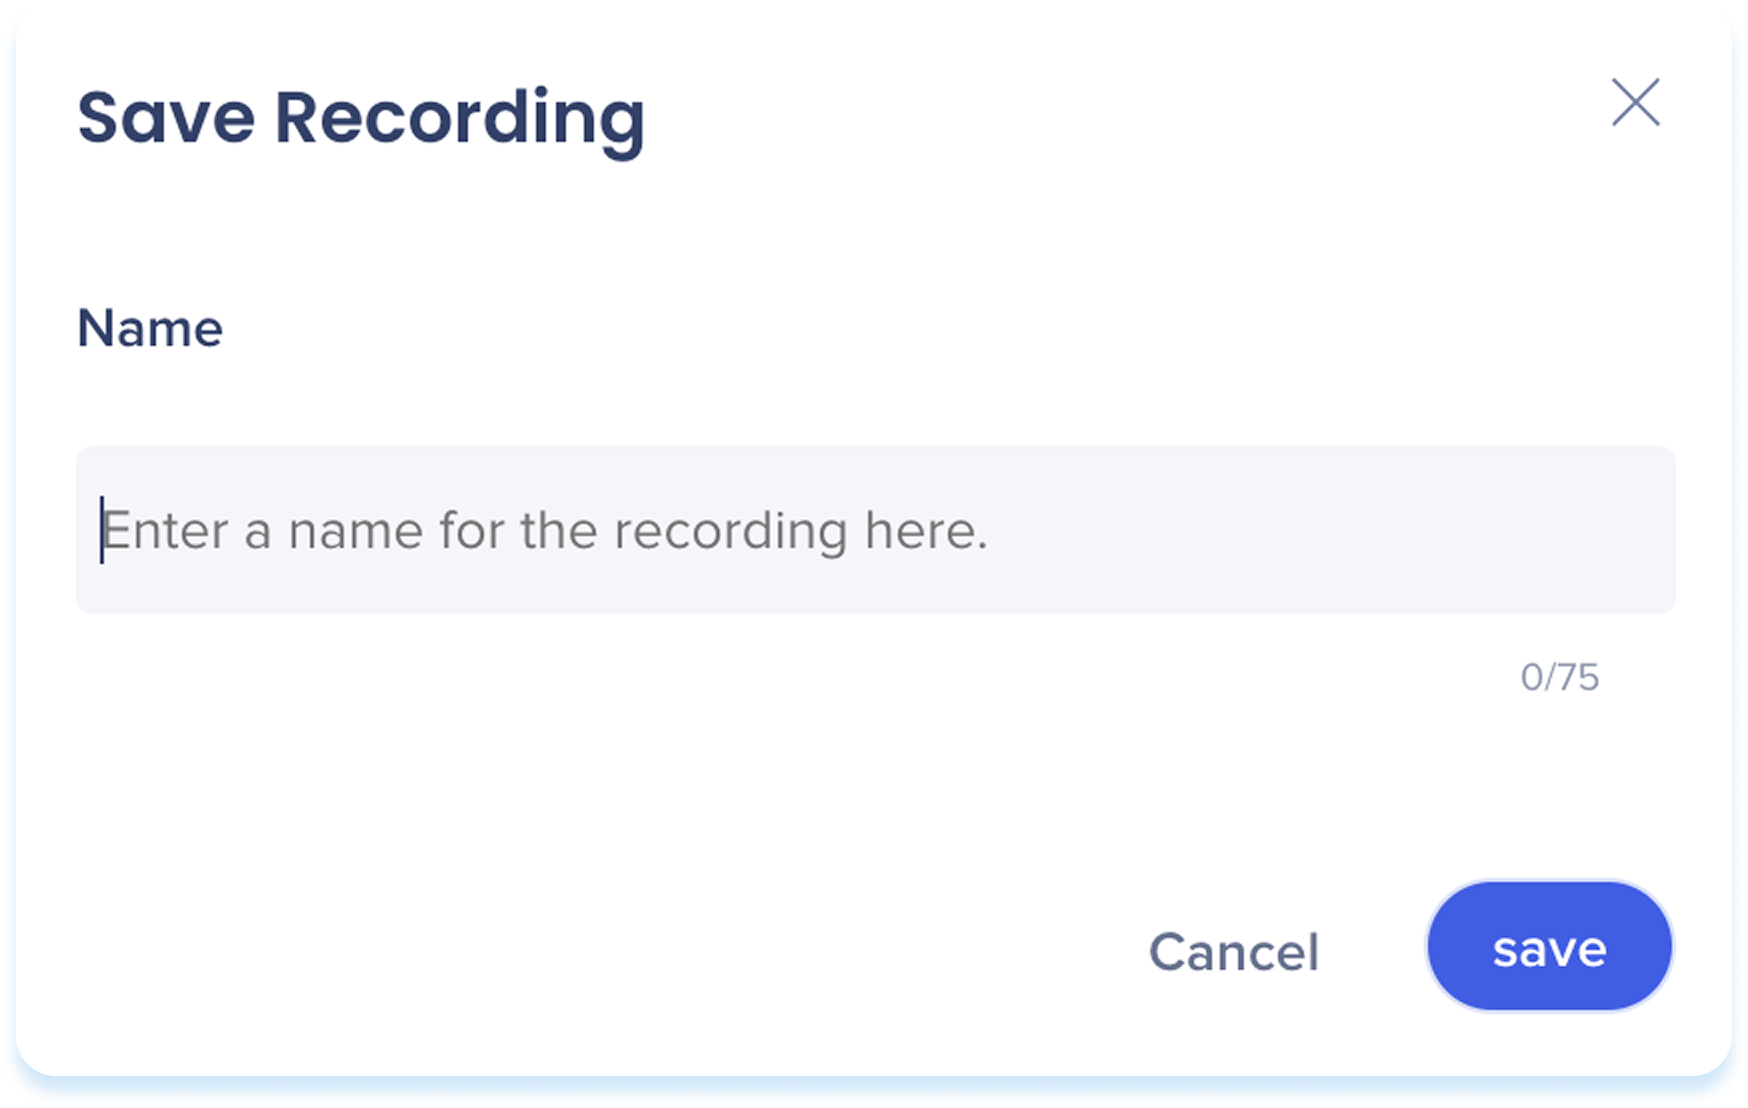
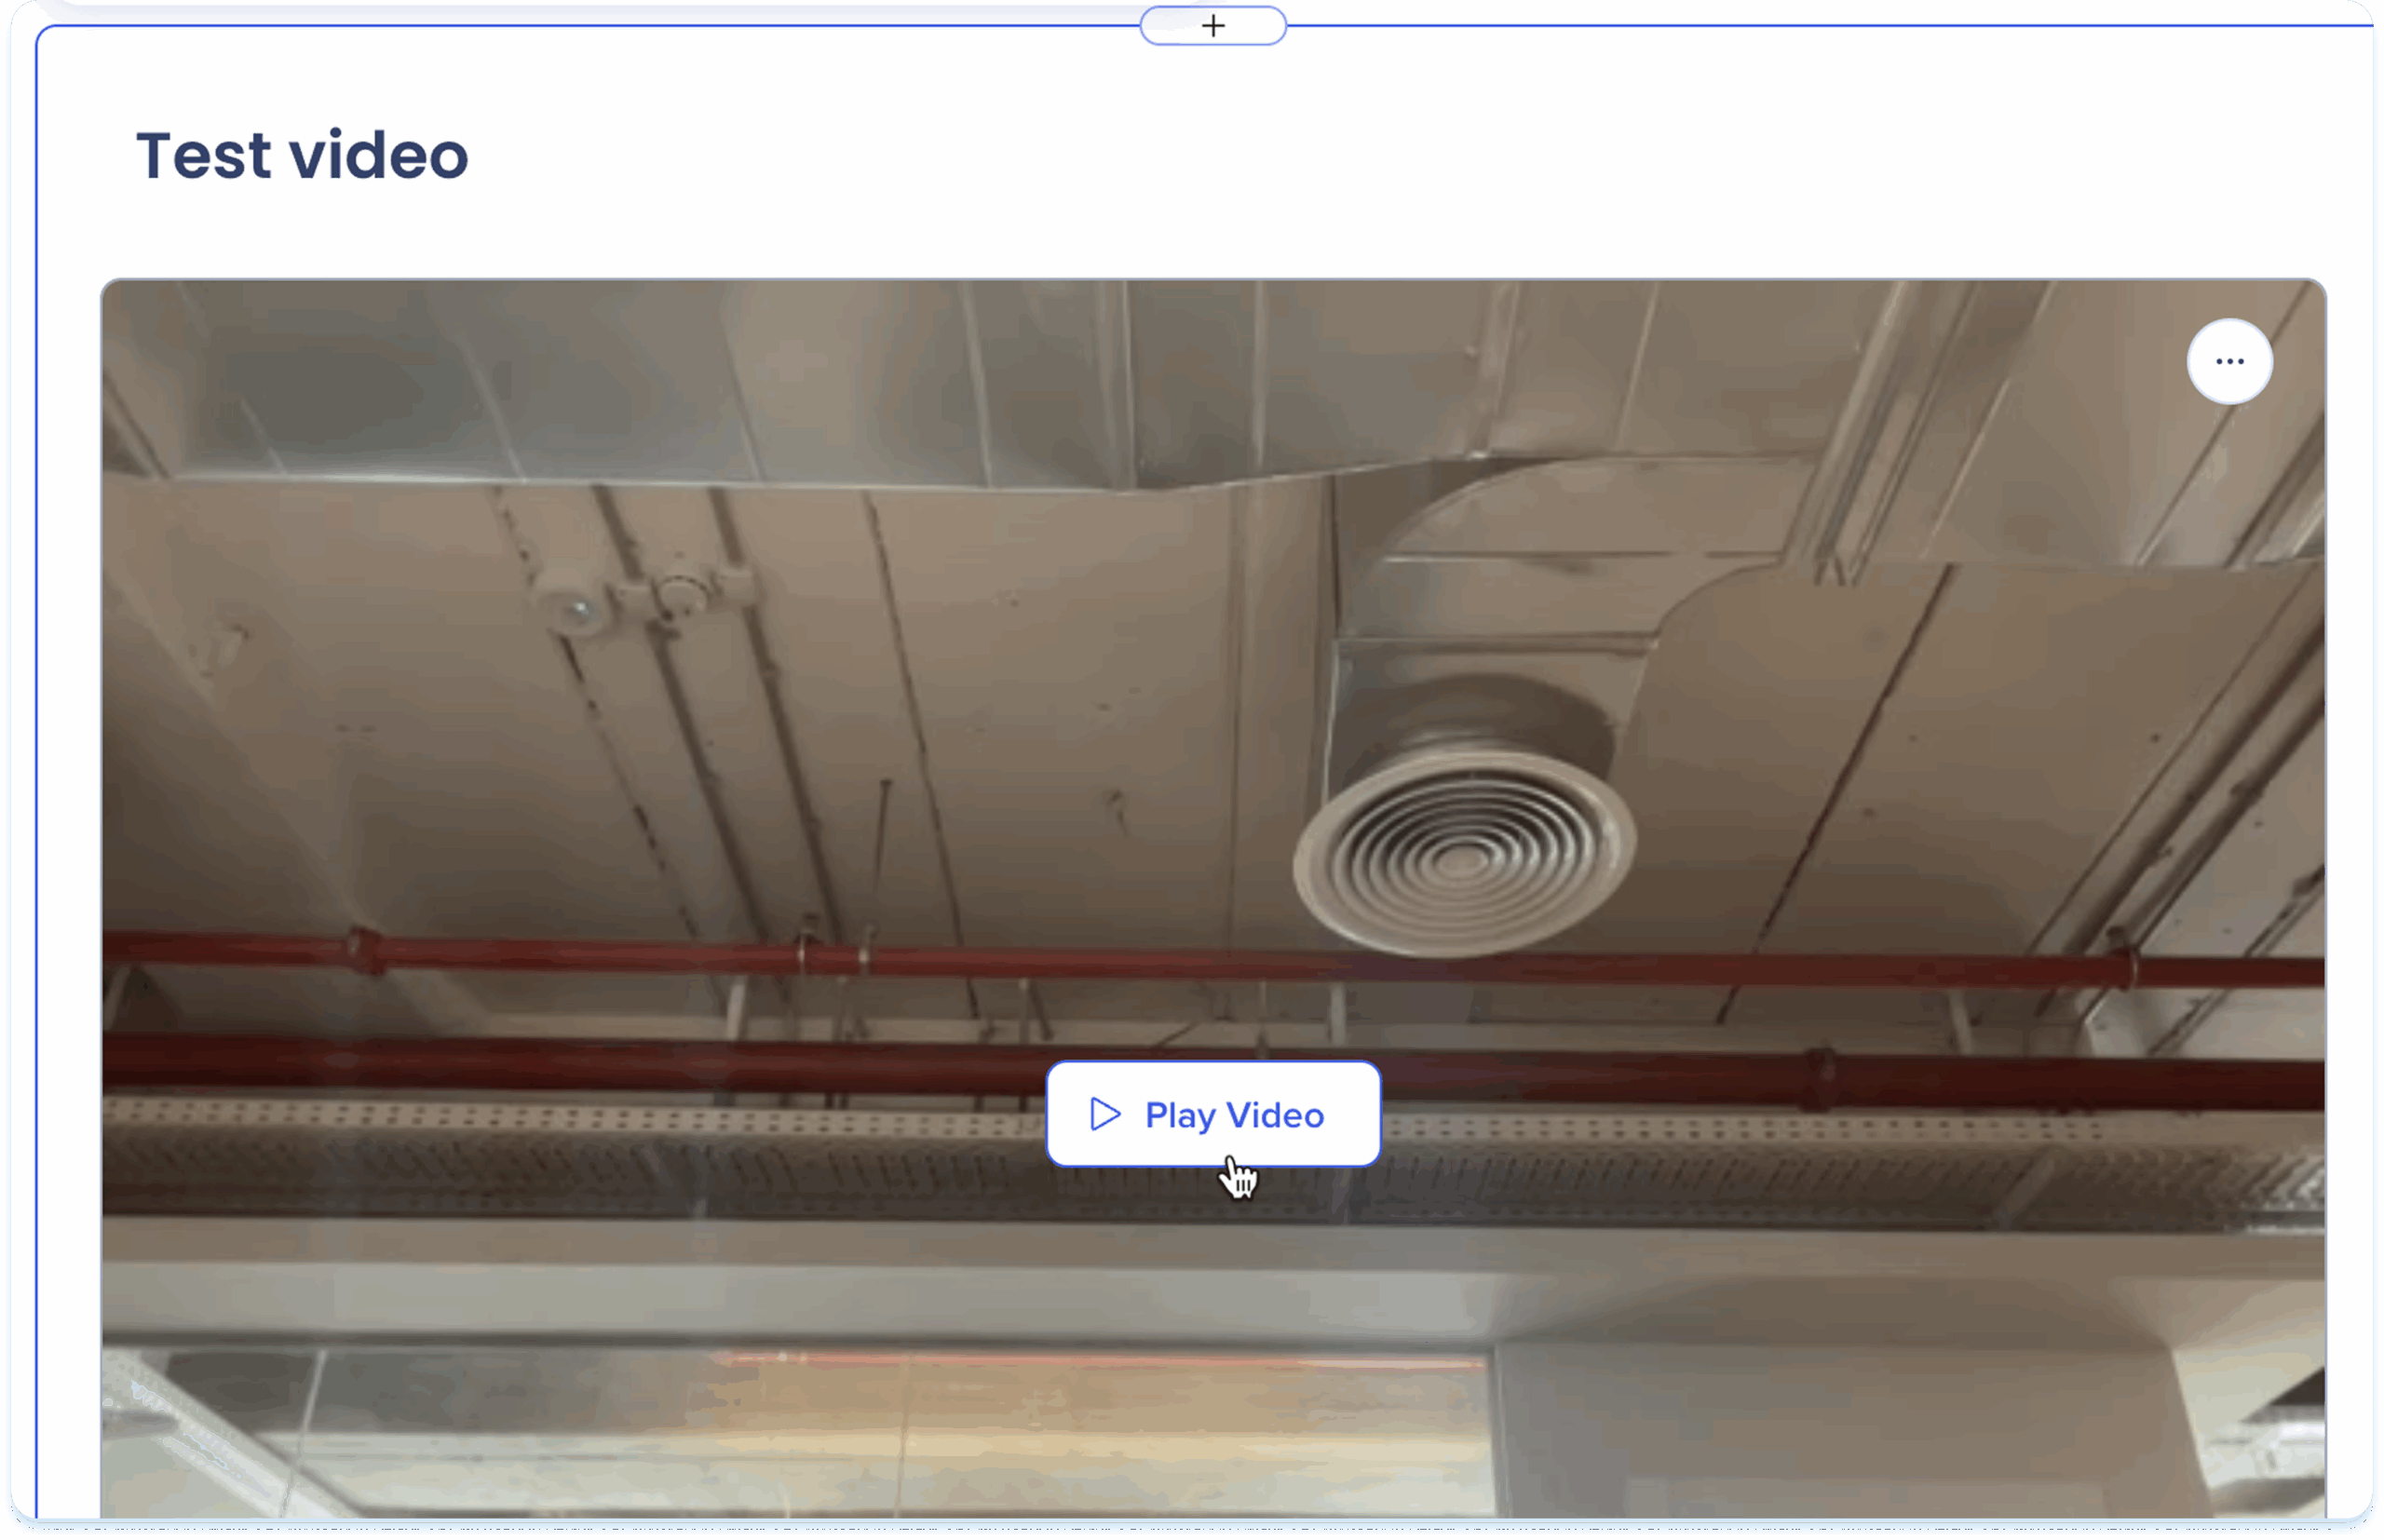
Play video
-
Click Play Video to view the video
-
The video will open in a preview popup
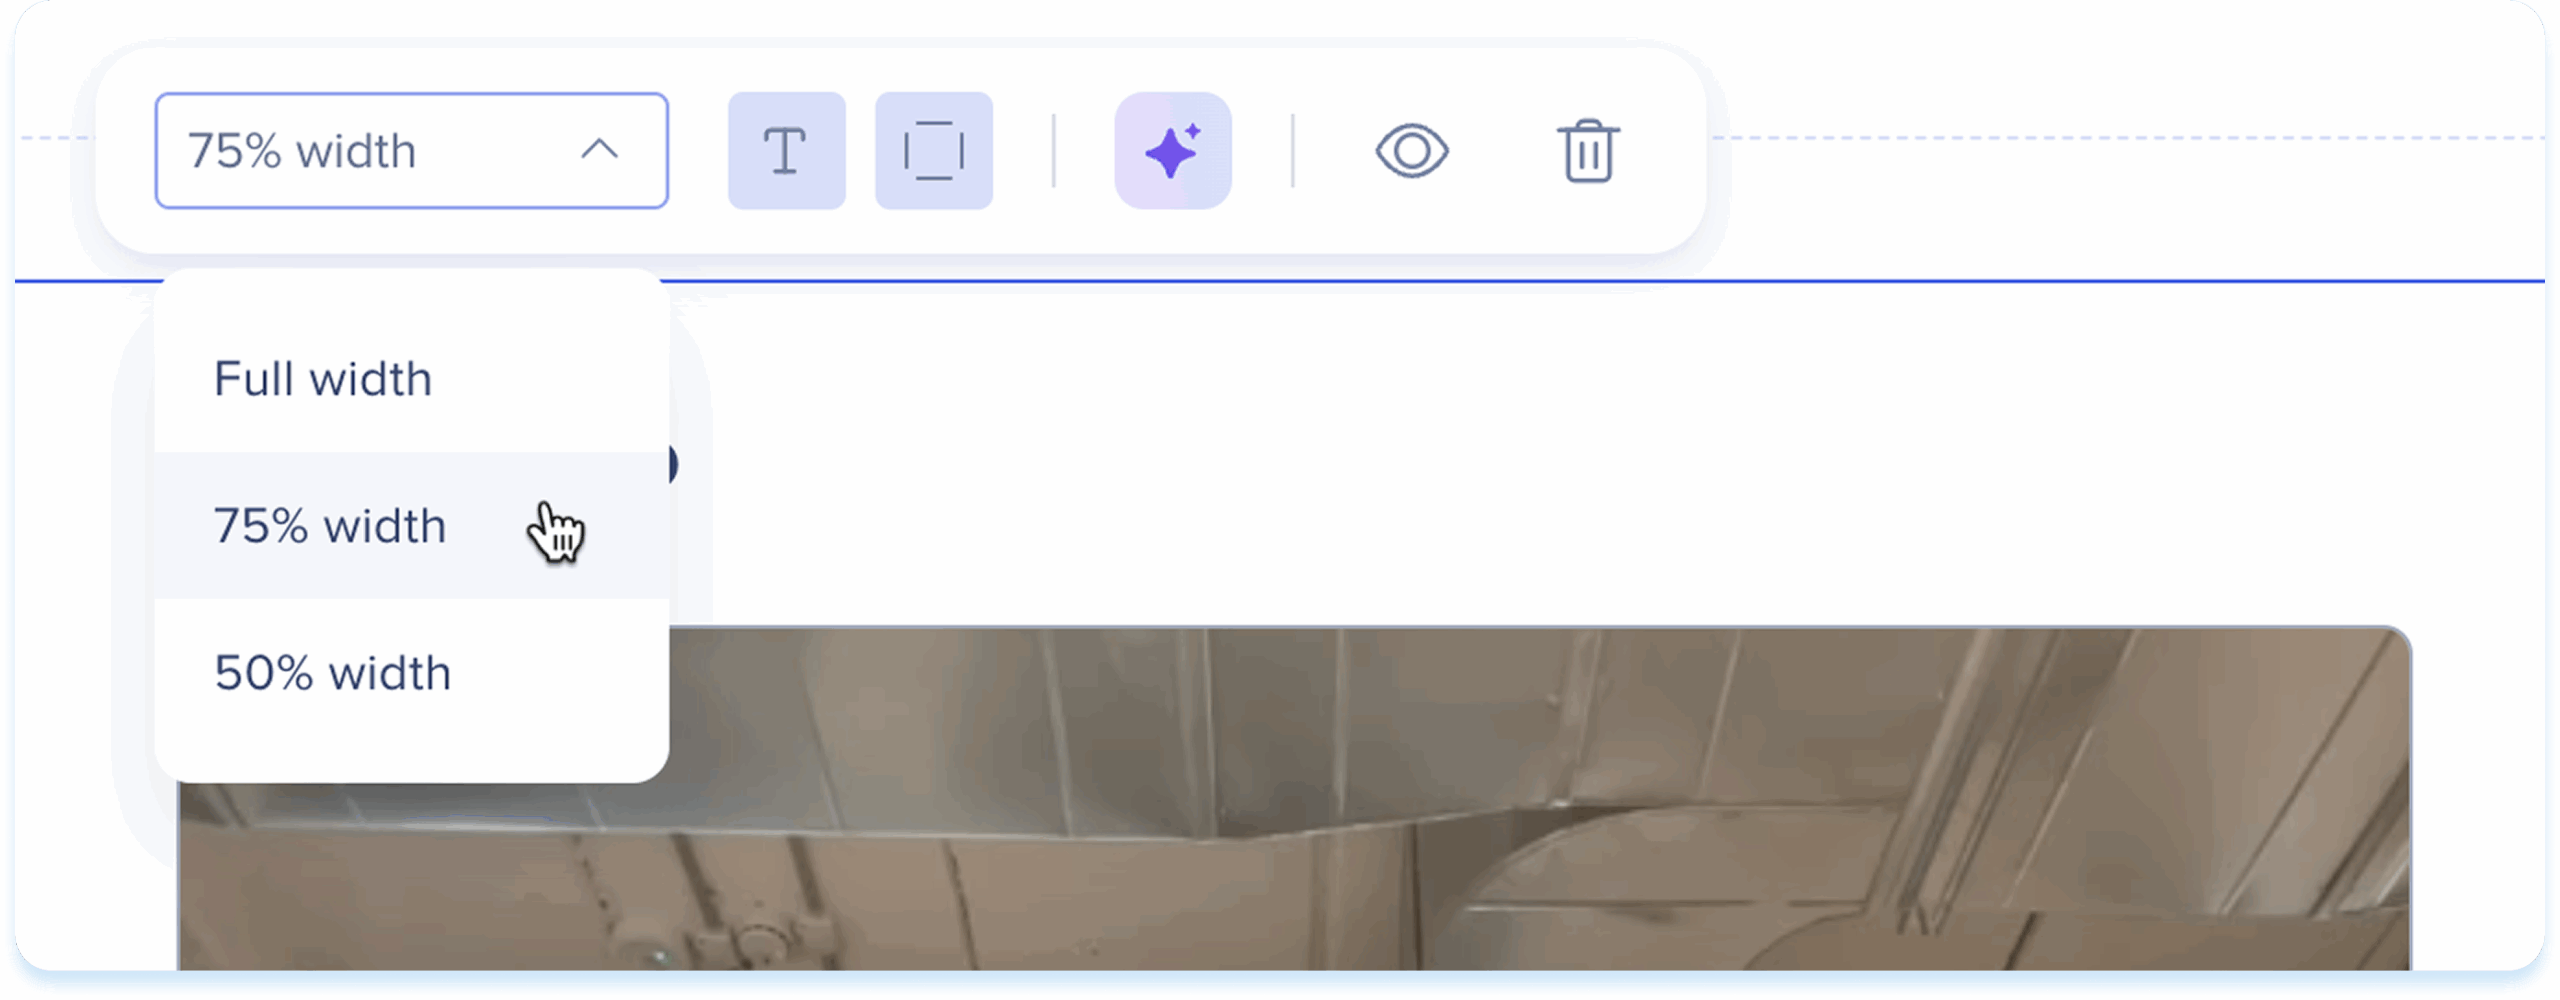
After you add the recording, use the toolbar to edit and adjust it.
-
Click the video to show the toolbar
-
Use the toolbar to adjust:
-
Width: Set the element width
-
Show title: Turn the video title on or off
-
Show border: Show an outline around the image
-
AI creation: Generate other elements from the video
-
Hide: Keeps the element hidden from learners but still available in the background
-
Delete: Remove the element from the lesson
Screen Recording Element
Use the screen recording element to show a step-by-step recording of a process or workflow.

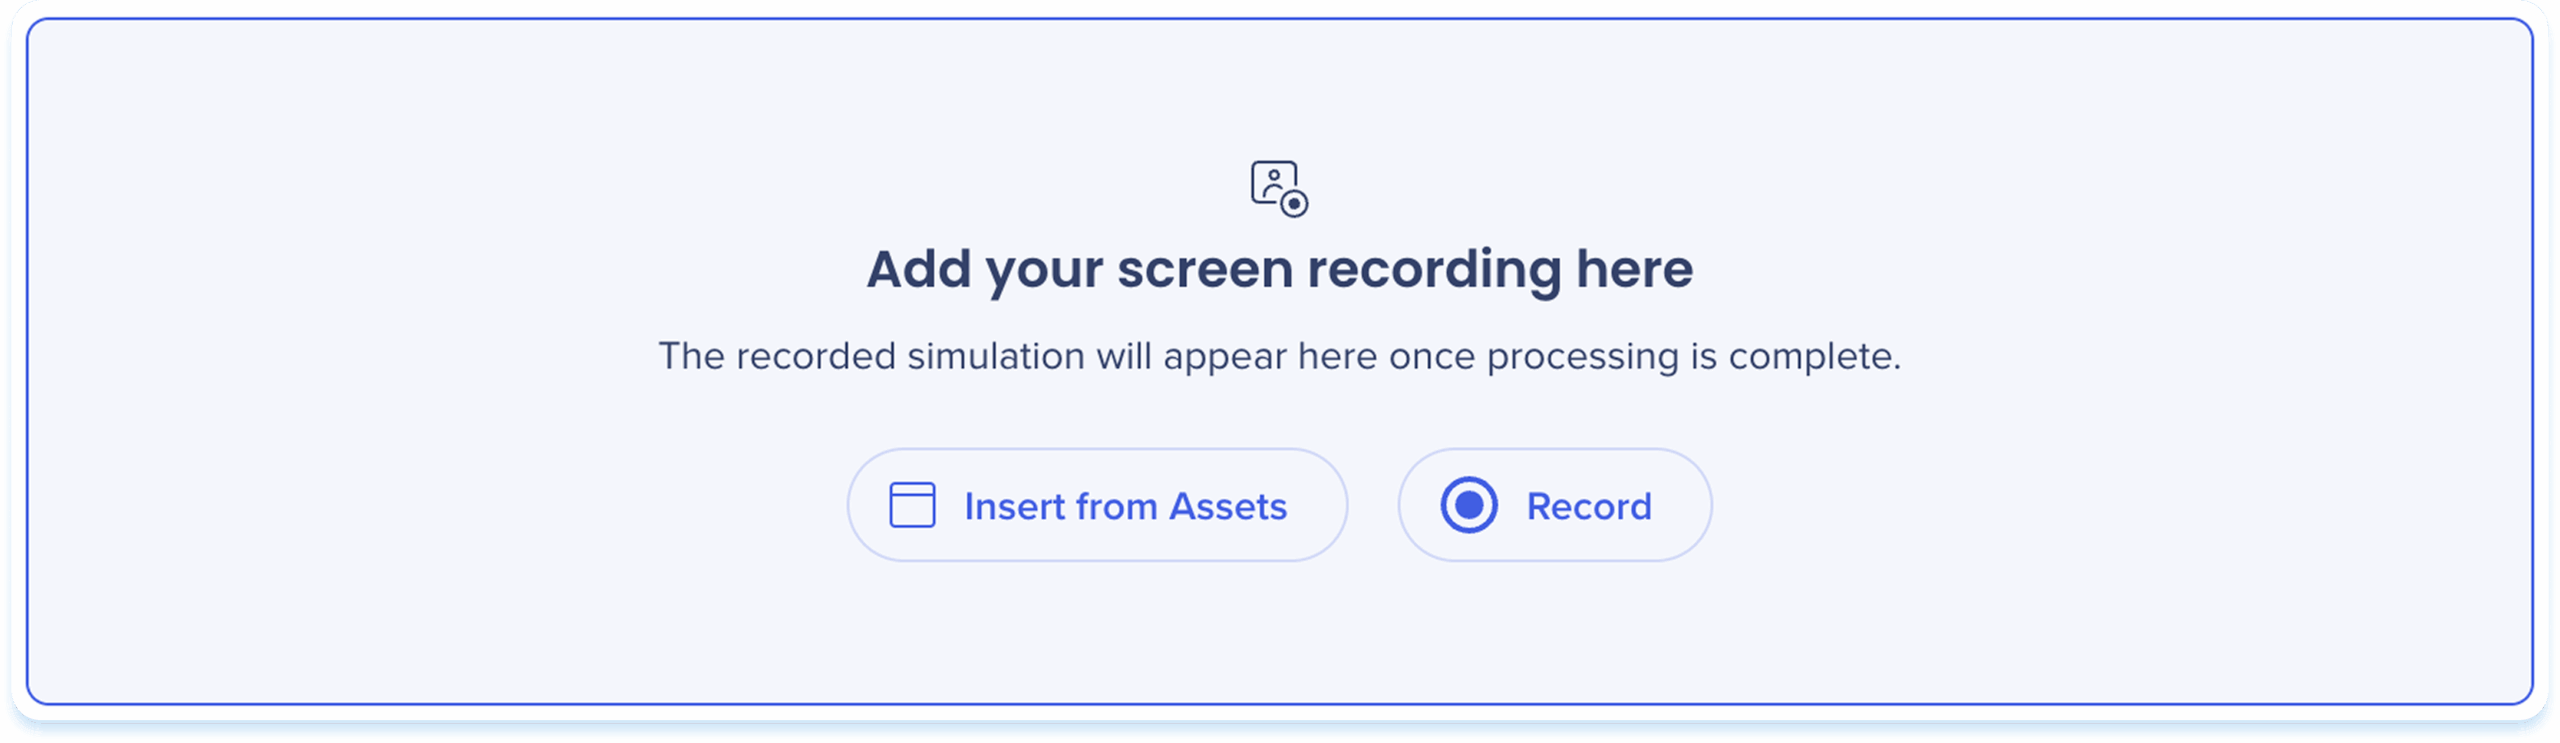
Add a screen recording
-
Choose one of the following options to add a screen recording:
-
Drag & drop the file into the screen recording element
-
Insert from Assets: Select a screen recording from your learning assets
-
Record: Capture a new screen recording
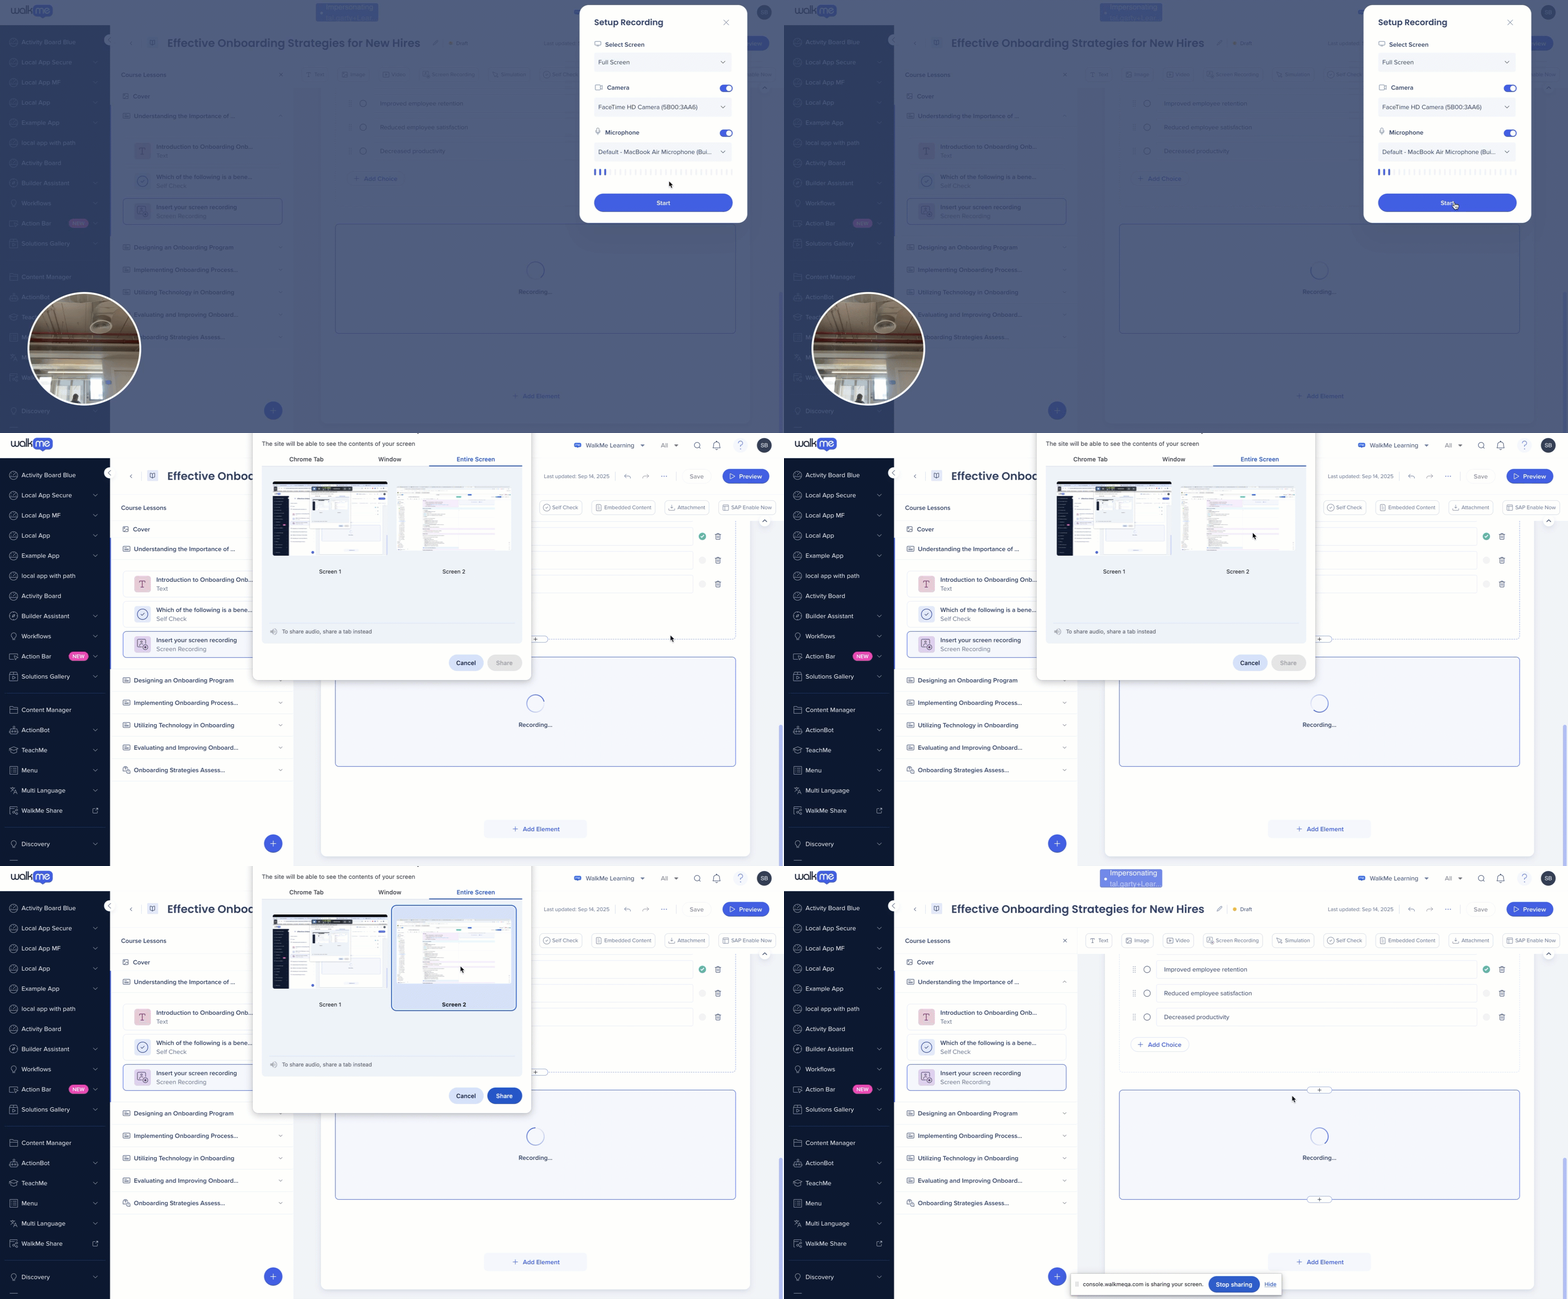
Record a screen recording
-
Click Record
-
The Setup recording popup will open
-
Select a screen to record
-
Turn on the camera and select a camera to record yourself (optional)
-
Turn on the microphone and select a microphone (optional)
-
Click Start
-
A share your screen popup will open
-
Select which screen to share:
-
Chrome Tab: Record a single browser tab
-
Window: Record one application window
-
Entire Screen: Record your full screen
Remarque
To share the sound you must share the tab and turn on Also share tab audio
-
Click Share to start recording your screen
-
Click Stop Sharing in the floating toolbar when you're done
-
The screen recording will be added to the element
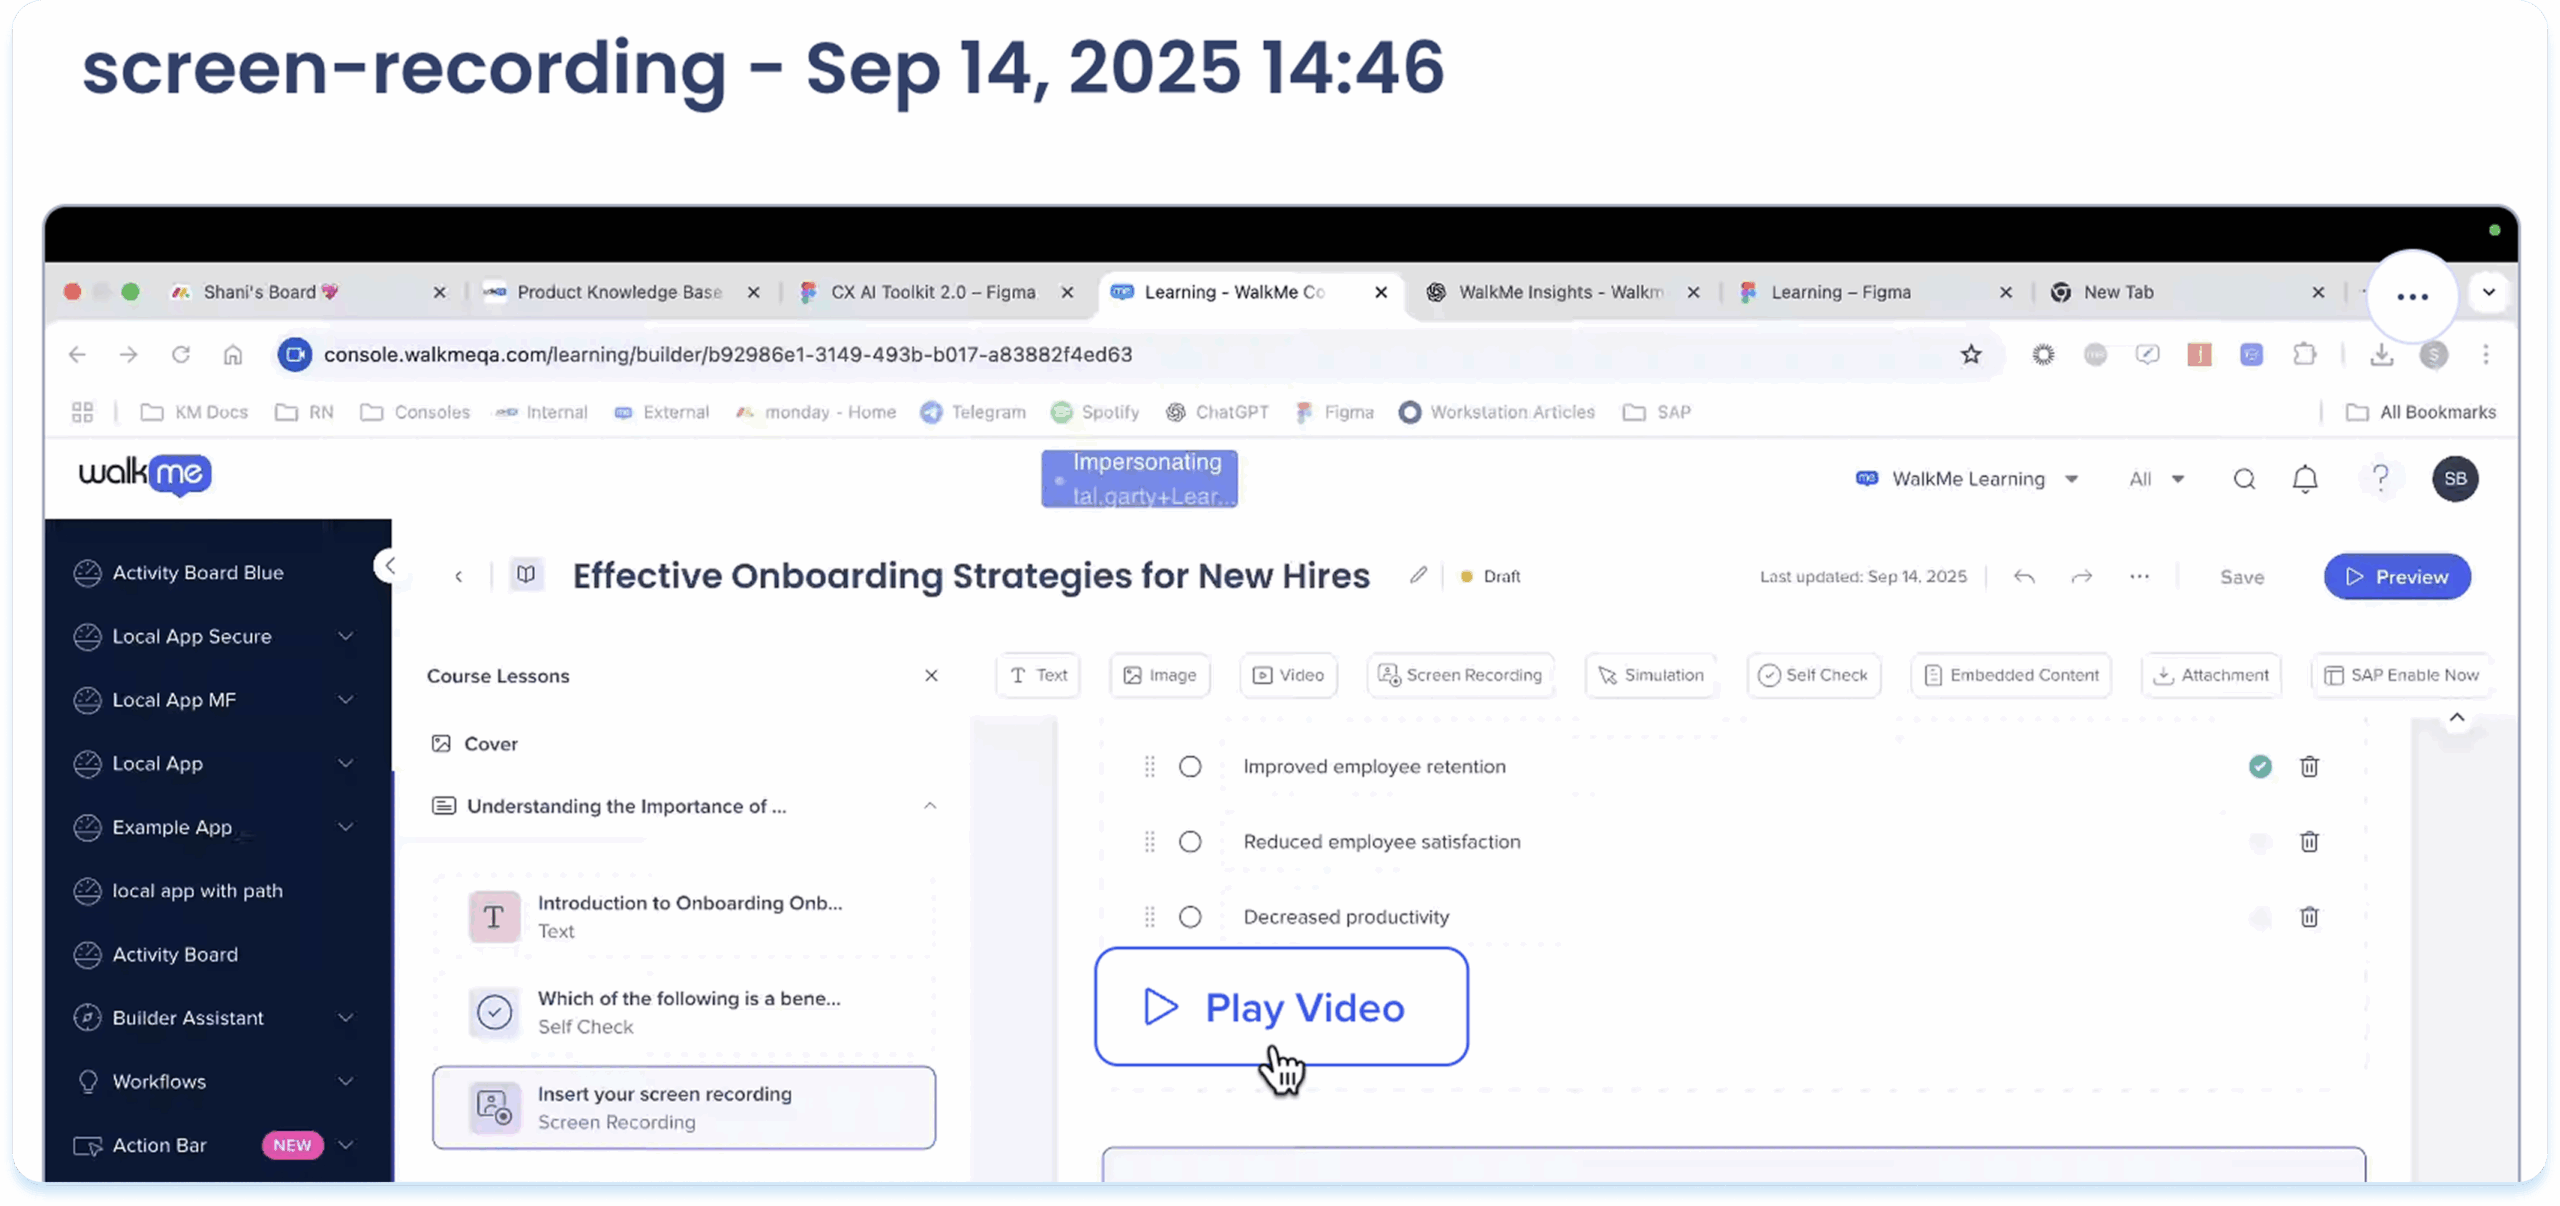
Play screen recording
-
Click Play Video to view the screen recording
-
The screen recording will open in a preview popup
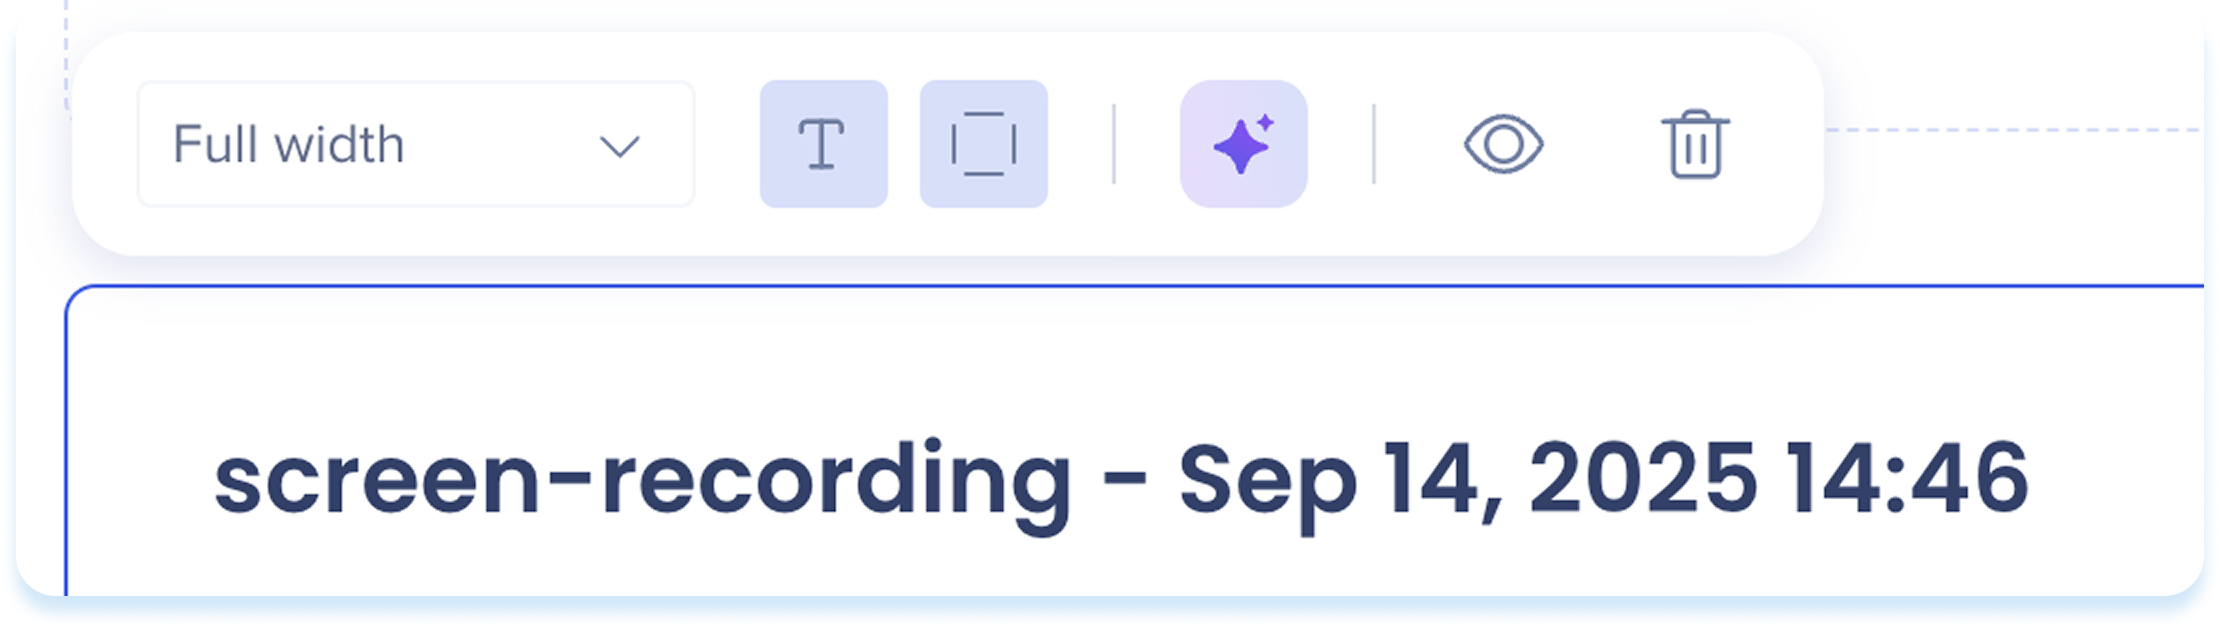
After you add the screen recording, use the toolbar to edit and adjust it.
-
Click the screen recording to show the toolbar
-
Use the toolbar to adjust:
-
Width: Set the element width
-
Show title: Turn the video title on or off
-
Show border: Show an outline around the screen recording
-
AI creation: Generate other elements from the screen recording
-
Hide: Keep the element invisible to learners
-
Delete: Remove the element from the lesson
Simulation Element
Use the simulation element to let users practice a process in an interactive, guided environment. Record a digital workflow and turn it into a hands-on learning experience, where learners can either click through the steps or watch the process.

Add a simulation
You can add a simulation in two ways:
-
Click Upload from assets to use an existing simulation
-
Click Record to create a new one
- In the What do you want to record? popup, choose one option:
- Browser tab: Record a web application opened in your browser
- Application window: Record a desktop application
Desktop Recording for Simulations
Remarque
-
WalkMe Learning Arc extension is required to start recording
-
To install it, follow the steps in the popup that appears
Record a simulation (browser tab)
-
Click Record
-
Select which tab to record
-
If the tab you want to record is not shown on the list, open a new tab and it will appear in the list below
-
Click Next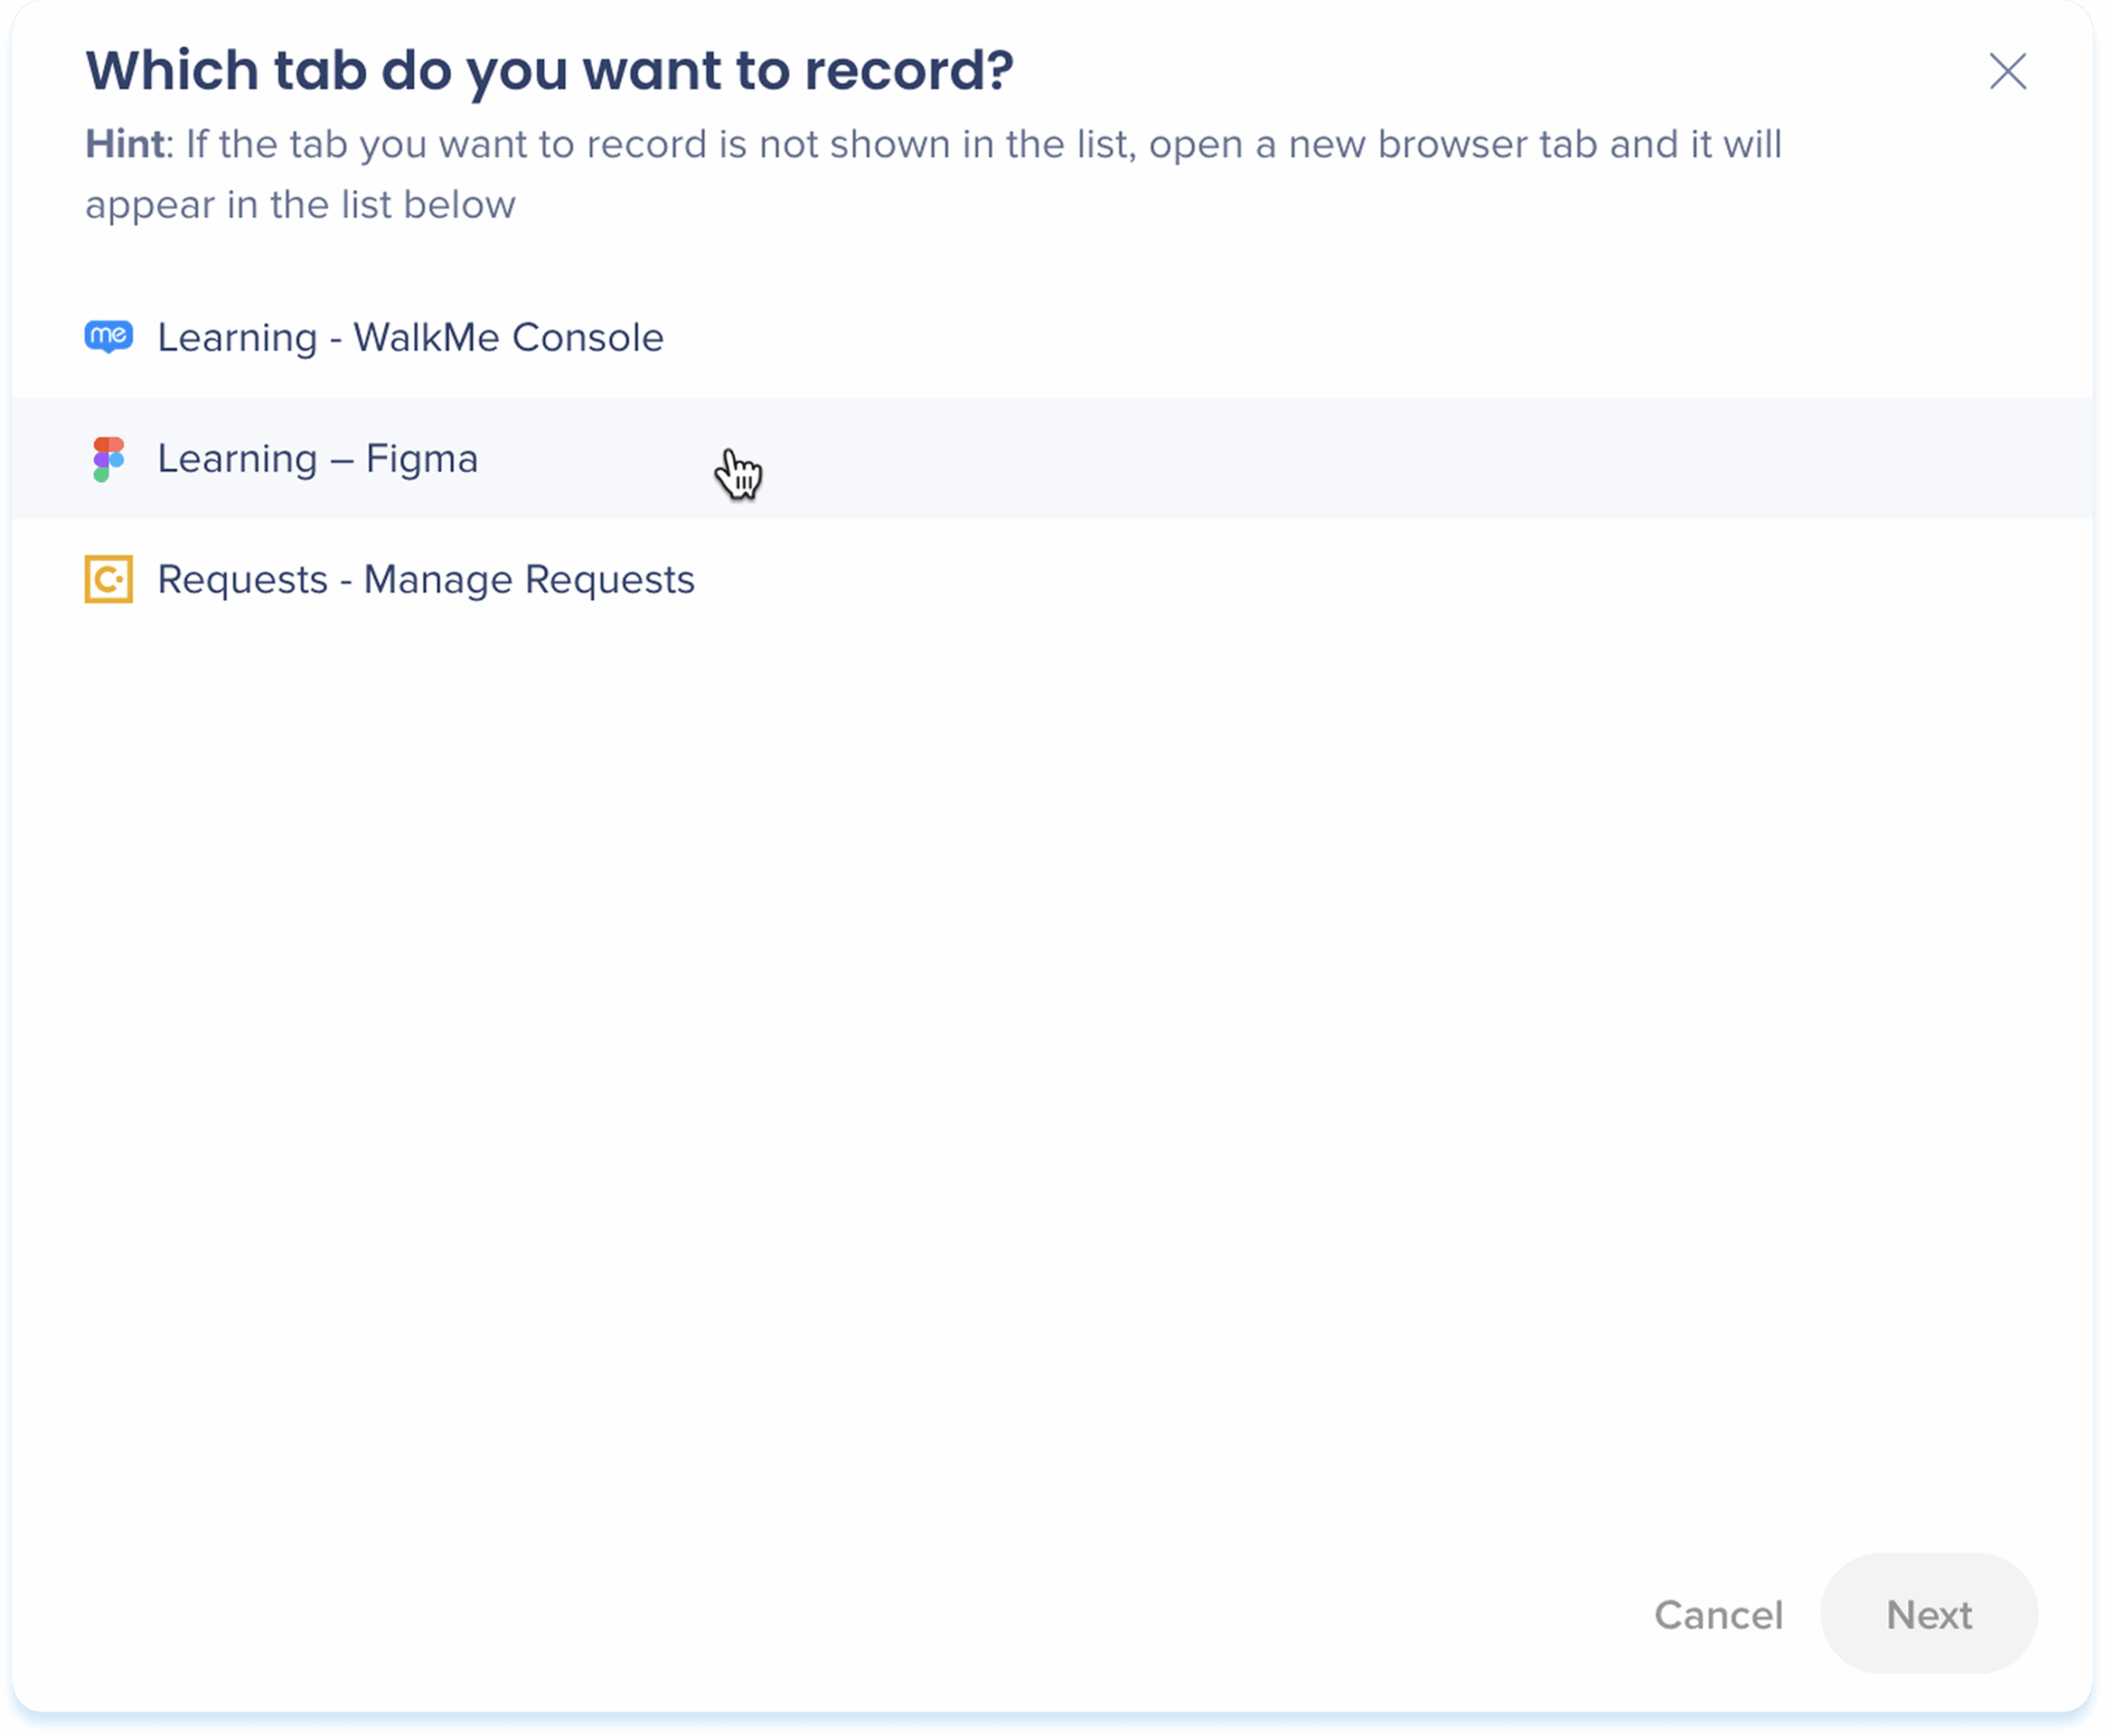
-
Go through the process you want to capture in the simulation
-
While recording, you can:
- Delete
- Restart
- Blur
- Pause
- Access recorder settings
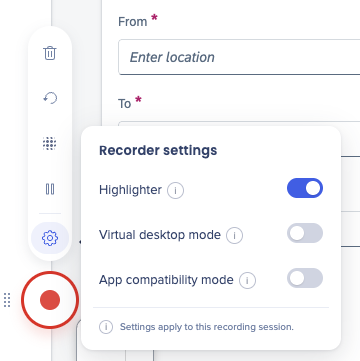
- Highlighter: Turn on (default) or off a green highlighter to indicate the elements being captured
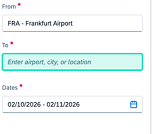
- Virtual desktop mode: Turn on recording on virtual desktop machines where standard capture isn't supported
- The highlighter turns off automatically when this mode is on
- App compatibility mode: Improves capture on highly responsive sites
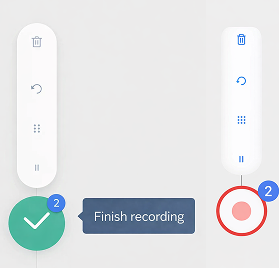
- When finished, select Finish recording
- The simulation will be added to the element
Remarque
- Settings apply to your current recording session
- The Record icon displays the number of steps being captured during recording

Blur elements
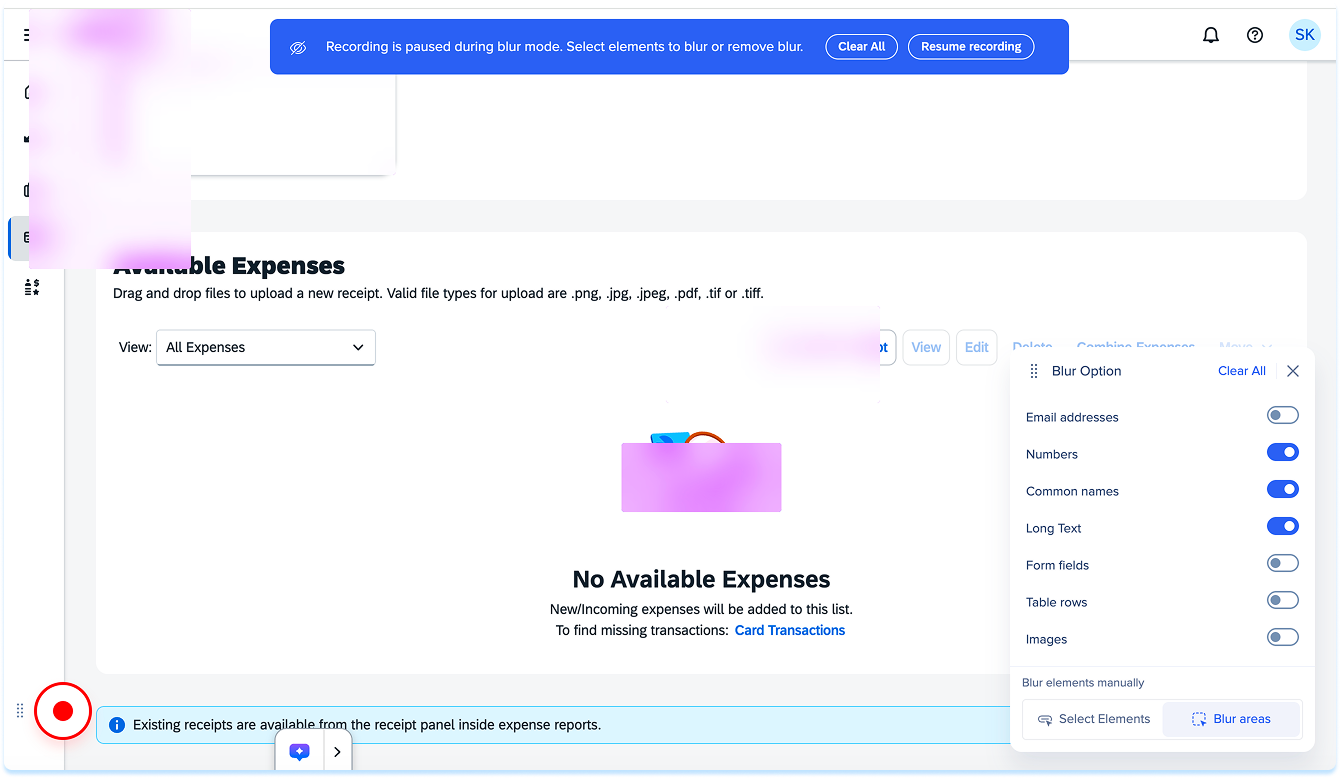
Hide sensitive content while recording so it stays hidden in the finished simulation. Recording pauses while you blur.
- Select Blur elements in the recorder toolbar to open Blur Options
- Blur content using one of the following:
- Select elements: Select an element on the page to blur it, or turn on a content type to blur all matching content (Email addresses, Numbers, Common names, Long text, Form fields, Table rows, or Images)
- Blur areas: Drag over an area of the screen to blur it
- To remove a blur, select the blurred element again, or select Clear all to clear all blurs
- Select Resume Recording when you finish
-
Click the simulation to show the toolbar
-
Use the toolbar to adjust:
-
Playback mode: Switch between demo mode or practice mode
-
Demo mode: Plays the simulation in a guided walkthrough format
-
Practice mode: Lets users try the steps themselves, with optional feedback for mistakes
-
Width: Set the element width
-
Show title: Turn the simulation title on or off
-
Playback steps: Select to play all steps or a specific range of steps
-
Show border: Show an outline around the simulation
-
AI creation: Generate other elements from the simulation
- Mandatory: Make a simulation required so learners can't complete the lesson until they finish it
-
Edit simulation: Open the simulation editor for advanced editing options
-
Hide: Keep the element invisible to learners but available in the background
-
Delete: Remove the element from the lesson

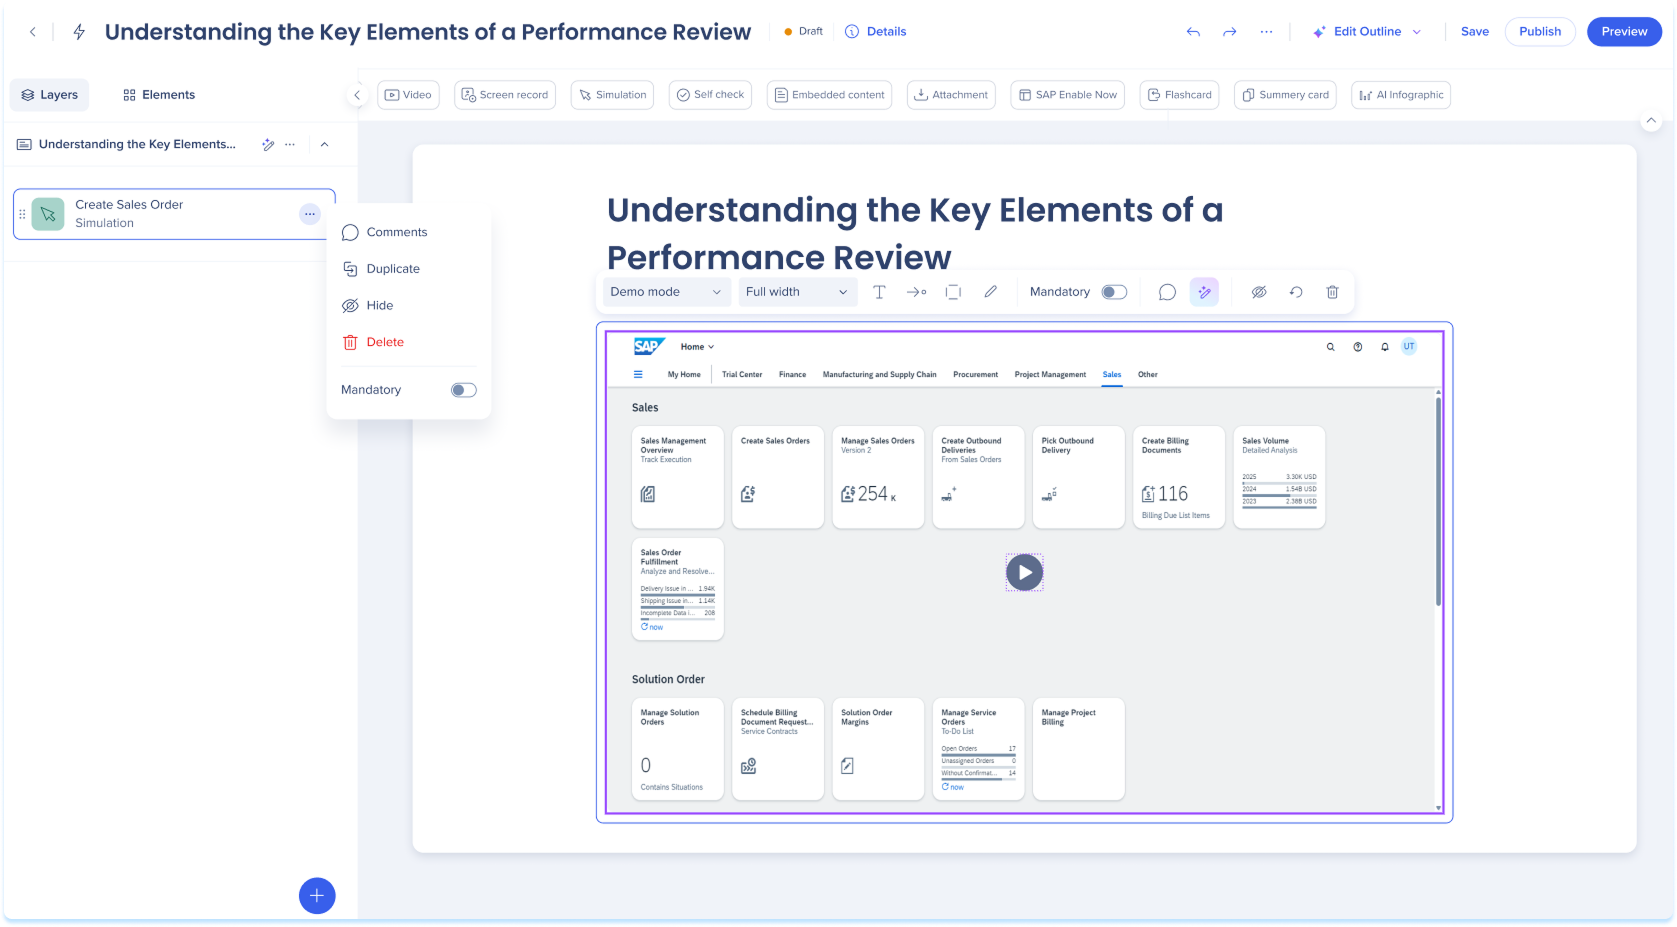
Mark a simulation as mandatory
Make a simulation required so learners can't complete the lesson until they finish it. Mandatory is set per element and is off by default.
To mark a simulation as mandatory:
- Hover over the element in the canvas, or select it in the layers panel
- Open the Options menu
- Turn on Mandatory
If a lesson has more than one required simulation, learners must complete all of them.
Ce qui compte comme terminé
Une simulation requise est terminée lorsque l'apprenant termine le mode que vous avez activé :
- Mode Démo : la lecture atteint la diapositive finale et le message de réussite s'affiche
- Mode Pratique : l'apprenant atteint la fin du flux
- Mode test : l'apprenant termine le flux
Modifier la simulation
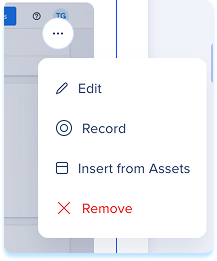
- Cliquez sur le menu Options en haut à droite de l'élément
- Sélectionnez Modifier pour ouvrir l'éditeur de simulation pour les options d'édition avancées
Simulation Editing in WalkMe Learning Arc
Lecture de la simulation
-
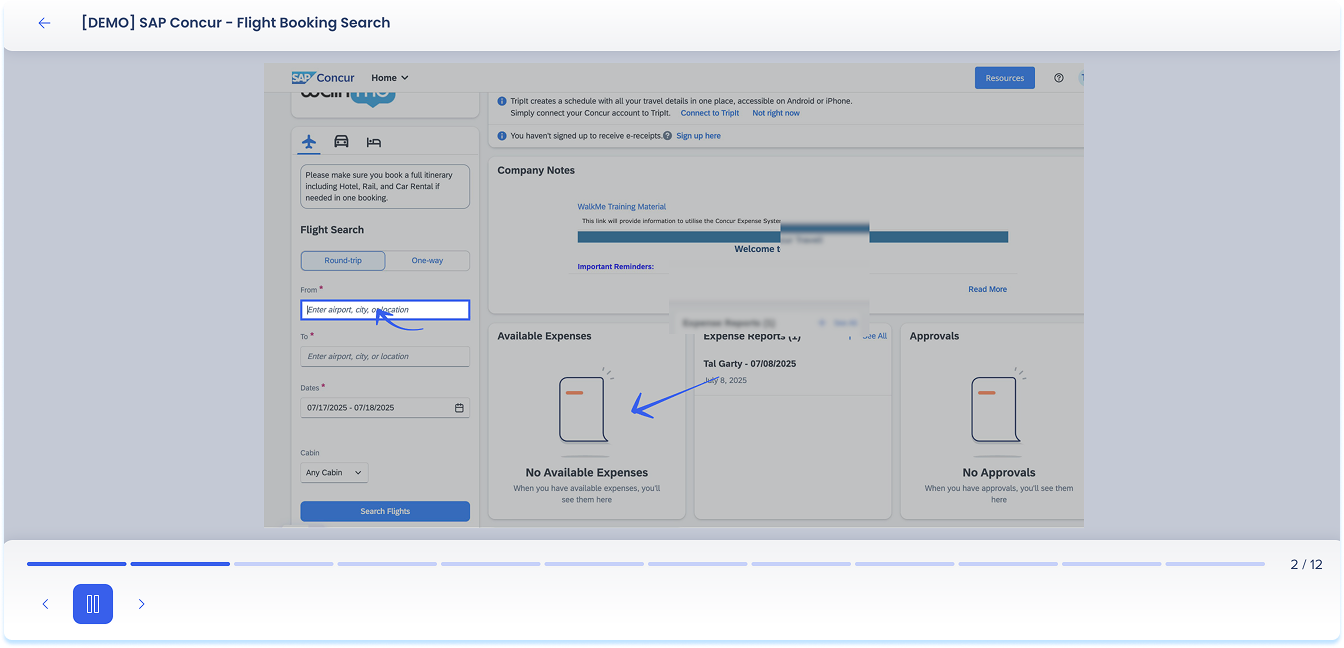
Cliquez sur Lecture (Démonstration/Pratique/Test)
-
La simulation s'ouvre dans une fenêtre d'aperçu et s'exécute en fonction du mode que vous avez sélectionné
Élément d'auto-vérification
L'élément Autoévaluation vous permet d'ajouter une question de style quiz afin que les apprenants puissent tester leur compréhension. Les autoévaluations sont uniquement destinées à la pratique et ne nécessitent pas de réussite

Ajouter une auto-vérification
-
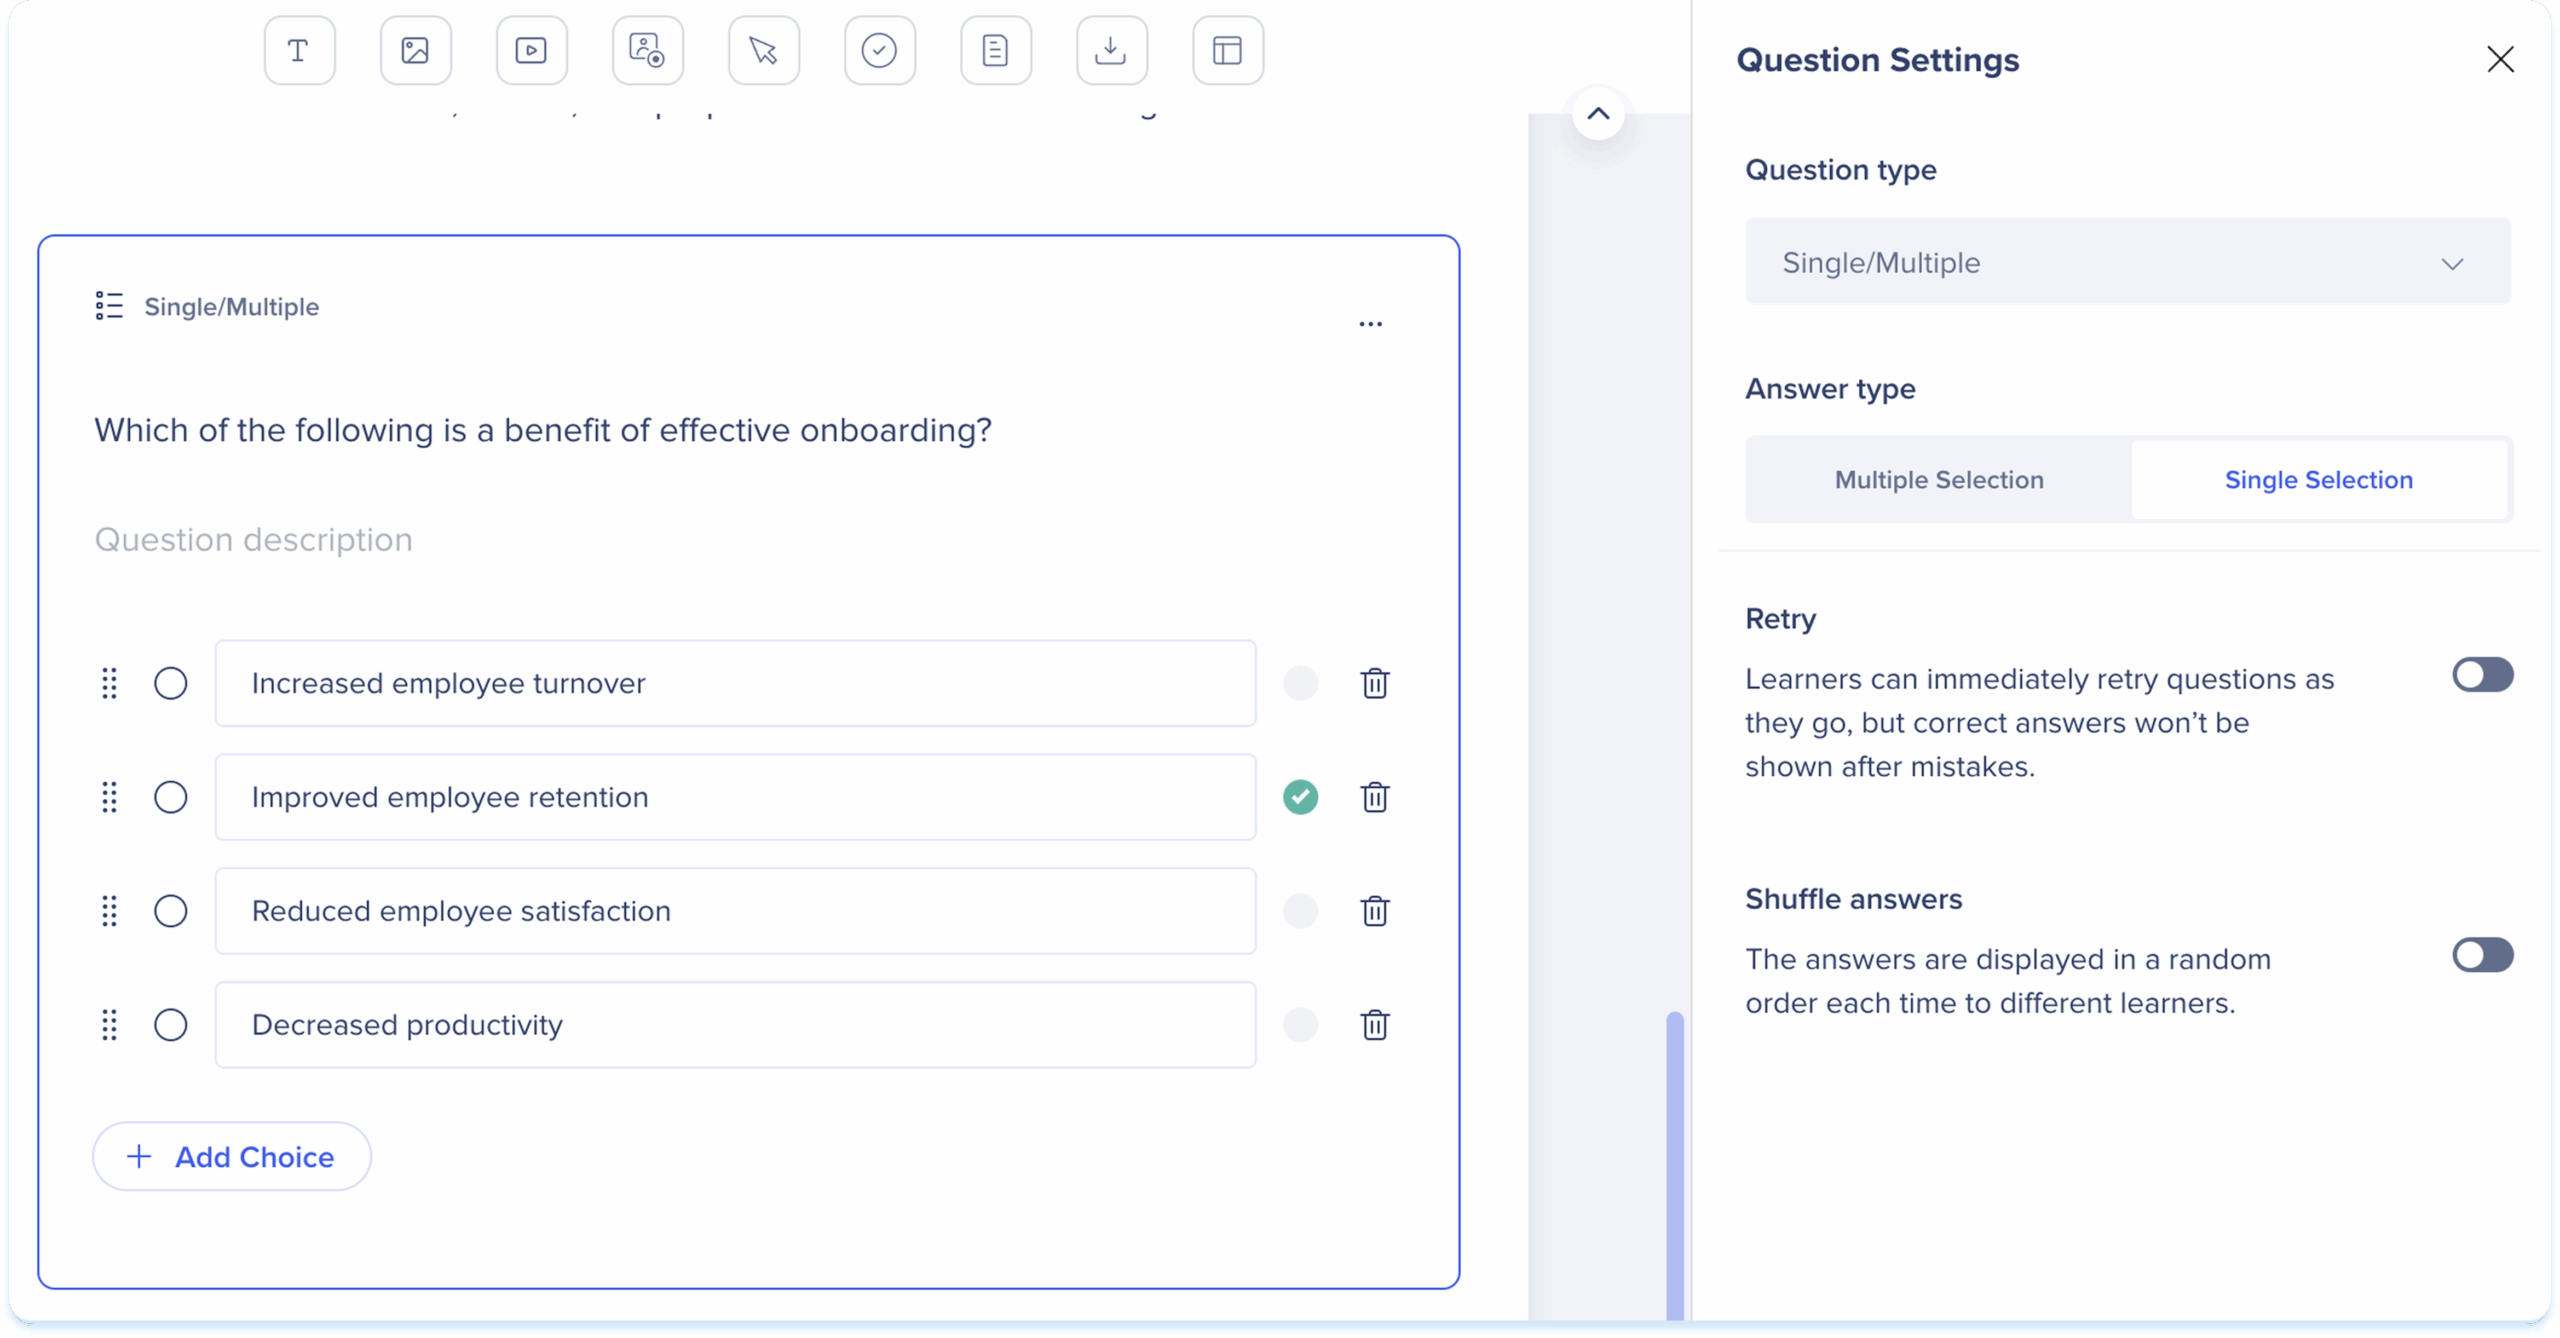
Le type de question par défaut dans une auto-vérification est Unique/Multiple
-
Cliquez sur l'icône Paramètres en haut à droite de l'élément
-
Dans le panneau des paramètres des questions sur la droite, sélectionnez un type de question différent
-
Fournissez les champs requis pour le type sélectionné
-
Activez Réessayer pour permettre aux apprenants de réessayer immédiatement après avoir répondu à une question, sans voir la réponse correcte (facultatif)
Quizzes in WalkMe Learning Arc
Élément de contenu intégré
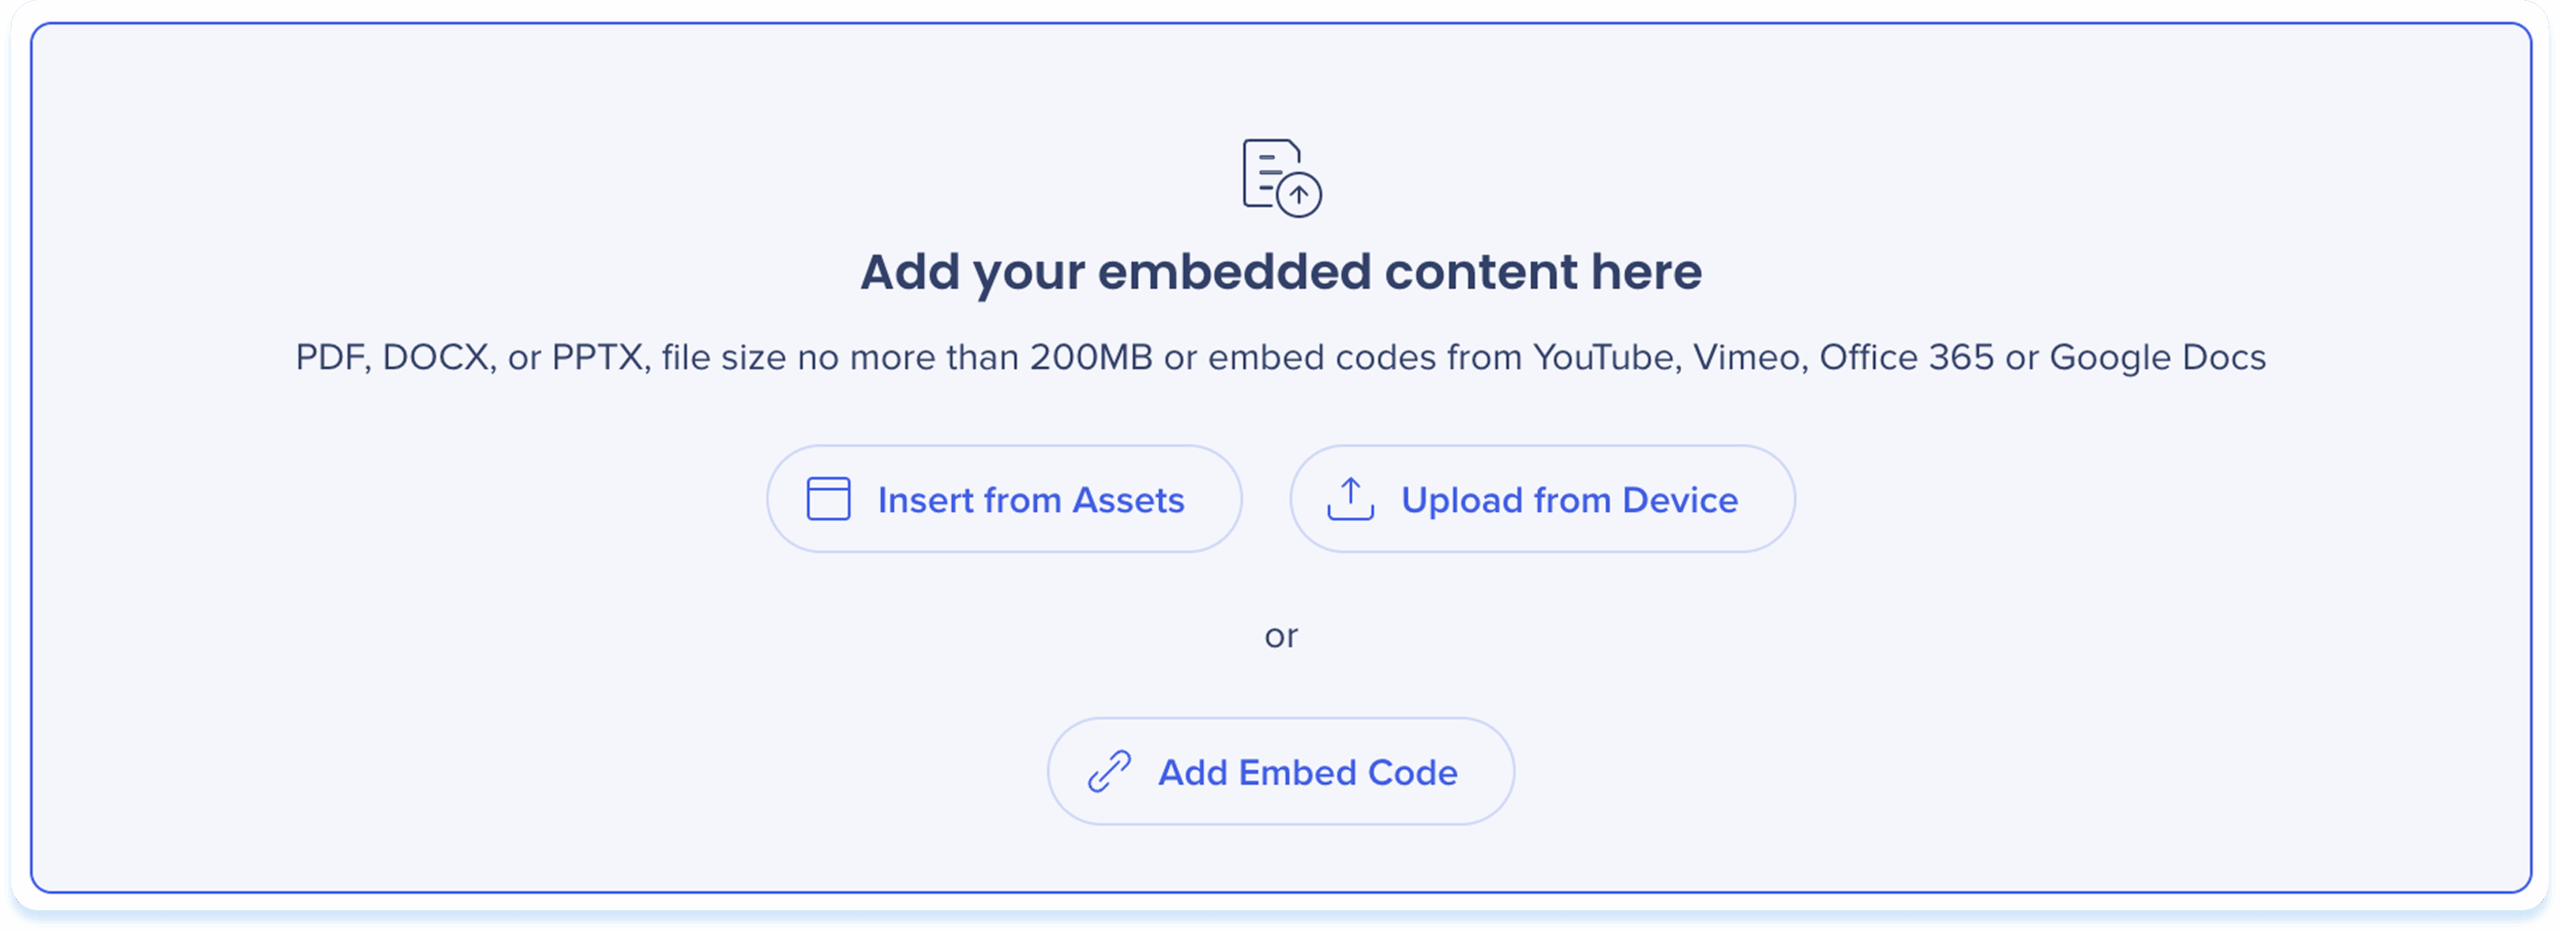
Utilisez l'élément de contenu intégré pour intégrer des documents ou du contenu tiers directement dans la leçon.

Ajouter du contenu intégré
-
Choisissez l'une des options suivantes pour ajouter du contenu intégré :
-
Insérer à partir des ressources : sélectionnez le contenu intégré à partir de vos ressources d'apprentissage
-
Télécharger à partir de l'appareil : choisissez un fichier à partir de votre ordinateur
-
Ajouter le contenu intégré : Collez le code intégré
Remarque
-
Learners may need to sign in to view embedded content
-
Not all embed codes may be supported
-
Please test your content before publishing
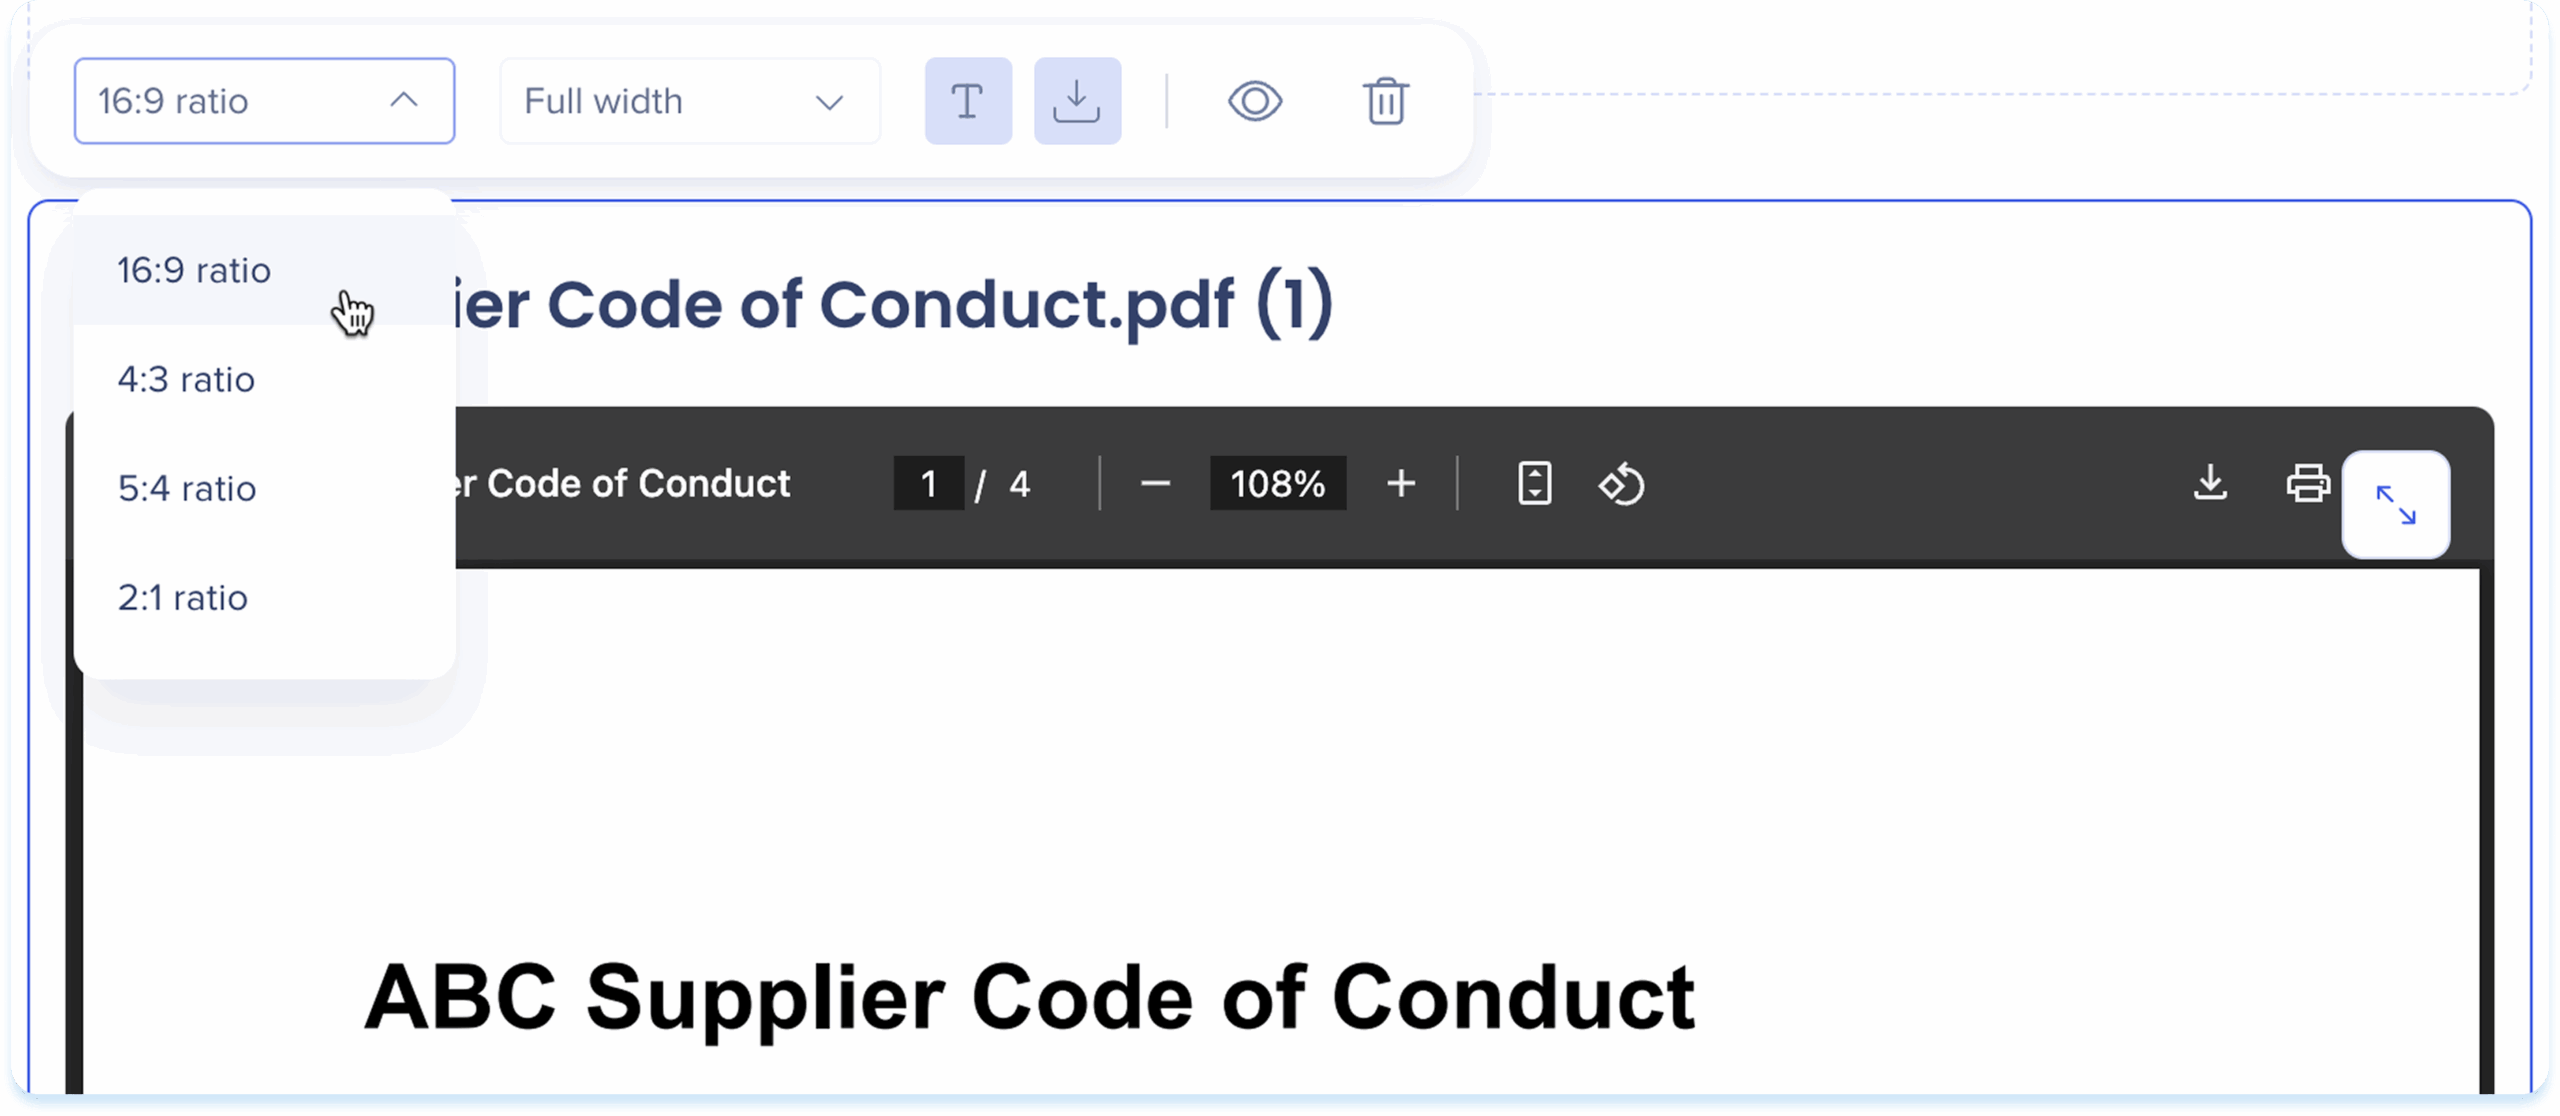
After you add the embedded content, use the toolbar to edit and adjust it.
-
Click the embedded content to show the toolbar
-
Use the toolbar to adjust:
-
Ratio: Choose an aspect ratio
-
Width: Set the element width
-
Show title: Turn the embedded content title on or off
-
Hide: Keep the element invisible to learners but still available in the background
-
Delete: Remove the element from the lesson
Attachment Element
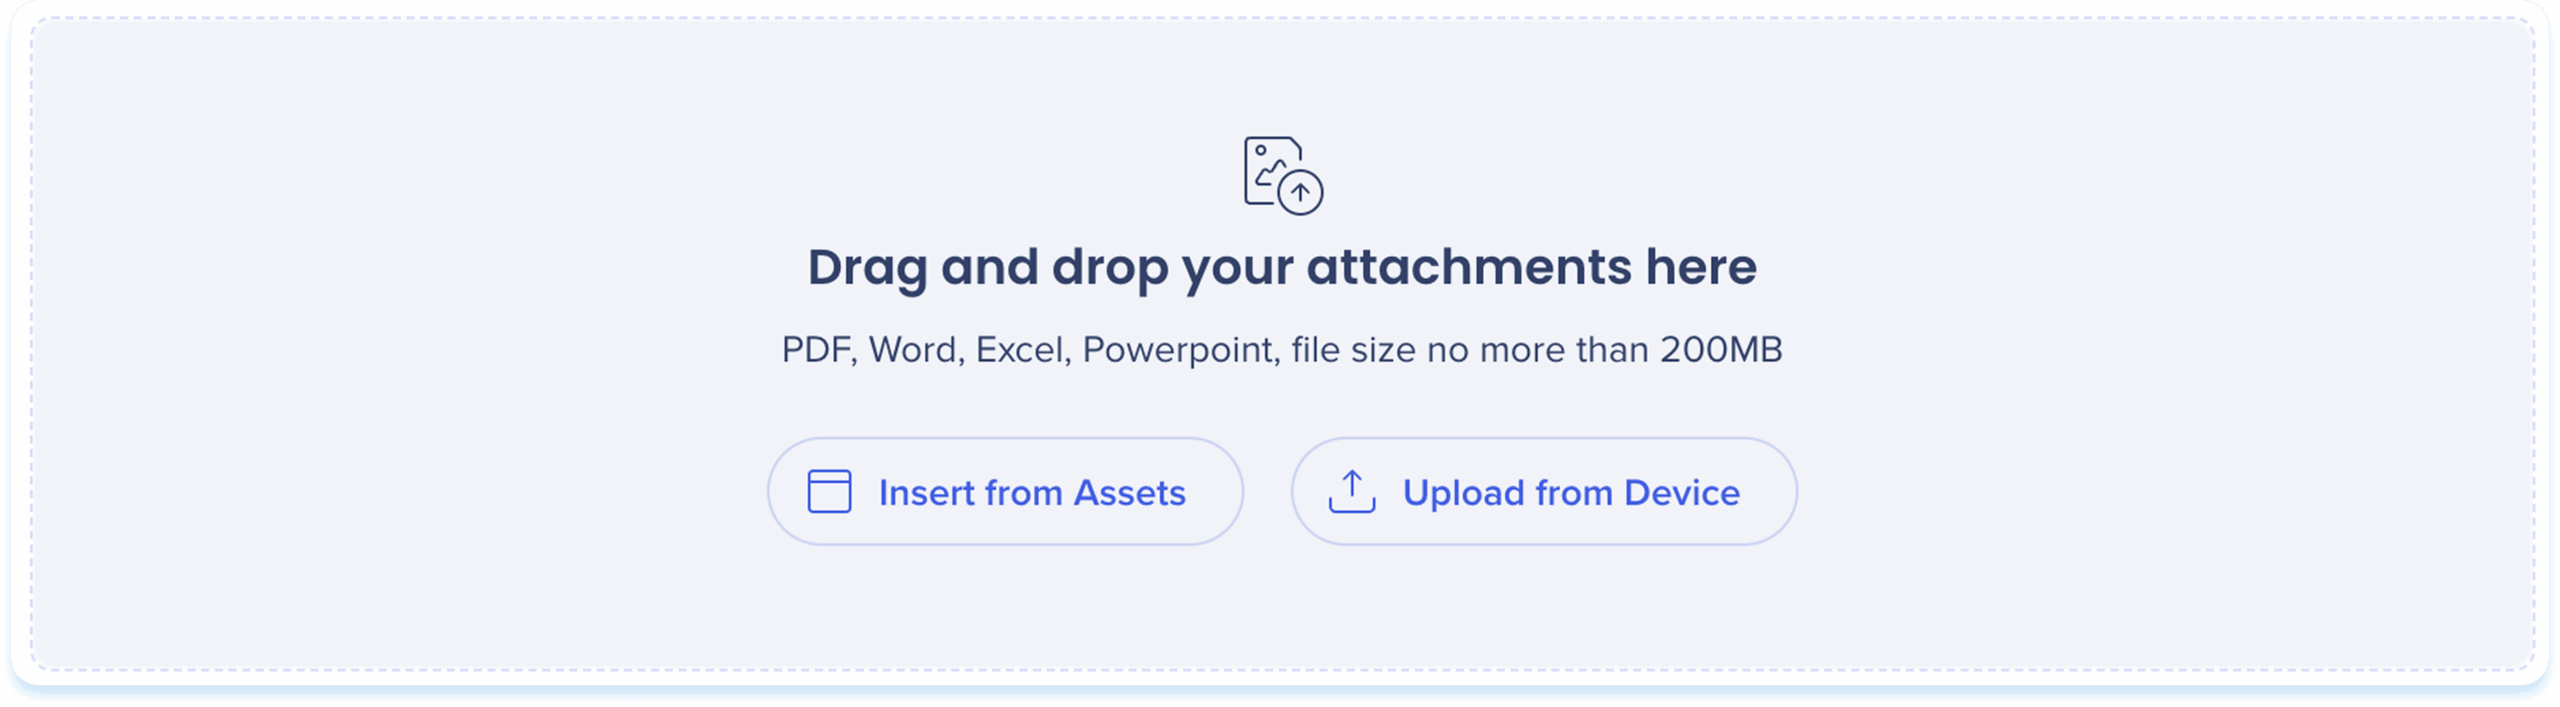
Use the attachments element to provide downloadable files like PDFs or guides.

Add an attachment
Choose one of the following options to add attachments:
-
Drag & drop the file into the attachment element
-
Insert from Assets: Select attachments from your learning assets
-
Upload from Device: Choose a file from your computer
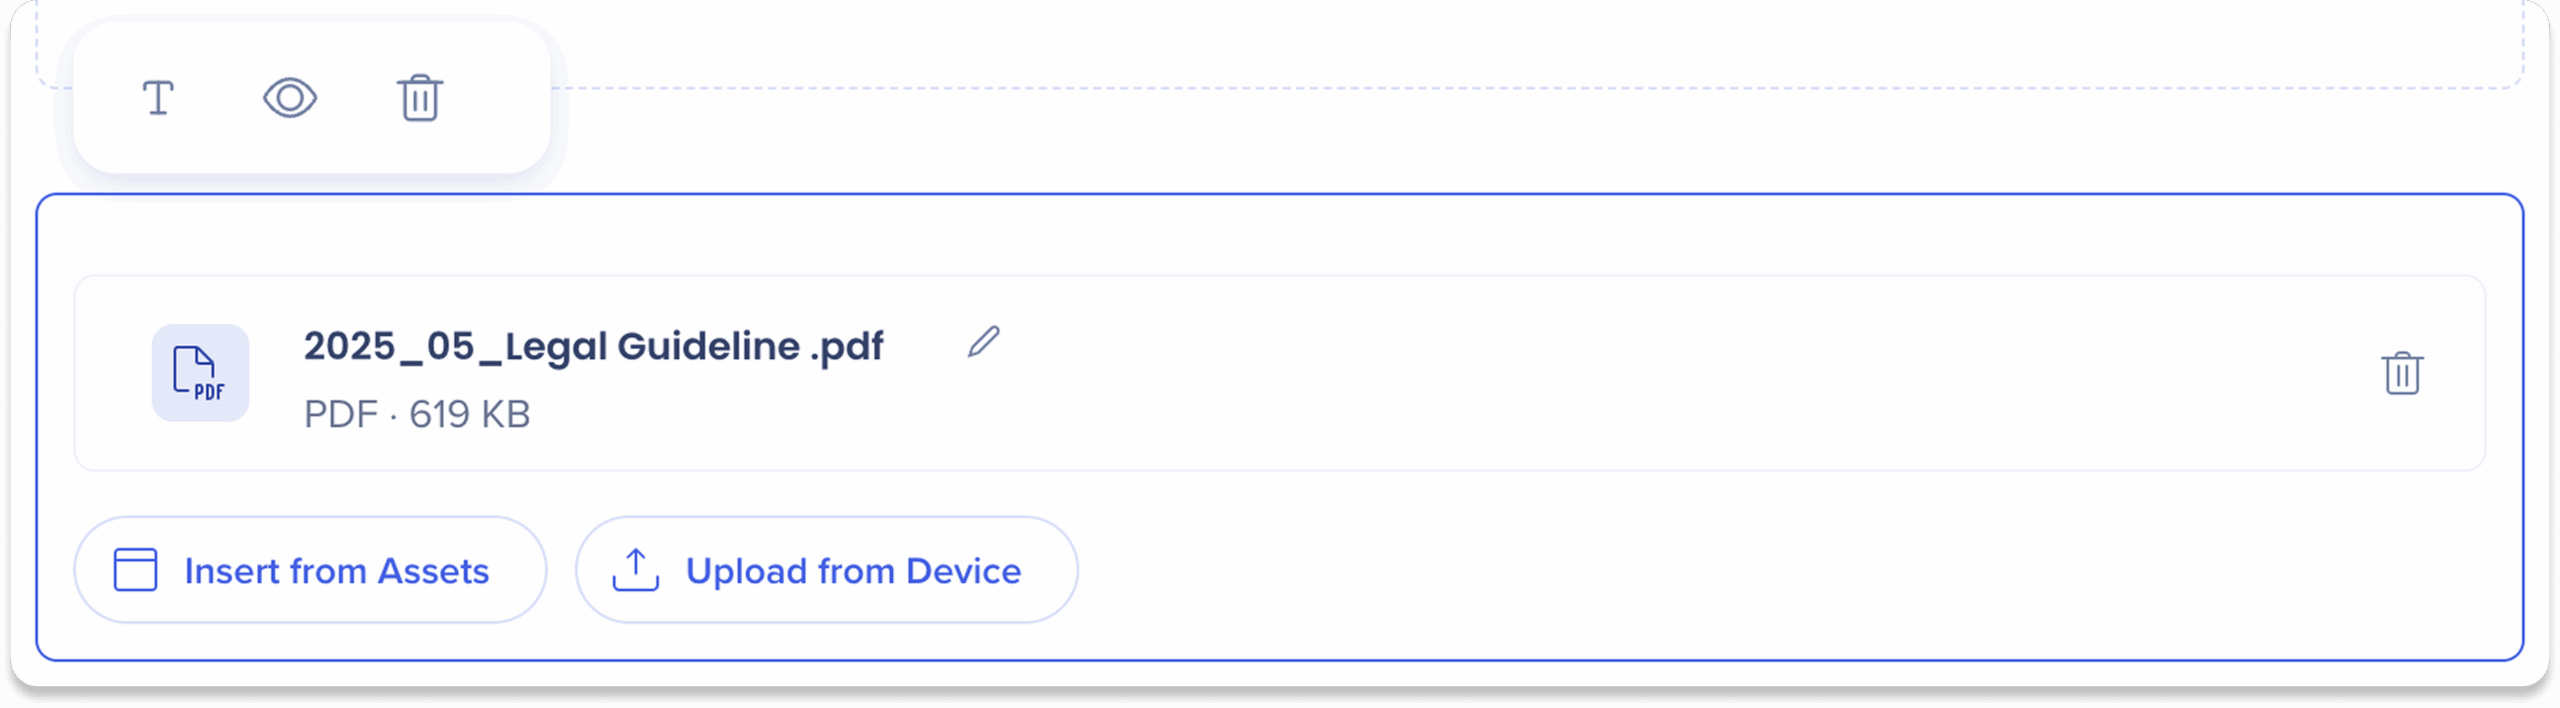
After you add the attachment, use the toolbar to edit and adjust it.
-
Click the attachment to show the toolbar
-
Use the toolbar to adjust:
-
Show title: Turn the attachment title on or off
-
Hide: Keep the element invisible to learners but still available in the background
-
Delete: Remove the element from the lesson
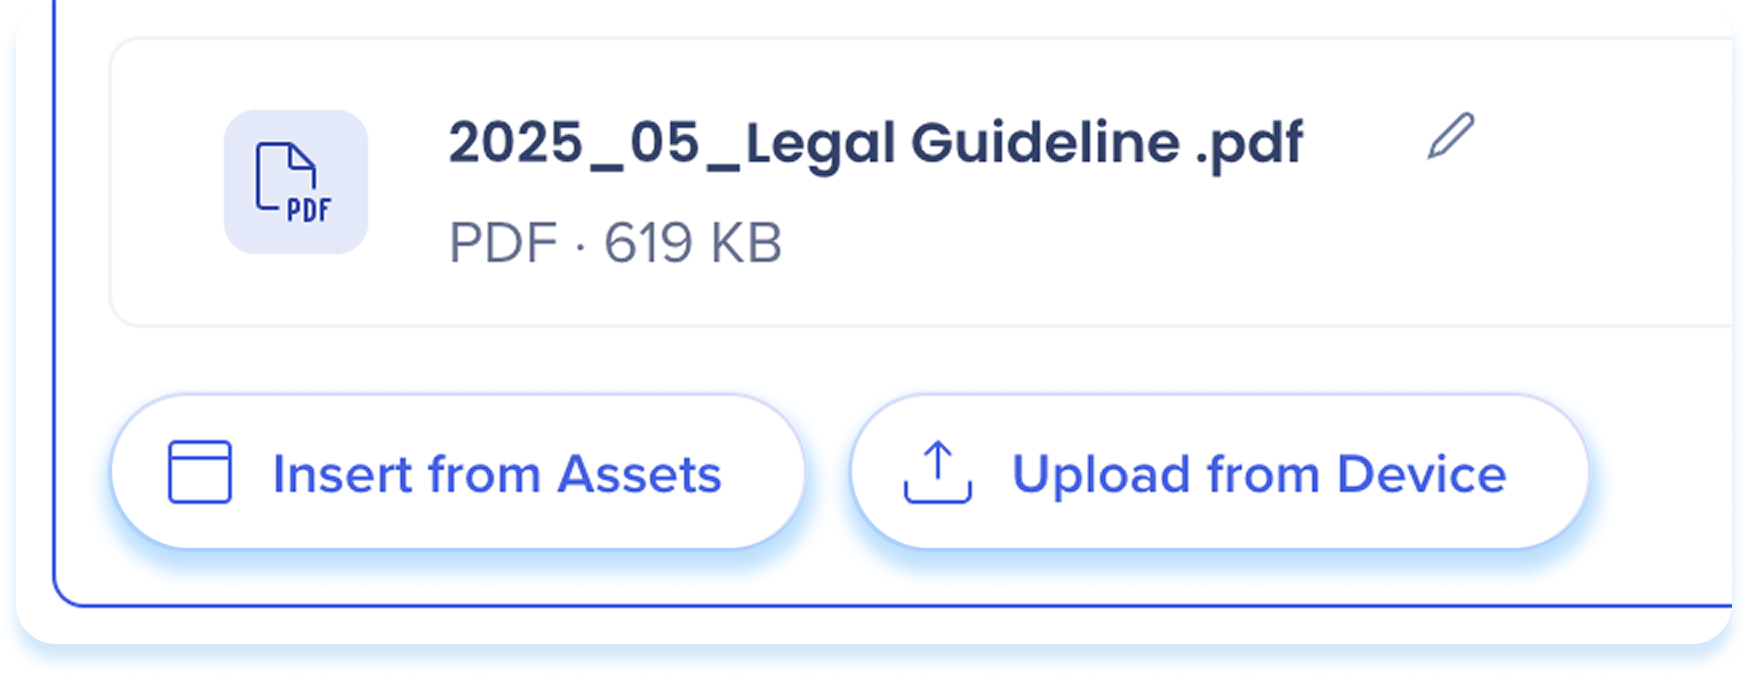
Additional actions
To replace files select either:
-
Insert from Assets: Replace the current content with a file from your learning assets
-
Upload from Device: Replace the current content with a content from your device
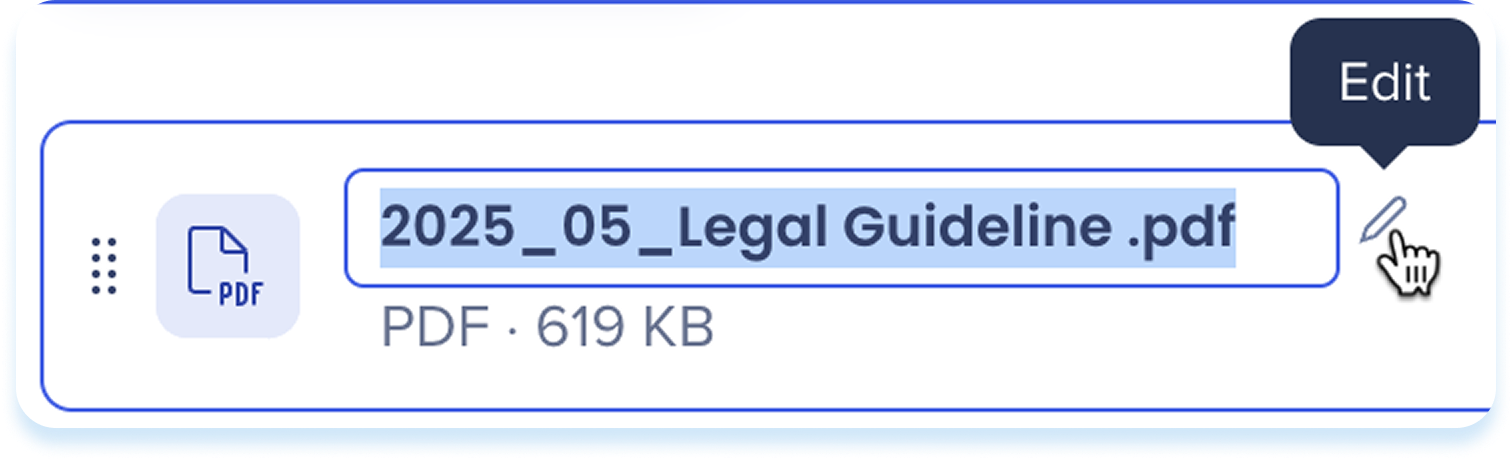
To rename a file:
-
Click Edit next to the file name
To remove a file:
-
Click the Trash icon on the file row

SAP Enable Now Element

Use the SAP Enable Now content element to insert content transitioned from SAP Enable Now.
Add SAP Enable Now content
-
Click Select from transitioned Enable Now content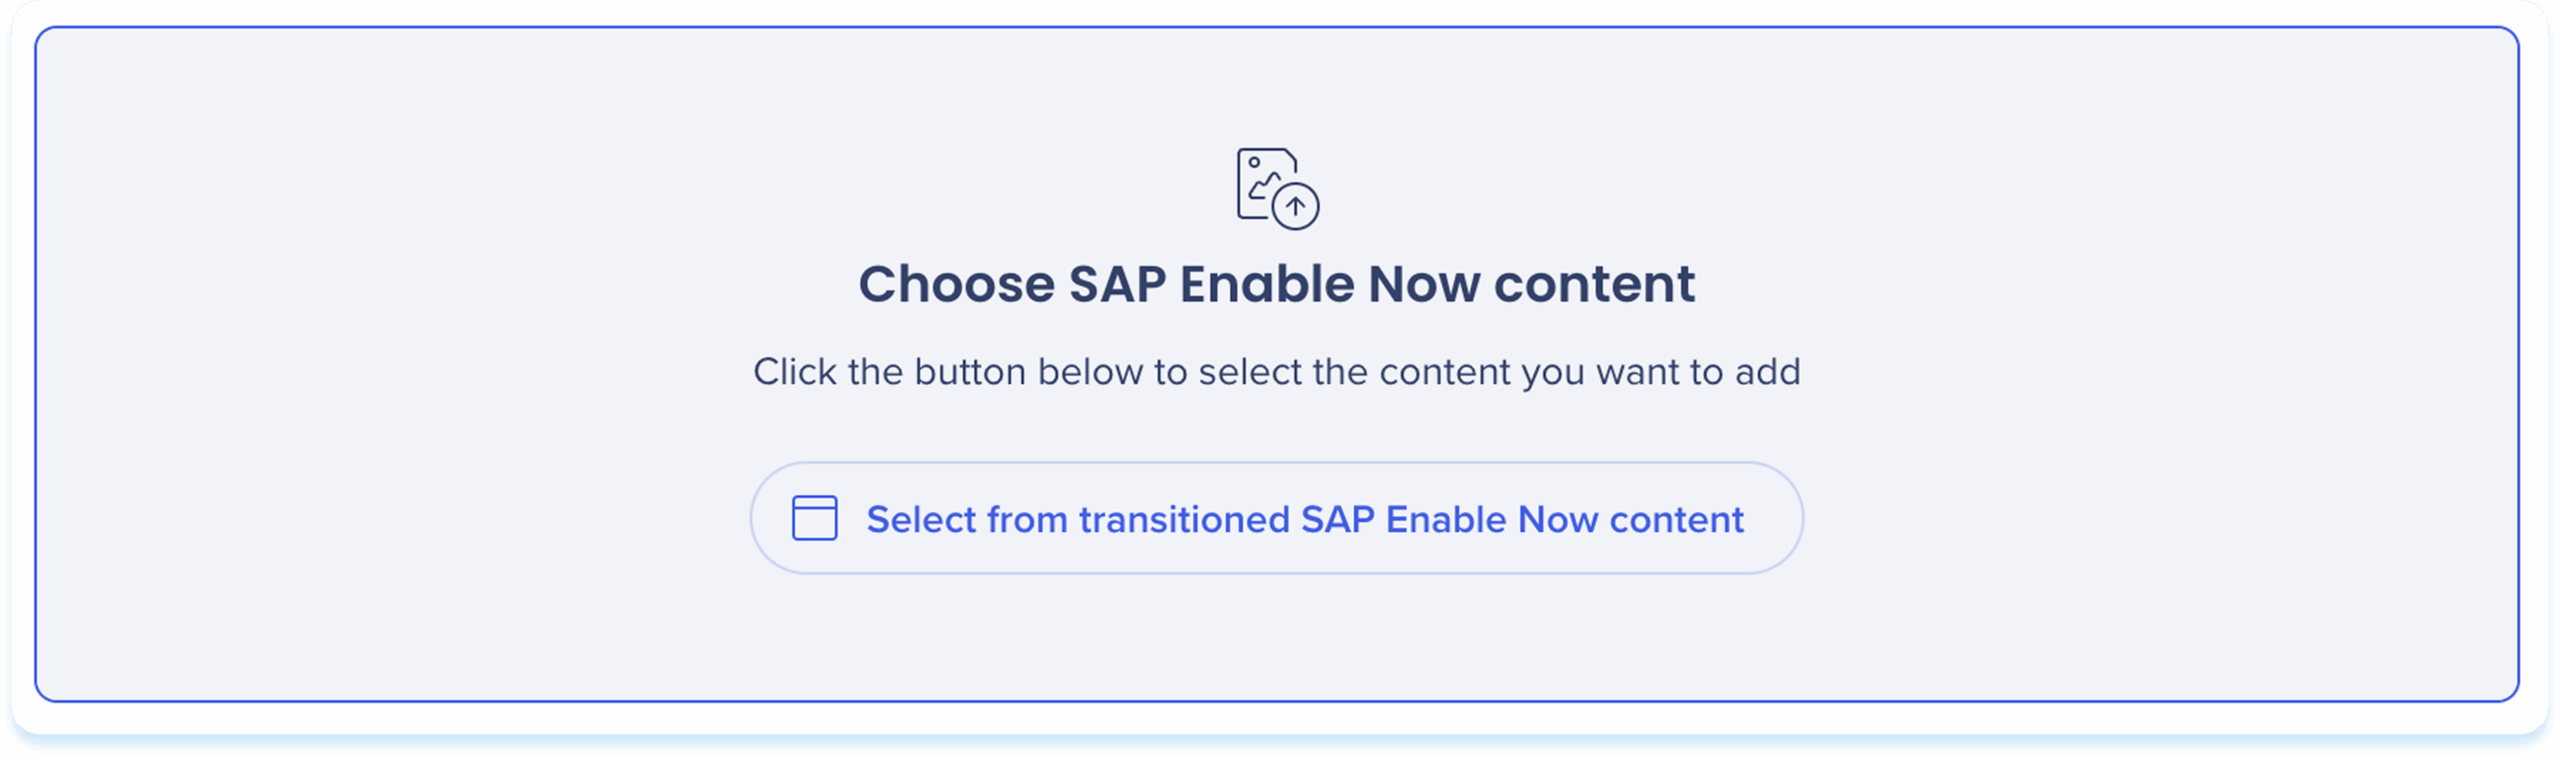
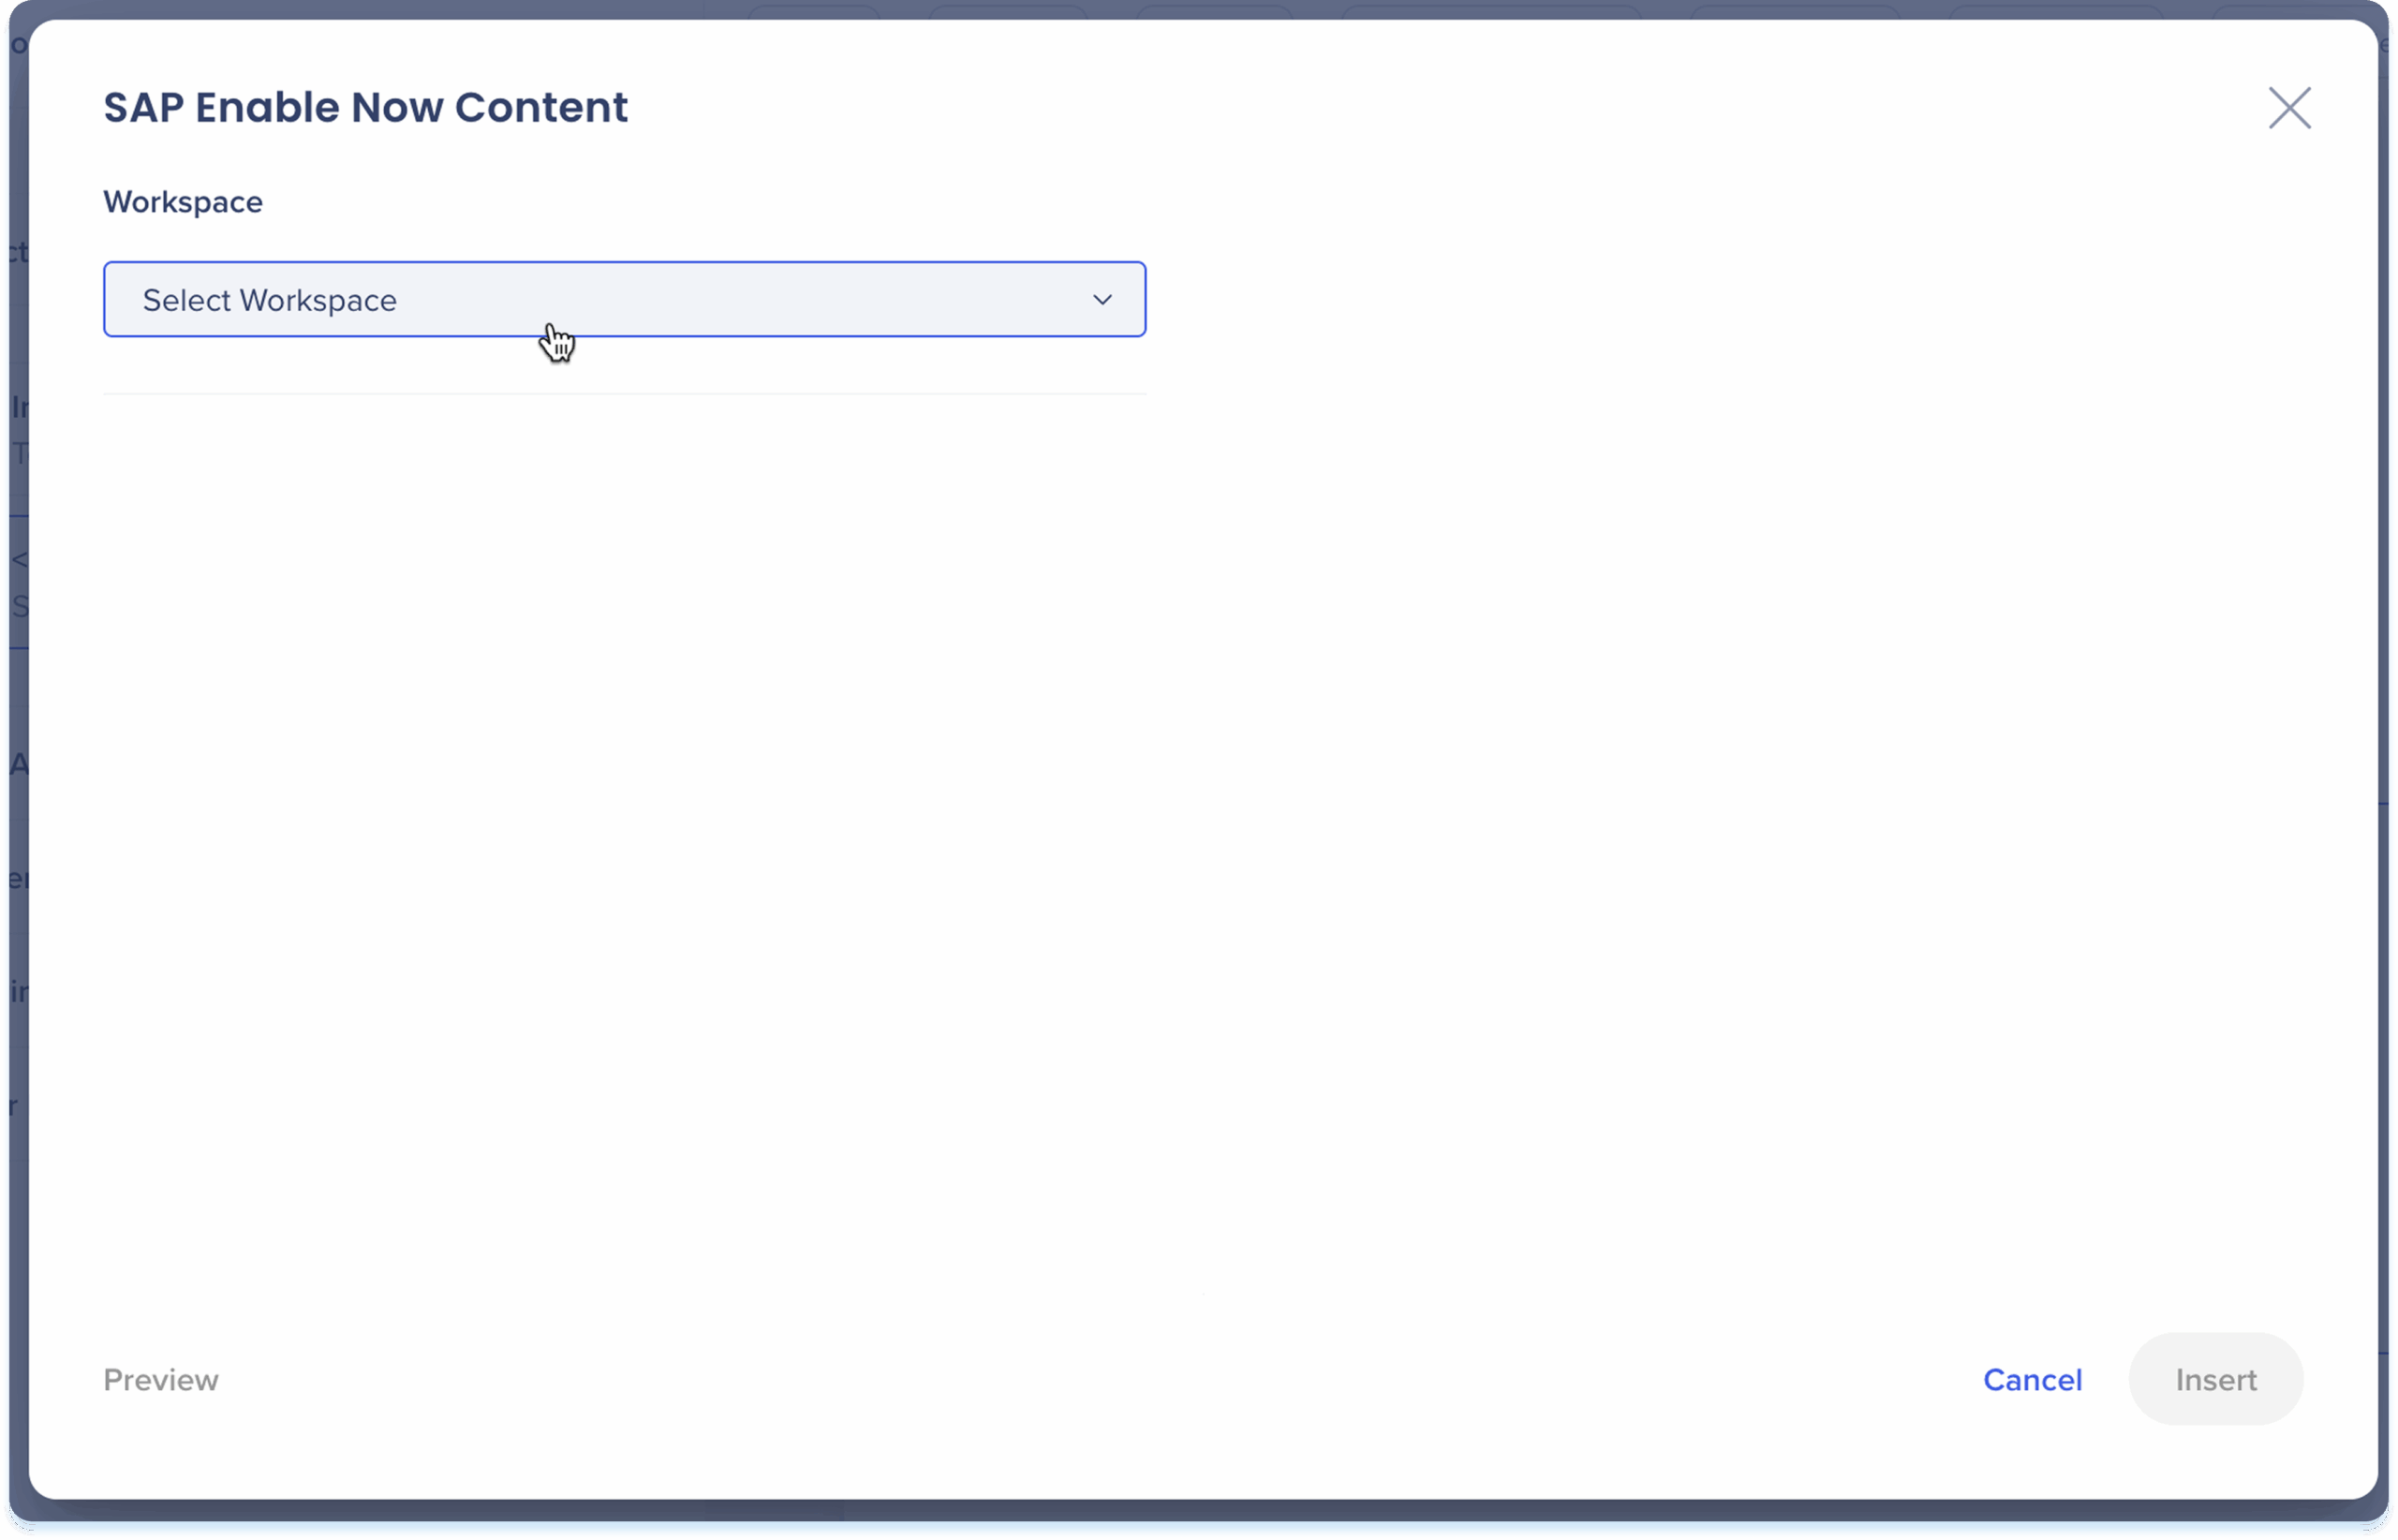
-
The SAP Enable Now content popup will open
-
Select the workspace from the dropdown
-
Choose the content item to insert
-
Click Insert
Actions de la barre d'outils
Après avoir ajouté le contenu transféré, utilisez la barre d'outils pour le modifier et l'ajuster.
- Cliquez sur le contenu transféré pour afficher la barre d'outils
- Utilisez la barre d'outils pour ajuster :
- Largeur: définissez la largeur de l'élément
- Afficher le titre : activez ou désactivez le titre pour le contenu transféré
- Afficher la description courte : activez ou désactivez la description courte pour le contenu transféré
- Afficher la description : activez ou désactivez la description pour le contenu transféré
- Masquer : gardez l'élément caché aux apprenants mais toujours disponible en arrière-plan
- Supprimer : supprimez l'élément de la leçon

Générer et modifier des éléments avec l'IA
Utilisez l'IA pour générer de nouveaux éléments et affiner le contenu que vous avez déjà ajouté à une leçon. Voir Générer et modifier des éléments avec l'IA.
Notes techniques


