SFTP Integration
Brief Overview
The SFTP integration is relevant for customers who require secure and reliable file transfer capabilities to handle sensitive or large data sets, comply with strict regulatory standards, automate business processes, or integrate seamlessly with existing IT infrastructures.
The WalkMe SFTP integration allows for seamless bi-directional communication between WalkMe and the customer's SFTP server, regardless of whether it is managed directly by the customer or through a third-party provider. Users can establish a connection with a remote SFTP server by authenticating with either a username/password combination or public key authentication. The integration offers two encryption algorithms, RSA2048 or ECDSA521, for those who opt for public key authentication. This ensures a secure file transfer process for both importing data to WalkMe and exporting data from WalkMe.
Set Up an Outgoing SFTP Integration
Step 1: Access the Integrations page in Insights Classic
-
Navigate to Insights Classic: https://insights2.walkme.com/
-
Select the system you would like to setup the integration on from the Monitored Systems widget
-
Click the Integrations tab in the sidebar
-
Click SFTP integration under Outgoing Scheduled Integrations
Step 2: Create a Destination
The user should begin by establishing an SFTP destination, which involves specifying the method of accessing their SFTP server (this step can also be initiated from Step 3 detailed below).
-
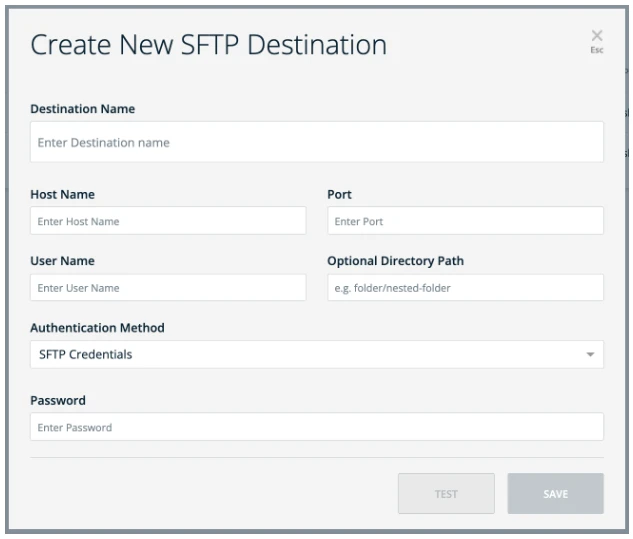
Enter the the required information in the Create New SFTP Destination fields:
-
Destination Name: A unique name assigned by the user to identify the created destination
-
Host Name: The address of the SFTP server you're connecting to
-
Port: The port number used for the SFTP connection
-
User Name: The account name for SFTP server access
-
Optional Directory Path: A specific folder path on the SFTP server for targeted file operations
-
Authentication Method: SFTP credentials/Public Key
-
-
Based on the selection above, the user will also need to enter/select one of the following:
-
Password: (if SFTP credentials are chosen)
-
Encryption Algorithm: RSA2048 or ECDSA521 (if SFTP Public Key is selected)
-
Note: When opting for the Public Key option, the user must also copy the public key provided by us and add it to their SFTP server's authorized keys list, enabling WalkMe to connect to their SFTP server
-
-
-
Click Test once finished to verify the connection
-
Click Save
Step 3: Add New Integration
This step involves two key actions as outlined below:
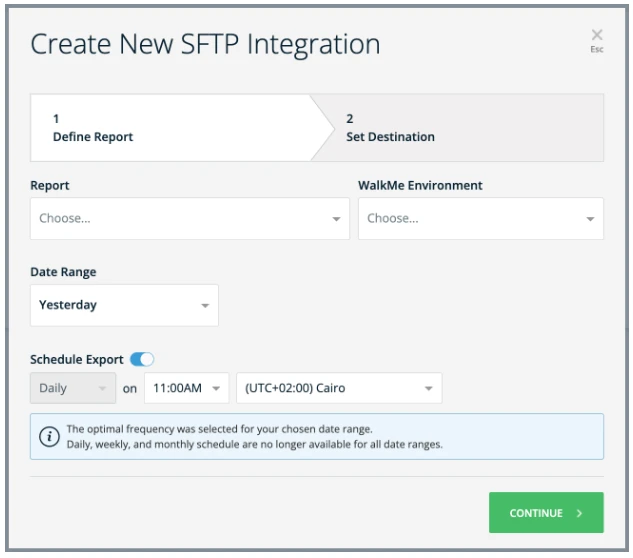
Define Report:
-
Choose the report's name and the origin environment from which you intend to export the data
-
Select the desired reporting frequency and determine whether it should be set up as a recurring process
Set Destination:
-
Define a new Destination OR select a Destination from a list
-
Selecting a Destination from the list will auto populate the rest of the information
-
Upon clicking Save after completing these steps, a new integration will be created. This integration can then be executed manually on request or set to run automatically according to the configuration defined in Step 2.
Set Up an Incoming SFTP Integration
Step 1: Create a Source
The user should begin by establishing an SFTP source - a location from which this file will be accessible. This involves specifying the authentication method for accessing their SFTP server (this step can also be initiated from Step 2, as detailed below).
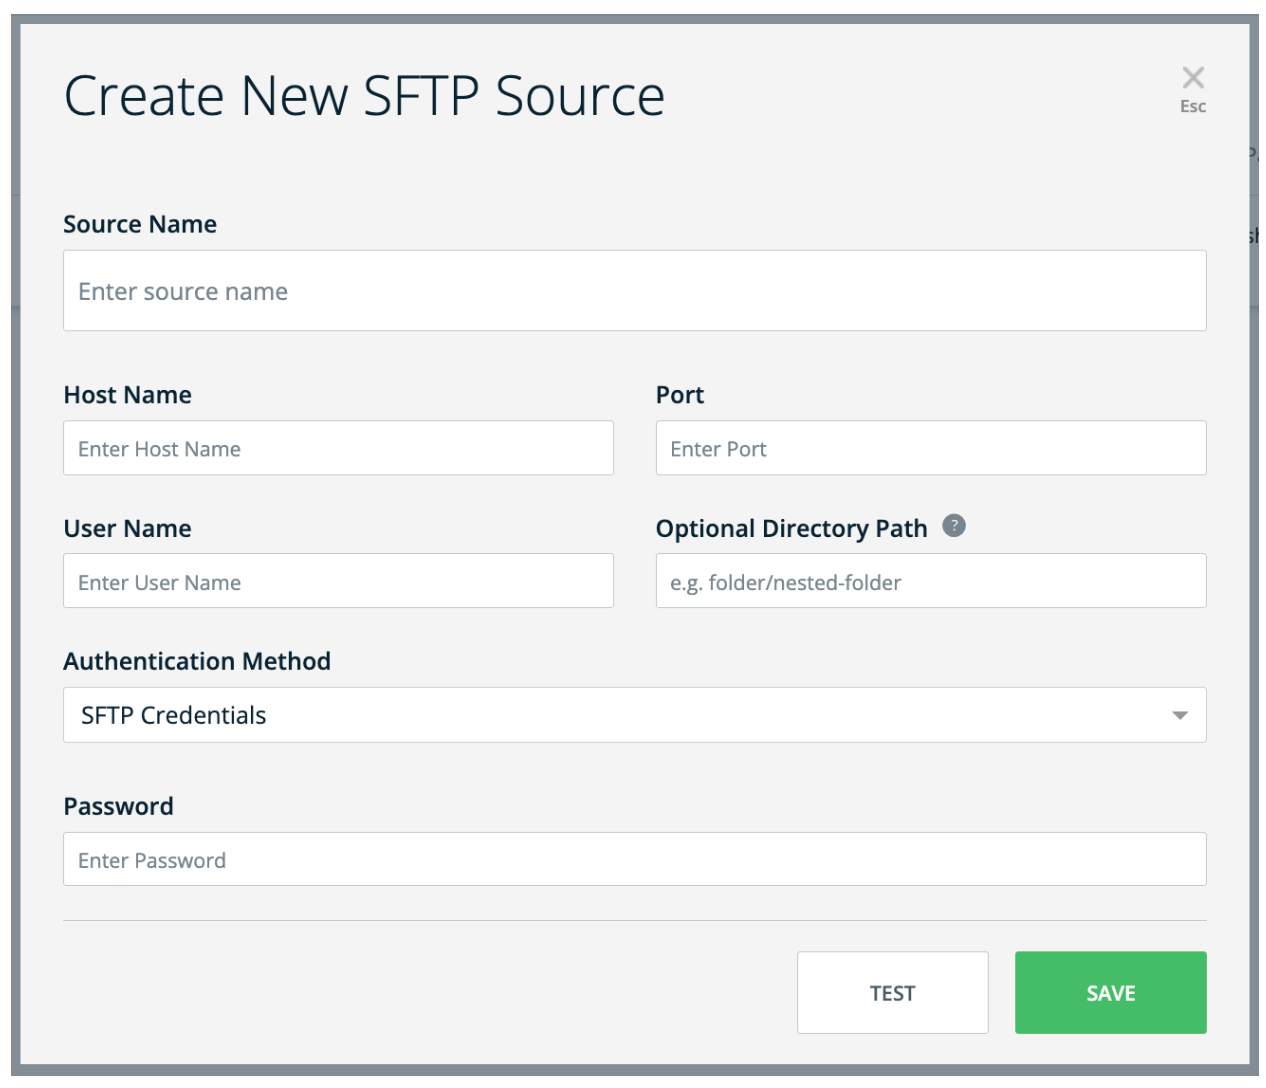
- Enter the the required information in the Create New SFTP source fields:
-
- Source Name: A unique name assigned by the user to identify the created source
-
- Host Name: The address (IP or Domain name) of the SFTP server you're connecting to
-
- Port: The port number used for the SFTP connection
-
- User Name: The user name for accessing the SFTP server
-
- Optional Directory Path: A specific folder path on the SFTP server for targeted file operations
-
- Authentication Method: SFTP credentials/Public Key
- Based on the selection above, the user will also need to enter/select one of the following:
-
- Password: (if SFTP credentials are chosen)
- Encryption Algorithm: RSA2048 or ECDSA521 (if SFTP Public Key is selected)
- Note: When opting for the Public Key option, the user must also copy the public key provided by us and add it to their SFTP server's authorized keys list, enabling WalkMe to connect to their SFTP server
- Click Test once finished to verify the connection
- Click Save
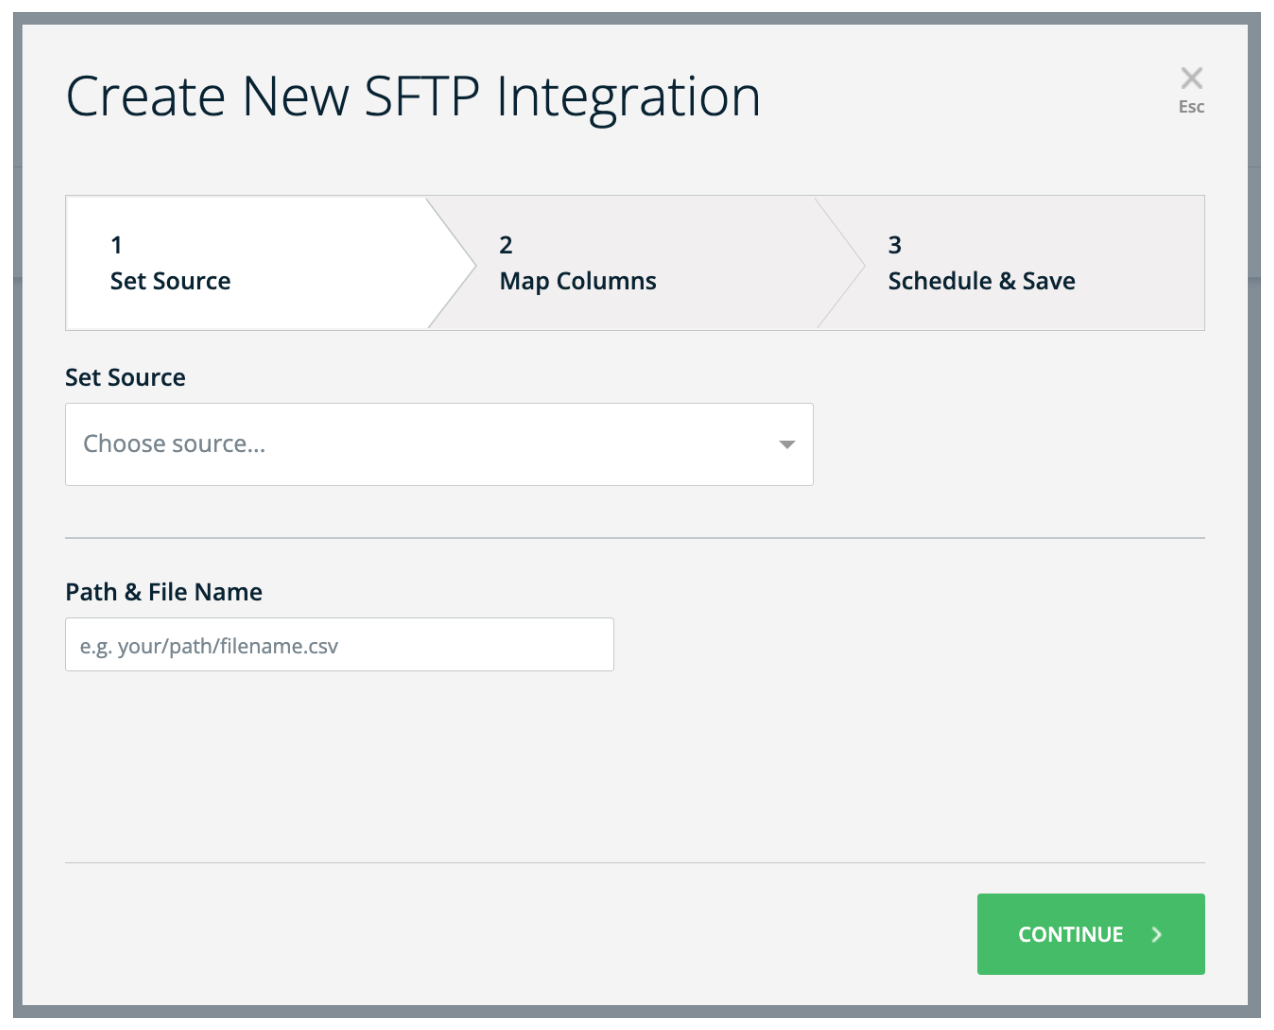
Step 2: Add New Integration
This step involves three key actions as outlined below:
- Set up a source → Define a new source OR select a Source from a list, and fill out the “Path and File Name” field at the bottom (=the path for the CSV file). Selecting a Source from the list will auto populate the rest of the information (Source Name, Host Name, Port, User Name, Optional Directory Path, and the Authentication Method details)
- Map Columns → Choose a unique user identifier to establish data synchronization between your SFTP server and WalkMe. Then, select the properties you wish to import into WalkMe, ensuring they are correctly mapped to their respective property types (string, number, boolean, etc.). If necessary, you can also rename the properties at this stage
- Schedule and Save → Specify the integration's name and determine if you wish to schedule it to run at specified intervals
Upon clicking Save after completing these steps, a new integration will be created. This integration can then be executed manually on request or set to run automatically according to the configuration defined in Step 3 above.
Technical Notes
- No limit to the number of rows for the integrated file; however, file size is limited to 1GB

