Brief Overview
Identity Management brings you the Unified Identity feature which lets you manage all your users' identities from across your organization into one central view at the account level. This end data is only available in Insights.
AI Insights
Unified Identity prevents user identities from being siloed in individual systems or sub-environments. Where a person could have separate, disconnected profiles and permission footprints across your organization, the mapping and collating of identities allows administrators to classify and collate identities according to a single value.
With Unified Identity, you get account-wide visibility and central governance over every user from one place.
Use Cases
- Get one view of every user in your organization without checking each system one by one
- Report on real individuals rather than duplicate system records
- Track user footprints, monitor access across environments
Access
Access Unified Identity in the console:
- Open the WalkMe Console:
- Go to the Admin app
- Select Identity Management category
- Select Unified Identity
How It Works
Before turning on Unified Identity users need the appropriate permissions.
Step 1: Give users access
- Go to Access Management
- Select Roles
Roles and Permissions
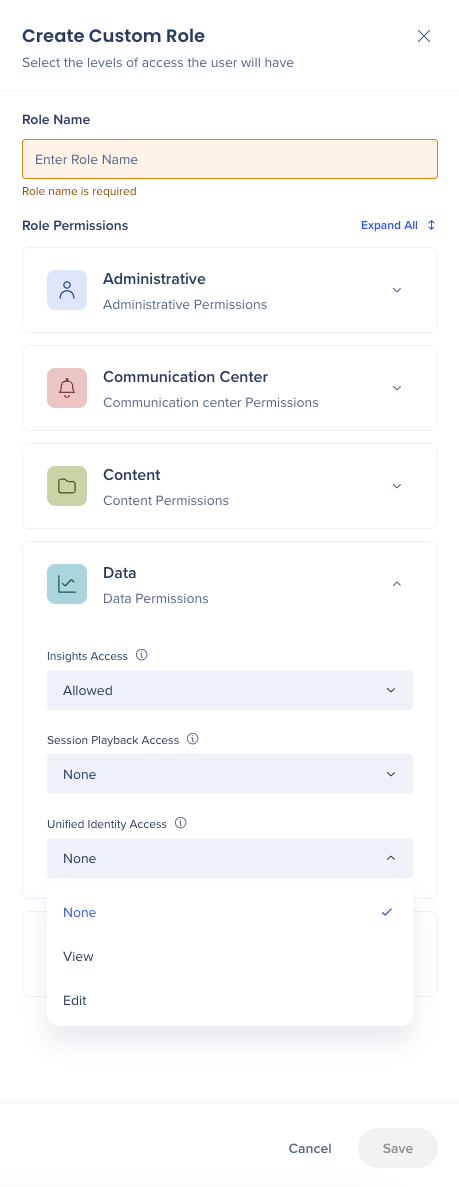
3. Select + New Role
4. In the Role Name field, enter a name for the role
5. Expand Data
6. Set Insights Access to Allowed
7. From the Unified Identity Access dropdown select:
- None -No access to Unified Identity (this is the default for new custom roles)
- View - Can view unified profiles
- Edit - Can view and manage unified profiles and identity settings
8. Select Save
Note:
Only give Unified Identity Access to the people who need it. Unified profiles bring together user data from across your organization's systems.
Step 2: Turn on Unified Identity
- From Identity Management select Unified Identity
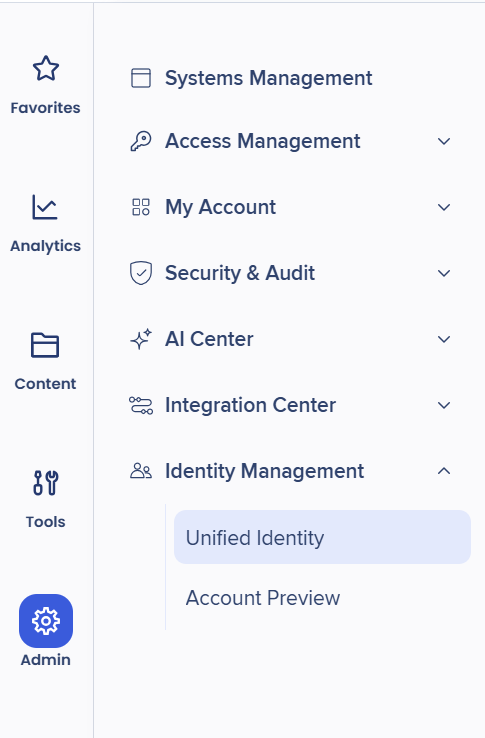
- Turn on Enable Unified Identity
- Select + Unified Properties Mapping or Create Mapping
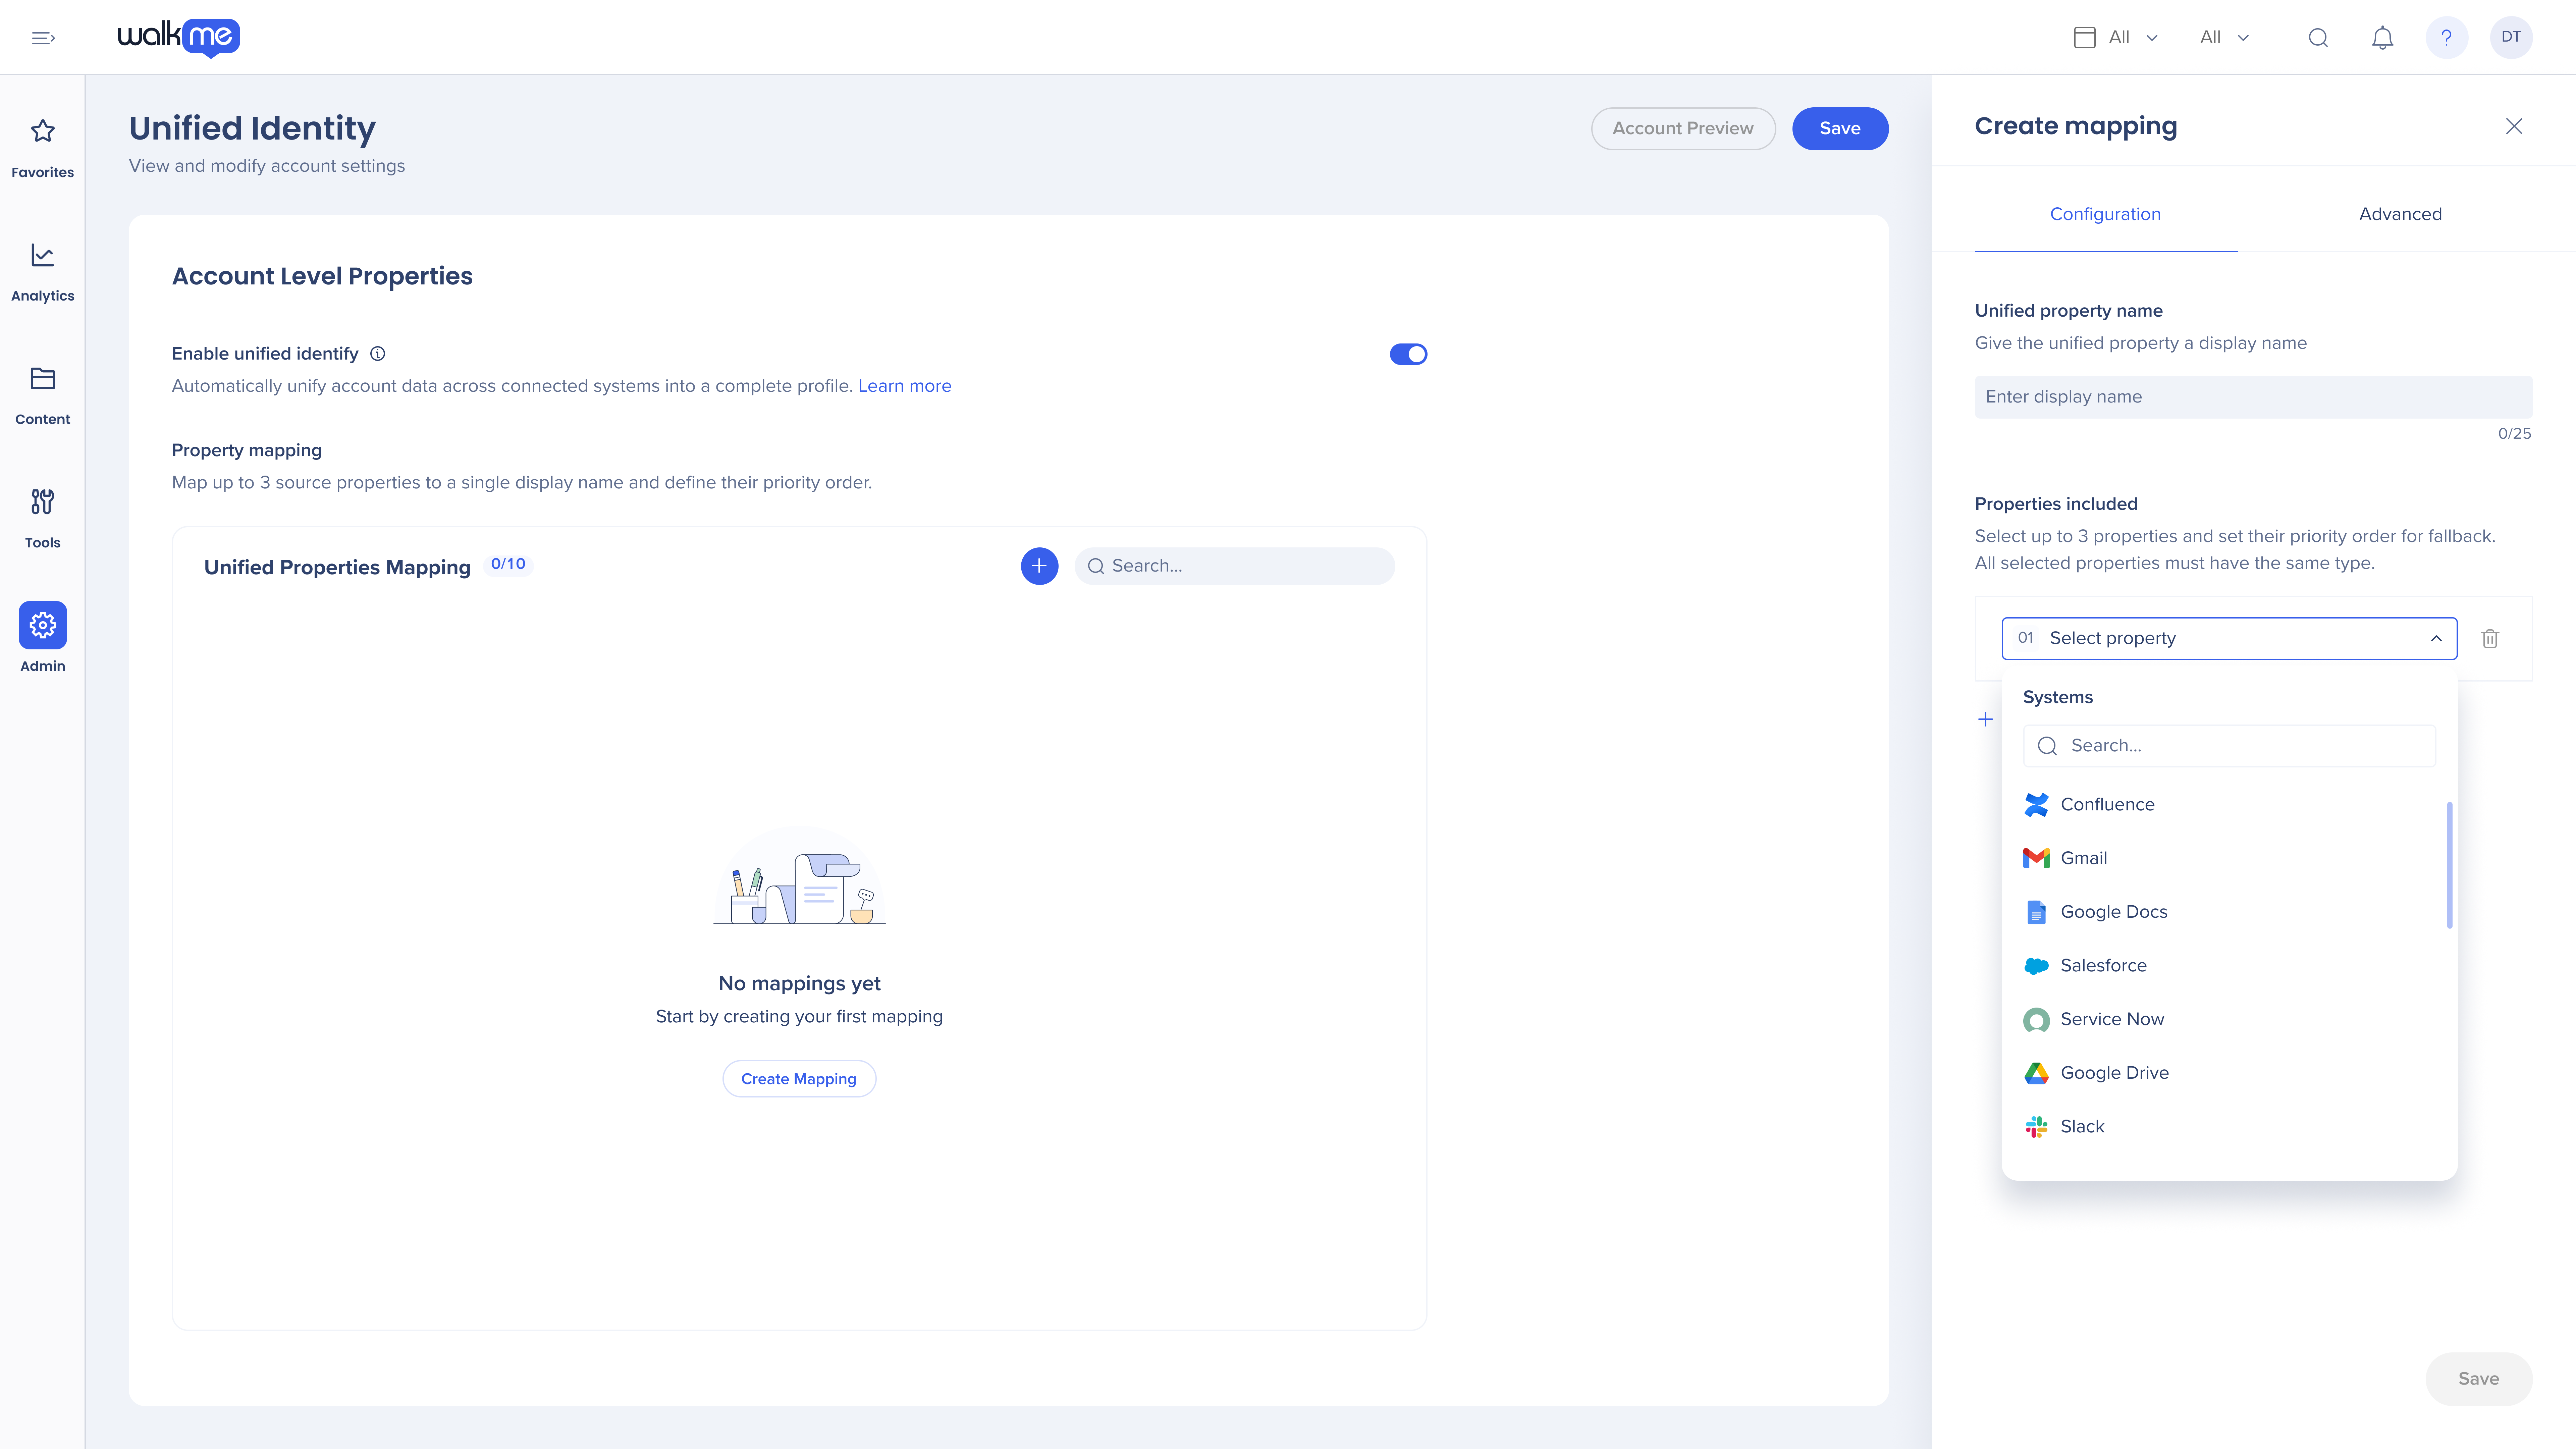
- Enter a Unified property name
- Select up to 3 properties and drag and drop them into their priority order
- Select Save
Note:
Your account overview profile is updated based on your selected mapping. These settings can't be changed again for 24 hours while the update is being processed.
Edit or Delete mapped properties
Make changes to your mapped propertes from Account Level Properties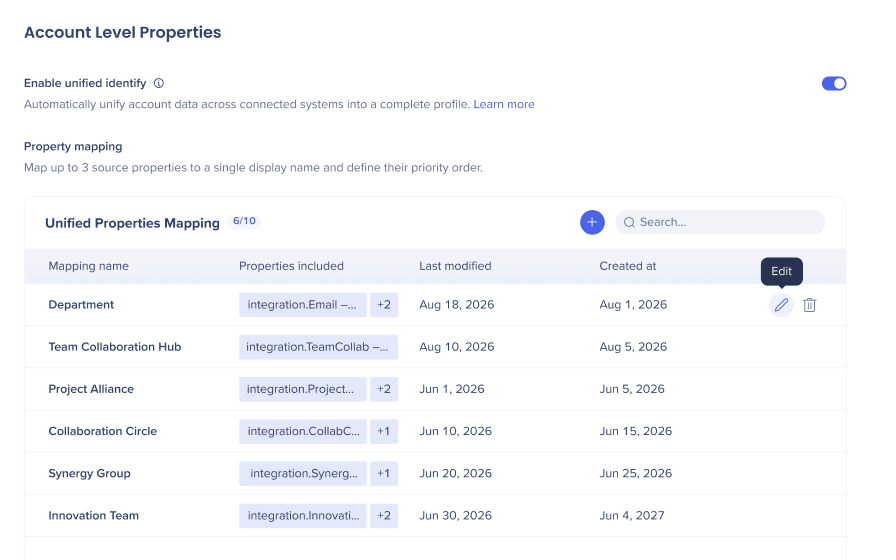
Edit
The Create Mapping panel opens with 2 tabs: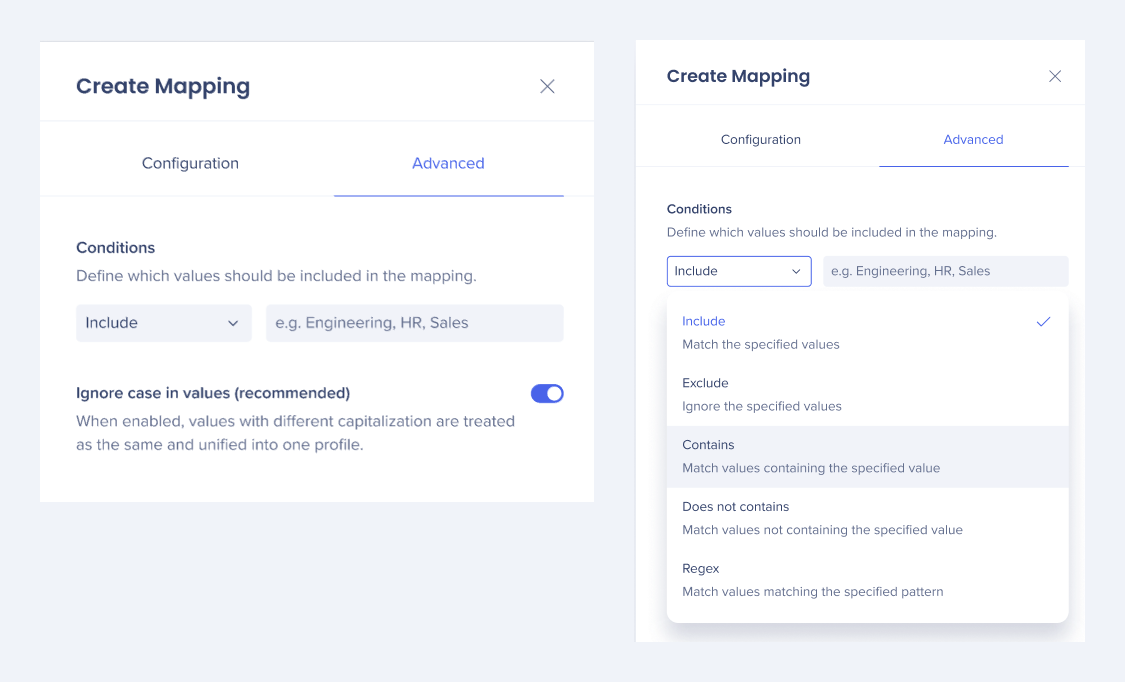
- Configuration
- Drag and drop your property mappings to change their priotiy order
- Change the name of you Unified property name
- Advanced
- Conditions- select and define which values should be included in the mapping
- Turn on or off Ignore case in values
Delete
You cant recover a deleted Unified Property Mapping.
Turn off Unified Identity
- From the Account Level Properties page turn off Enable Unfied Identity
- Choose what data you want to keep
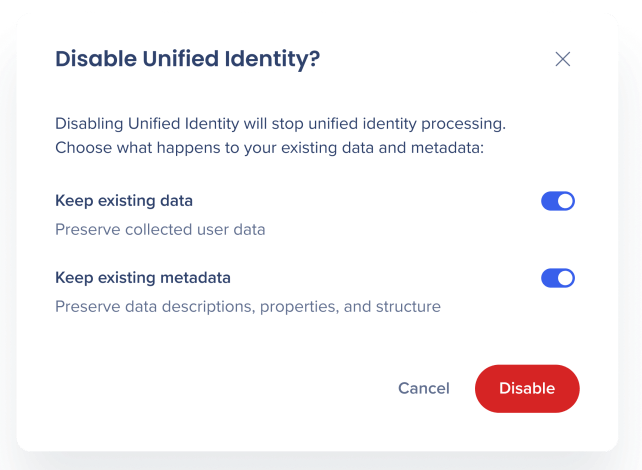
- Select Cancel or Disable
- Select Save or Undo

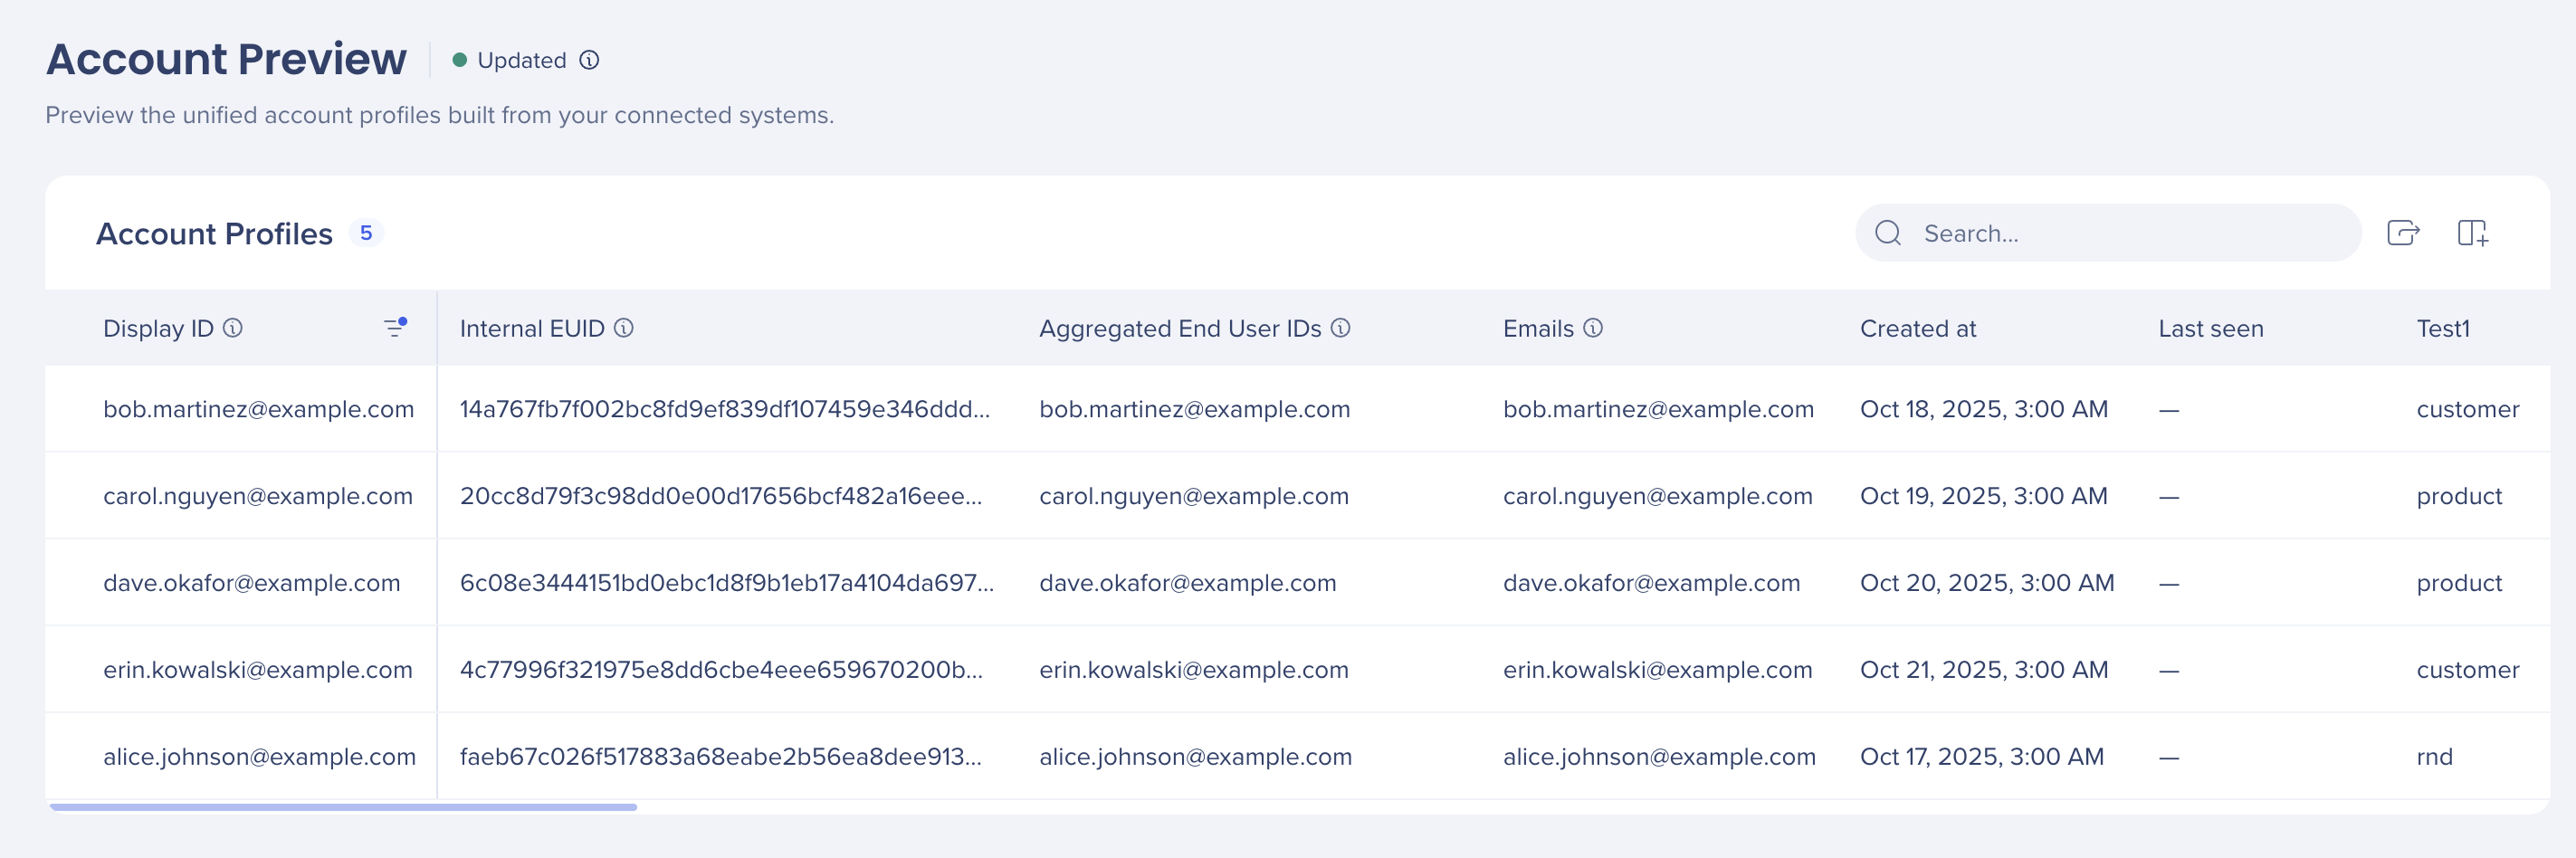
Step 3: Account Preview
You can view all your collated Unified Identity data here.
- Go to Identity Management
- Select Account Preview
Important
This is available only after the feature has been enabled and WalkMe has calculated the unified identities (typically 24hrs).
Technical Notes
- Unified Identity is off by default. An account administrator has to turn it on at the account level
- Unified Identity can be disabled after it has been enabled
- You will be able to choose whether to delete all data or just disable the feature this doesn't have any effect on system level data
- You control who can view and manage unified profiles
- Admins can create custom roles and assign Unified Identity permissions only to the users who need them, this keeps sensitive cross-system user directories and identity settings limited to authorized people
- Unified Identity is GDPR compliant and stores the same type of information as integration data -it doesn't produce any new information