Welcome to the WalkMe Help Center

Please login in order to continue:

Work flows better with WalkMe
Work flows better with WalkMe.

Install WalkMe for Sharepoint

Last Updated September 16, 2024

Let's Get WalkMe to Your Users!

WalkMe is made available to your Sharepoint users by injecting a snippet of code into the Sharepoint Master Page. Once complete, your WalkMe content will immediately be accessible and WalkMe will begin collecting data. Talk to you Account Manager about the best timing for deployment on your site.

There are just a couple steps to getting WalkMe up and running on Sharepoint.

1. Retrieve the WalkMe Snippet

The snippet code is available from the WalkMe Editor. Learn how to install the editor. 
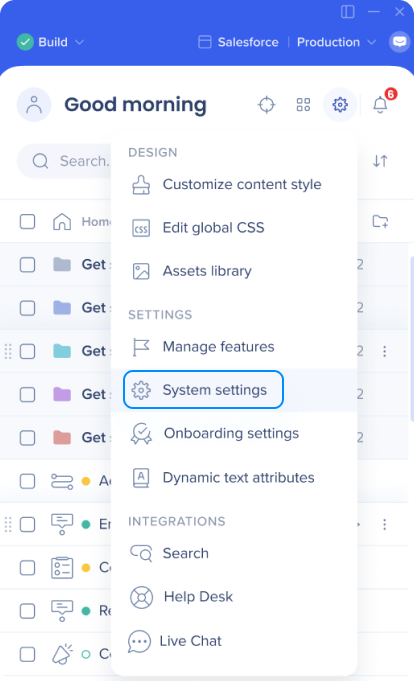
  1. Click the Settings icon in the editor to open System settings

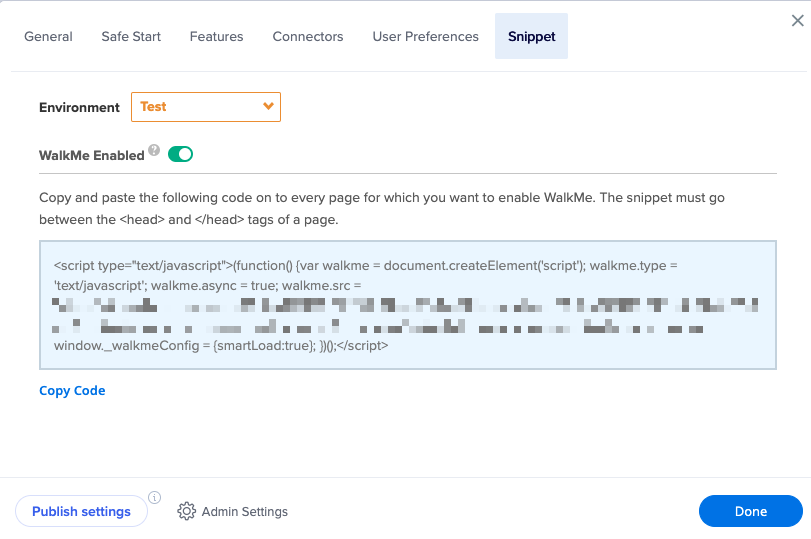
  2. Go to the Snippet tab
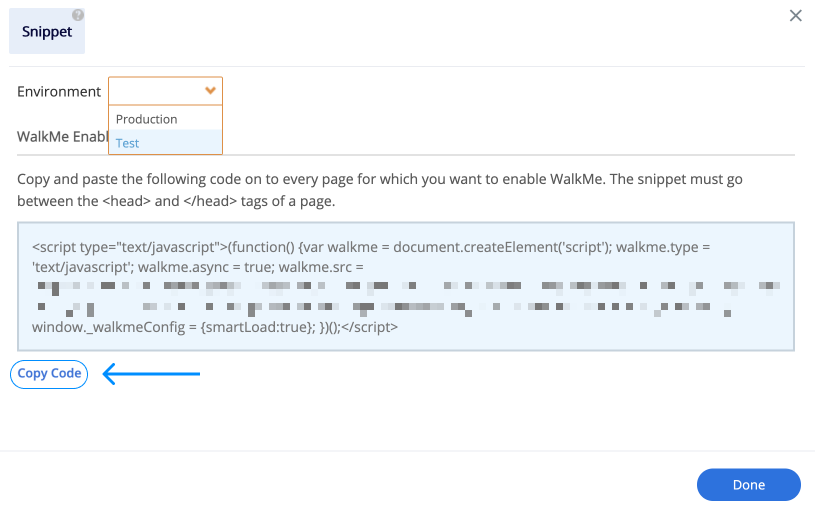
  3. Select the correct environment from the dropdown (Test/Production)
    • Each environment has a slightly different snippet code
    • If you have a test/sandbox/staging site, select the Test snippet
    • If you would like the snippet for publishing to your end-users, select the Production snippet

      Note

      The snippet environment will automatically select the environment open in the editor.

  4. Click Copy Code to copy the snippet

Note

If you aren't able to retrieve the snippet code, please contact our support team.

2. Find your Master Page

  1. Log in to SharePoint 2013 with a user who has Administrator permissions
  2. Click on the settings button, then click on Site Settings 
  3. Under Look and Feel, click Master Page
  4. View the master pages that you are using in the SharePoint environment and save the information for the next step. In this example below, the default page is Oslo

3. Add the Snippet to Your Site

  1. Open SharePoint Designer 2013 (Installed locally on your computer)
  2. Select Sites then click Open Site 
  3. In the Open Site window, select the web application for WalkMe and click Open. Make sure that you see the URL of the application in the Site name field before you click Open
  4. Log in to SharePoint Designer with a user who has Administrator permissions
  5. In the left navigation bar, select Master Pages
  6. Right-click the master page that you identified in the previous procedure and select Check Out. Then click Edit File in Advanced Mode 
  7. Add WalkMe snippet code to the page under the HTML tag 
  8. Click the Save button and close the page. If a popup window asks you to confirm, click Yes
  9. Right click the master page file again and select Check In.

This completes the Walkme setup. Go to your SharePoint website to see the WalkMe widget. You can now use the WalkMe editor to create and publish Walk-Thrus that will show up on your Dynamic CRM

Was this article helpful?

Thanks for your feedback!

Related Articles

Be part of something bigger.

Engage with peers, ask questions, share ideas

Ask the Community
×