Brief Overview
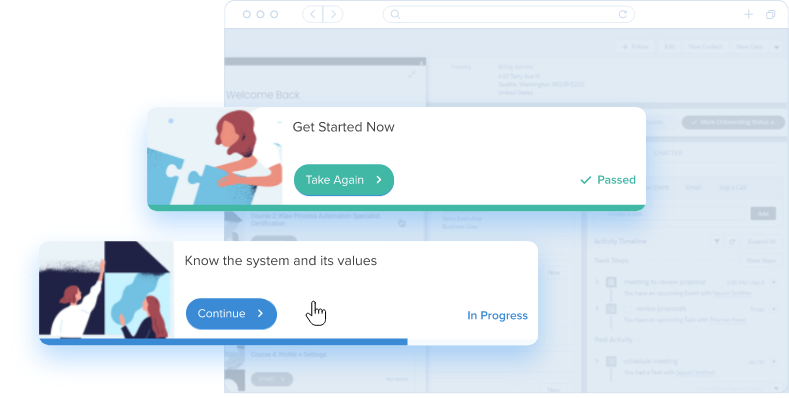
TeachMe is an App that lets you package your WalkMe experiences into learning modules and complete courses. Unlike other learning platforms, TeachMe allows users to learn your site system as they use it, without having to go back and forth between systems and screens. Learning is available to them in your application when it's most relevant to them.
Custom Feature
TeachMe is a custom-made learning environment. If you would like to offer multiple courses in a central portal for your user, TeachMe may be right for you. Contact your Customer Success Manager to learn more.
How It Works
You can build courses for TeachMe on the WalkMe Console (console.walkme.com/teachme) where you can also view your TeachMe Analytics.
Course Items
Courses are made up of lessons, which are organized within a Course Outline. Each Lesson is made up of items that you drag and drop into the relevant lesson. It has a similar functionality to the WalkMe Menu Organizer.
Before we get started on Course creation, let's first review the items you can use for your course:
- Smart Walk-Thrus - Guide your learners through a process with hands-on experience.
- Smart Walk-Thrus must be previously created in the editor in order to add them to a lesson.
- Resources (Articles & Videos) - Link to necessary articles and videos.
- You can use previously created resources from the Editor or create them directly from the TeachMe dashboard (see below: Step 2)
Create Course
Now that you have an idea of what creating a course entails, let's get building!
Step 1: Create New Course
From TeachMe:
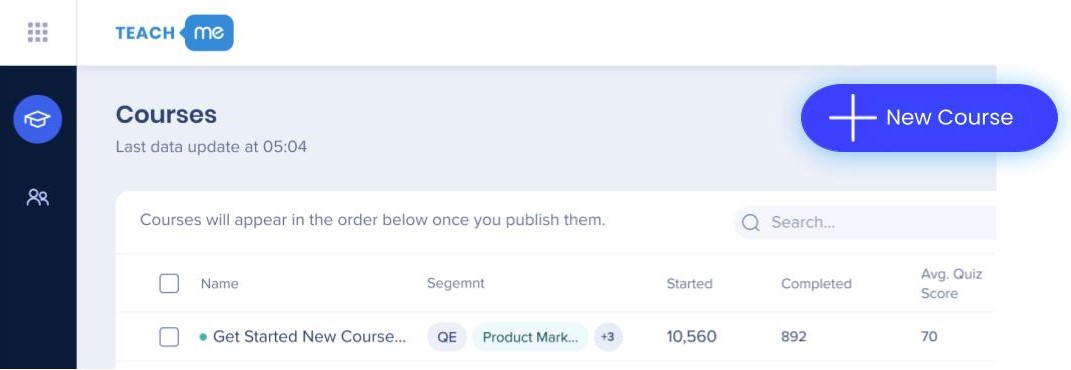
- Click + New Course.
The Course Editing page displays.
- Name the course.
Step 2: Create Lessons
We recommend that you categorize the different items by lessons within courses, rather than displaying each Item as a course in one long list.
From the Course Editing page:
- Click Add Lesson.
- Type the lesson name.
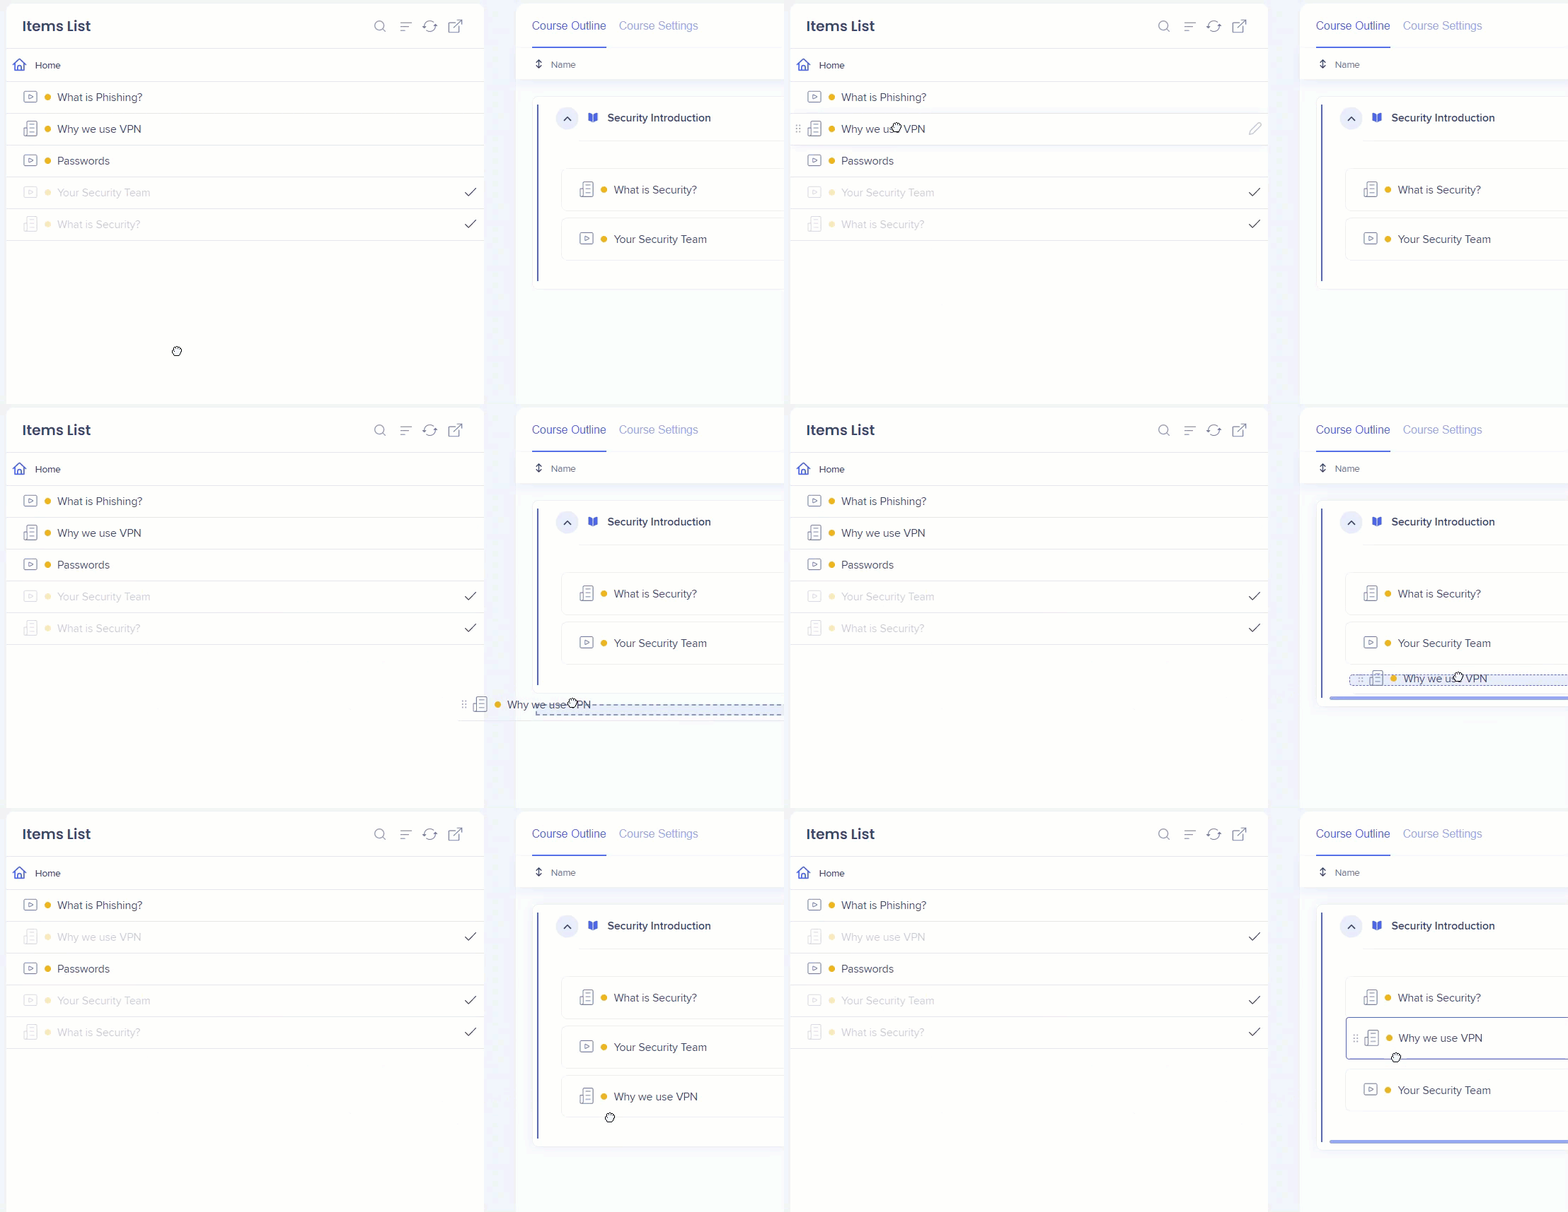
- Drag relevant items from the Item List to the Lesson.
- Items in the Item List are previously built in the Editor. This is similar functionality to building a Menu.
- Items include: Smart Walk-Thrus, Resources (articles, videos)
-
You can add items directly from the Course Builder. Click here to learn more.
It is possible to create new items directly from the TeachMe Course Builder.1. Click + in the bottom right corner of the Item List.
2. Select the type of Item you want to create (Smart Walk-Thru, Video, Article).Smart Walk-Thrus - New Smart Walk-Thrus can only be created via the Walkme Editor. Once it is created in the Editor, you can click the "refresh" button on the Items List to see the new item on the new TeachMe Editor.Resources (Articles and Videos) - Create a new Article or Video via the Dashboard by completing the "New Article" or "New Video" form.
- Click Save.
A course can have multiple lessons so repeat this step as many times as necessary.
Step 3: Set Goals and Progress
Goal Rules are evaluated once a course is opened. Goal completion is monitored after the user clicks on the specific learning item (i.e. the Smart Walk-Thru or Resource has been launched).
Limitation
When using the same SWT or Resource in two different courses, the goal has to be the same for both. This means that either “item is completed” or “reaching item's goal"
By clicking on the item itself, goals can be set to measure the completion or use of a Smart Walk-Thru or Resource, or use the Main Goal assigned to those items. Unlike Onboarding goal rules, TeachMe goal rules will be checked only after the user has engaged with the item.
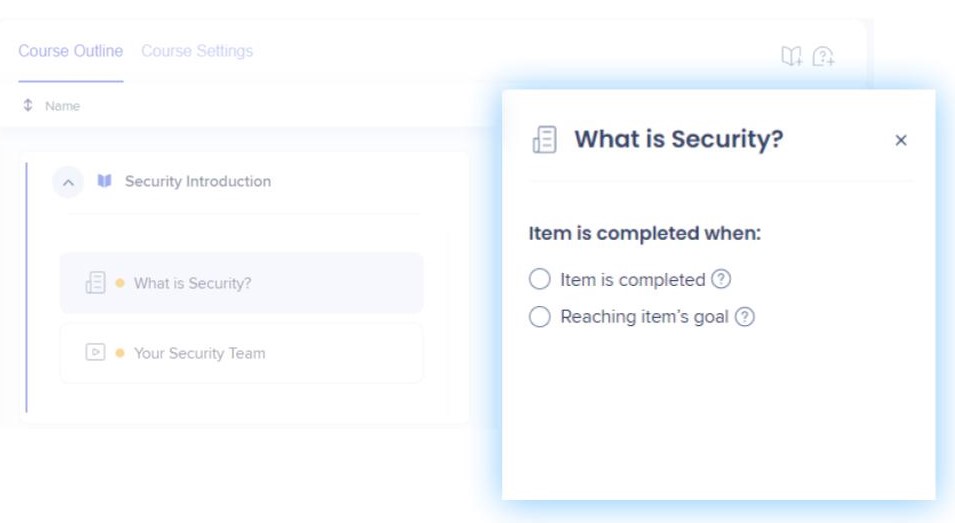
From the Course Editing page:
- Go to Course Outline.
- Click the Item for which you want to set a goal.
- Select the relevant item completion goal:
- Item is completed
- Reaching Item's goal
- Click Save.
Repeat for all necessary Lessons.
Step 4: Choose Segmentation
It's important to make your courses available only to the relevant Segment of users.
Course Segmentation will apply to all the items/lessons within the course.
Segmentation for TeachMe items within a Course is set by the Segment originally applied to the Walk-Thru or Resource.
From the Course Editing page:
- Go to Course Settings.
- Under Target Audience, select the relevant audience(s) for this course - you can choose multiple segments.
- Click Save.
New segments can only be created via the Walkme Editor. Once it is created, refresh the page to see the new segment in the segment dropdown. Courses can be Segmented using any of the standard rules in the Rule Engine.
Any changes to Goals or Segmentation require you to re-publish your course.
Now that you have a Course Outline, let's configure your course for the learning experience.
Configuring a Learning Path
Courses can be configured to be completed in a specific order using the Learning Path settings. Turn both toggles ON to enforce a specific course order.
From the Course Editing page:
- Go to Course Settings.
- Under Learning Path toggle ON relevant settings:
- Enforce order of courses.
- The next course will not be available until users complete the previous one. Course order is created on the Courses page.
- Enforce order of lessons/items in the Course Outline.
- The next item/lesson will not be available until users complete the previous one. Lesson/item order is created in the Course Outline.
- Click Save.
Change Course Image
You can replace the cover image of a course with custom images, which will be displayed to users who view this course.
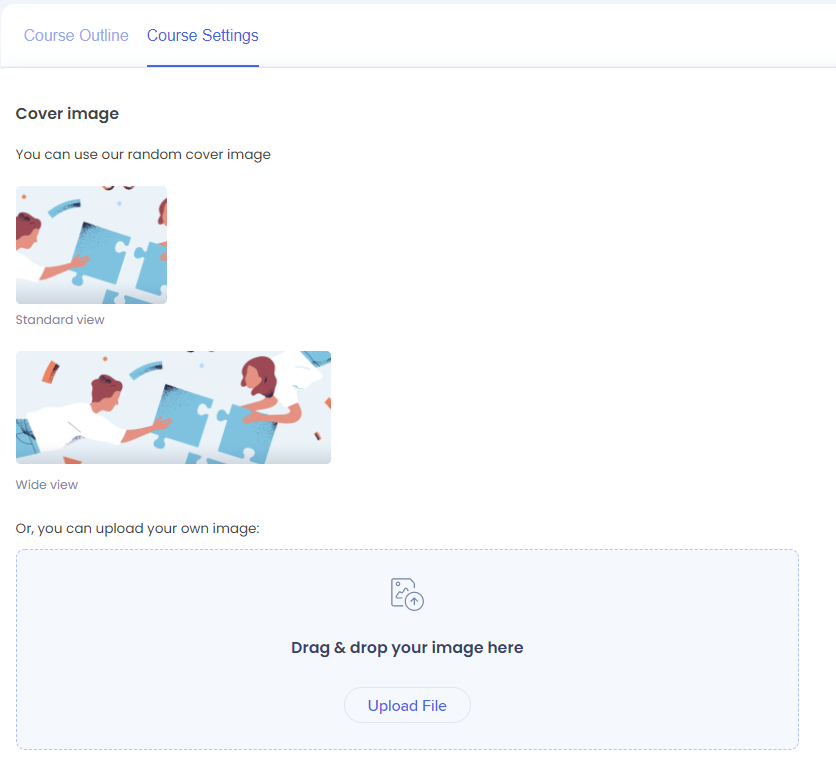
From the Course Editing page:
- Go to Course Settings.
- Under Cover Image, upload image file.
- Click Save.
Done! You made a course. Now let's add a quiz?
Add Quiz
Once the course content is complete, you can add a quiz at the end of the Course Outline. You can edit each quiz item by clicking it and using the right panel to edit it.
Each quiz includes the following items:
-
- Welcome Page - Customize the page that appear as the opening banner of the quiz.
- Questions - Add a question and choose from single or multiple selection question types.
- Summary - Customize separate messages for quiz Success ("Pass") and Failure ("Fail") that will display after the user submits an answer to the final question.
- Quiz settings - Configure the quiz with a variety of settings that will challenge or help your learners.
Step 1: Add Quiz
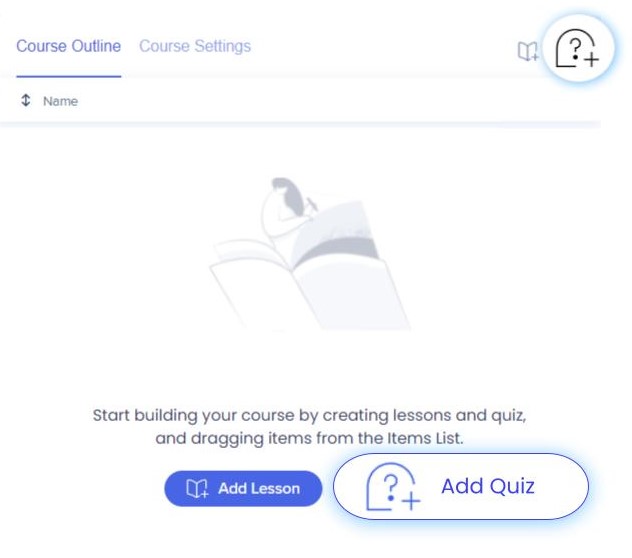
From the Course Editing page:
- Go to Course Outline.
- Click Add Quiz.
- Click Save.
⚠️ Only one quiz can be added per course.
You can configure your quiz in a variety of ways.
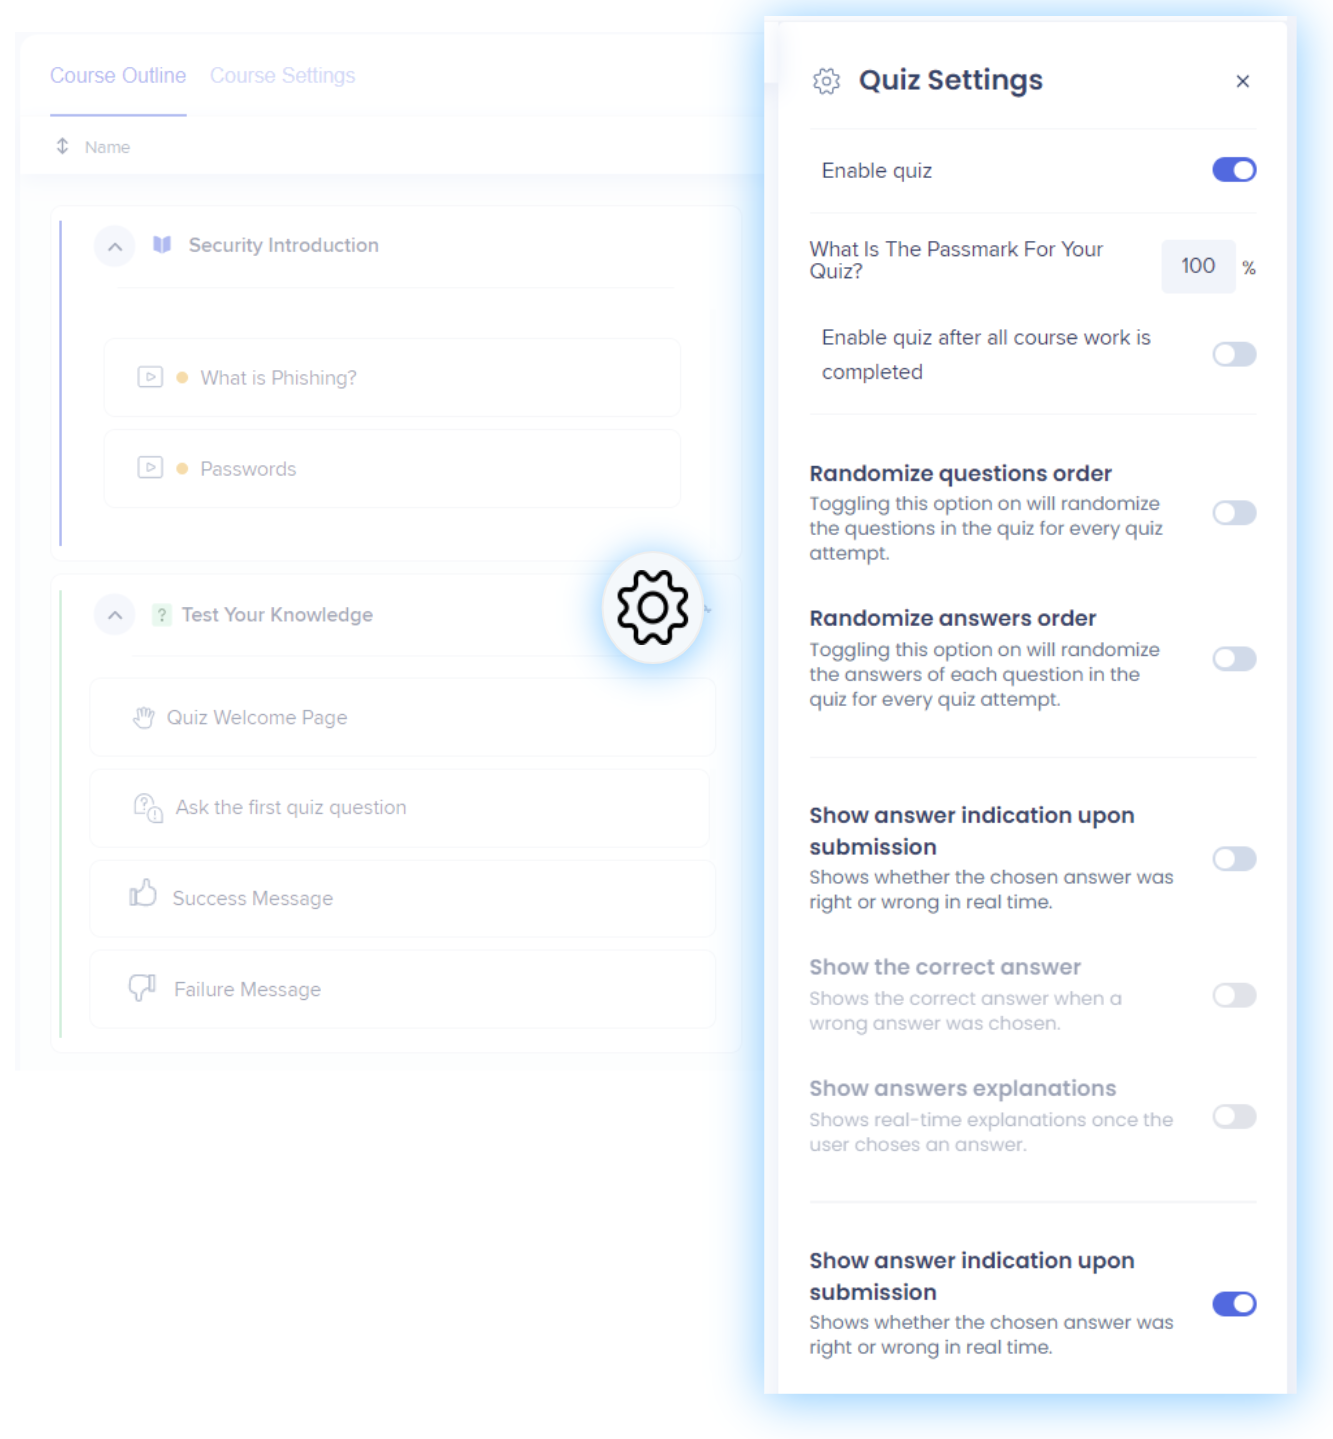
To change quiz settings, click the Settings icon.
See explanations below and toggle settings relevant to the course:
- Enable Quiz - Turn on the toggle for the quiz to be available after the course.
- What is the passmark for your quiz? - Decide a minimum percentage (out of 100) in order for a learner to pass the quiz.
- Enable quiz after all course work is completed - The quiz will only appear after all the courses have been completed.
- Randomize question order - Turning on this option will randomize the questions in the quiz for every quiz attempt.
- Randomize answer order - Turning on §this option will randomize the answers for each question in the quiz for every quiz attempt.
- Show answer indication upon submission - Shows whether the chosen answer was right or wrong in real-time.
- Show the correct answer - Shows the correct answer when a wrong answer was chosen.
- Show answer explanations - Shows real-time explanations once the user chooses an answer.
Step 3: Edit Welcome Page
This page will appear as the opening banner of the quiz. You can customize the quiz title and add a short description (i.e. the purpose of the quiz, estimated time, total number of questions etc.), and add the quiz action button.

From the Course Editing page:
-
- Under Test Your Knowledge, click Quiz Welcome Page.
- Complete the following fields:
- Title - Type your quiz title.
- Description - Type a short description of the quiz.
- Button - Type the action word for your quiz.
- Click Save.
Step 4: Add Questions
Add a question using the plus icon on the top of the quiz, and choose from Single Selection or Multiple Selection question types.
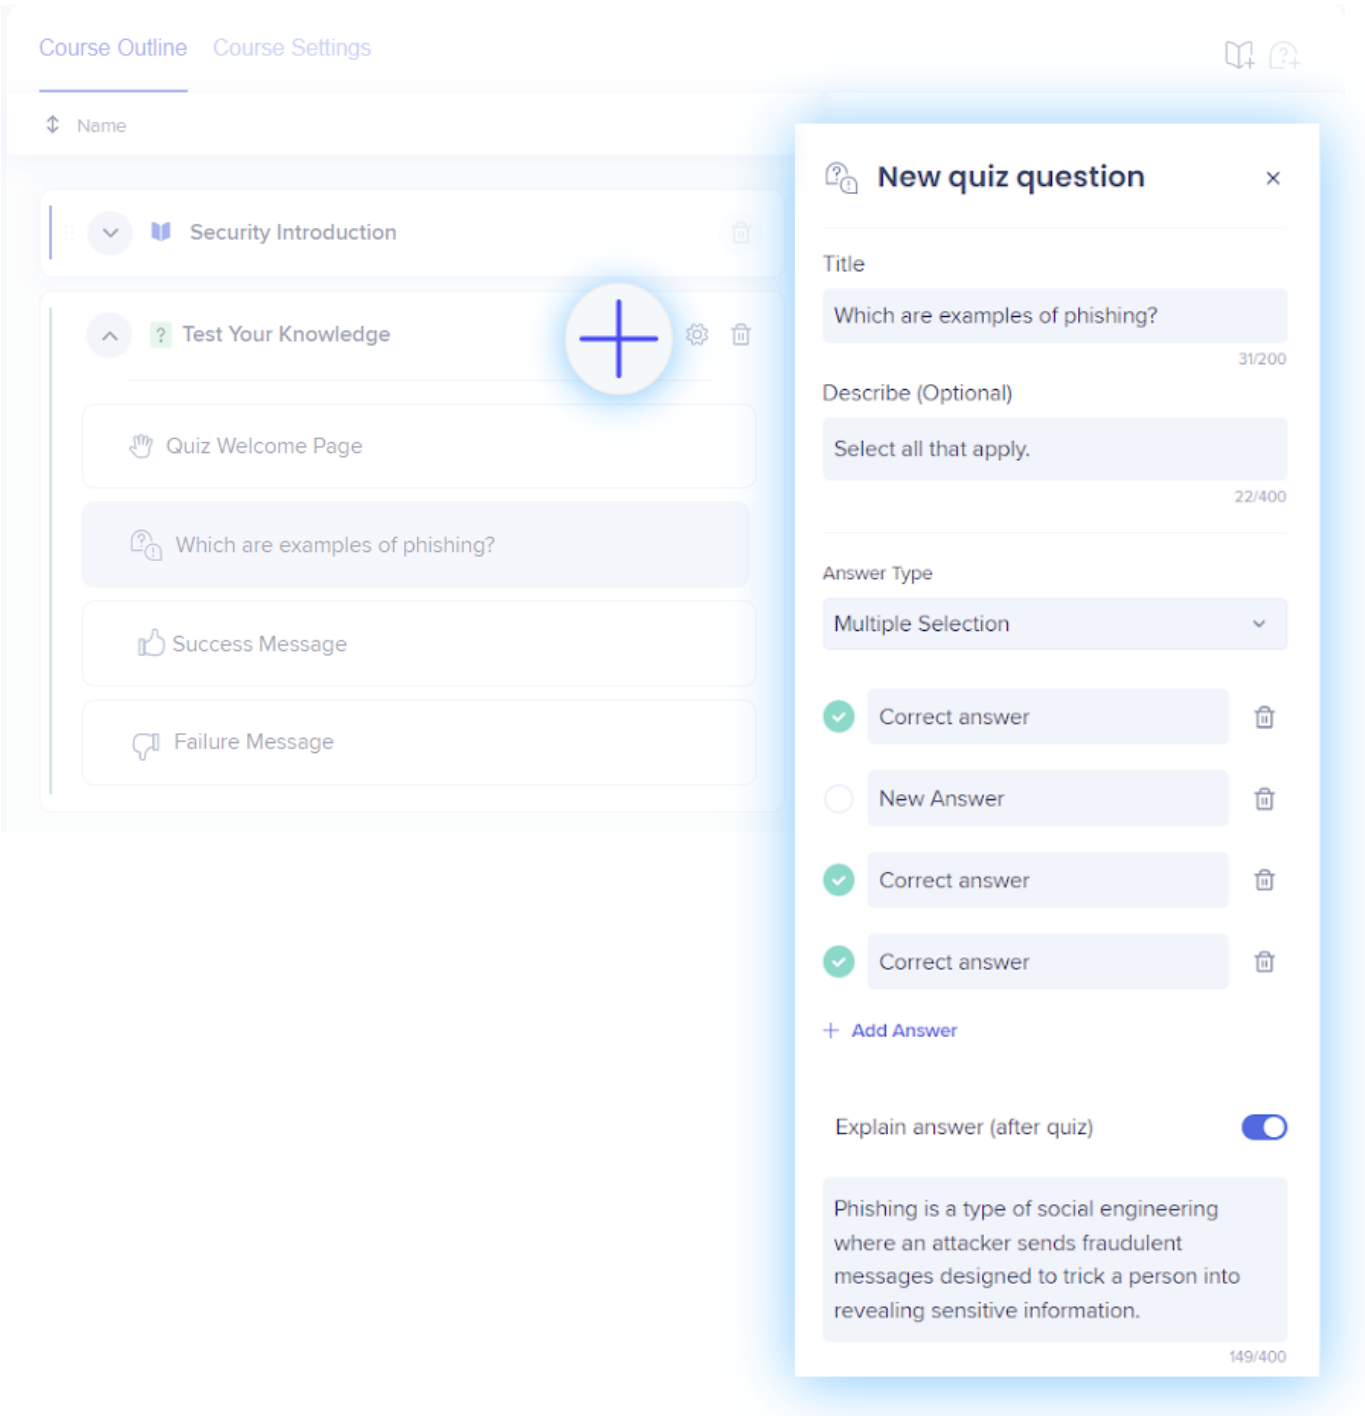
To add a question:
- Click + next to Test you Knowledge
- Complete the following fields:
- Title - Type the question.
- Describe - Optionally, type a short description.
- Answer type - Choose single selection (one answer) or multiple selection (multiple answers)
- Explain answer - Optionally, type a short explanation that will show once the answer has been submitted.
- Click Save.
Repeat for all questions.
Step 5: Add a Summary
Customize separate messages for Success ("Pass") and Failure ("Fail") that will display after the user submits the answer to the final question.
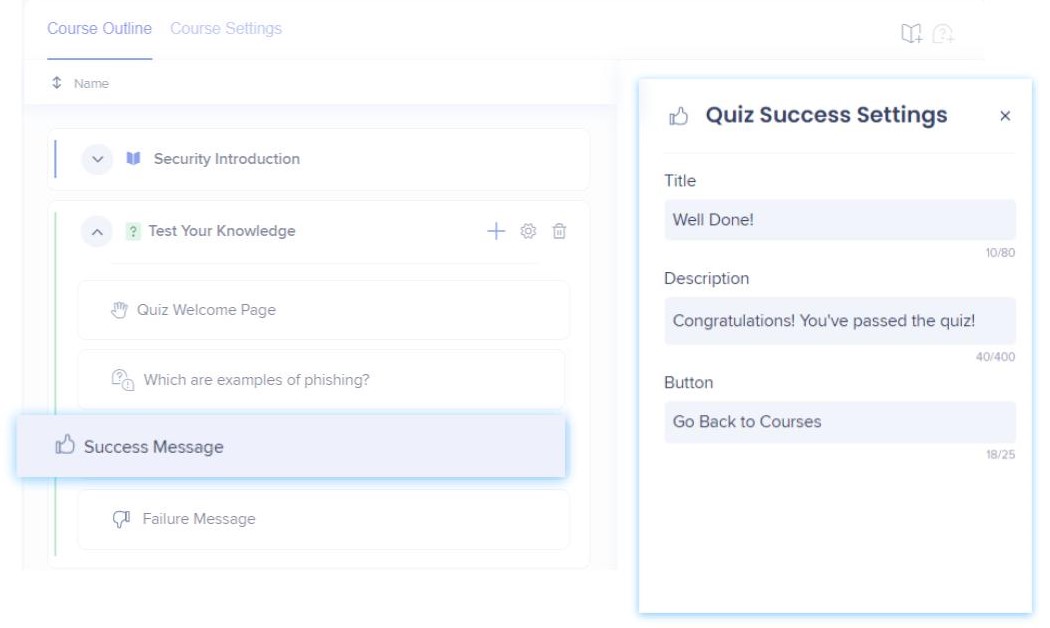
From the Course Editing page:
- Under Test Your Knowledge, click Success Message or Failure Message
- Complete the following fields:
- Title - Type your success or failure message
- Description - Type a short description.
- Click Save.
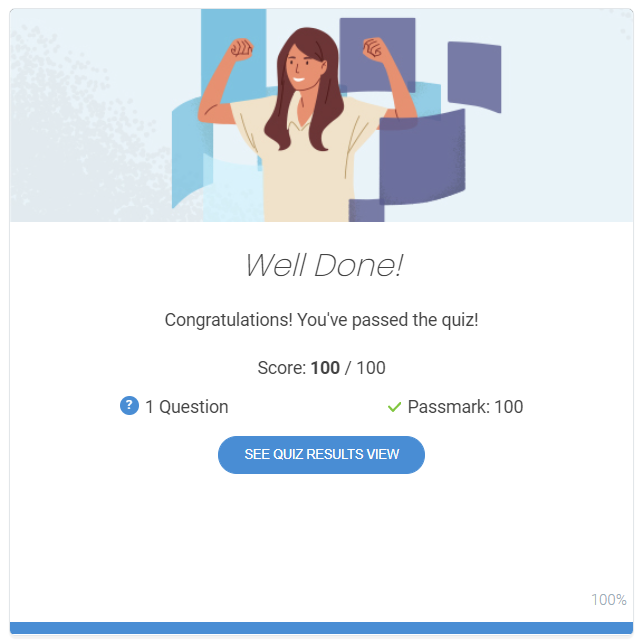
You can keep the quiz in draft mode by keeping the Enable quiz toggle turned OFF. When you are ready to publish the quiz, turn the switch to ON.
Note
If you want a course to be marked as completed when a Smart Walk-Thru is finished, the Smart Walk-Thru needs to end in the top frame. If the Smart Walk-Thru includes a step to switch to an iframe (Switch to Frame), you must add another step to switch back to the top frame before it ends (rule: current flow => is not in internal iframe). If you don't, the Smart Walk-Thru will be marked as completed in the iframe instead of the top frame, which can cause issues with the course's completion validations.
Publish Course
Now that you have built your course, it's time to publish!
Publishing is as simple as clicking a button (okay, maybe two buttons). Take a look:

Step 1: Click Publish
From the course editing page:
- Click Publish.
- In the Review Your Course pop-up, select the environment to which you want to publish:
- Click Publish to [environment].
Done! That was easy, right?


