Brief Overview
AI Chat is where you create and manage assistants for your users. Assistants connect to different sources — AI public models, ActionBot, WalkMe in-app content, and more — giving users one place to get answers, complete tasks, and navigate their applications without leaving their workflow.
AI Chat is built around the Unified AI Chat, a single interface where smart routing automatically directs each query to the most relevant assistant. Optionally, you can also set up Independent Assistants — stand-alone assistants users can select from a dropdown, each opening in its own tab, for when you want to give users direct access to a specific assistant.
Once configured, AI Chat is surfaced to users in the locations you enable.
Access
Access the AI Chat in the console:
-
Open the WalkMe Console:
-
Go to the Content category
-
Select AI Chat
-
AI Chat contains two pages: Assistants and Locations
Assistants Page Overview
The Assistants page is where you create, view, and manage your AI assistants. It has two tabs: AI Assistants and Appearance.
-
The Assistants tab lets you create and manage assistants that power the chat interface, either as part of unified chat or as standalone independent assistant
-
The Appearance tab lets you control the look and feel of the chat interface, including welcome messaging and logo branding
AI Assistants tab
Each assistant appears as a card showing its name, description, and current status. Assistants are organized into two sections depending on how they're surfaced to users — Unified AI Chat and Independent Assistants. From here you can create new assistants or select an existing one to edit.
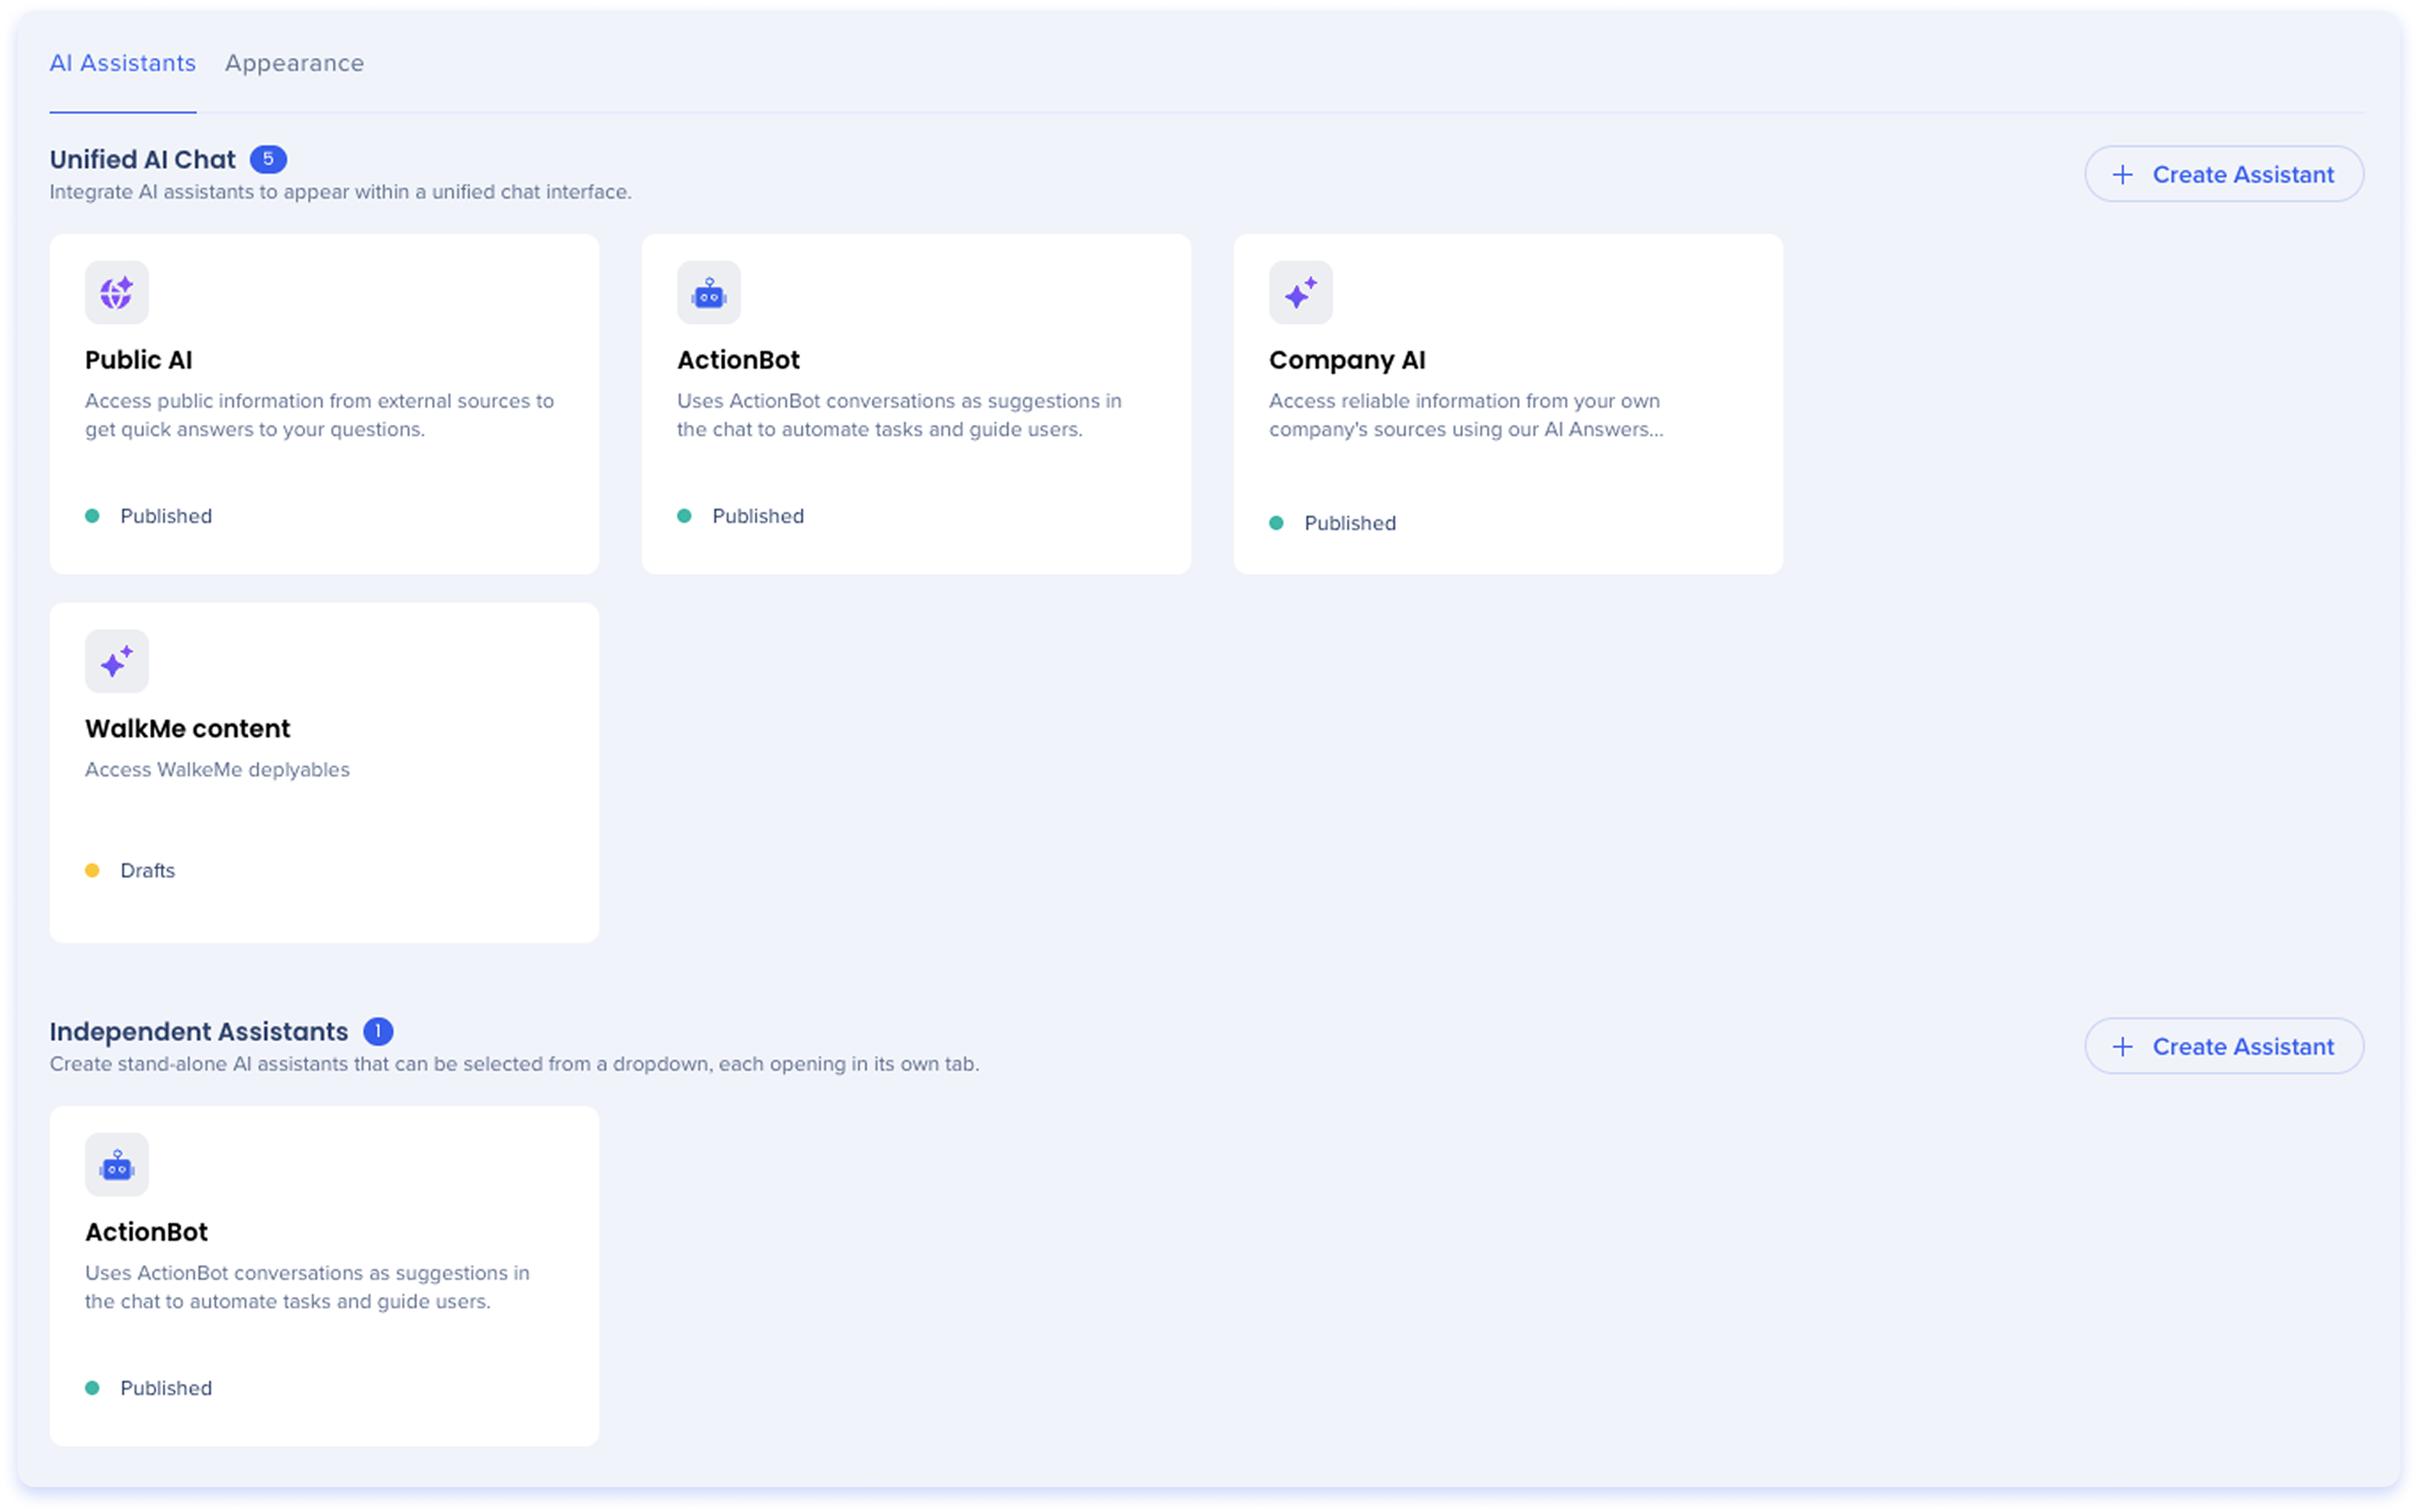
Status
Each assistant card displays its current status. The status indicates whether the assistant is available to users.
-
Published: The assistant is live and available to users
-
Unpublished: The assistant has been published before but is currently not available to users
-
Draft: The assistant has never been published. Changes are saved but users can't see it yet
Unified AI Chat
The Unified AI Chat section displays all assistants integrated into the unified chat interface. When a user opens AI Chat, smart routing directs their query to the most relevant assistant automatically.
The section header shows the number of assistants currently added to the unified interface.
Key Benefits
-
One interface, multiple assistants
-
Automated smart routing to the best source
-
Maximize answer quality by leveraging all available chat bots
Independent Assistants
Independent Assistants are stand-alone assistants available to users via a dropdown selector. Each assistant opens in its own tab, giving users direct access to a specific assistant for a specific purpose.
Key Benefits
-
Offers direct, isolated assistant control
-
Limit what sources your audience can access
-
Test new assistants before rolling them into the unified experience
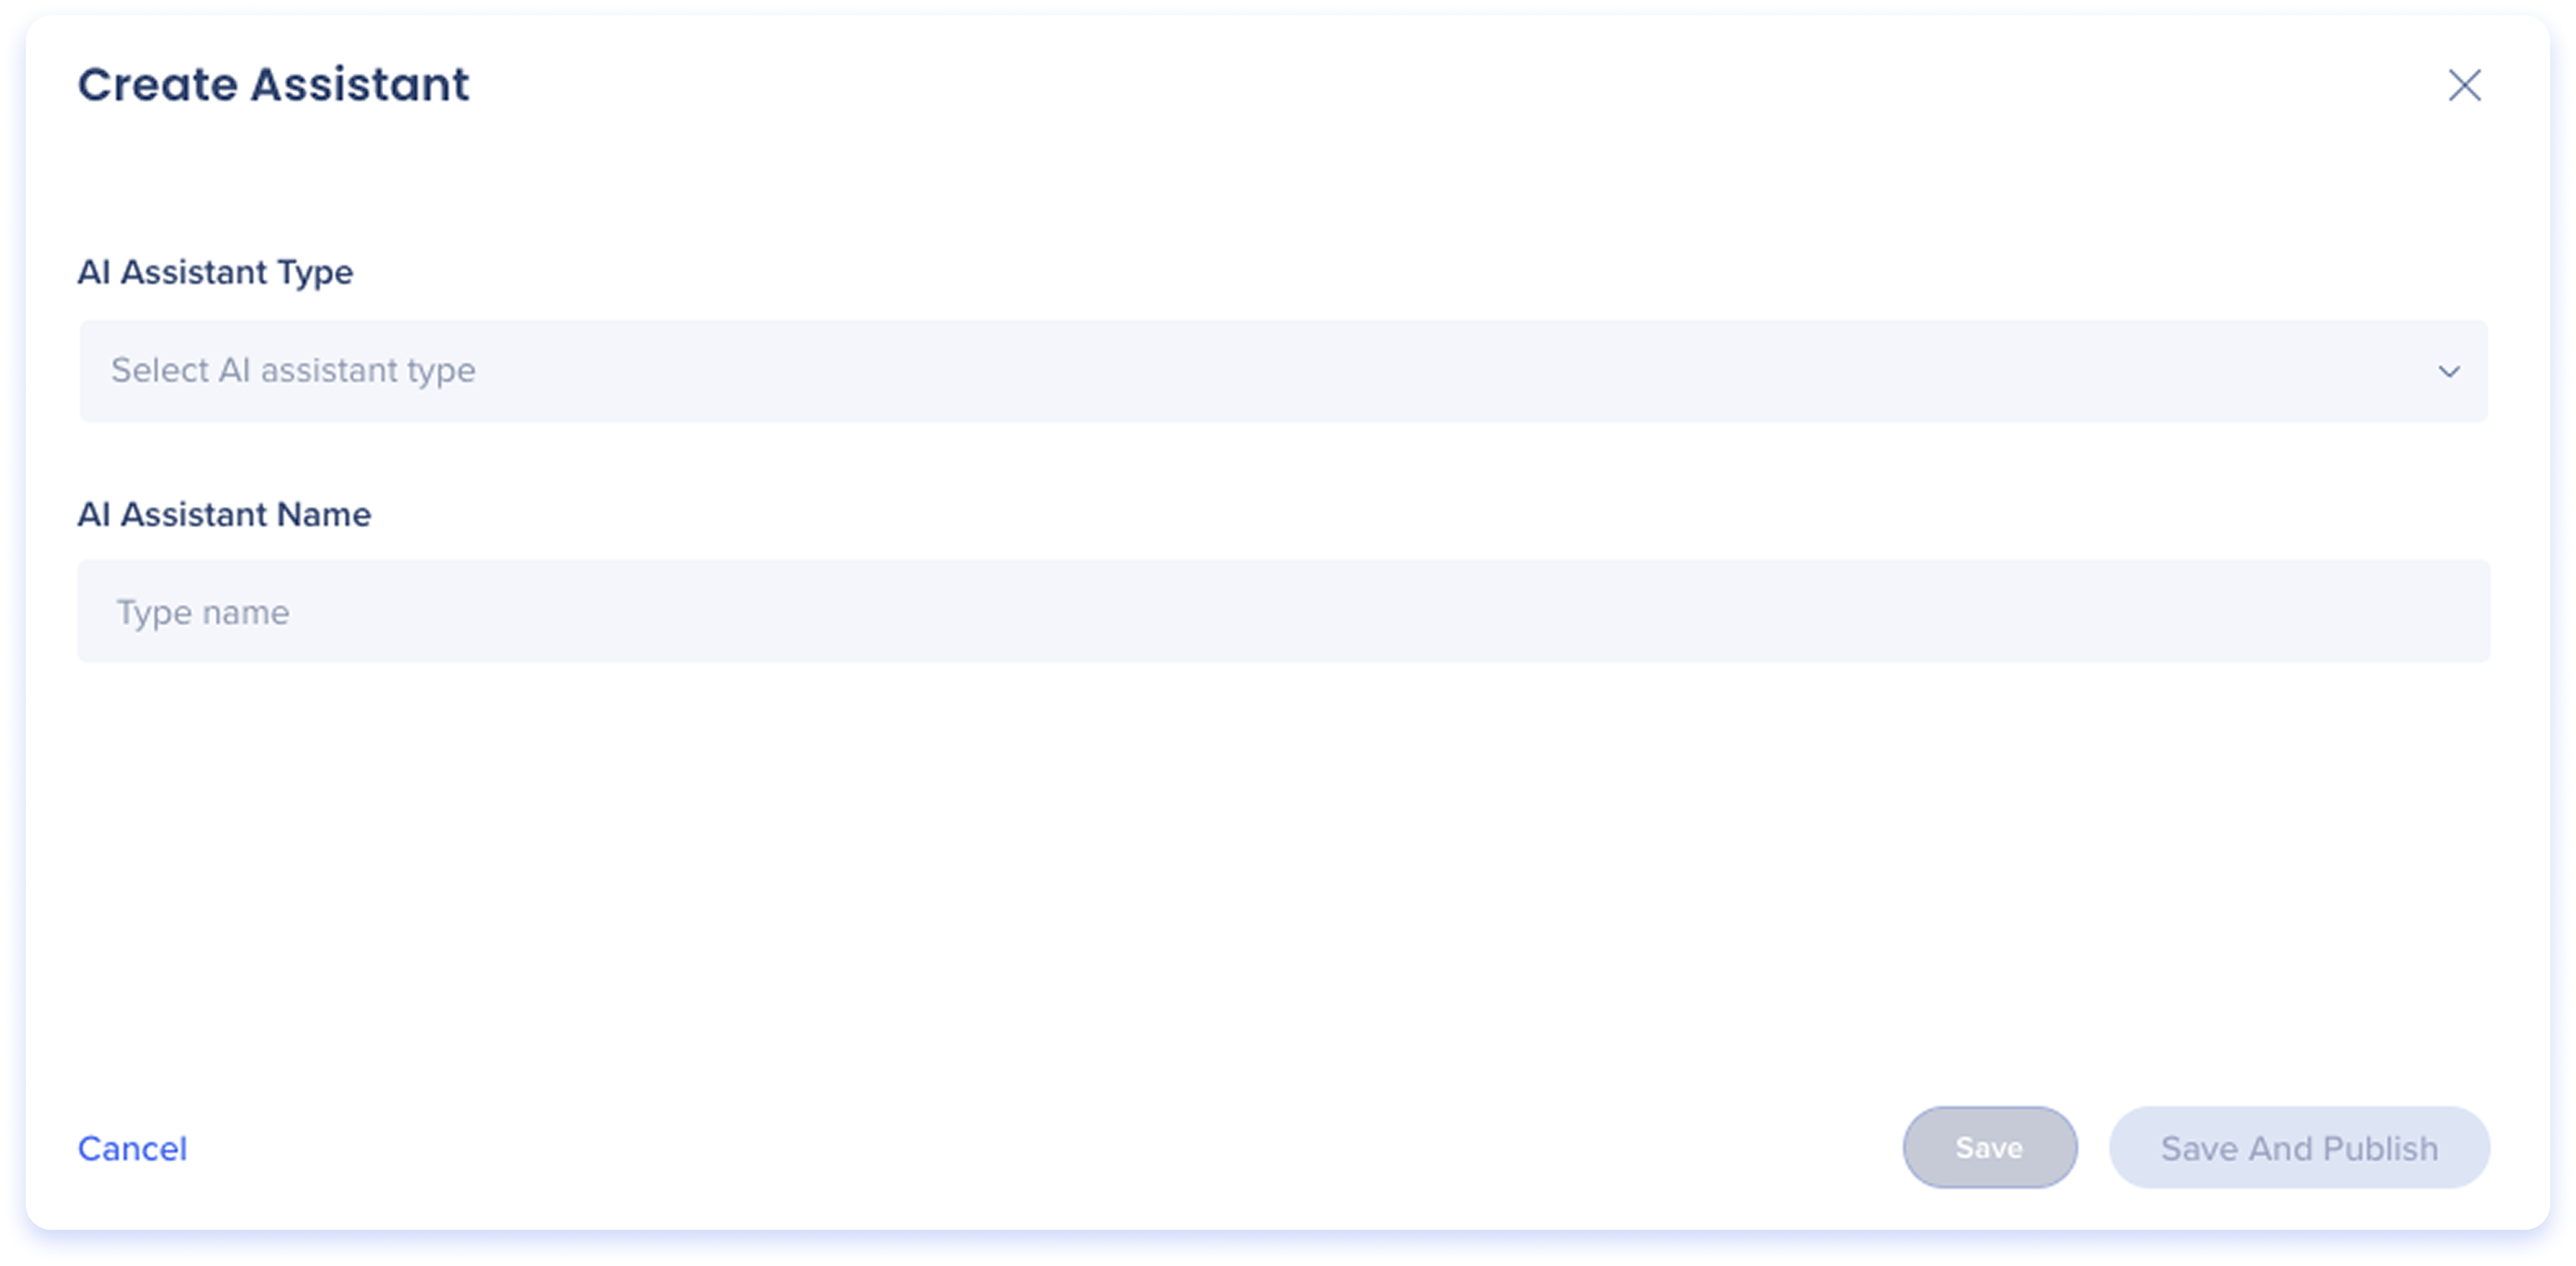
Creating an assistant
- On the Assistants page, select + Create Assistant — either in the Unified AI Chat section or the Independent Assistants section, depending on where you want the assistant to appear

-
Select an assistant type
-
If needed, enter the assistant's configuration details provided by the assistant's platform
-
Save as a draft, or save & publish the assistant
Appearance tab
The Appearance tab is where you customize how AI Chat looks and feels for your end users. Changes are reflected in the live preview on the right side of the screen.
To view or edit settings for an independent assistant, select it from the assistant list at the top of the page.
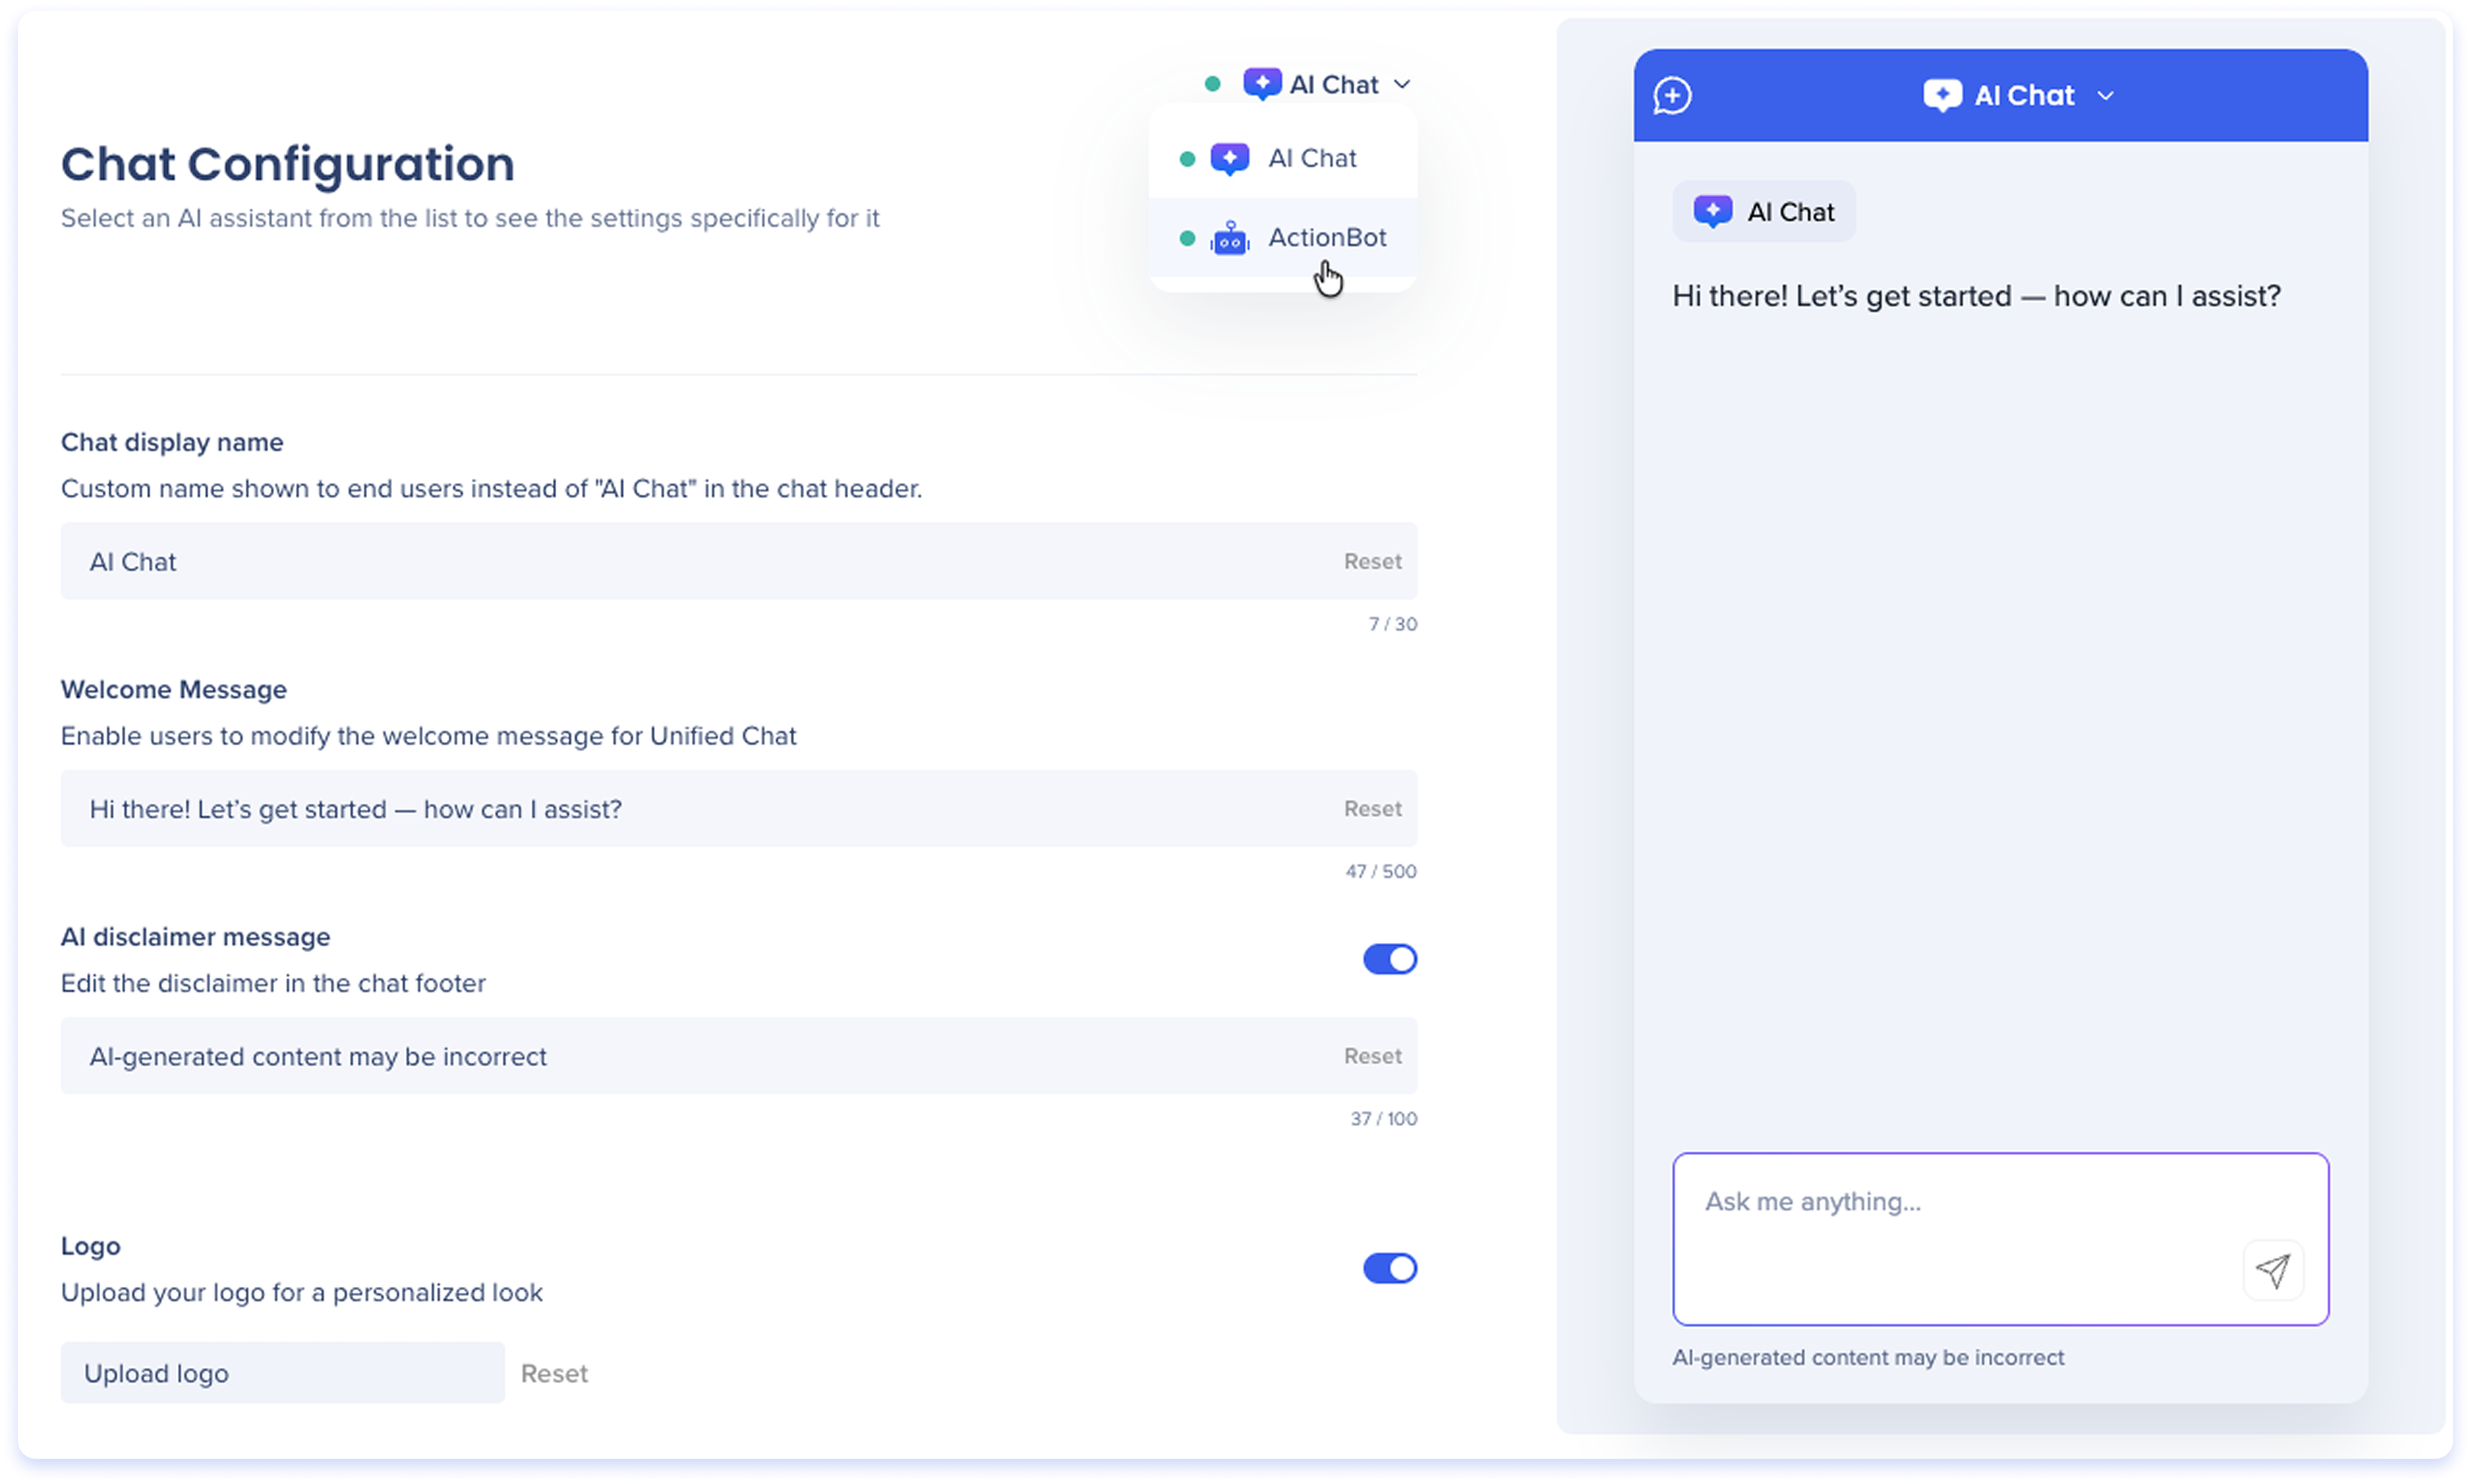
Chat display name
The name shown to end users in the chat header instead of the default "AI Chat." Enter a custom name to match your organization's branding.
Welcome message
The opening message users see when they start a chat session. This applies to the Unified AI Chat interface.
AI disclaimer message
A disclaimer displayed in the chat footer to let users know that AI-generated content may be incorrect. Turn the toggle on or off to show or hide the disclaimer.
Logo
Upload a custom logo to personalize the chat interface. Turn the toggle on or off to show or hide the logo.
Locations Page Overview
The Locations page controls where AI Chat is available to your users.
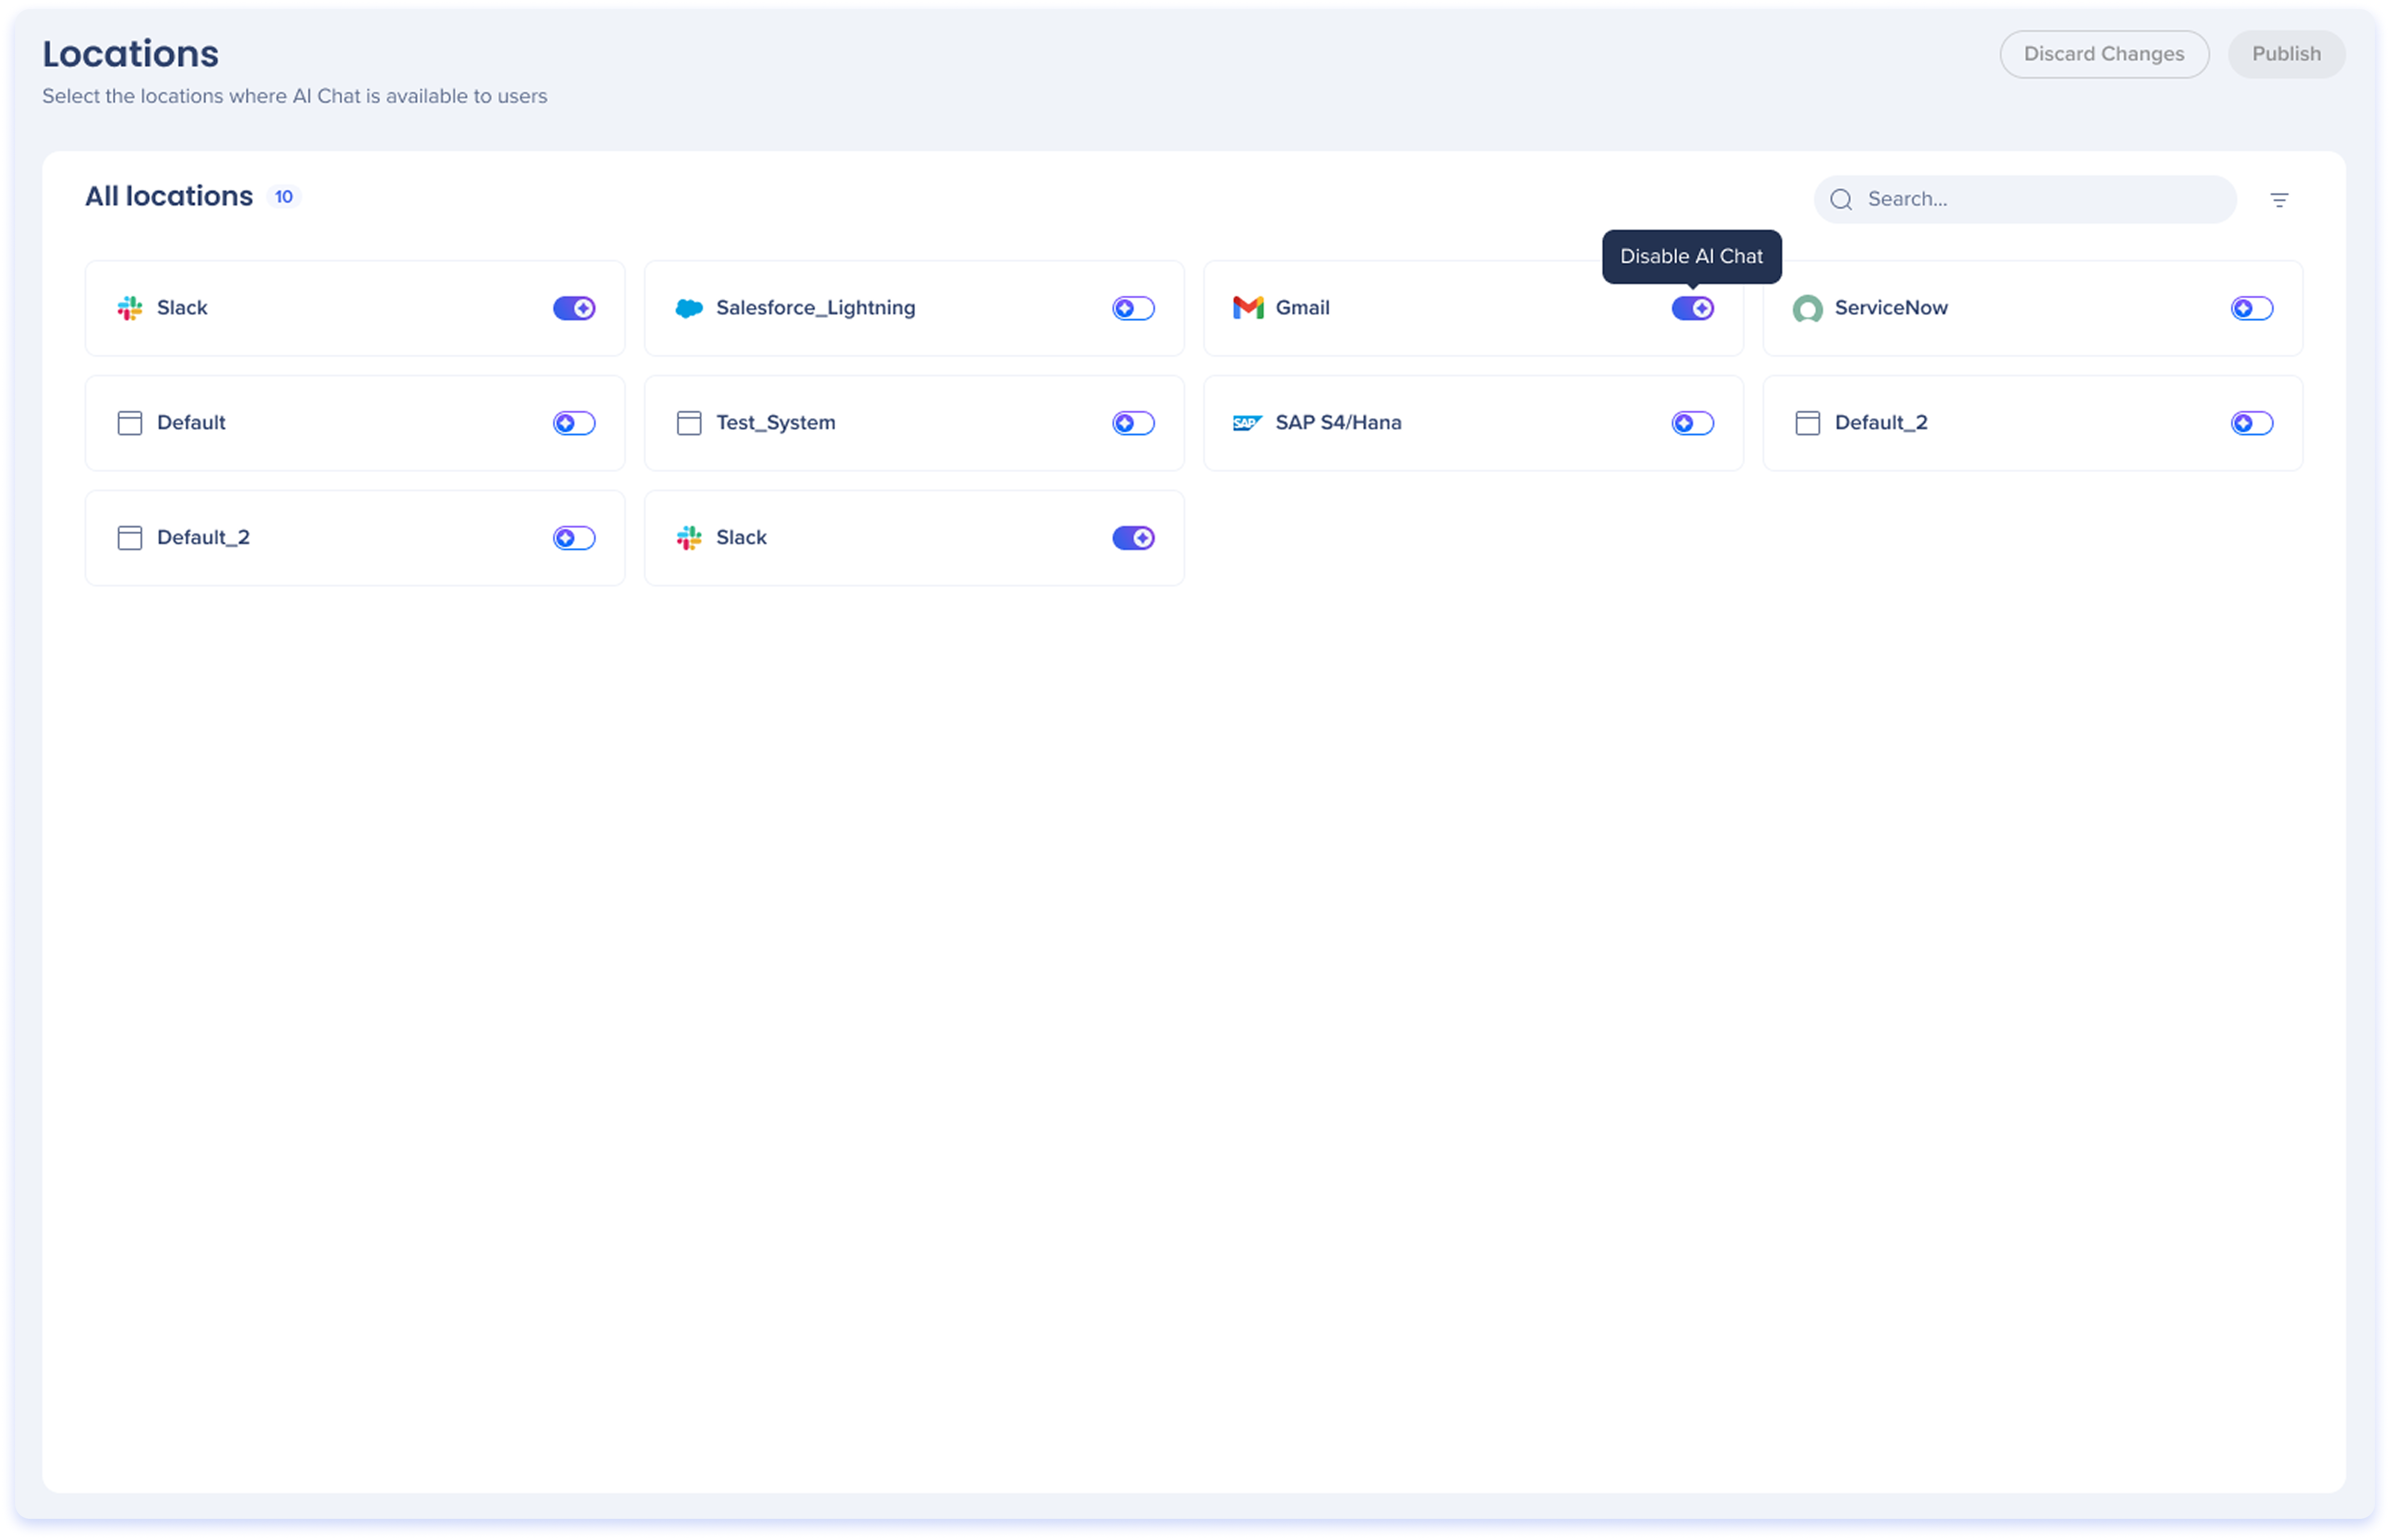
To enable or disable AI Chat for a location:
-
Find the location you want to update
-
Use the search bar to filter by name, or select the filter icon to filter by status
-
Toggle the switch next to the location:
-
Select Publish to apply your changes. To undo your changes before publishing, select Discard Changes
- A confirmation dialog will appear after selecting Publish. Publishing applies all current settings to production. Wherever AI Chat is enabled, the chat interface will update to align with the new AI Chat experience
Note
If you currently use ActionBot, enabling AI Chat will update the chat interface your users see. Review your locations carefully before publishing.
Technical Notes