Brief Overview
The AI Center in the Admin Center is a powerful tool for admins to monitor their AI usage across various systems and applications. It also includes an AI settings page where admins can connect knowledge sources to AI Answers and enable AI Answers for their integrations.
The AI Center offers an AI file scanning capability that enhances the versatility and effectiveness of conversational search, ensuring users have access to the information they need in the flow of work. Additionally, admins can request for webpages to be scanned, but this process must be requested though their CSM.
Admins can also request segmentation to knowledge sources to boost the accuracy of answers and improve compliance by ensuring access to information is restricted to the right users.
Note
Access to different AI Center tabs and capabilities varies depending on the WalkMe plan you've selected.
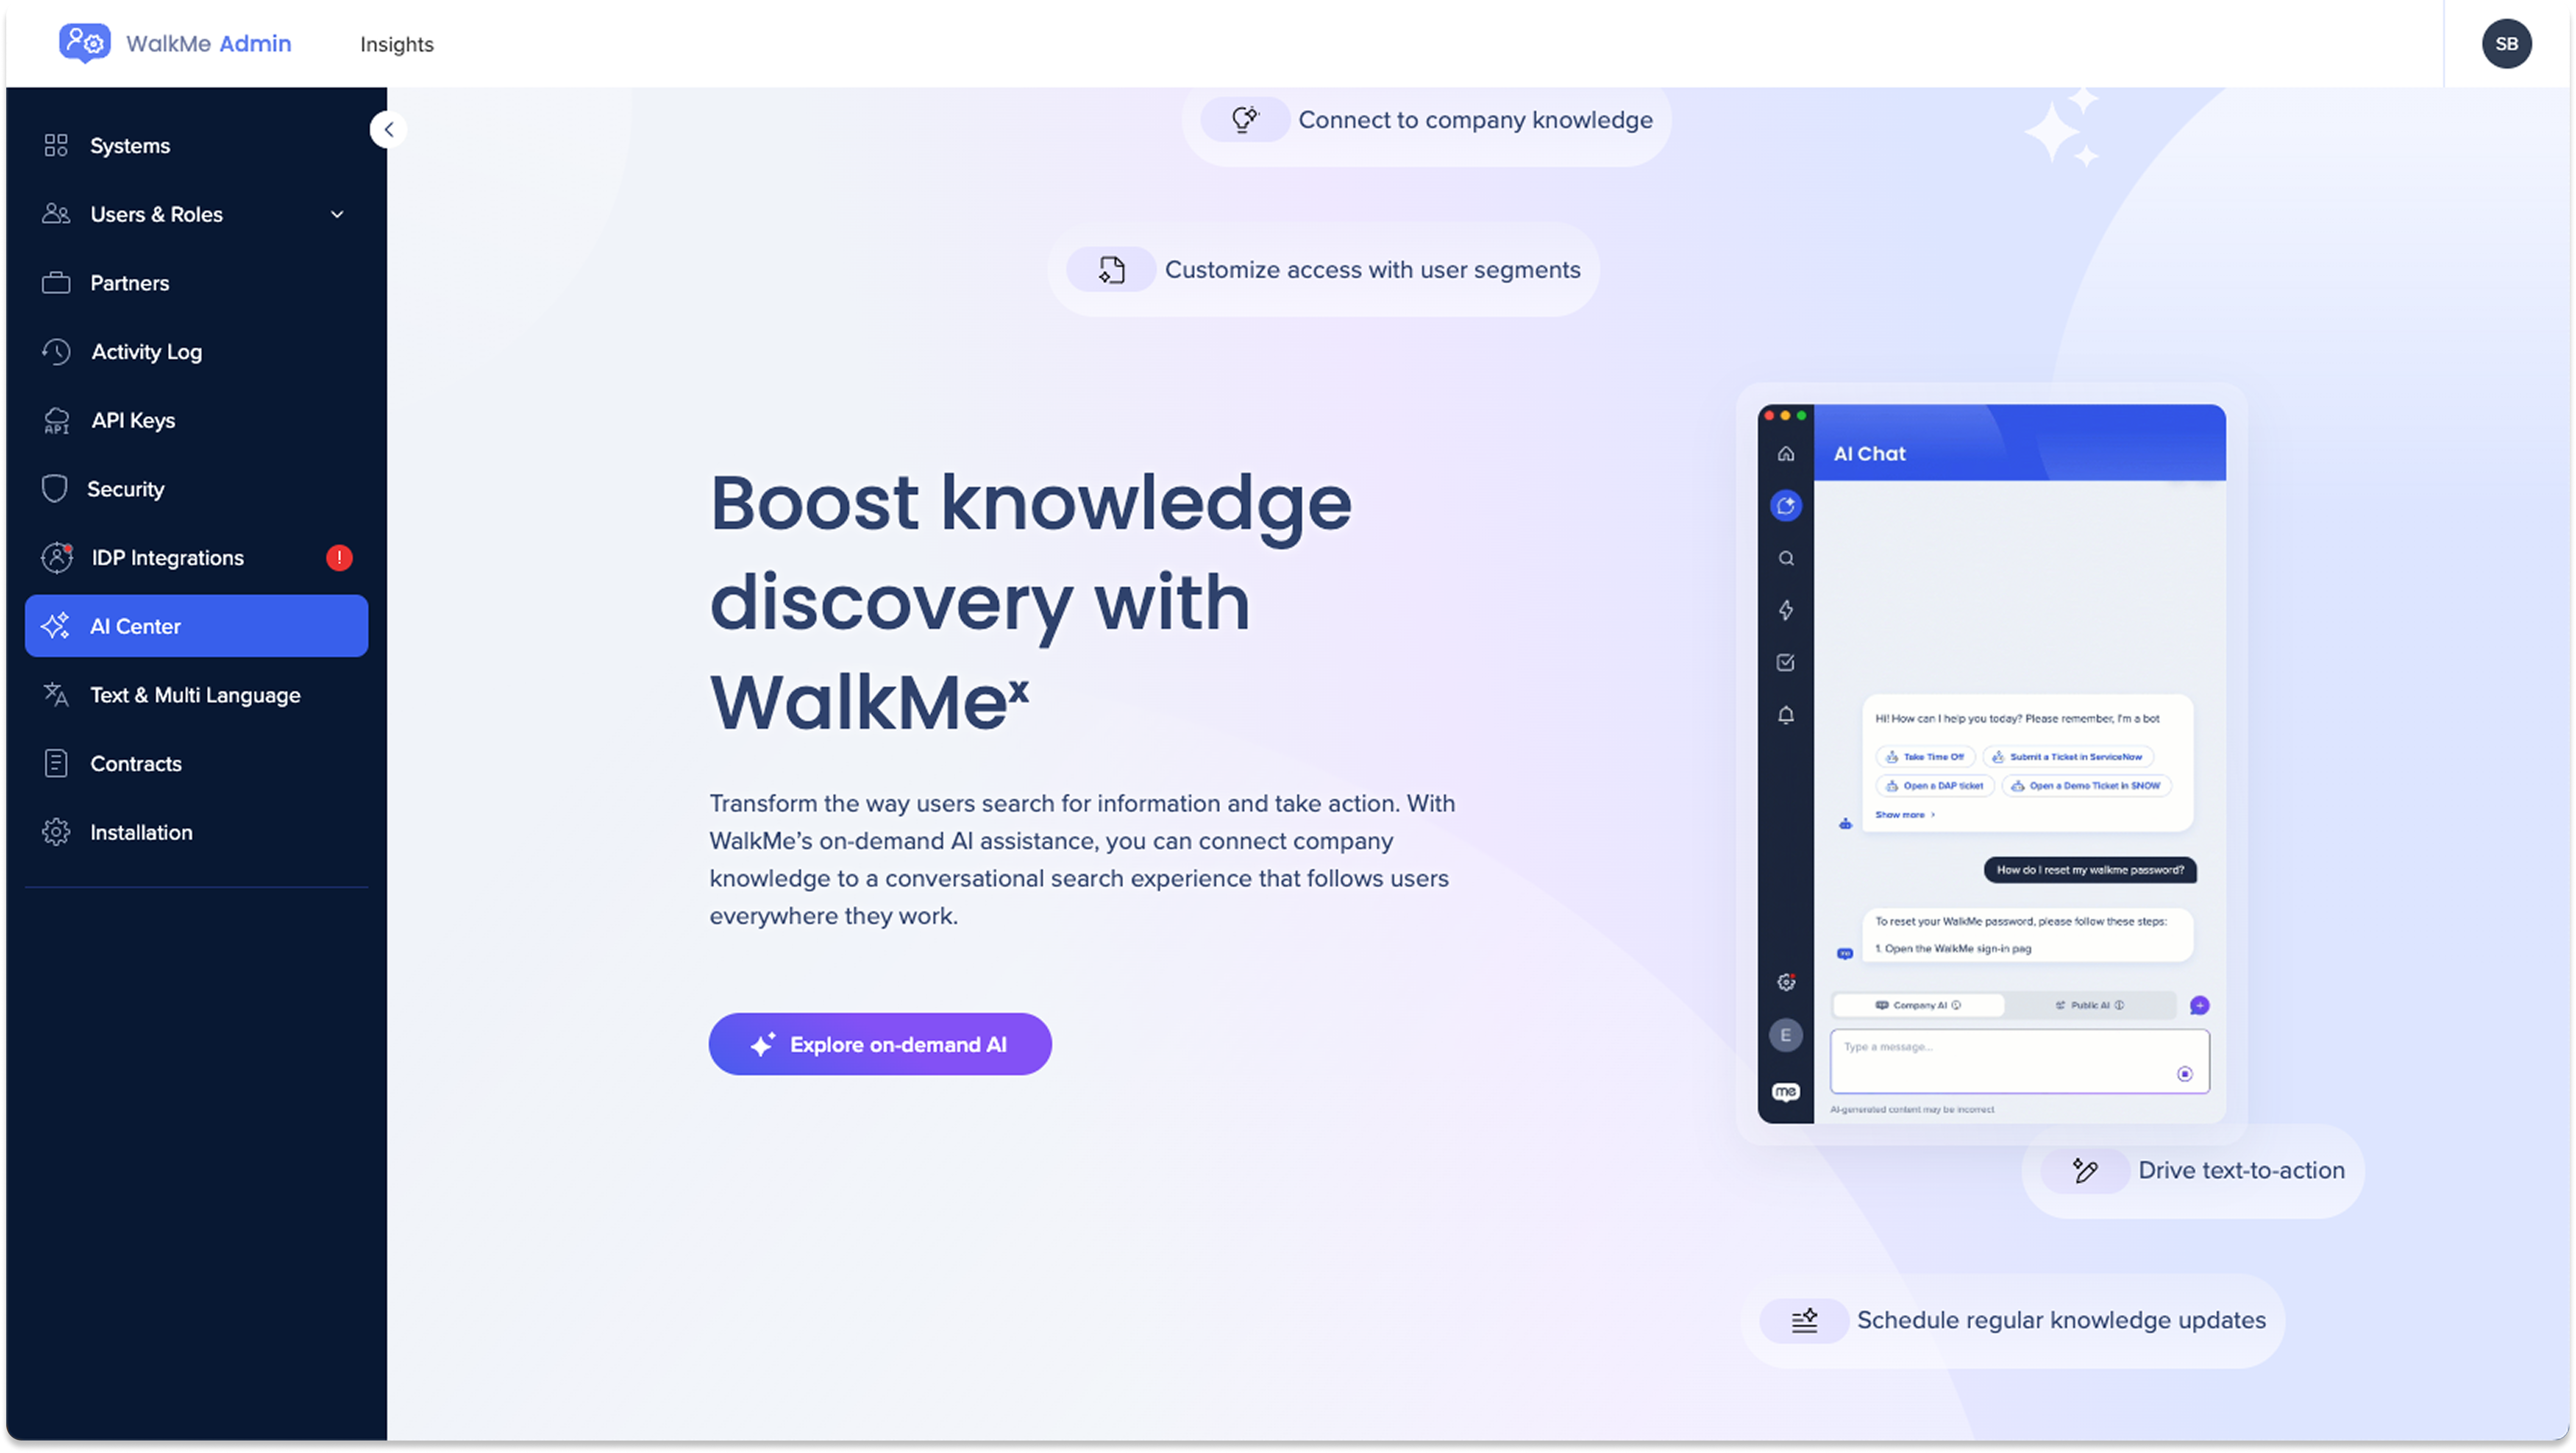
How to Access
The AI Center can be accessed from the Admin Center at admin.walkme.com.
- The AI Center includes two tabs: AI usage and AI settings
Getting started
- If you have not yet purchased an AI features plan, the getting started screen will appear
- By clicking on Get Access Now, you will be redirected to the AI SmartTips Landing page
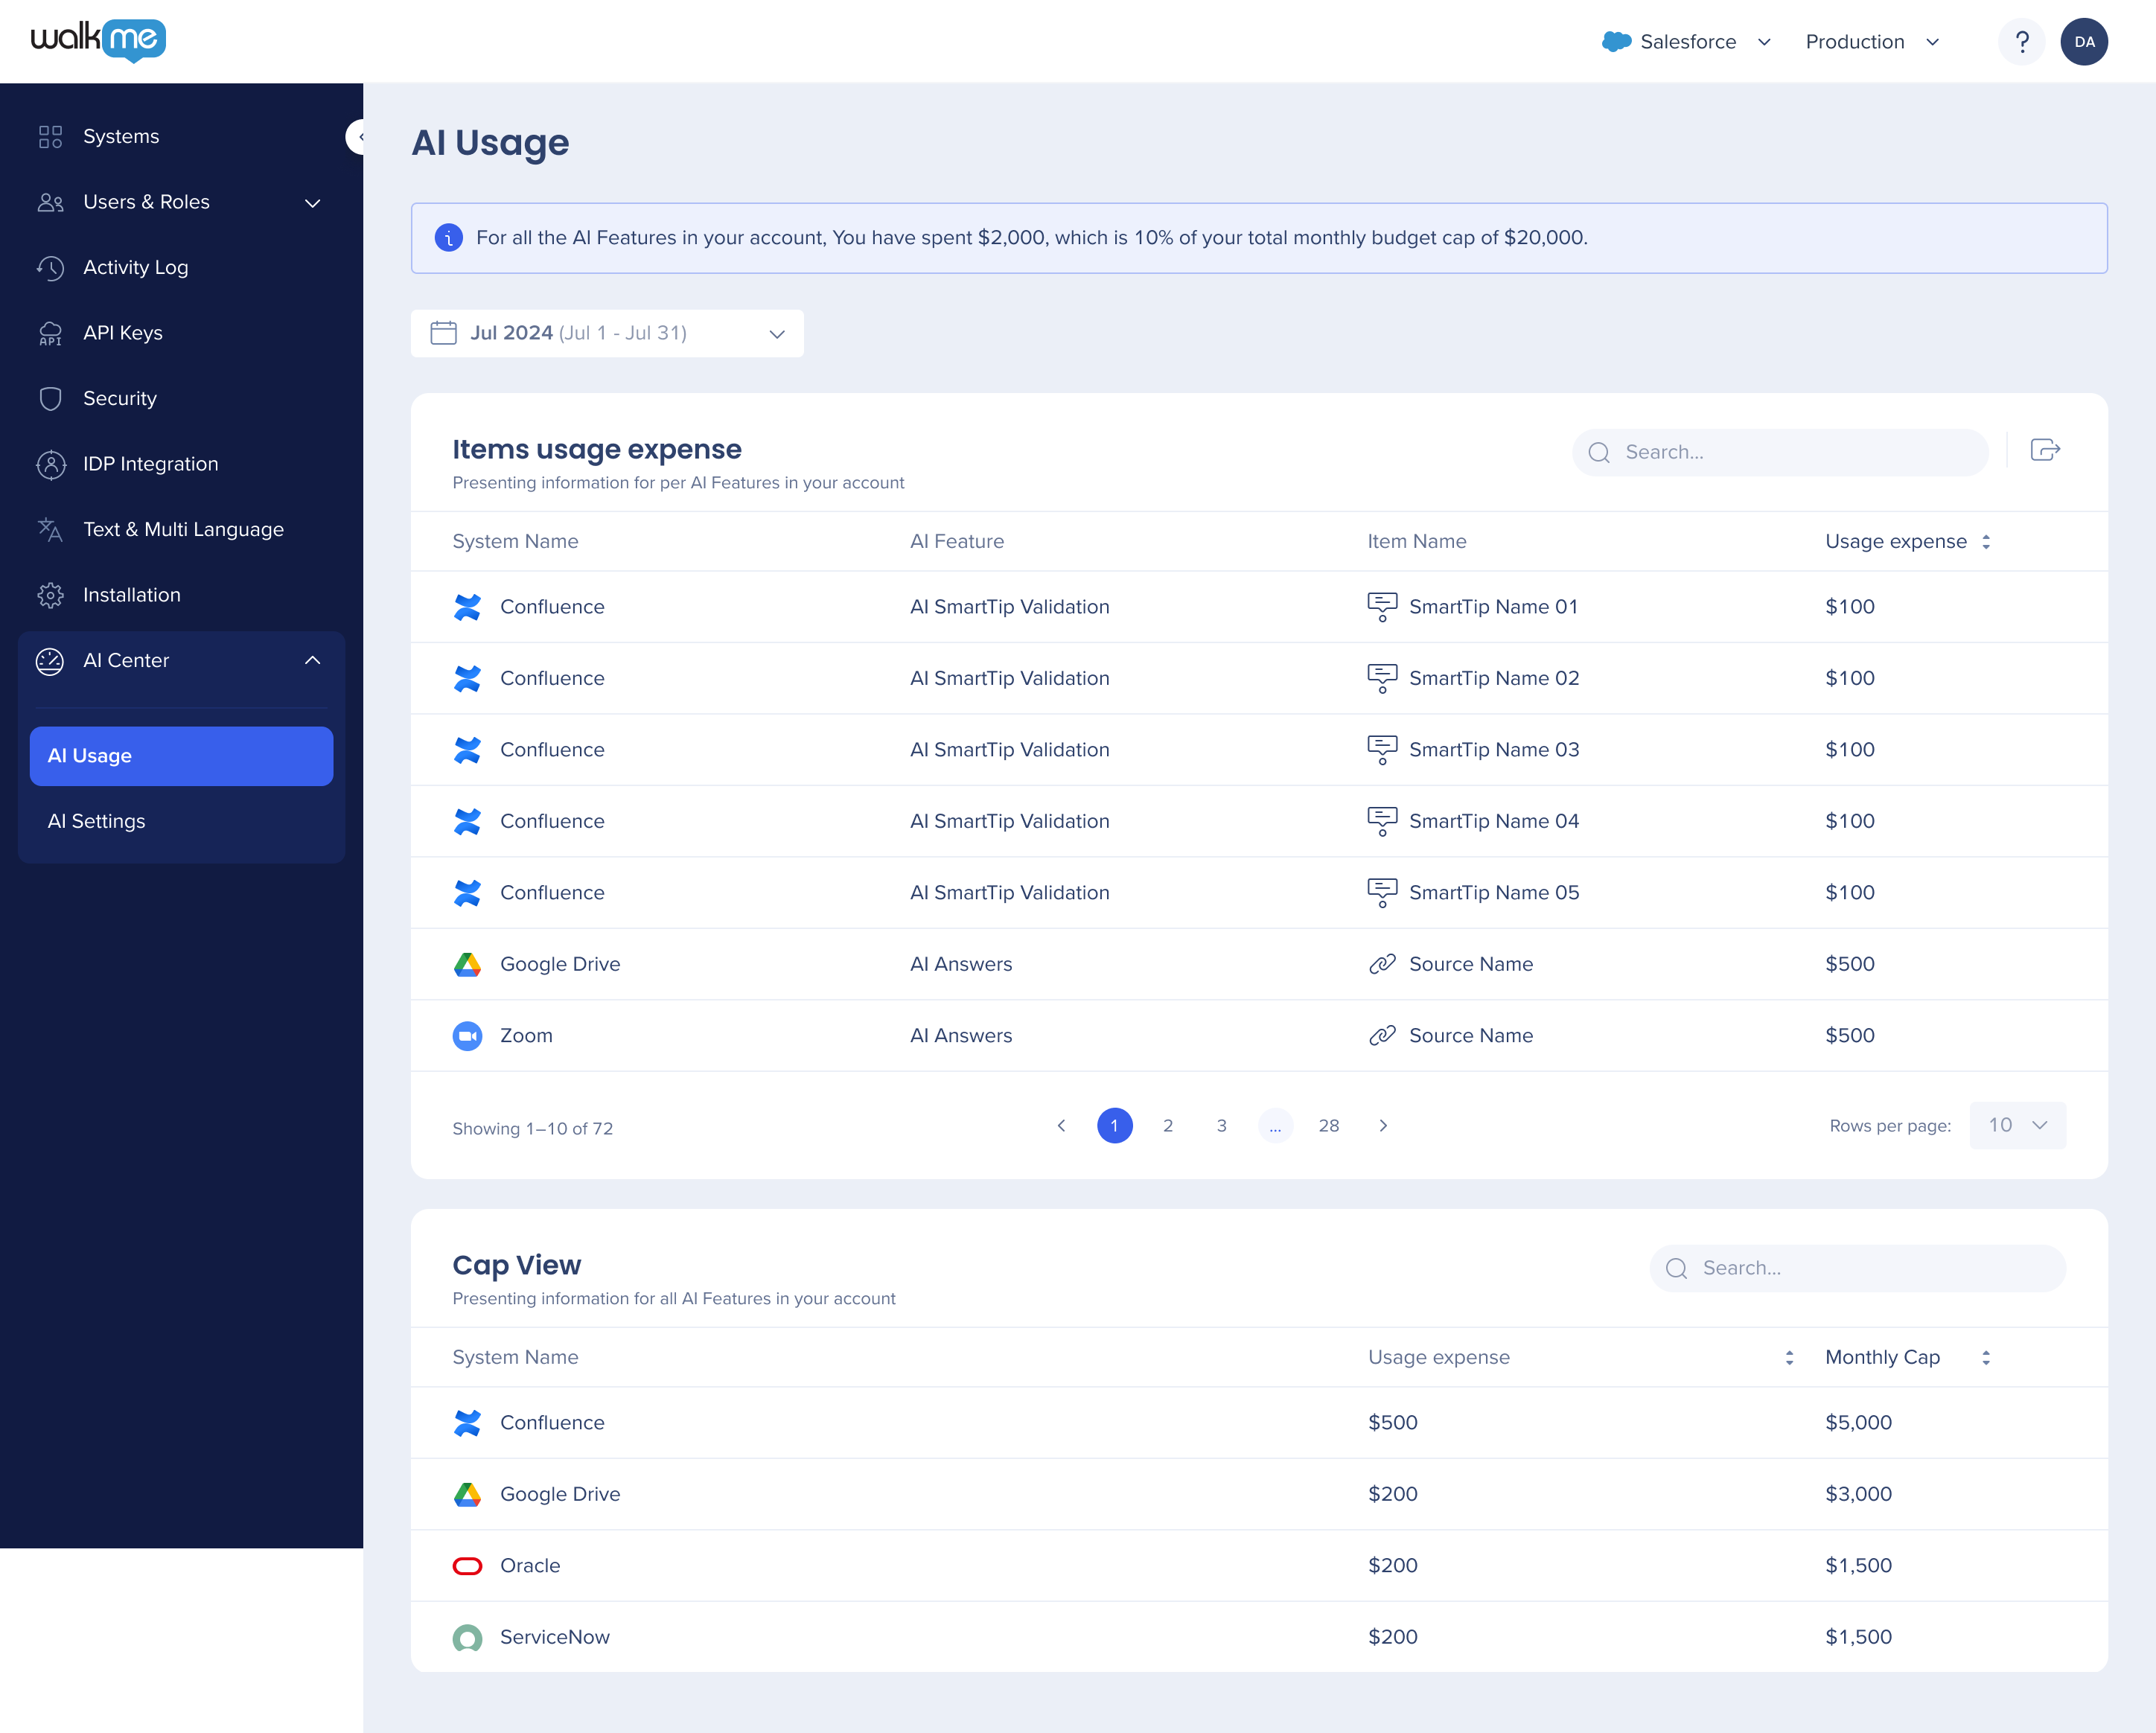
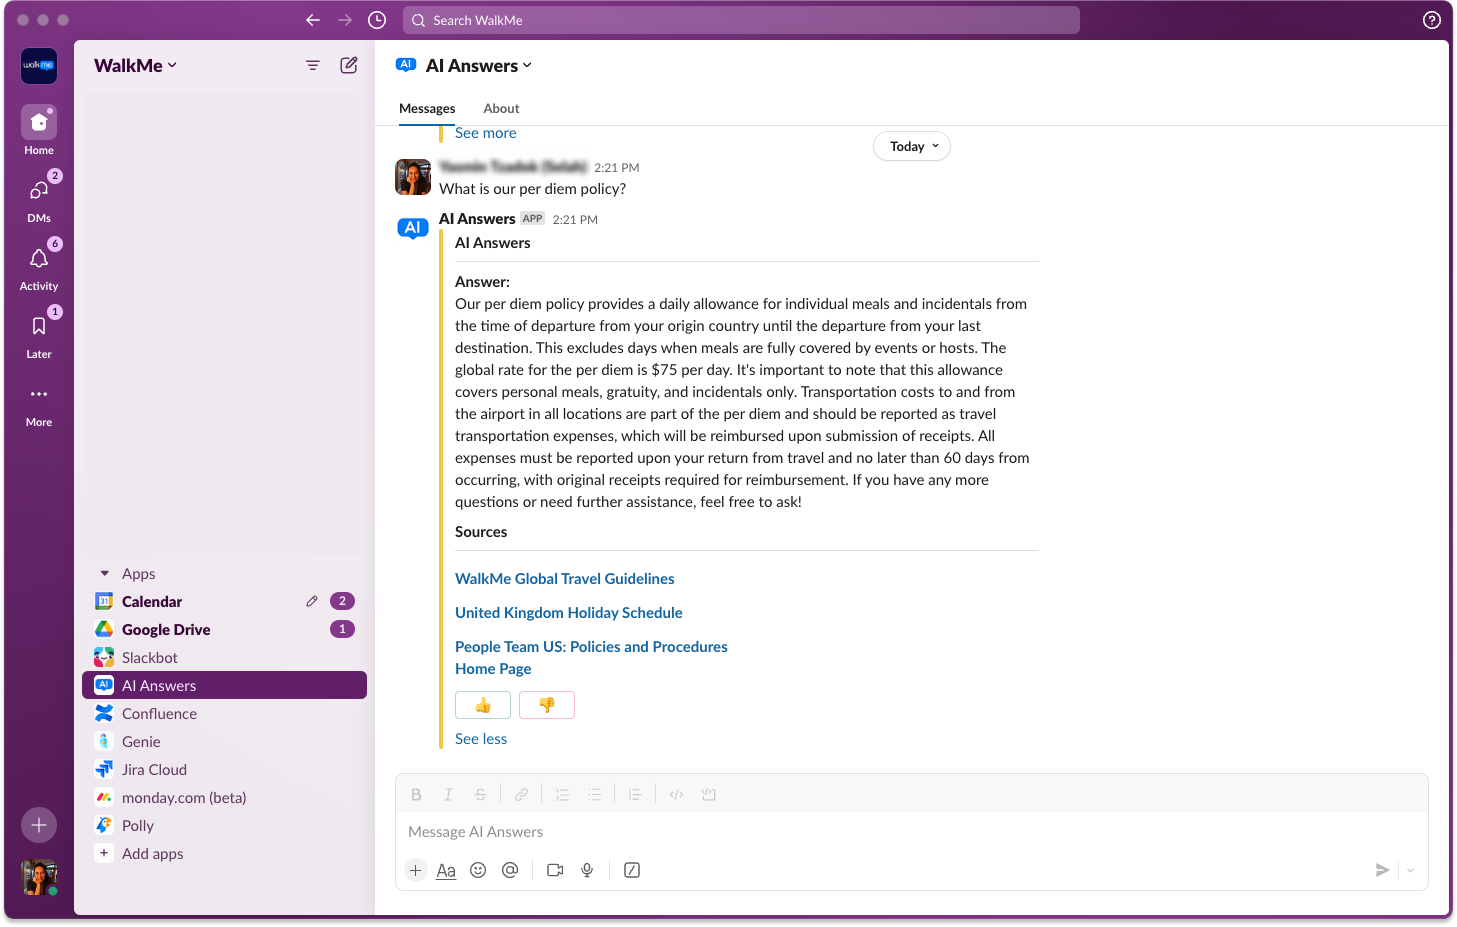
AI Usage
This is the AI Usage page in the Admin Center. The dashboard provides an overview of total usage in dollars, allowing you to keep track of your AI consumption. This information helps you understand which features are most used and which items within them are the most utilized.
You can adjust the timeframe for the data displayed by months and export this data in CSV format for further analysis.
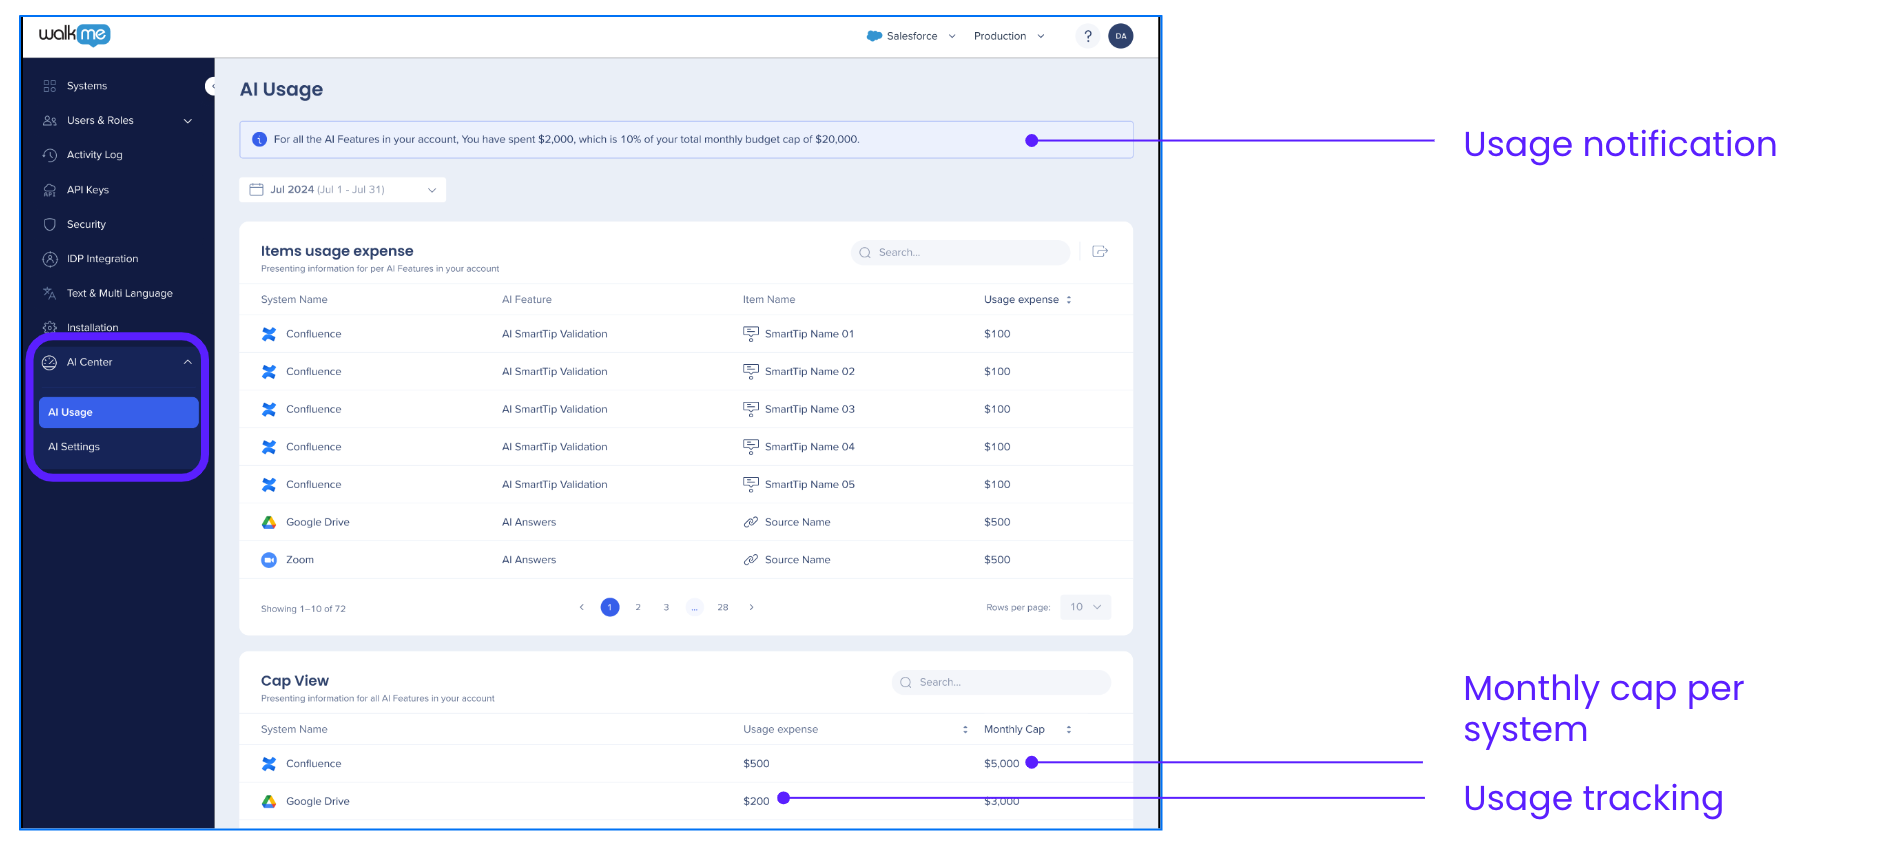
Based on the cap defined in the signing, we've included an alert that triggers when 90% of the cap has been used.
This alert gives you options to either contact customer service for assistance or send an admin email alert.


AI Settings
The AI settings page in the Admin Center allows admin users to upload knowledge source files and integrate tools to the AI-powered conversational search experience.
The page consists of two tabs:
-
AI Knowledge Sources: This dashboard allows admins to view, manage, and upload all of their knowledge sources
-
AI Integrations: This dashboard allows admins to enable AI Answers to their existing integrations
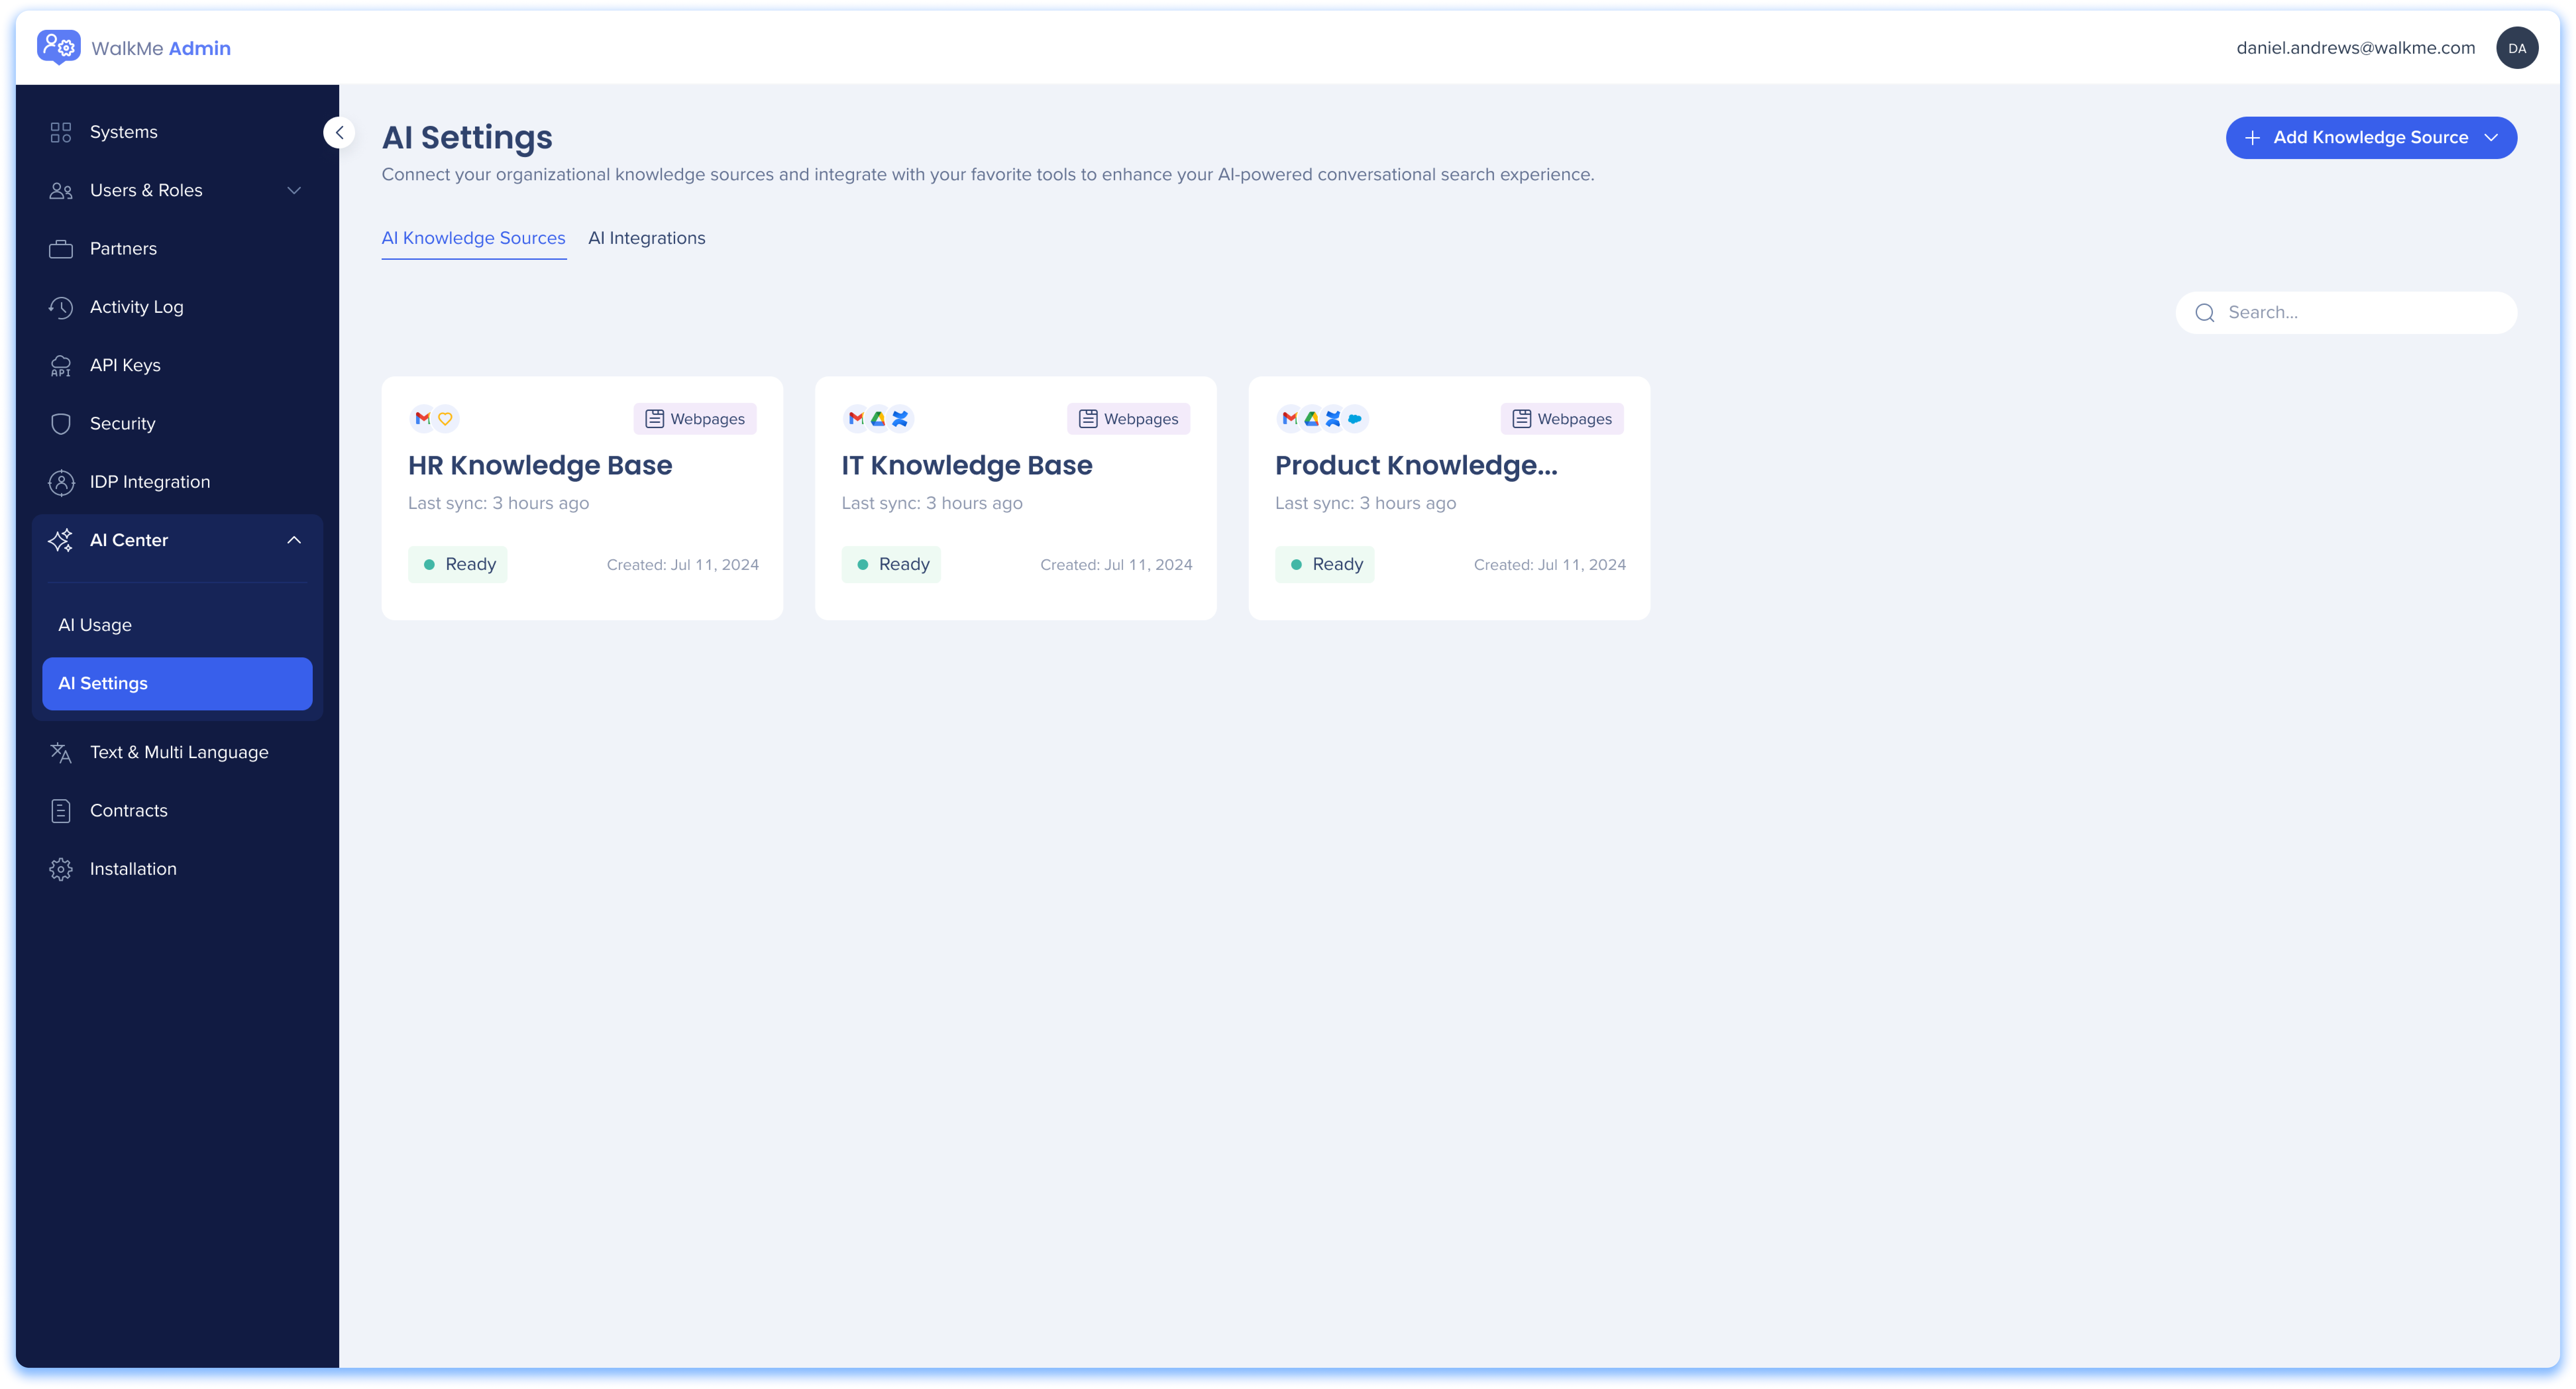
AI Knowledge Sources
This dashboard allows admins to view, manage, and upload all of their knowledge sources.
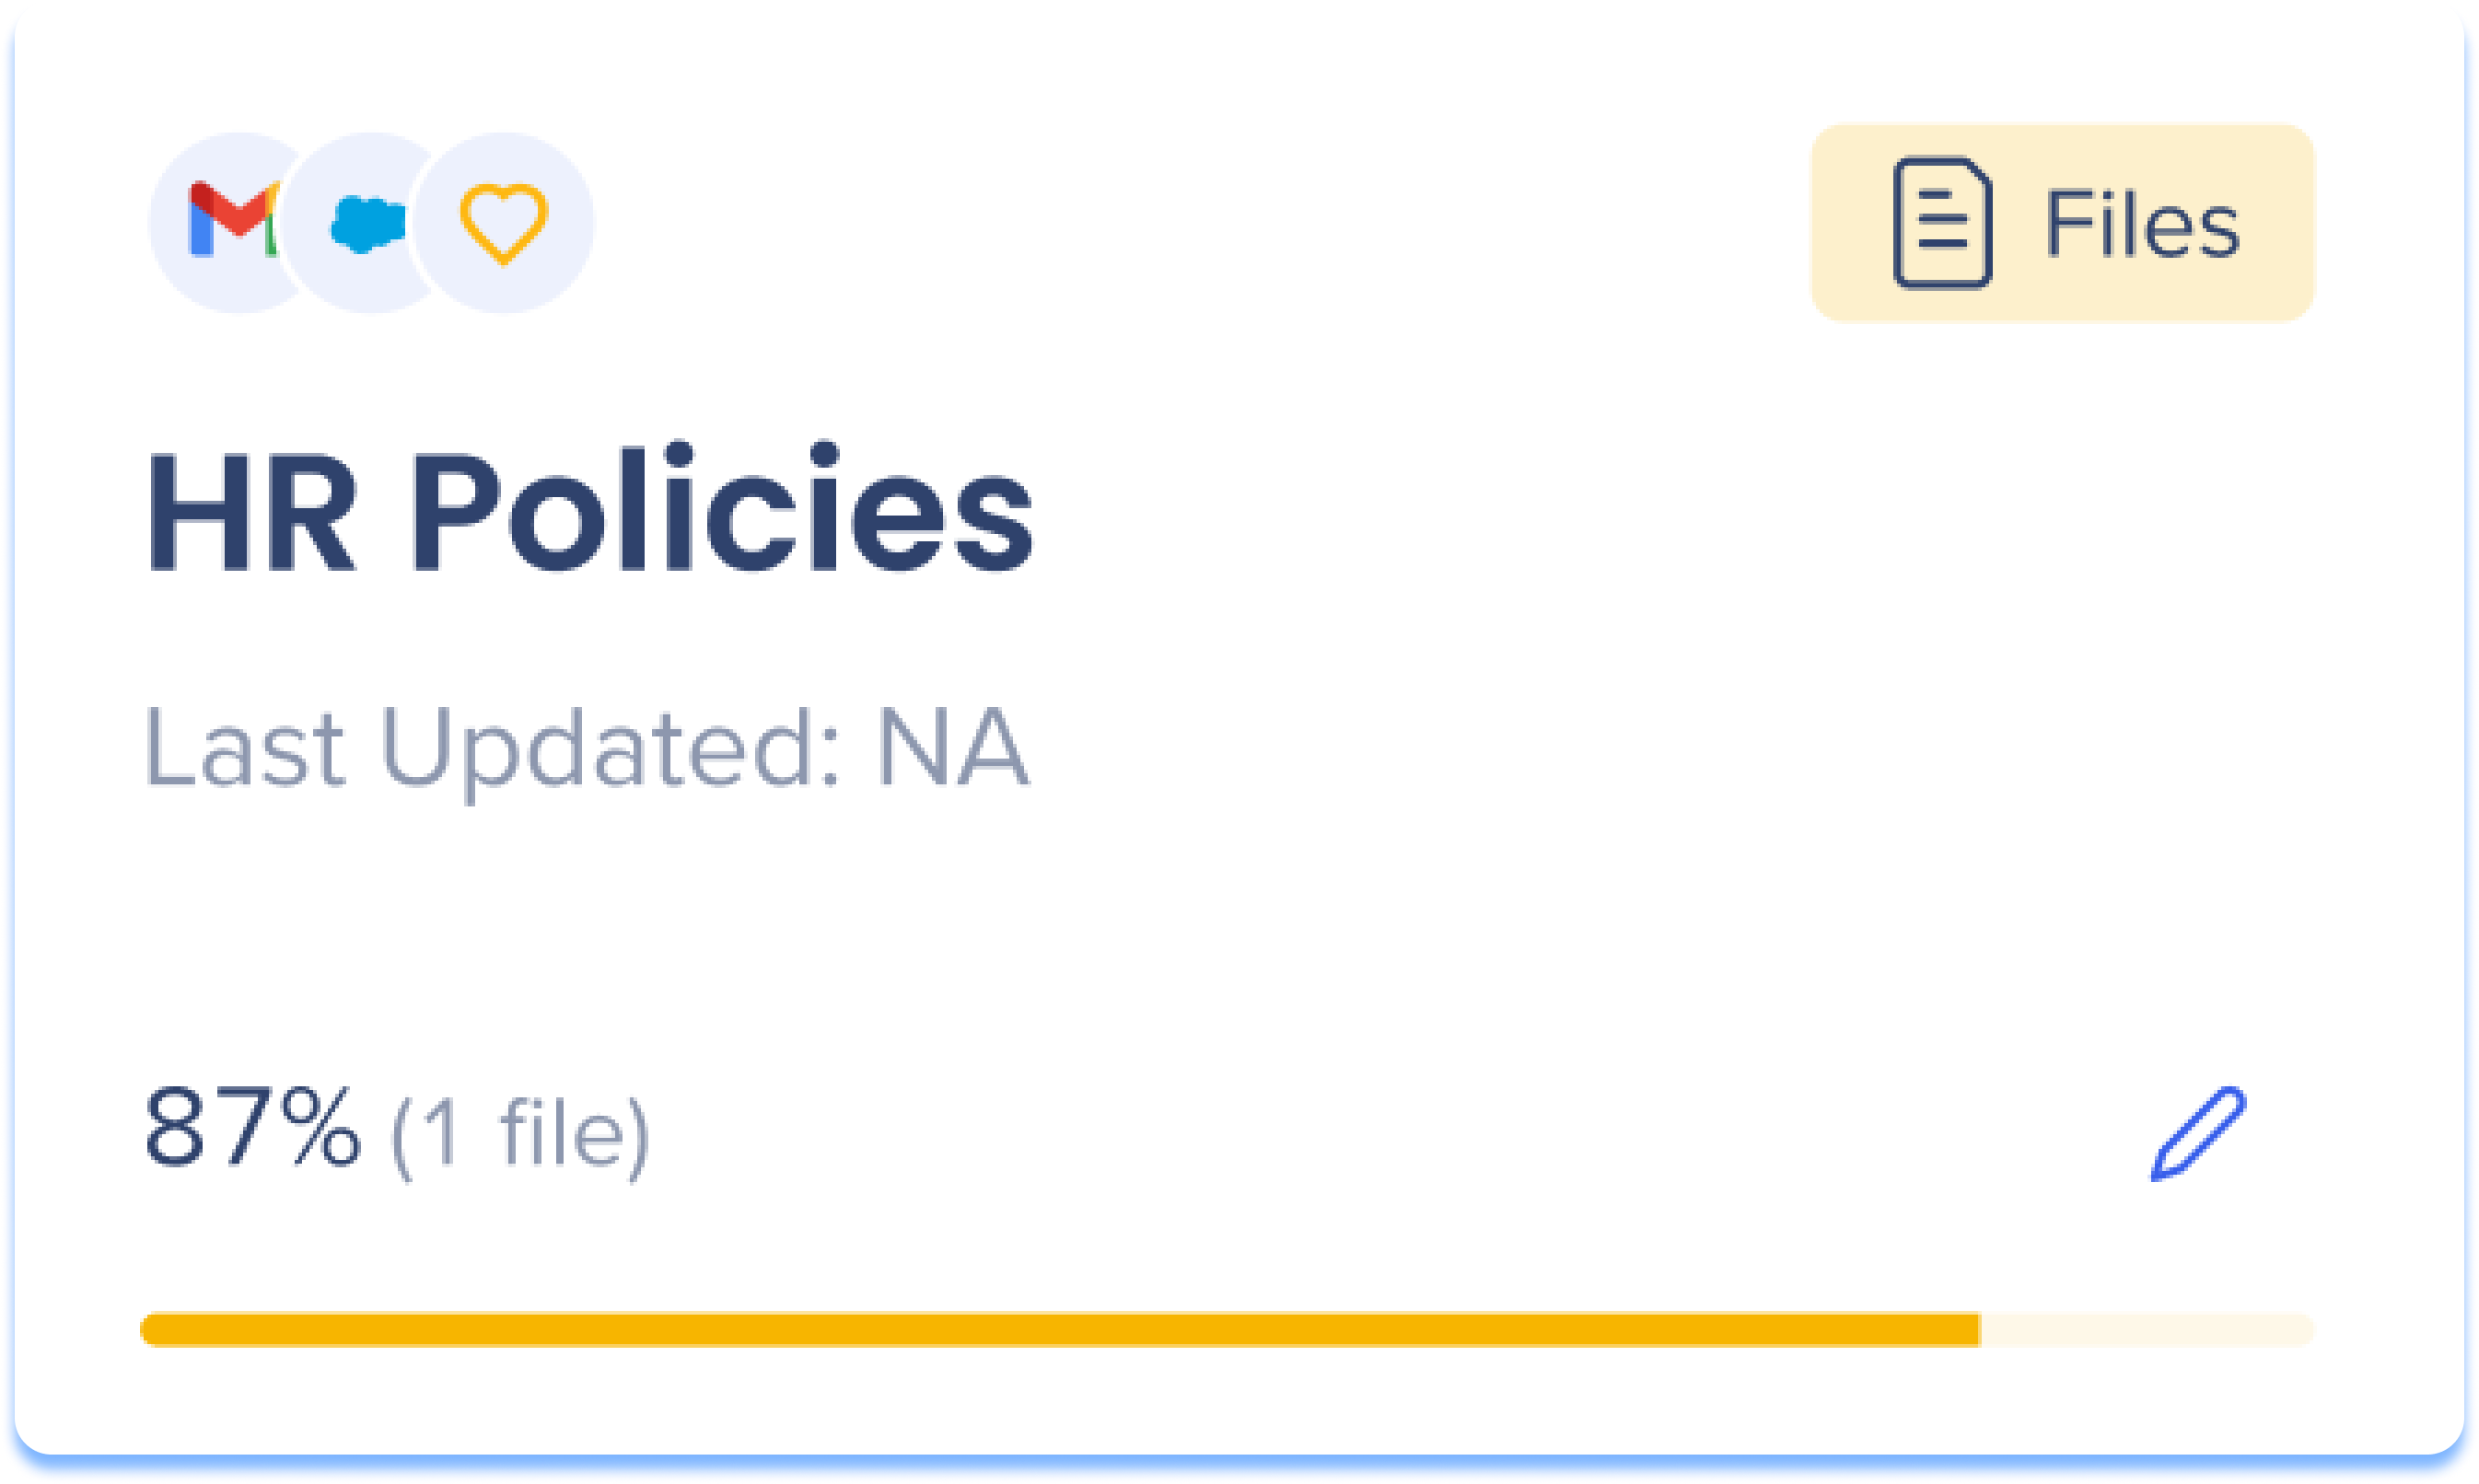
Source tiles
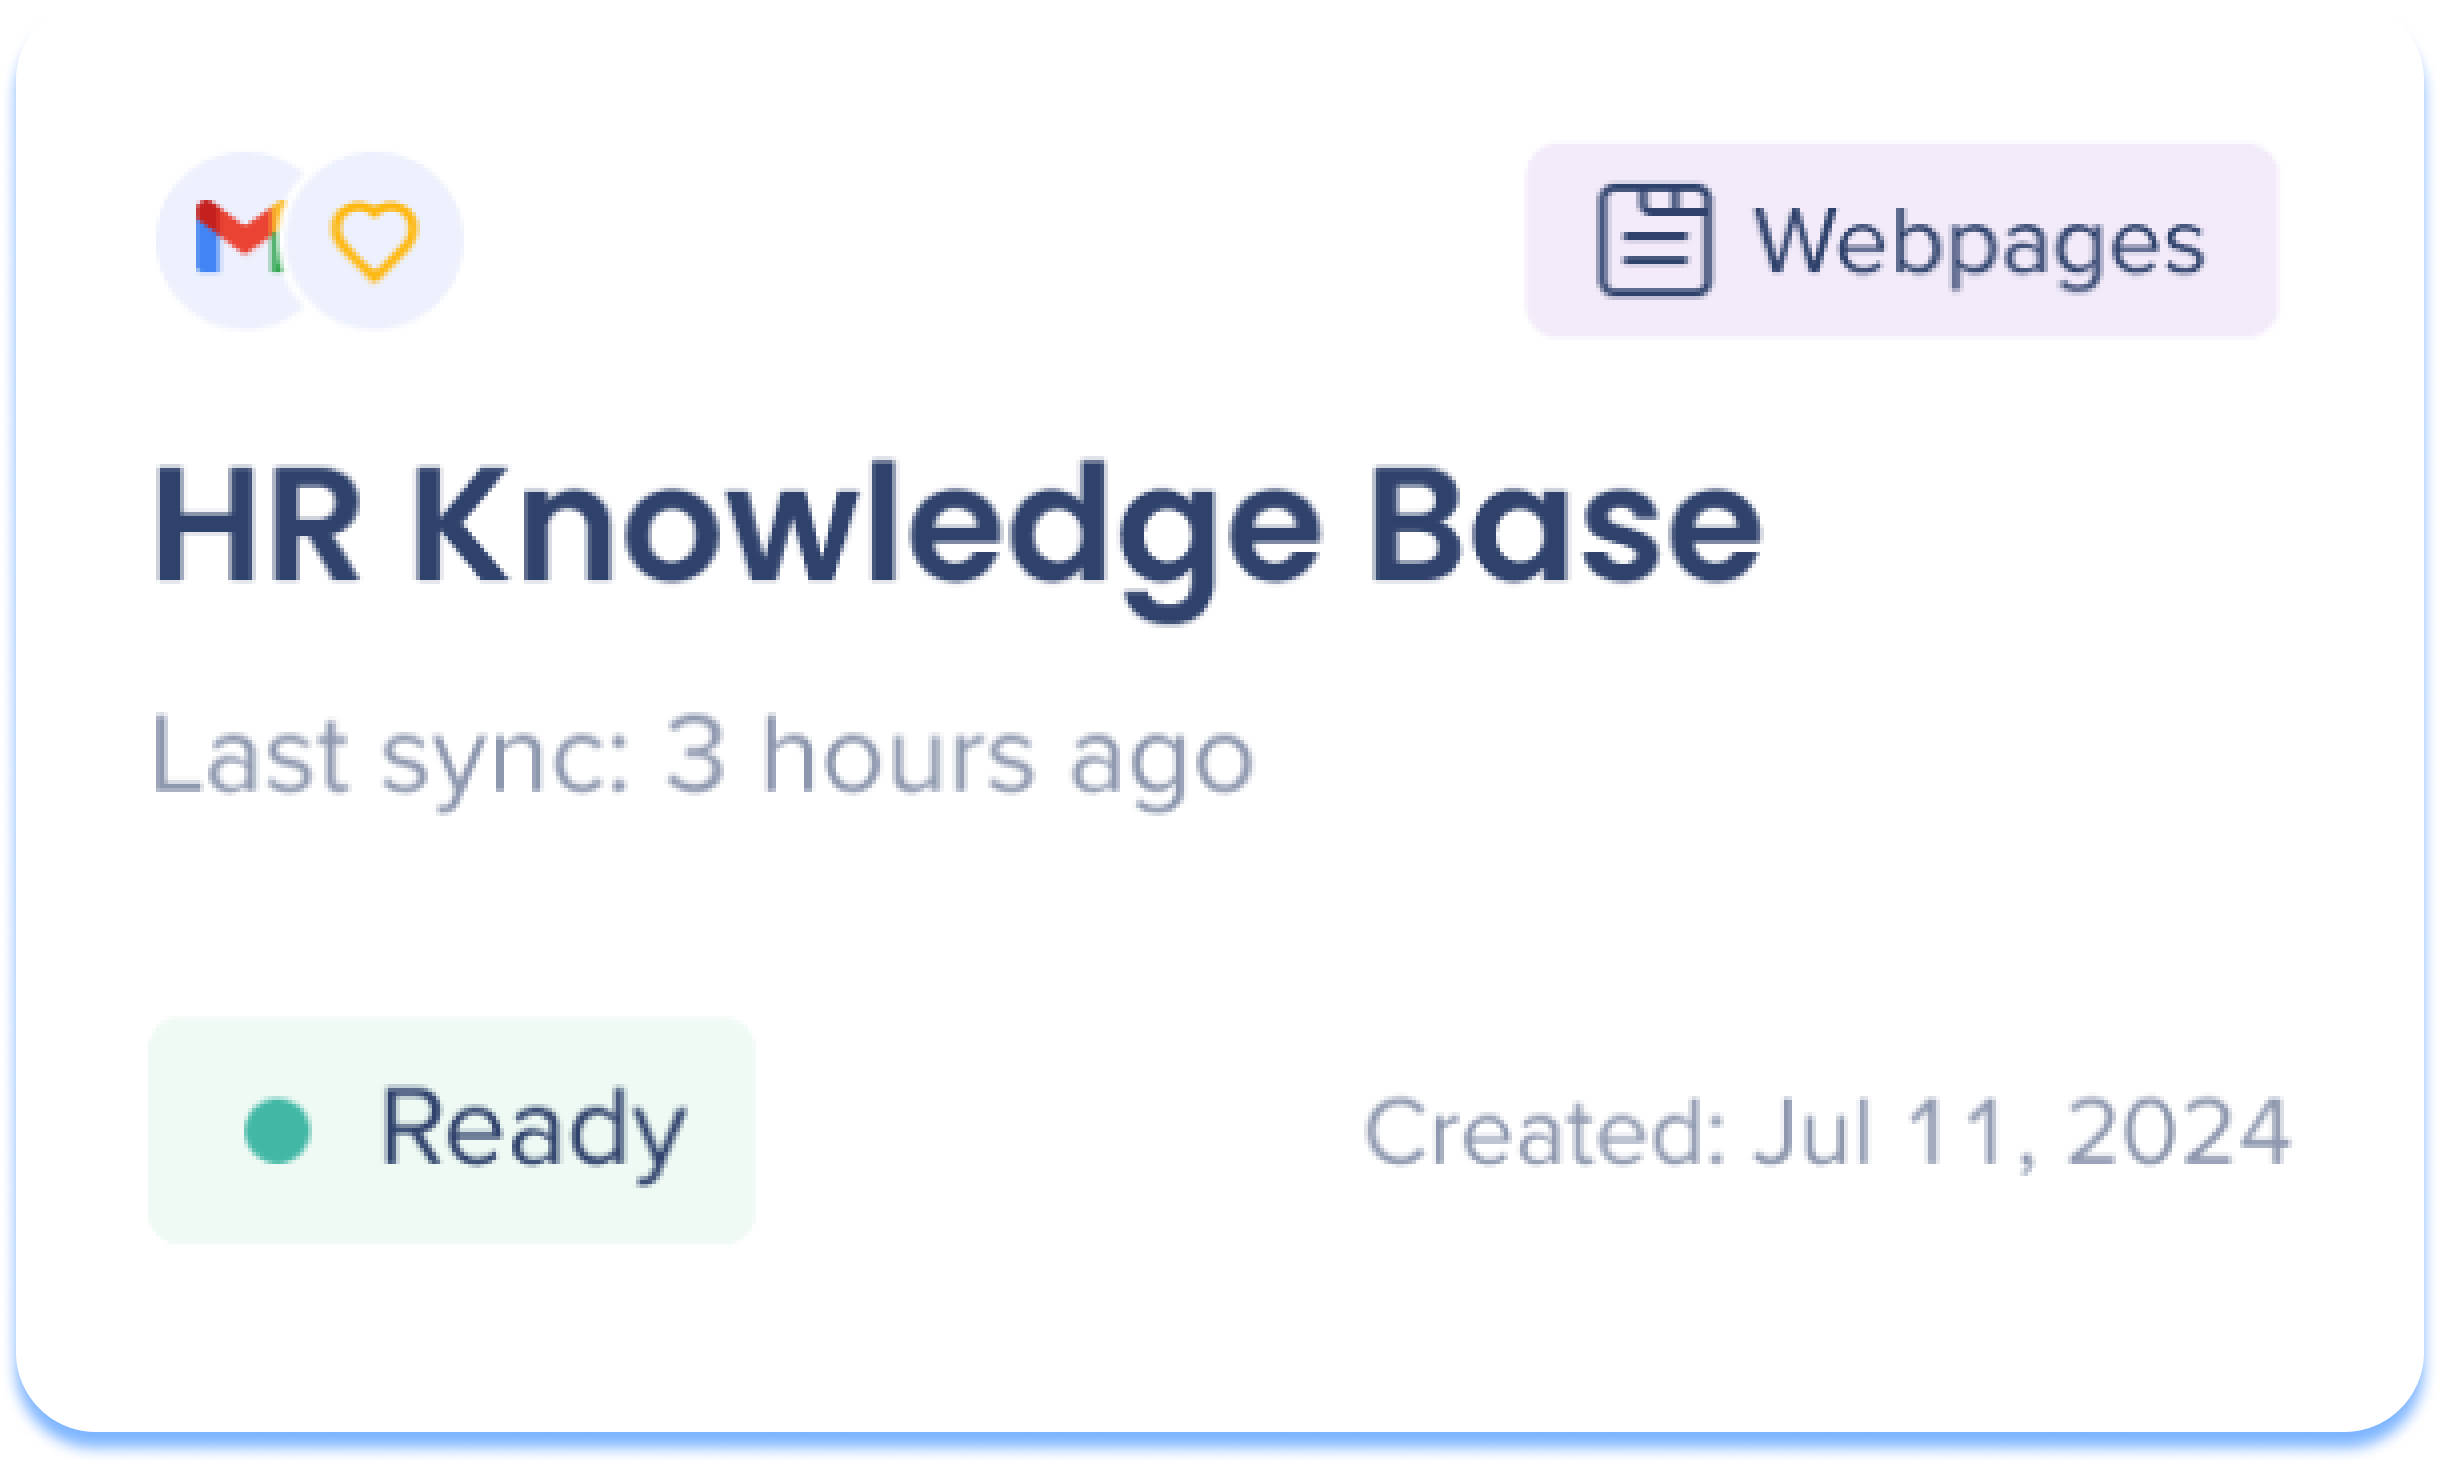
Each knowledge source is presented as a tile on the page and displays the following information:
-
Systems: Which systems have access to this knowledge source
-
Source type:
-
Source name: The name of the source
-
Last sync: Time the source was last updated
-
Status: Displays the uploading progress
-
Created date: Date the source was added
Hover actions

Hover over a source tile to view actions.
-
Delete: Permanently removes the knowledge source from the dashboard and AI Answers
-
Edit: Make changes to the knowledge source
-
Refresh: Re-syncs the knowledge source for updates
-
Demo: Opens a demo of AI Answers so admins can simulate the end-user experience
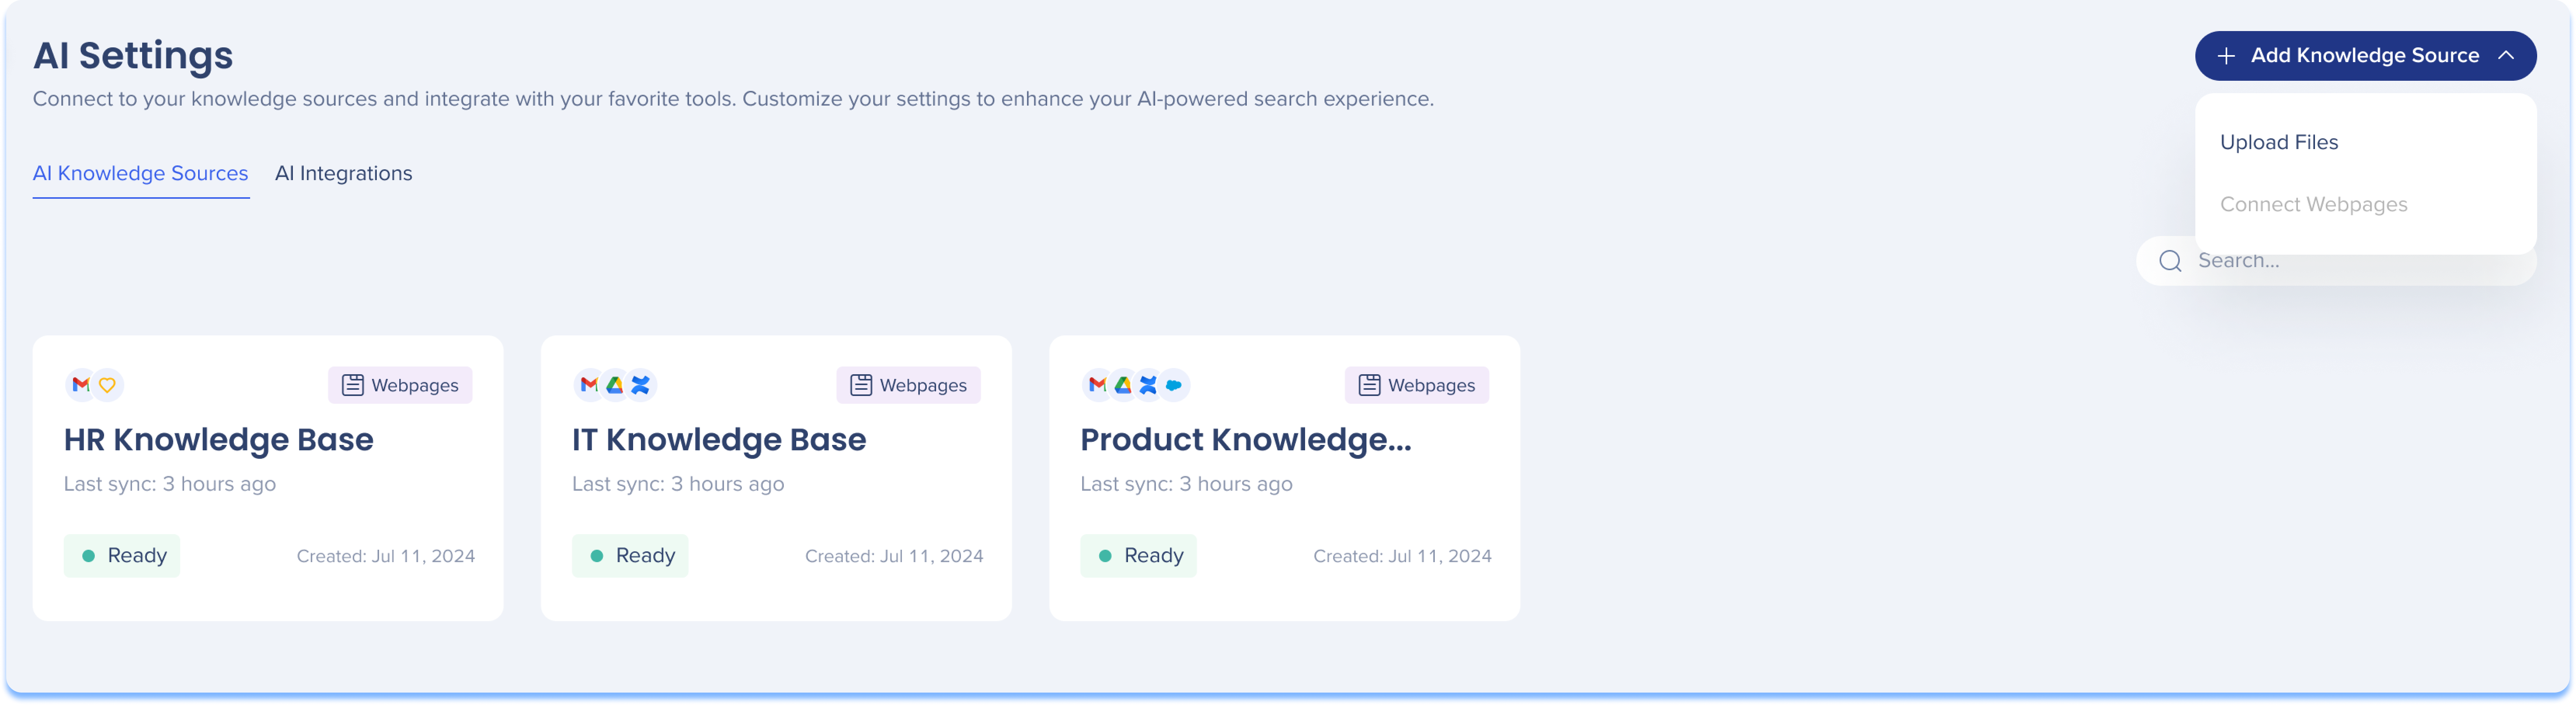
How to upload files for knowledge sources
-
Click the Add Knowledge Source button
-
Select Upload Files
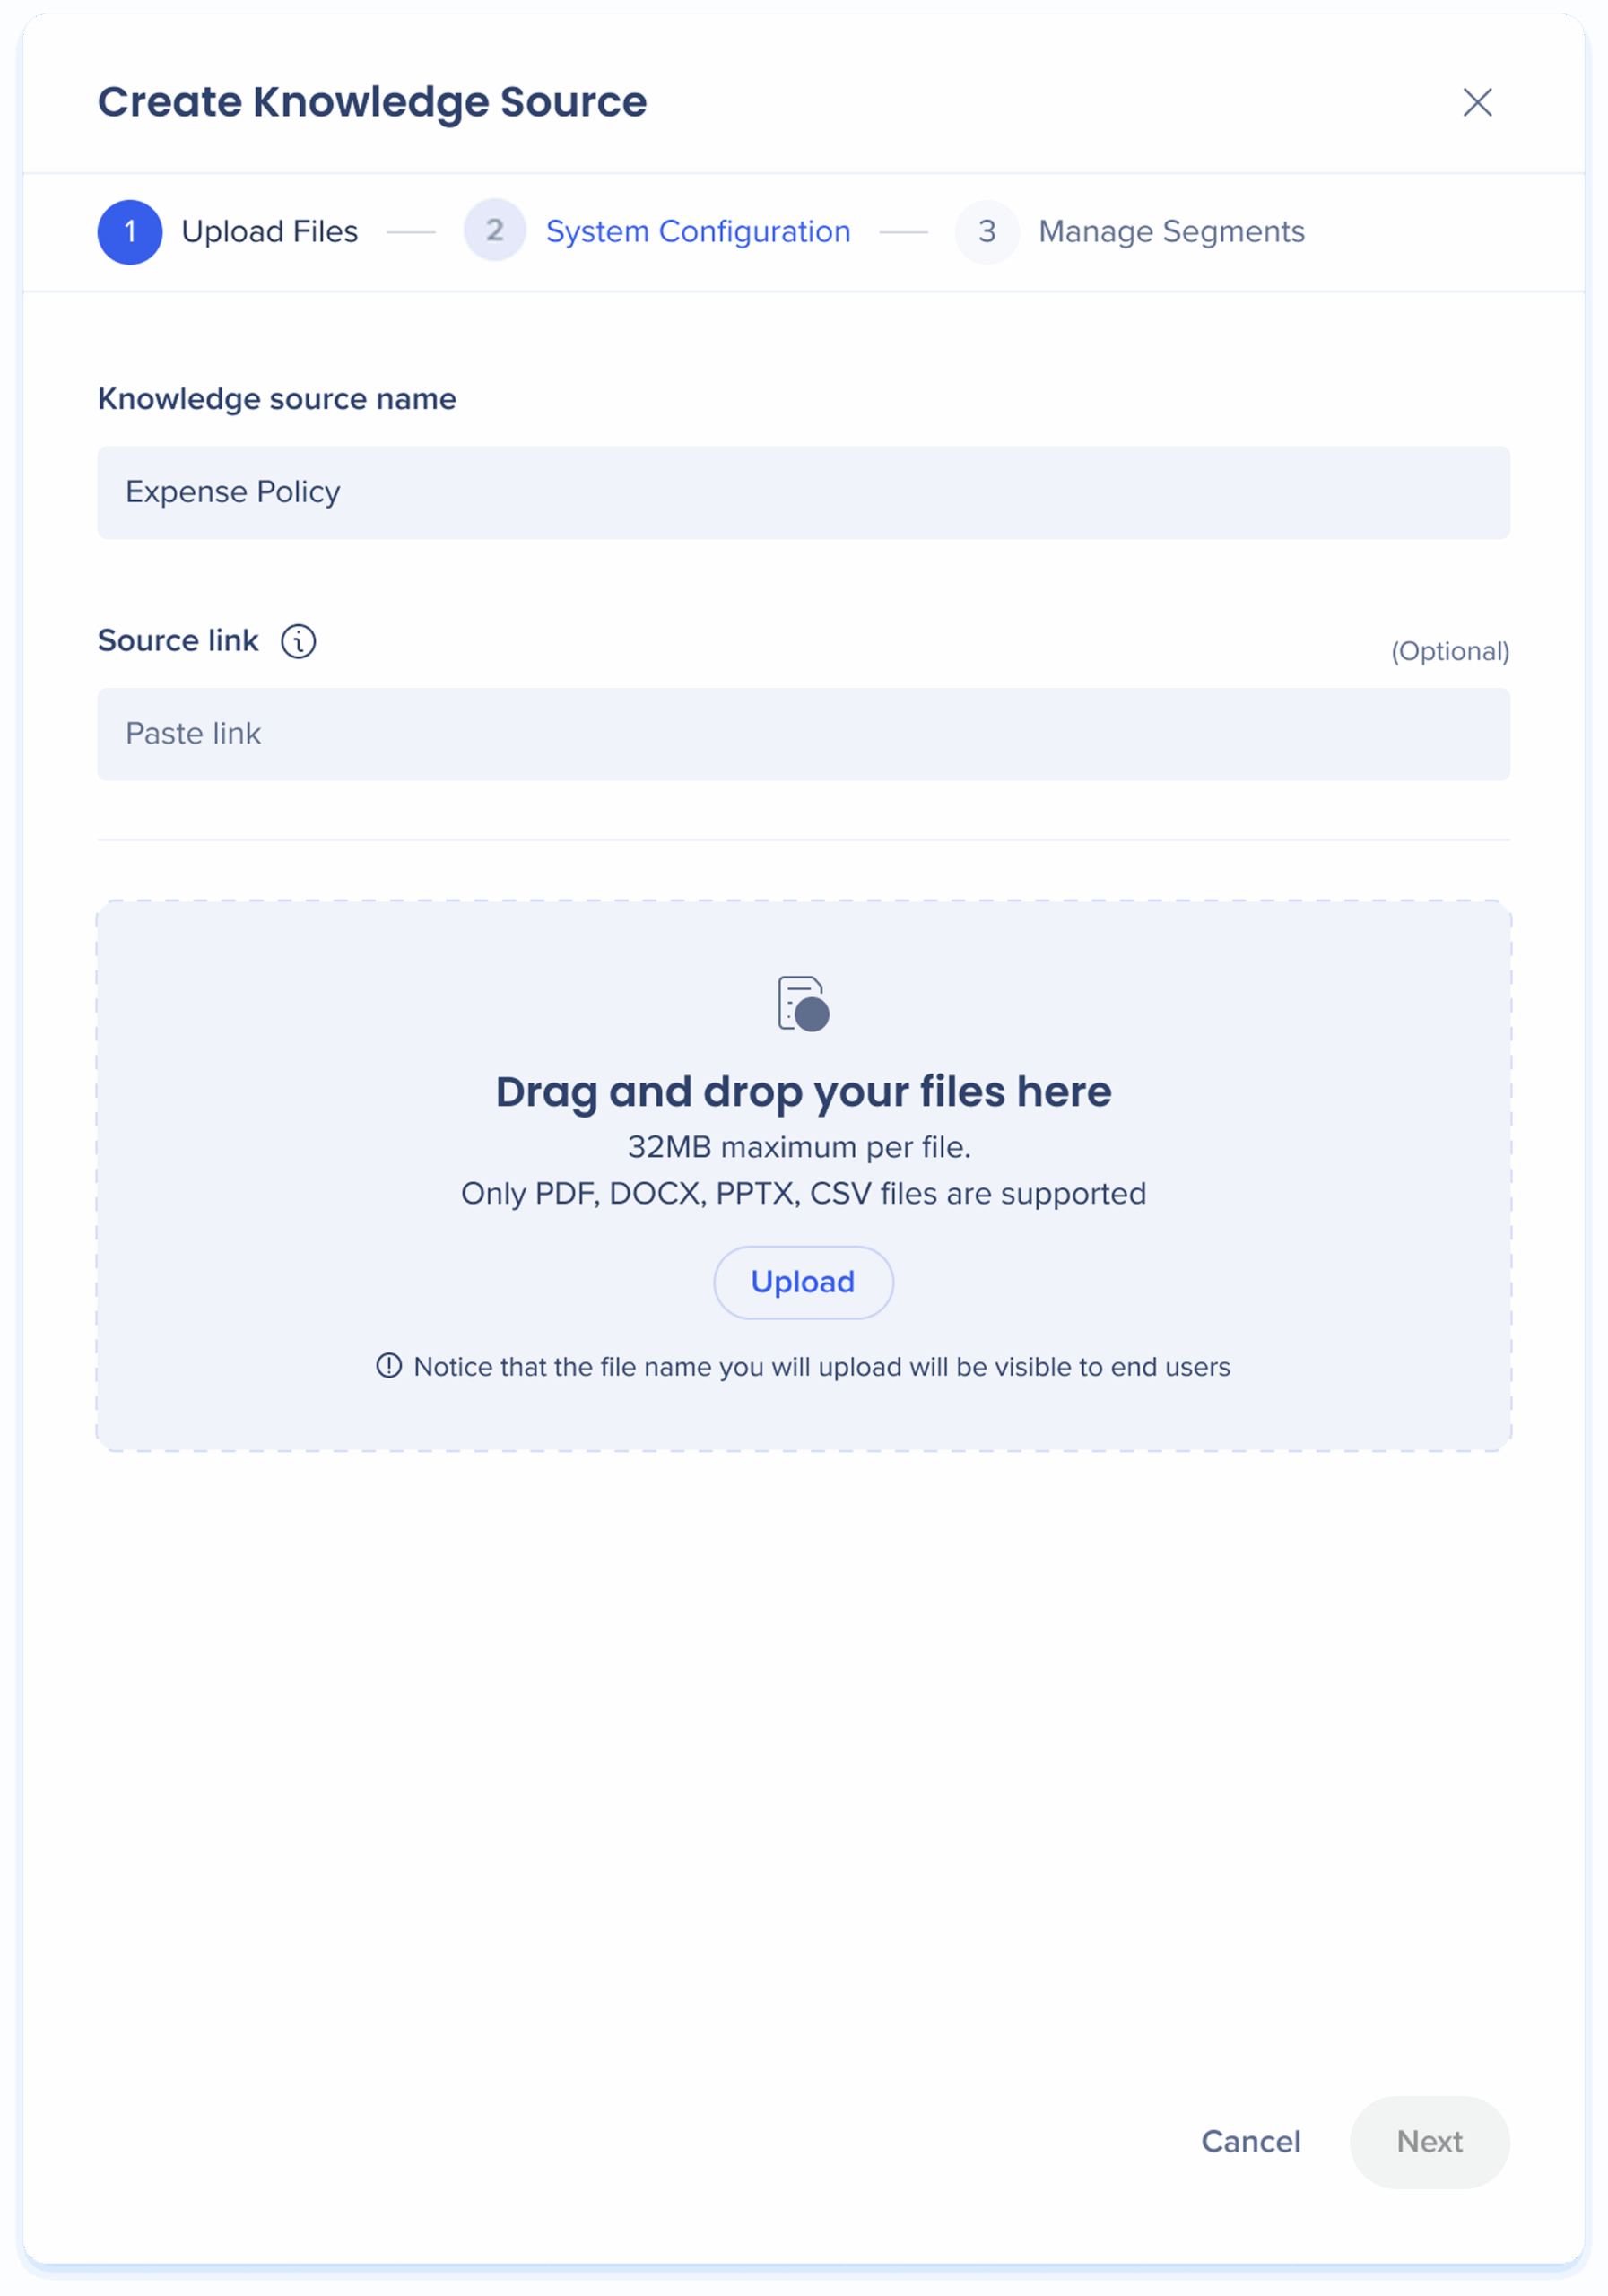
Step 1: Upload Files
- Enter a name for the Knowledge Source
-
Add a link to your file source. This link will appear as a clickable reference in chat responses (optional)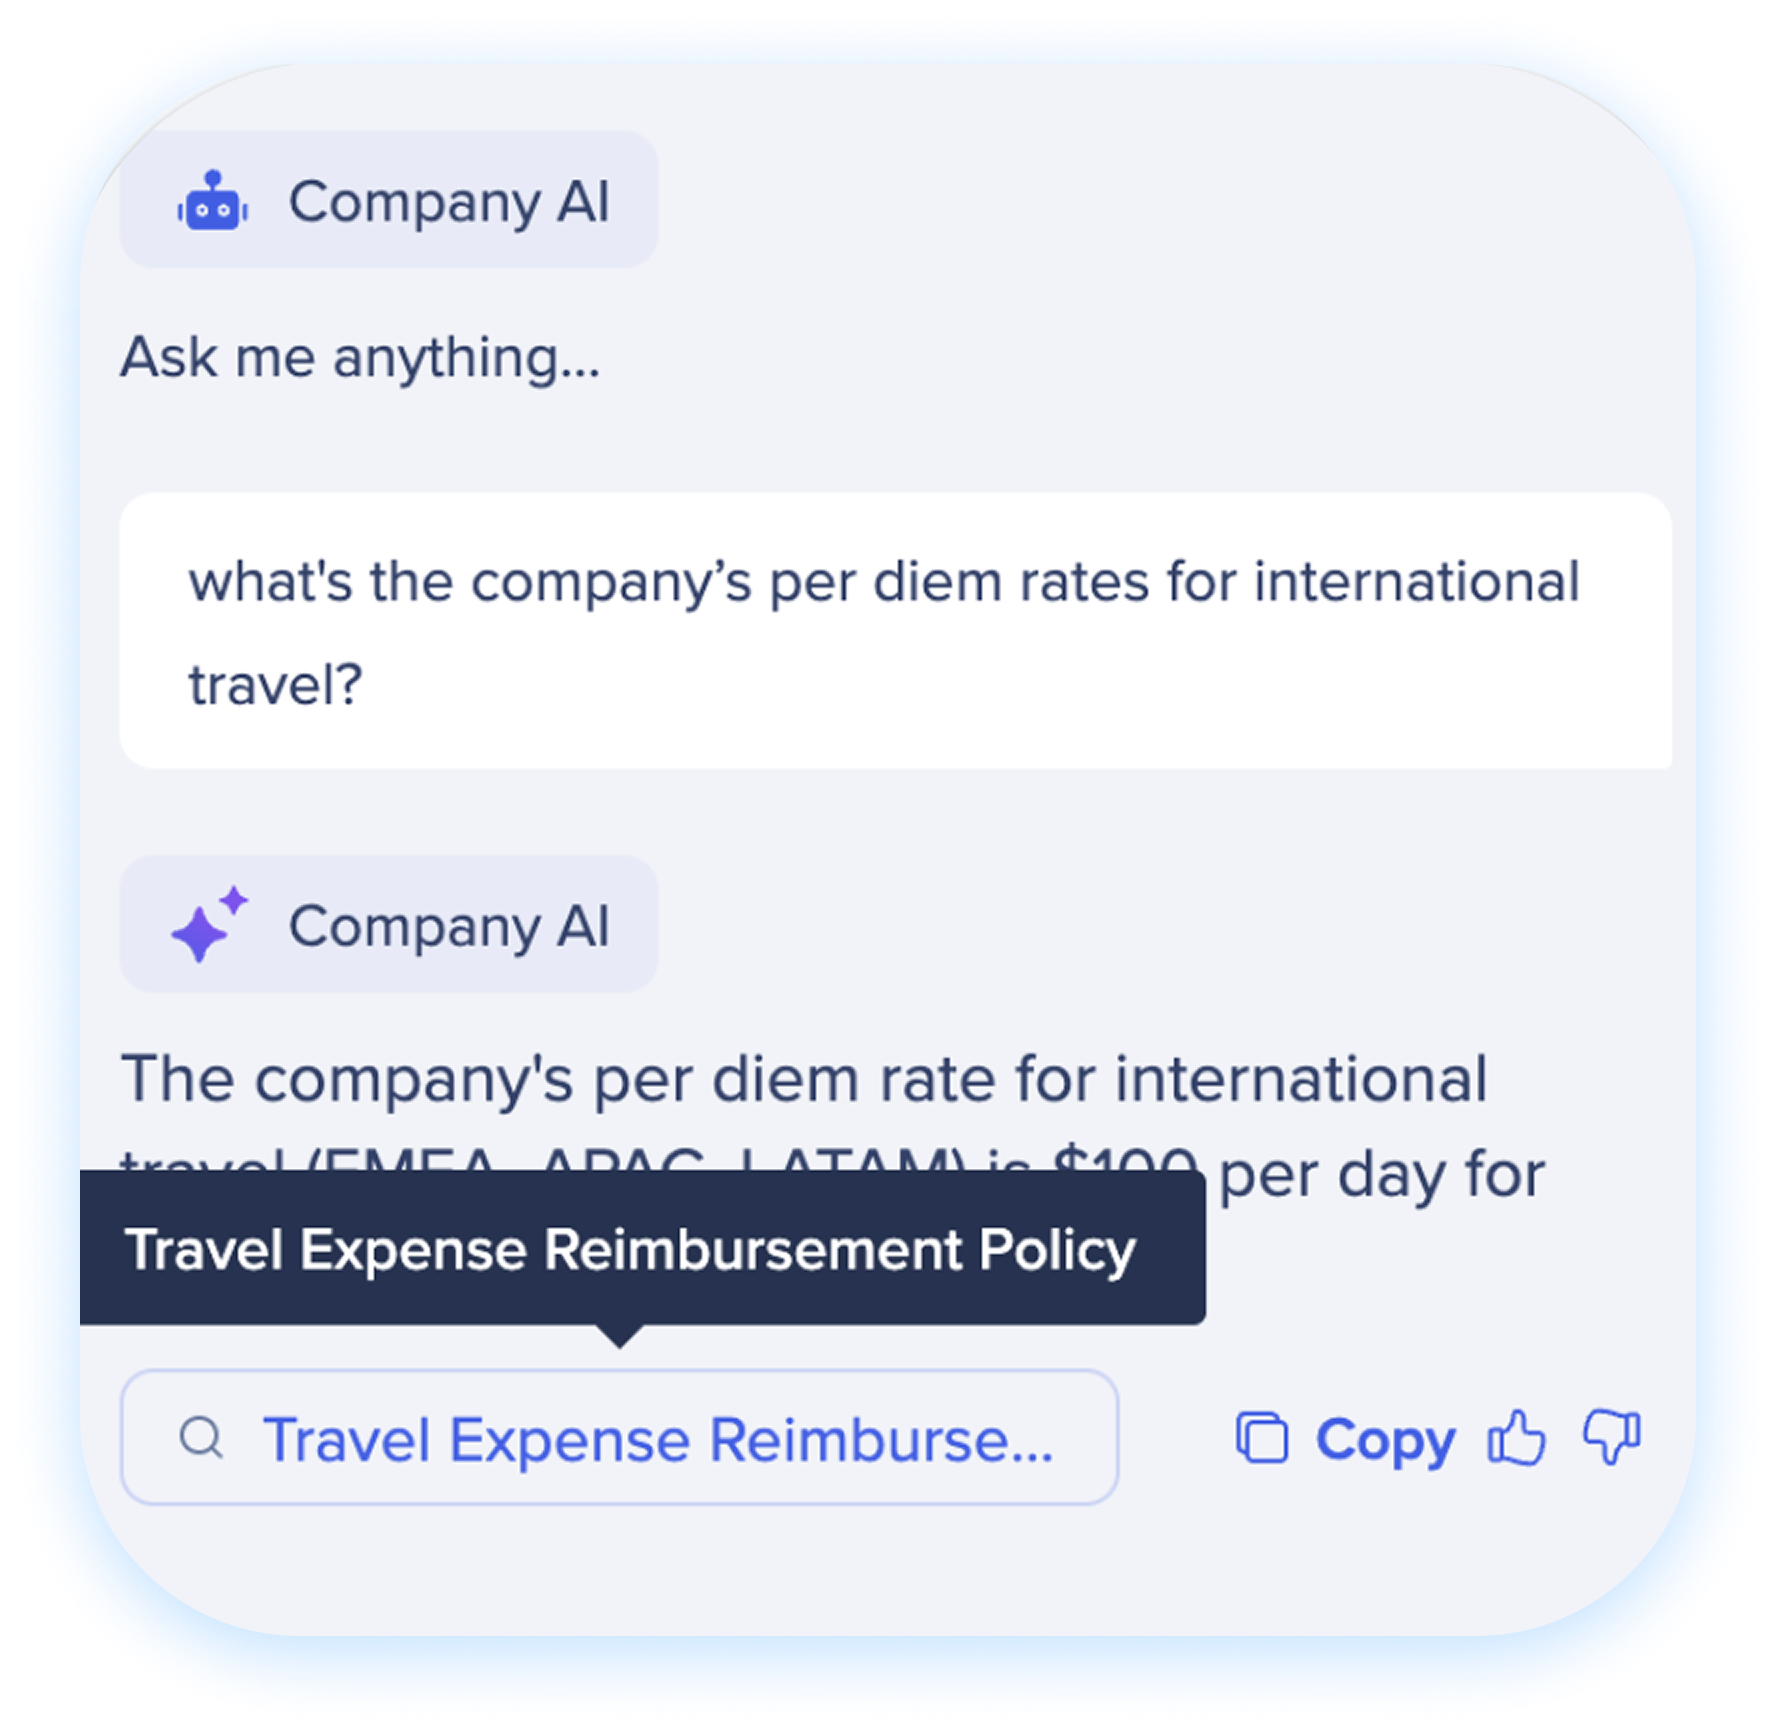
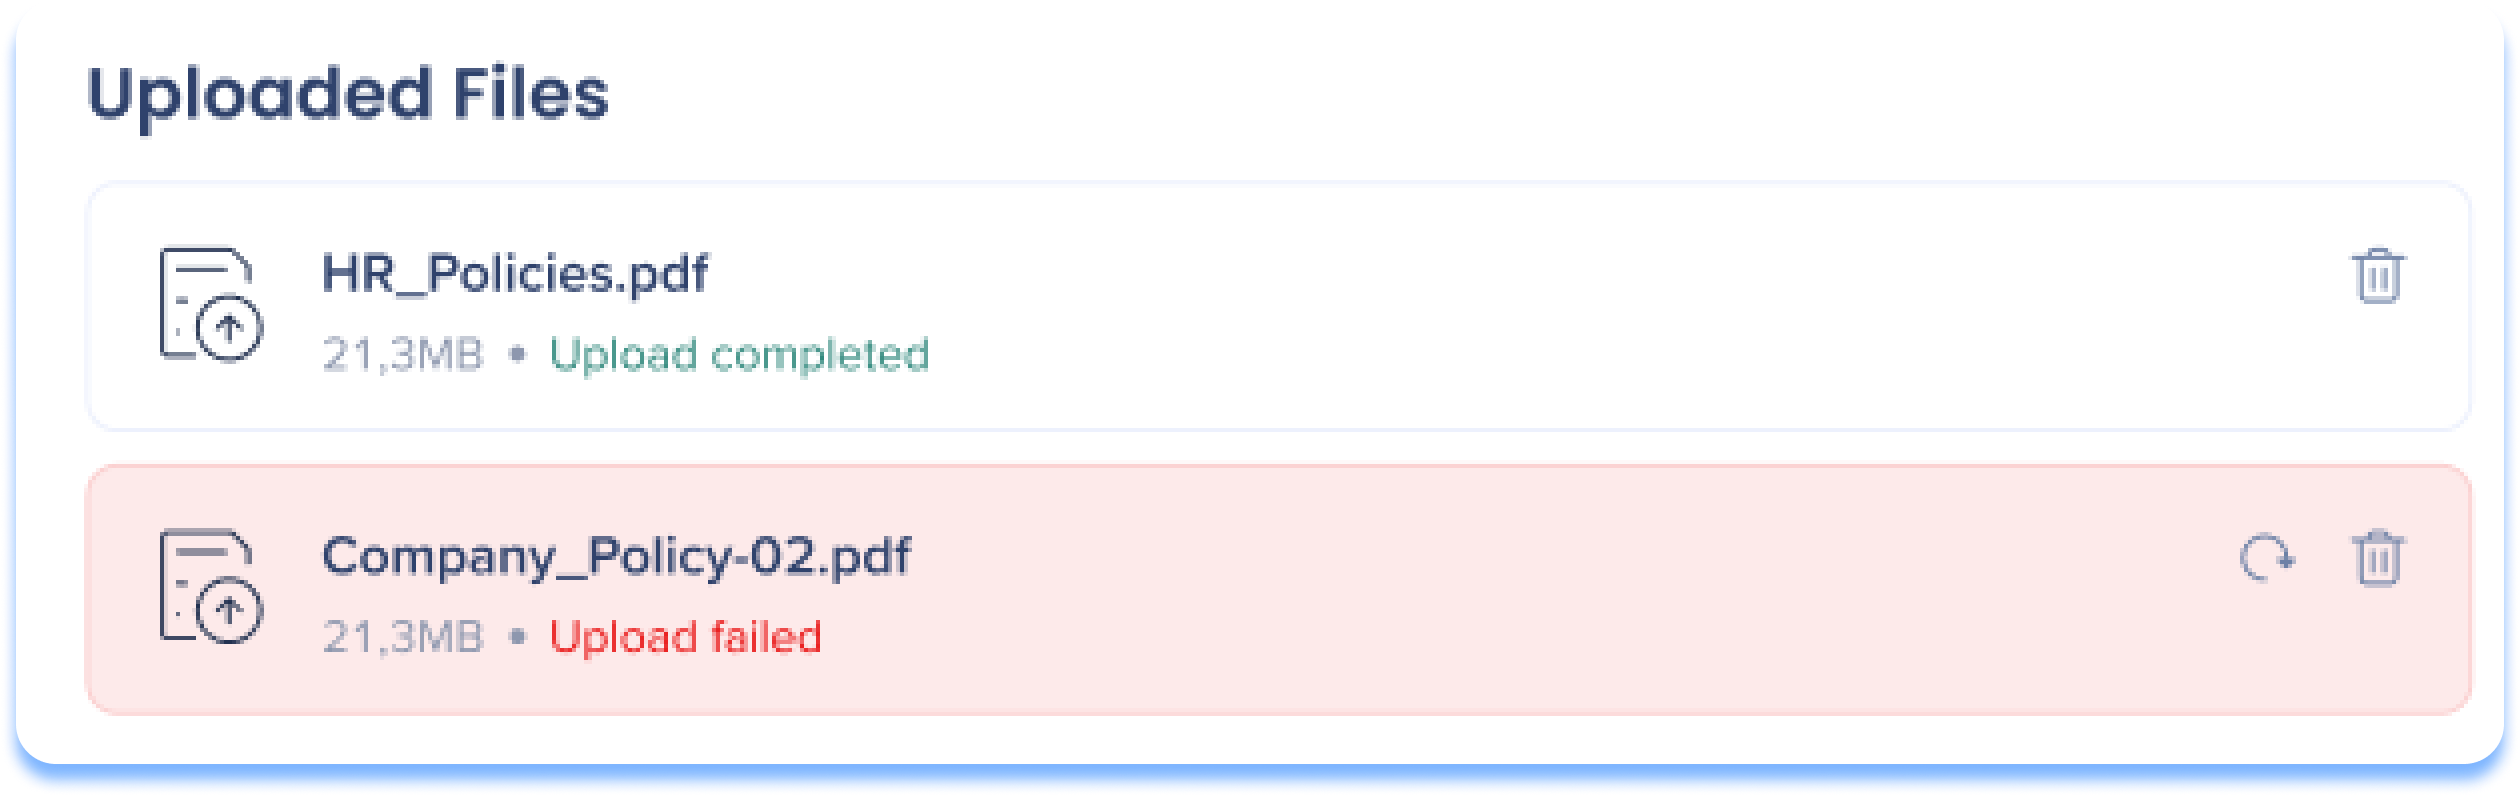
- Drag and drop your files or click Upload
4. The progress of the uploading files will appear
5. Click Next
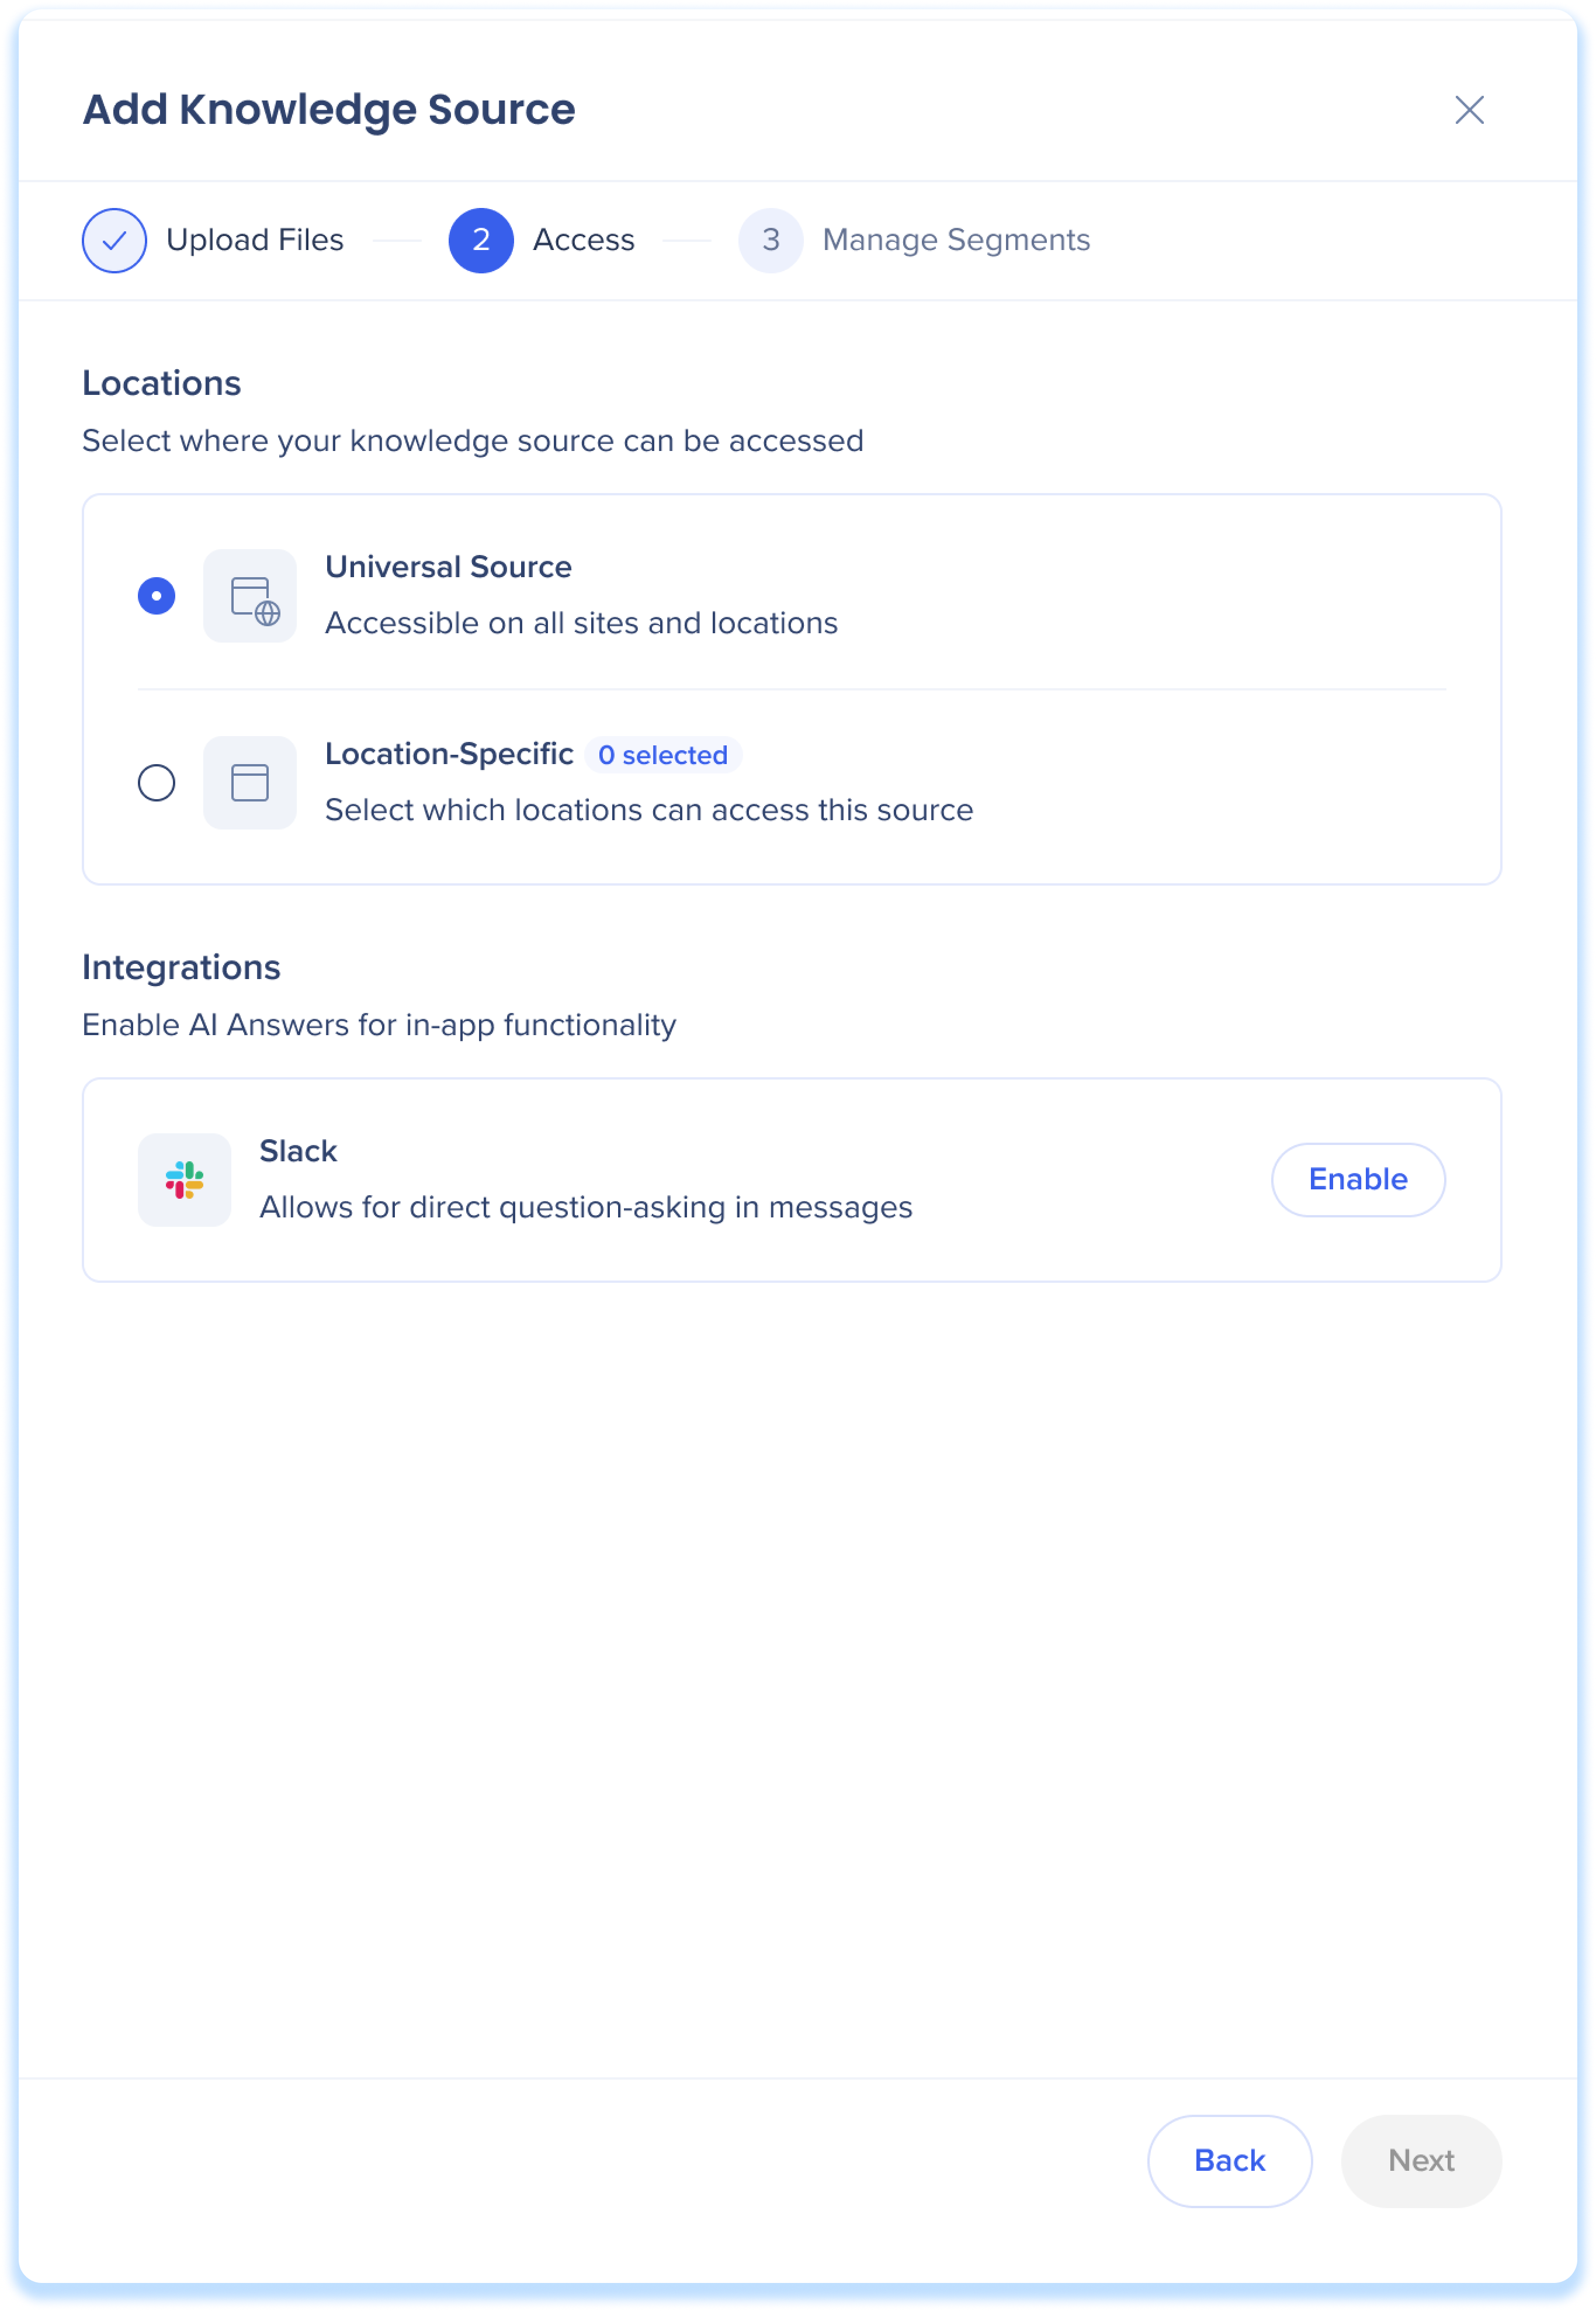
Step 2: Access
-
Select where your knowledge source can be accessed
- Click Next
Step 3: Manage Segments
For each system, customers have the option to add their user segments to better control the knowledge source availability.
- Select a system from the list
-
Select the user segments that will have access to your knowledge sources
-
Turn on a user segment toggle to enable per system
-
Click Create Source
-
The new knowledge source will appear in the dashboard
How to upload webpages
To upload webpages as a knowledge source, users can contact their customer success manager to make requests.
Learn more about segmentation and creating segments in the editor:
Segmentation
Custom Q&A
Enhance AI Answers with custom Q&As to resolve conflicts or fill gaps in your knowledge sources.
How it works
The AI prioritizes your custom Q&A over other knowledge sources, treating it as the most authoritative source of information.
It searches both your knowledge sources and your custom Q&A, but always ranks the custom Q&A higher. This ensures users receive the most relevant and correct answers quickly.
How to create custom Q&A
-
Click the Q&A icon on a source tile
-
Click + Add Q&A
-
Enter your question and answer in the fields
-
Click Add
-
To add additional Q&A click + Add Q&A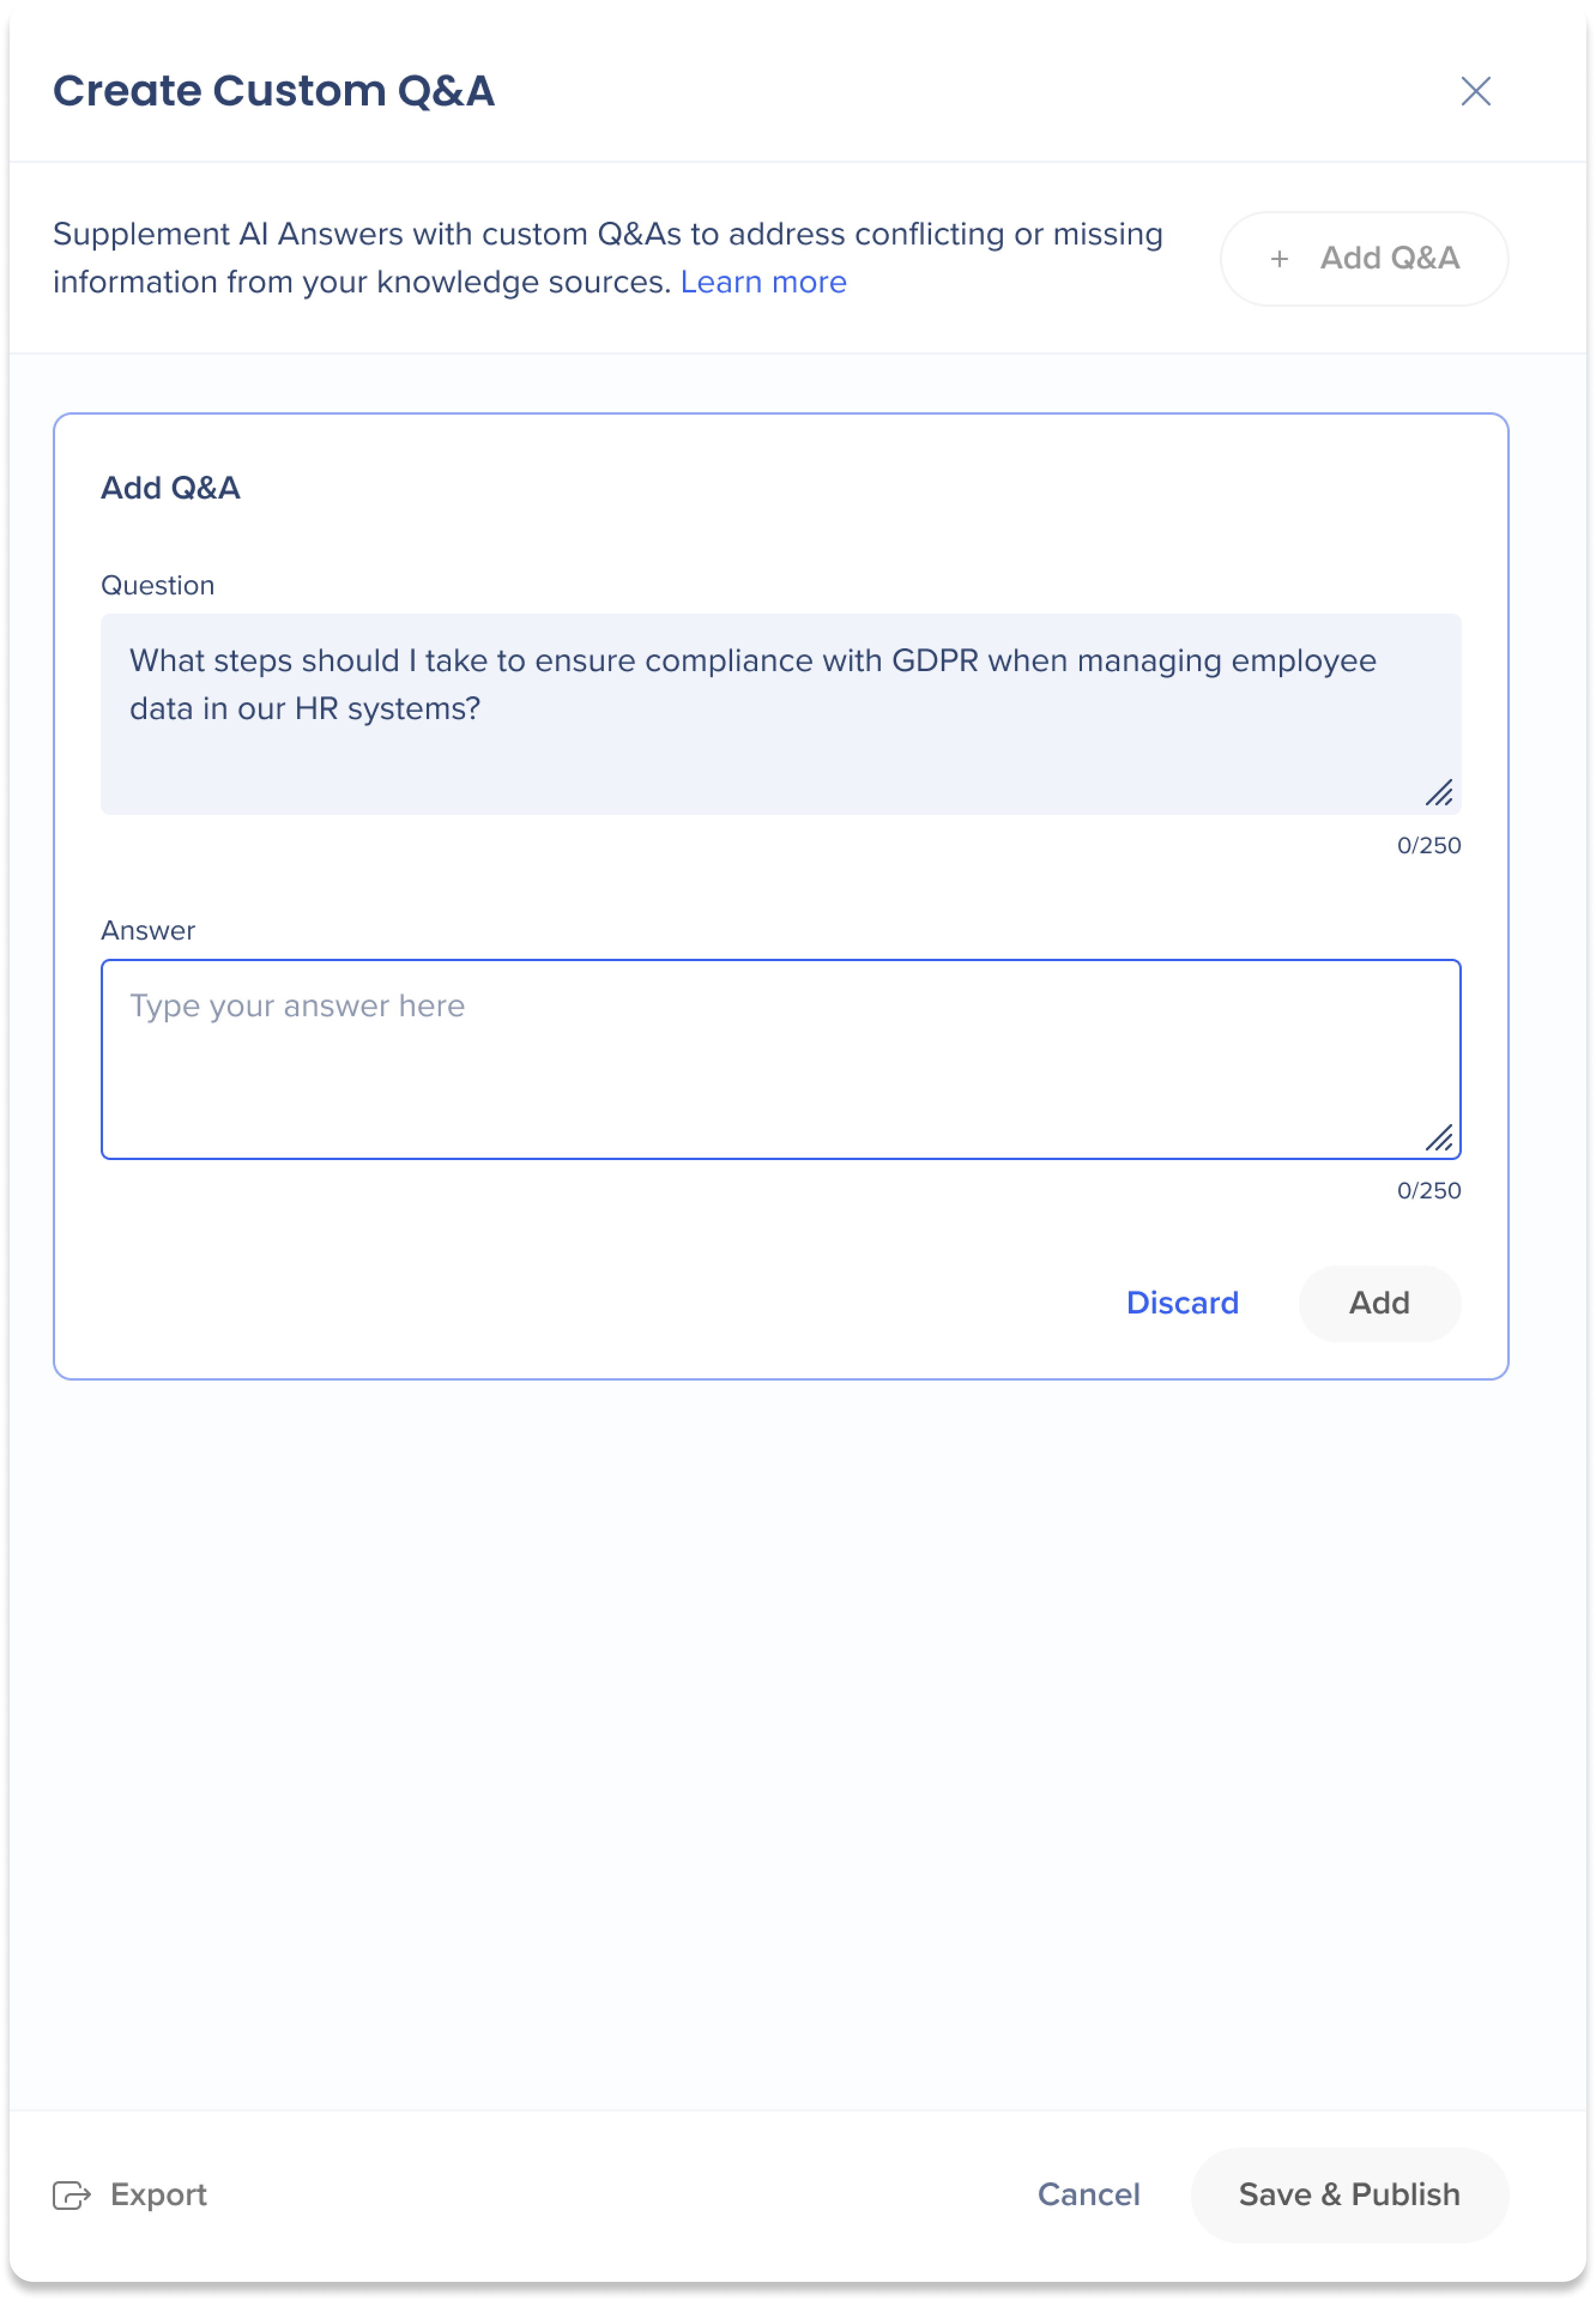
-
Click Save & Publish
-
A popup will appear informing you that the Q&A you've created will be available instantly to end-users. Click Save & Publish
-
To test AI Answers with your new supplement Q&A, click the Demo icon on the source tile you want to test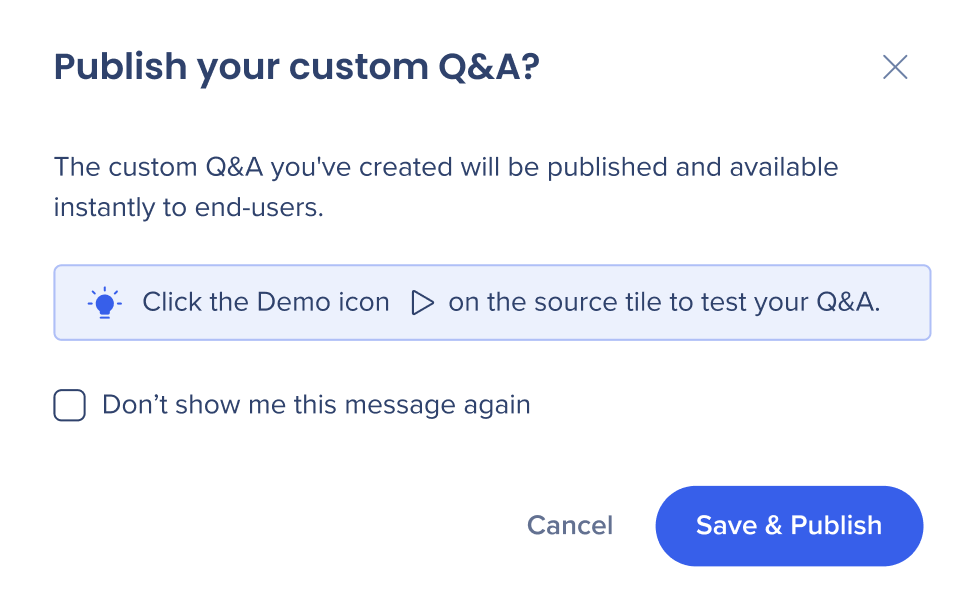
Note
Click Export to download your Q&A as a CSV file
Edit or Delete custom Q&A
-
Click the Q&A icon on a source tile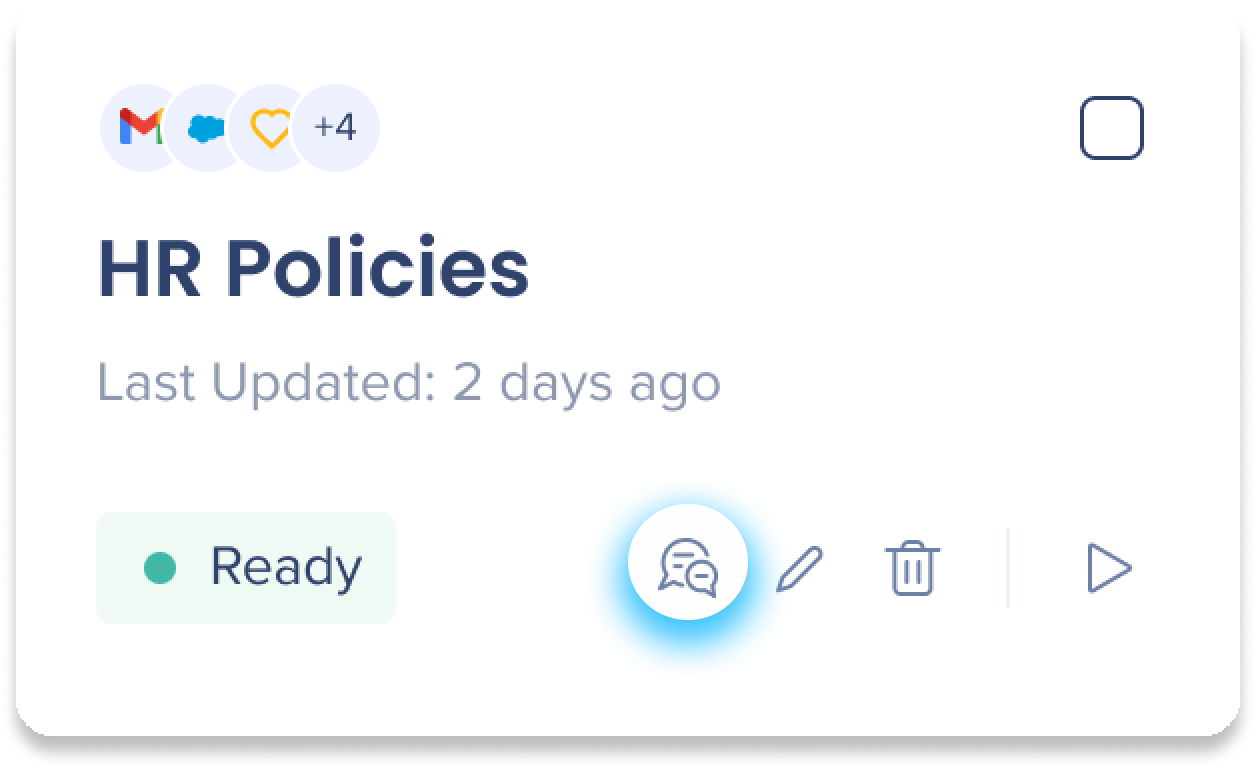
-
Select the Q&A you wish to edit or delete
-
To delete, click the Trash icon
-
To edit, make and change and click Update Changes

Rescan Knowledge Sources
Rescanning knowledge sources lets users schedule updates and view a summary of changes, including additions, modifications, and removals, along with other scanning settings.
How to rescan knowledge sources
-
Go to the AI Settings page in the AI Center
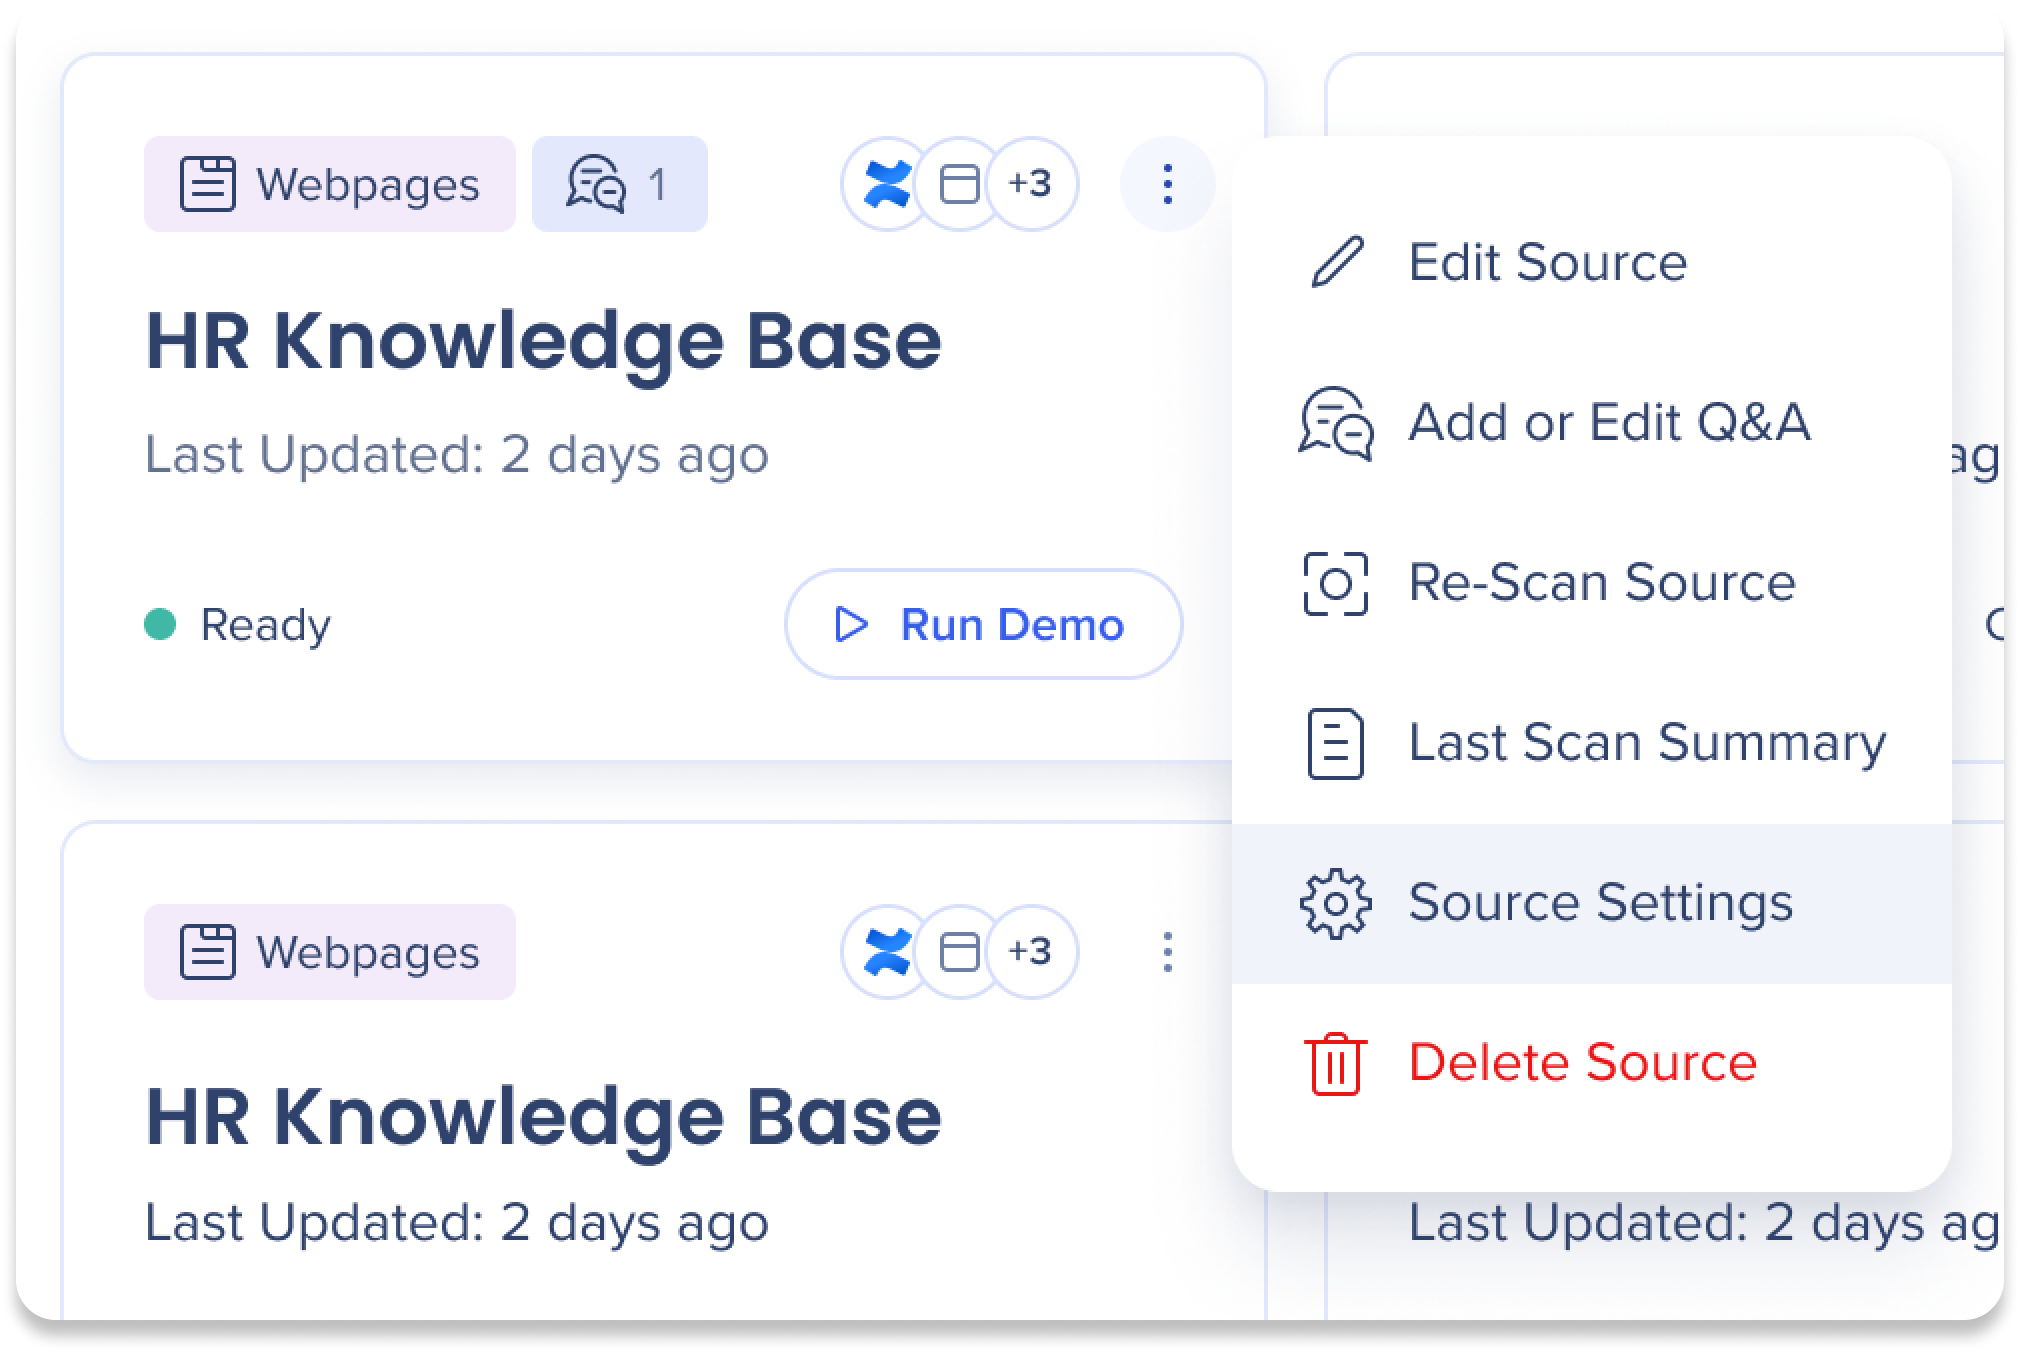
-
 Click the Options menu on the source you want to rescan
-
Click Source Settings
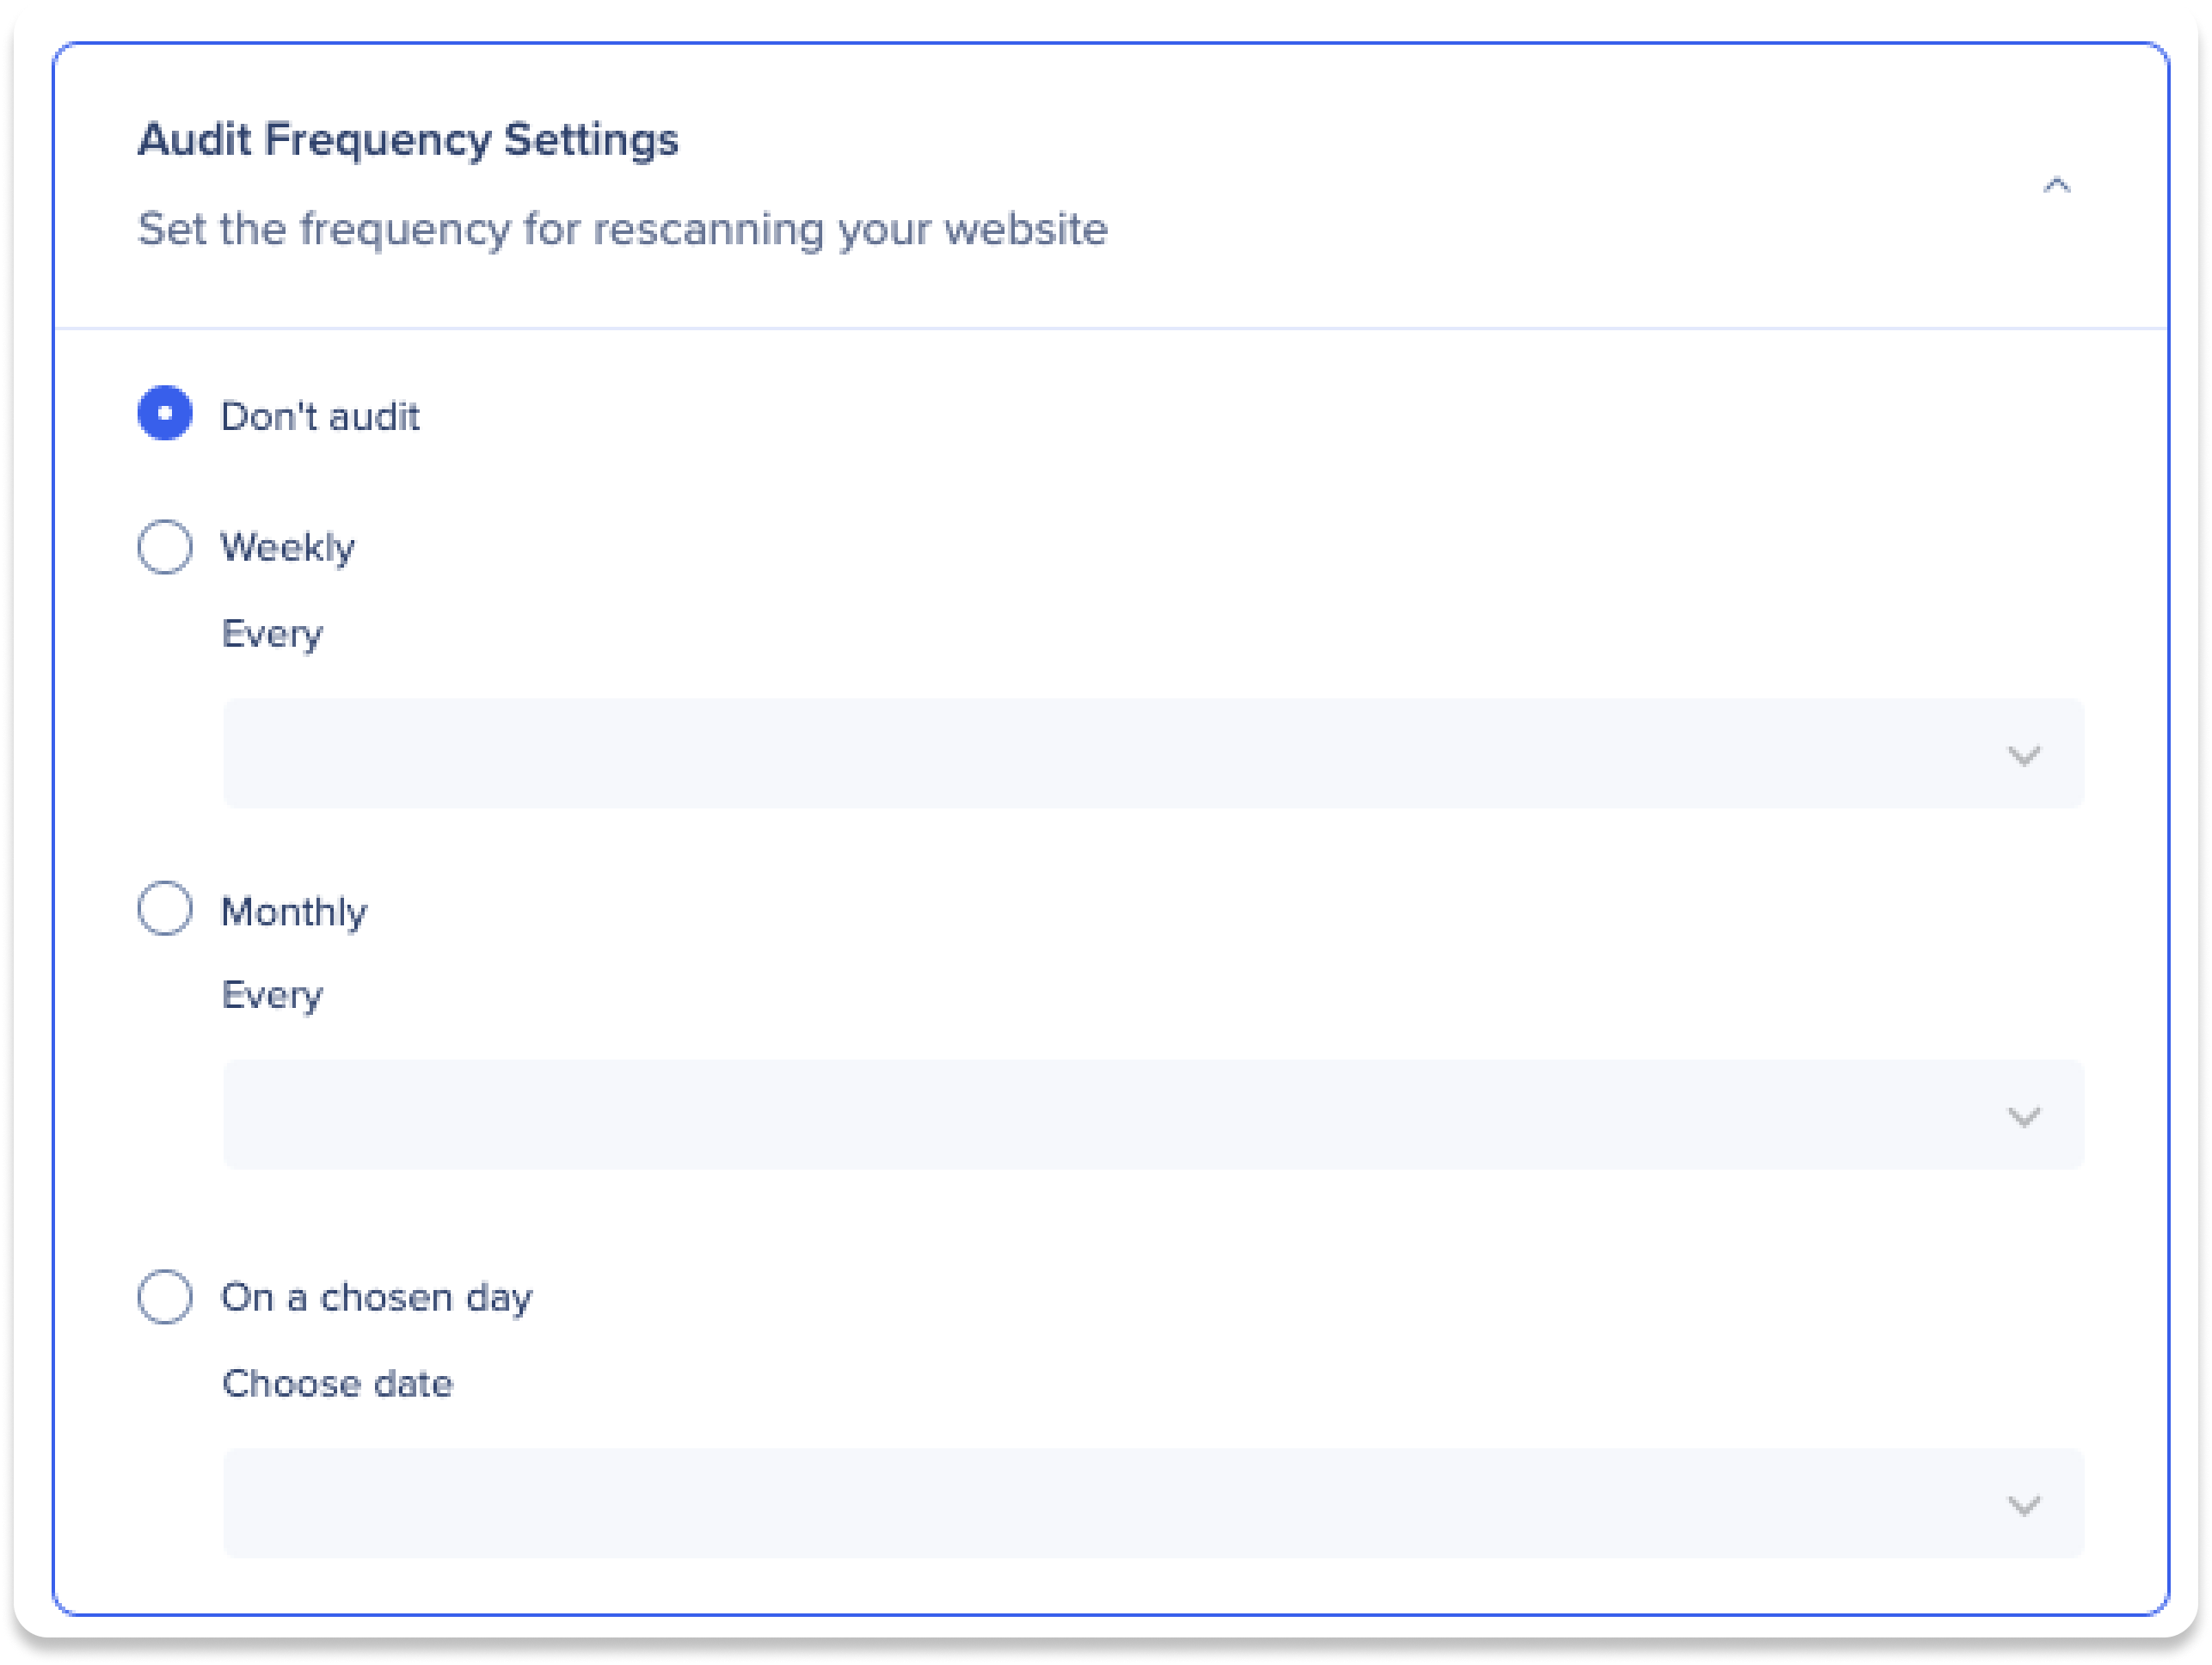
Rescan frequency settings
Choose how often you want to rescan your website:
-
Don't audit: Disable automatic website rescanning
-
Weekly: Select the day of the week for the weekly rescan
-
Monthly: Select the day of the month for the weekly rescan
- On months with fewer than 31 days, the rescan will take place on the final day of the month
-
On a chosen date: Select a specific date to rescan
Enter your website login credentials to allow the AI access for scanning your website.
Note
Some information may already be filled out by the WalkMe Dev team. If there is an issue with invalid credentials, you likely only needs to update your username and password in the Authorization Settings.

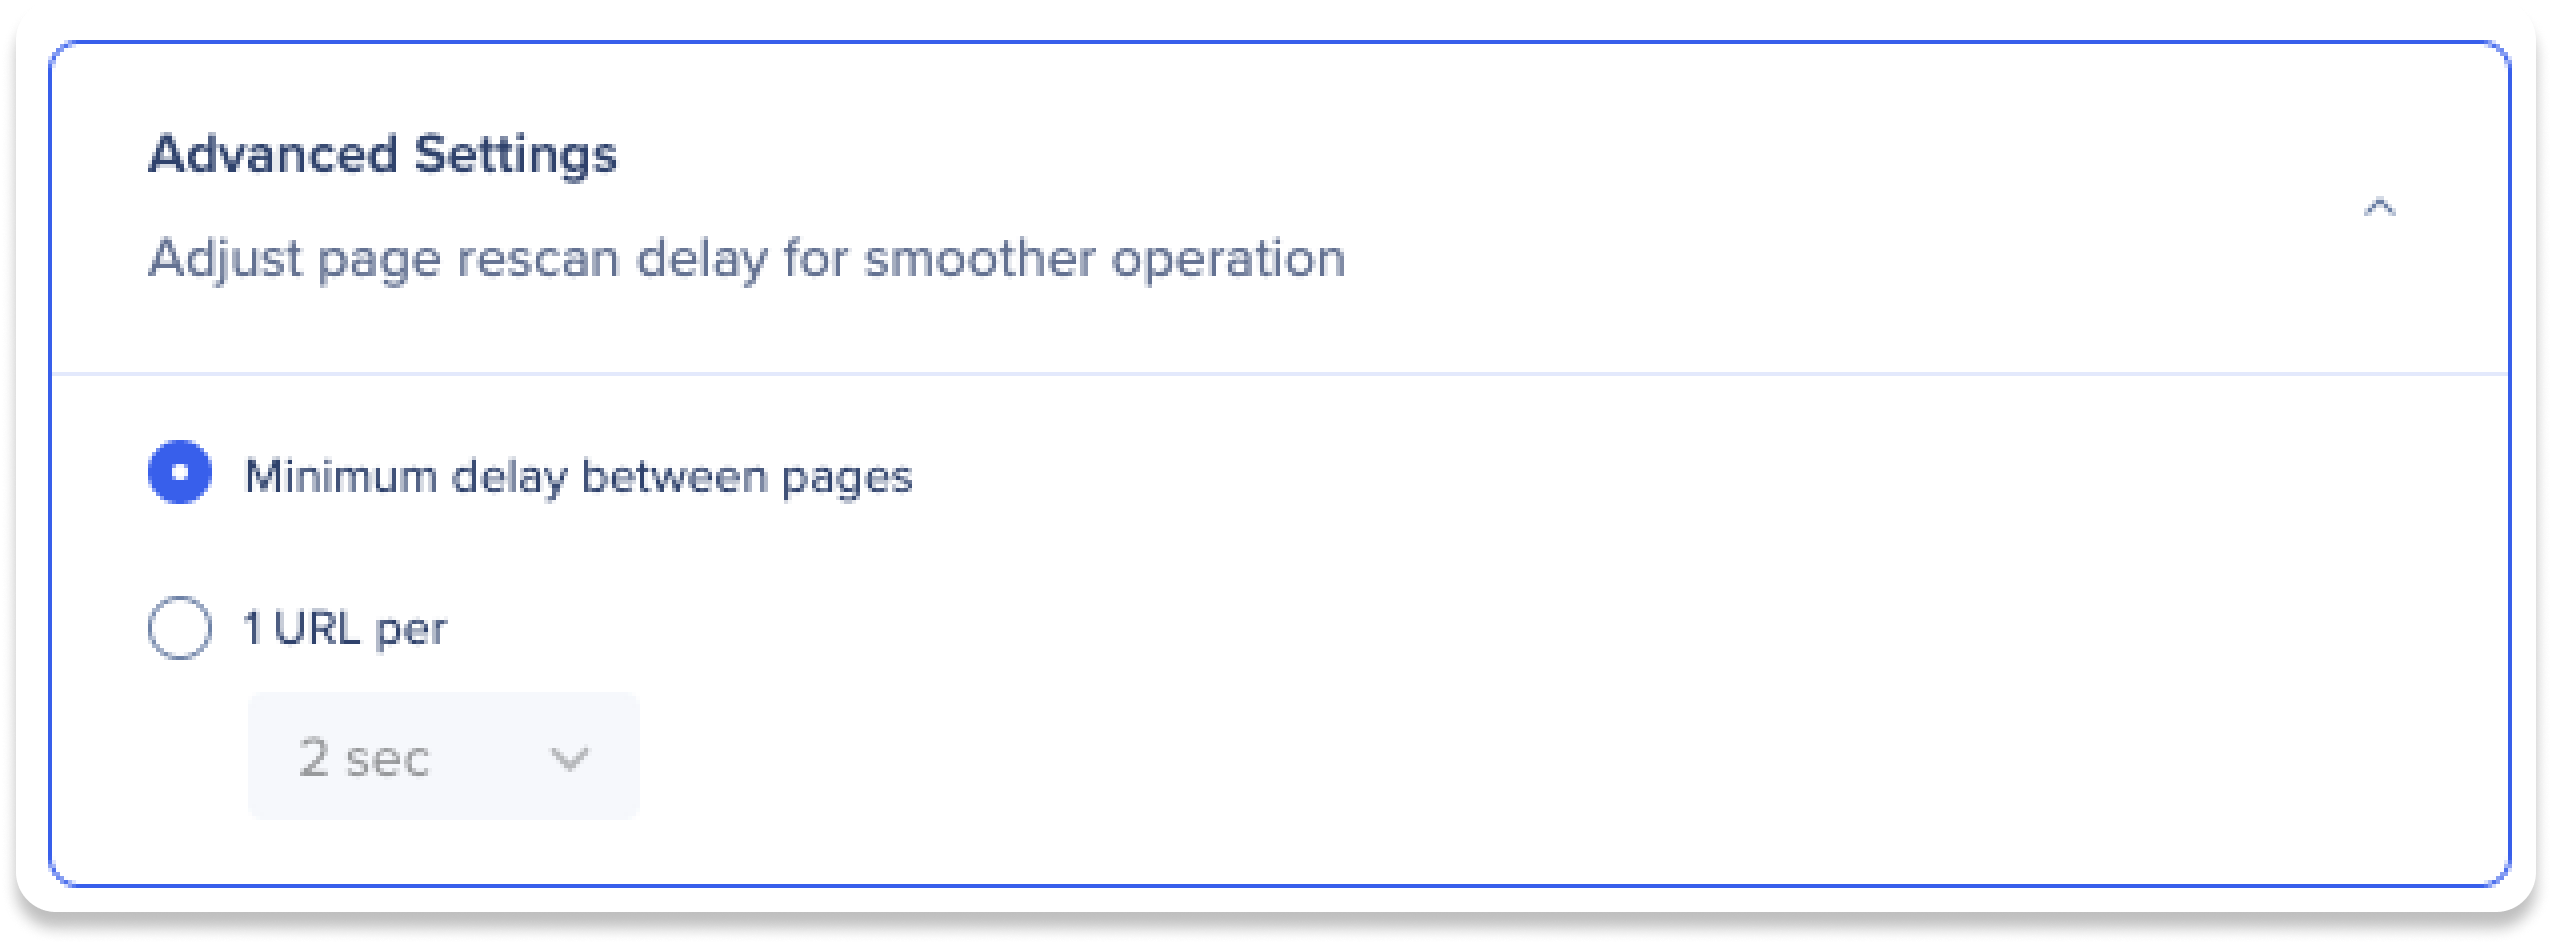
Advanced settings
Set the time intervals between page scans to ensure optimal performance, with the minimum delay usually sufficient.
-
Minimum delay between pages
-
 Best option for most users
-
URL per second
-
Select the amount of seconds between each page scan
Note
In most cases, you can keep the default minimum delay setting. The URL per second setting is typically only needed for specific situations where the site may have issues handling large data volumes.
Scan summary
After configuring the rescan settings, click Save Changes to view a summary of the updates and current status of your AI Answers knowledge source. The scan summary consists of two pages:
-
Last Scan Summary: Compare your latest scan with the previous one, highlighting new, modified, and removed pages. Switch between Summary and AI Summary view mode toggles.
-
Summary: Click the tabs to view the webpages that have been added, updated, or removed
-
AI Summary: View a summary of all changes analyzed and generated by WalkMe's AI
-
Current URLs: View a list of all URLs integrated into your knowledge source and those that failed to scan

Note
-
 You can revert to the previous scan, but only once after a changes are saved. To do so, click the Revert to previous version icon
-
 Tabs show up to 10 URLs. Click the Export icon to view the full list
AI Integrations
Enable the Slack Integration to use AI Answers within your Slack channels.
Configure the Slack integration
-
Click the AI Integrations tab on the AI Knowledge source page
-
Click Enable on the Slack tile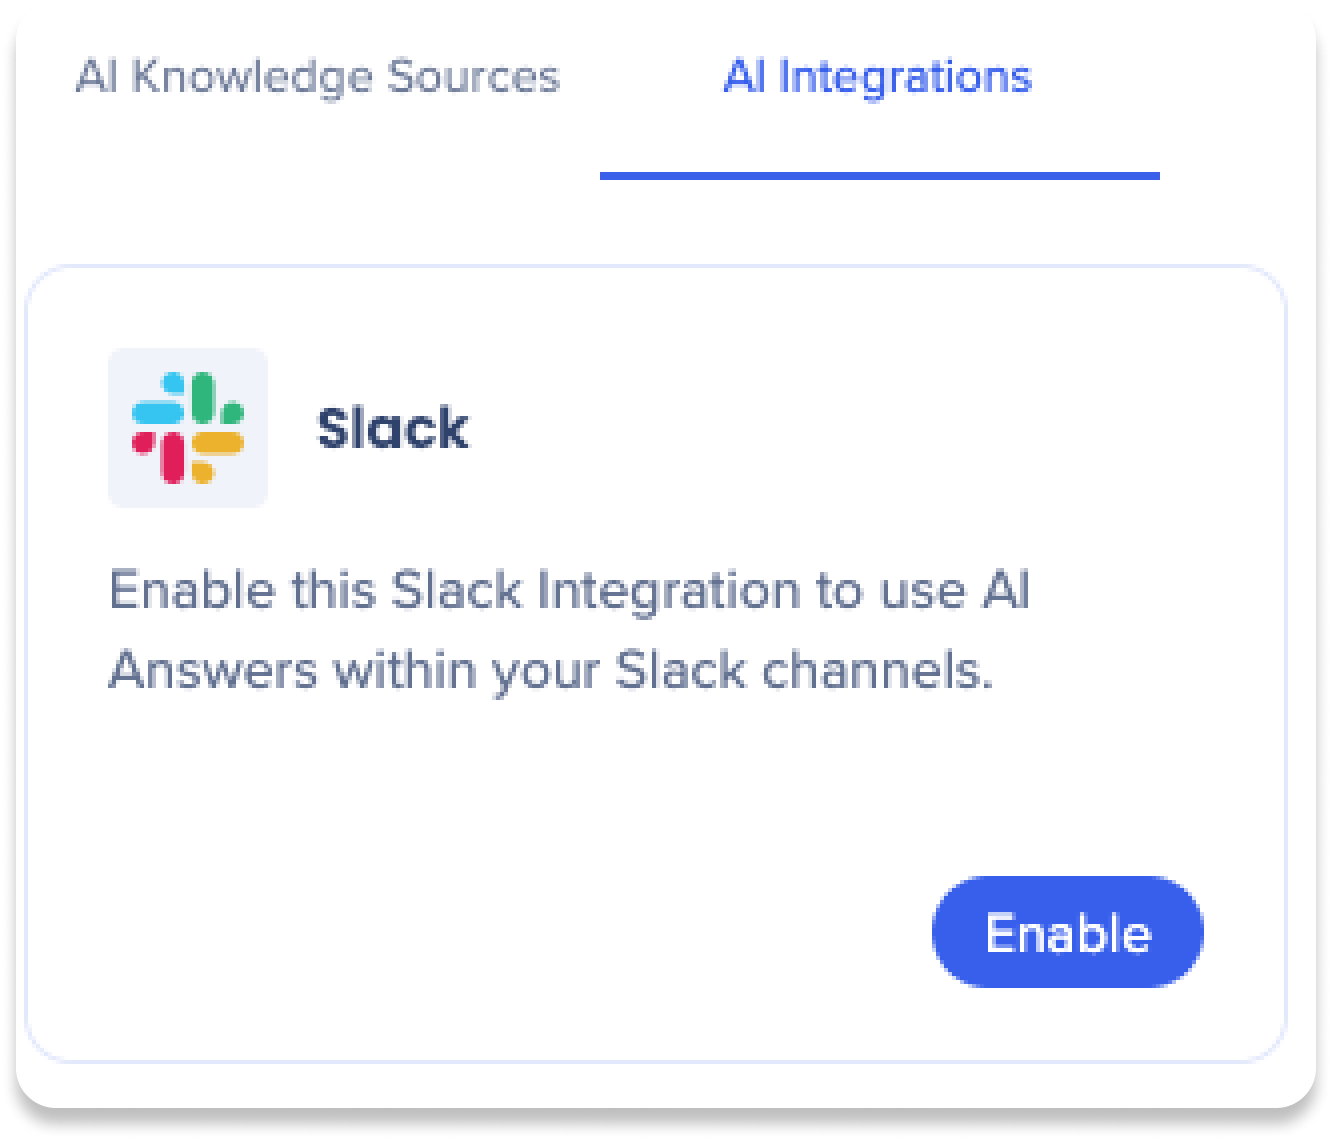
-
A popup will appear to configure the Slack integration
-
Enter a name for the Slack integration
-
Click Next
-
Follow the instructions for the App Manifest
-
Once completed, click Next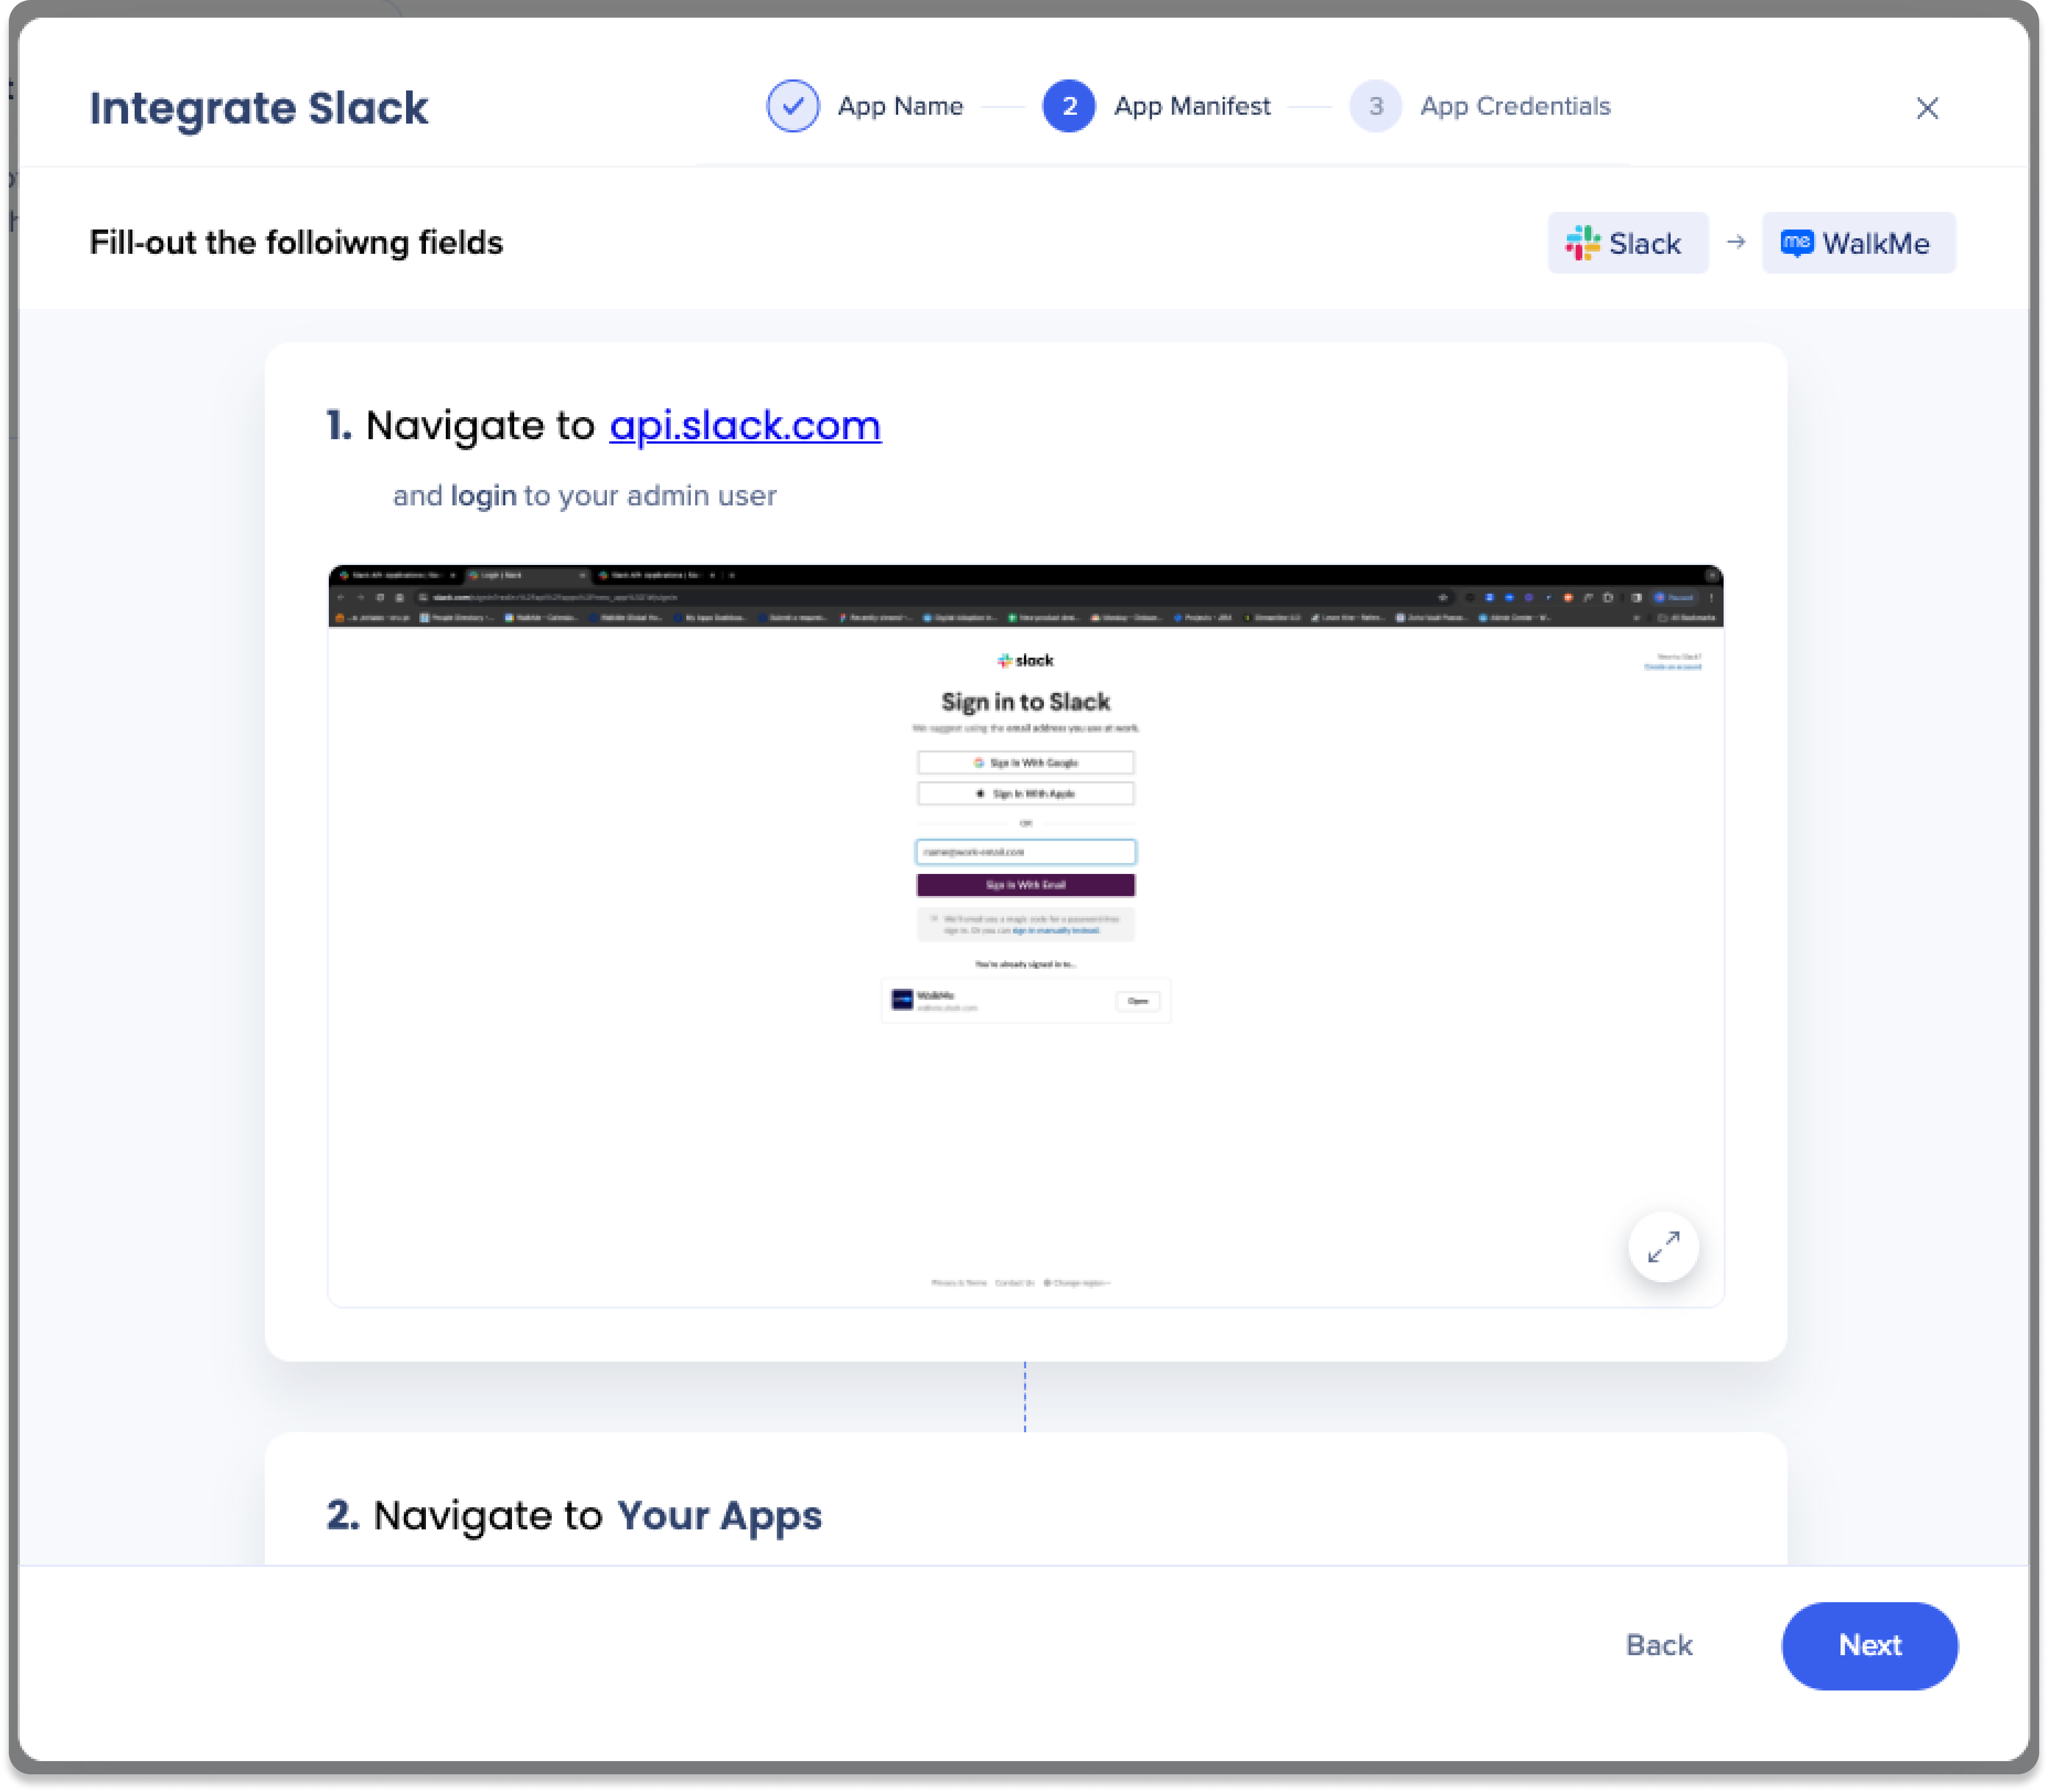
-
Copy and paste the app credentials
-
Signing Secret
-
Bot User OAuth Token
-
Click Add Slack Integration
-
Done!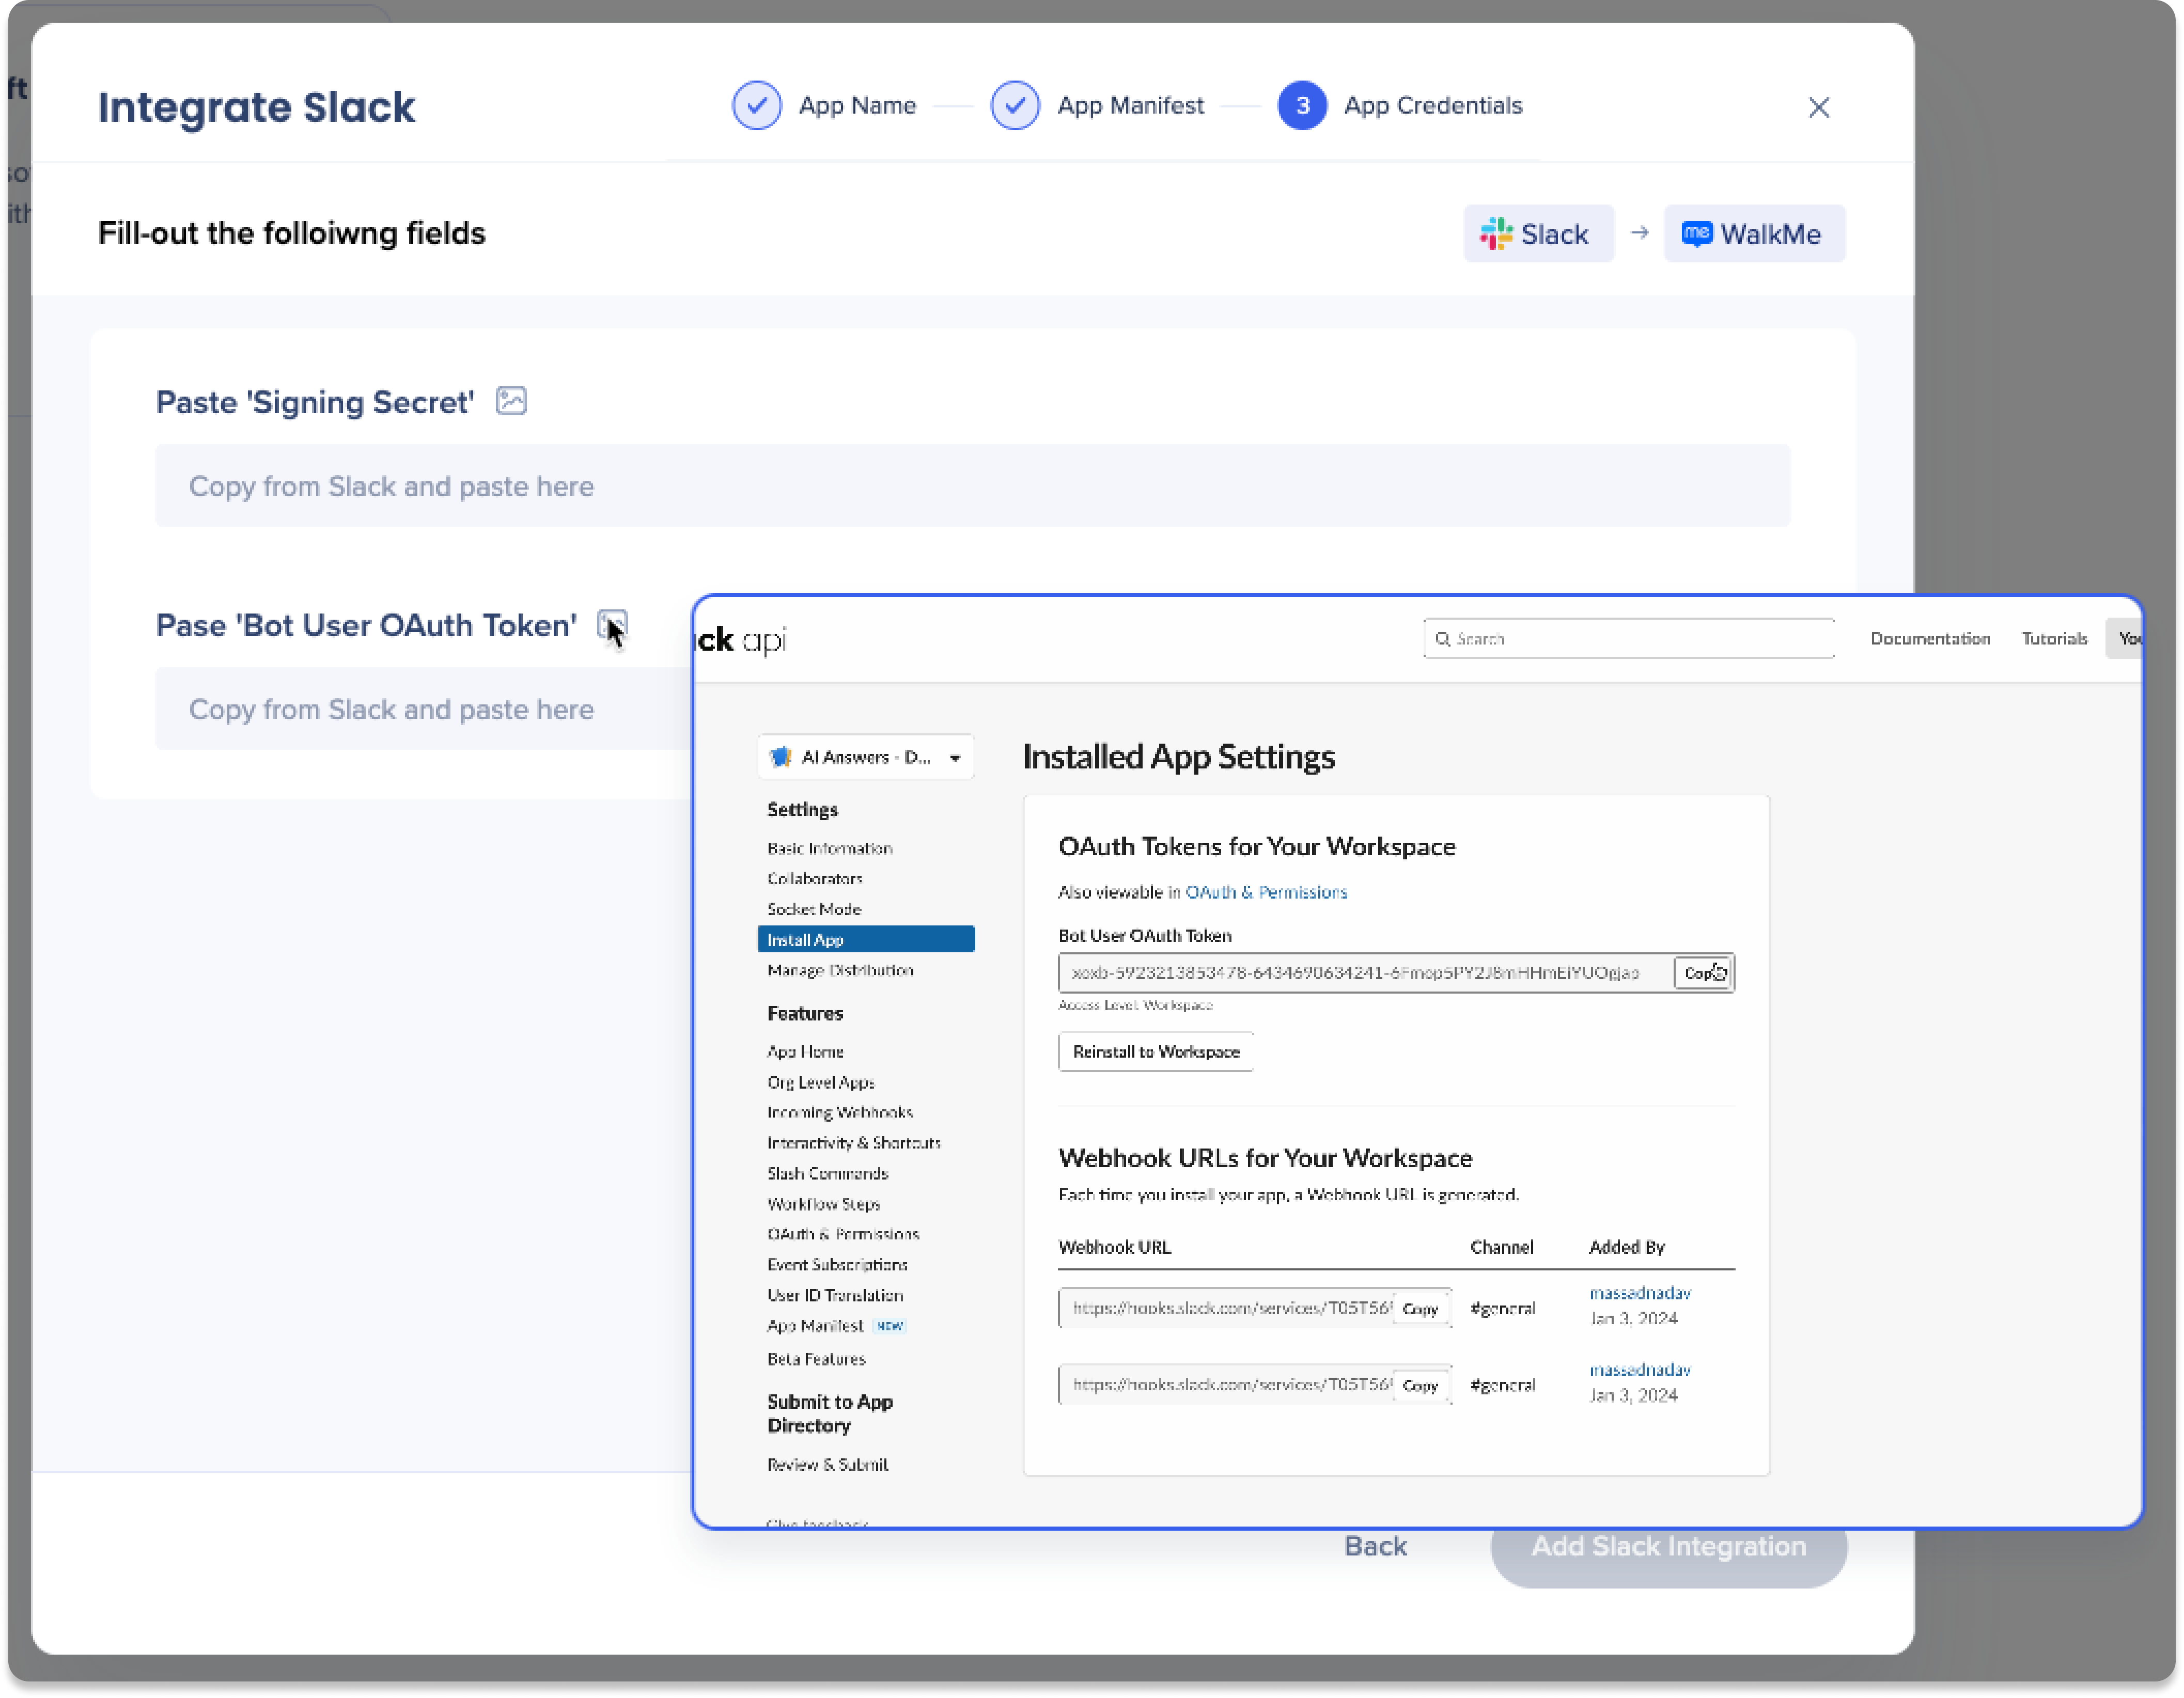
Data Collection Export
Opt in to view full report of Q&A interactions generated by AI Answers.
Enablement
You must opt-in to capture and export full Q&A logs:
-
 Select the Settings icon
-
Turn on the Enable Export AI Chat button toggle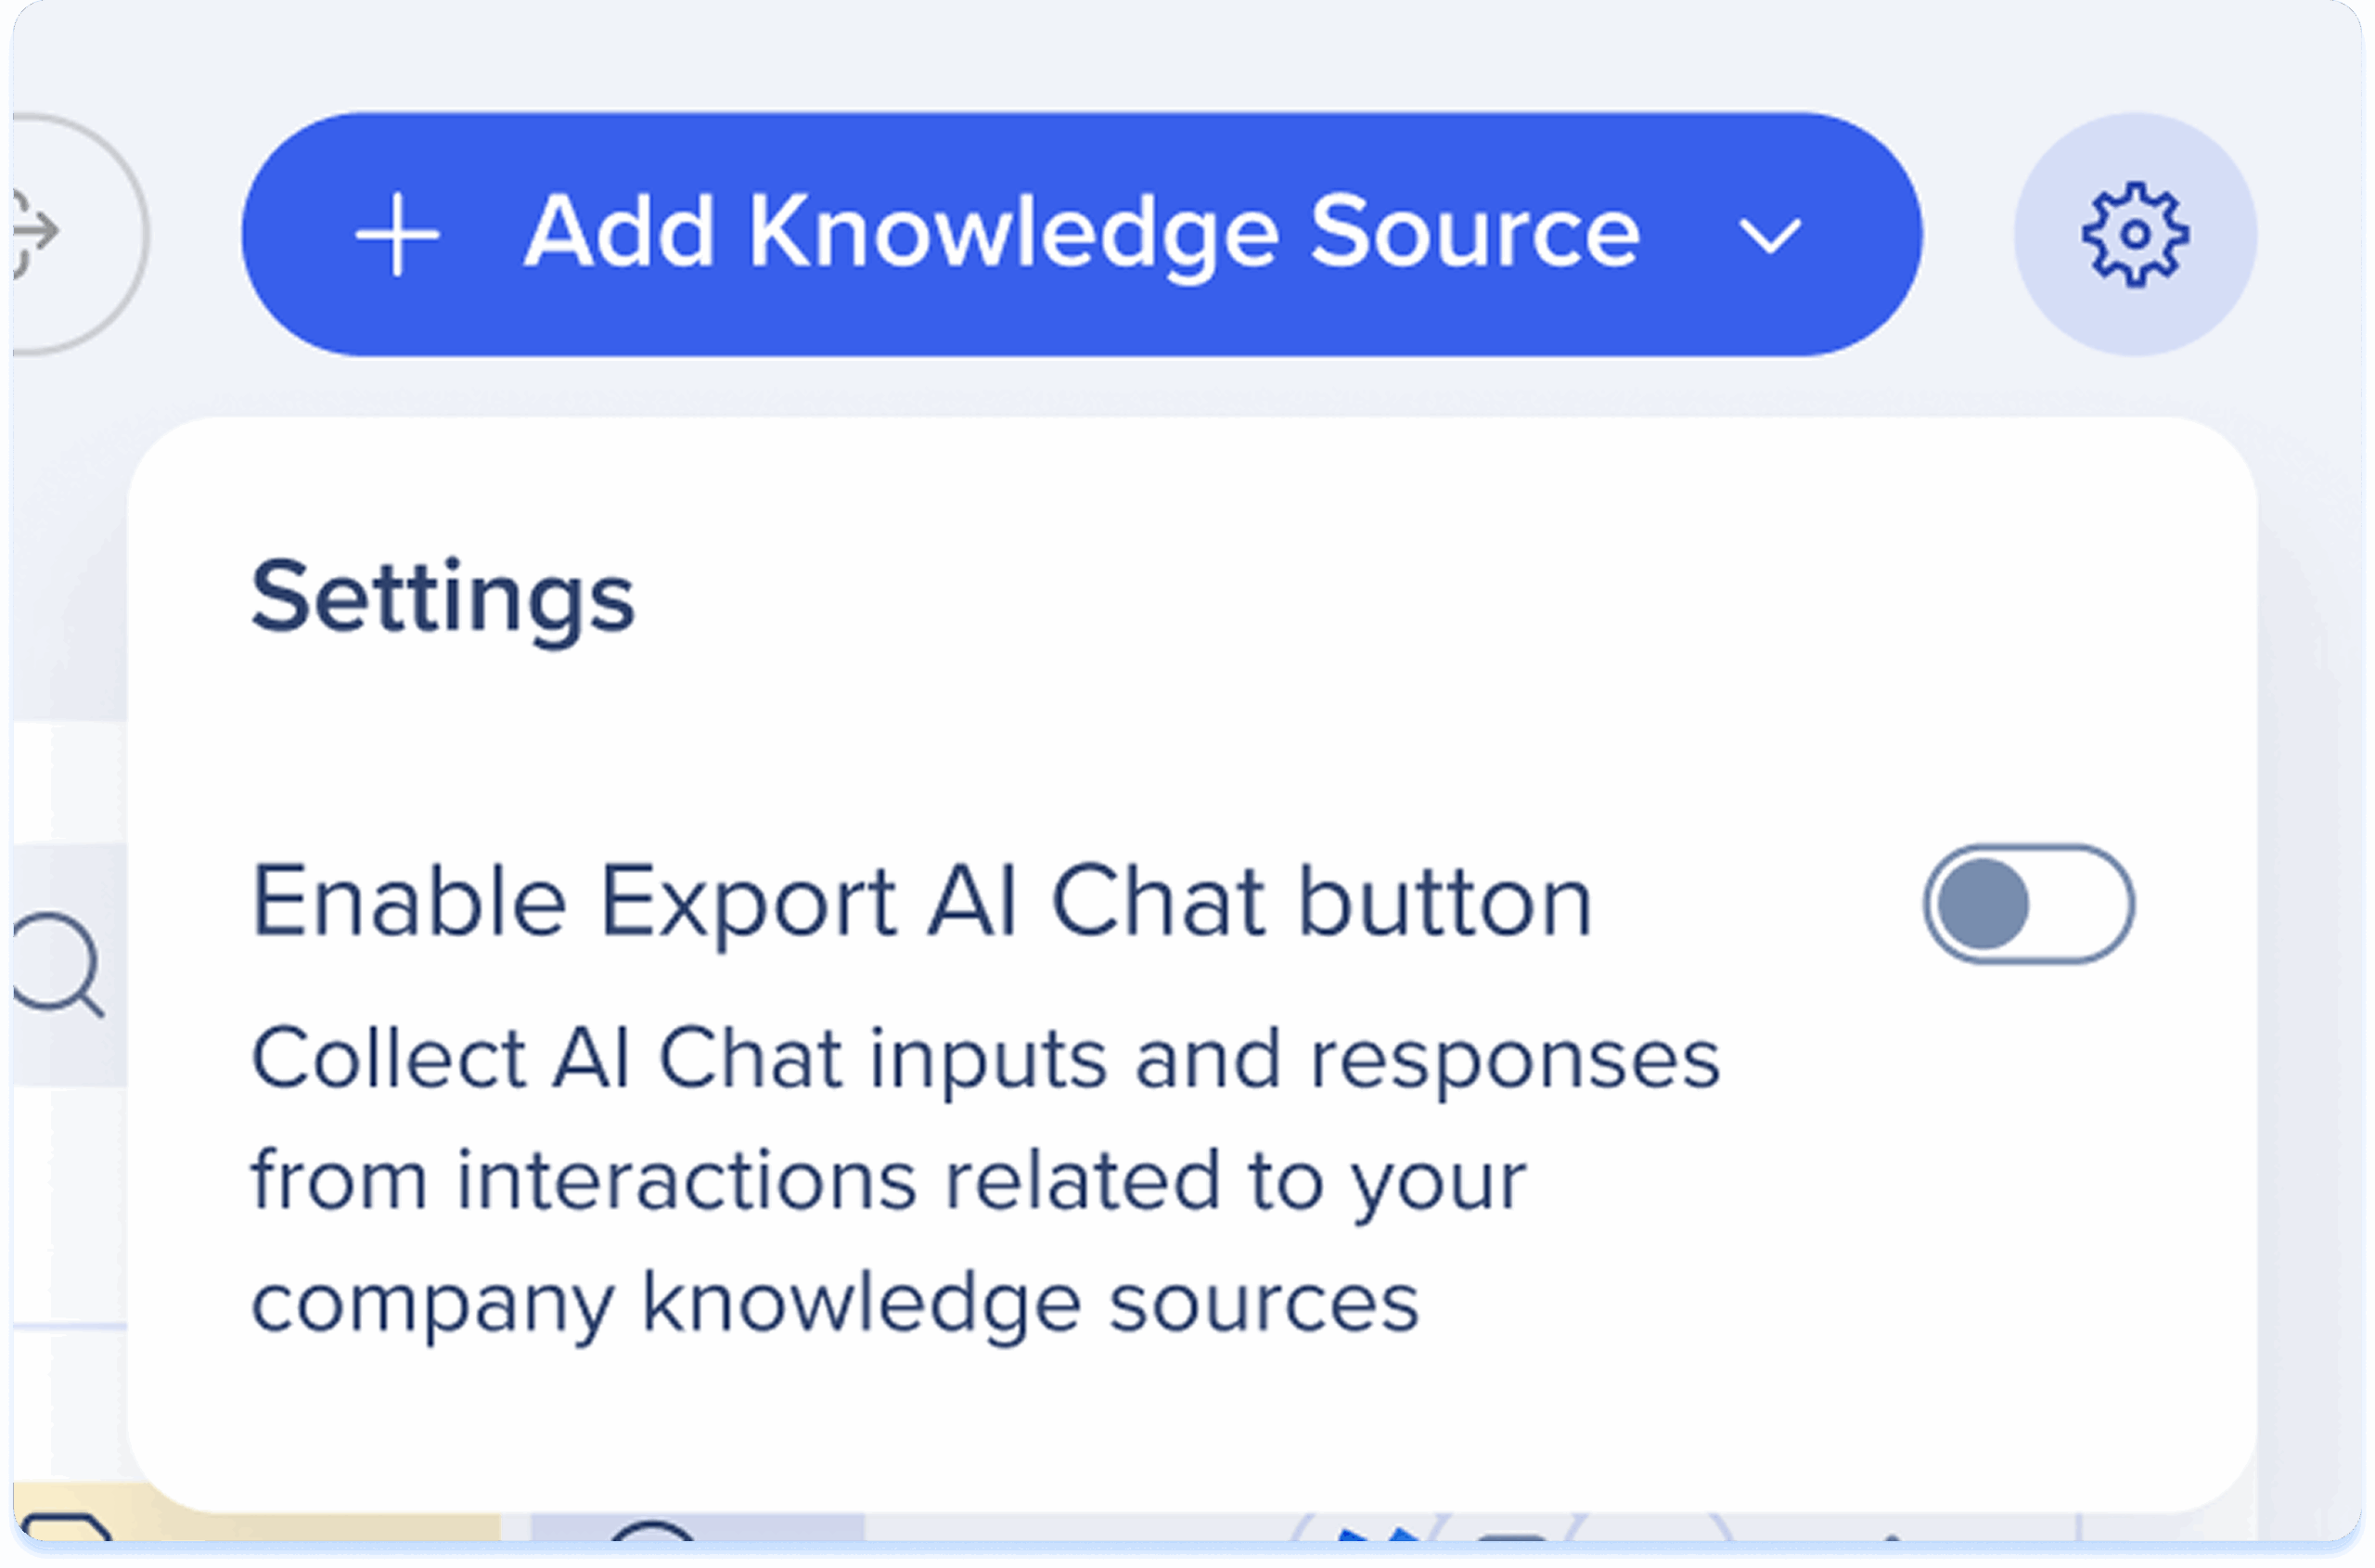
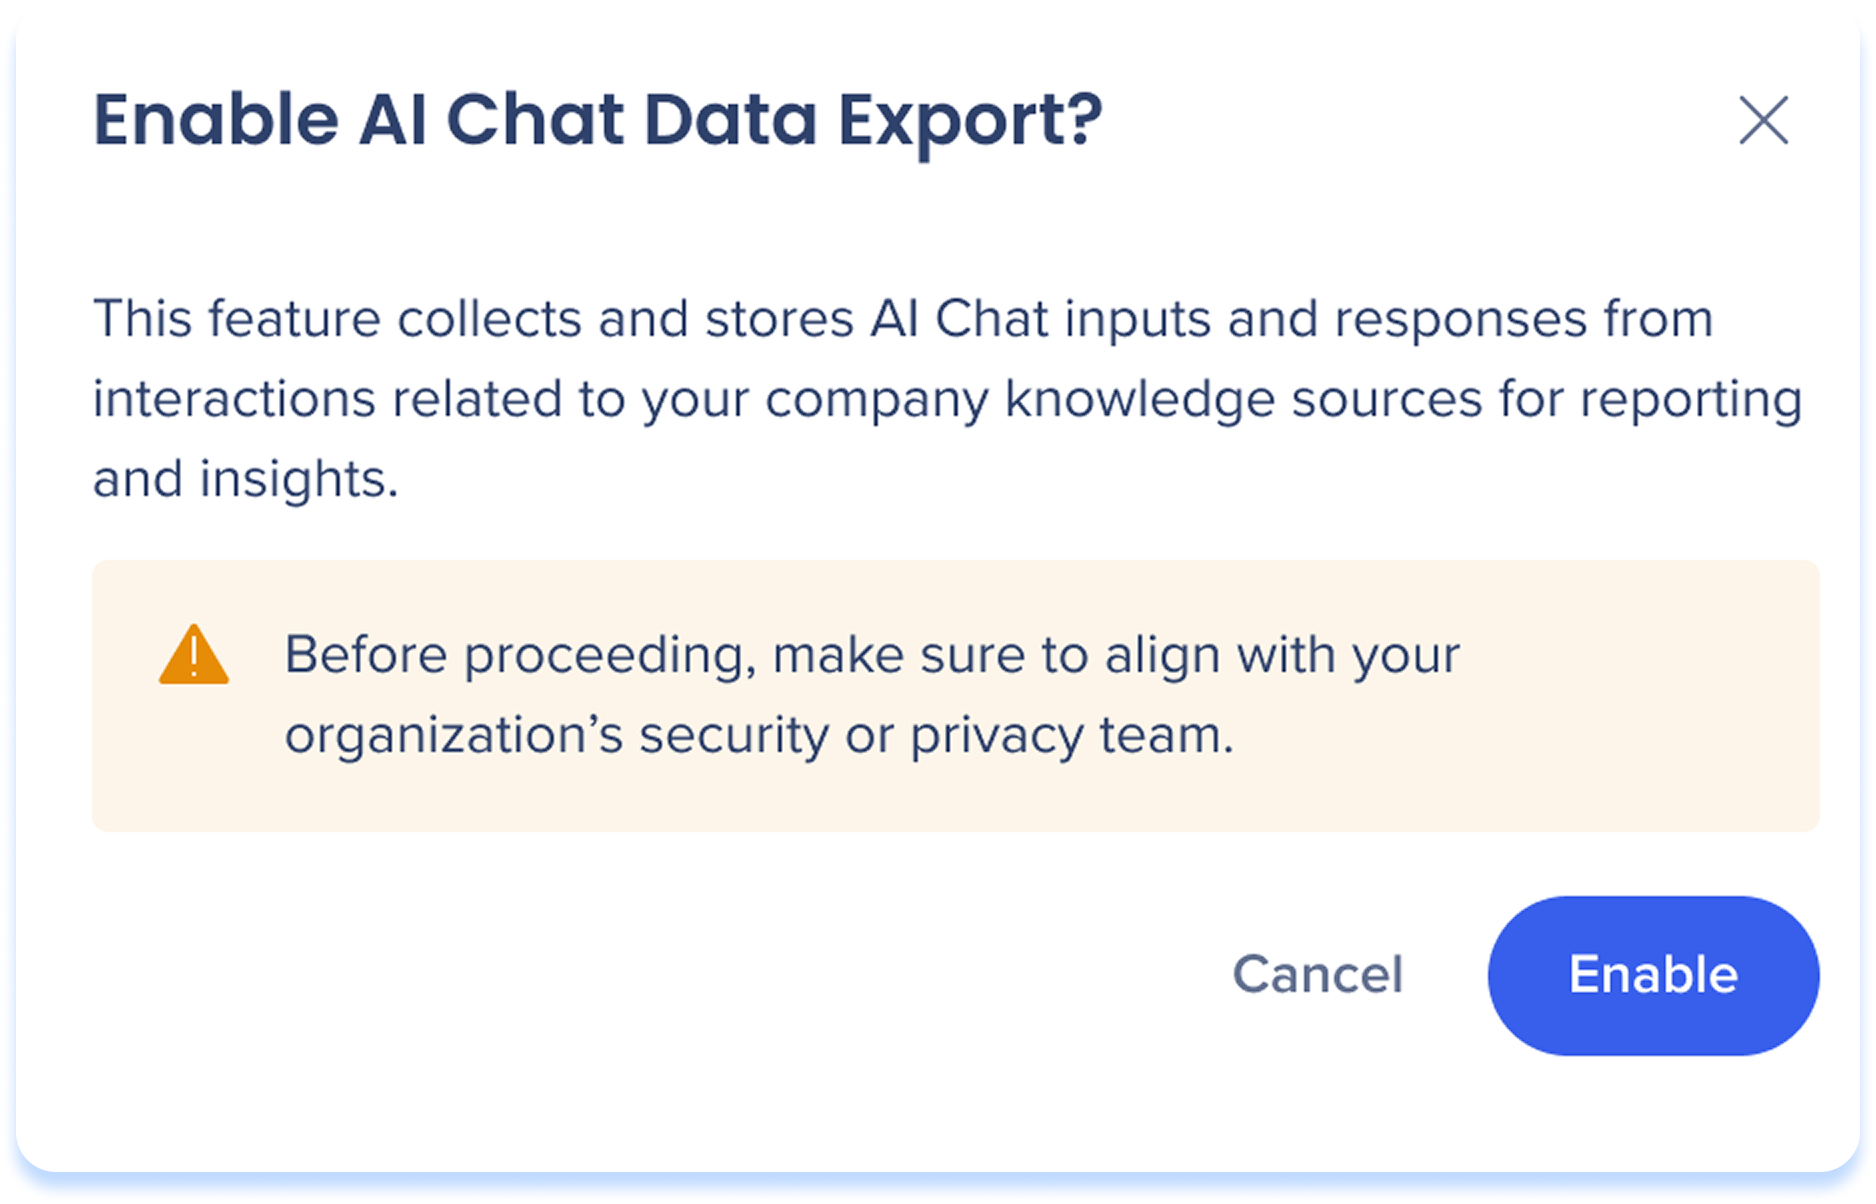
-
You'll get a popup warning letting you know that this feature collects and stores AI Chat inputs and responses from interactions related to your company knowledge sources for reporting and insight
-
Select Enable
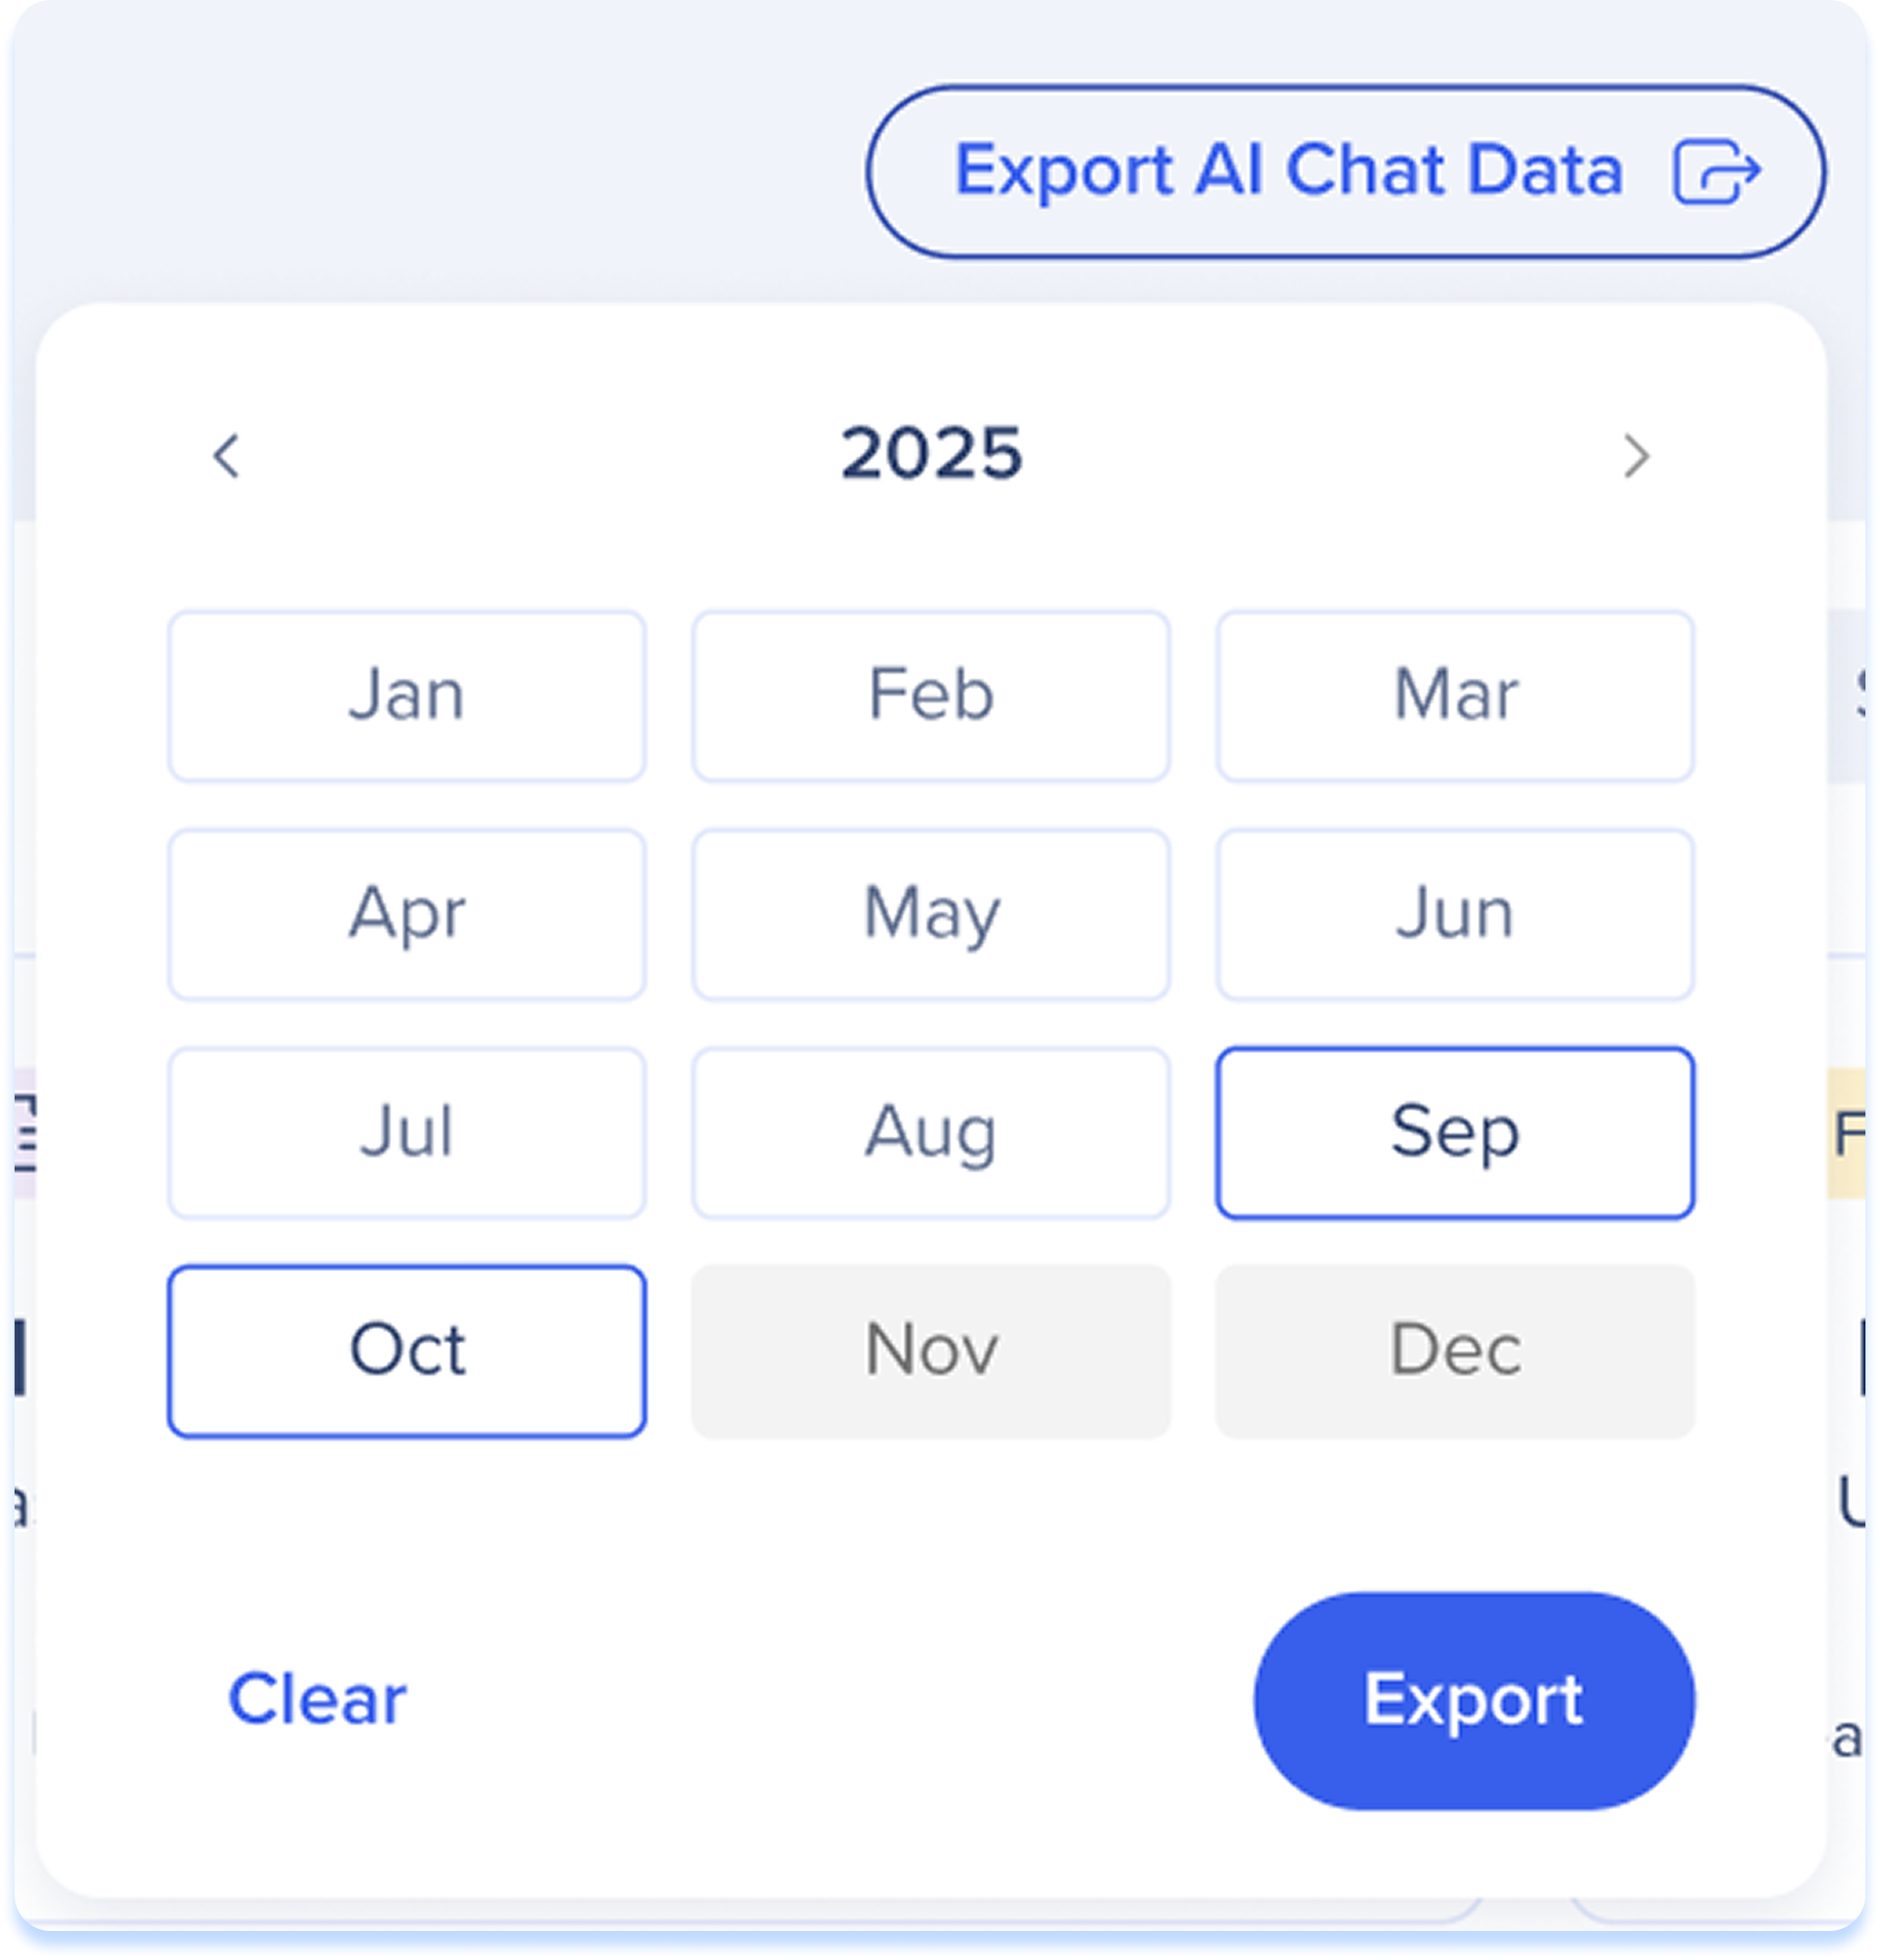
How it works
-
After enablement, Select the Export AI Chat Data button
-
Choose a date range
-
Select Export
Technical Notes
Prerequisites
File Scanning
-
The following file types are supported: txt, doc, pdf, and coming soon csv
-
Only text is pulled from files
-
The file names appear to users in the AI Answers results, but the files aren't accessible by end-users
-
A single knowledge source can consist of one file or multiple files
-
Maximum file size is 15 MB
-
There is no limitation to the number of files you can upload
AI Segmentation
-
By default, sources are applied to all segments (including future segments that will be created in the system)
-
Once specific segments are applied, no publish is required for changes to take effect