Brief Overview
Use the Data Integration Center in the Console to manually import user data into WalkMe by uploading a local CSV file. Once imported, the data can be used to enrich user profiles, segment content, and personalize the user experience. This integration is ideal for one-time or occasional updates and does not support scheduling.
Access
Access the WalkMe Console using the correct link for your data center.
WalkMe Console
How It Works
How to set up a CSV incoming integration
-
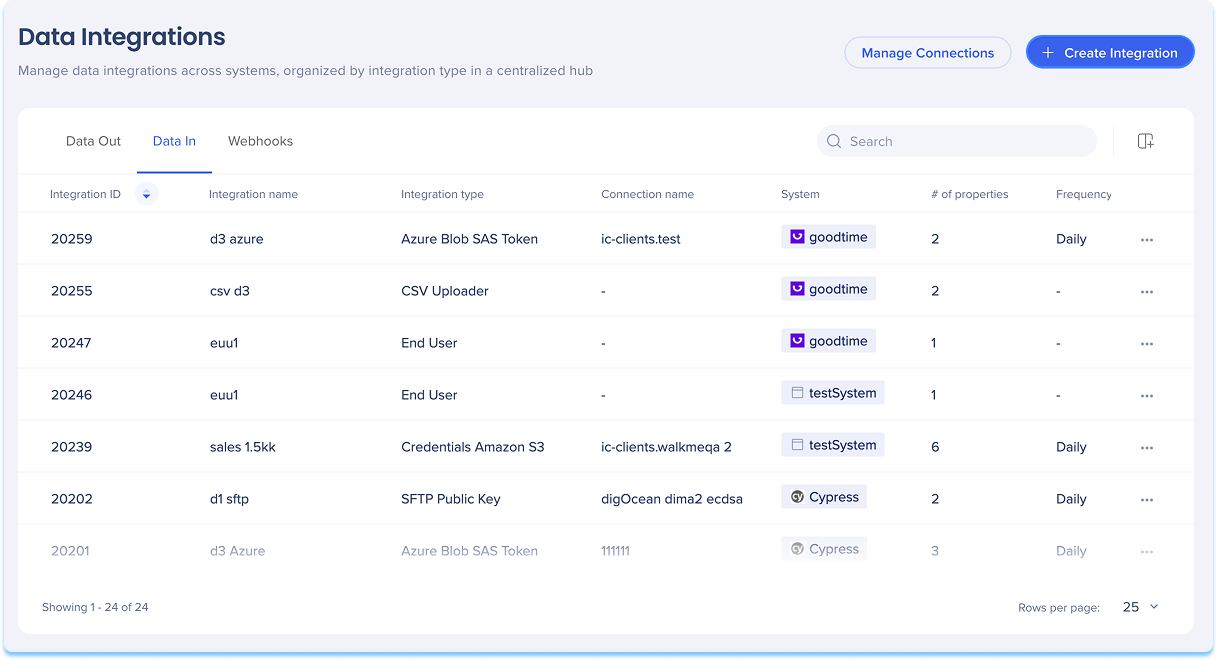
Navigate to the Data Integrations page in the console
-
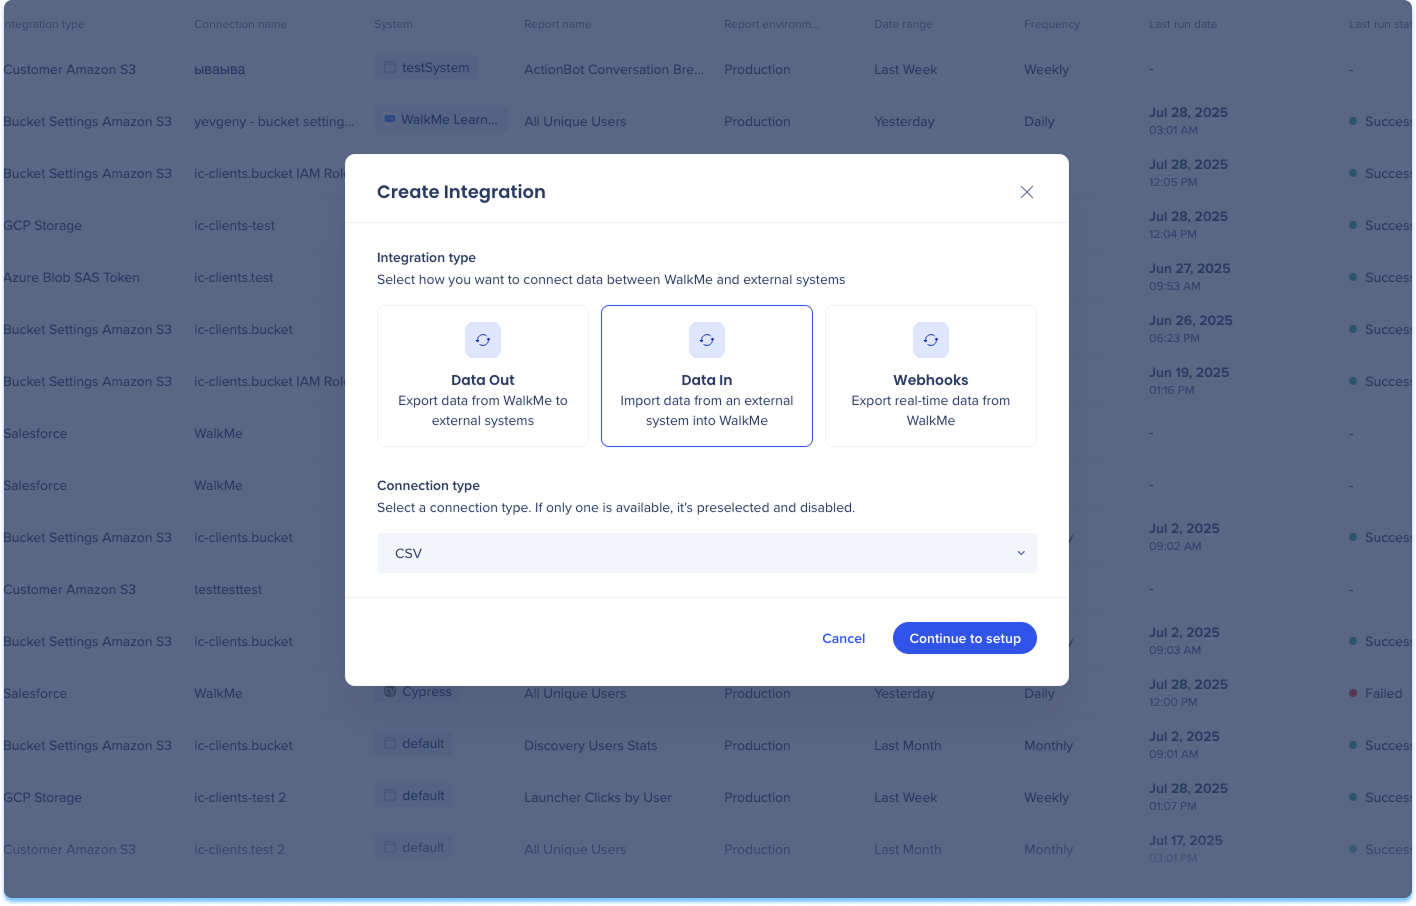
Click Create Integration in the top-right corner
-
A modal will open with the option to choose the integration type
-
Click the Data In tile
-
Select CSV from the Connection Type from the dropdown menu
-
Click Continue to Setup

-
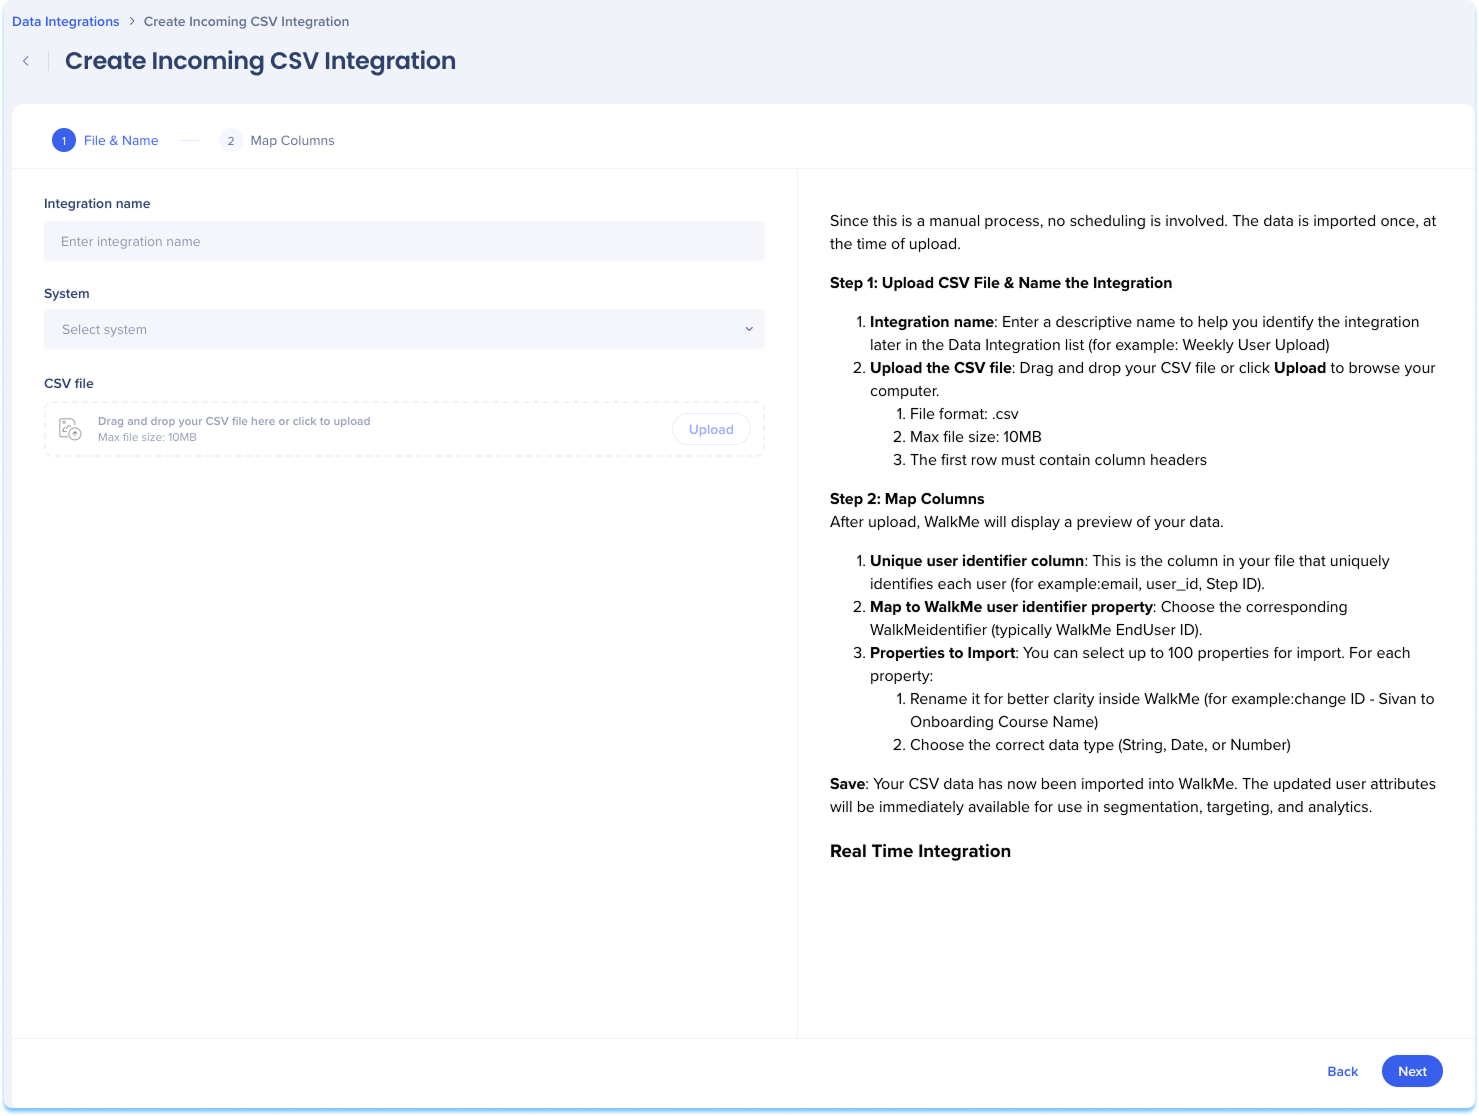
You'll be taken to the Create Incoming CSV Integration page, which includes three steps:
-
File & Name
-
Map Columns
File & Name
-
Enter a descriptive name to help you identify this integration in the Data Integration list
-
Select the WalkMe system the imported data will apply to
-
Drag and drop your CSV file or click Upload to browse your computer
-
File format: .csv
-
Max file size: 10MB
-
The first row must contain column headers
Best practices
We recommend using consistent column names when uploading and reuploading CSV files to the same integration. As a best practice, use unique column names across different CSV integrations.
-
Click Next
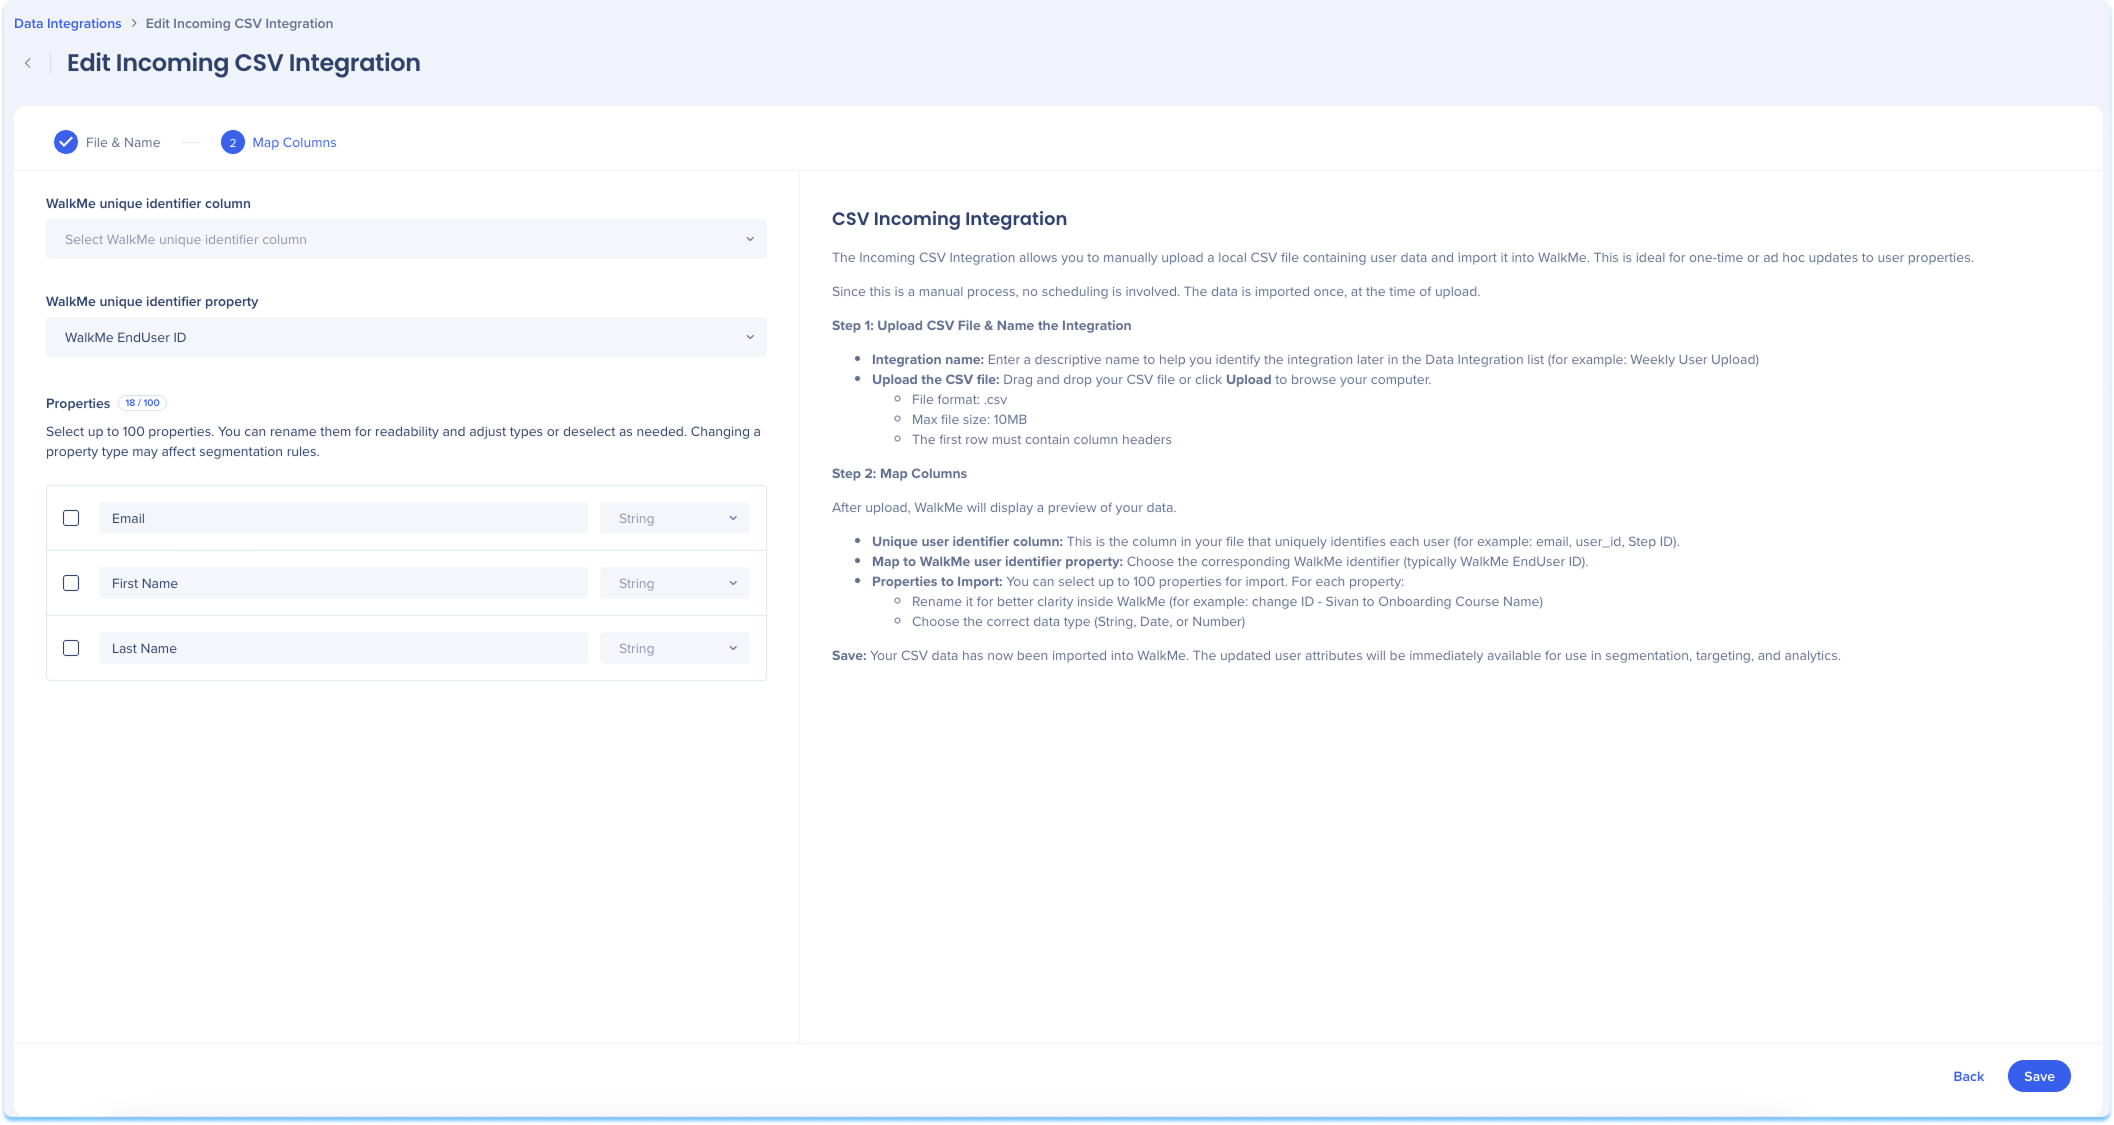
Map Columns
After the upload, WalkMe will display a preview of your data
-
Select the column from the file that uniquely identifies each user
-
For example: email, user_id
-
Choose the unique user identifier property
-
This is the WalkMe property to map the identifier to
-
For example: WalkMe EndUser ID
-
The system will display a list of all available columns in your file
-
For each column, you can:
-
Select or deselect the column
-
Rename the property for clarity
-
Assign a data type (String, Number, Date)
Track property usage
You can import up to 100 properties per integration. The UI shows a counter to help you track usage. For example: 20/100
-
Click Save
Note
Your integration is now active and will import data from the CSV file either on-demand or based on the schedule you defined.
Publish settings
This is required for CSV integrations to be pushed to published environments and applies to new integrations and updates of existing ones


