Brief Overview
The Deploy Desktop page in the Menu Console enables organization-wide installation and deployment of the desktop menu on users' machines.
Deployment Steps
Activation required
- Before you can deploy the WalkMe Menu, you must create and activate a Desktop/Mobile system in the Admin Center
- This step is required for the menu to appear and for the Deploy page to be available in the console
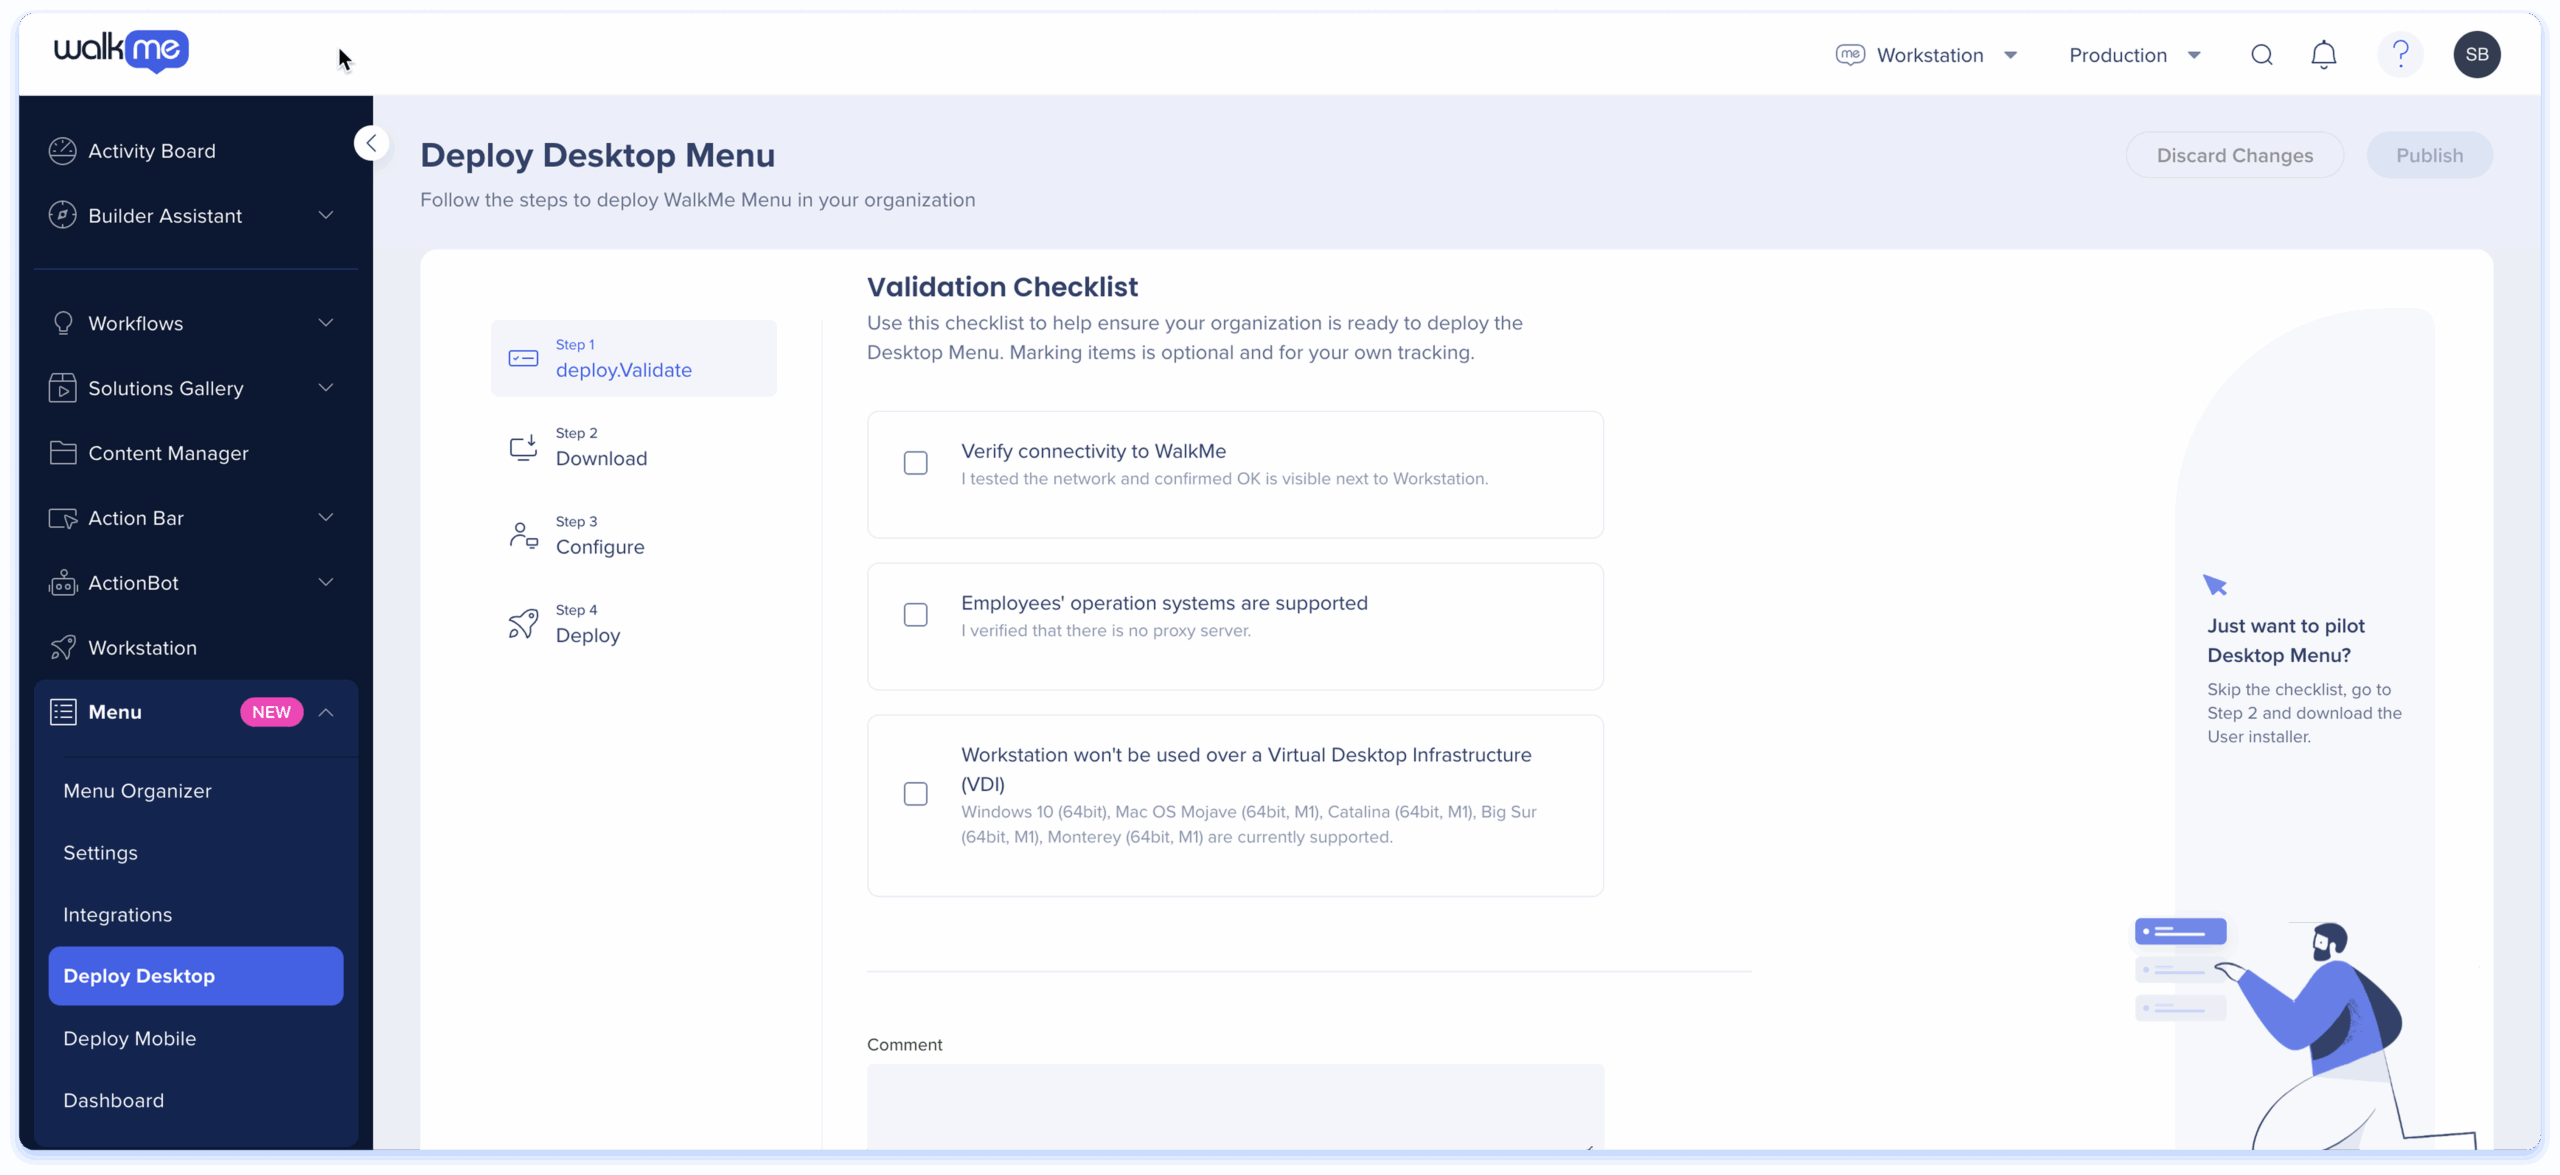
Step 1: Validate
The validation checklist ensures that the desktop menu can be deployed in your organization.
Review the checklist with the relevant stakeholders, which likely include your IT team and check the box once a condition has been confirmed.
- Hover over the checkbox to see who from the company confirmed each of the conditions.
- Hover over the condition or click on the down-arrow to expand the description of the condition.
- Add a comment to leave a note under the conditions and click "Save comment".
Step 2: Download
On this screen, download the installers for each of the operating systems (Windows and MacOS) within the organization.
Windows
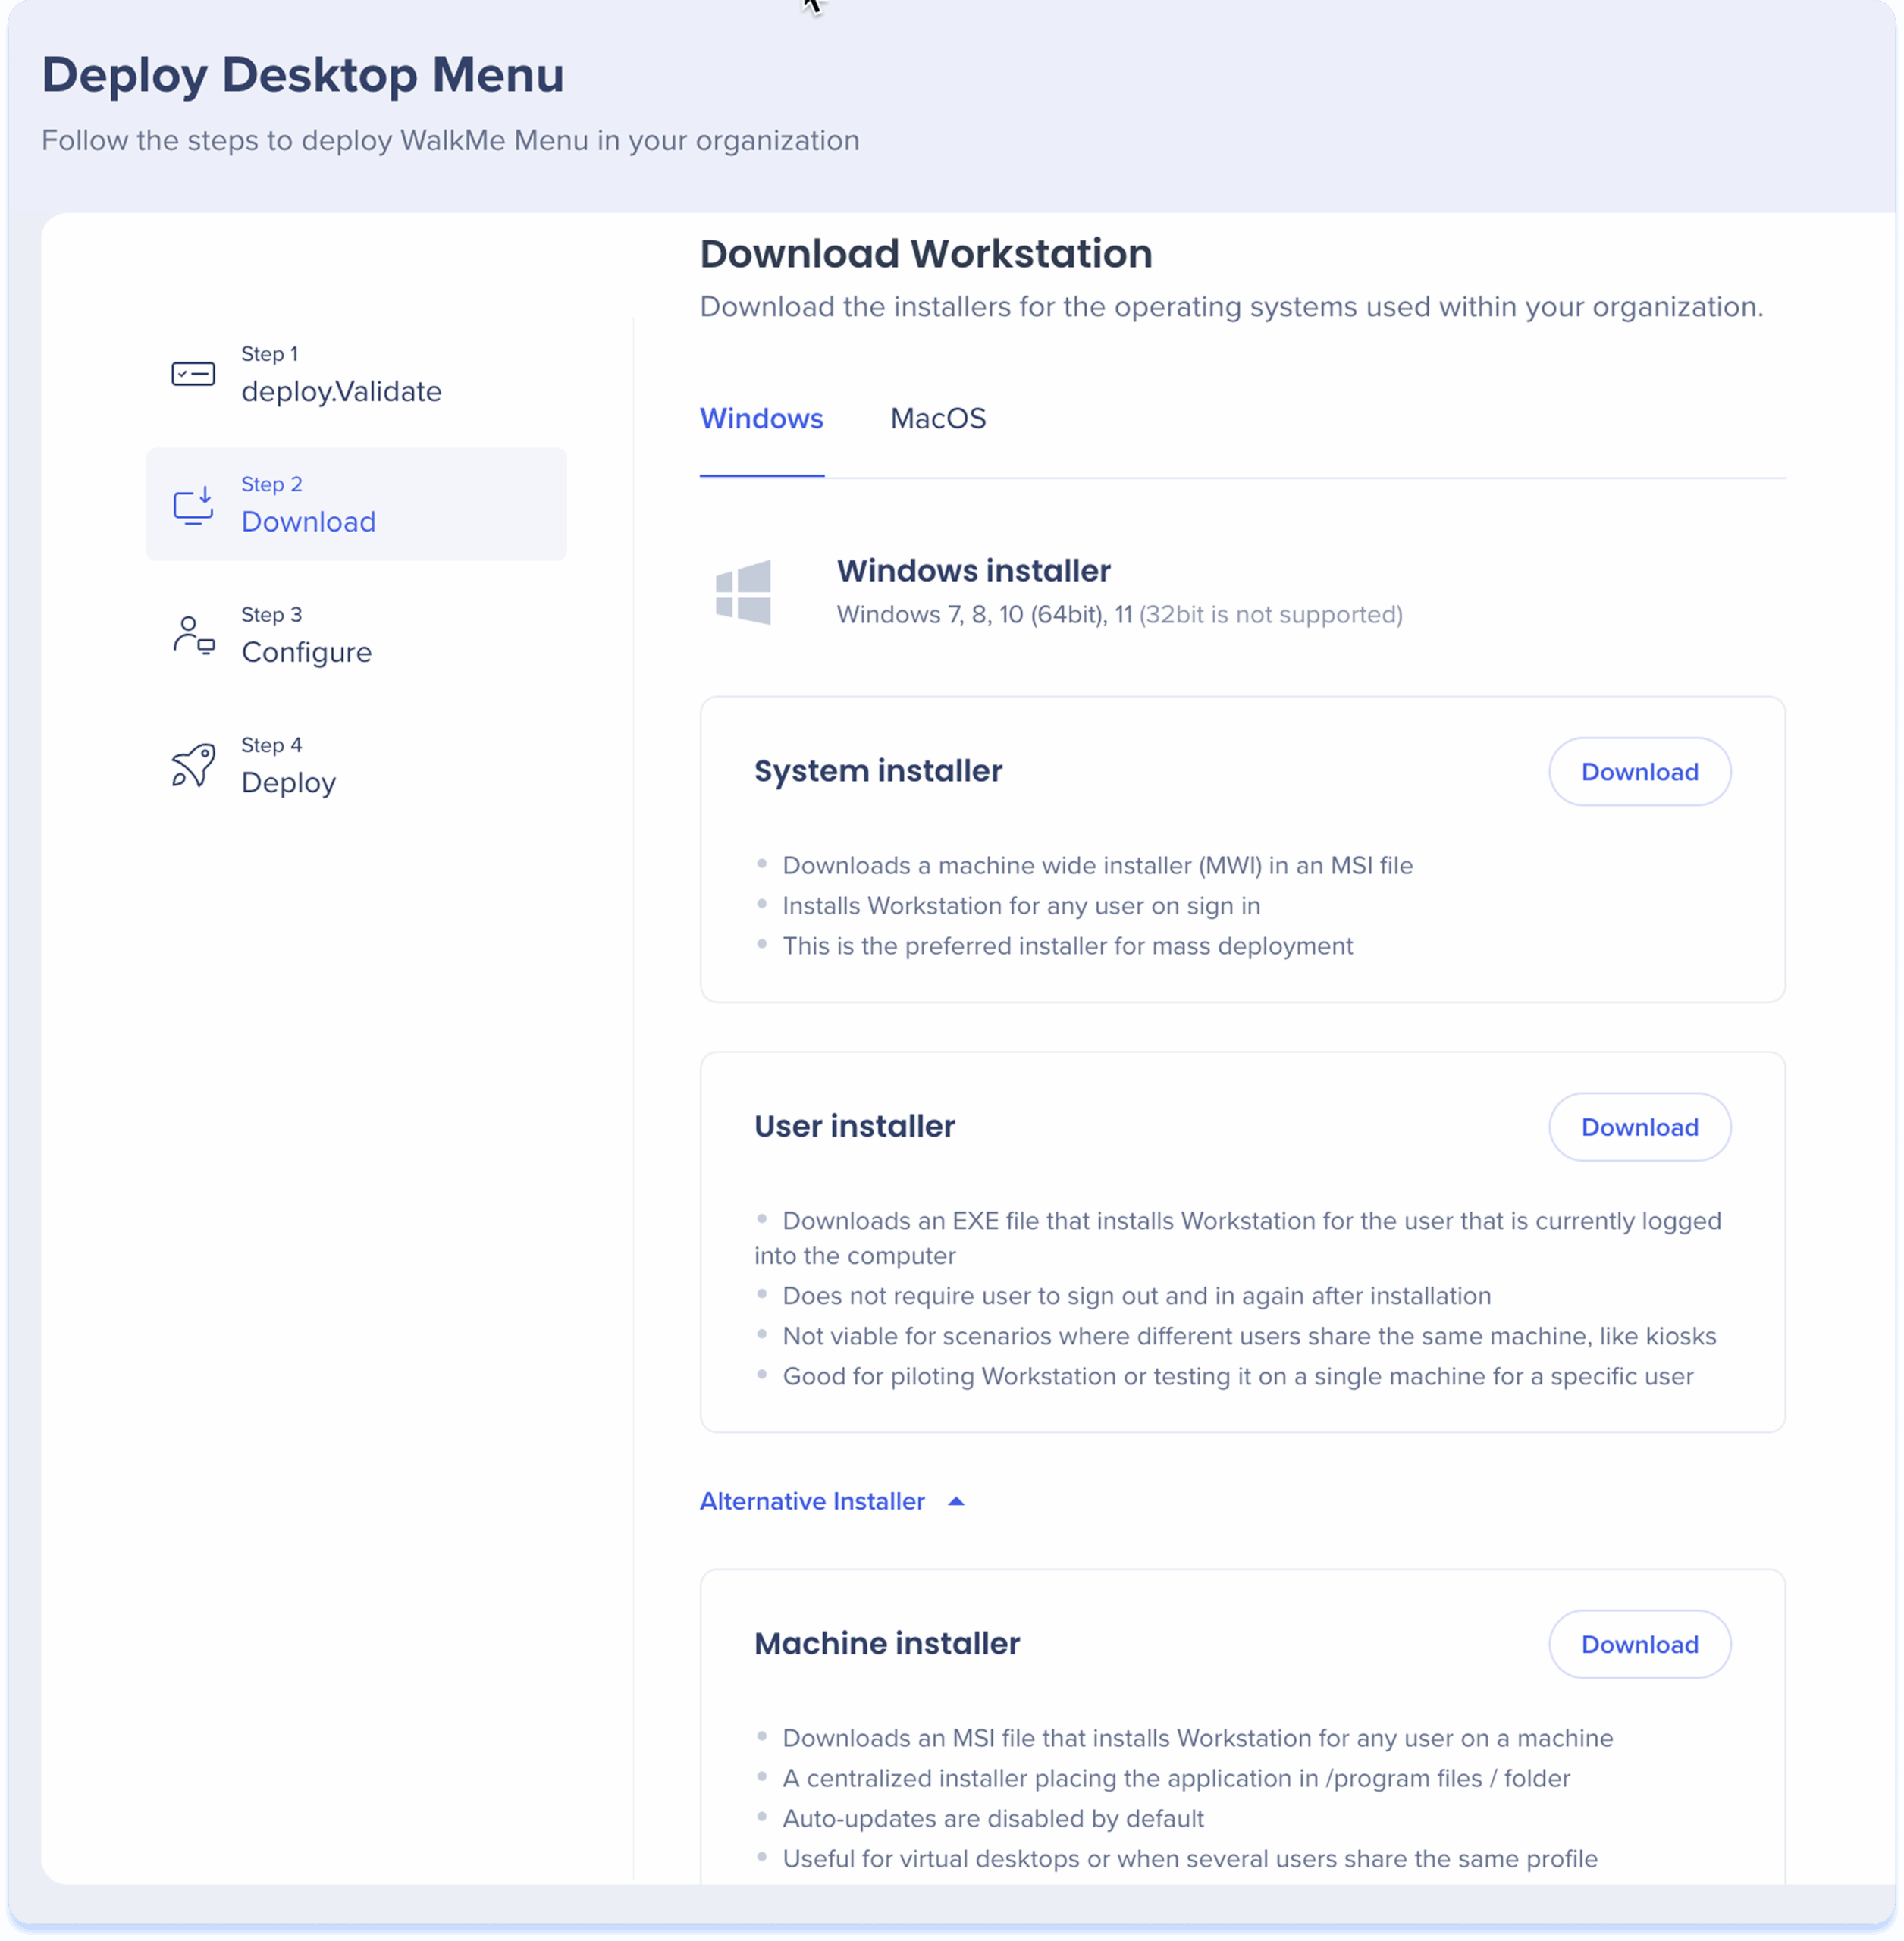
There're three types of the Windows installers - download the installer that best suits your needs:
- System Installer:
- Preferred installer for mass deployment
- Downloads a machine wide installer in a MSI file
- Installs the desktop menu for any user on sign in
- User Installer:
- Downloads an EXE file that installs the desktop menu for the user that's currently logged in into the computer
- Does not require user to sign out and in again after the installation
- Not viable for scenarios where different users use the same machine, like kiosks
- Good for piloting the desktop menu or testing it on a single machine for a specific user
- Machine Installer:
- Downloads an MSI file that installs the desktop menu for any user on that machine
- A centralized installer placing the application in / program files / folder
- Auto-updates are disabled by default
- Useful for virtual desktops or when several users share the same profile
MacOS
- Installer:
- Downloads a PKG file that installs the desktop menu for all users on the machine
- Supports only MacOS Intel processors
- Used for both mass deployment and pilot testing
Mobile
The Mobile app can be downloaded via App Store or Google Play.
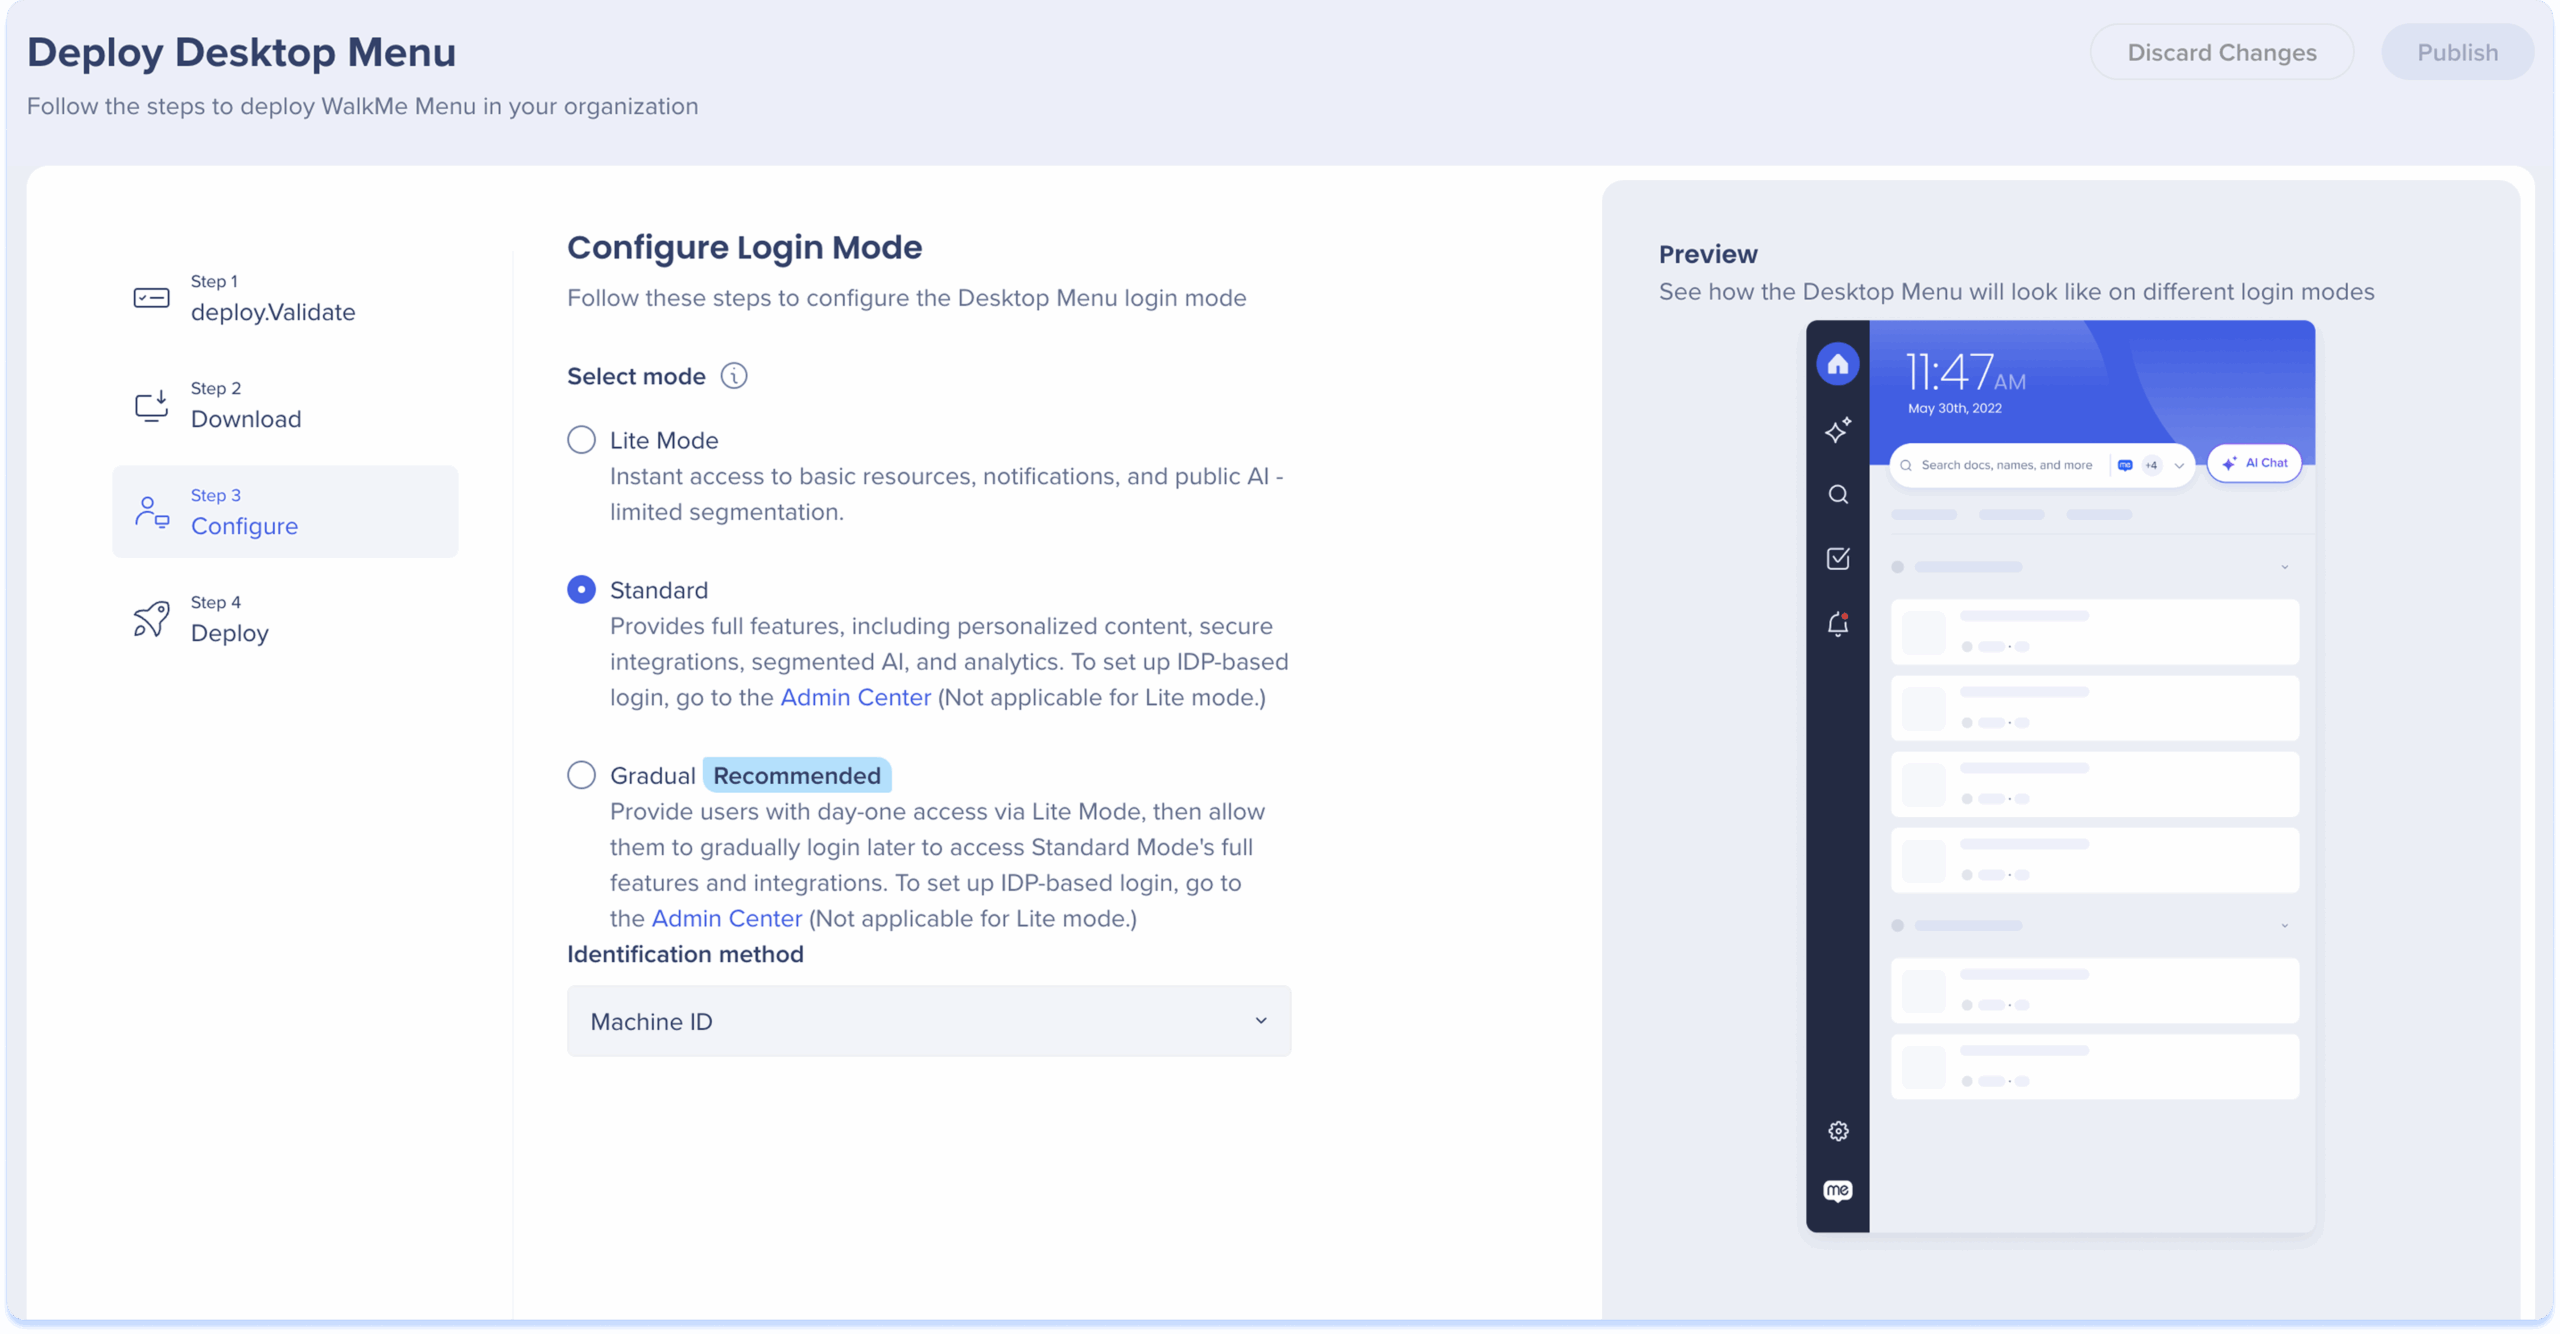
The WalkMe Menu now supports three login modes — Lite, Gradual, and Standard — giving organizations more flexibility in how users access content on the desktop menu.
Learn more about login mode configuration here:
Login Mode
Step 4: Desktop
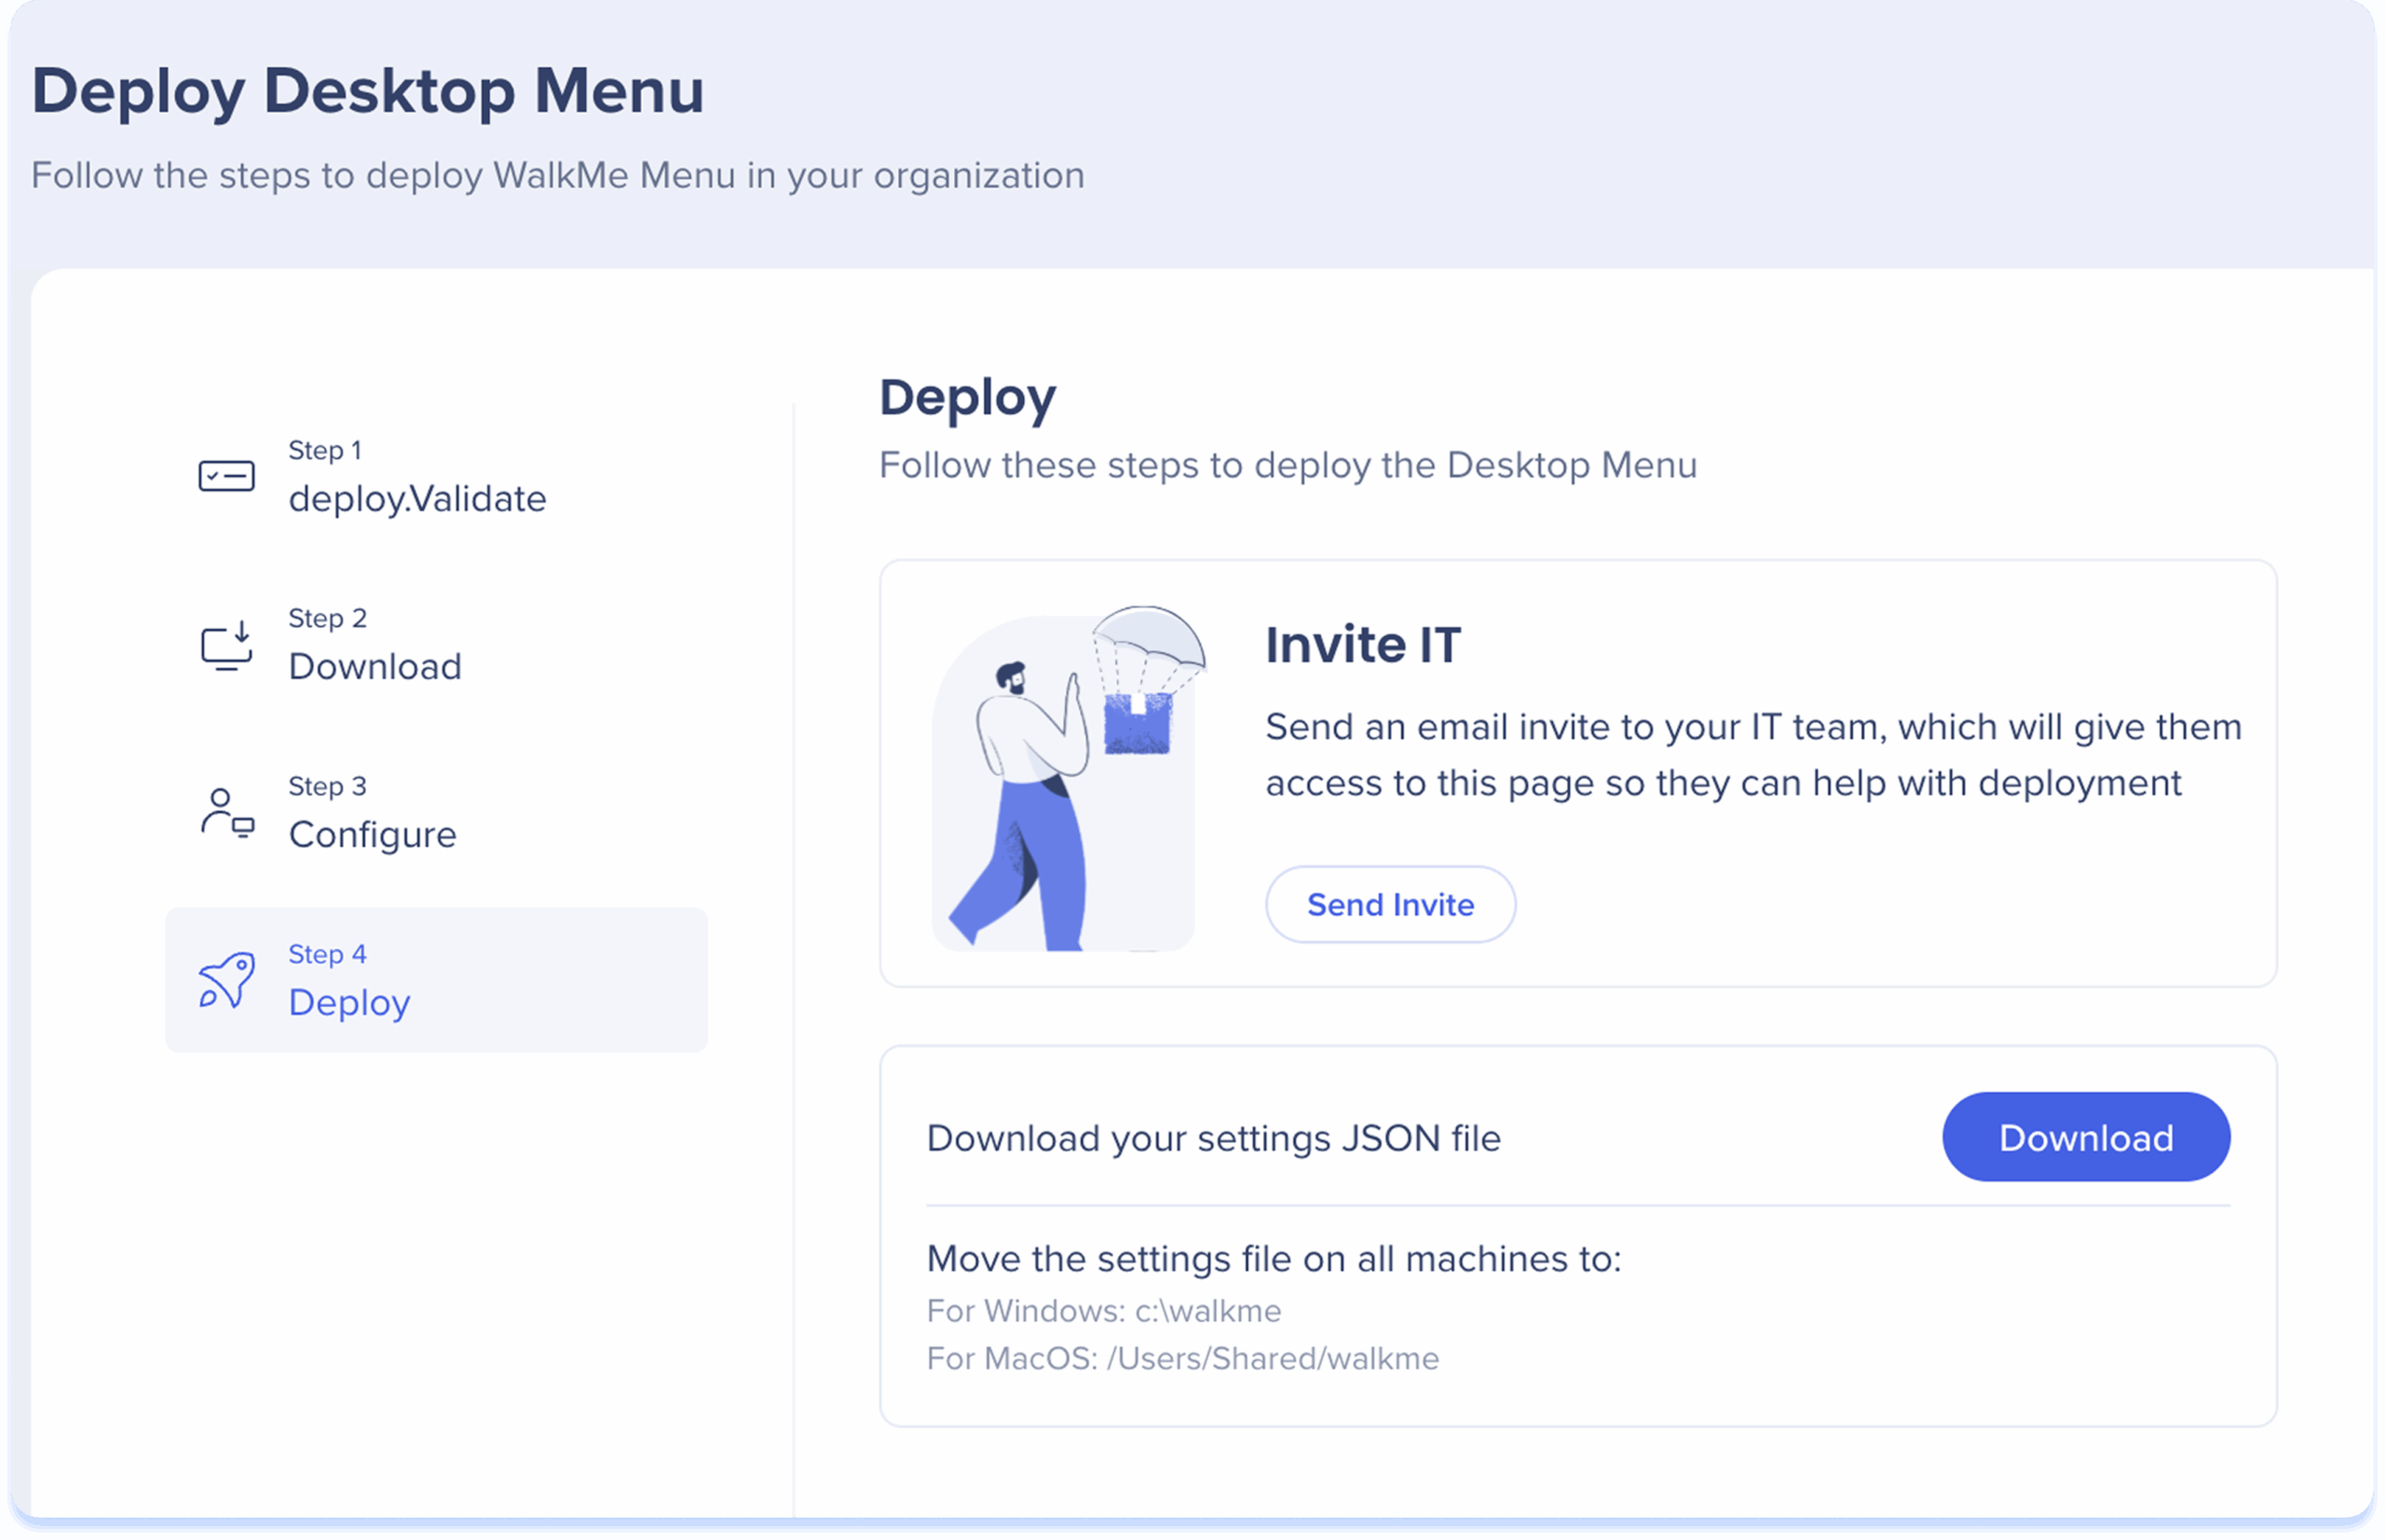
- Click Send Invite to send an email invite to your IT team. This will give them access to the page so that they can help with deployment
- Download the JSON file
- Choose which location is compliant with the organization policy, and place the settings file there:
| Operation system |
Installers |
Settings File Path |
Description |
Example |
| Windows |
.msi, .exe |
<installationDir>.. or %localappdata% |
One folder above the installation path |
C:Program FilesWalkMe |
| Windows |
.msi, .exe |
%ProgramW6432%WalkMe |
Program files, in WalkMe folder |
C:Program FilesWalkMe |
| Windows |
.msi, .exe |
<system drive>..WalkMe |
WalkMe folder in system drive |
C:WalkMe |
| macOS |
.pkg |
/Users/Shared/walkme |
|
|
4. Enable your IDP in the Admin Center if standard or gradual mode was selected on the configuration step
WalkMe Desktop/Mobile Menu Installation and Settings Files


