WalkMe Shield is a testing automation tool utilizing WalkMe's advanced capabilities and easy-to-use interface, to continuously ensure that the WalkMe experience is always up-to-date.
In this article you will learn the basic concepts of testing and the recommended approach for testing WalkMe implementations with Shield, as well as the types of results you can get with Shield, which will help you analyze your test runs. We'll also cover some best practices for testing common WalkMe scenarios and a few tips about Shield to make your life easier.
Shield Value
As digital transformation leaders, we constantly strive to provide our users with the best experience and to support their ongoing digital adoption needs. In constantly changing environments, it's difficult to keep track of every website change, browser update, or platform version release.
Making sure that our experience is consistent is our highest priority. With WalkMe Shield you can take a proactive approach to guard user journeys, keep your customers happy, and your employees productive.
Save time and money by reducing manual testing efforts, and focus on increasing value and scaling up with WalkMe
Your Shield tests are essentially the expected behavior of your entire WalkMe implementation, a single source of truth
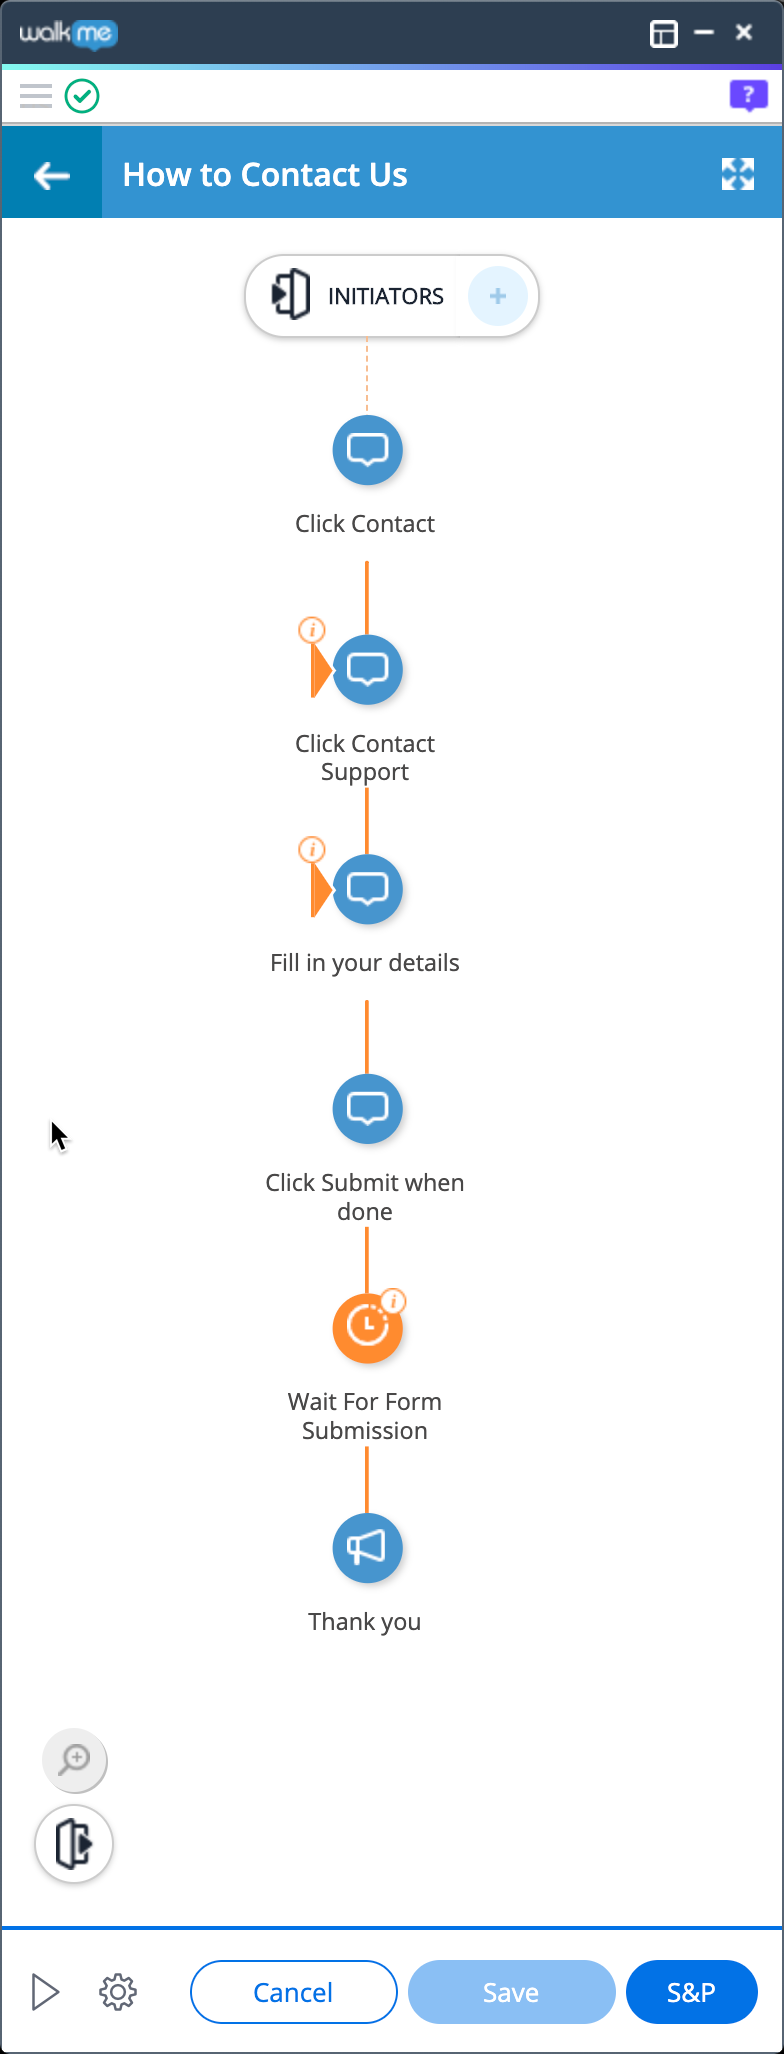
Recording a test is as simple as building a Smart Walk-Thru, no coding required
Utilize WalkMe's world-class algorithms and automation capabilities for your tests
Shield provides automatic and detailed reporting of every test run
Quickly identify potential issues and validate your changes as a part of your workflow
Collaborate with your entire team for efficient content management processes
How It Works
Since WalkMe is an adoption layer on top of an underlying website, we need to make sure that we have our user journeys mapped out, and that we understand the expected behavior of the WalkMe experience.
For example, let's say we have a web form and a Smart Walk-Thru explaining how to fill it out successfully. We should imagine the expected interaction of the user with the website and WalkMe - achieving a successful outcome of the journey. Once we have it outlined, we can plan our test.
A test usually consists of 3 parts:
Pre-conditions: Specifies the conditions that must be in place before testing
For example, start from a specific URL, or login as user X
Instructions: The test steps that simulate user behavior
For example, click on a button, enter text, or click on a WalkMe menu item
Expected result: Specifies the expected outcome of a test
Also known as "success criteria"
Build a Test
We suggest breaking the work into two parts:
Plan: Know the user journey, understand the role of WalkMe, and outline the flow of the test
Record the test, run it, and view the results
Plan
1. Know the user journey
Our website will be salesforce.com and our user journey is focused on creating a new contact
2. Understand the role of WalkMe
We have a Smart-Walk Thru that is launched from the menu and has a goal
Try to build a similar Smart Walk-Thru. It doesn't have to be identical as long as it's working as expected - Don't forget to make it available in the menu so you can later run it as a user would.
3. Outline the test
Our test will start from the homepage where you open the WalkMe menu and click on our "Create a New Contact" Smart Walk-Thru.
We will need to fill in the form correctly to pass the validation.
Our final step would be to click "Done" on the "You have successfully created a contact!" popup at the end of the Smart Walk-Thru.
Tip
Ask yourself, "How would I manually test this journey?", then build it with Shield.
Record
1. Record the test
Open the WalkMe Editor
Click WalkMeApps
Select WalkMe Shield
Click +
Give your test a name
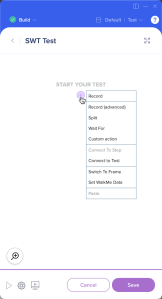
Hover over the +
Click Record
WalkMe will enter record mode to record the test flow
You can switch between record, on-screen, and navigate modes, just like normal capturing
Click Save
You can edit it later as needed, just like a Smart Walk-Thru
2. Run the test
Make sure your test is working as expected.
Go to the list of tests in the Shield app
Select your newly created test
Click Run
Watch WalkMe previewing the content and running the test
3. See the results
Once the run is completed, click on "View Results" to go to the results area
You'll find a visual breakdown of the entire test, both WalkMe steps and test steps
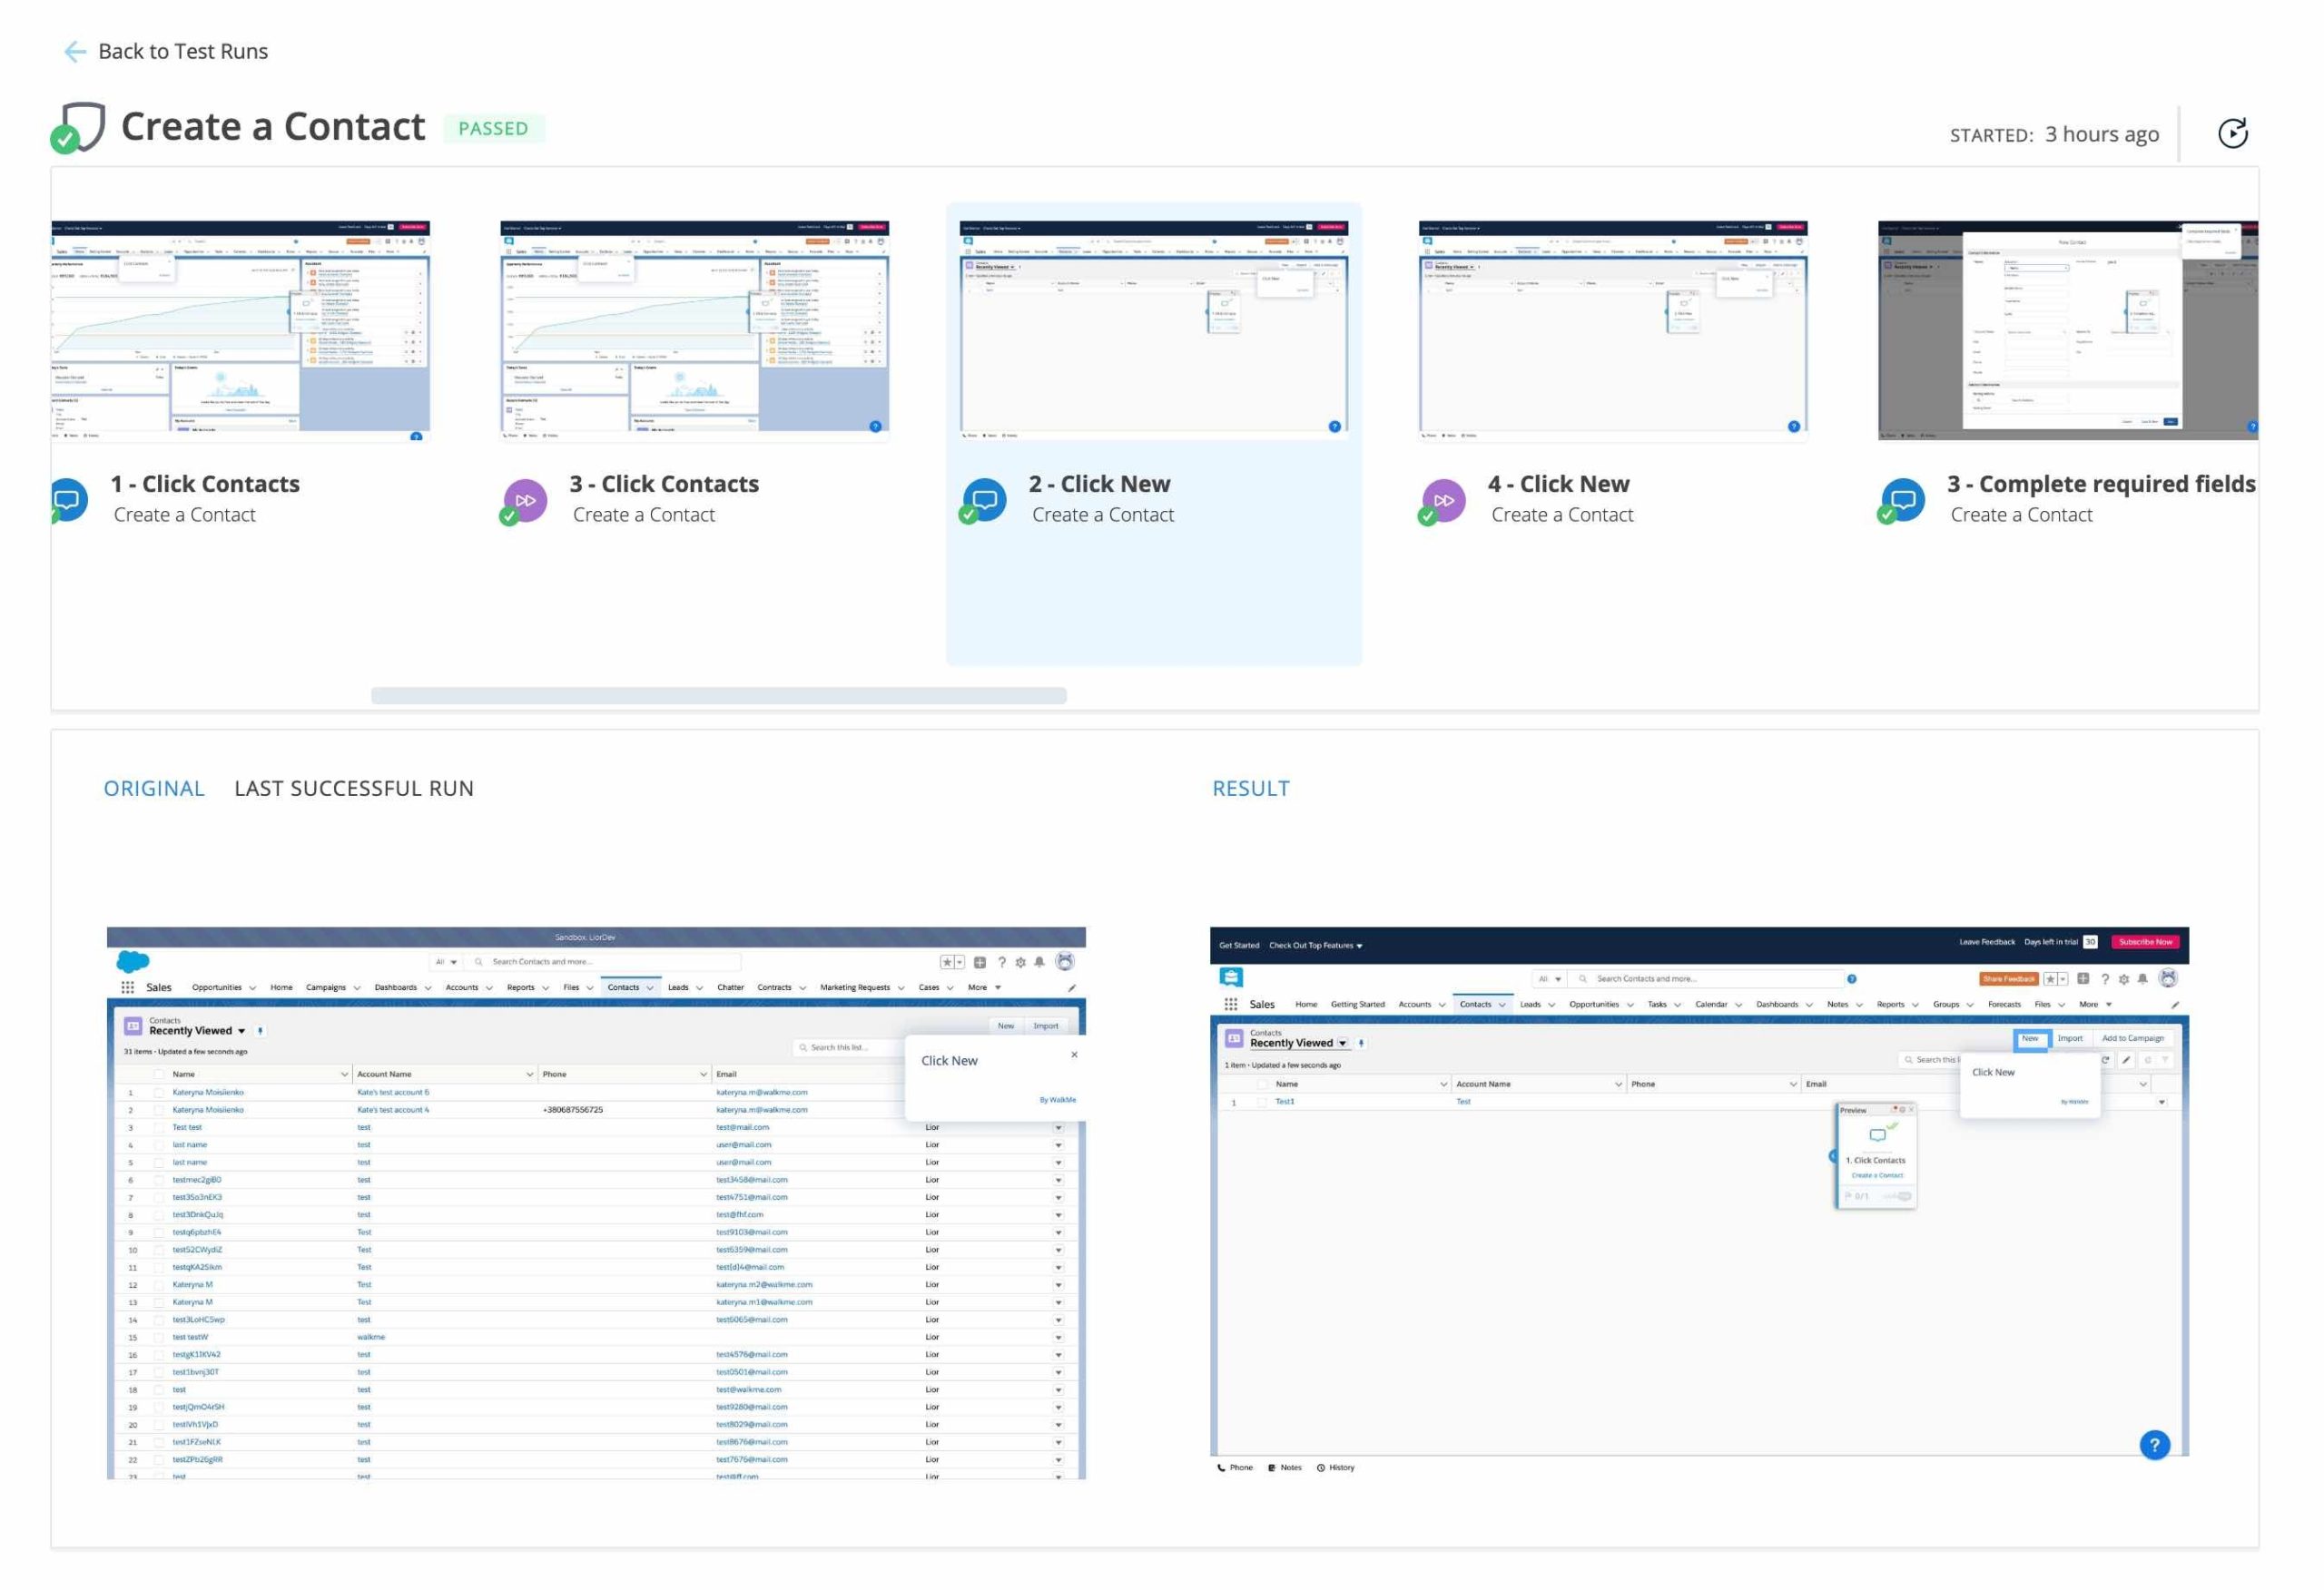
When you run a test multiple times, you can compare the screenshots of a specific run to the original state (capture) and to the last successful run
This is a powerful tool when analyzing the differences that might have caused an issue
Test Results
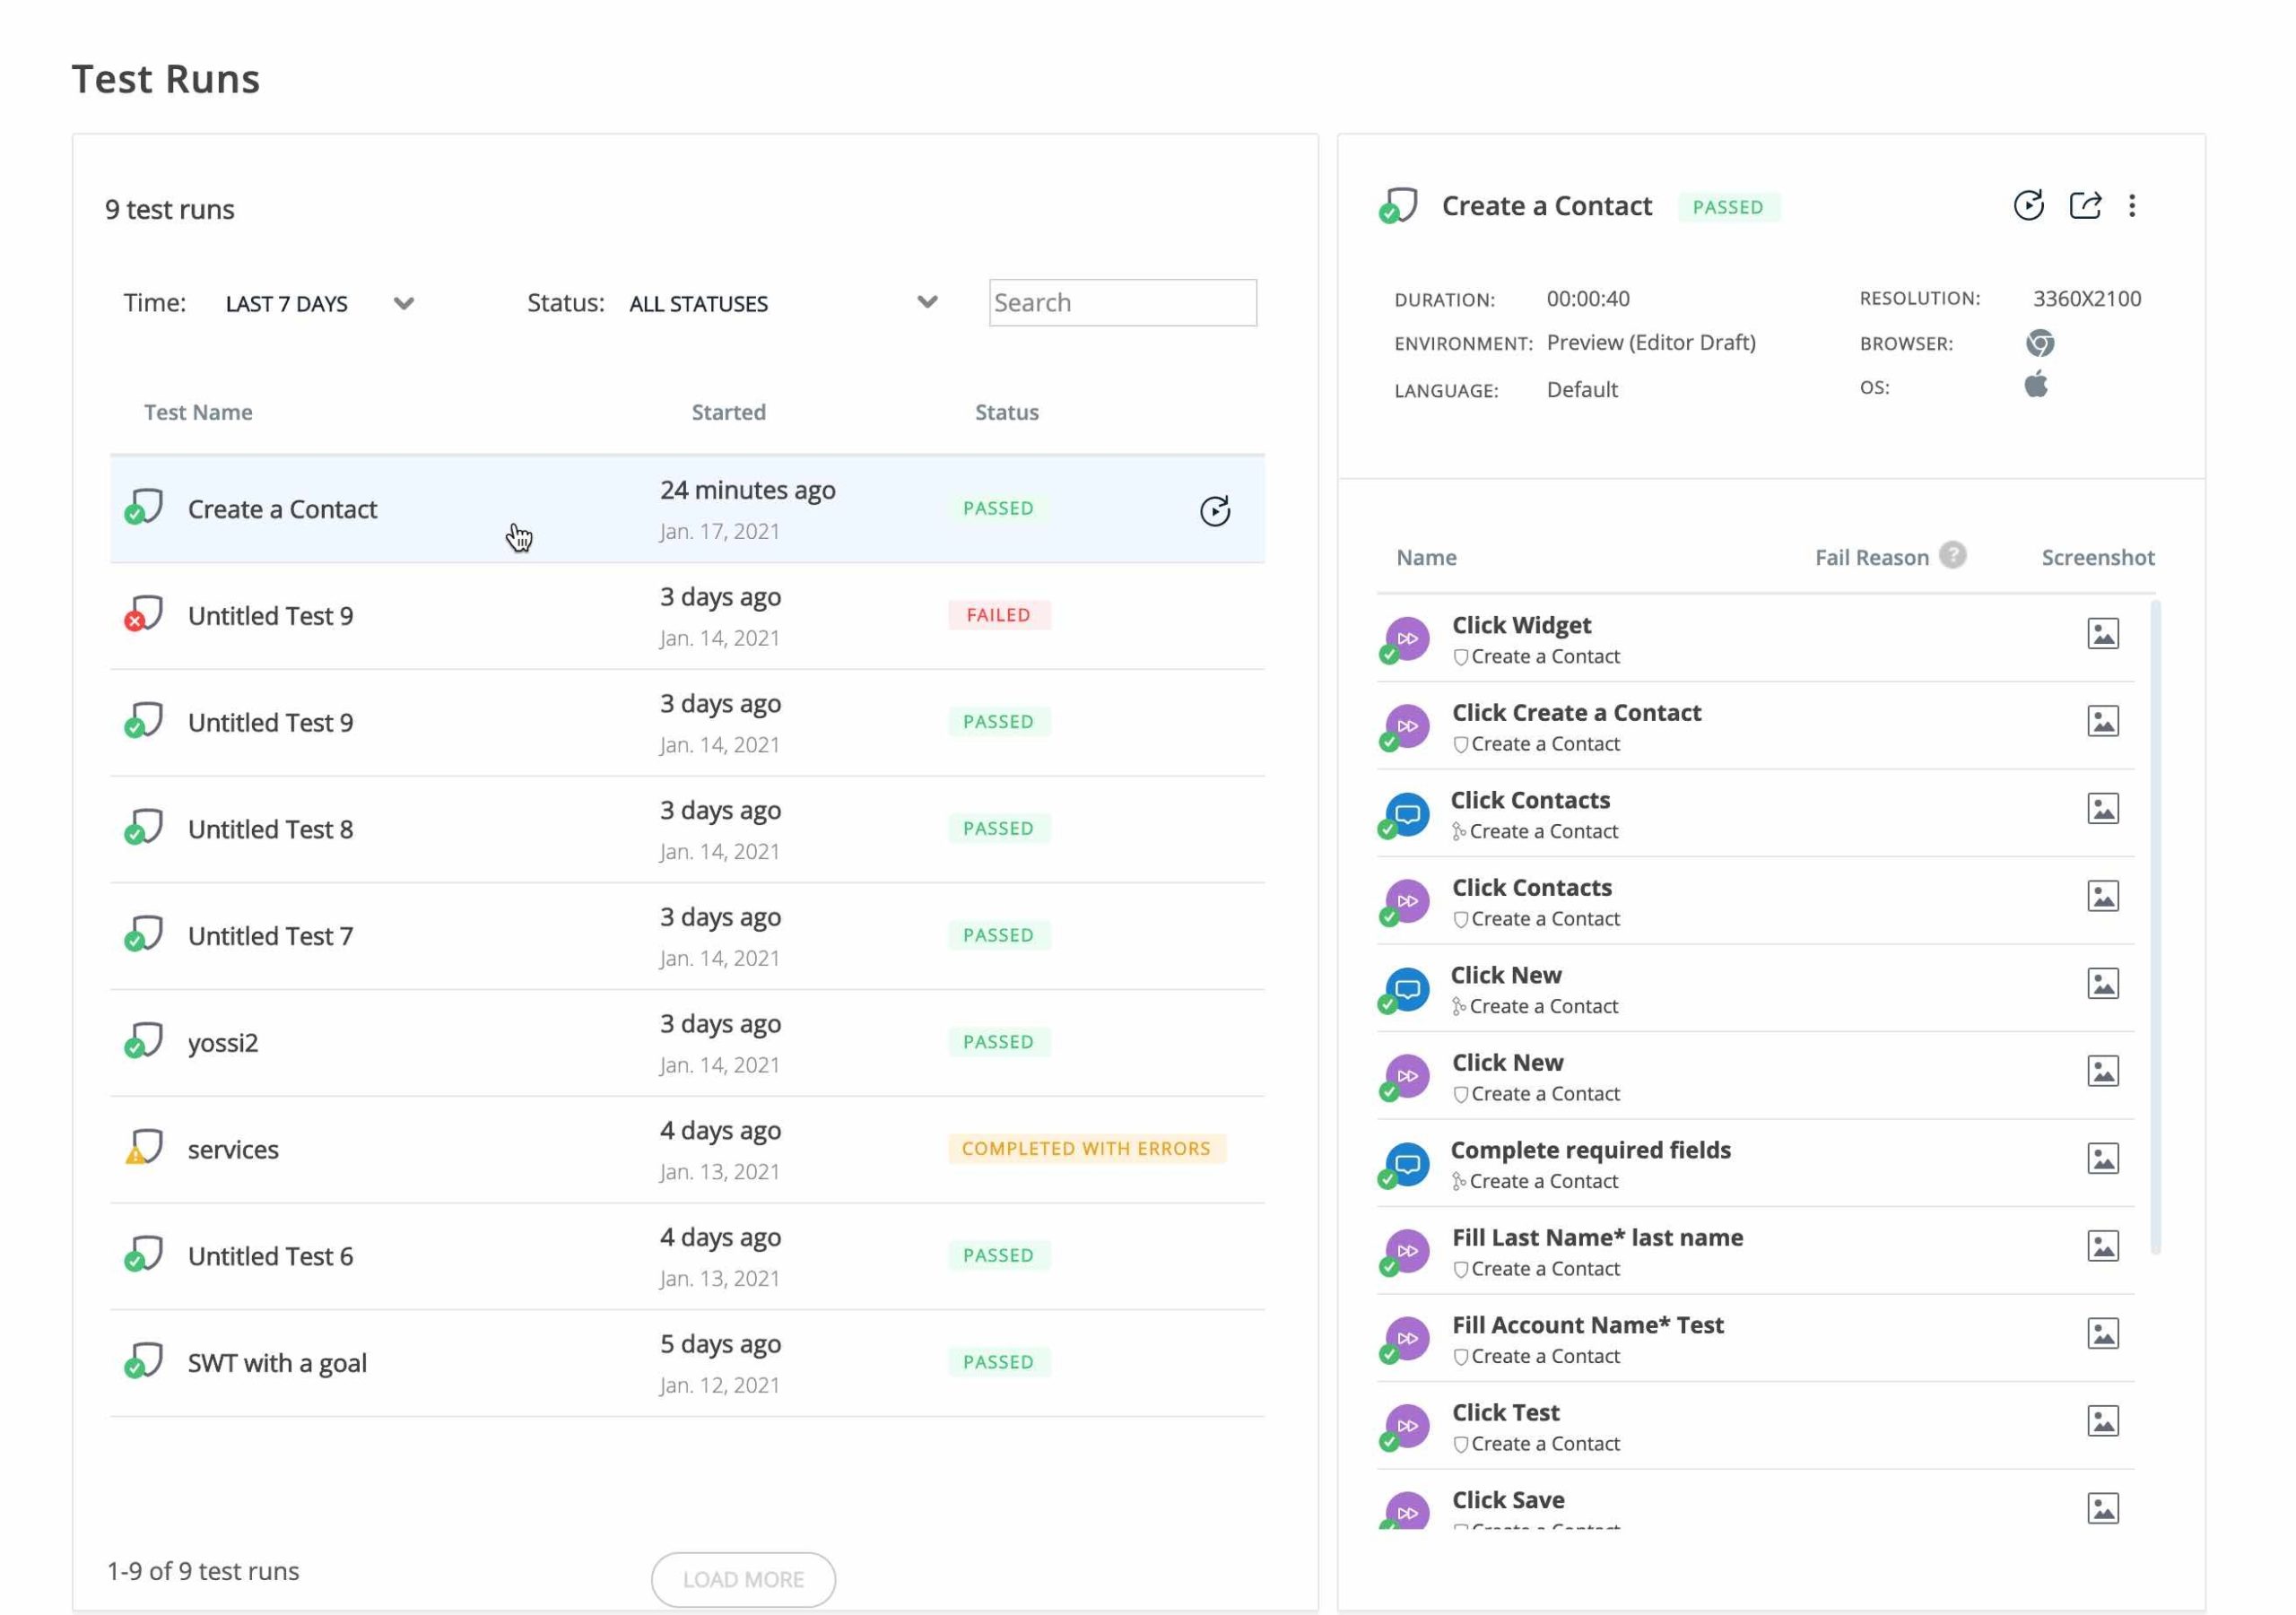
The following statuses for each test run are available in the results area:
PASSED:The test completed successfully (reached its last step)
COMPLETED WITH ERRORS: The test completed successfully, but the WalkMe experience didn't
For example, a Smart Walk-Thru that played during the test didn't reach its end
FAILED:The test wasn't completed successfully (regardless of the WalkMe content outcome)
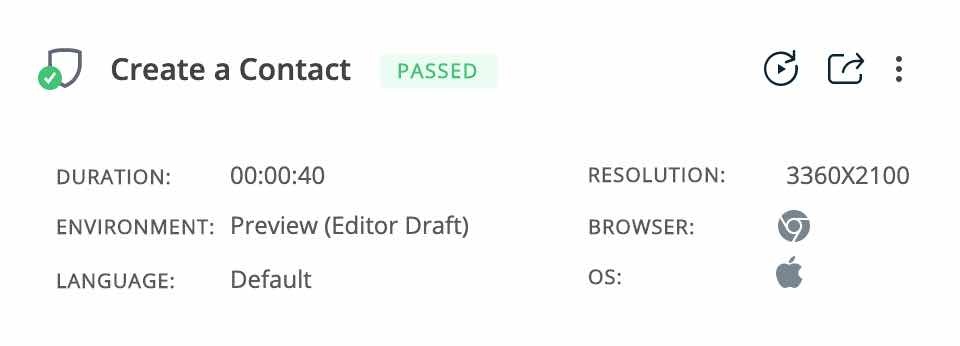
Every test run result holds information such as date of the run, status, WalkMe environment, WalkMe language, run duration, screen resolution, and more.
You can also rerun the test, edit it, and even share it with other team members who have access to this system in the editor.
Below the test run information, you'll see a breakdown of the entire test run, containing all the test steps and the Smart Walk-Thru steps that played during the test.
Each step has a screenshot, and by clicking on it you'll get directly to that step's edit dialog for quick and easy content adjustments.
Did you know?
Shield automatically tracks Smart Walk-Thru goals and start points, providing you a clear indication if something doesn't work as expected!
Handling failures
When a test fails, it could be an issue with the WalkMe experience, the underlying website, or the test itself.
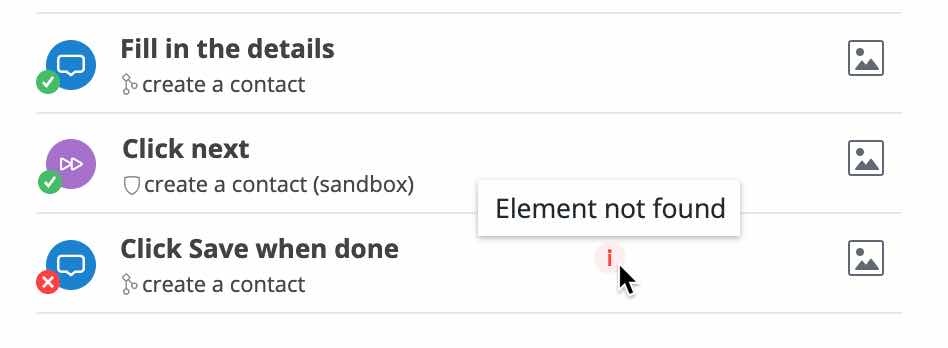
First, identify which step failed, read the fail reason, and look at the screenshot.
Depending on the issue source, validate that the WalkMe experience is working as expected by playing the relevant content and adjusting it as needed. The same goes for the test itself. You might need to recapture elements, update rules, or review your segmentation logic.
Looking at previous steps usually helps to pinpoint the issue source. Comparing screenshots to ones taken from previous test runs is another powerful tool for identifying changes in the environment that might be the cause of the failure. Let's learn more about screenshots.
Click on one of the screenshot icons next to each step to enter a more visual breakdown of the test progress. Here you can compare screenshots with ease to identify changes between test runs, across time. Shield automatically shows the original screenshot and the one from the last time this test was successfully completed.
Common Testing Scenarios
SmartTips, Launchers, ShoutOuts, and more!
Shield supports various WalkMe experiences. When you outline your target user journey, remember to take into account all the relevant parts in the experience and test them with Shield. This is how you get the full coverage we're all aiming for.
For example, click on a launcher to start a Smart Walk-Thru, and during the guidance click on a SmartTip in a form to cover it as a part of the test. When the Smart Walk-Thru ends, a survey opens, so fill in the details and submit it with Shield too! Your test will hold the entire experience and report back when something changes. Shield also identifies any WalkMe content it's interacting with during a test, and allows you to quickly edit it through the results area.
Goals
Shield automatically checks for Smart Walk-Thru goals and fails the test if at least one of them isn't reached during the test run.
Start Points
Start points are usually used to make sure your Smart Walk-Thru can start correctly if the user plays it from different locations on a website.
Coming soon: Shield will automatically identify start points and fail the test if one of them isn't met (when the relevant step is played). You can also create dedicated tests for any start point you'd like.
Splits
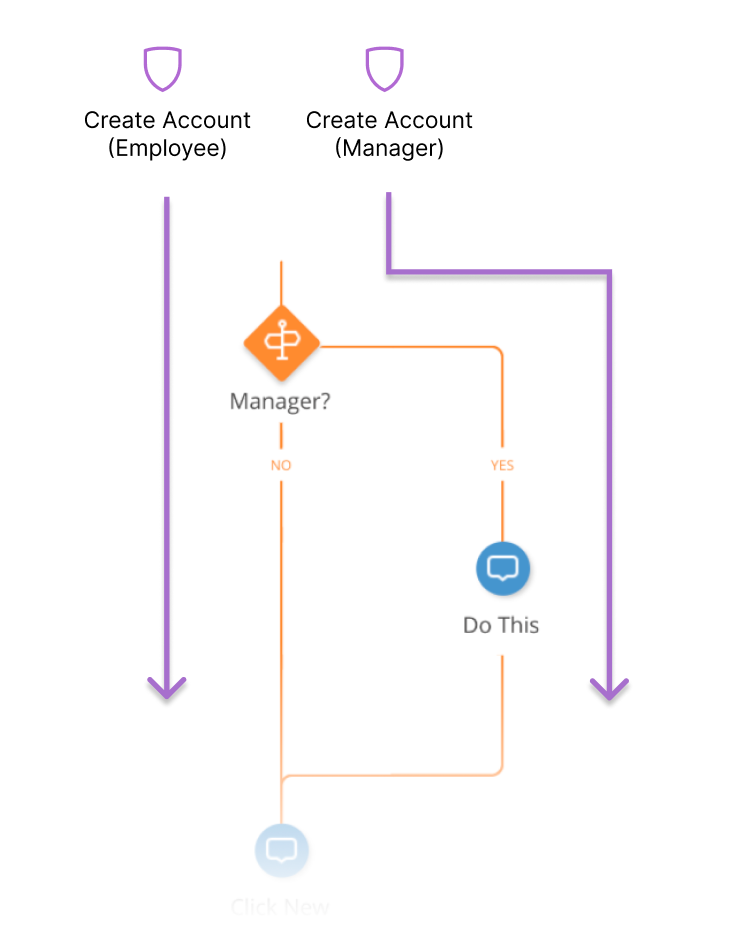
Splits are usually used to handle variations in a user journey. Sometimes it can be a minor deviation from the main path, like a logged-out user we want to walk through the login process before the flow continues, and sometimes it's a more fundamental variation of the process, such as two types of users seeing different layouts of the same page, an extra tab, or additional fields in a form.
After we identified the user journeys that are covered in our Smart Walk-Thru, we should ask ourselves which journeys we want to test and create a dedicated test for each. This is basically what you would do if you were to test it manually.
Finally, we would run the tests in a single automated batch, going through all of the journeys that matter to us, and getting detailed results that can be easily analyzed further.
Illustration of two tests, one per user journey
Auto Play
By default, Shield prevents any auto plays while recording or running tests.
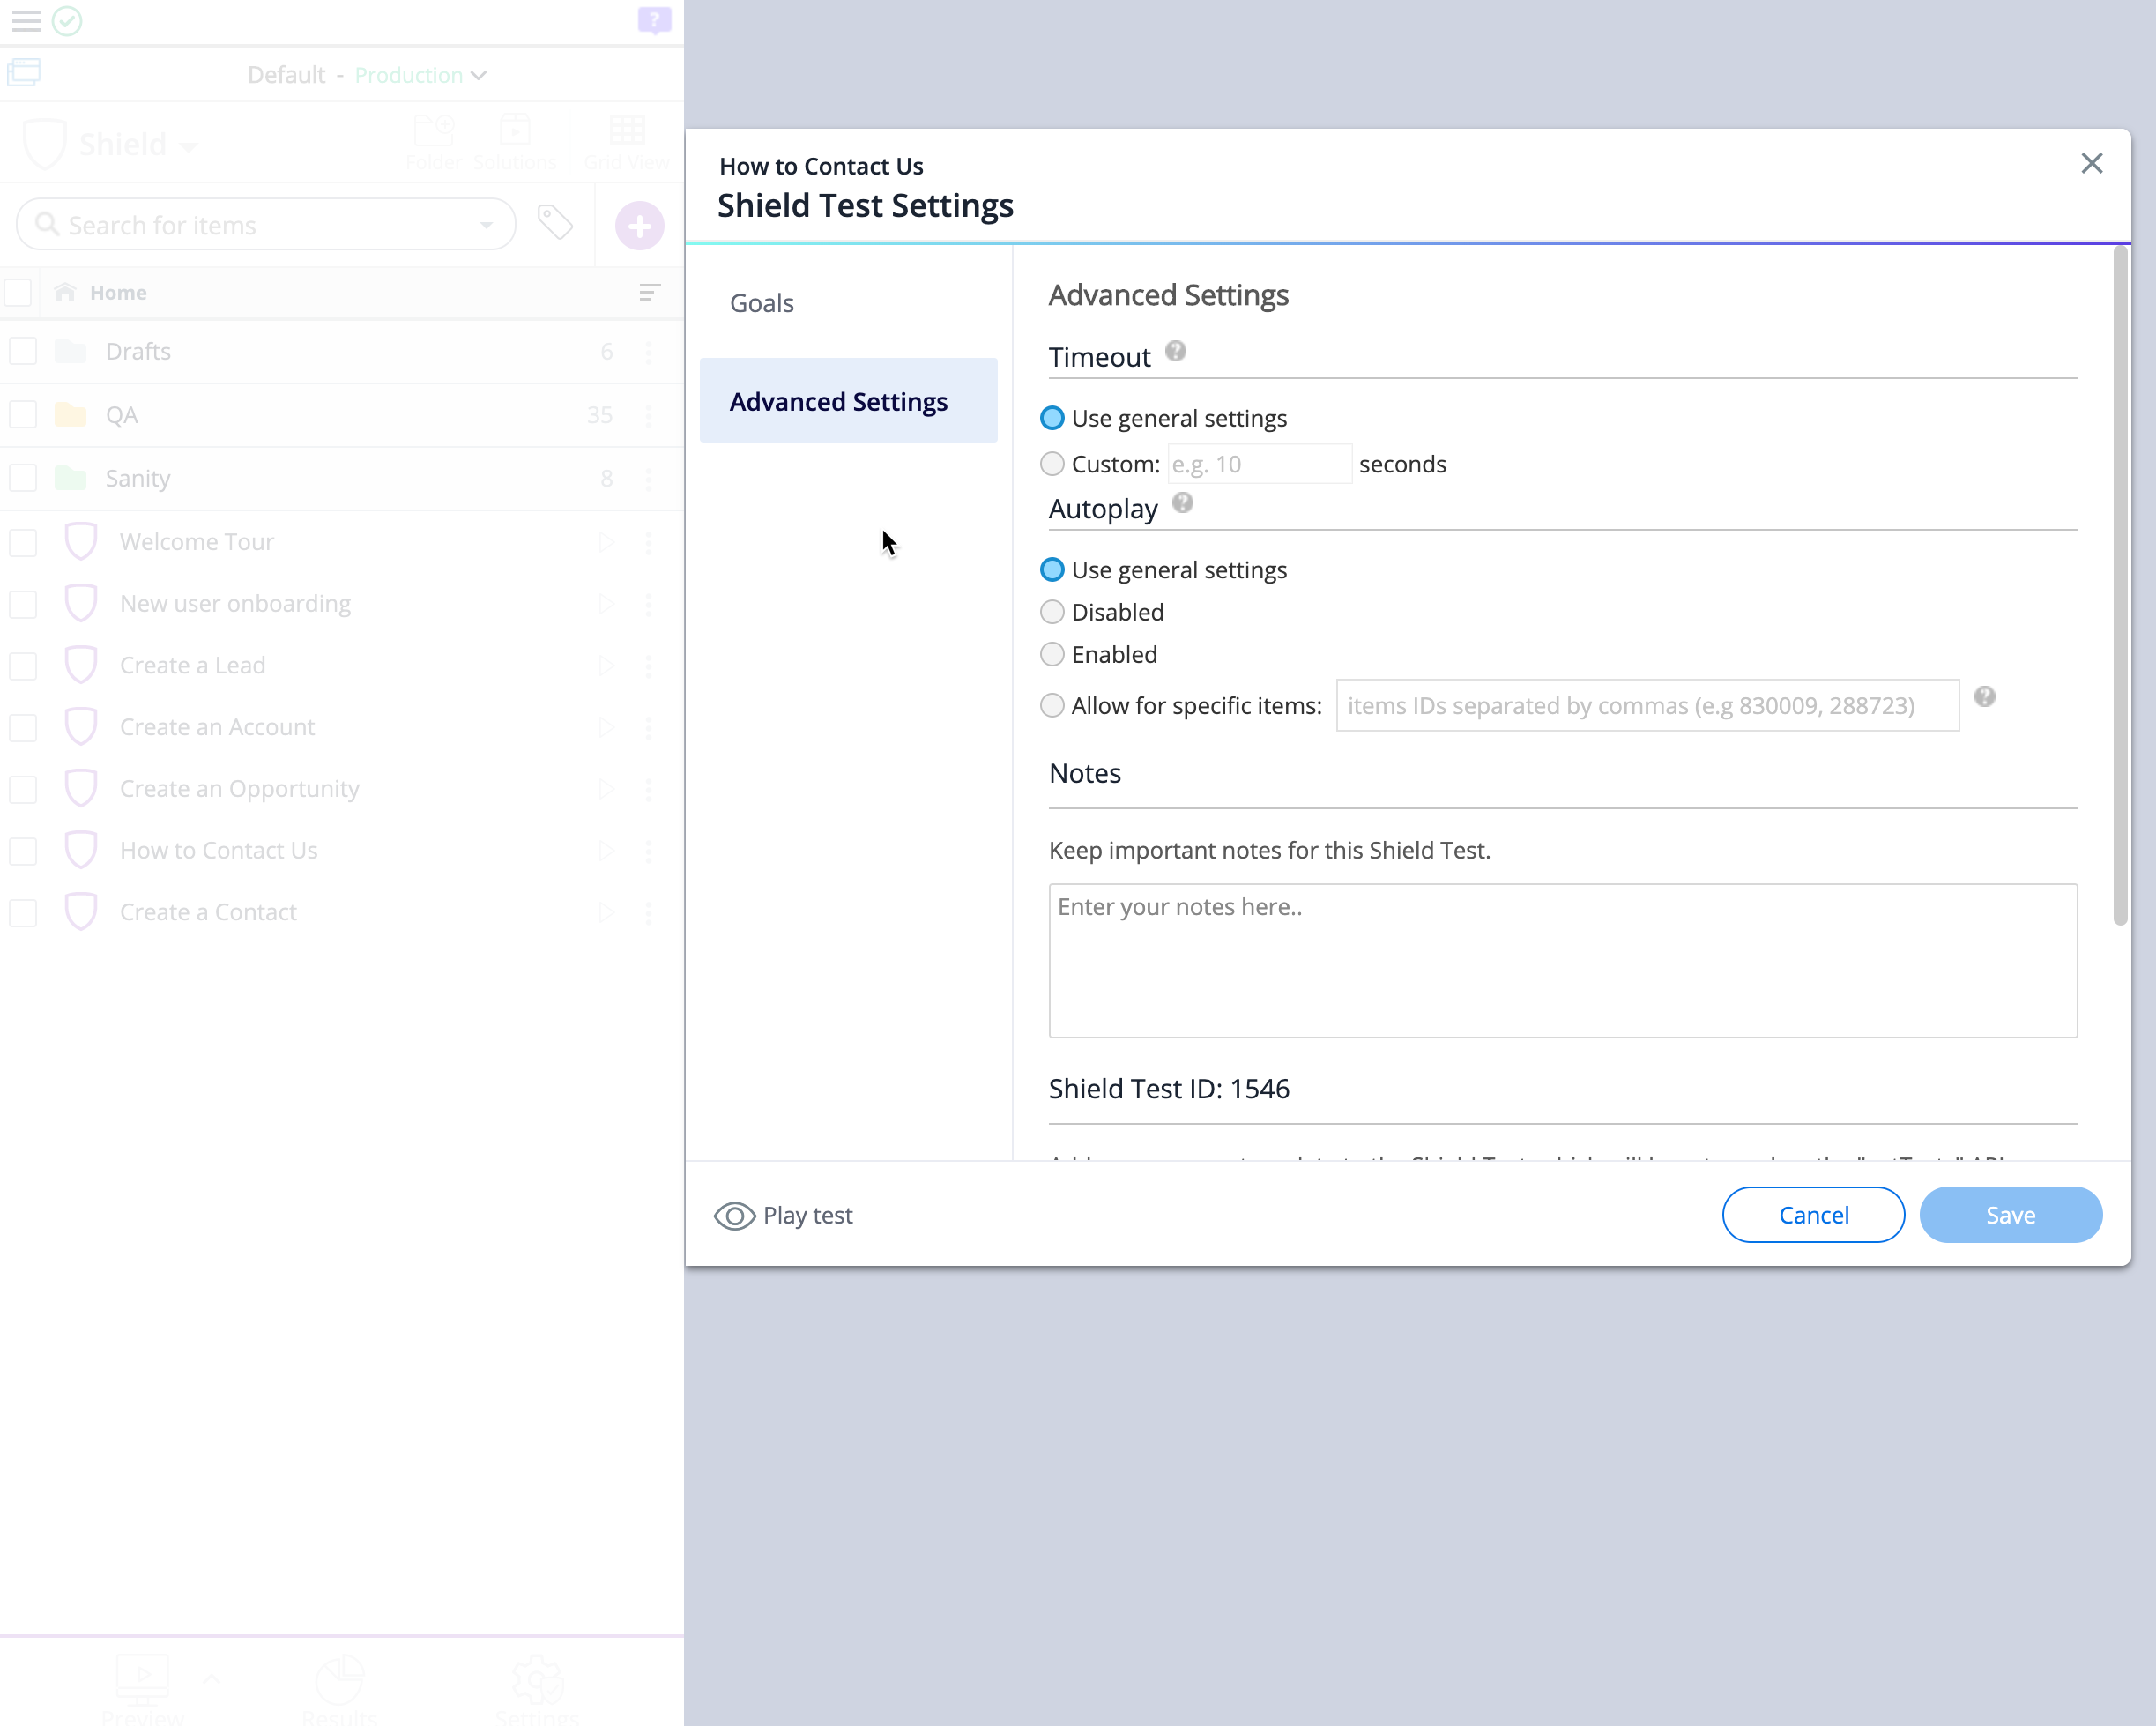
If you need to allow specific content to be auto played during a test, or prefer to allow auto plays in general, this can be easily controlled through the Shield settings. If you want to exclude from the general settings in a specific test, you can do that by configuring those settings in the test level.
Switch to Frame
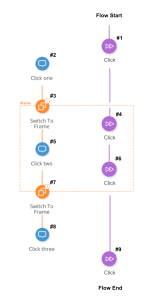
Just as with Smart Walk-Thrus, tests might require switch to frame steps to point WalkMe to the right iFrame or popup window during a test flow. Usually, the switch to frame steps in the Smart Walk-Thru will do the job, and the test will run in the right context.
For example, in the image below part of the Smart Walk-Thru plays inside an iFrame. We also have two test steps playing inside that same iFrame. The switch to frame steps we have in the Smart Walk-Thru make everything play in the right context. The numbers in black show the order in which this test would play when running.
In rare cases, test steps will need their own switch to frame step because they can't use the ones in the Smart Walk-Thru, as they need to play before the Smart Walk-Thru reaches the iFrame.
In that case, just create switch to frame steps in the test itself. Make sure to return to the top frame with a second switch to frame step before the ones in the Smart Walk-Thru play in order for them to play correctly (they usually start from the top frame).
Best Practices
WalkMe Environments
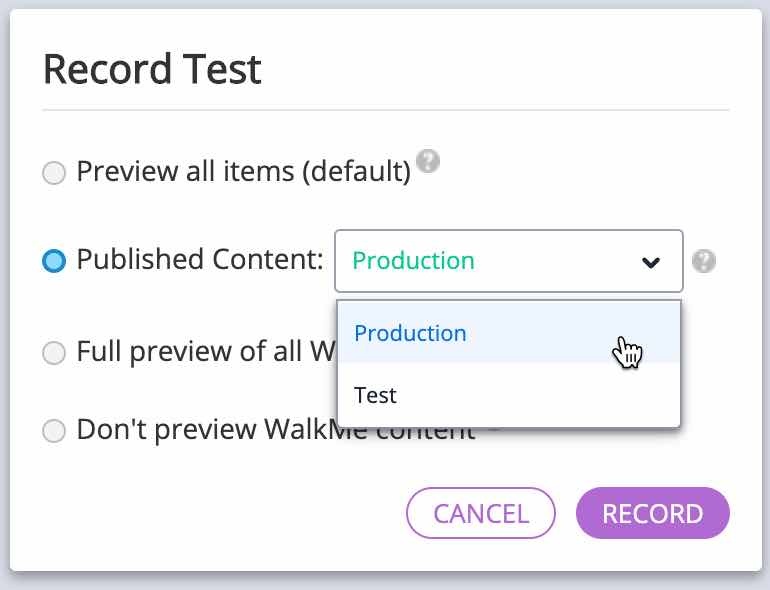
Shield has the ability to preview a specific environment, such as production or test, when recording tests. This allows you the maximum scope of testing - not only your latest content in the editor, but also your actual experiences being served to users in real-time.
To select an environment other than the editor draft, click on "Record (advanced)" when entering record mode, and select the correct environment.
Batch runs
For greater efficiency, you can run multiple tests in a single run.
Select them and click Run.
They will play in the order they appear in the Editor. Batches are grouped into a single row in the results area.
Play WalkMe content
It is recommended to play WalkMe content the same way your users do. That way you ensure that the end-to-end experience is tested and verified by Shield.
For example, click on a launcher to play a survey, or open the WalkMe menu and select a Smart Walk-Thru from the list.
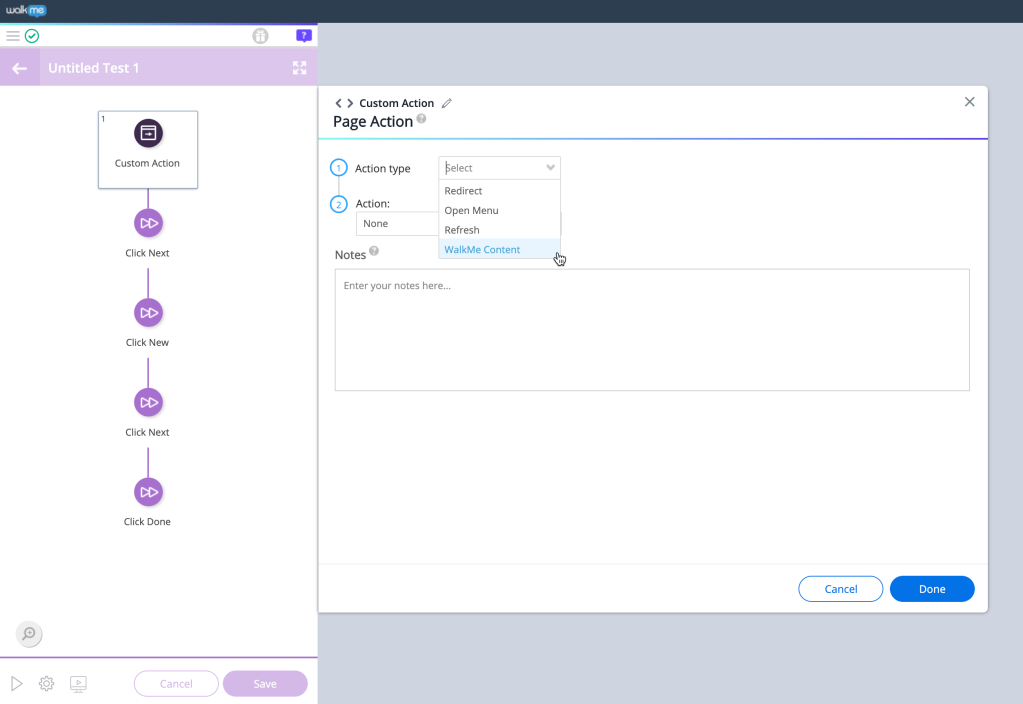
There are cases, however, when you can't replicate the exact user experience, for example, because you can't reach the exact segmentation conditions needed for an item to be visible.
In this situation we recommend to use a "Page Action" test step.
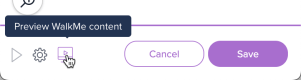
Then click Preview WalkMe Content.
Test goals
Adding goals to tests can be useful for cases when you need to make sure that something happened during the test, which represents success, and is not necessarily a part of the WalkMe experience. You can add goals to tests in a very similar way that you add them to Smart Walk-Thrus or other WalkMe content.
For example, you may want to make sure that a success message appeared, a new item was created, or a specific URL was reached.
If a test has a goal, Shield will fail the test if the goal wasn't reached during the run. You'll then be aware and be able to address the issue.
The trademarks and product names of Workday, Inc., including the WORKDAY® mark, are the property of Workday, Inc. WalkMe is not affiliated with Workday, Inc., nor does Workday, Inc. sponsor or endorse WalkMe, its services or its website.