Brief Overview
WebHooks (AKA callbacks) allow you to build WalkMe directly into your workflows by triggering 3rd party APIs and/or adding WalkMe Event data into your analytics platform.
This article explains how to define webHooks for Zendesk.
End-To-End Example of Creating a Ticket Using Webhooks with Zendesk
Step 1: Open an account or log into Zendesk
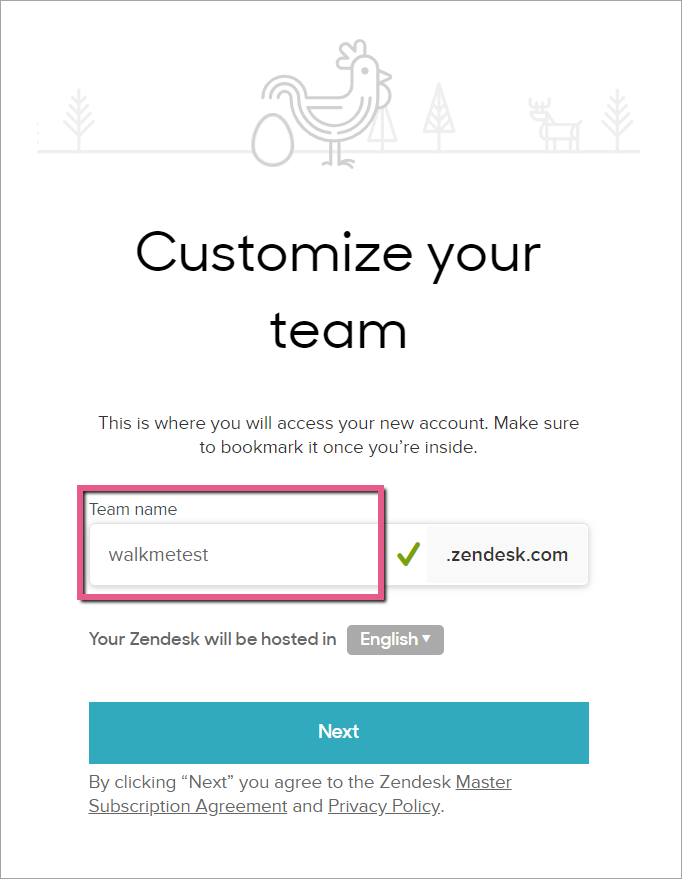
Step 2: Enter your team name
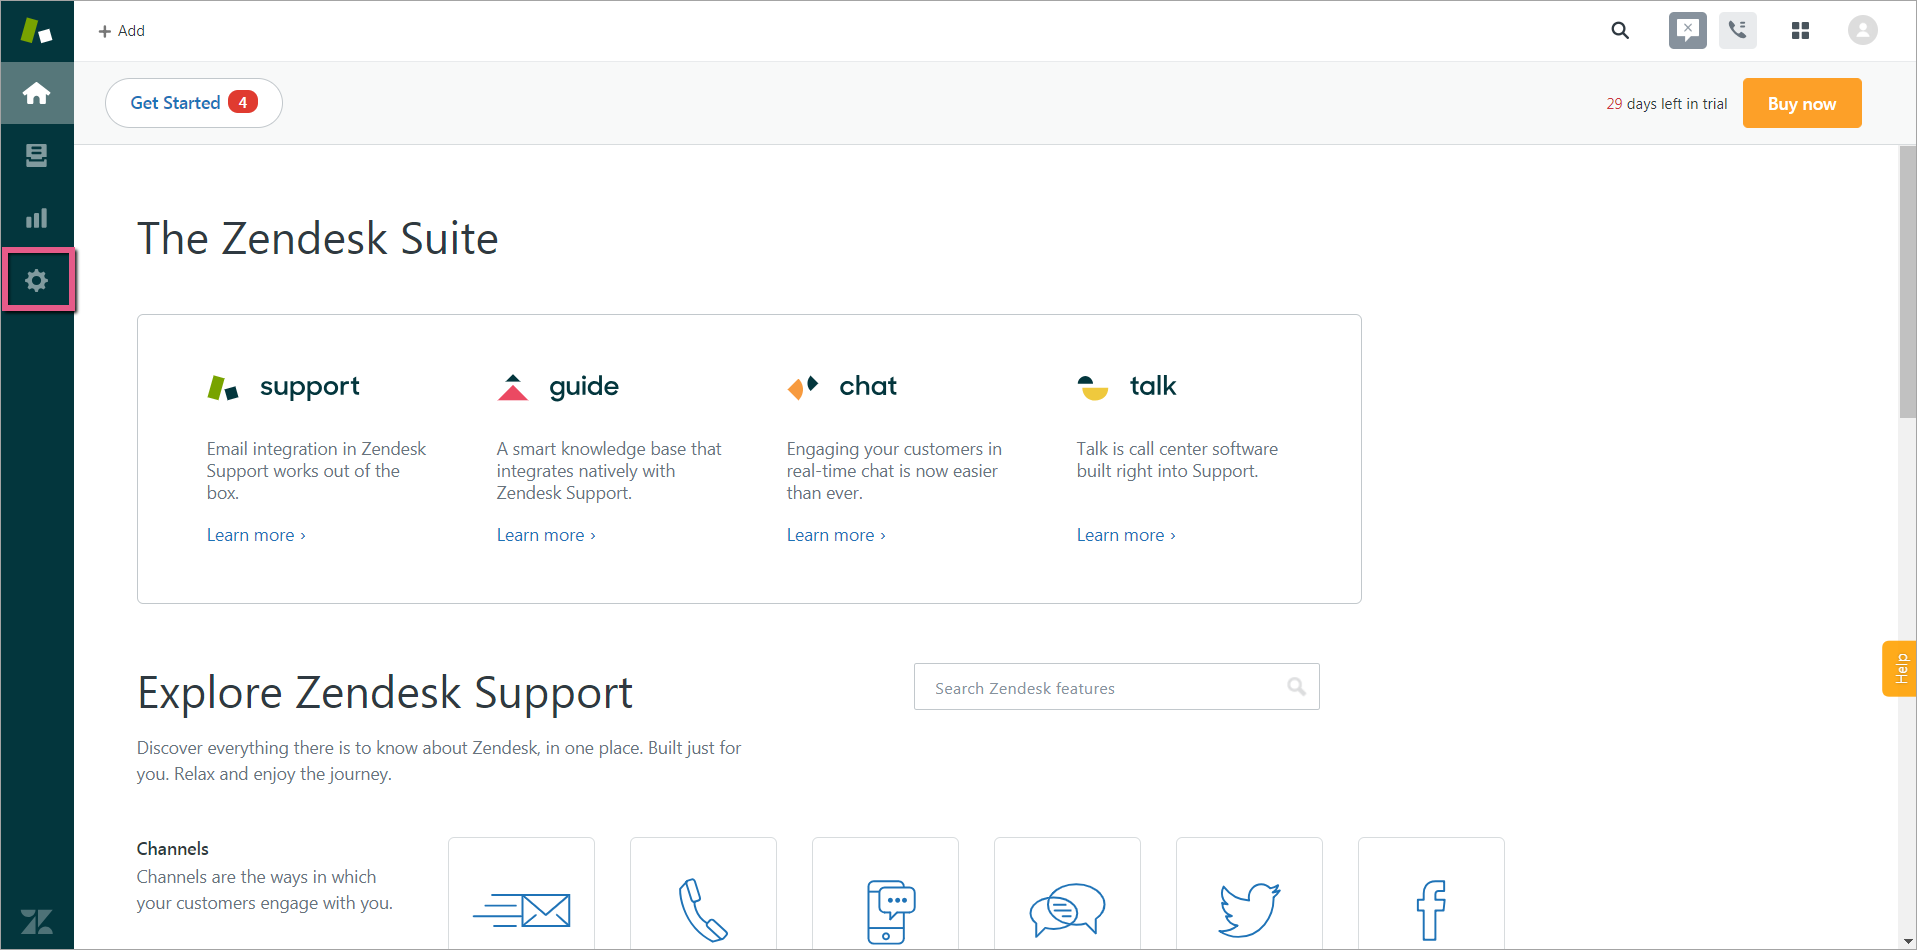
Step 3: Click the Admin icon
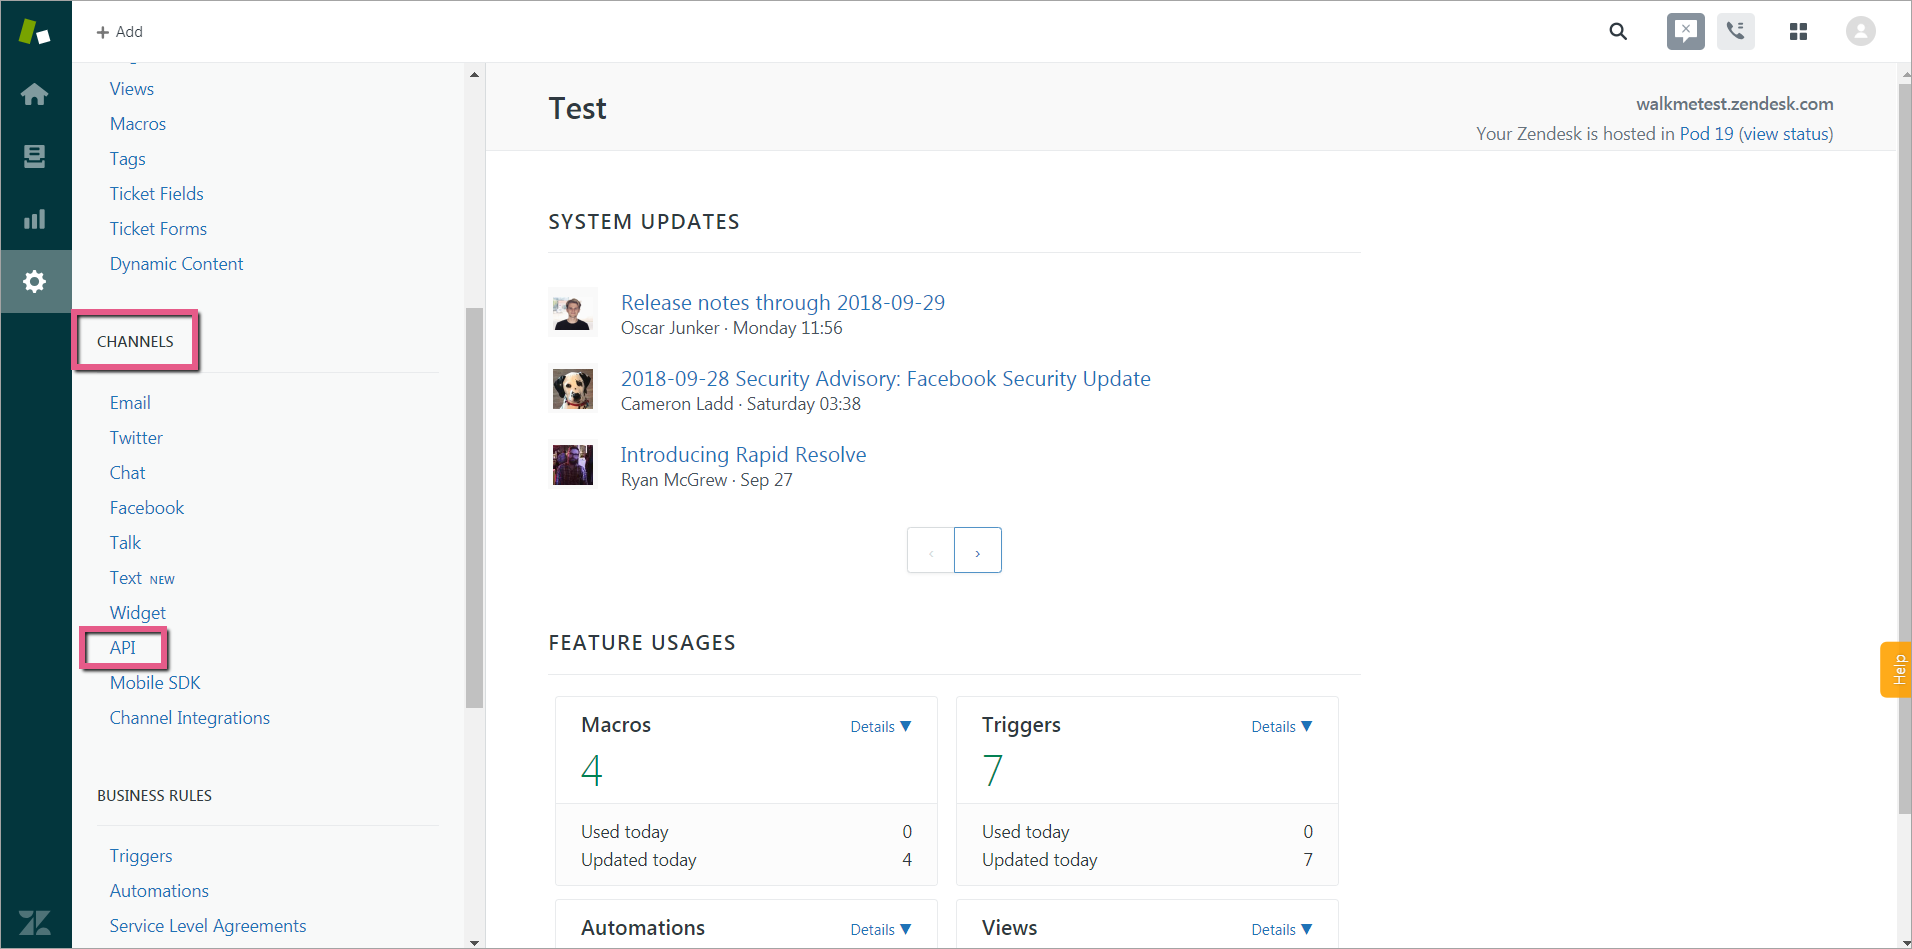
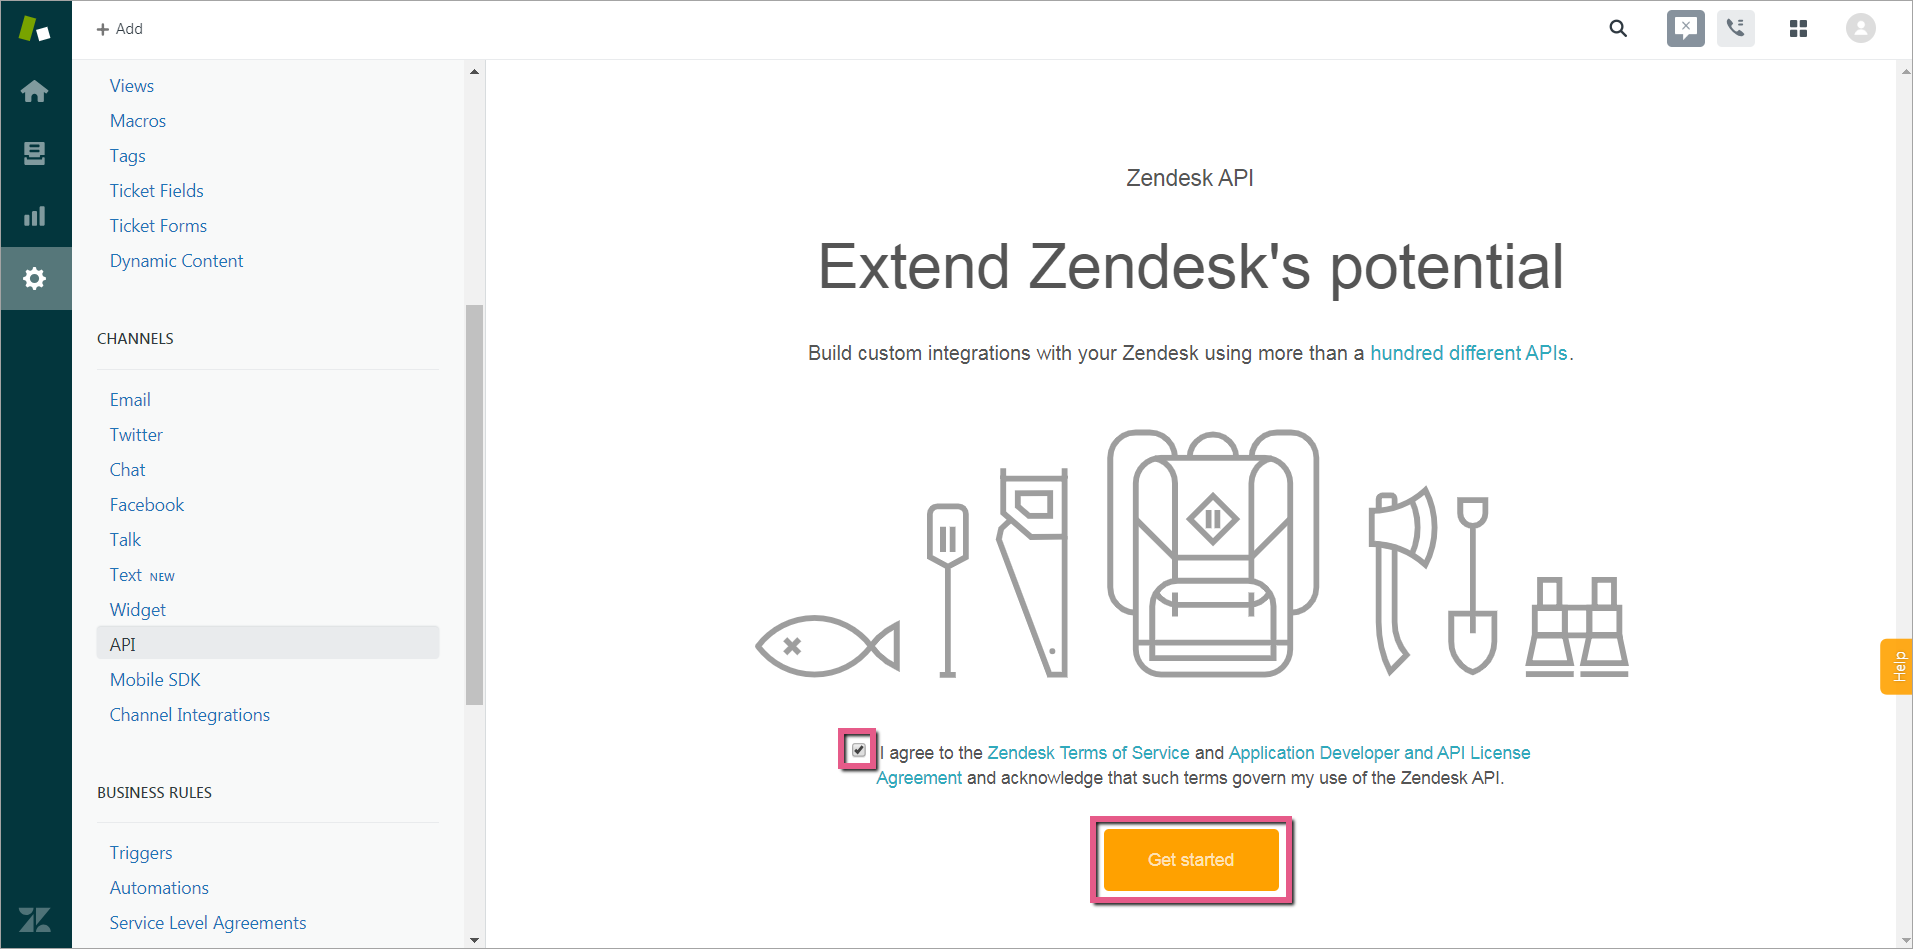
Step 4: Click API under CHANNELS
Step 5: Agree to Zendesk's terms and click Get started
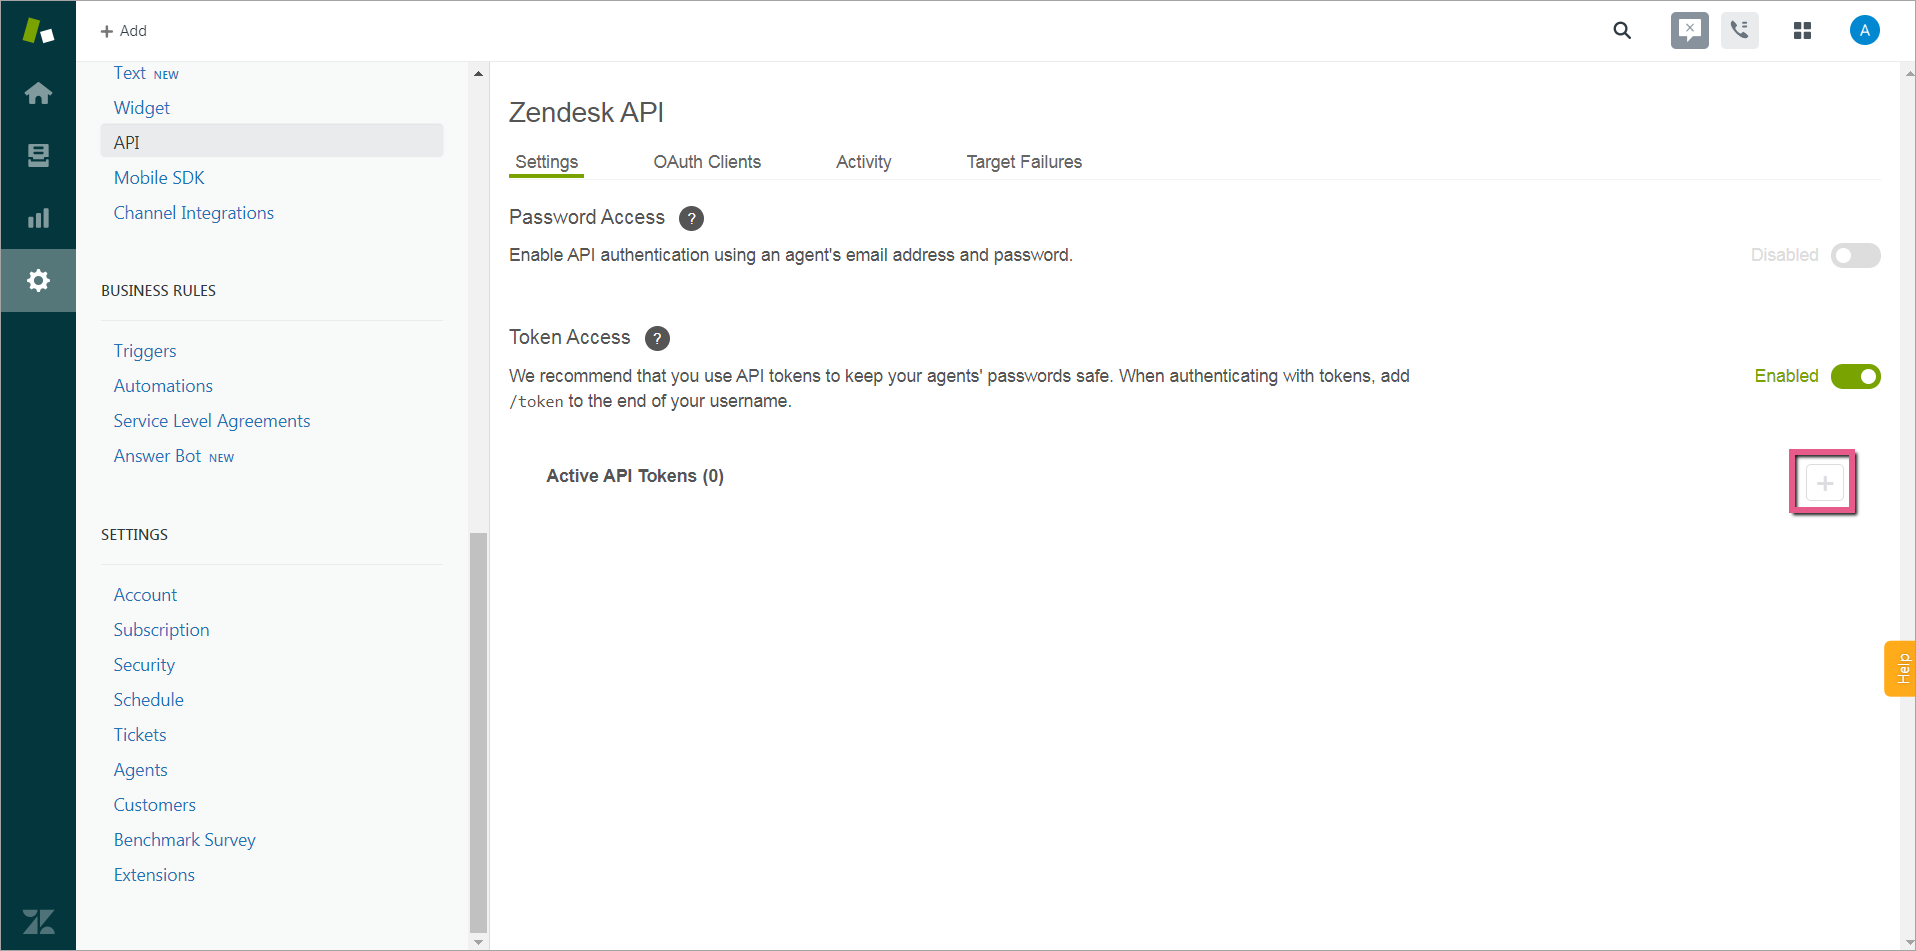
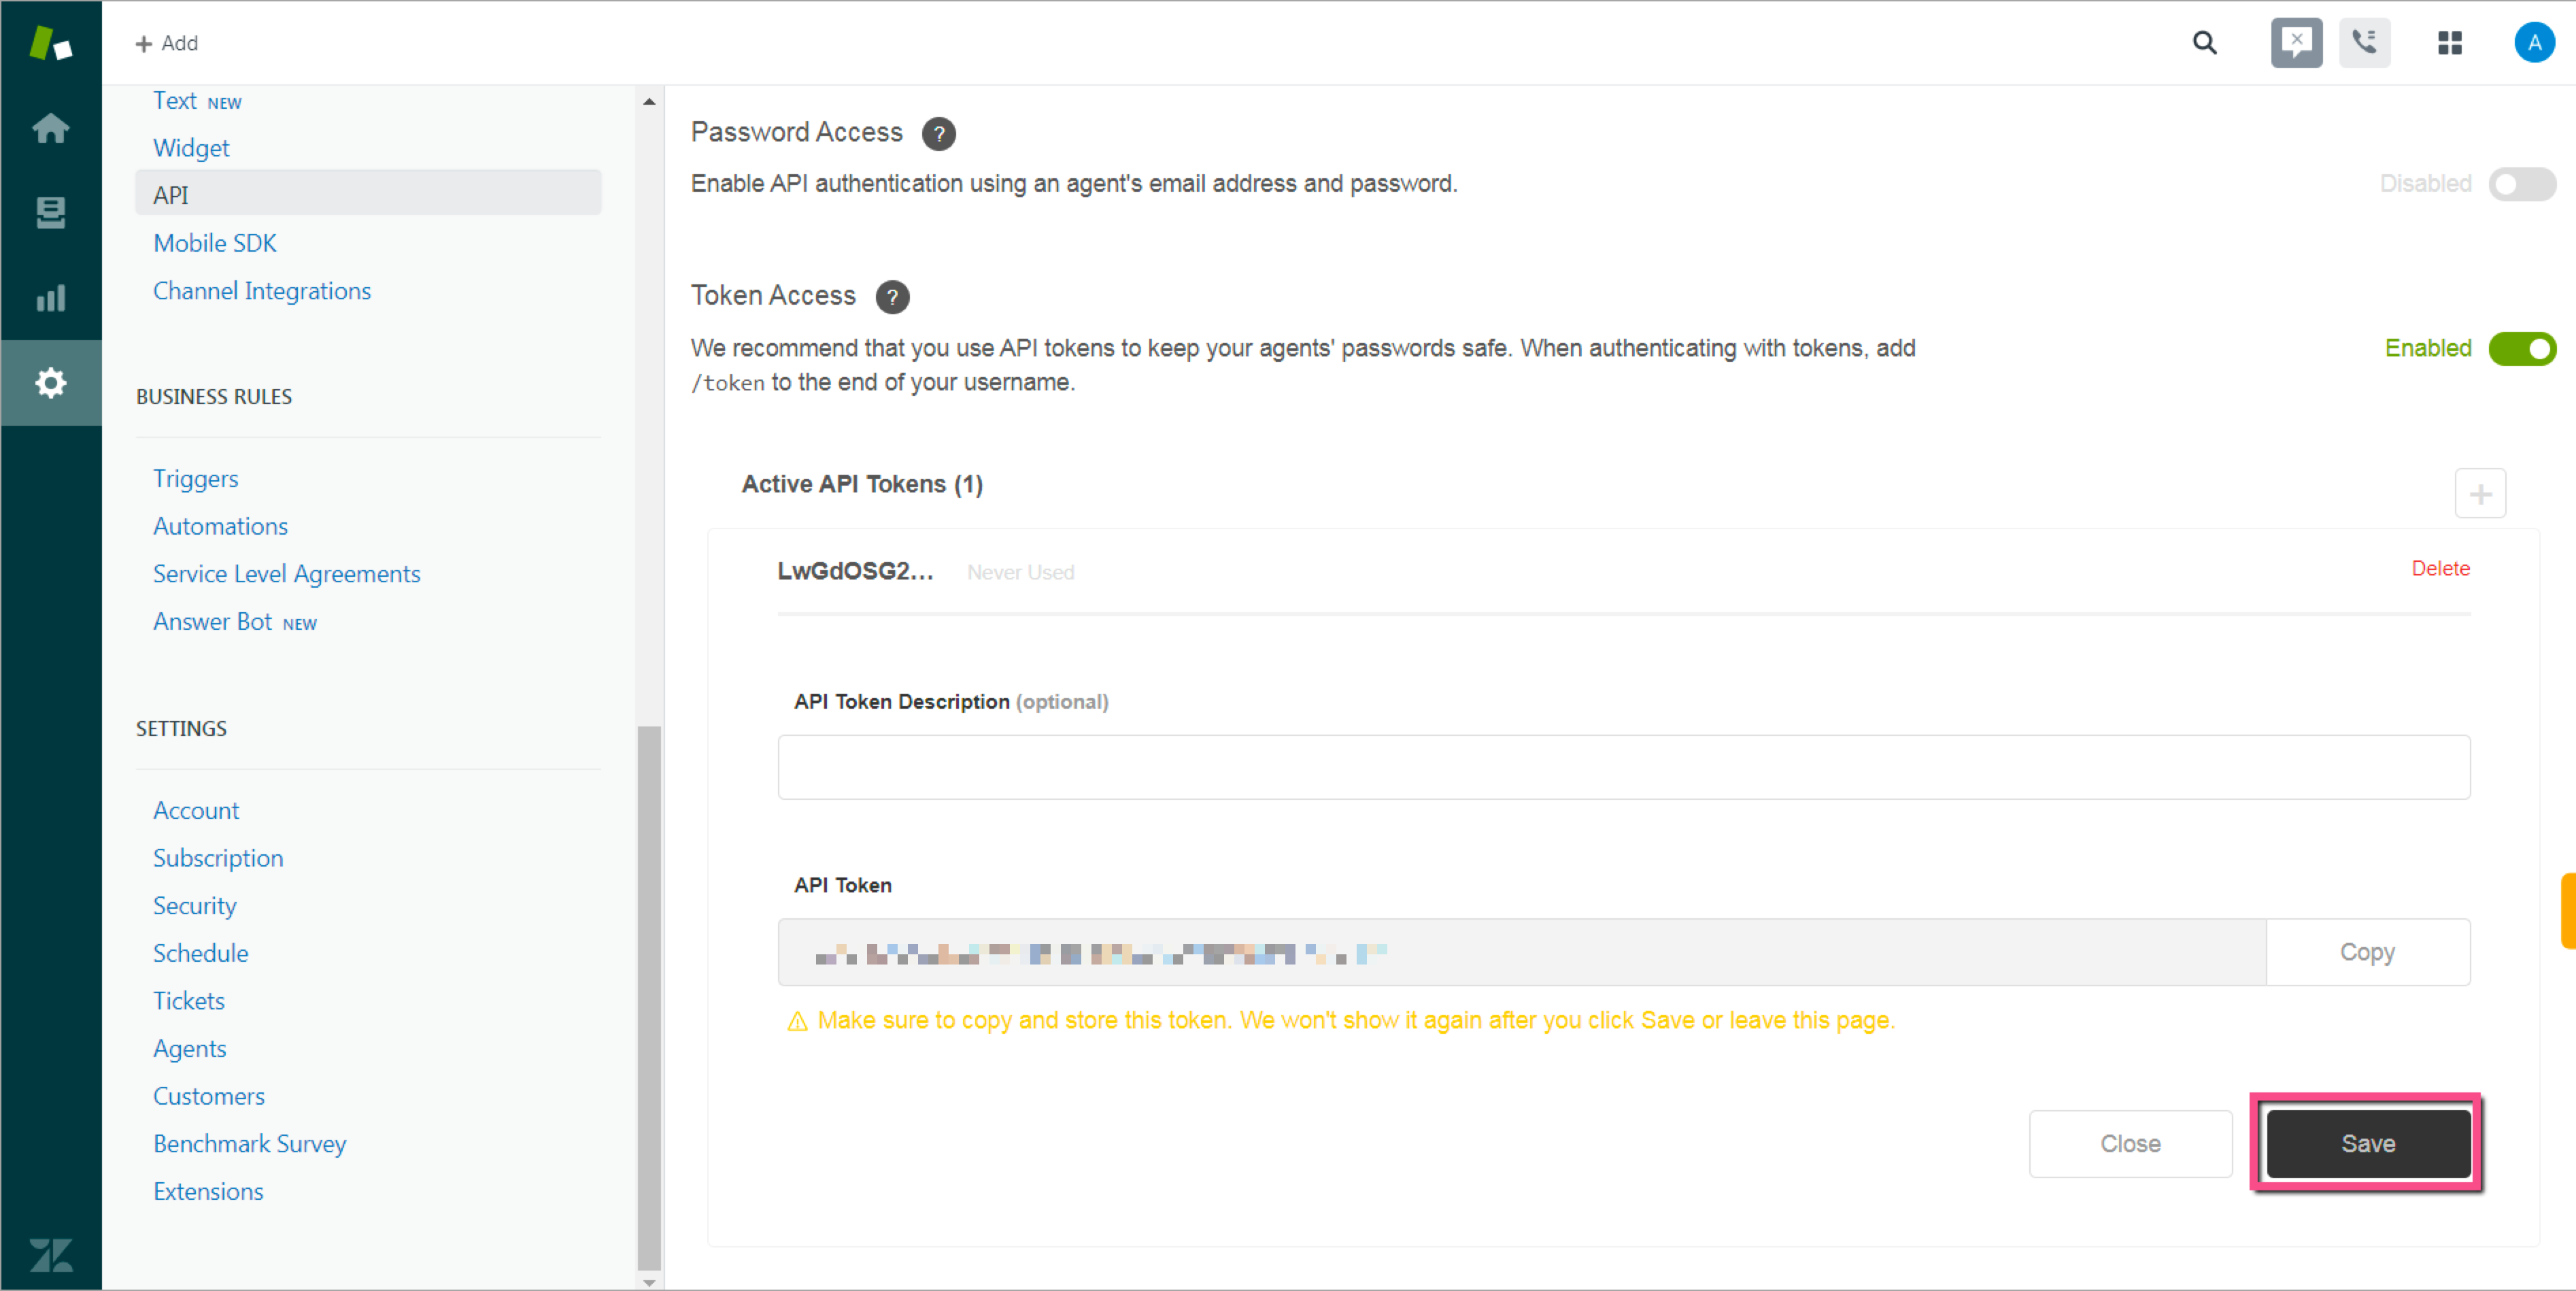
Step 6: Enable Token Access under Settings
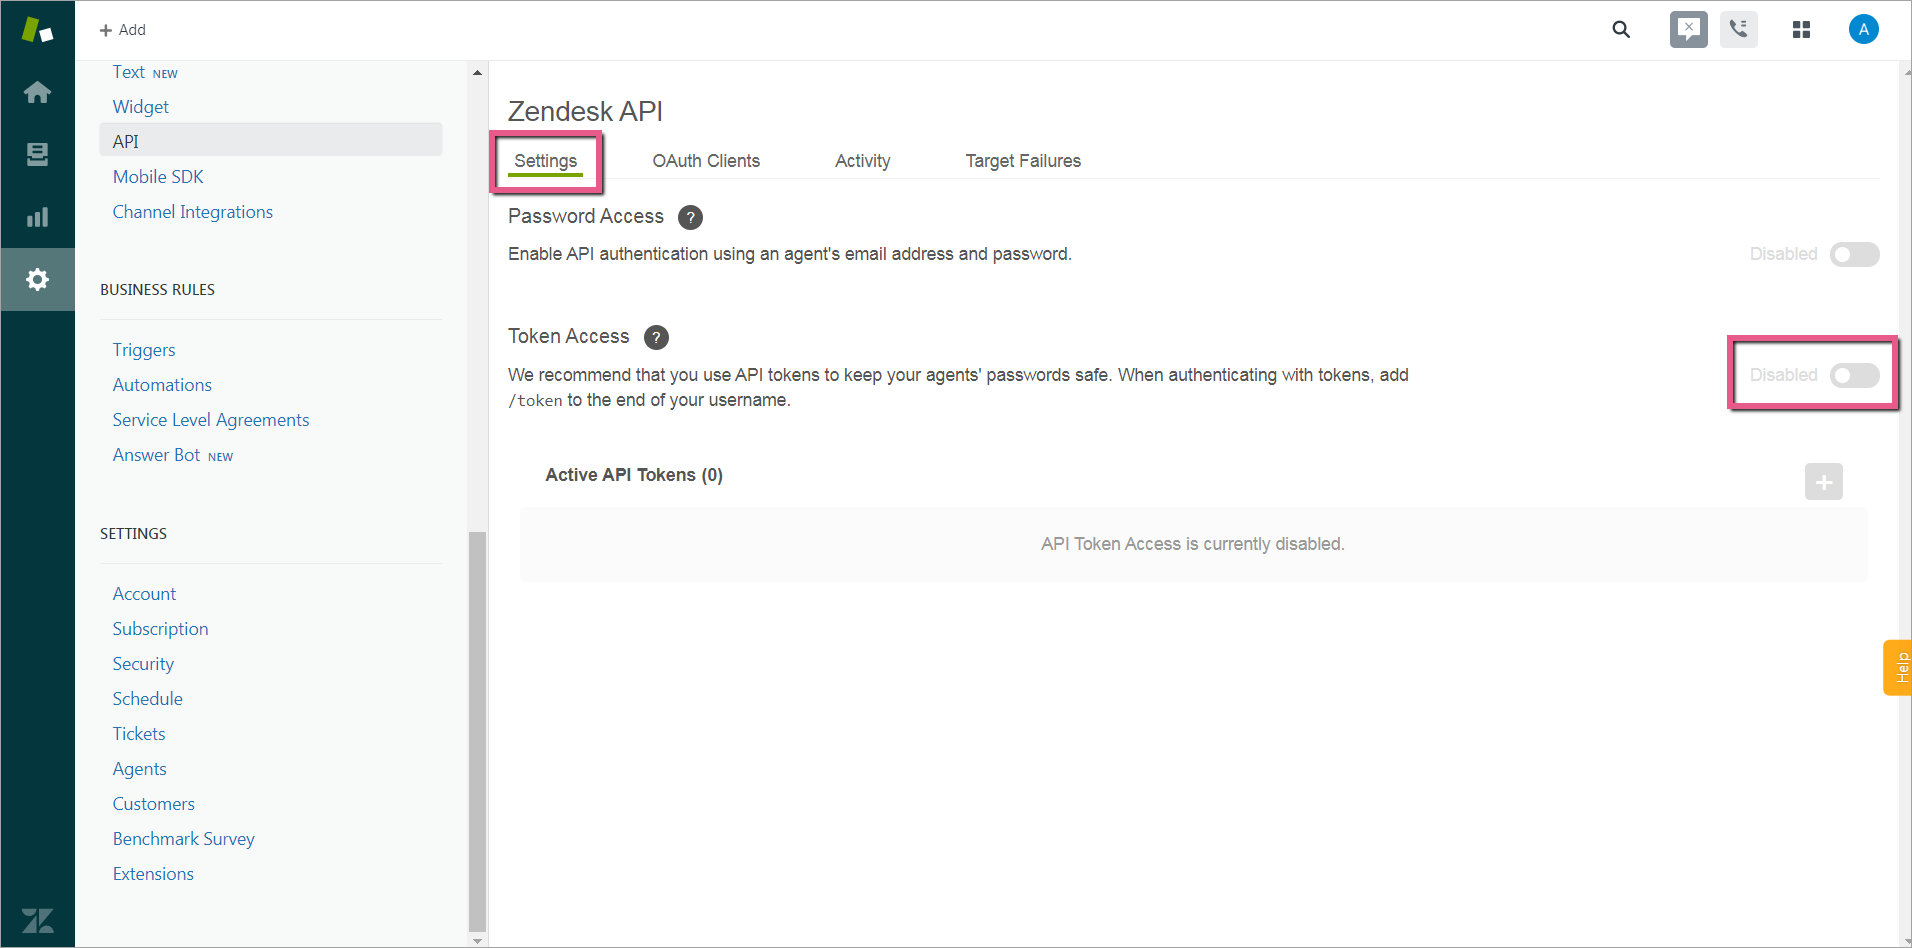
Step 7: Click "+" to add an API Token
Step 8: Copy the API Token
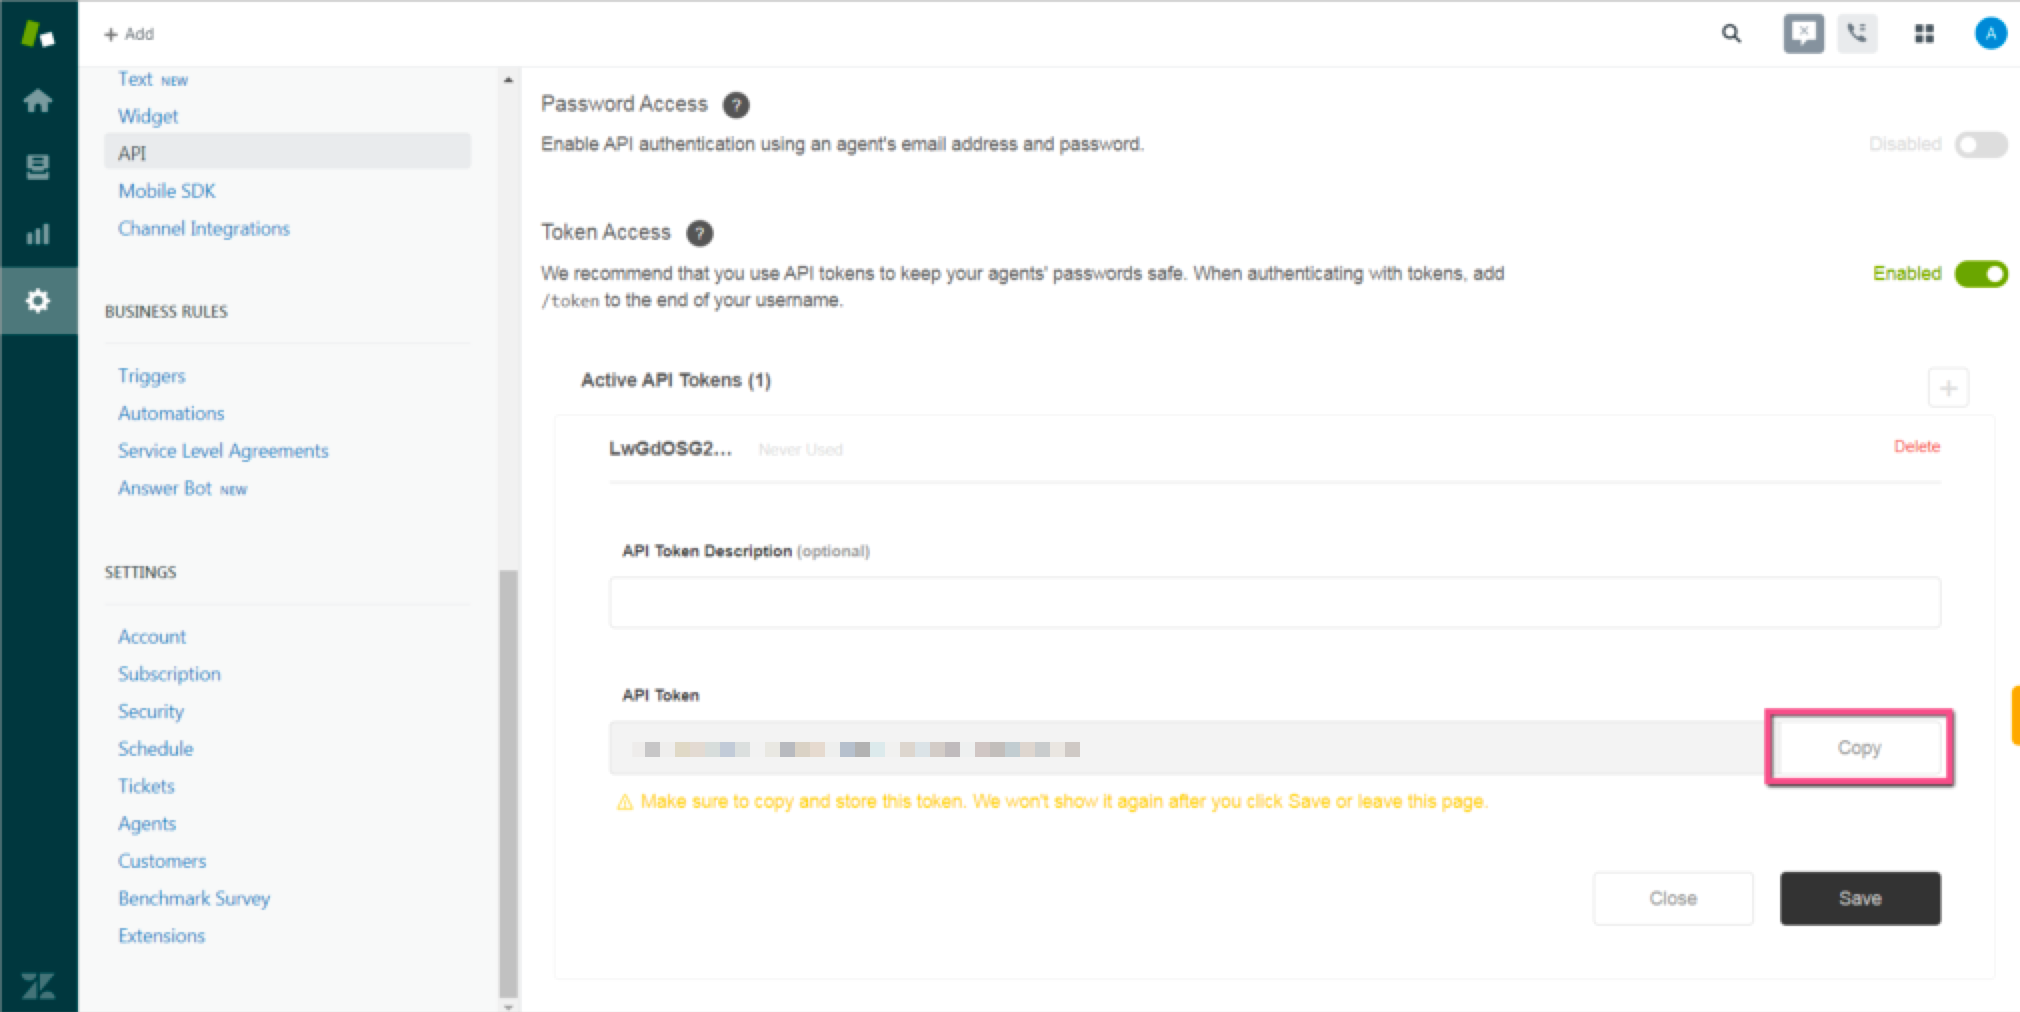
Step 9: Click Save to save the API Token
Step 10: Review the 'How to Set Up a WebHook' article
Step 11: Set up your WebHook in Insights using the Wizard
Wizard Step 1: Define event
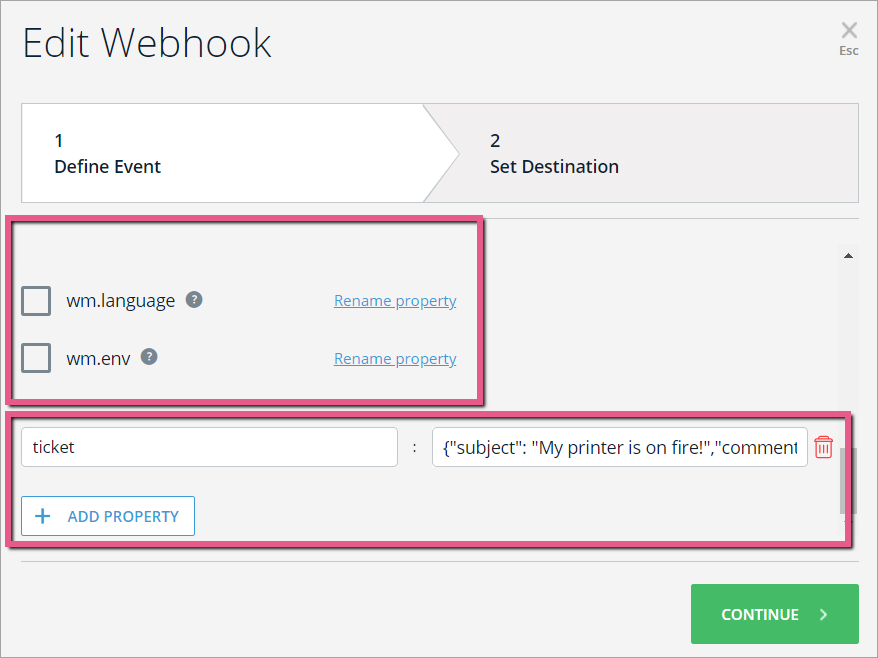
Required properties
- The Track Event sent to Zendesk requires the ticket property with the following variables:
- subject
- comment
- title
- type
- priority
Steps
- Select an Event to send to Zendesk;
- Click Advanced to open the list of properties;
- Select from the pre-defined properties on the top and rename them (make sure to mark the event as selected), or click ADD PROPERTY to send a property with specific value:
 Pro-Tip: Different use cases in Segment will require different properties to send.
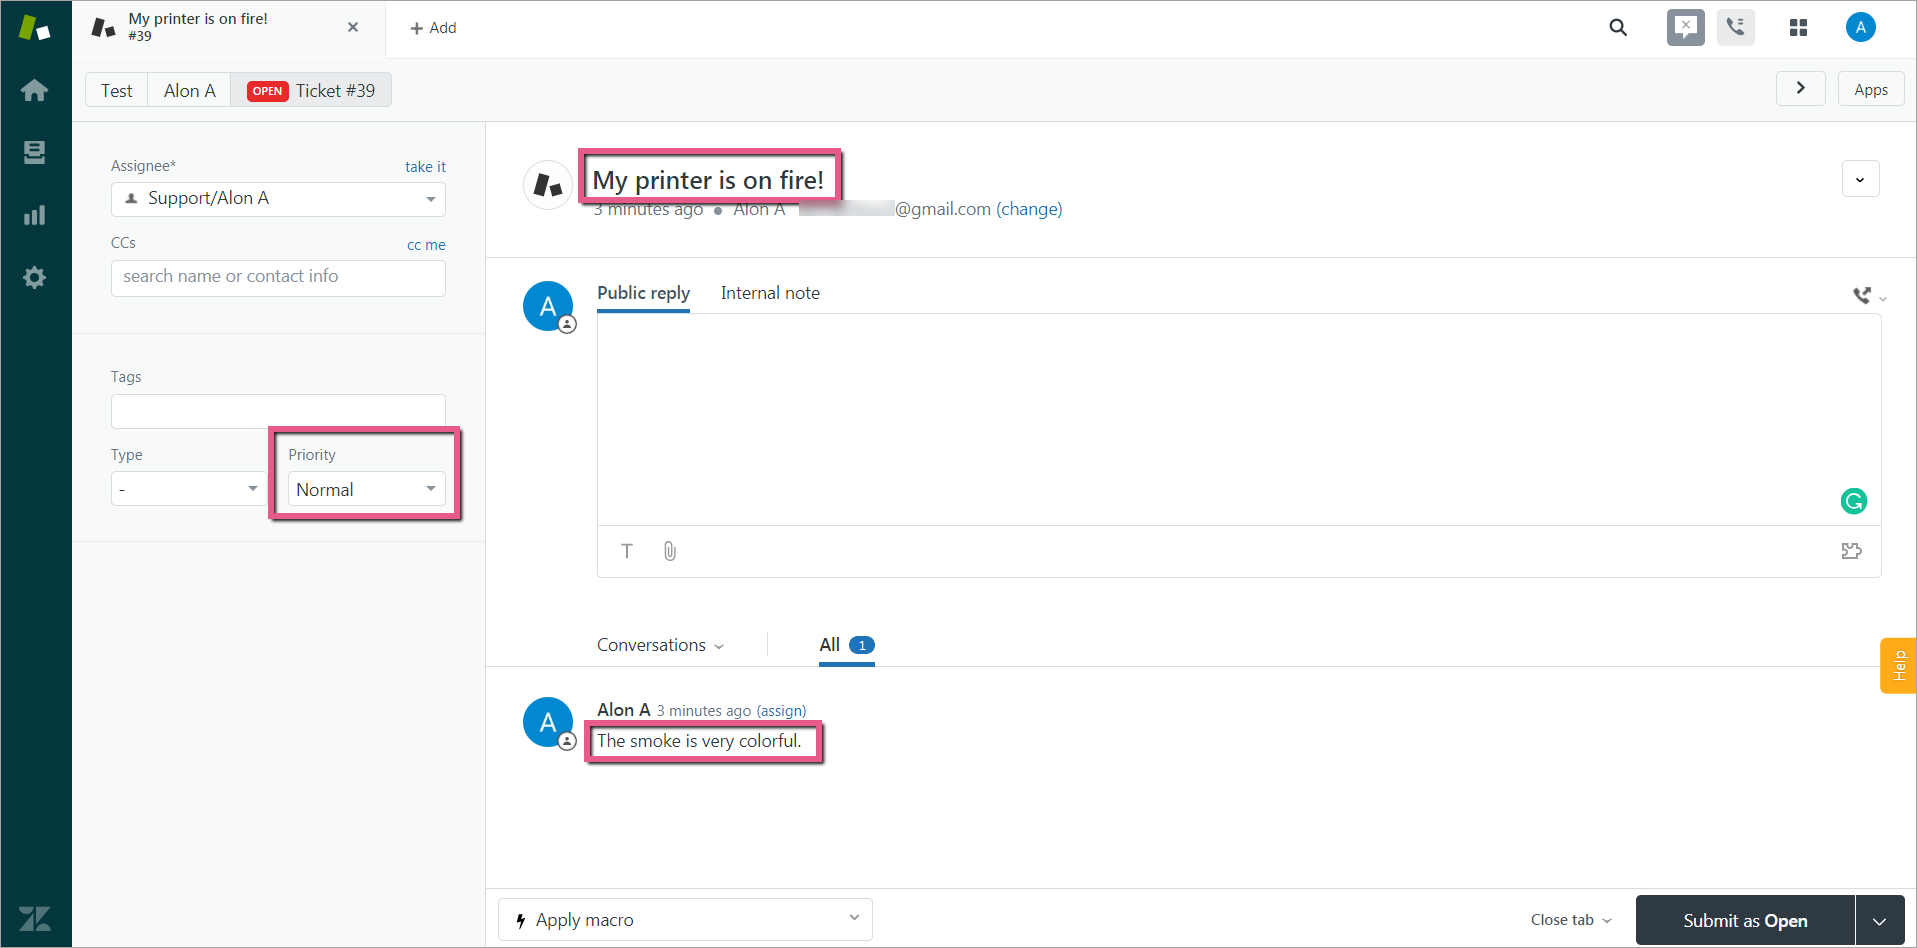
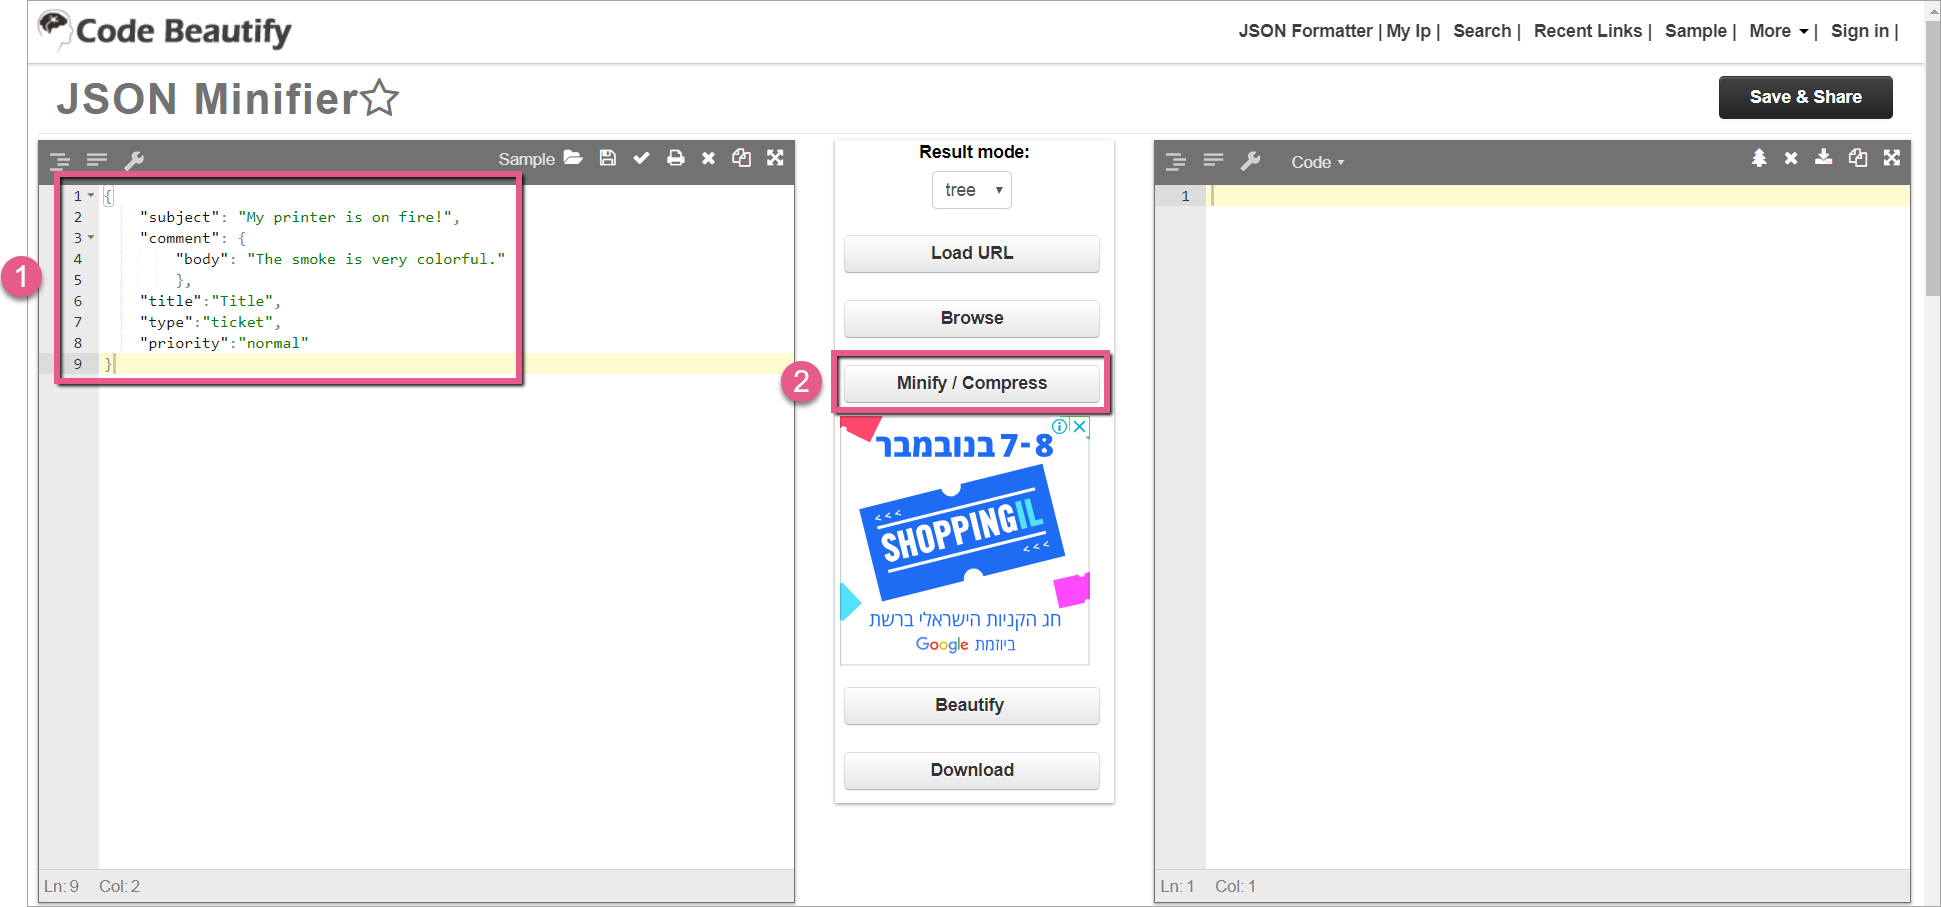
- Add your ticket property with the required variables (example below):
{
    "subject": "My printer is on fire!",
    "comment": {
        "body": "The smoke is very colorful."
        },
    "title":"Title",
    "type":"ticket",
    "priority":"normal"
}
-
- Open any JSON minifier (e.g., https://codebeautify.org/jsonminifier), paste the property into the minifier console, and click Minify / Compress:
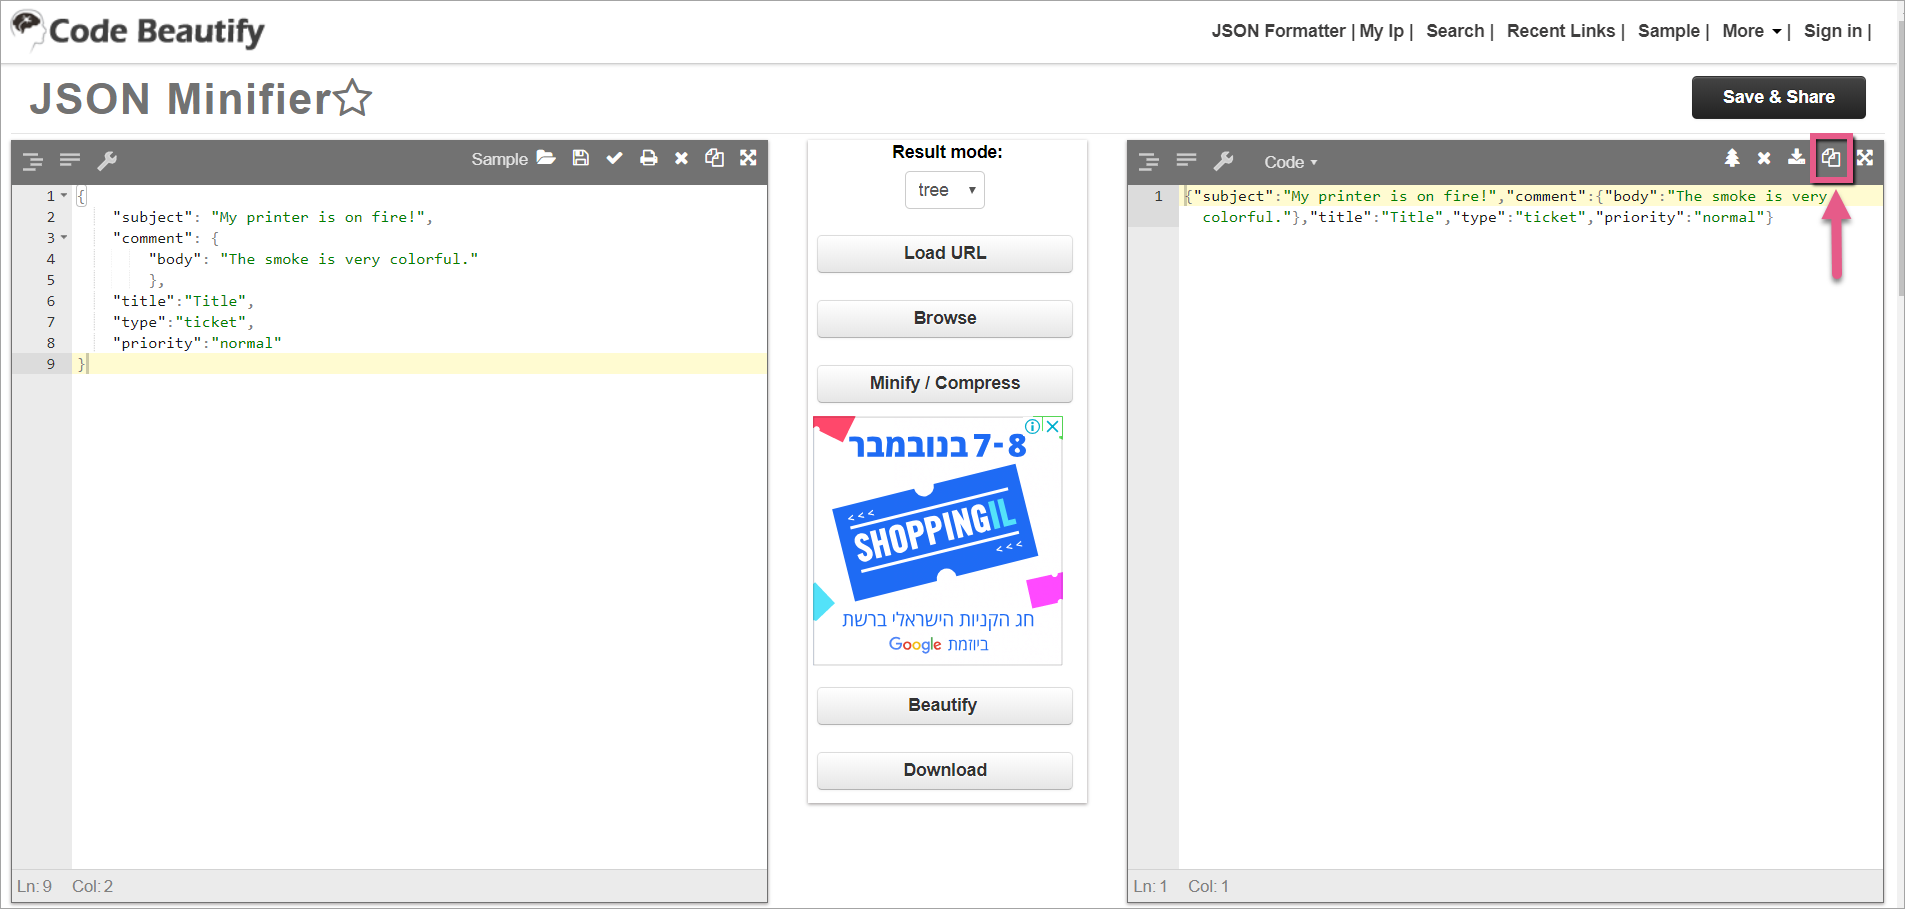
- Copy the minified JSON; you should receive the JSON formatted as follows:
- {"subject":"My printer is on fire!","comment":{"body":"The smoke is very colorful."},"title":"Title","type":"ticket","priority":"normal"}
Wizard Step 2: Set destination
Steps
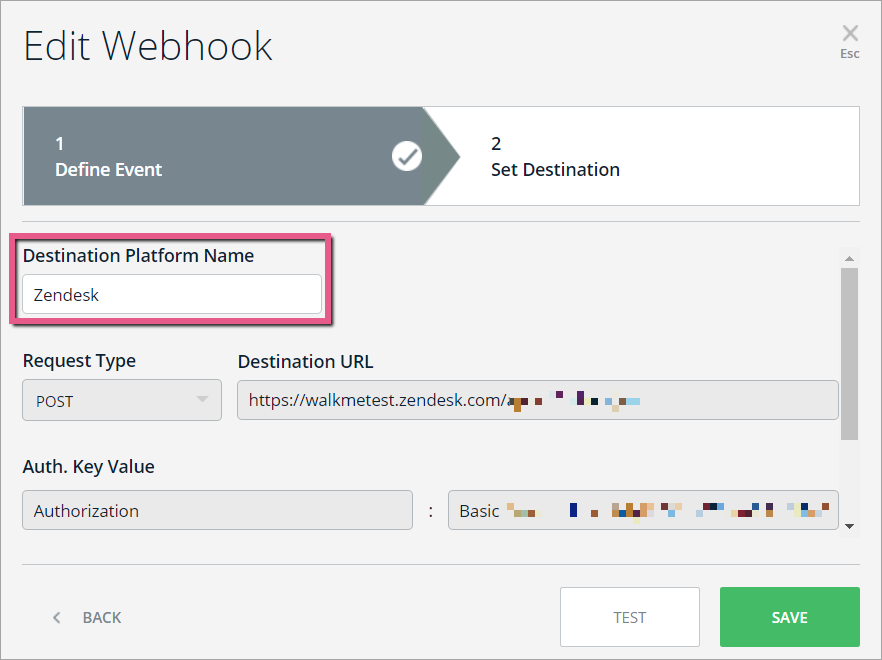
- Write in the Destination Platform Name. This name identifies the destination system (In this case Zendesk):
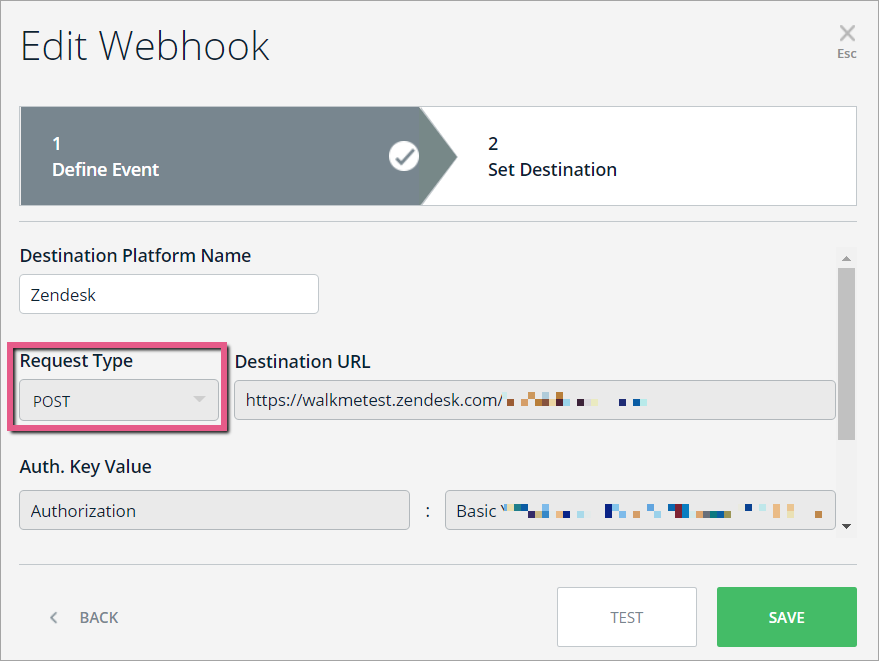
- Set Request Type to POST:
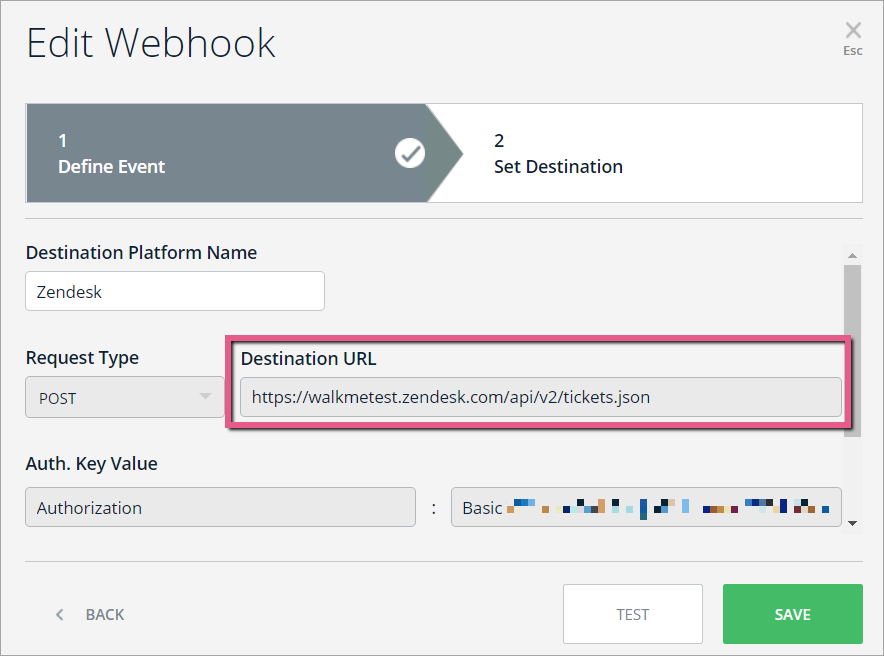
- Paste the URL according to your use case (in the following picture the URL is for creating a new ticket). The URL will always begin with "https://walkmetest.zendesk.com/api/v2/":
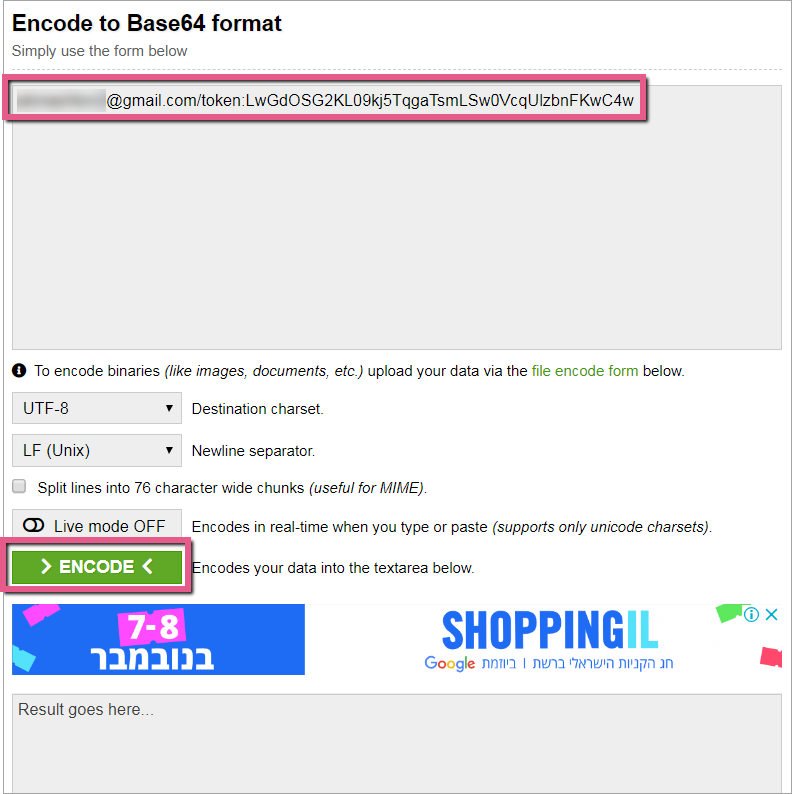
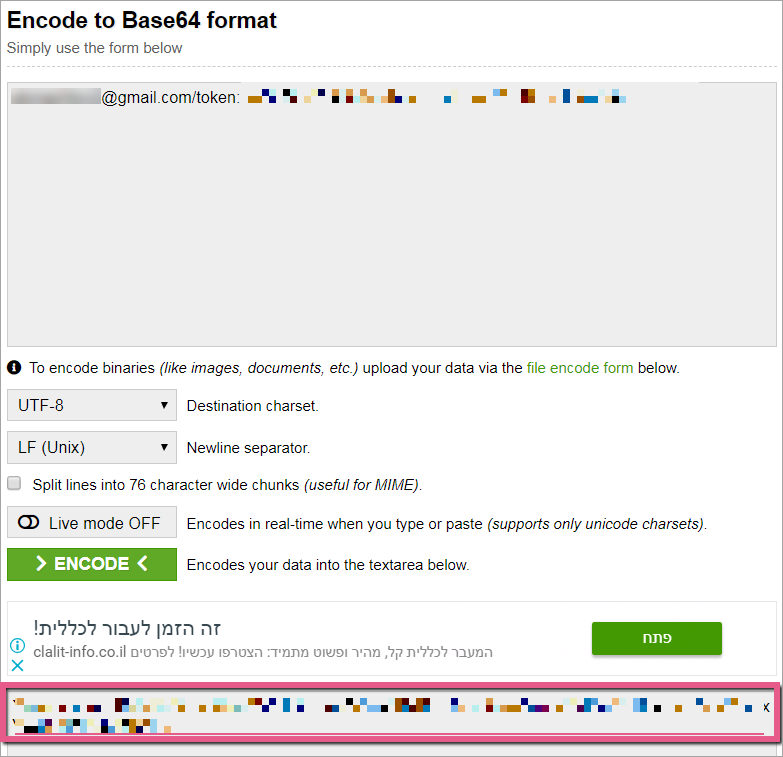
- Create a Base64 key as follows:
- Open any Base64 encoder (e.g., https://www.base64encode.org).
- write the email you defined in Zendesk and paste the API key you copied in Step 8 above in the following format:
- {email_address}/token:{api_token}
- Click Encode:
- Copy the Base64 result:
- Back in the WebHook Wizard, add an Auth. Key Value as follows:
- Authorization : Basic <paste a Base64 key here>:
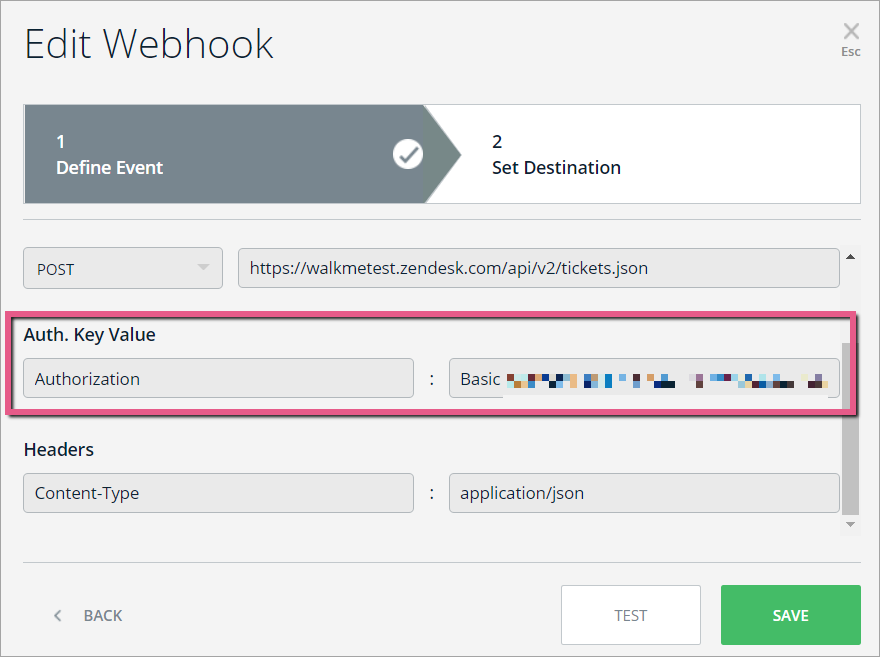
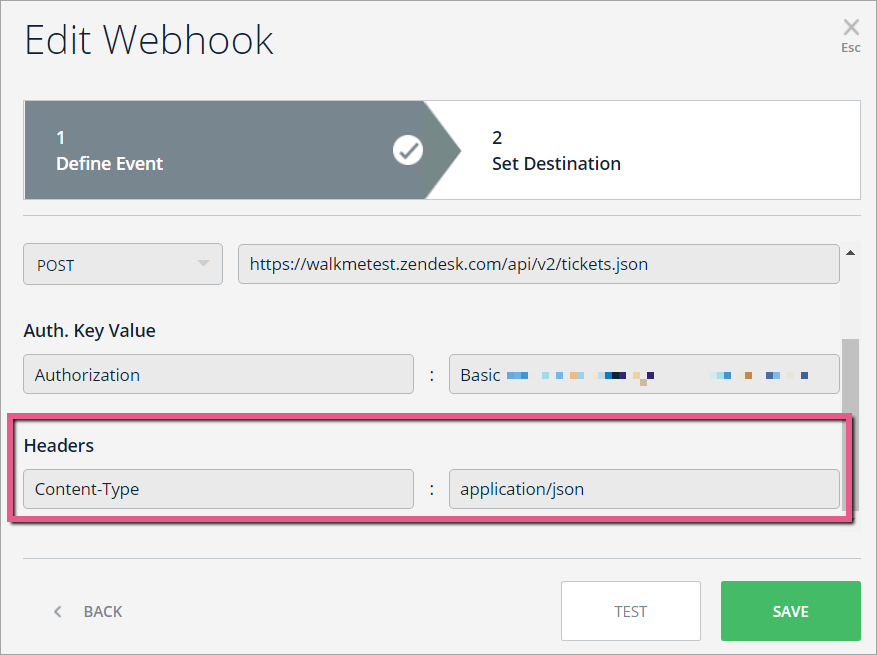
- Add Headers as follows:
- Content-Type : application/json:
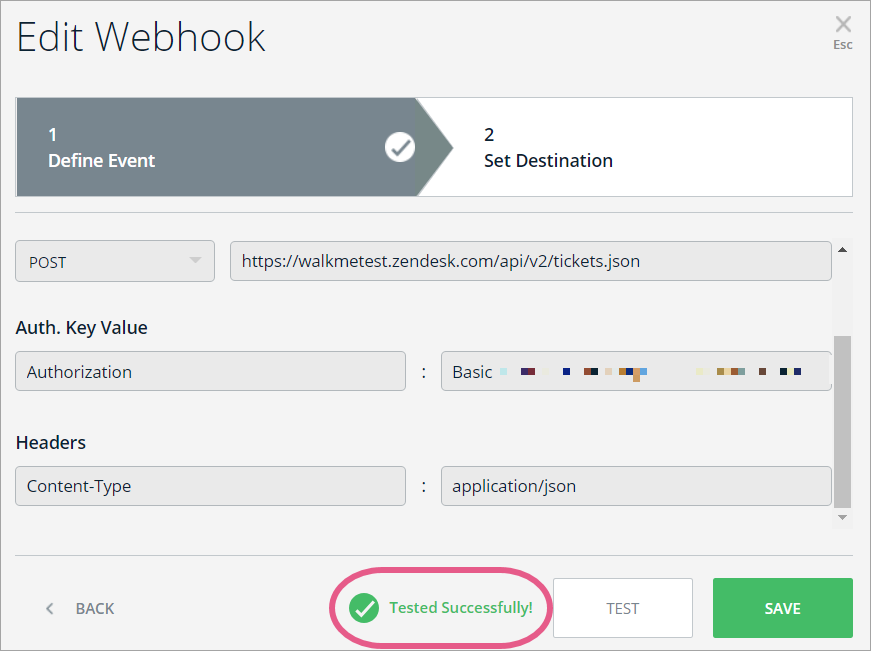
- Click TEST
- This will send the event that you defined in Wizard Step 1 to your destination platform to ensure that a connection successfully made.
- You should see the message: "Tested Successfully!":
 Pro-Tip: If you don't see the success message, check if all the mandatory properties are defined properly, per the instructions above.
Step 12: Go back to Zendesk and click Views

- You should now see the ticket that you created previously:
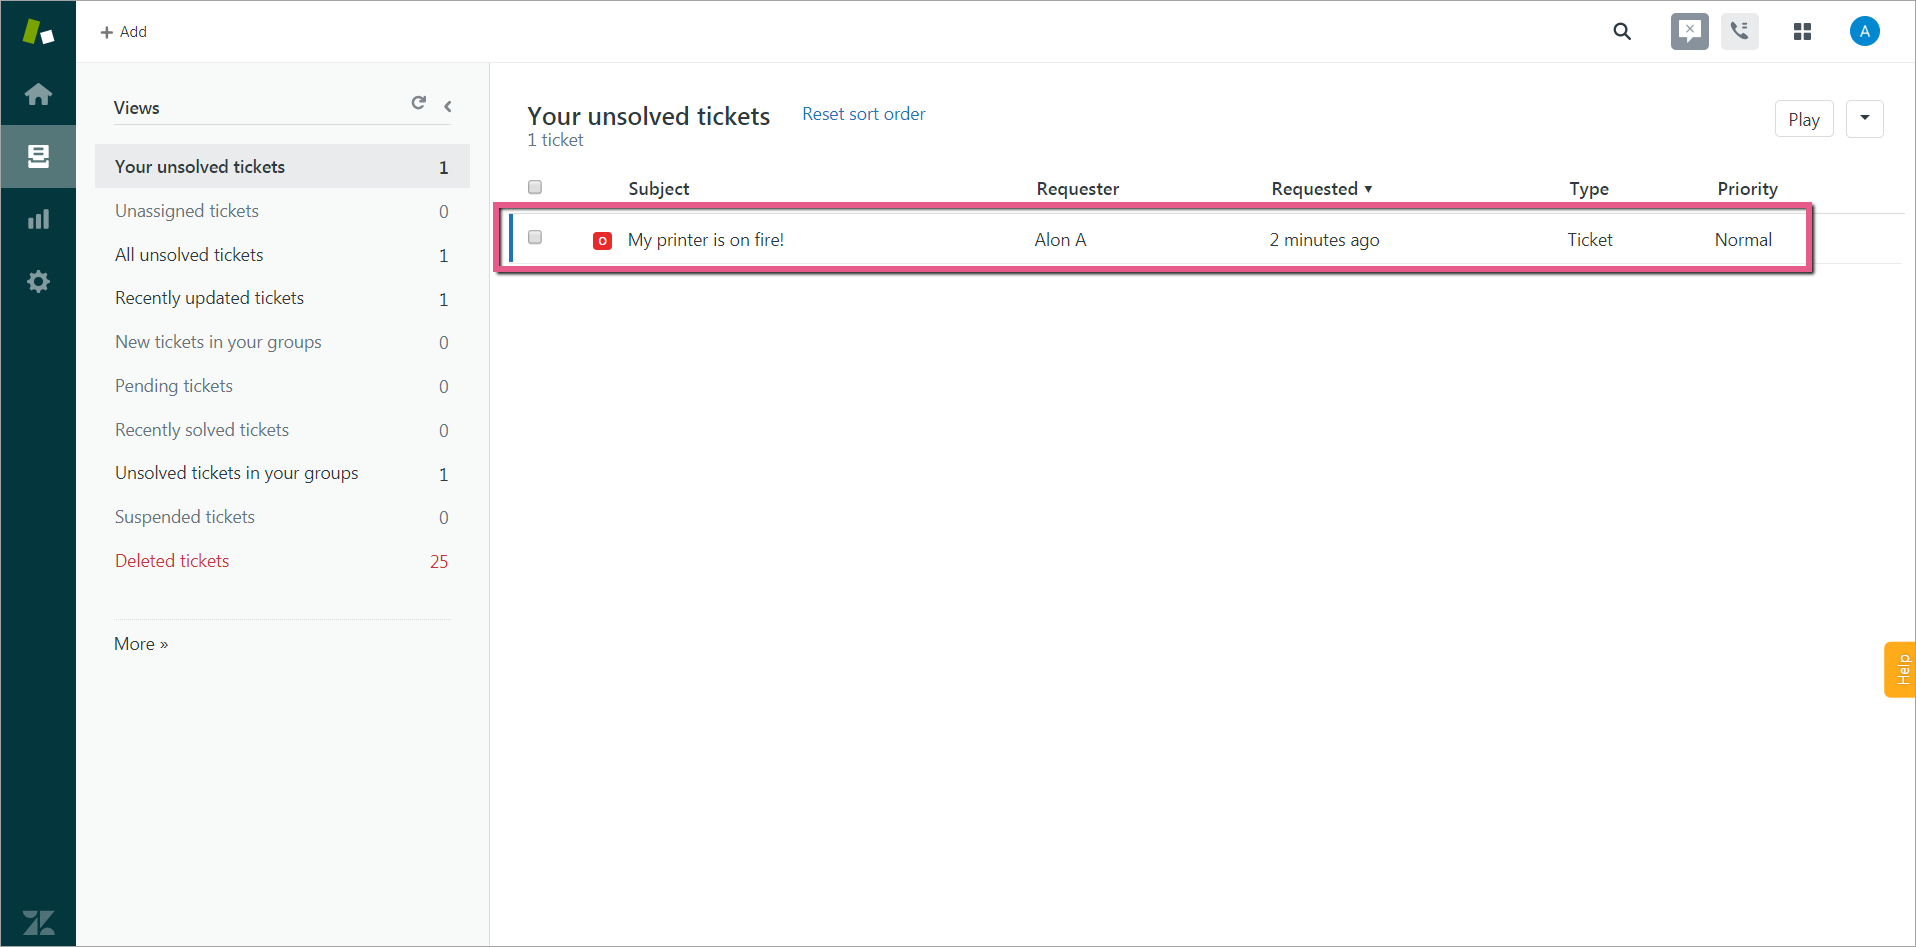
- In the image below, you can see the variables we sent from Insights to Zendesk using WebHooks!