
How to Send WalkMe Event Data to 3rd Party Systems Using Webhooks
Brief Overview
Make data-driven decisions in real-time or trigger experiences on the spot by creating and customizing webhooks (AKA callbacks) to send WalkMe Event data to 3rd party systems you use to trigger specific outcomes.
Webhooks deliver real-time WalkMe Event information to your system of choice, triggered by the event itself. This means you receive information with no delay, so your teams can take immediate action on time-sensitive information.
Webhooks can be used to add WalkMe Event data into your analytics / BI tool, or to trigger 3rd party APIs. Now when a user clicks on a ShoutOut, you can add them to an email list in your email marketing system, or when they respond to an NPS survey you can have an instant notification sent to a Slack channel. With webhooks, WalkMe can be built directly into your workflows, with no R&D effort.
To learn more about webhooks, please refer to the following article: What Are Webhooks?
Use Cases
- Integrate WalkMe Event data into your analytics BI tool
- Add users to an email list directly when a user engages with WalkMe
- Instantly send notifications directly to Slack channels after users take action
Steps For Sending WalkMe Data Using Webhooks
-
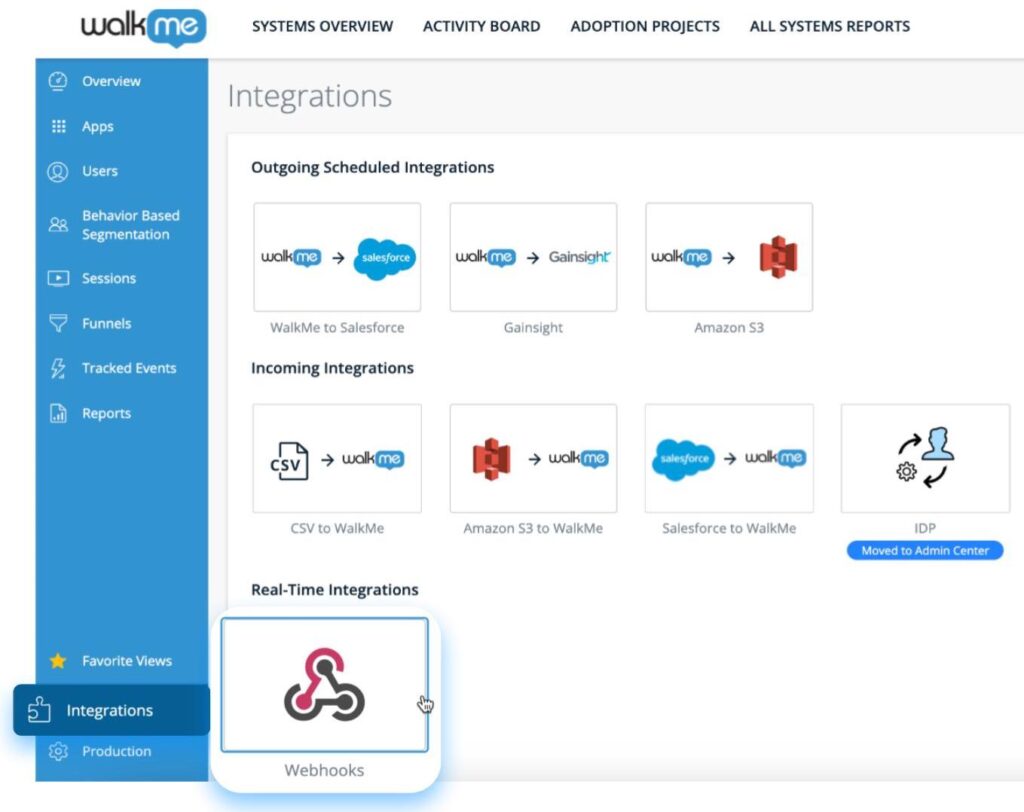
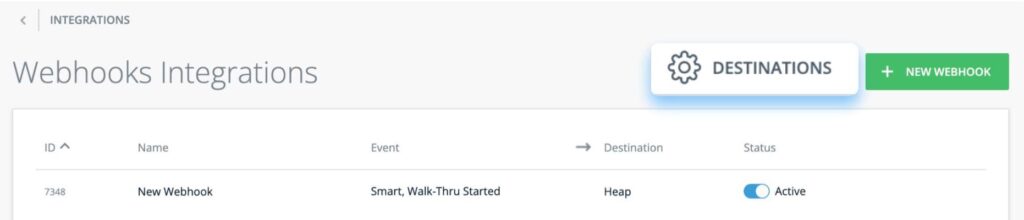
- Go to the Integrations page in Insights at insights.walkme.com
- Click Webhooks under Real-Time Integrations
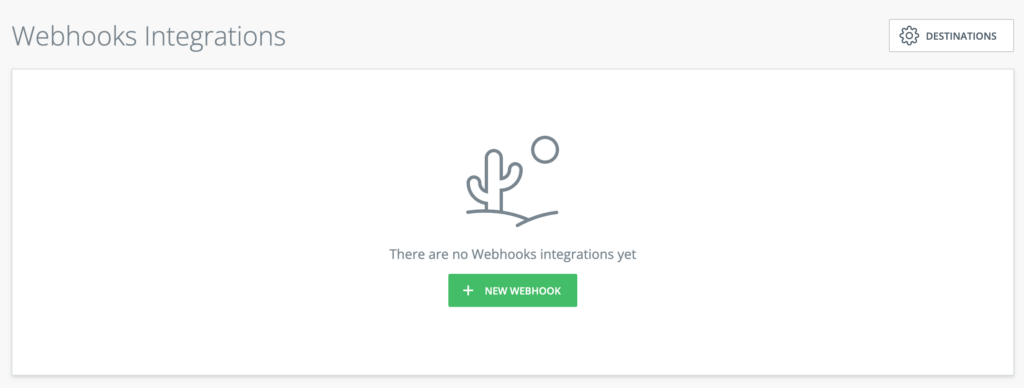
- Click + NEW WEBHOOK
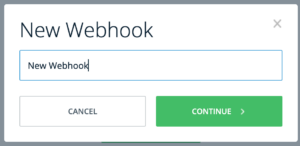
- Give your webhook a name and click CONTINUE
- Enter the webhook event details
- Select a WalkMe Event from the Event dropdown
- Add optional conditions
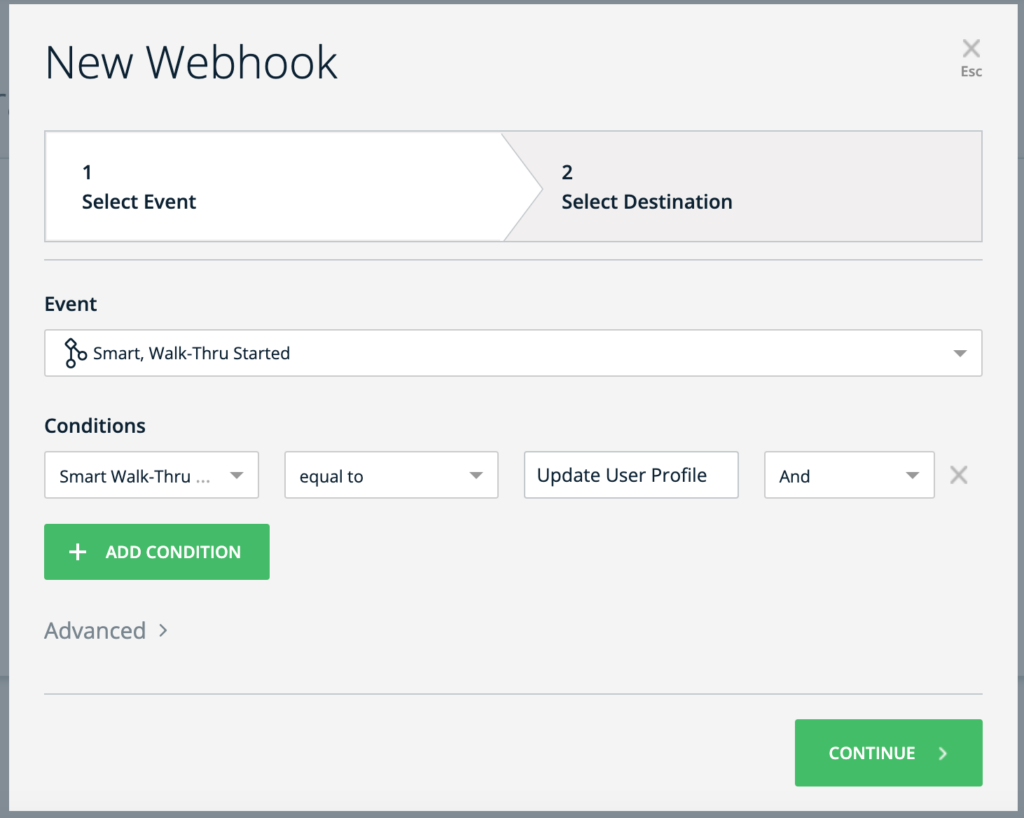
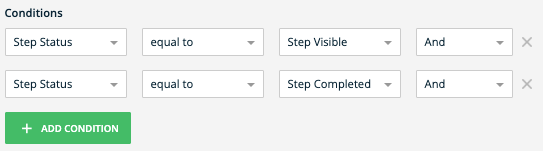
- When sending a webhook based on an SWT step, two events need to be dispatched to the customer server:
- When the step appears in the environment
- When the step is completed (closed, proceeded, failed, etc
- To do this, add Step Status rules to the webhook condition, as shown in the image:
- When sending a webhook based on an SWT step, two events need to be dispatched to the customer server:
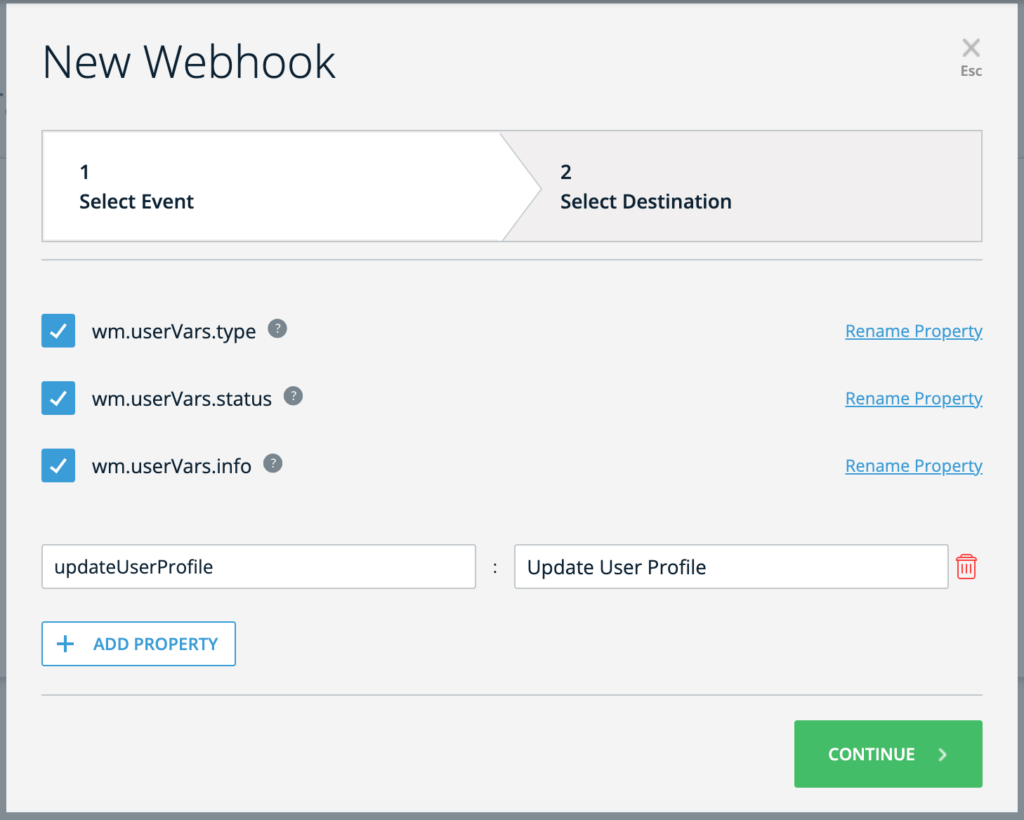
- In the Advanced > dropdown section you can specify which properties of your chosen event you want to
- You can rename properties to match the destination system's expected attributes.
- If you do not rename them, these are the values you will receive in the webhook call.
- You can also set additional static properties to send alongside the webhook call using the + ADD PROPERTY button.
- No spaces are allowed in the property name.
- We recommend separating words using “_” or camelCase.
- Click Continue
- Enter the webhook destination details
- Enter the Destination Platform Name
- This is the 3rd party platform where you want the event data sent, for example, Heap Analytics, Mixpanel, or Google Analytics
- Enter the Request Type and Destination URL
- These specify how to perform the webhook call and to where
- These details can be found in the destination system's API documentation
- Select an optional Authentication Type
- Consult the destination system's API documentation to understand if this is necessary
- WalkMe supports the following authentication methods:
- No Auth
- Bearer Token: Requires a token
- Basic Auth: Requires a user name and password
- OAuth 2.0
- Enter any optional Headers using the + ADD PROPERTY button
- These are the values required to perform the webhook call
- Consult to the destination system's API documentation to understand if this is necessary
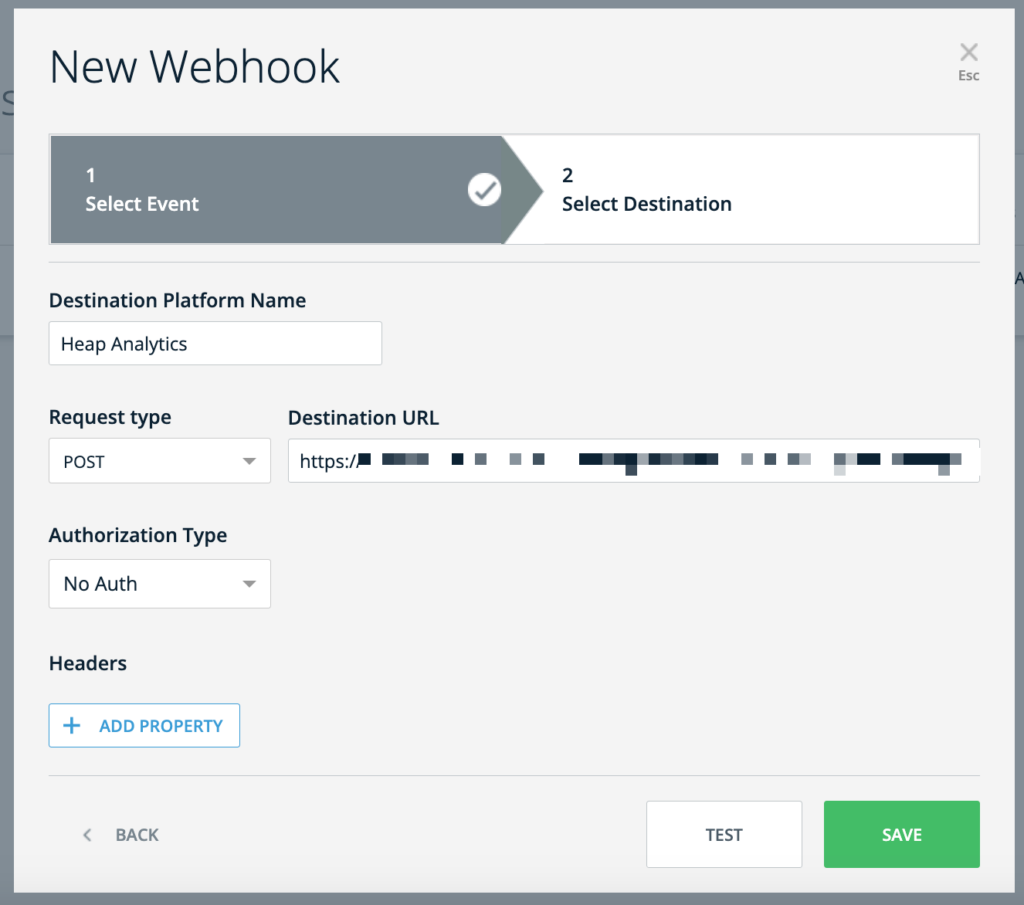
- Enter the Destination Platform Name
- Click Save
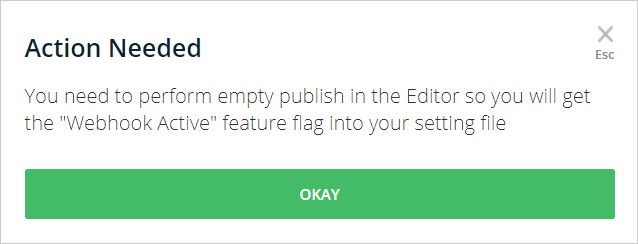
- You will be prompted to perform a settings publish in the Editor
- This step is necessary only for the first webhook you create
- To learn more, please refer to the following article: How to Publish Global Settings
- Go to the Integrations page in Insights at insights.walkme.com
To verify that you've successfully configured the webhook, follow these steps:
- Enter your application
- Perform the event the webhook is tracking
- Check that the destination system you've configured receives the webhook call and executes the desired outcome
List of Available Events
The below table displays all options available for creating webhook events:
| Group | Name | Description |
Smart Walk-Thru |
Smart Walk-Thru Step Played | Receive Events with a specific Smart Walk-Thru Step |
| Smart Walk-Thru Goal Reached | Receive events with Goals you've set to a Smart Walk-Thru | |
| Smart Walk-Thru Started | Receive events where a Smart Walk-Thru was shown to the User | |
| Smart Walk-Thru Failed | Receive events for Smart Walk-Thrus that failed to start | |
|
Launcher |
Launcher Clicked | Receive events where a user clicked on a Launcher |
|
Onboarding |
Onboarding Task Completed | Receive events where a specific Onboarding Task was completed |
|
ShoutOut |
Shoutout Action Clicked | Receive events where a user clicked on a Shoutout |
| Shoutout Dismissed | Receive events when Shoutout Dismissed | |
| Shoutout Goal Reached | Receive events when Goals you've set to a Shoutout | |
| Shoutout Shown | Receive events where a Shoutout was shown to the User | |
|
SmartTip |
SmartTip Message Shown | Receive events where a SmartTip message was shown to the user |
| SmartTip Validation Error | Receive events where a SmartTip Validation rule was triggered | |
|
Survey |
Survey Question Answered | Receive events where a user answered a specific question |
| Survey Dismissed | Receive events where a user started a survey but didn't submit it | |
| Survey Submitted | Receive events where a user submitted a survey | |
|
Menu |
Menu Opened | Receive events where WalkMe's menu was opened |
| Menu Search | Receive events where the search bar was used | |
| Menu Item Selected | Receive events where a search result was selected by the user | |
|
Shuttle |
Shuttle Goal Reached | Receive events where a shuttle goal was reached |
|
Resource |
Resource Clicked | Receive events where a Resource was used |
| Resource Goal Reached | Receive events where a resource goal was reached | |
|
TeachMe
|
TeachMe was visible | Receive events when a TeachMe course was visible |
| TeachMe step started | Receive events when a TeachMe step started | |
| TeachMe Course started |
Receive events when a TeachMe course started | |
| TeachMe course completion | Receive events when a TeachMe course was completed | |
| Quiz played | Receive events when a quiz was played | |
| Quiz submitted | Receive events when a quiz was submitted | |
| Quiz passed | Receive events when a quiz was submitted and passed | |
| Quiz failed | Receive events when a quiz was submitted and failed | |
|
Digital Experience Analytics (DXA) |
Click/Tap | Receive events when an element of the site was clicked or tapped |
| User Input | Receive events when an input field was interacted with. | |
| Page View | Receive events when a page of the site was viewed |
Technical Notes
- Please note: For the certificate provided by the customer, WalkMe requires the use of a full certificate, not an abridged one.