
How To Use Webhooks With Google Analytics
Brief Overview
Webhooks (AKA callbacks) allow you to trigger 3rd party APIs and/or add WalkMe Event data into your analytics platform. The webhook is triggered by a designated WalkMe Event, for example, a ShoutOut being displayed. The webhook integrates between WalkMe and your chosen 3rd party platform.
This article explains how to define webhooks for Google Analytics.
Steps for Using Webhooks With Google Analytics
NOTE: Steps 1-6 are optional, and only need to be completed if you have not yet set up a Google Analytics account. If you already have a Google Analytics account, log into your account and skip to Step 7 and copy the Tracking ID for use in defining your webhook.
Step 1: Open an account or log into Google Analytics
- Website address is: https://analytics.google.com/analytics/web.
Step 2: Click Admin
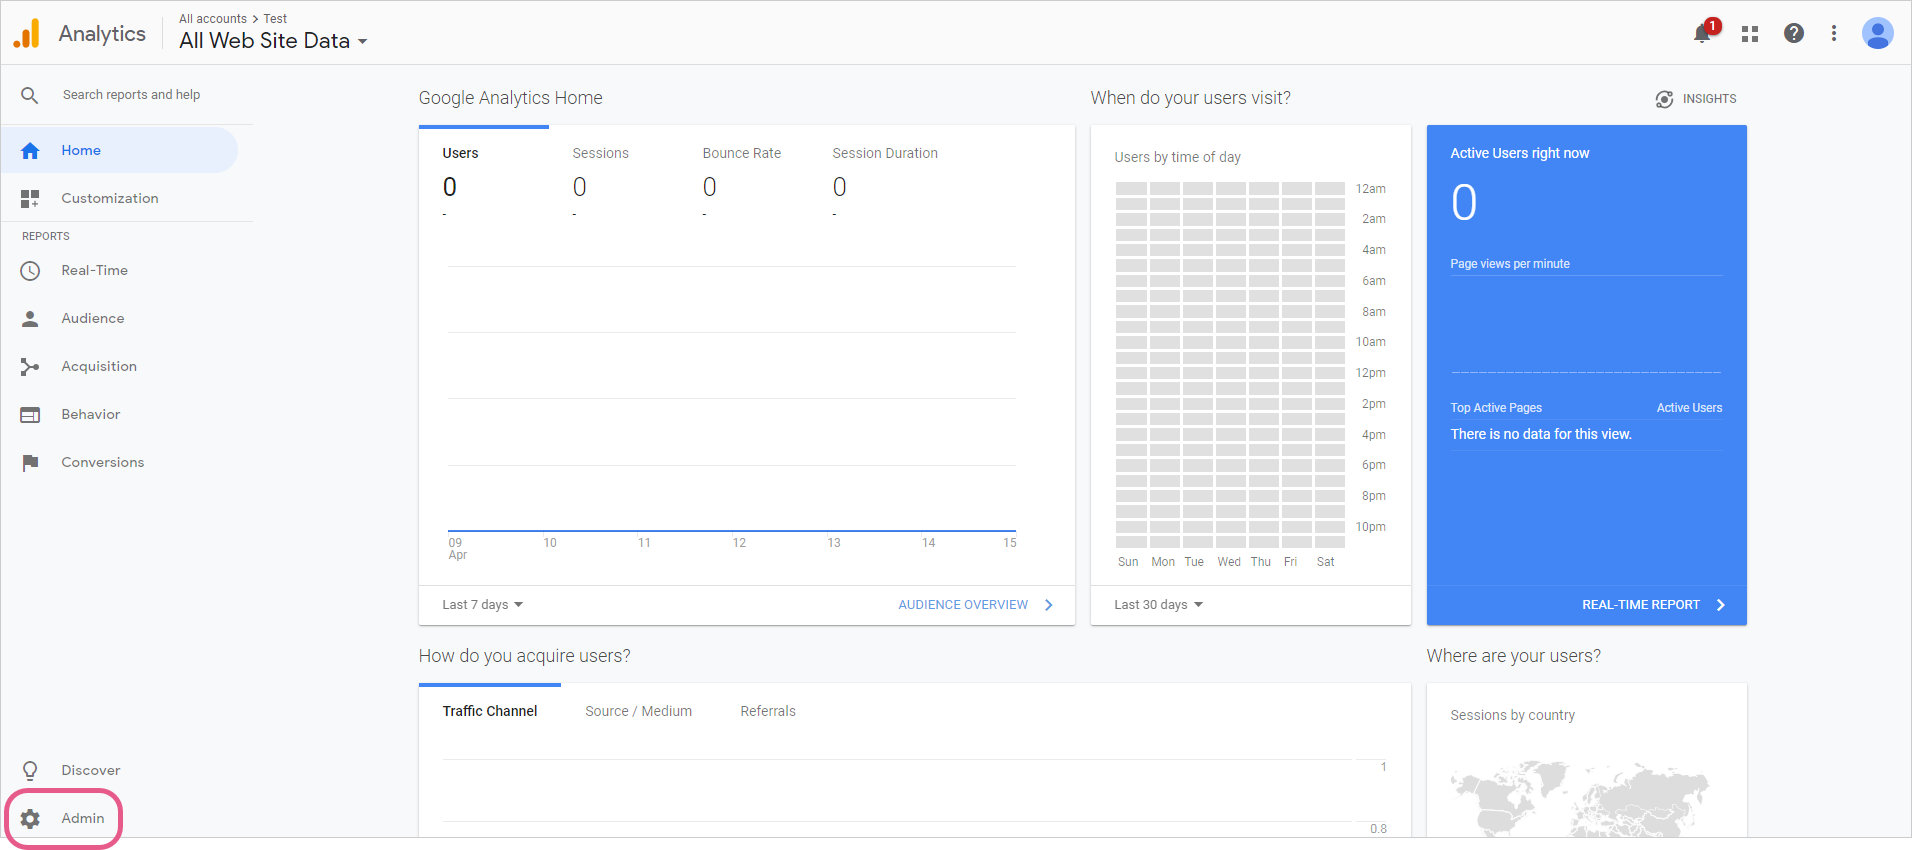
Step 3: Click Create Account
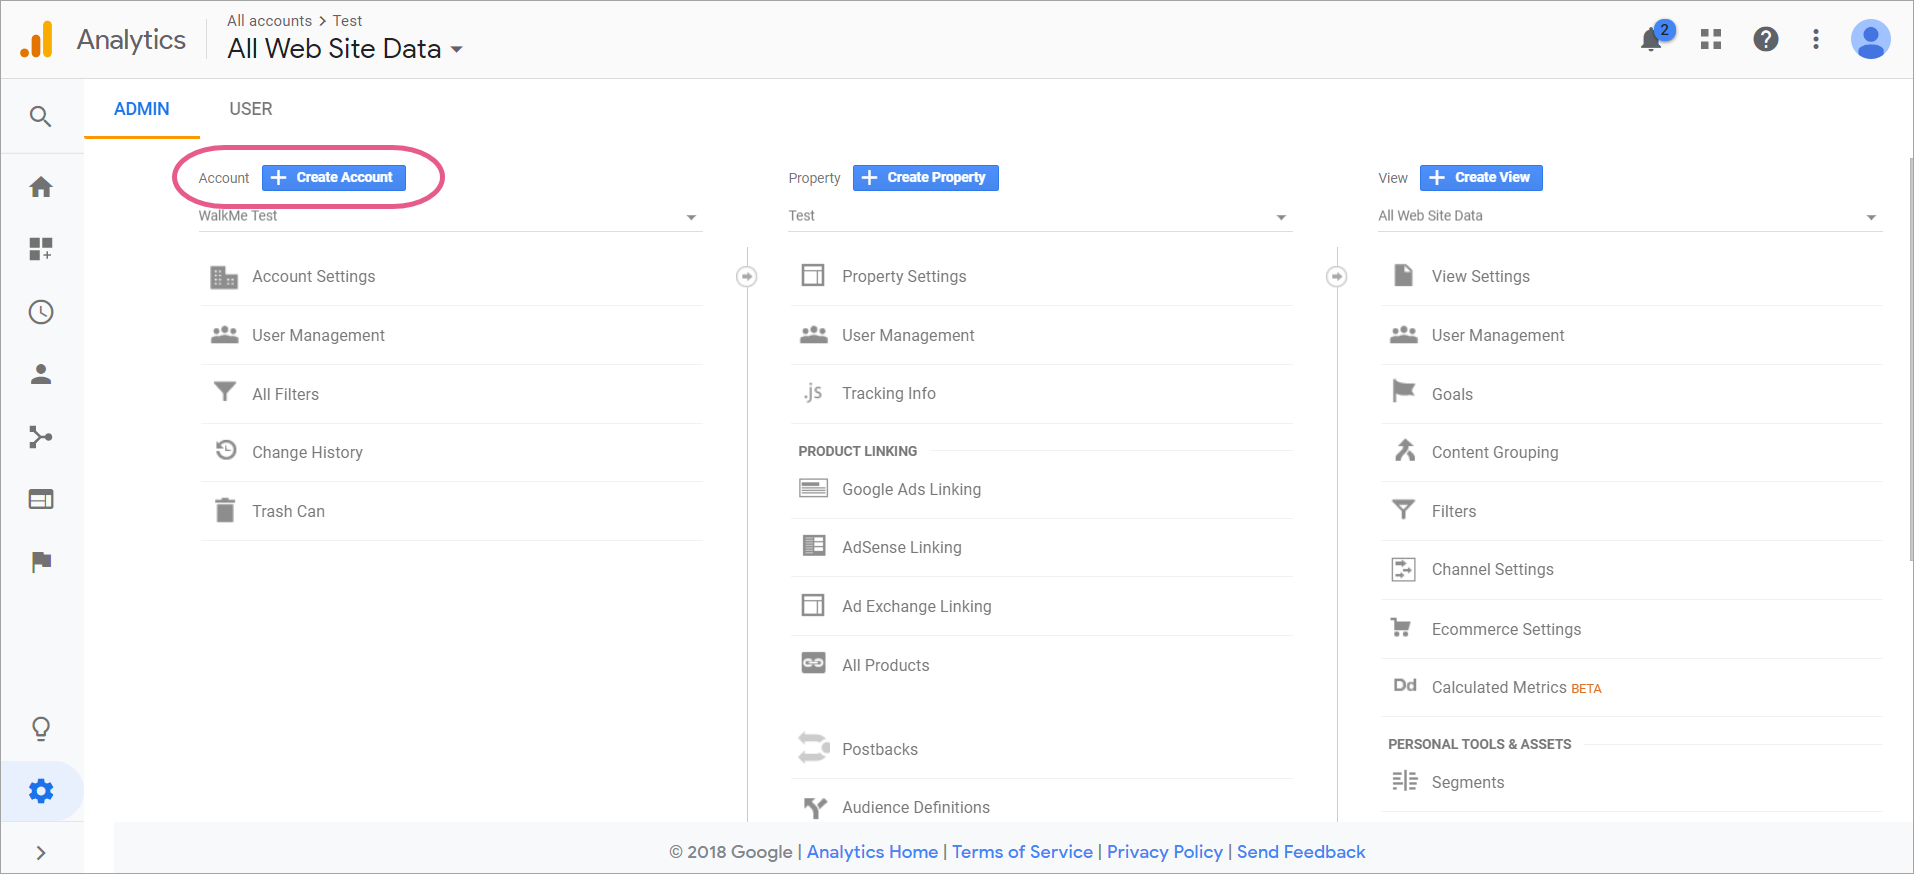
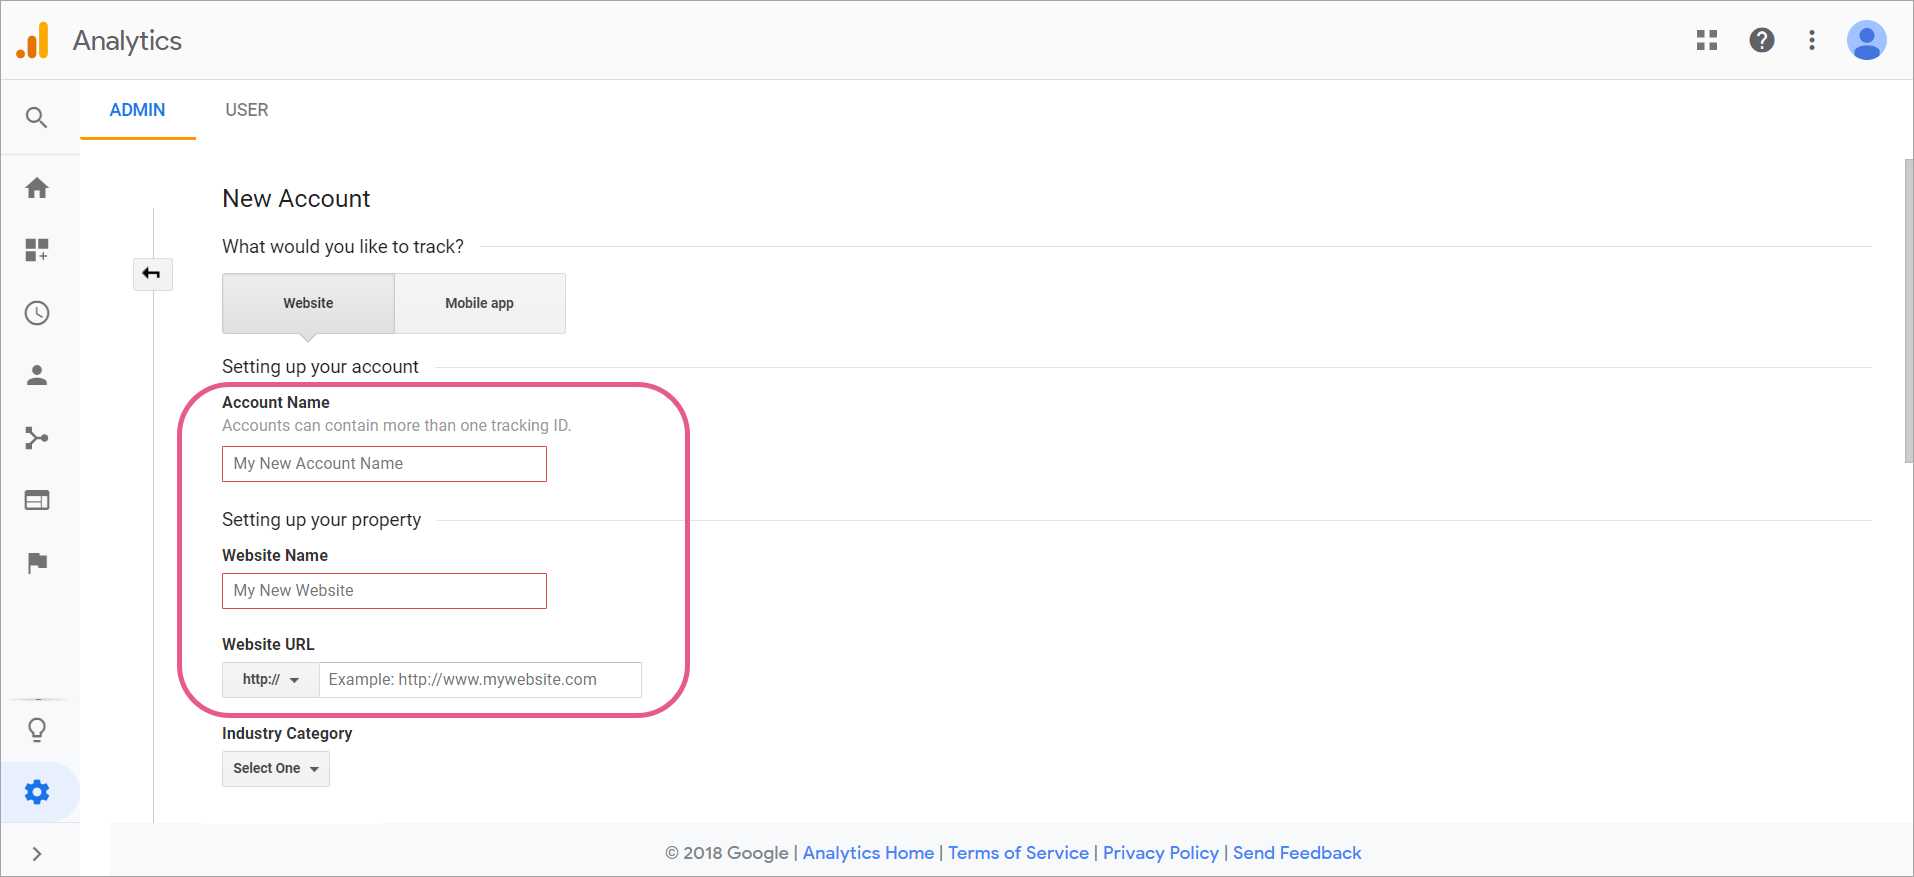
Step 4: Fill in account details
- Enter the account name and website details.
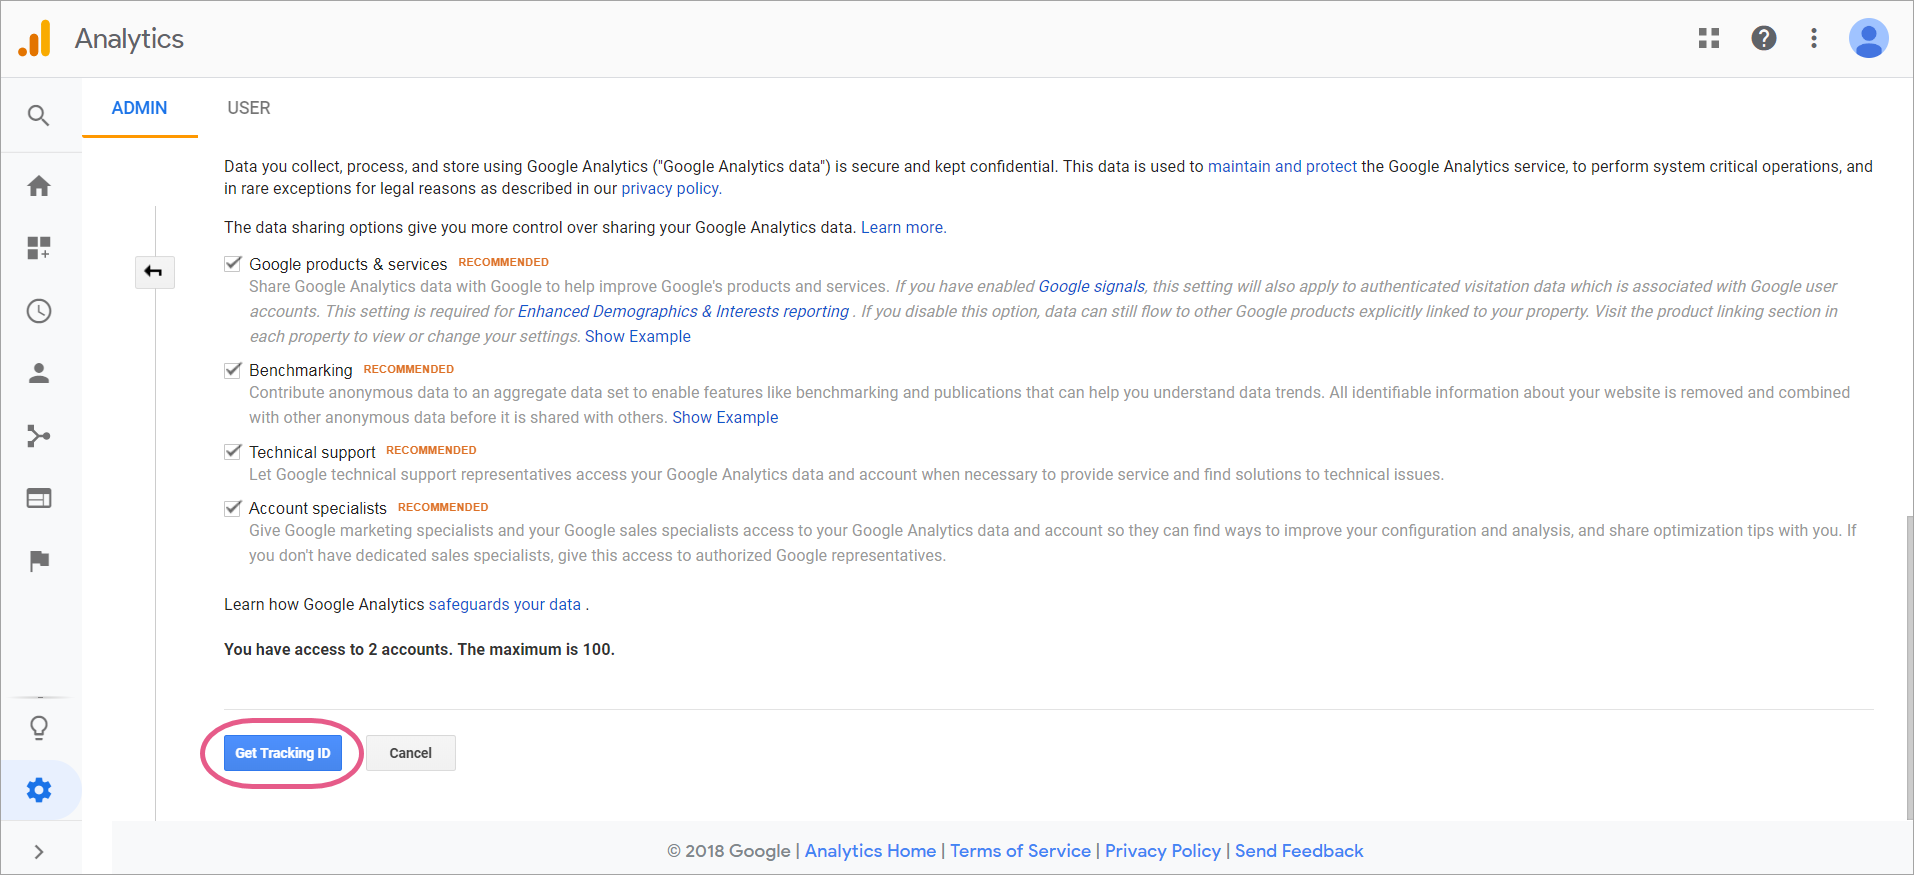
Step 5: Click Get Tracking ID
- Scroll down and click Get Tracking ID:
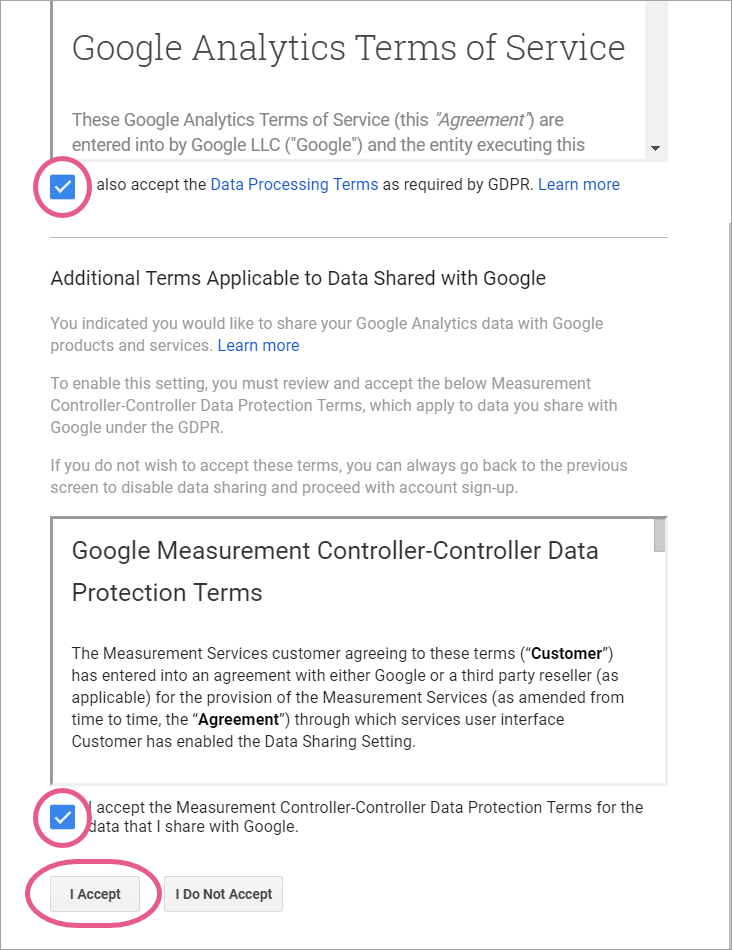
Step 6: Accept Google's terms of service
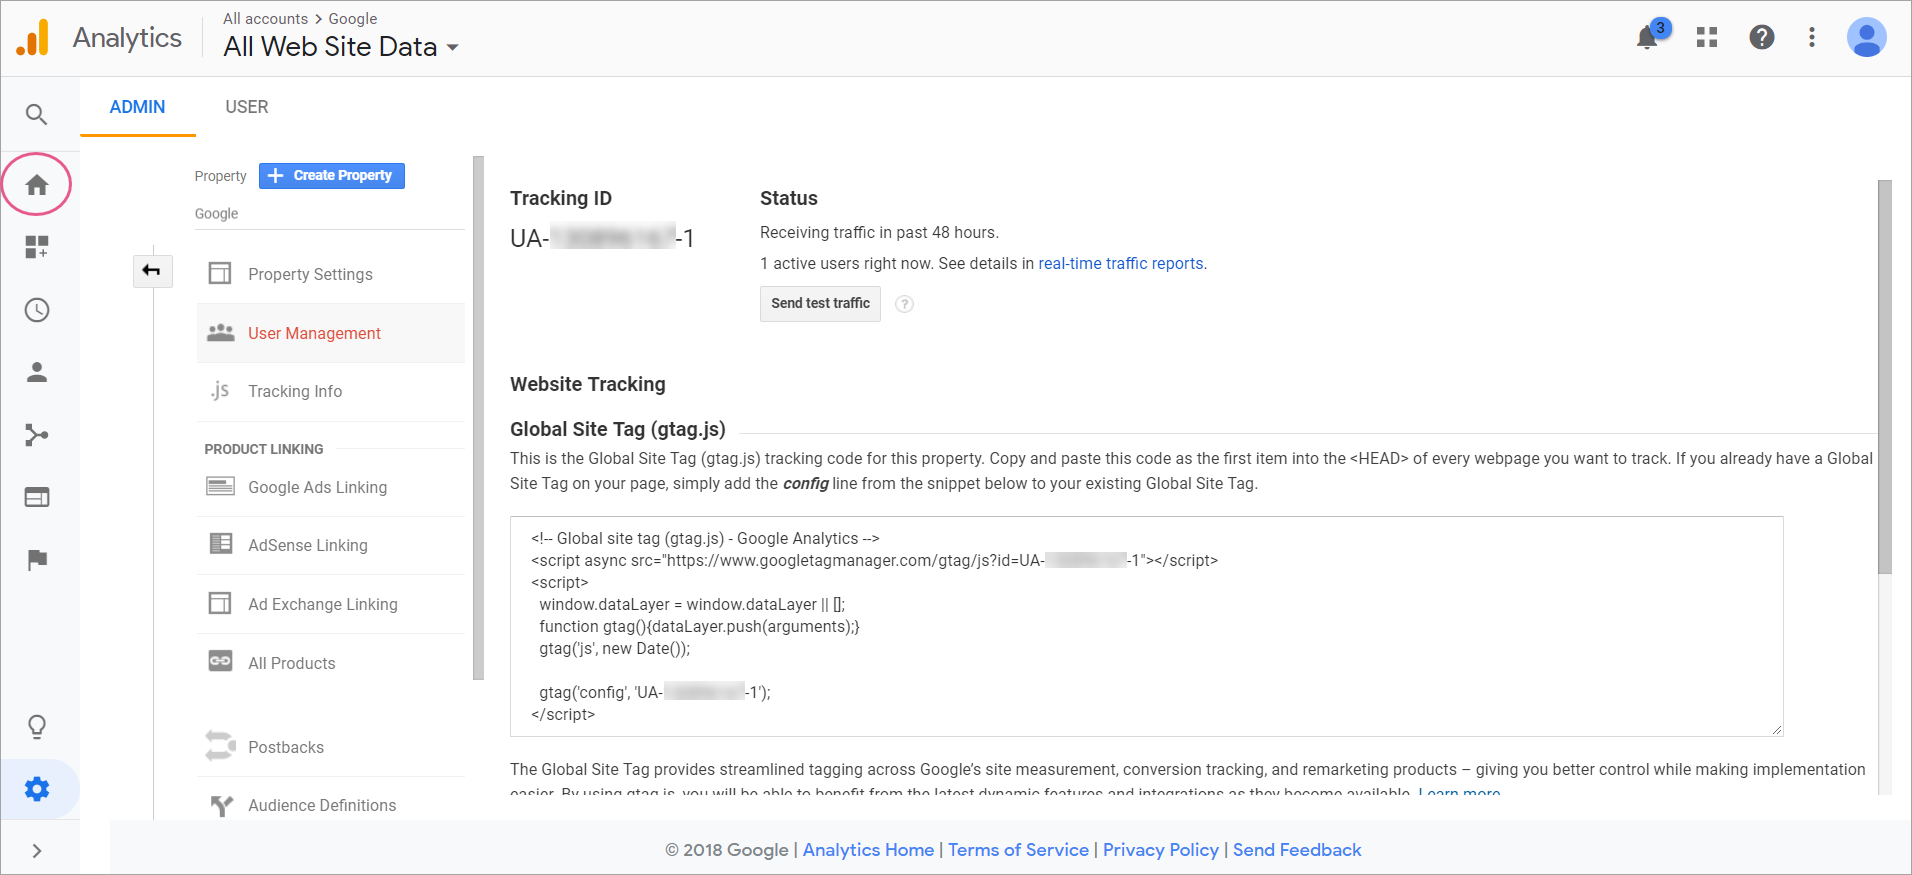
Step 7: Copy Tracking ID
![]()
Step 8: Review 'How to Set Up a Webhook' article
- Please review the steps provided in our How To Send WalkMe Event Data To 3rd Party Systems Using Webhooks article;
- The steps that follow are specific to setting up webhooks for Google Analytics.
Step 9: Set up your Webhook in Insights using the Wizard
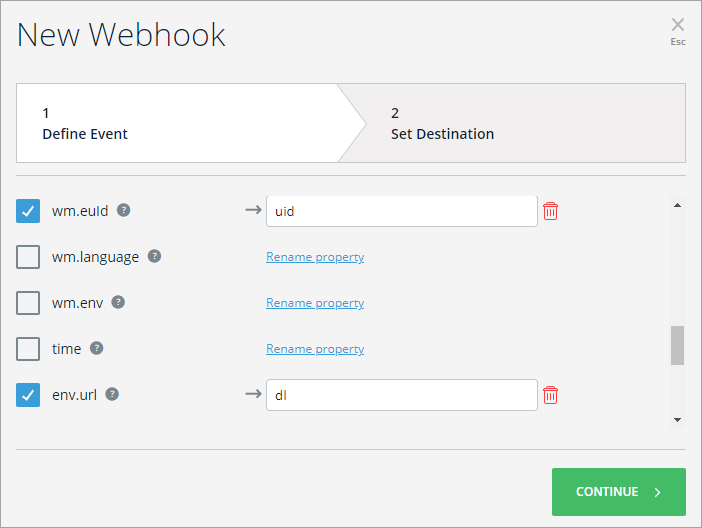
Wizard Step 1: Define event
Steps
- Select a WalkMe Event that will trigger your webhook;
- Select the Event Properties you would like to send to Google Analytics in the Advanced section;
- You can select from the pre-defined properties on the top and rename them (make sure to mark the event as selected), or click ADD PROPERTY to send a property with specific value;
For example, we've sent the wm.euId as uid and the env.url as 'dl':
 And configured the following additional properties to match Google Analytics' mandatory properties:

- tid - paste the tracking id value from step 6;
- v = 1;
- t = the type of hit type you want to map the event to (choose one from: 'pageview', 'screenview', 'event', 'transaction', 'item', 'social', 'exception' or 'timing');
- Notice that if you're using an 'event' type, you also need to configure the event category (ec) and action (ea), like we've added in our example.
- cid = client ID
Pro-Tip: See the Google Analytics Parameters Documentation for more information.
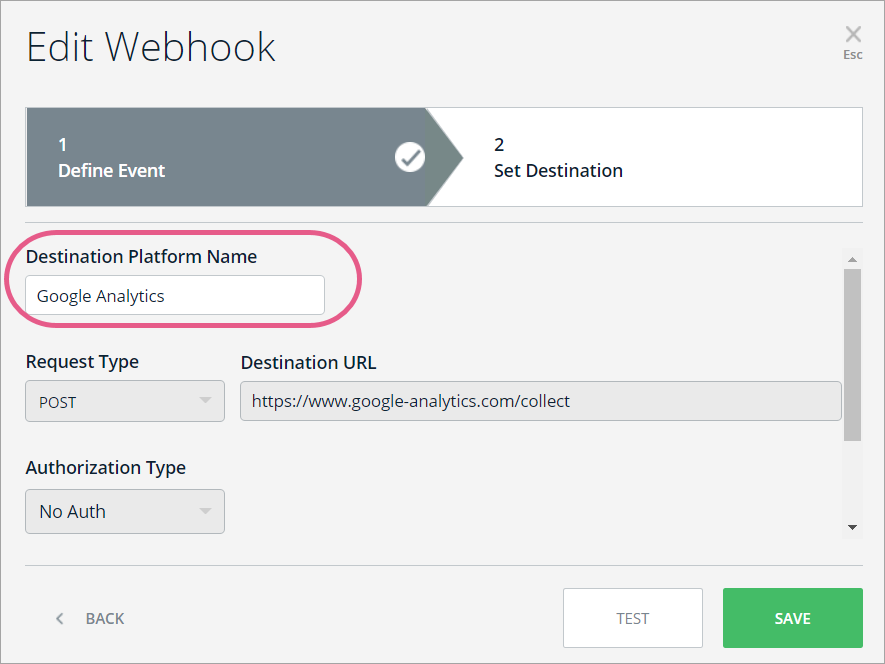
Wizard Step 2: Set destination
Steps
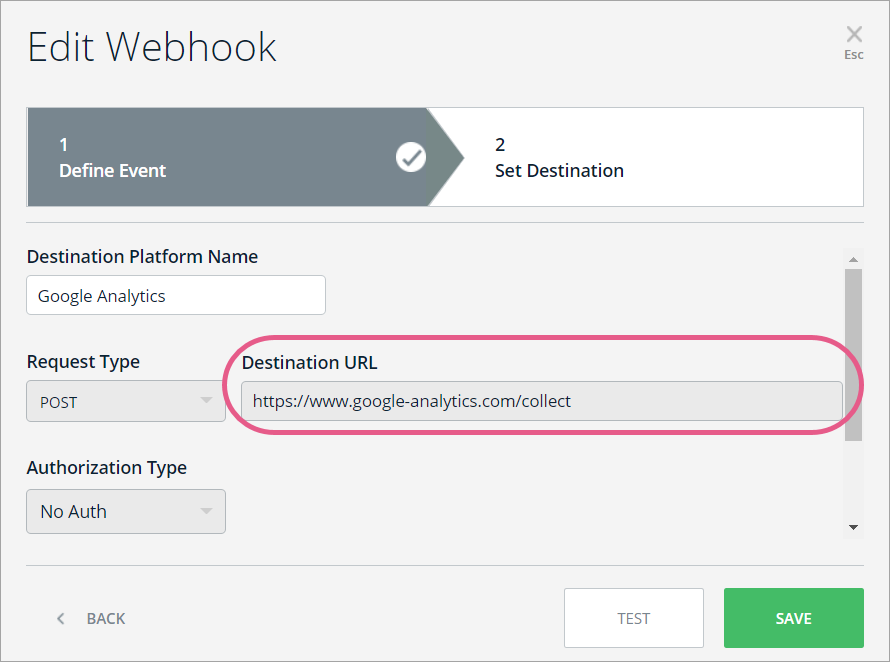
- Write in the Destination Platform Name. This name identifies the destination system (In this case Google Analytics):
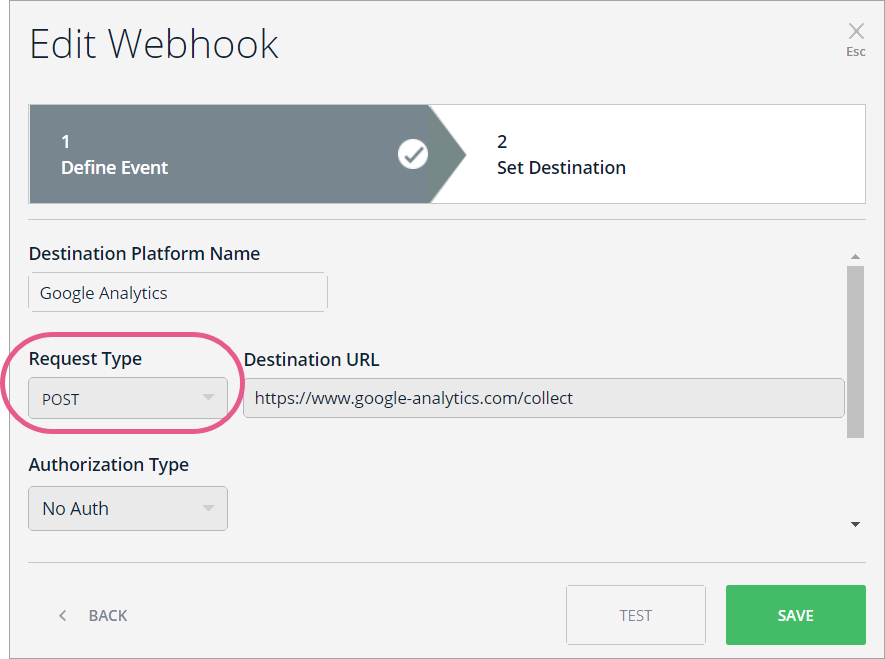
- Set Request Type to POST:
- Paste the URL according to your use case (in the following picture the URL is for creating tracker objects). The URL will always begin with "https://www.google-analytics.com/":
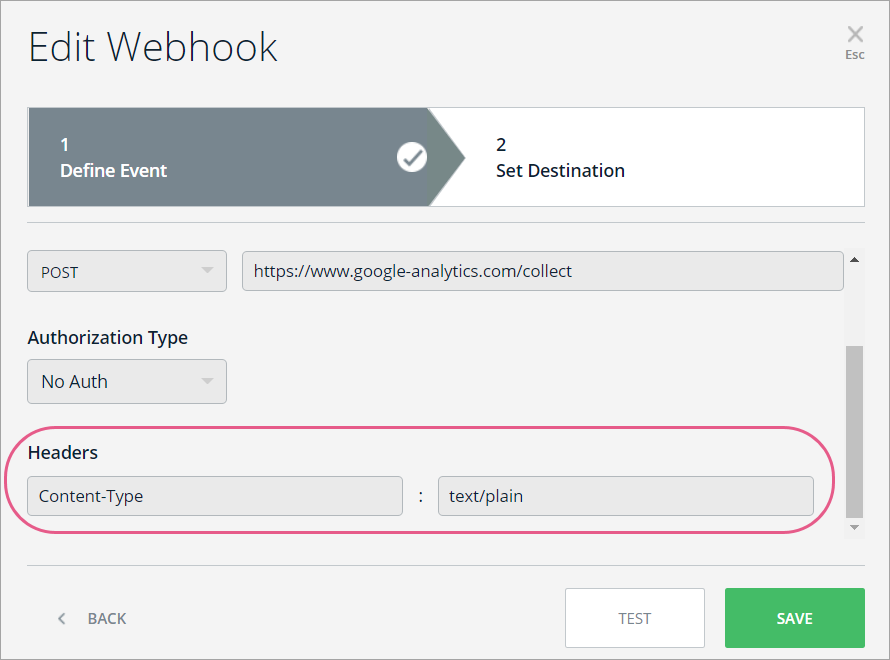
- Add Headers:
- Content-Type : text/plain:
- Content-Type : text/plain:
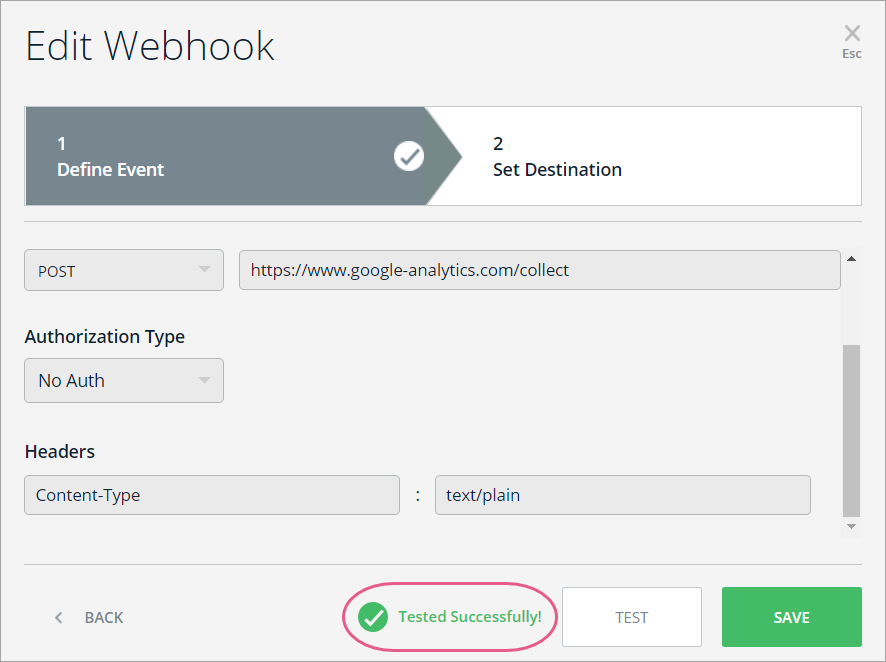
- Click TEST
- This will send the event that you defined in Wizard Step 1 to your destination platform to ensure that a connection was successfully made;
- You should see the message: "Tested Successfully!"
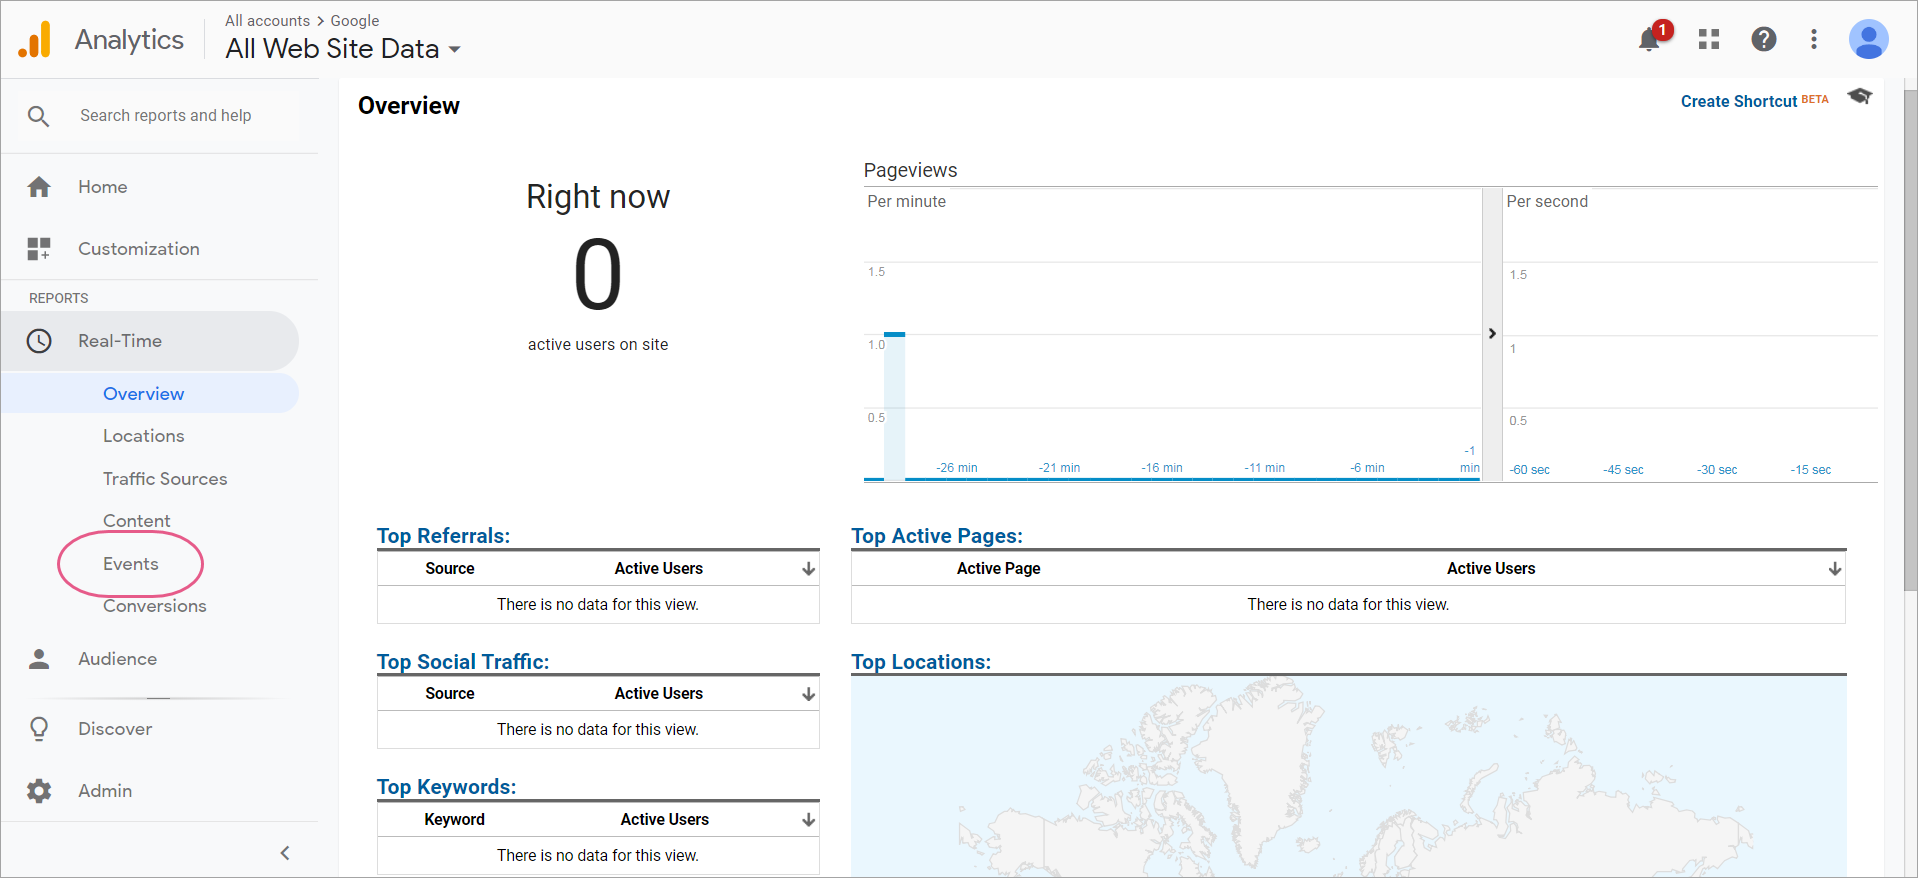
Step 10: Return to Google Analytics and click the Home icon
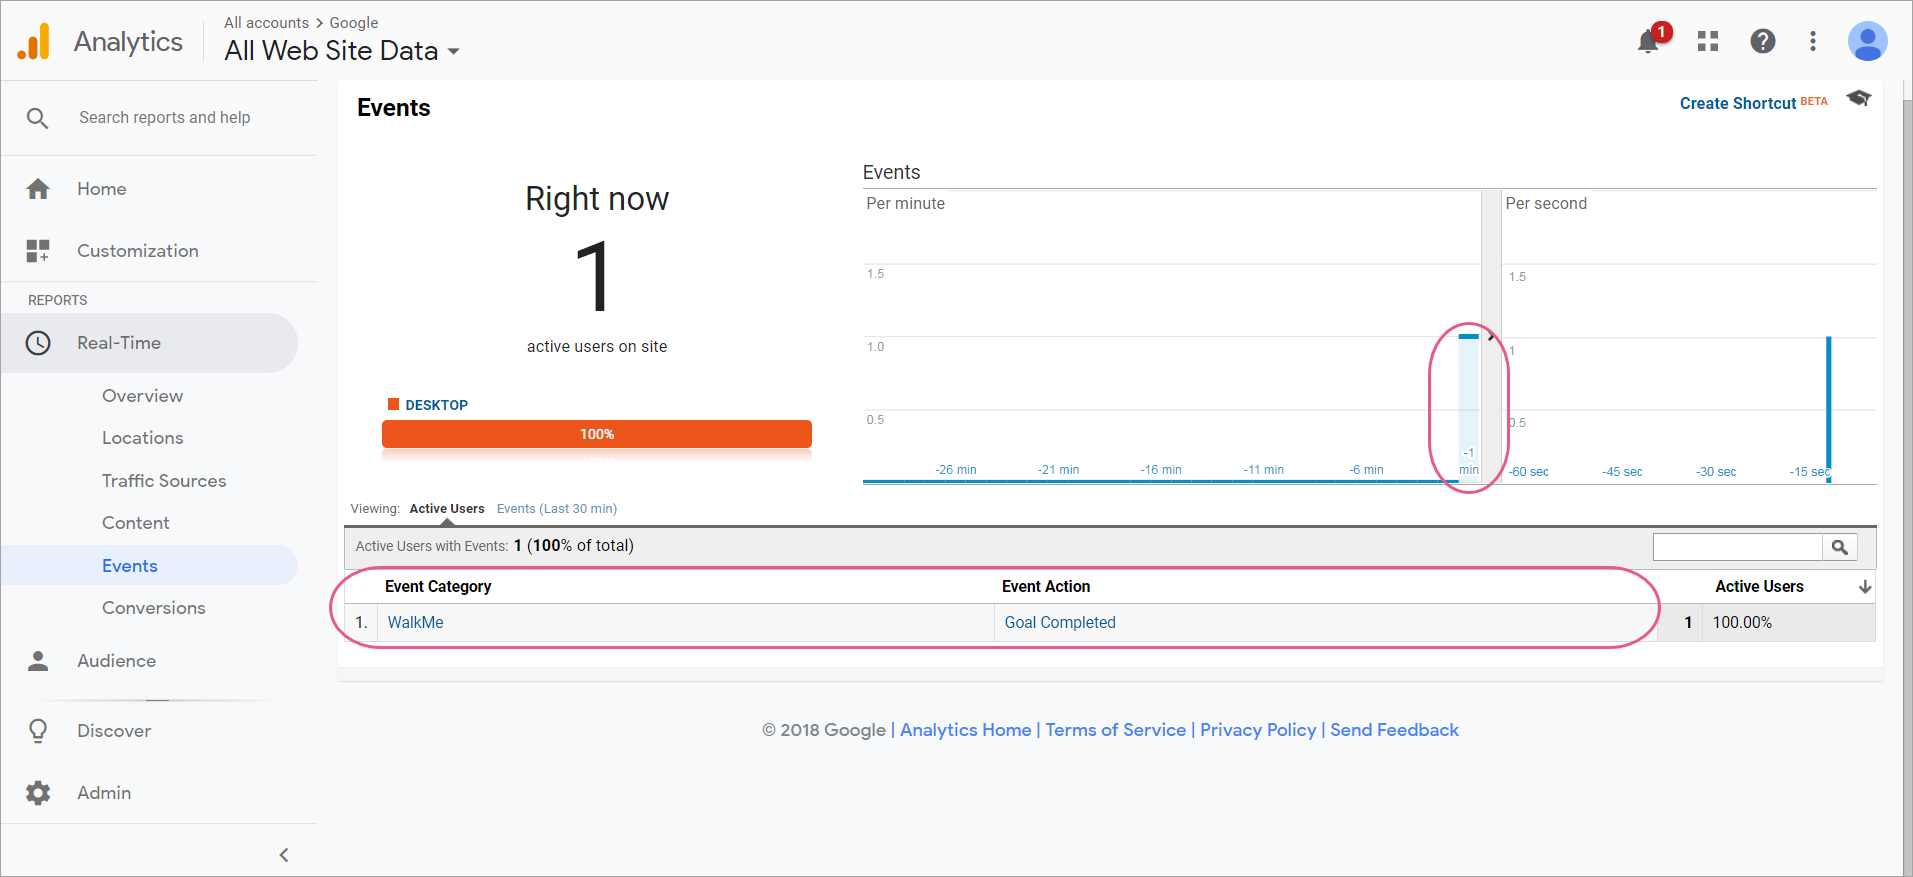
Step 11: Click Real-Time > EVENTS
- An event mark will appear with details:
Required Values
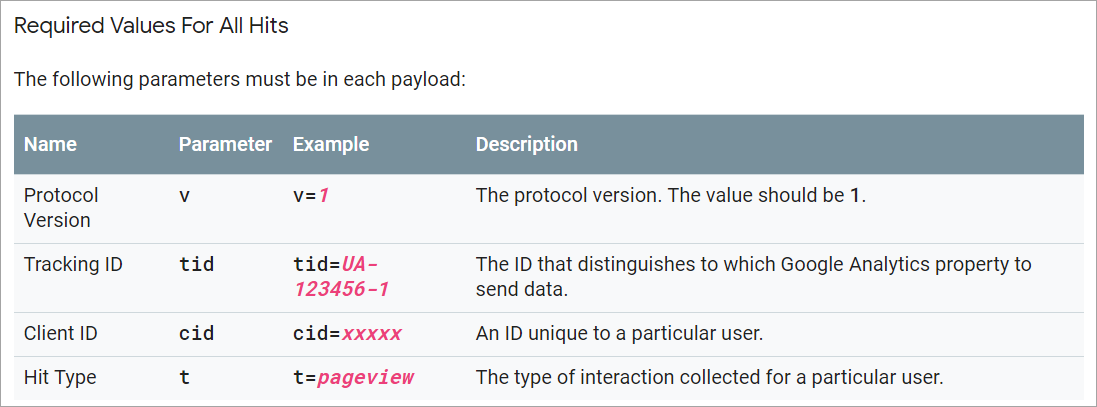
Pro-Tip: Some parameters may only be sent with specific hit types. For example, the pageview hit type requires the Page Path parameter ("dp").
Related Resources
Limitations
- Webhooks does not support new structure of data needed for GA4