
How to Use WebHooks With Zendesk
Last Updated June 29, 2022
Brief Overview
WebHooks (AKA callbacks) allow you to build WalkMe directly into your workflows by triggering 3rd party APIs and/or adding WalkMe Event data into your analytics platform.
This article explains how to define webHooks for Zendesk.
End-To-End Example of Creating a Ticket Using Webhooks with Zendesk
Step 1: Open an account or log into Zendesk
- The website address is: https://www.zendesk.com.
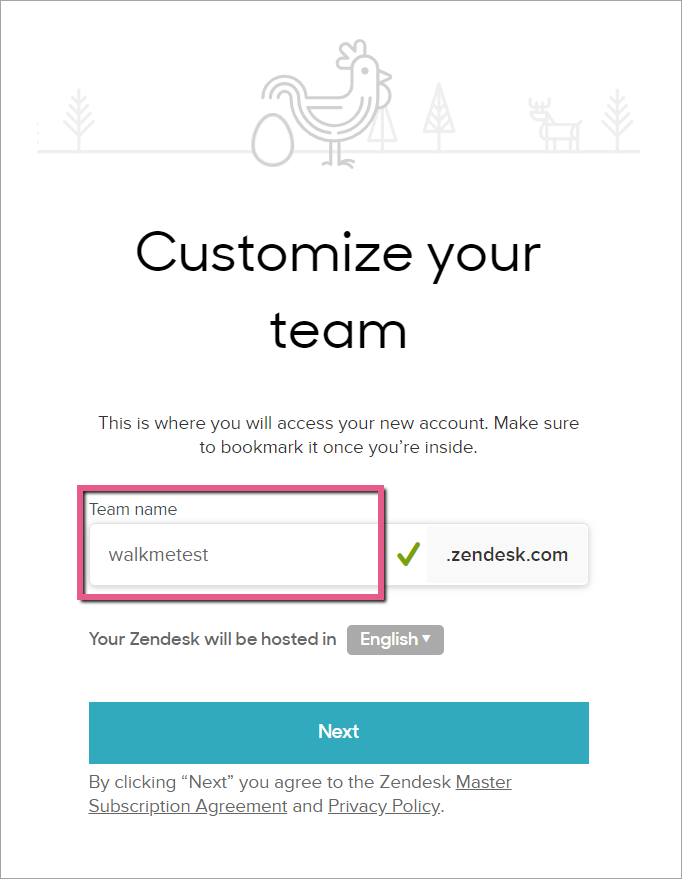
Step 2: Enter your team name
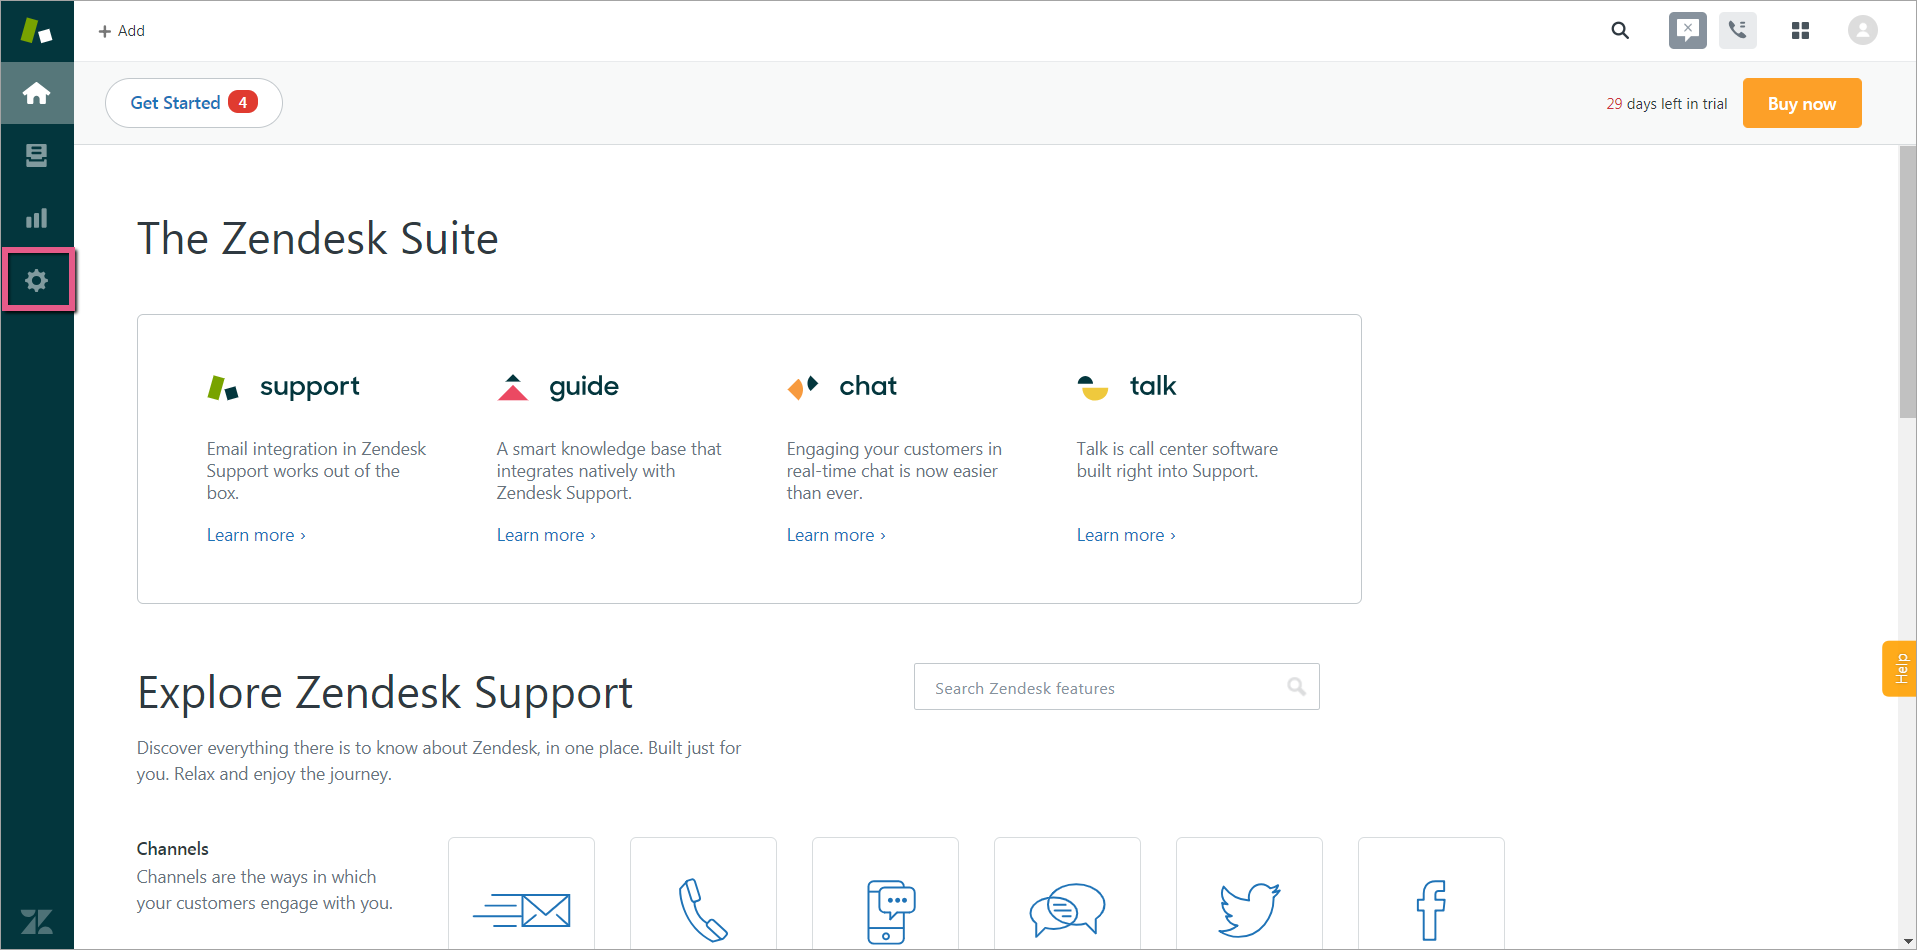
Step 3: Click the Admin icon
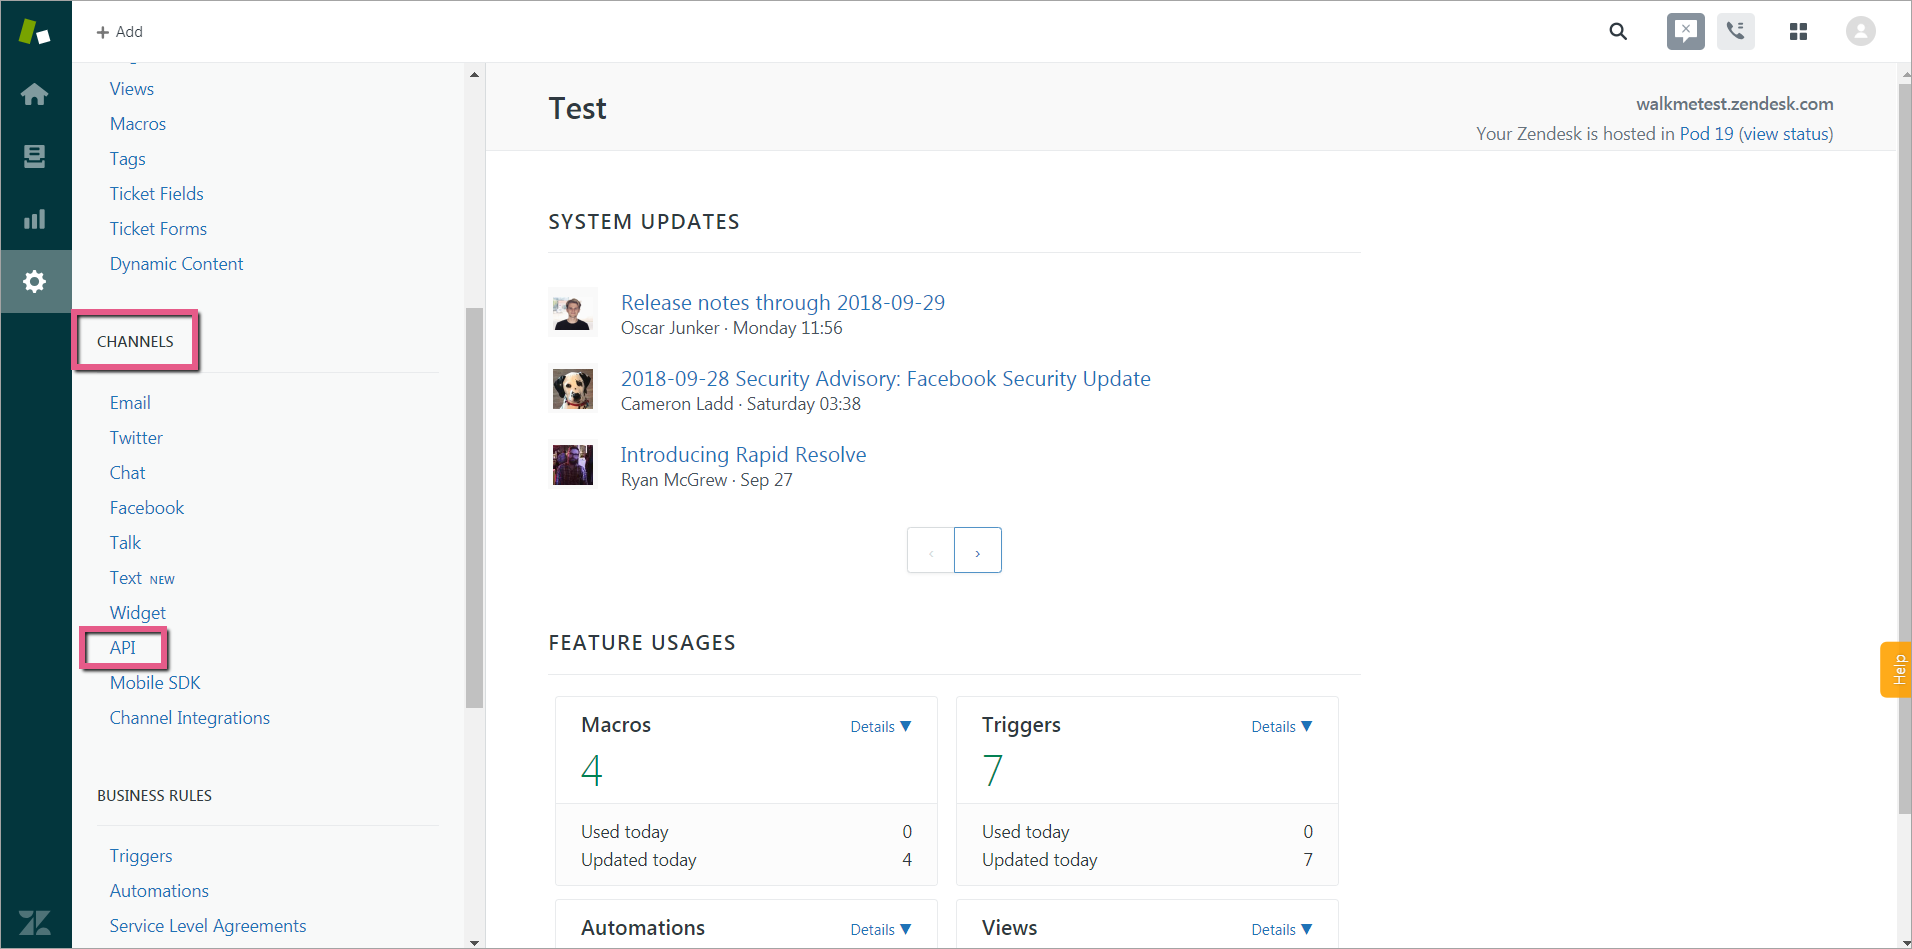
Step 4: Click API under CHANNELS
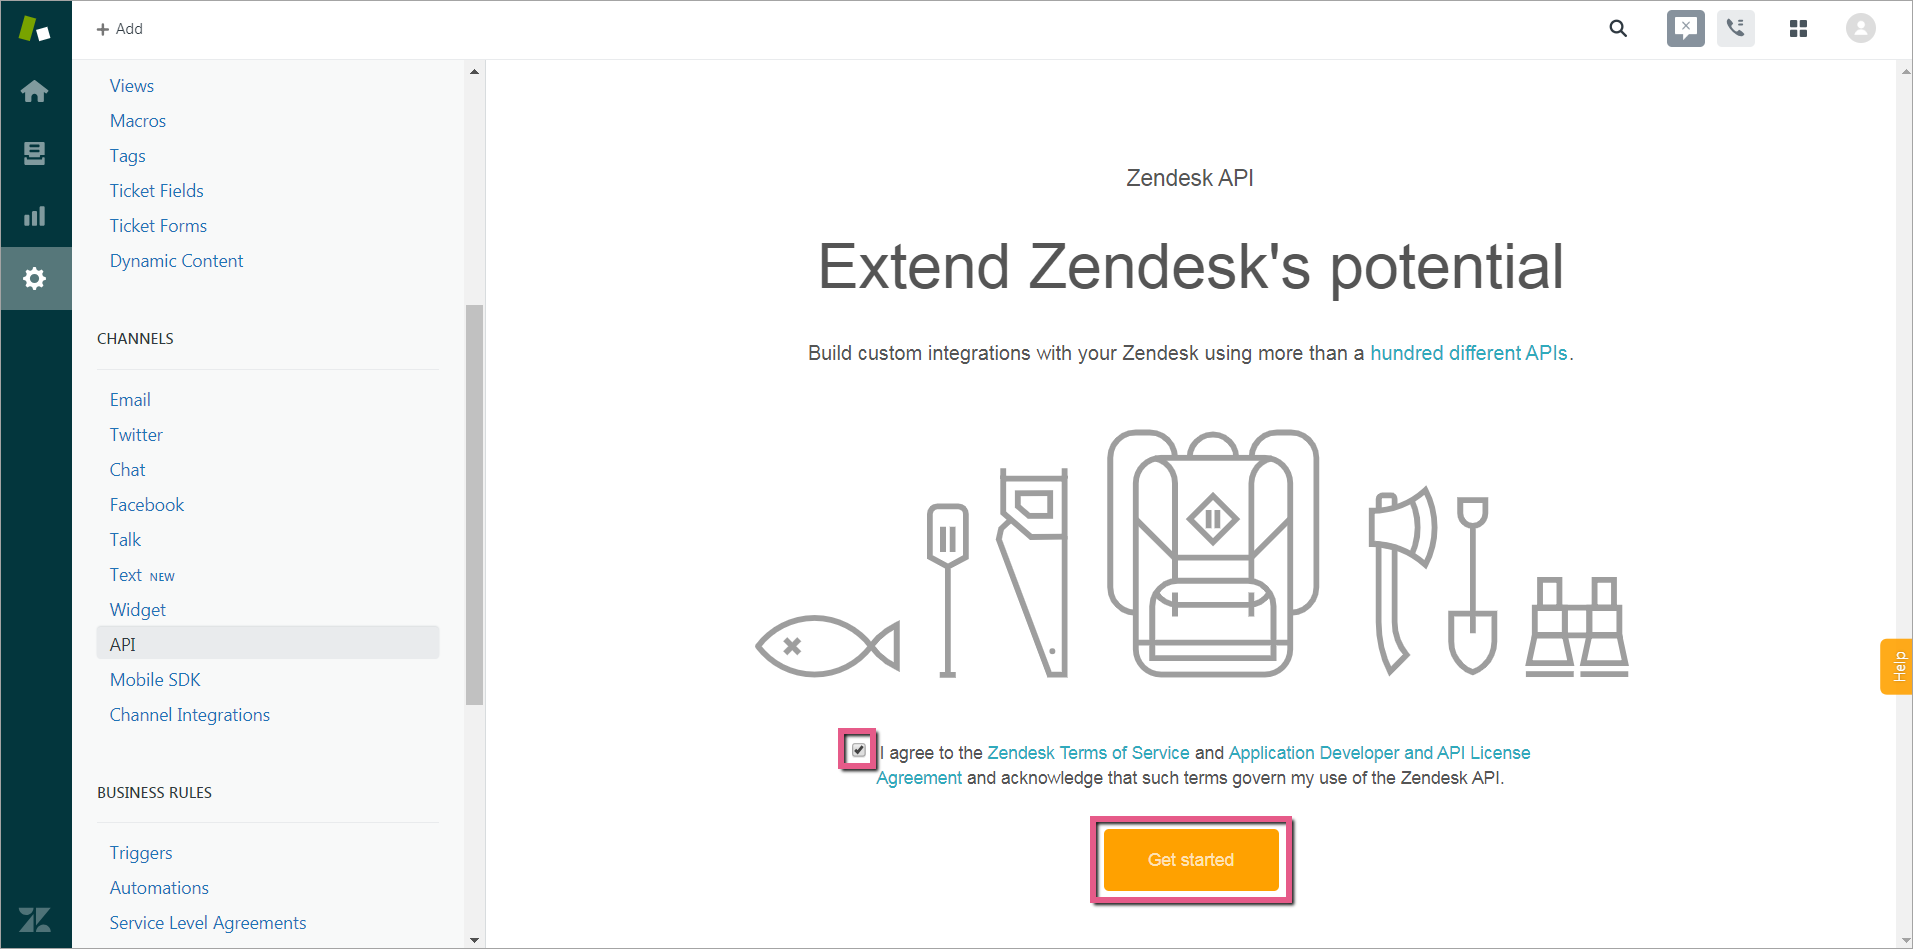
Step 5: Agree to Zendesk's terms and click Get started
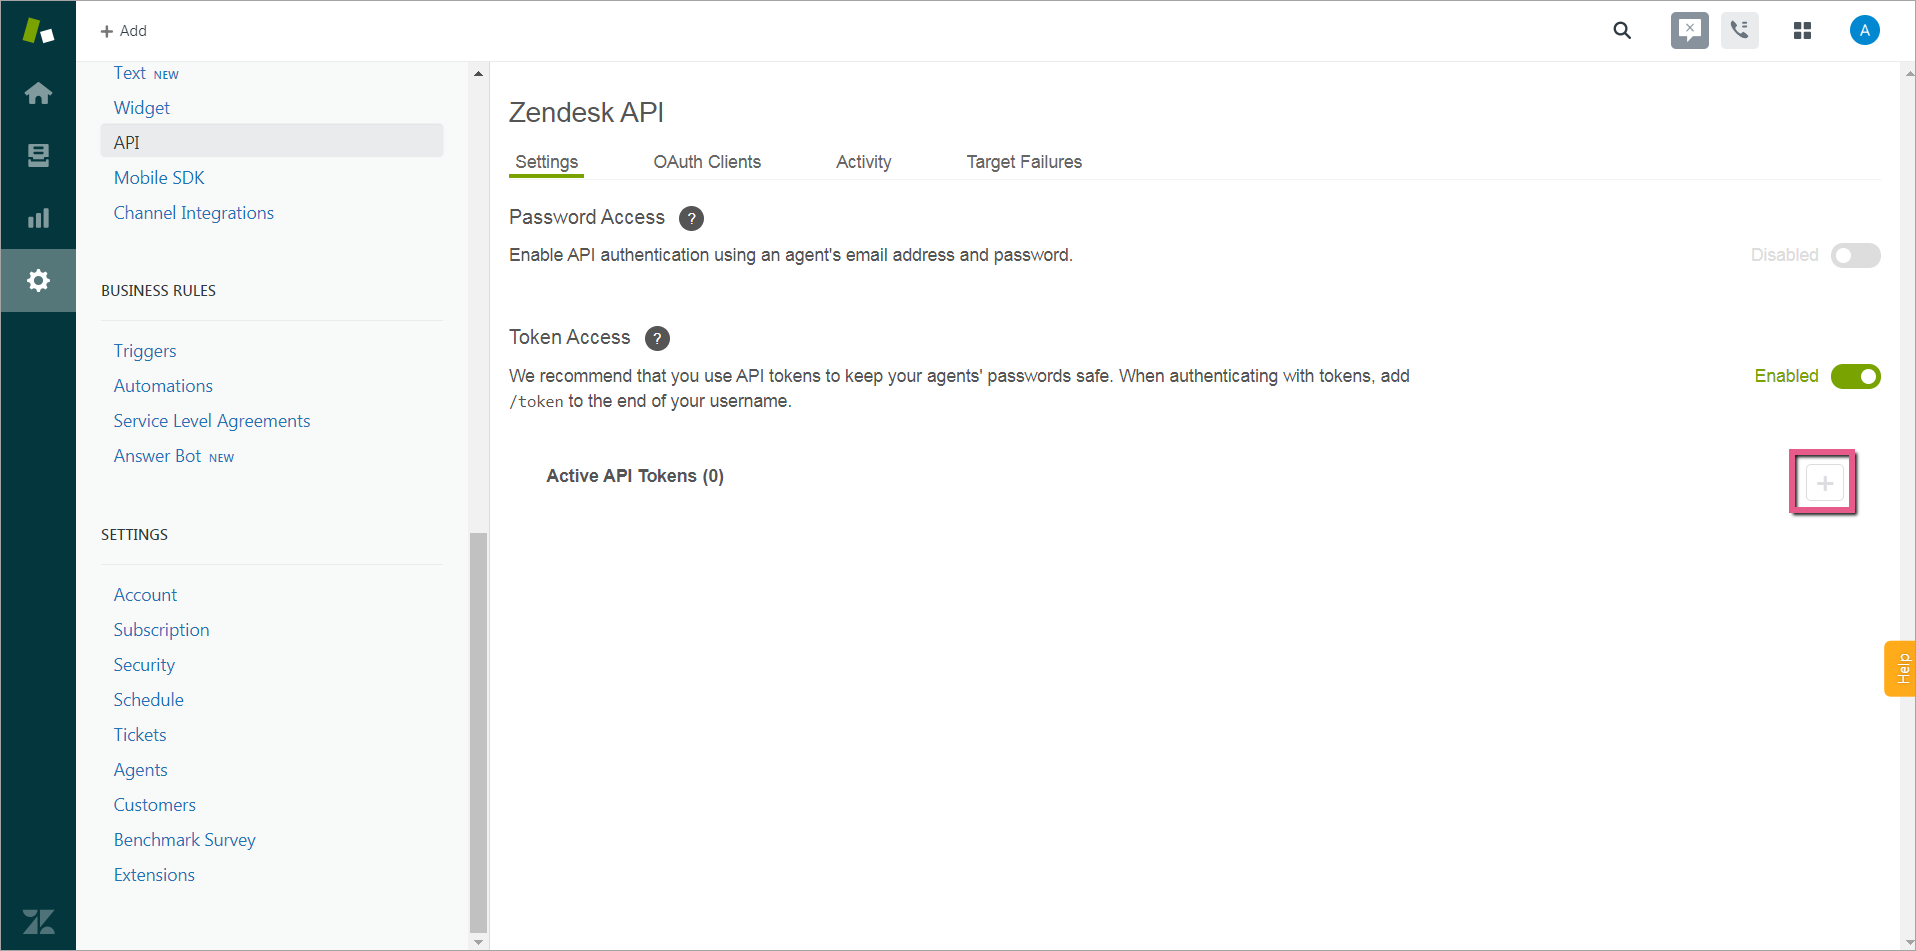
Step 6: Enable Token Access under Settings
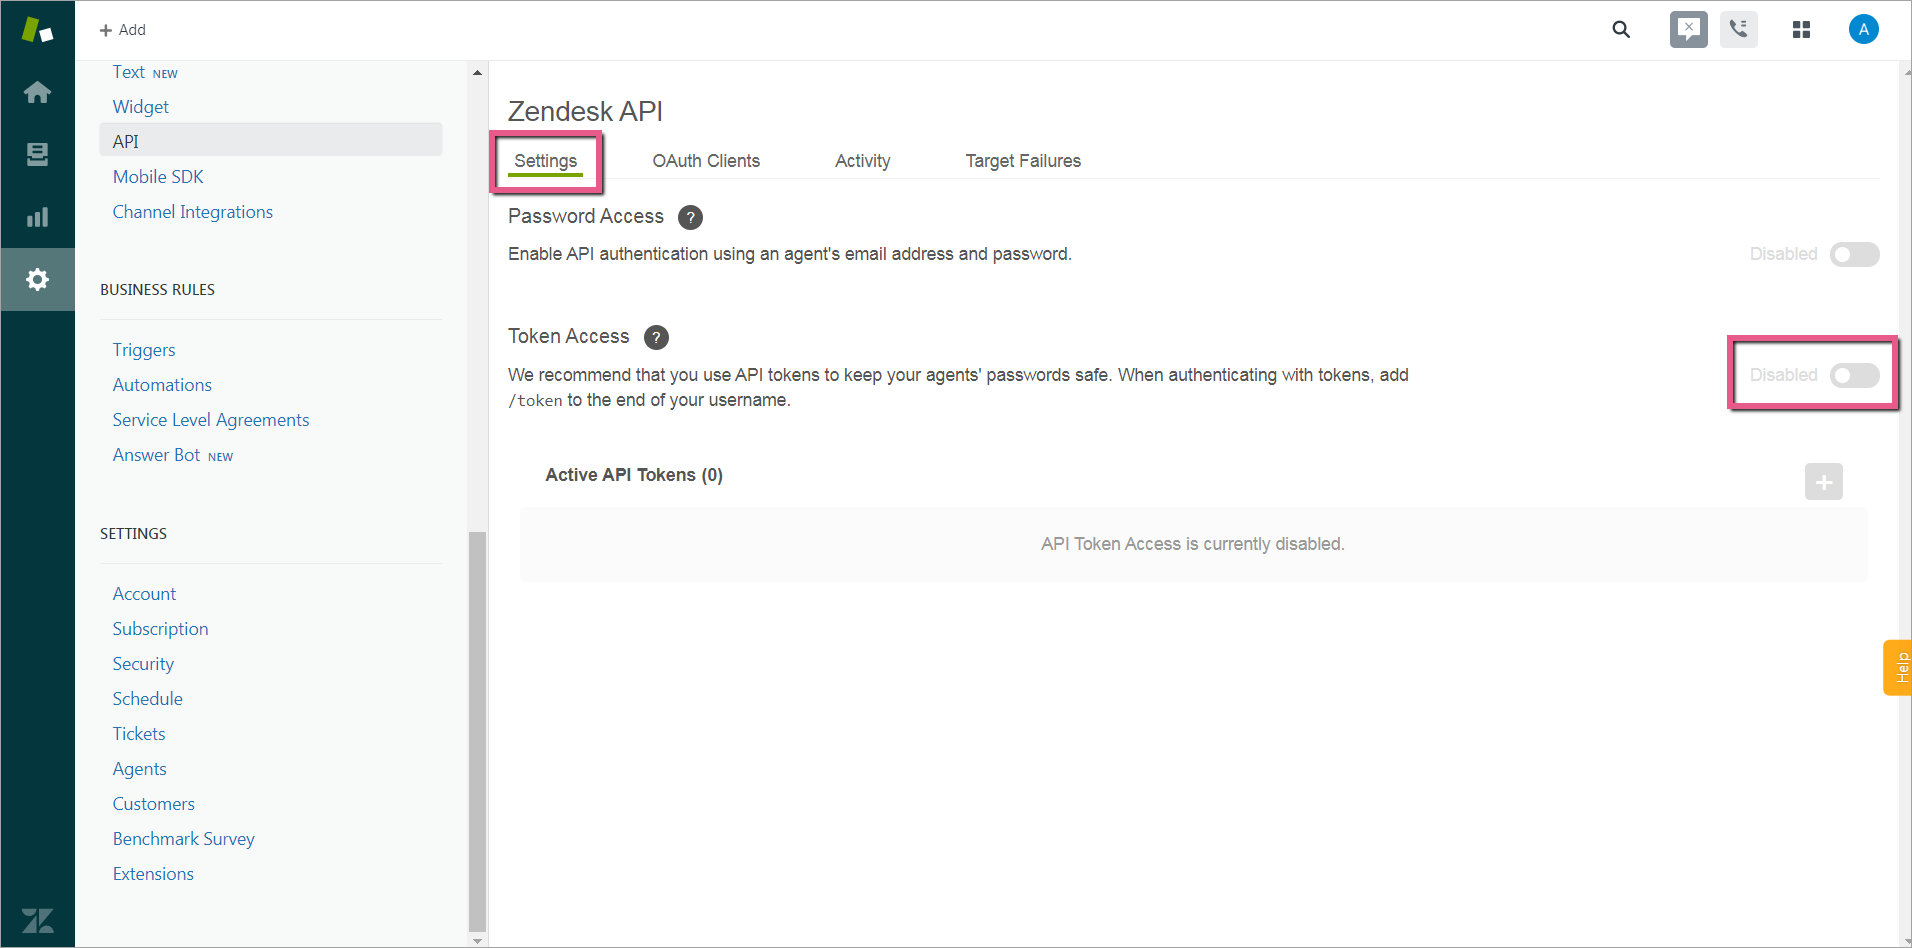
Step 7: Click "+" to add an API Token
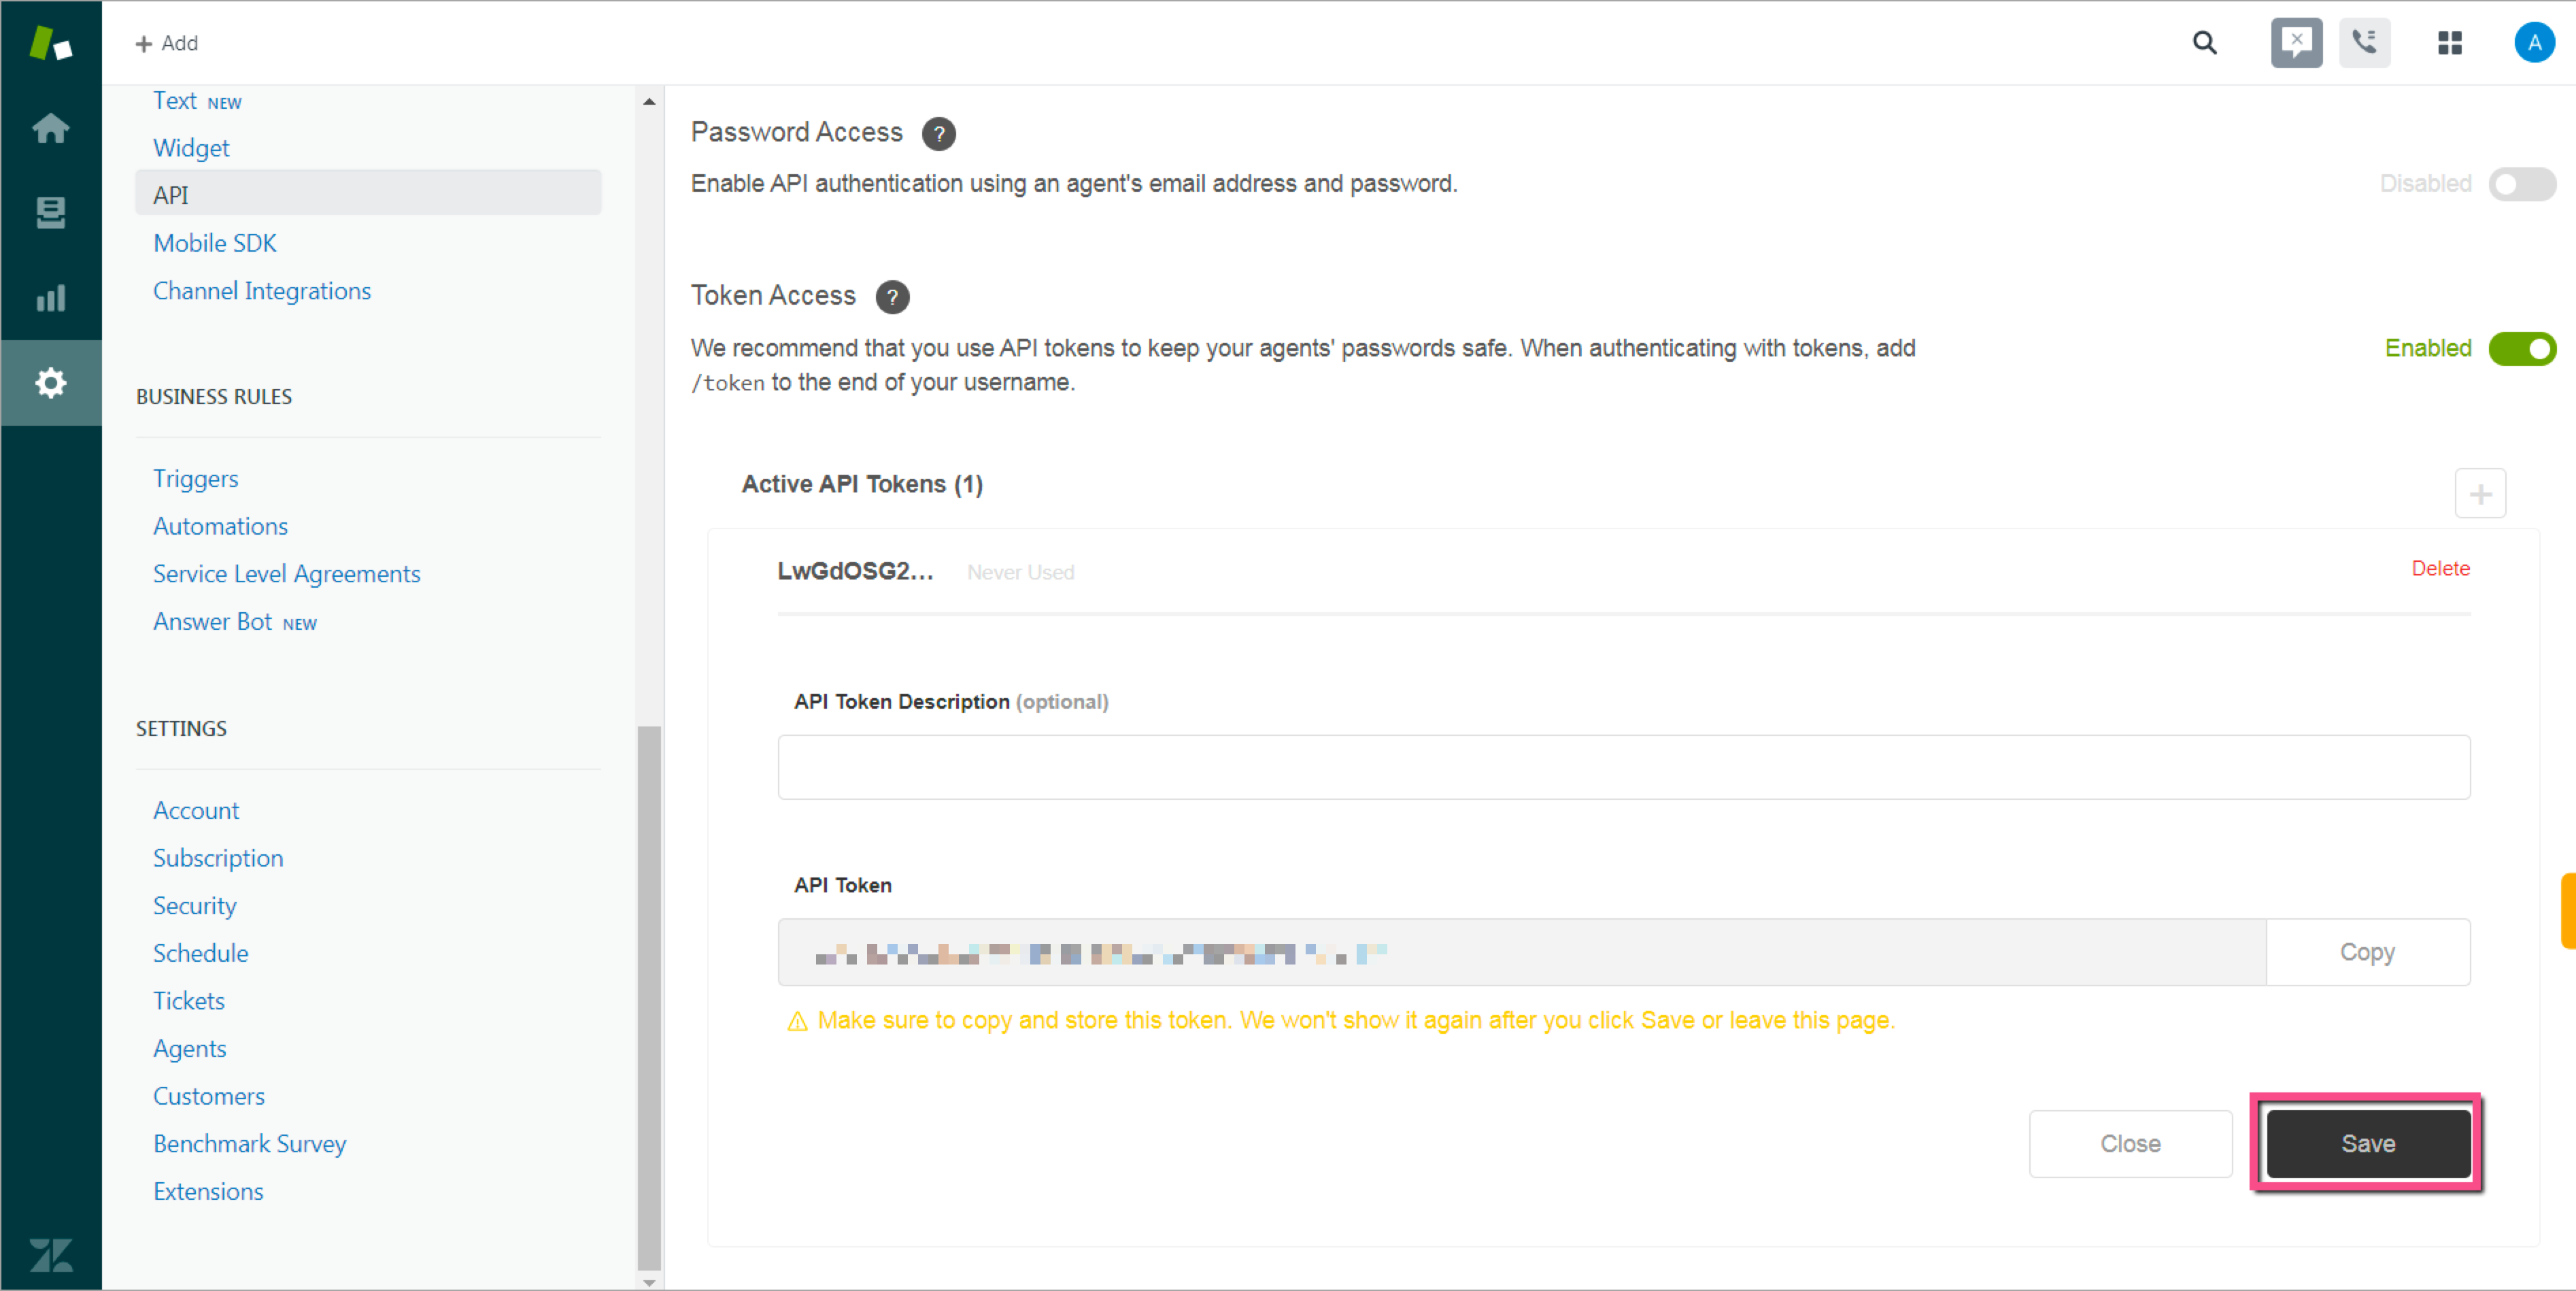
Step 8: Copy the API Token
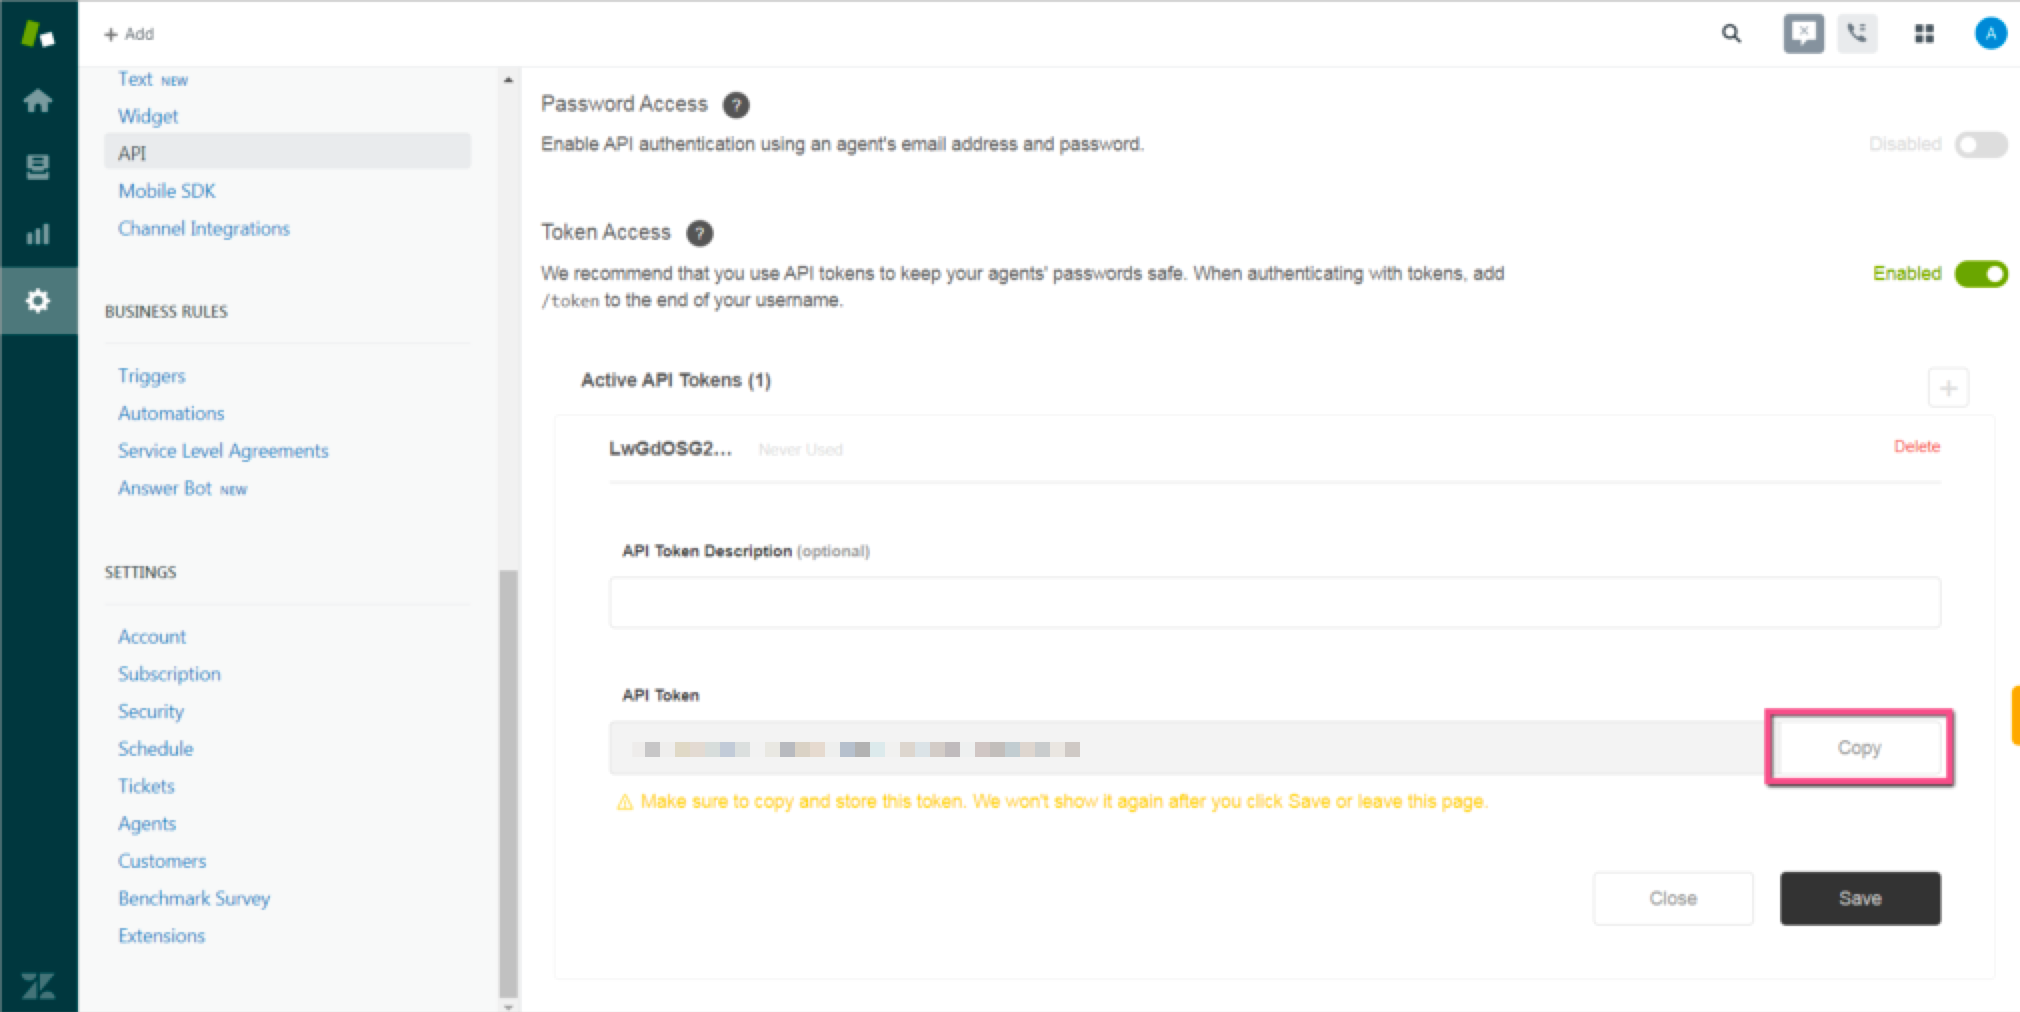
Step 9: Click Save to save the API Token
Step 10: Review the 'How to Set Up a WebHook' article
- Please review the steps provided in our How To Send WalkMe Event Data To 3rd Party Systems Using Webhooks article.
- The steps that follow are specific to setting up WebHooks for Zendesk.
Step 11: Set up your WebHook in Insights using the Wizard
Wizard Step 1: Define event
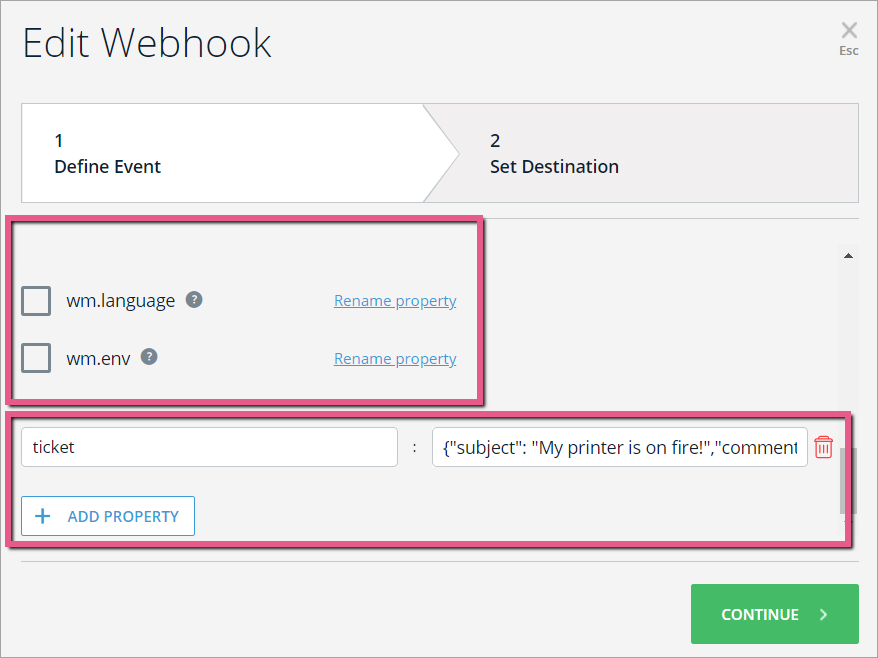
Required properties
- The Track Event sent to Zendesk requires the ticket property with the following variables:
- subject
- comment
- title
- type
- priority
Steps
- Select an Event to send to Zendesk;
- Click Advanced to open the list of properties;
- Select from the pre-defined properties on the top and rename them (make sure to mark the event as selected), or click ADD PROPERTY to send a property with specific value:
 Pro-Tip: Different use cases in Segment will require different properties to send.
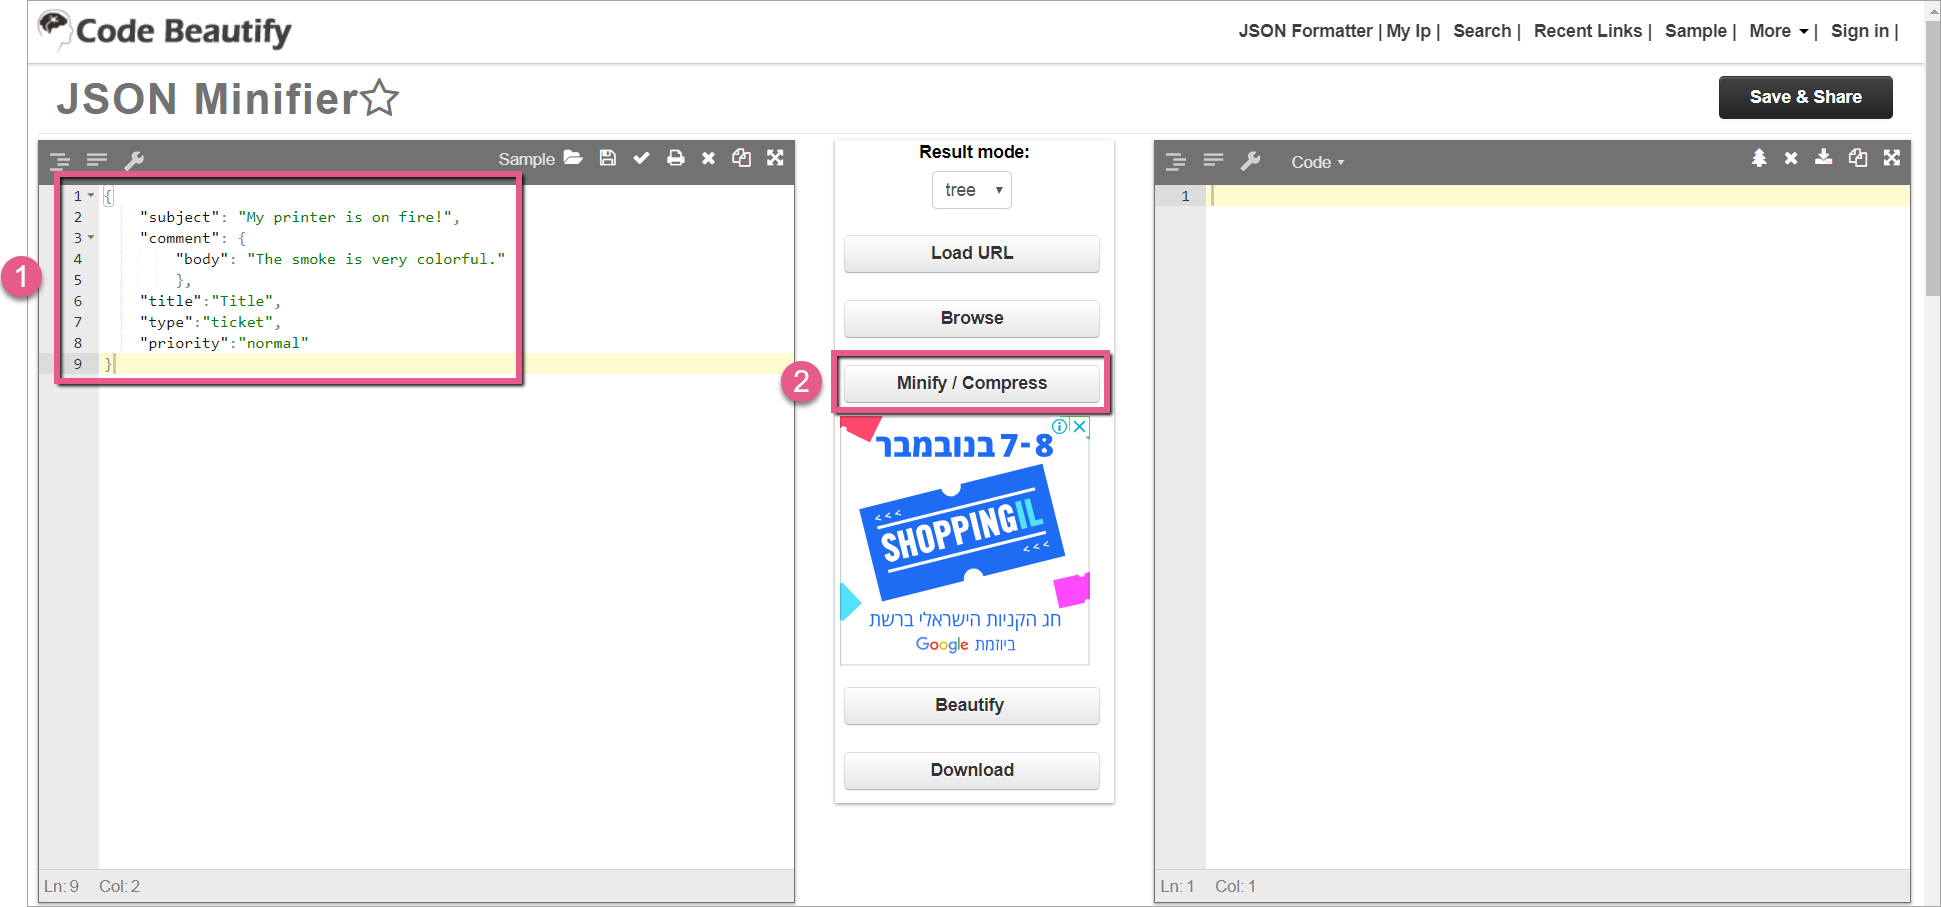
 - Add your ticket property with the required variables (example below):
{
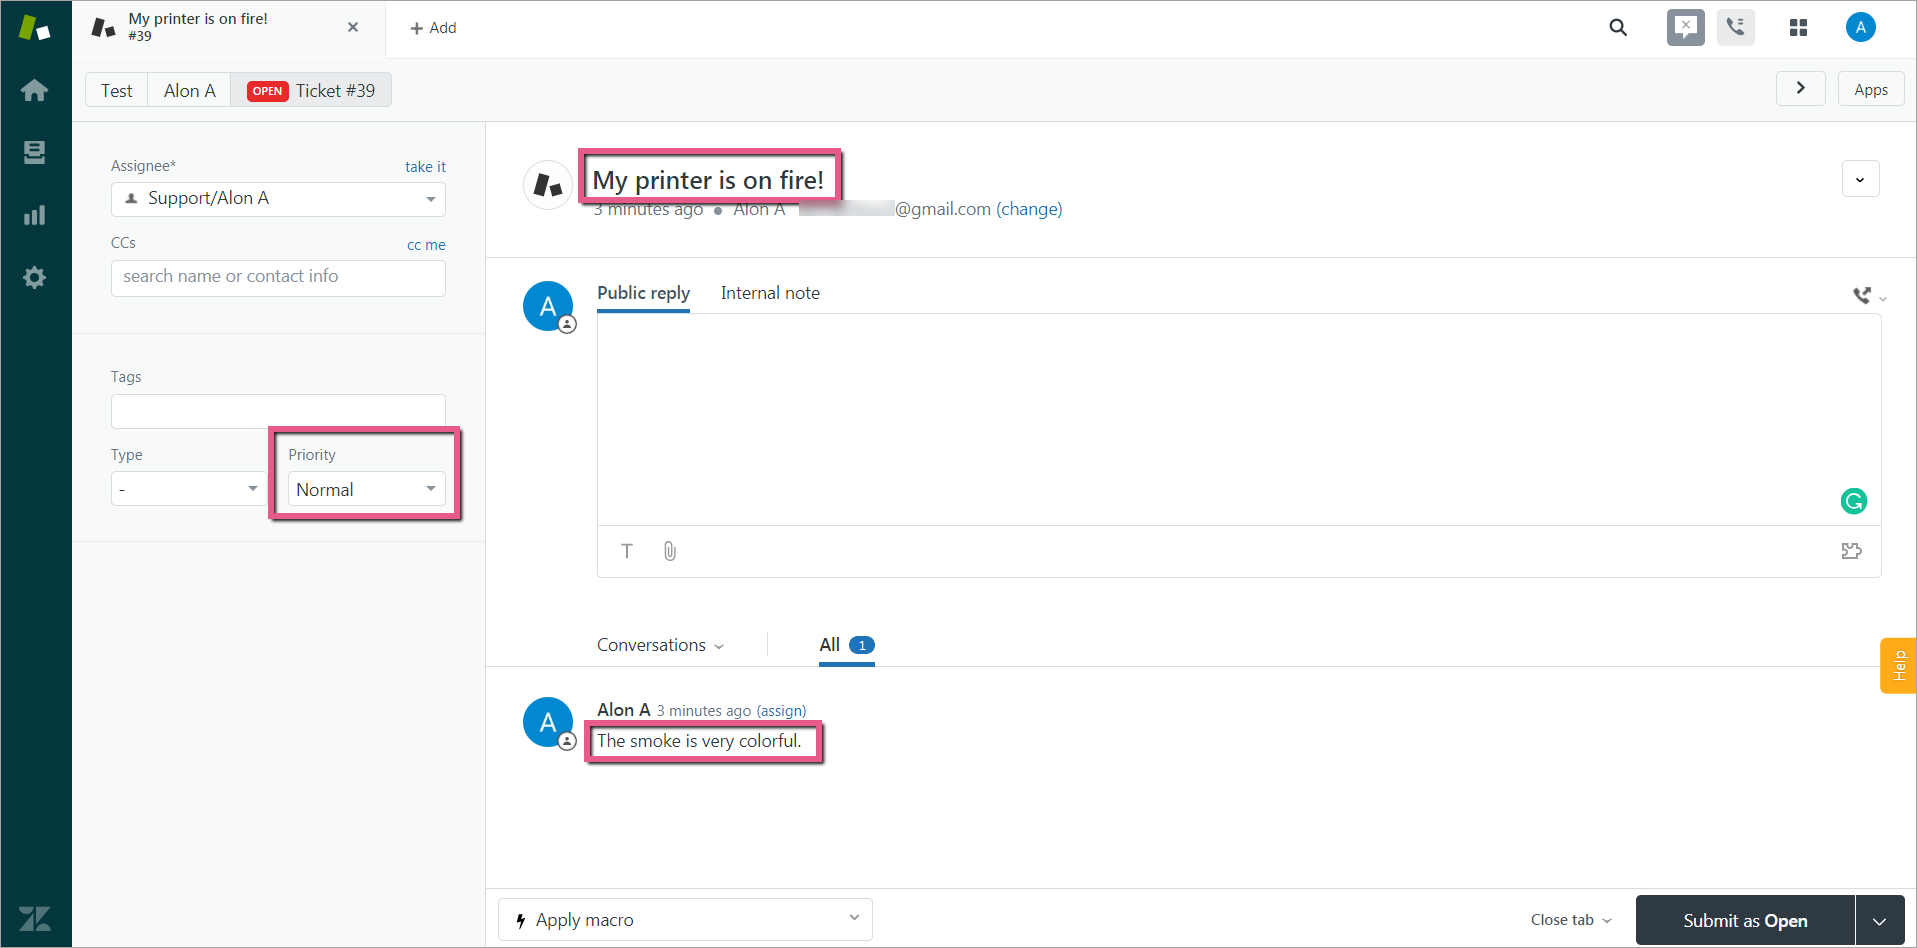
"subject": "My printer is on fire!",
"comment": {
"body": "The smoke is very colorful."
},
"title":"Title",
"type":"ticket",
"priority":"normal"
}
-
- Open any JSON minifier (e.g., https://codebeautify.org/jsonminifier), paste the property into the minifier console, and click Minify / Compress:
- Copy the minified JSON; you should receive the JSON formatted as follows:
- {"subject":"My printer is on fire!","comment":{"body":"The smoke is very colorful."},"title":"Title","type":"ticket","priority":"normal"}
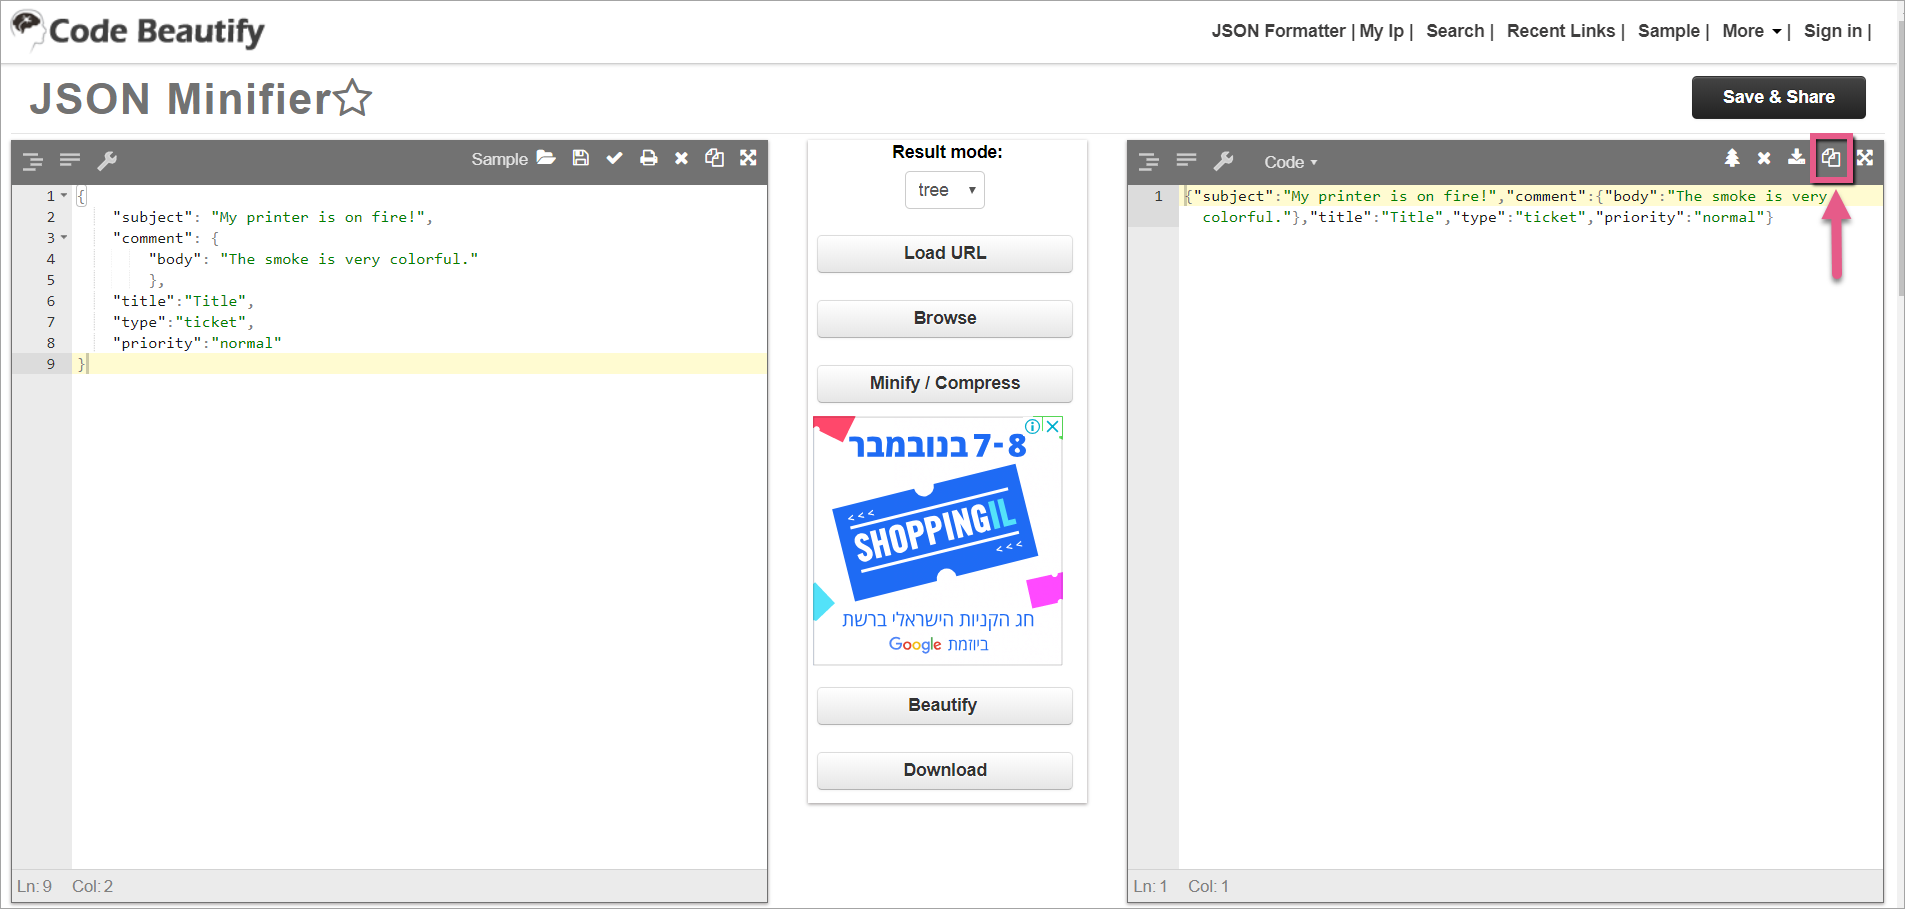
- {"subject":"My printer is on fire!","comment":{"body":"The smoke is very colorful."},"title":"Title","type":"ticket","priority":"normal"}
- Open any JSON minifier (e.g., https://codebeautify.org/jsonminifier), paste the property into the minifier console, and click Minify / Compress:
Wizard Step 2: Set destination
Steps
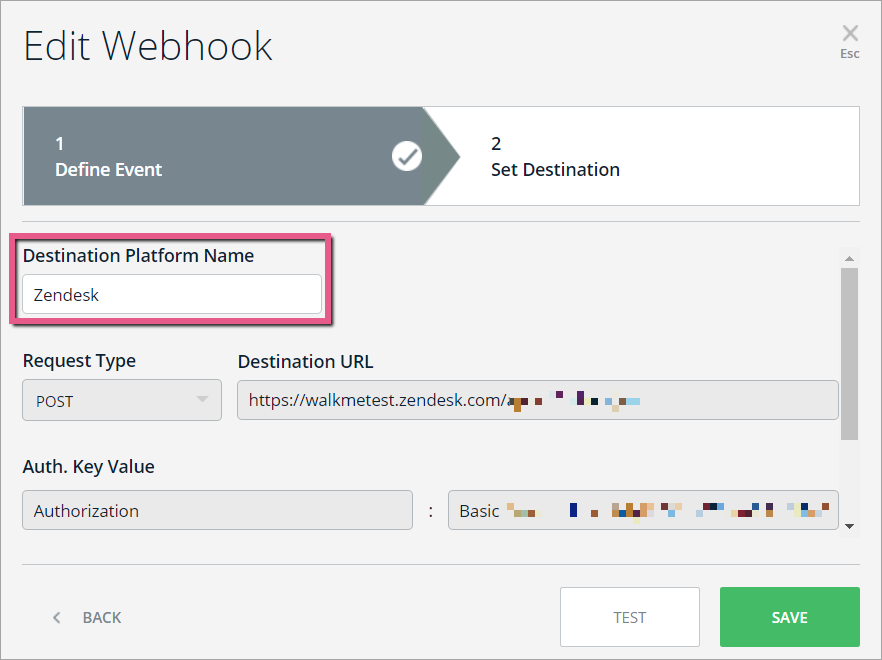
- Write in the Destination Platform Name. This name identifies the destination system (In this case Zendesk):
- Set Request Type to POST:
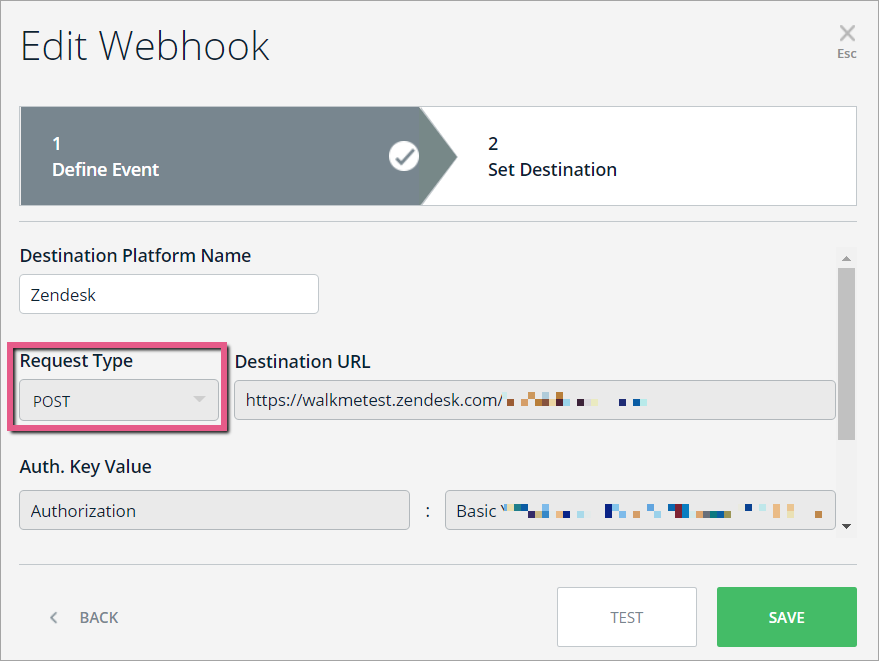
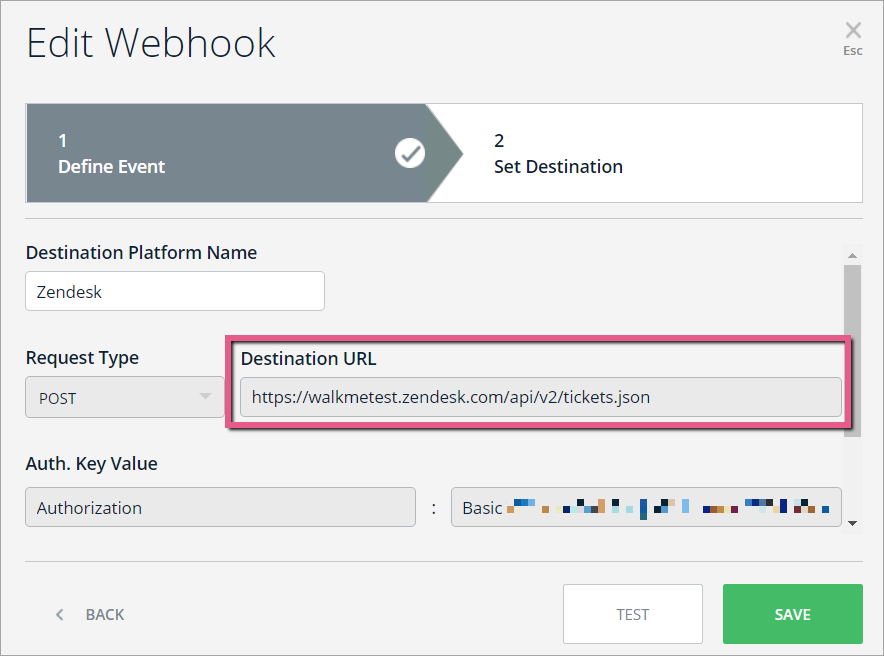
- Paste the URL according to your use case (in the following picture the URL is for creating a new ticket). The URL will always begin with "https://walkmetest.zendesk.com/api/v2/":
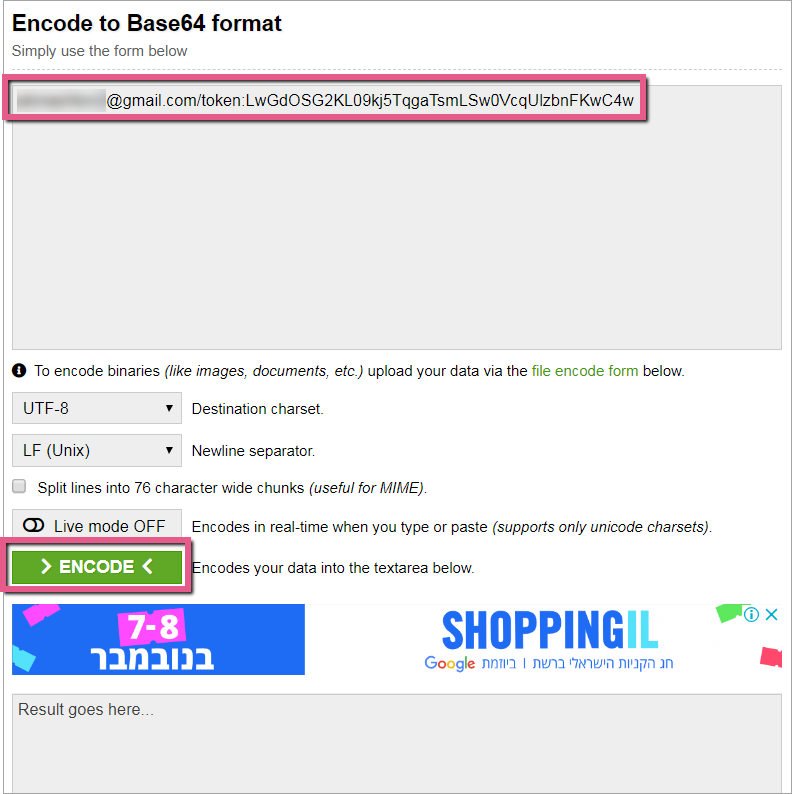
- Create a Base64 key as follows:
- Open any Base64 encoder (e.g., https://www.base64encode.org).
- write the email you defined in Zendesk and paste the API key you copied in Step 8 above in the following format:
- {email_address}/token:{api_token}
- Click Encode:
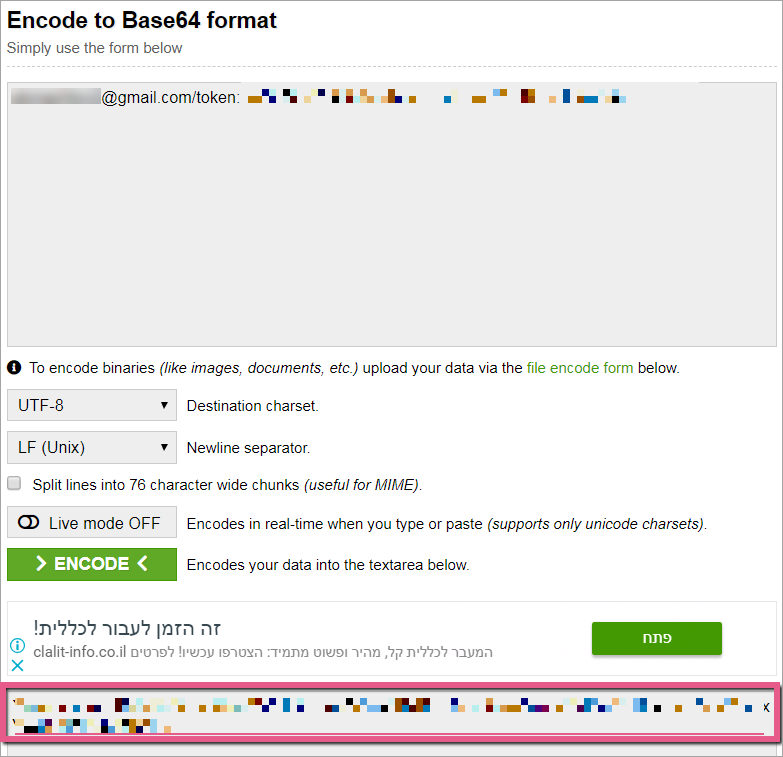
- Copy the Base64 result:
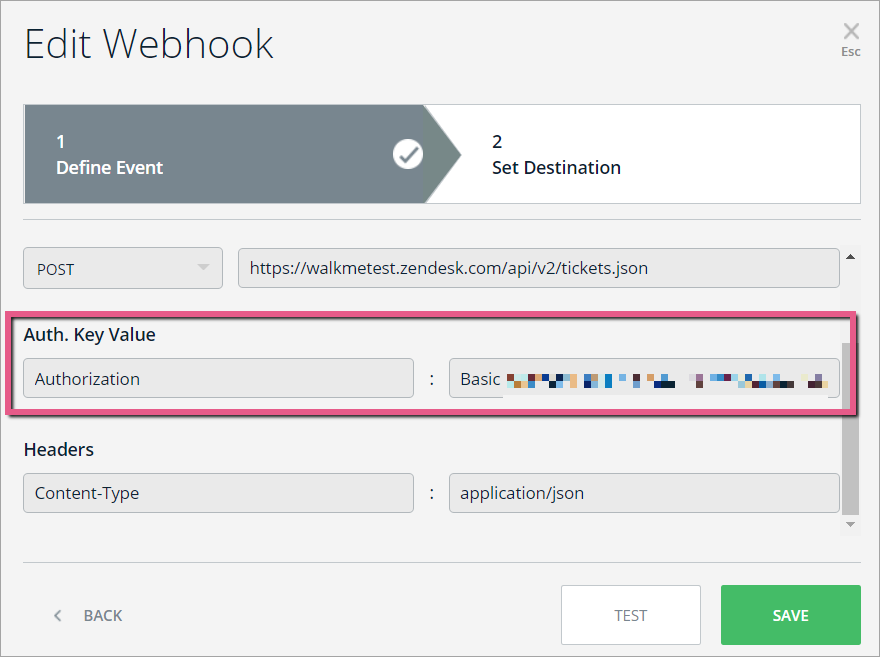
- Back in the WebHook Wizard, add an Auth. Key Value as follows:
- Authorization : Basic <paste a Base64 key here>:
- Authorization : Basic <paste a Base64 key here>:
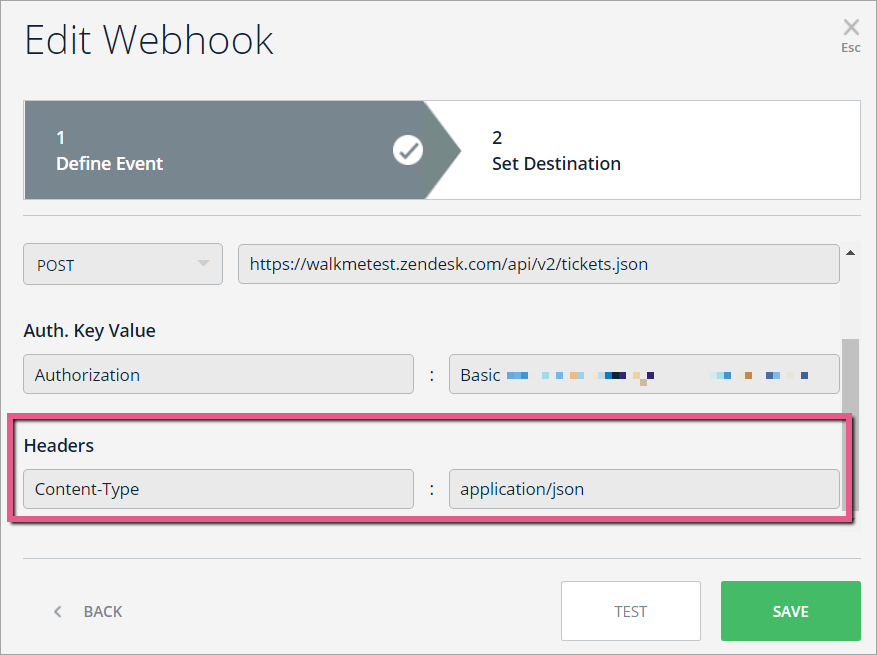
- Add Headers as follows:
- Content-Type : application/json:
- Content-Type : application/json:
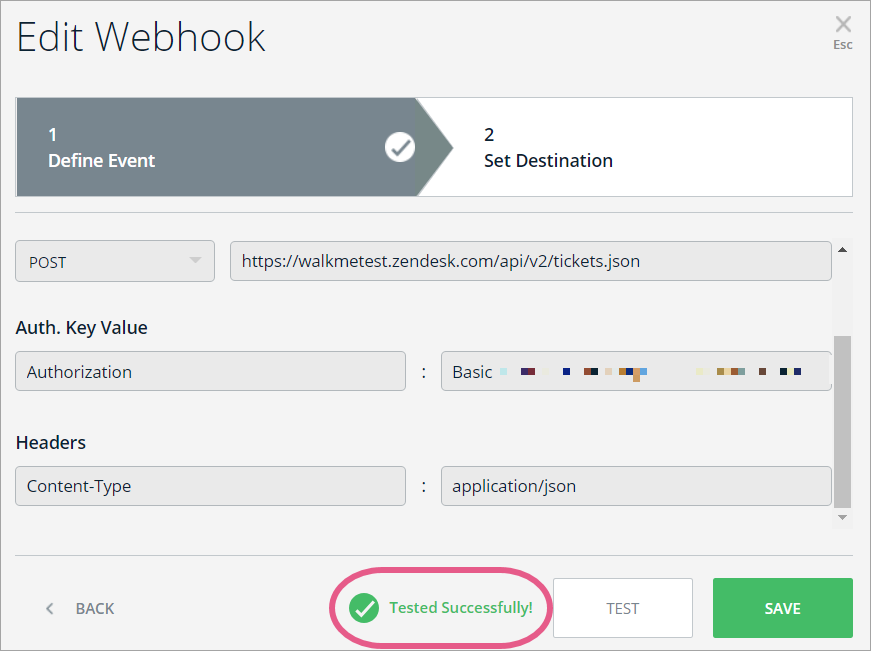
- Click TEST
- This will send the event that you defined in Wizard Step 1 to your destination platform to ensure that a connection successfully made.
- You should see the message: "Tested Successfully!":
 Pro-Tip: If you don't see the success message, check if all the mandatory properties are defined properly, per the instructions above.
Step 12: Go back to Zendesk and click Views

- You should now see the ticket that you created previously:
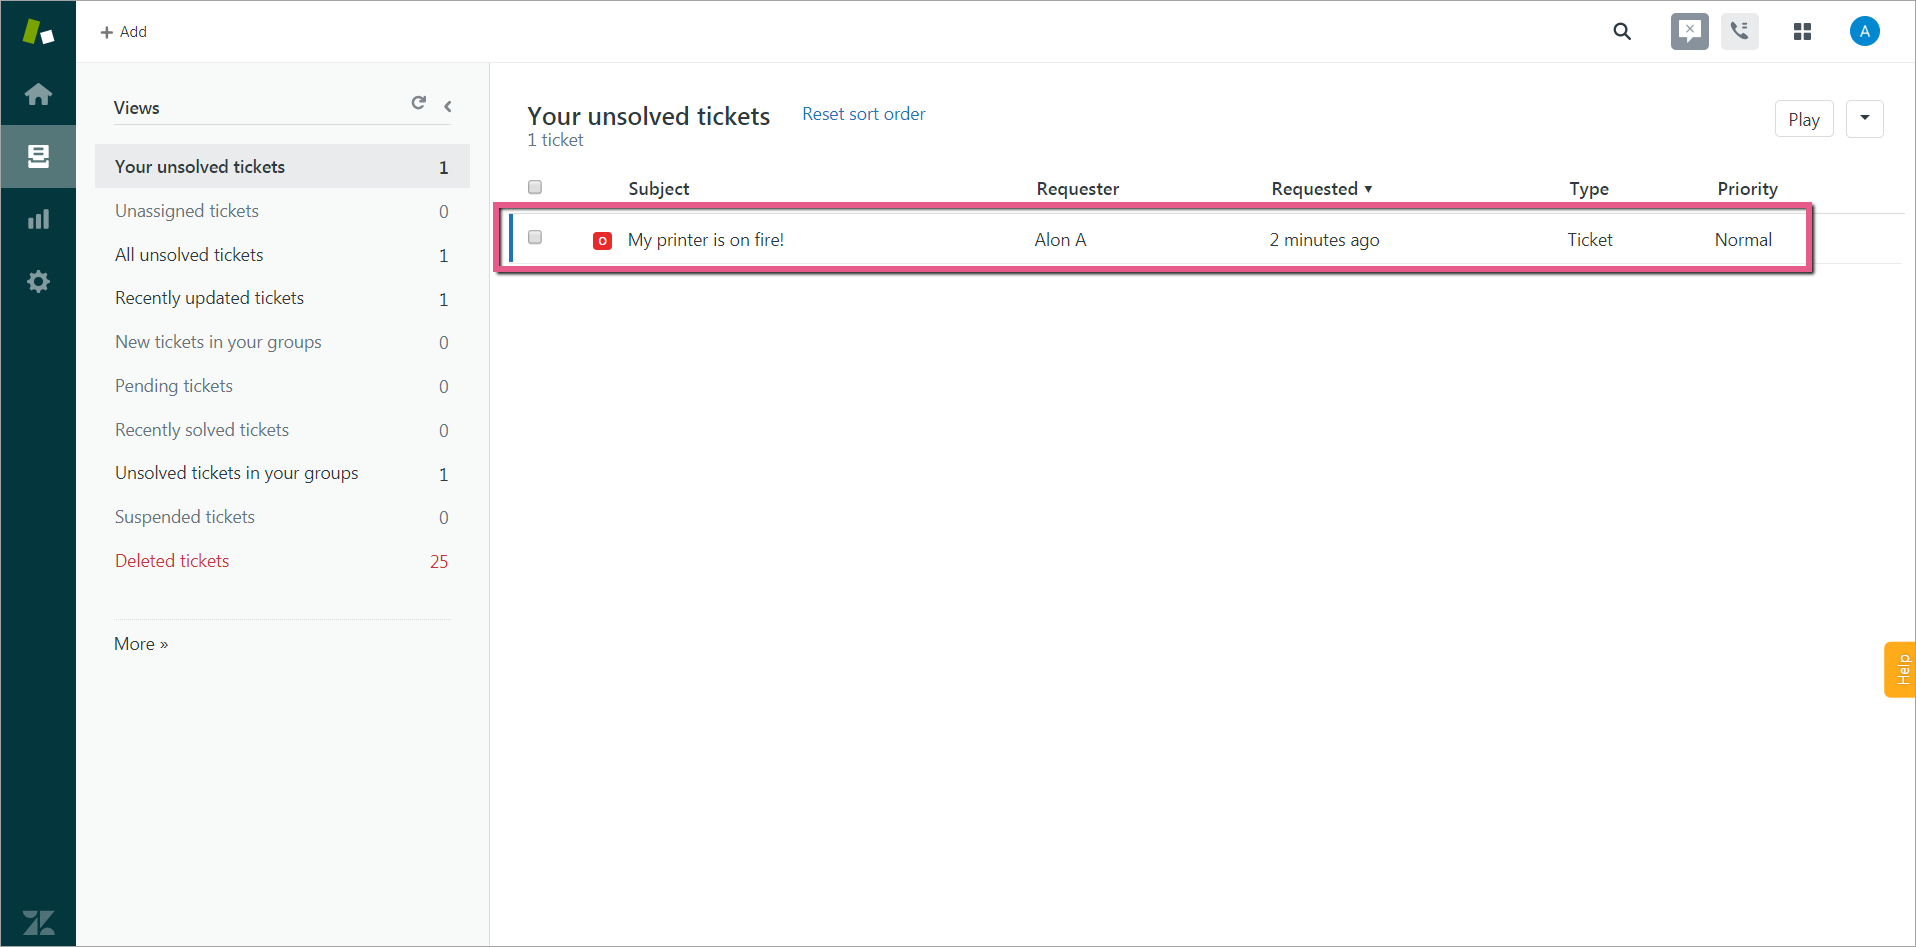
- In the image below, you can see the variables we sent from Insights to Zendesk using WebHooks!
Was this article helpful?
Yes
No
Thanks for your feedback!