Brief Overview
The Lexicon Translations Upload page in the Admin Center now offers DAP professionals the option to upload their application translation files. The upload populates the dictionary that the Lexicon uses to find on-screen elements in different languages so WalkMe items captured in the application using the base language (for example, English) will work seamlessly when changing the application language.
Upload entire platform dictionaries or smaller translation files to make smaller additions or translation updates.
This new capability does not replace but rather complements the Lexicon mechanism of automatically using translated phrases from the application and auto-populating the dictionary using the Natural Language Processing engine. The Lexicon mechanism will continue to work and populate phrases within WalkMe element captures that are not included in the uploaded translations.
https://walkme.wistia.com/medias/sa1aixwmqz
Prerequisites:
- Account is using Smart Element Recognition (DeepUI)
- Lexicon is activated
- Only the Admin role can upload translations
- CSV is the only accepted format for upload (template available to download from the Admin Center)
- First column has to be Deployable ID (can remain empty)
- At least two language columns are required (base language and one more)
- Use language codes in accordance with the AWS Supported language codes
- For example zh, es for 2 letter languages and zh-tw, es-mx for 4 letter language variations
How to use
- Access the Admin Center
- Select Systems from the side panel, then select the relevant system
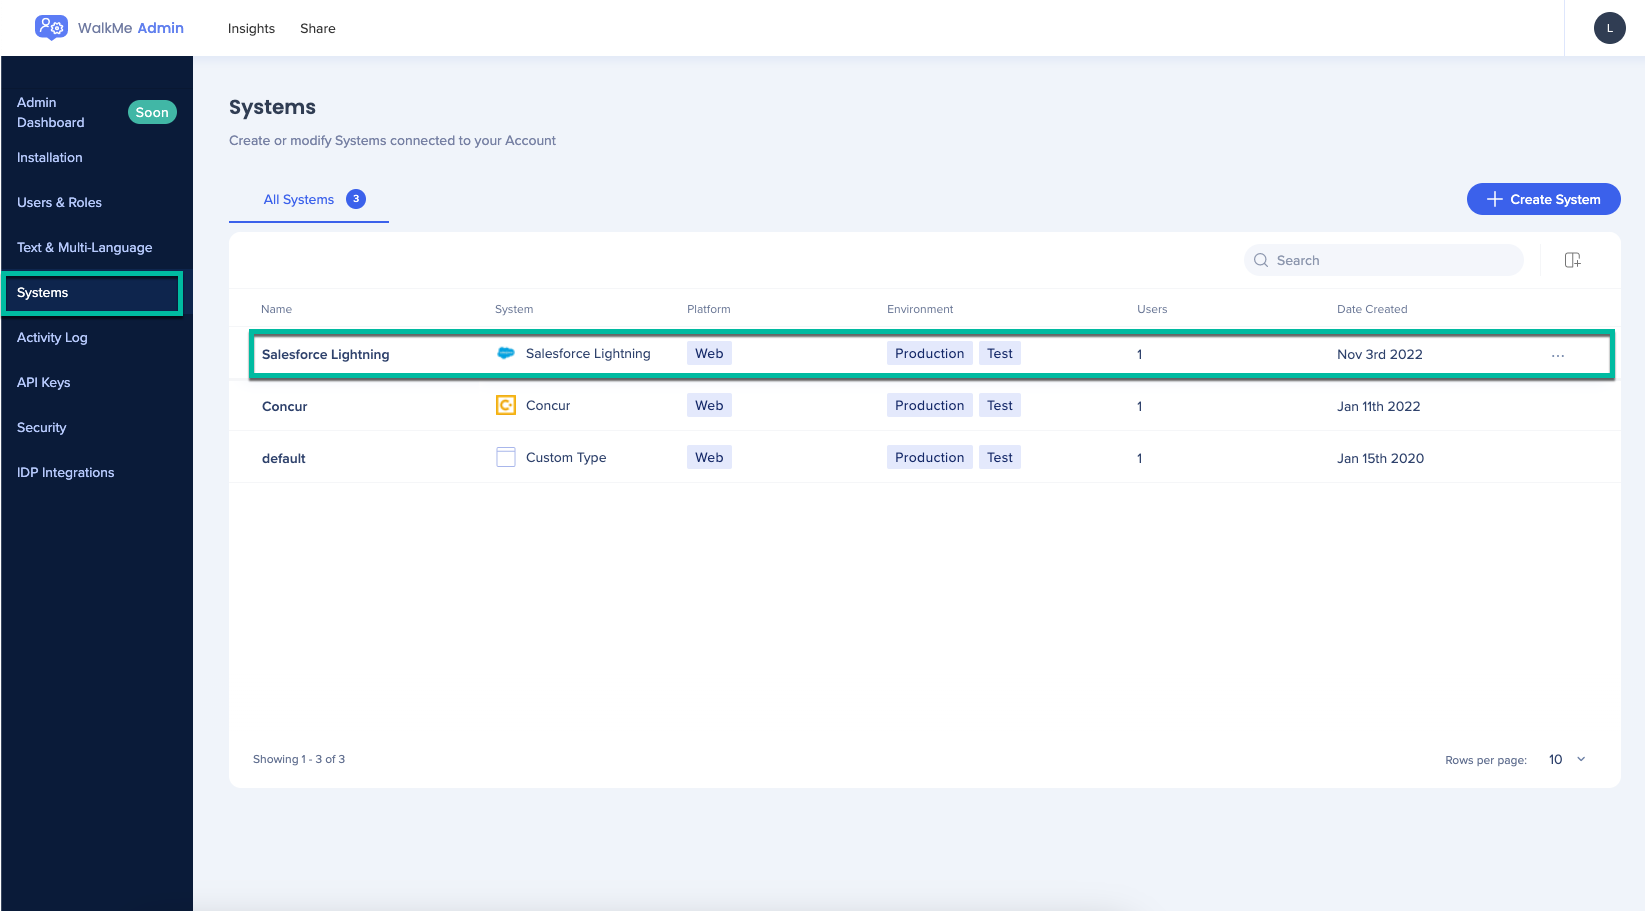
- The Lexicon Tab will be visible in the panel that will open on the right (given that Lexicon is enabled)
- Click Download CSV Template
- The template lists some sample languages to demonstrate the correct structure and lettering
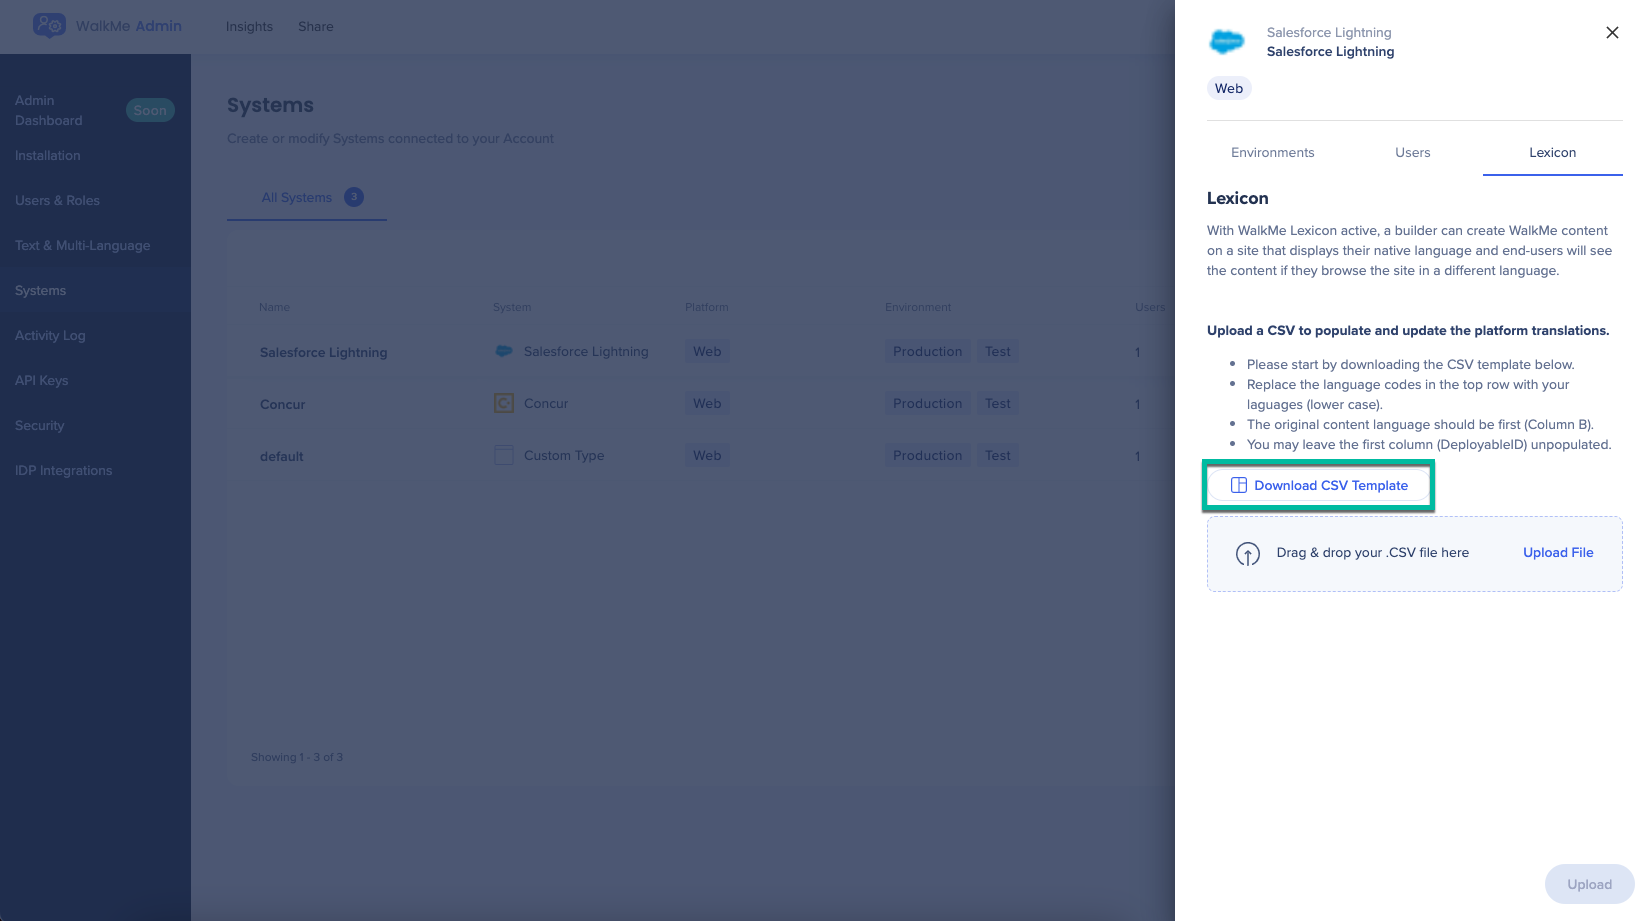
Due to the format requirements (see pre-requisites above), it's recommended to start the process by downloading the template file and populating it
5. Copy your Application dictionary into this CSV file (or manually populate it)
- You can leave cells unpopulated, but not in the column of the original base language
- Note: the CSV needs to be saved using UTF-8 encoding
- Here is an example of a valid CSV file:
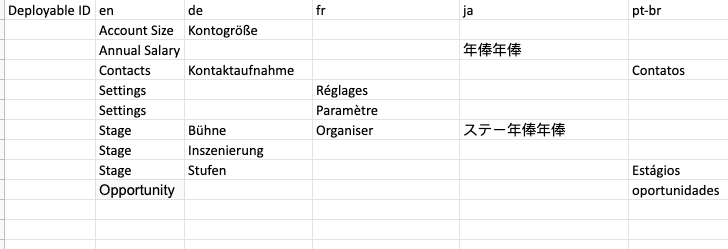
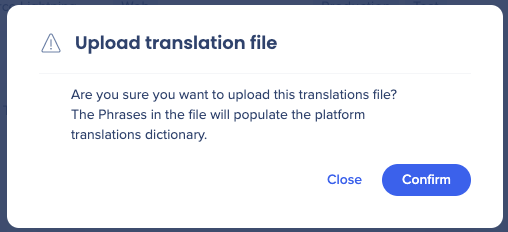
6. Select the file (or use the drag & drop option) and click Upload File
- Then, click Confirm
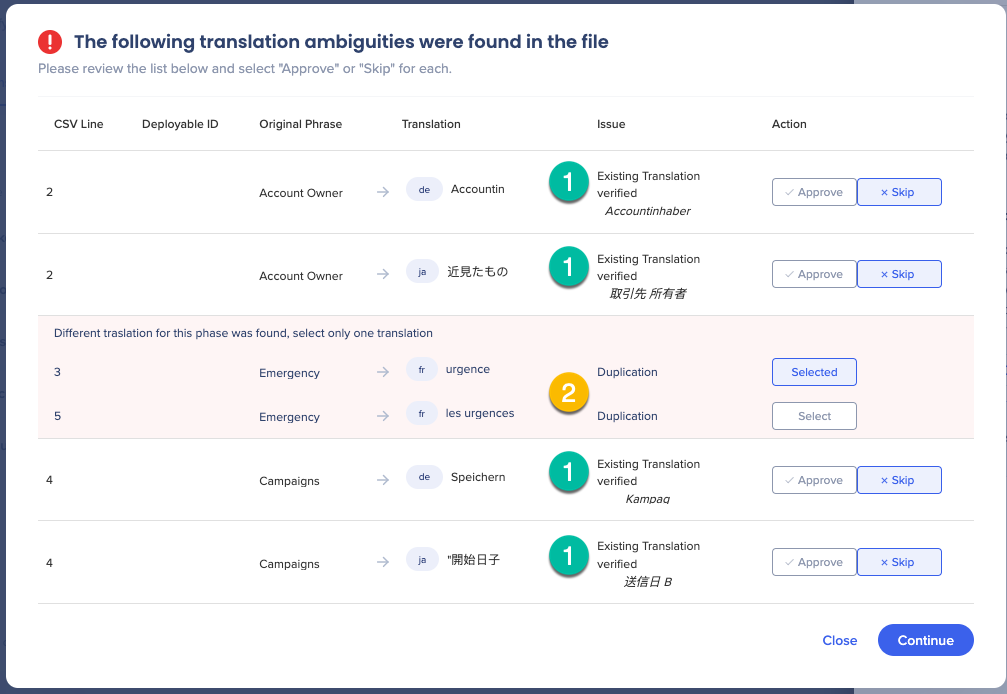
- The system will process the phrases in the file. If the system encounters any ambiguities, you will be prompted to make a decision to approve or skip it.
The Ambiguities window will appear after all of the other phrases in the file have already been processed and updated. You can choose to ignore this window and close it. Doing this would skip the lines where the "Skip" button is selected by default (All "Existing Translation Verified" lines) and will leave the "Selected" values for the duplications. Once the upload has been completed, you will see the "Summary" pop-up
- Potential ambiguities include:
-
- Existing translation verified
- The translation they are overrunning is likely to be the correct translation. An existing translation (which will appear below the message "Existing Translation verified") will qualify as "verified" if it meets one of two conditions:
- Has a high Lexicon NLP score (and is different from the existing translation: If it's the same as the existing Lexicon translation that was auto-populated, it would just be tagged as manual)
- Is a translation that has already been manually updated before (and is different than the translation trying to upload now. If it's the same manual translation, it would be automatically skipped)
- Duplication
- The Lexicon dictionary can only populate one global translation per phrase per language. If your upload file includes a duplicate phrase in the source language but with different translations for the same language, the system will ask you to select the one of the translations to be populated.
Please allow up to 15 minutes for translations to update in the system before testing.
7. Click the Download Summary button to download a CSV summarizing what was uploaded and what was skipped

How to use the deployable ID
The Lexicon dictionary can only populate one translation per original phrase per language.
Example 1:
Your Lexicon application translations are populated with the French (fr) translation "Mettre fin à l'emploi" for the original English (en) phrase "End Employment" (either because you've manually updated it or this is the phrase that has been collected from the French application pages).
In one place in the application, the English phrase is the same "End Employment", but the French phrase is a slightly different "Mettre fin." Only one of them can be used as the global French translation for when the system looks for this menu option on the French page.
Example 2:
The "Account" page in German (de) shows the "Account Owner" label properly translated to "Accountinhaber" in one place on the page. But in another place, the original English phrase appears. Since the page is identified as being in German, the phrases from the German Lexicon dictionary are used when trying to locate elements. So if a Smart-Walk-Thru step, Launcher, SmarTip etc. is attached to the "Account Holder" field, the Lexicon will look for the German word “Accountinhaber” when looking for the element.
The Solution:
For both of these examples we need to use a translation that is different from the global Lexicon translation for a specific piece of WalkMe content. To do this, you can define a different translation for a specific Deployable ID when uploading Lexicon application translations.
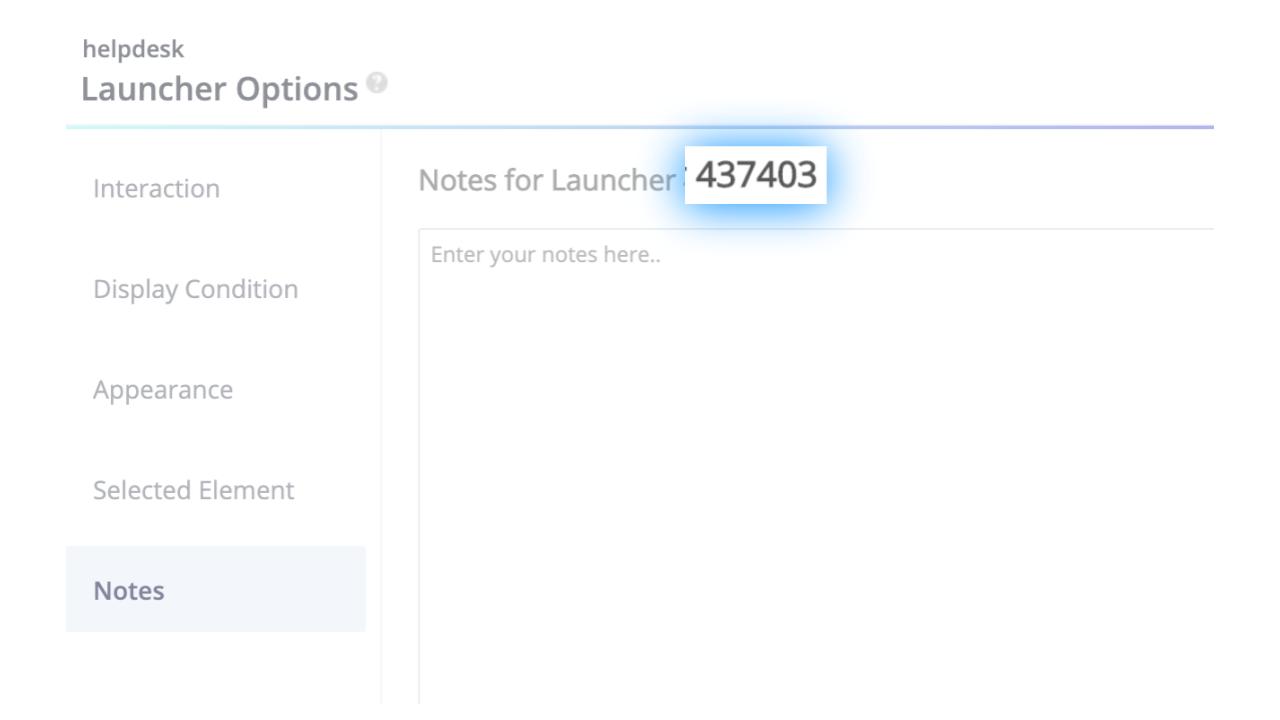
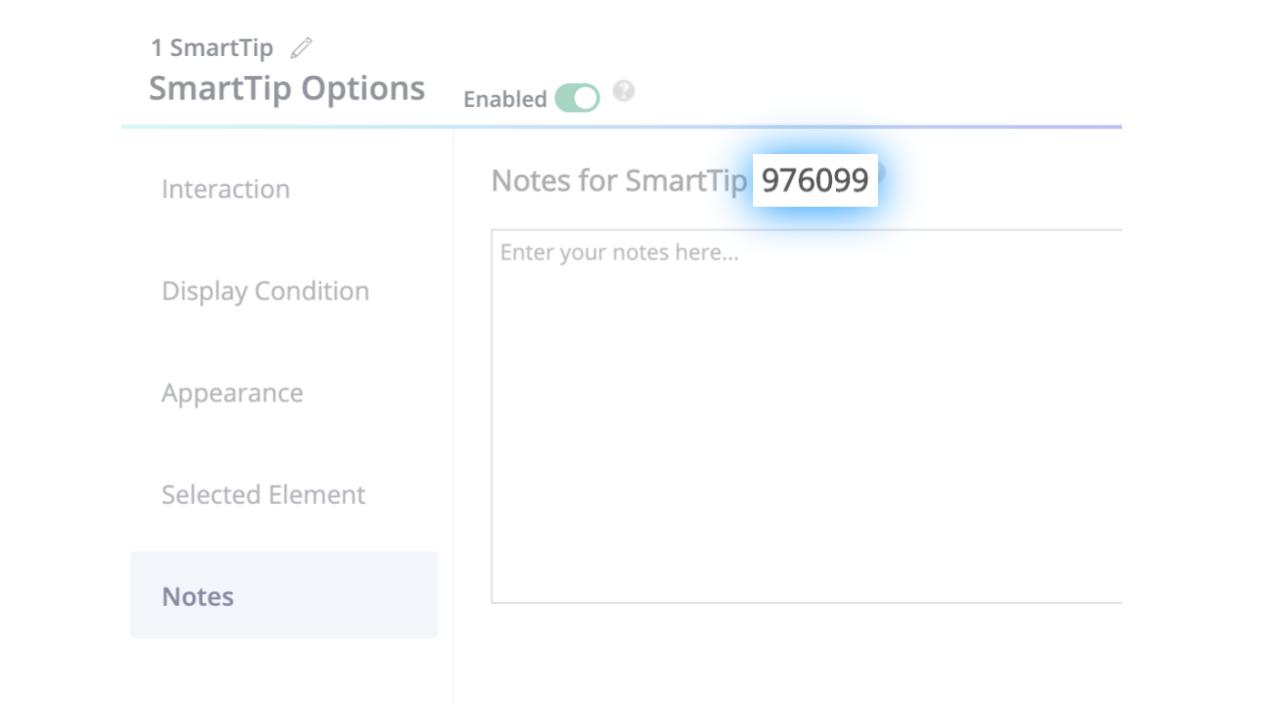
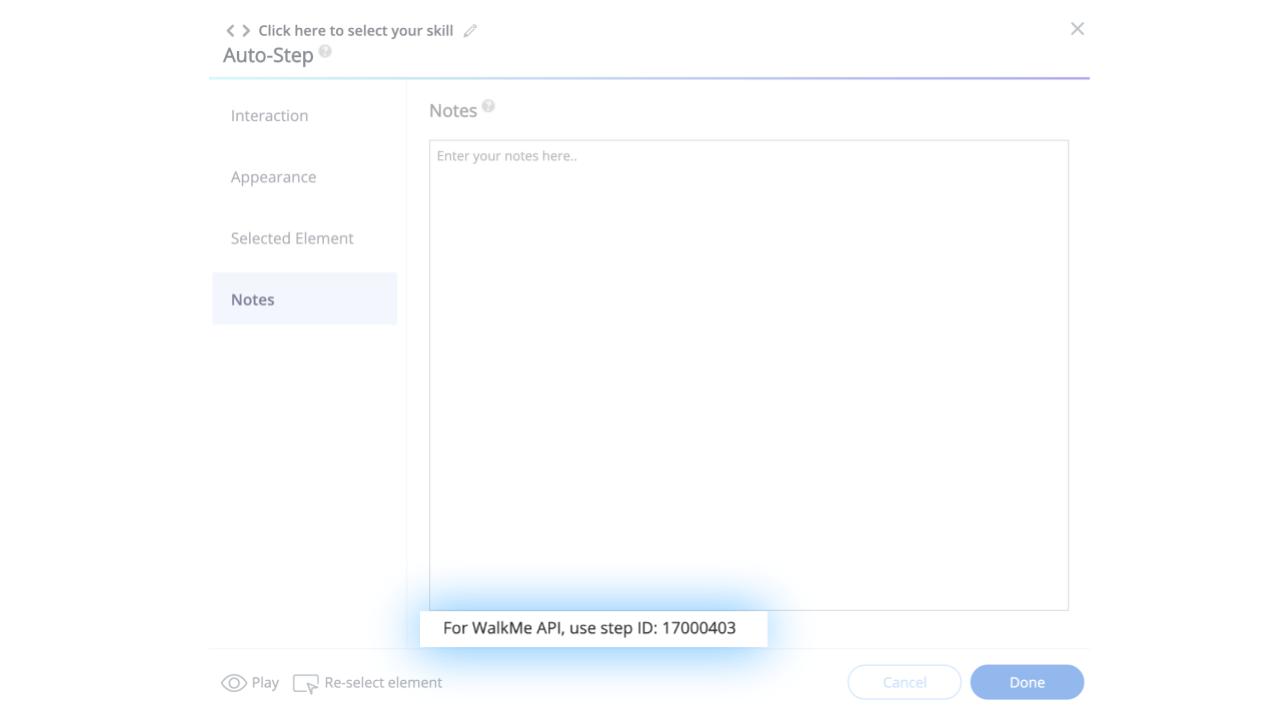
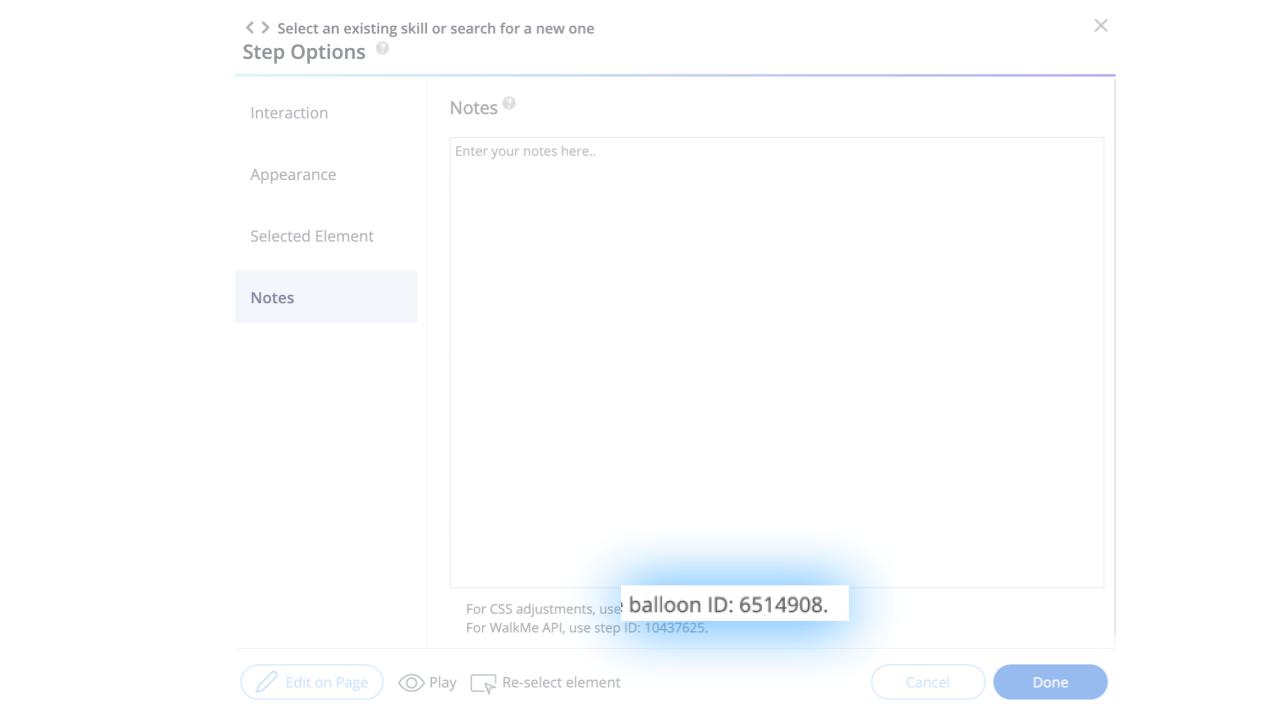
Find the deployable ID for SmartTips, Launchers an Smart Walk-Thru steps in the Notes section of the items settings in the WalkMe Editor.
Launcher deployable ID:
SmartTip deployable ID:
Smart Walk-Thru Auto Step deployable ID
Smart Walk-Thru manual step deployable ID
Here you'll actually see two different IDs. The relevant ID is the one labeled balloon ID.
Let's say I want my global German translation for "Account Owner" to be "Accountinhaber" because that's how it appears across the site. But for one Smart Walk-Thru step (Deployable ID 1000722094) I need a different translation (in this case use the phrase in English). The upload CSV lines would look like the screenshot below.

You can upload as many Deployable ID translation variations as needed.
Troubleshooting
Issue: I'm not seeing the "Lexicon" tab in the Admin Center under "Systems"
Solution: It can be one of two reasons why you wouldn't see the Lexicon tab:
- Lexicon is not activated for this account. In such a case, please reach out to your WalkMe contact.
- You are not Admin. Only the Admin user role has permissions to see the Lexicon tab and upload translations.
Issue: File structure errors while trying to upload
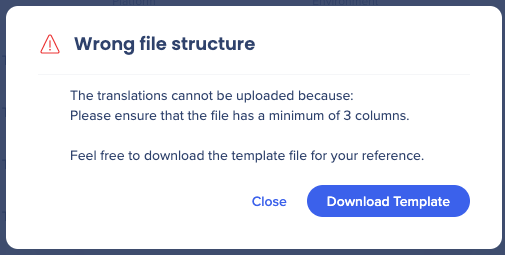
Solution: While the interface in the Admin Center will only enable you to upload CSV file types, you may still encounter some errors in the structure that would prevent the processing from beginning:
- Insufficient Columns: The file must include at least 3 columns. Not having at least these 3 columns will result in this error.Deployable ID (doesn't have to be populated, but has
- to exist as the first column)
- Base Language
- One additional language
- If the first column isn't "Deployable ID"
- Undefined Language codes: the file structure must contain the language codes in this manner:
- In adherence with the AWS Supported Languages Support article, and only language codes in this list.
- Only languages activated for the account can be included
- By default, when Lexicon is activated, it's activated with 14 base languages (English, Dutch, French, German, Japanese, Portuguese, Spanish, Chinese (simplified - zh), Italian, Danish, Swedish, Polish, Russian and Hebrew)
- Any additional required languages have to be specifically activated in the Lexicon. Reach out to your WalkMe contact if you need to support a language that is not listed here.
- See more information on Lexicon activation and additional language request in this article
- If a CSV file contains more than 10k phrases, an error message will appear notifying the user that the maximum allowed in a single upload is 10k phrases.
- If this character � appears in the file, the upload will be blocked, as this is a sign of wrong encoding.
The AWS list shows native Portuguese (Portugal Portuguese) as pt-PT, and Brazilian Portuguese as pt (even though the two letter code is usually reserved for the native languages). We've switched these two so native Portugal Portuguese is represented by the two letter code of pt, while Brazilian Portuguese is represented as the more traditional pt-br. While Japanese is supported by default, the language code for Japanese is ja, not jp
Tip Tuesday Videos
Easily play WalkMe content in multiple languages across your applications
https://walkme.wistia.com/medias/vm6mi8n11p


![]()
![]()
![]()
![]()
![]()
![]()
![]()
![]()

