Brief Overview
Whether you are using TeachMe for your employees internally or helping your external users have the best experience with your website or product, they'll need to be able to access TeachMe.
In this article, we will review how to launch your TeachMe experience via the WalkMe Menu. The Menu is a great place to store your most important items, including your TeachMe courses. Your users will have easy access to the training they need when they need it.
Don't have a menu yet? No worries! It's simple. Just check out this article on the Menu Organizer.
How it Works
You have two options to open TeachMe via the Menu:
- You can add a Launcher to the footer of your Menu.
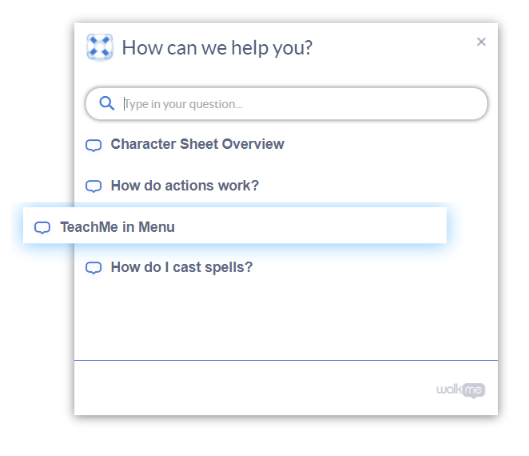
This gives TeachMe a prominent place in the Menu where users will always be able to see it and access it. 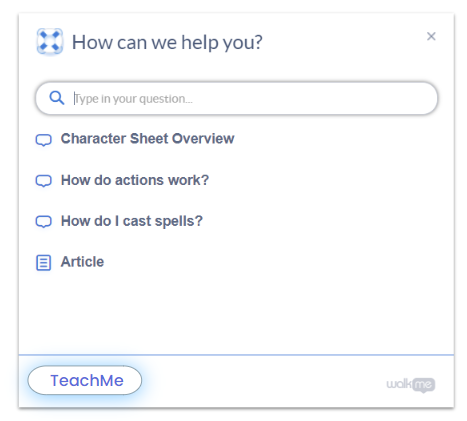 2. You can add a Smart Walk-Thru with an Auto-Step within the Menu.
This will integrate TeachMe into the list with the rest of your items.
Whatever your choice, we will be using jQuery (don't worry, we'll tell you exactly what you need).
If the Launcher is your choice, we recommend adding it to the footer of the Menu. This is typically the area with the most space. That said, should you like to add your Launcher to a different part of the menu, you can search for the jQuery snippet and replace the one below.
To add a Launcher to the Menu:
Step 1: Create a Launcher
- From the Editor, create a Launcher via the big blue + icon.
- Capture anything on the site (we'll change the location later).
- Click Save.
Launchers: Getting Started Guide
Step 2: Insert jQuery
- In the Editor, click on the Launcher to open the Launcher Options screen.
- Go to Interaction > Action.
- Select Open Courses Menu from the dropdown.
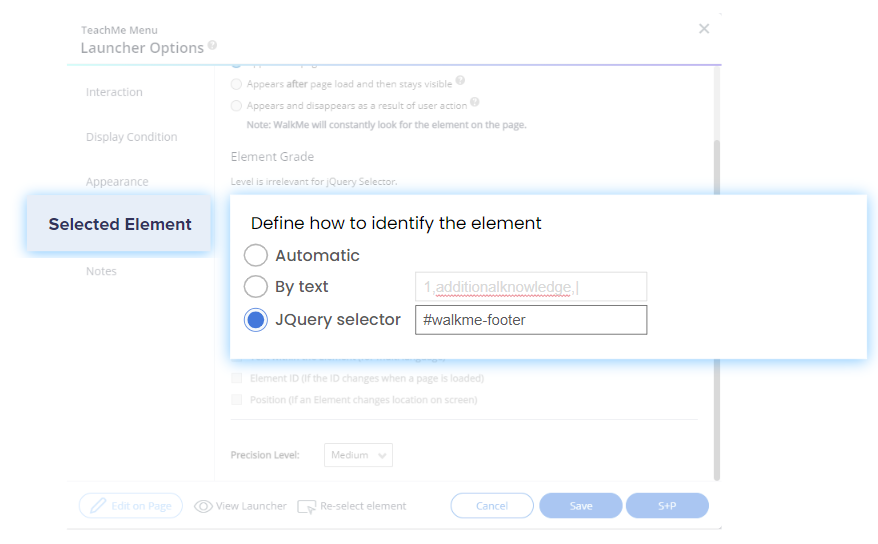
- In the Launcher Options page, go to the Selected Element tab.
- Under Element's Behavior, select Appears and disappears as a result of user action
- Under Define how to identify the element, select jQuery Selector.
In the jQuery selector field: Type: #walkme-footer (if you want it in a different place in the menu, add the jQuery here).
Step 3: Change Launcher Setting Appearance
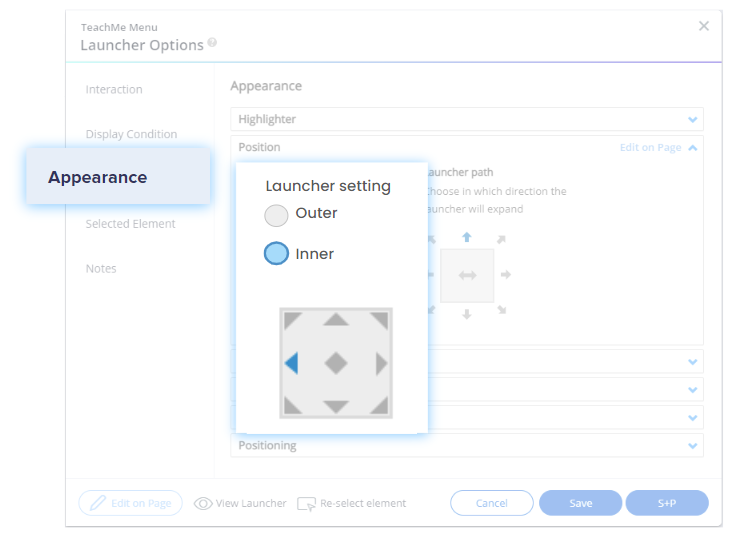
- Go to Appearance > Position.
- Under Launcher Setting, select Inner and the left arrow (This will place the Launcher on the bottom left corner of the menu).
Step 4: Change Z-Index
- Still in the Appearance tab, go to Arrange Layer Order.
- Toggle Z Index ON.
- Under Define Z index value manually, type 2147483647.
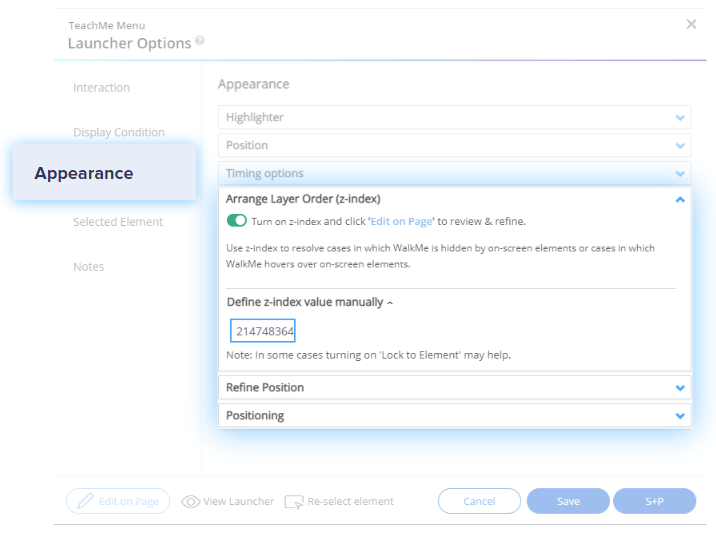
- Click Save.
Done!
Whenever you're ready, publish this launcher and the launcher will appear on the Menu. To customize your launcher, go to the Launchers article.
Add Smart Walk-Thru with Auto-Step
Perhaps having a separate button on the Menu isn't quite your style. Maybe you'd like to add your TeachMe experience into the list of other items on the Menu. In this case, you'll create a super simple Smart Walk-Thru with an Auto-Step that opens the Course Menu (Yup! It's just one step). Let's get started.
To add a Smart Walk-Thru Auto Step:
Step 1: Create a Smart Walk-Thru
- From the Editor, create a Smart Walk-Thru via the big blue + icon.
- Start your Smart Walk-Thru by clicking the orange + and selecting Auto Step.
- Select any element (we'll change the location later).
- In the Action dropdown, leave Click as selected.
- Click Done.
Step 2: Step 2: Insert jQuery
- Back in the Editor, click the Auto Step you created.
- Go to the Selected Element tab.
- Under Define how to identify the element, select jQuery Selector.
- In the JQuery selector: Type: #walkme-player-panel (This opens the Menu instead of clicking the random element you selected).
- Click Done.
- Navigate to the Menu Organizer in the WalkMe Console: console.walkme.com/menu
- In the Item List, locate your new Smart Walk Thru and drag it to the desired location in the Menu.
- Click Save.
Done!
Learn more about Smart Walk-Thrus and AutoSteps in this article.
Smart Walk-Thru support
If you are experiencing issues with your Smart Walk-Thru, you can find our support article for troubleshooting here.


 2. You can add a Smart Walk-Thru with an Auto-Step within the Menu.


