
Salesforce Data Integration
Brief Overview
Create more personalized experiences for your customers by incorporating Salesforce data into WalkMe's Digital Adoption Platform.
By using the Outgoing Integrations in Insights Data Integration Center, data from WalkMe Insights will be accessible in Salesforce and can be used in workflows, reports, and activities. This data is synced every 24 hours at 9:00 am UTC.
How It Works
Use the Salesforce integration to push WalkMe Insights data into Salesforce objects to enhance your understanding of end-user behavior.
During the setup process, you'll choose the Salesforce object to push the data into and which data you want to be pushed into Salesforce according to an Insights custom report.
If a match is found between the custom report's unique identifier (usually email or GUI) and the Salesforce object's unique identifier (usually email), then you can push the data found in the insights report to this object.
- You can sync any Salesforce object
- You can sync to both Salesforce environments: Sandbox and Production
Authentication Method
We use the Salesforce OAuth 2.0 authorization method to obtain a token (that we store) for the end-user. This access can be revoked at any time by the Salesforce Admin or within the system by disconnecting the account.
Requirements
- You must be a Salesforce admin or contact your Salesforce admin in order to add custom fields to your targeted Salesforce object(s)
- You must have a Salesforce user that either has Salesforce admin access or ModifyAllData permissions to grant WalkMe access to OAuth 2.0 authorization to read and update the metadata of Salesforce objects (this access can be revoked by the Salesforce Admin at any time)
Preparing for Integration
Step 1: Identify the Data
Determine which WalkMe Insights data should be pushed to Salesforce in order to achieve your goals.
The data must be structured in a report:
- Each row on the report should stand for a specific record of the object you want to integrate to
- For example, each row could show data of a user
- Each column of the report should stand for a specific field in Salesforce you want to push the data to
- There should be 1 column in the report that holds the mapping key for your record on Salesforce
- For example, if the way you will identify your target object record on Salesforce is an email, then this email should be a column on the report
Learn more about common reports available in Insights.
Step 2: In Salesforce, add custom fields to the Salesforce Object
This can only be done by your Salesforce Admin.
Integration
How to access
The WalkMe Data Integration Center can be found in the Integrations page in Insights, accessible at insights.walkme.com.
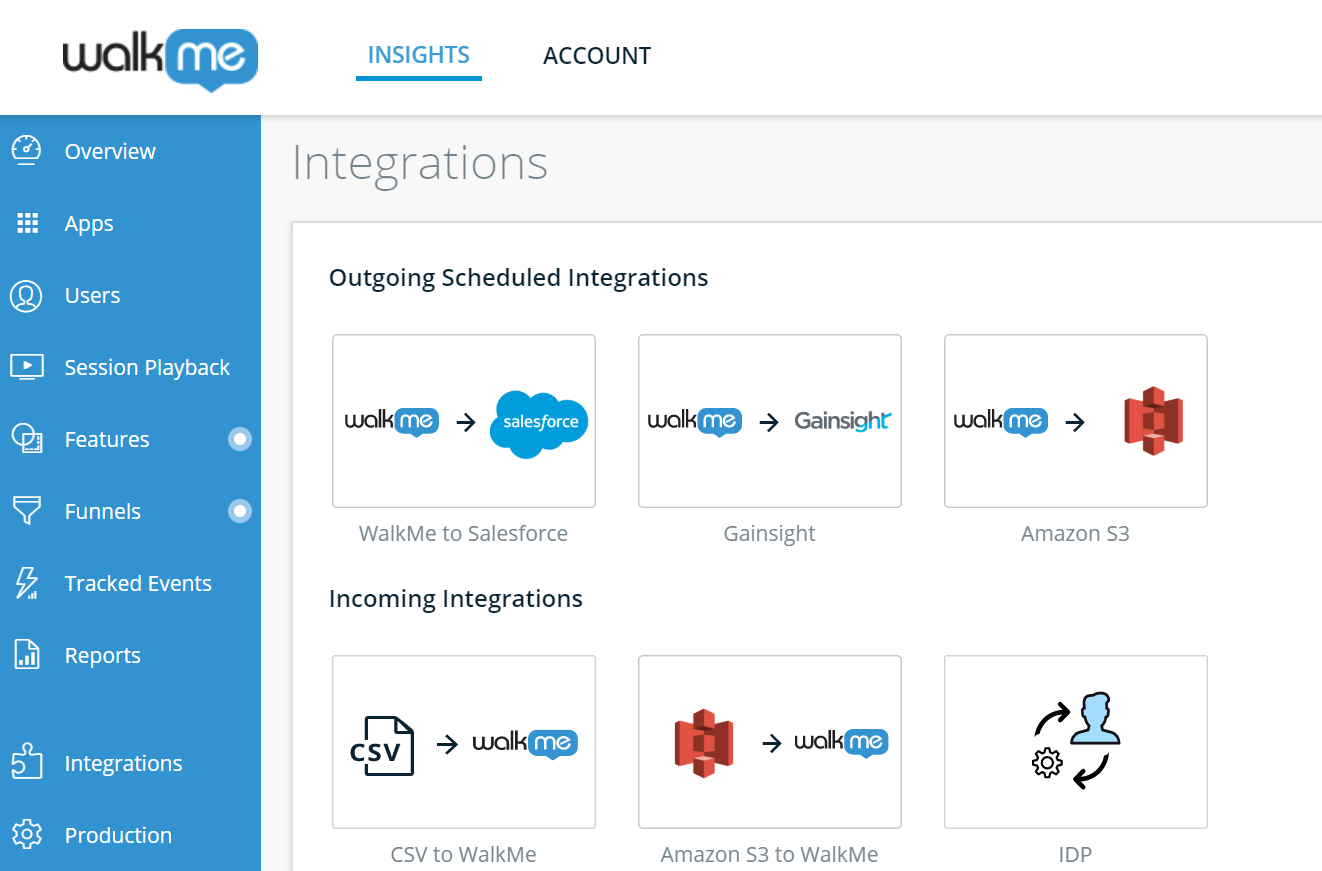
Step 1: Select your Integration
Select WalkMe to Salesforce under Outgoing Scheduled Integrations.
The integration wizard will open to guide you through the process of setting up an integration.
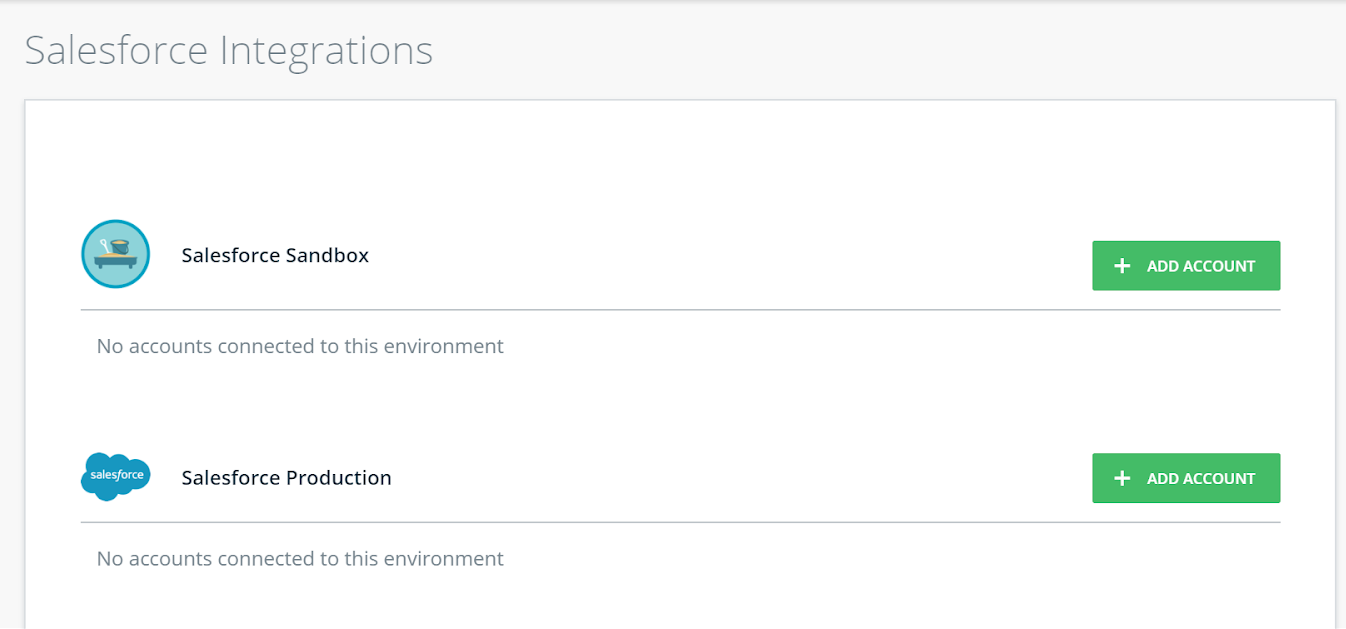
Step 2: Connect the Environment
Click + ADD ACCOUNT next to the environment you want to connect.
The Salesforce authentication screen will open for you to give WalkMe permission to push data to this account using OAuth 2.0 authorization.
Once you enter the email and password for your account, you will be redirected back to the Salesforce Integrations page in Insights.
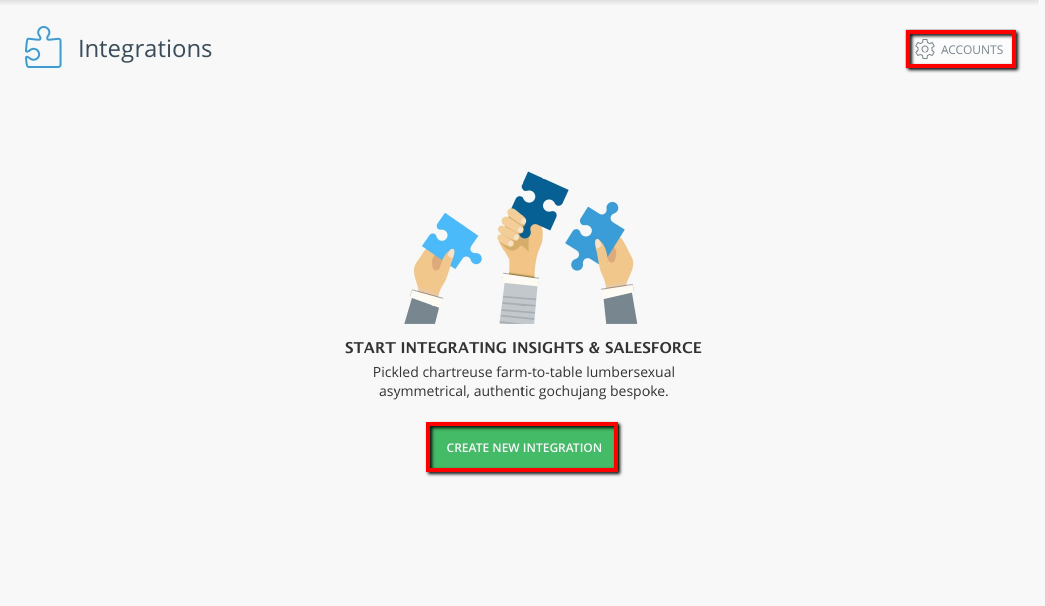
Step 3: Create the Integration
Click CREATE NEW INTEGRATION.
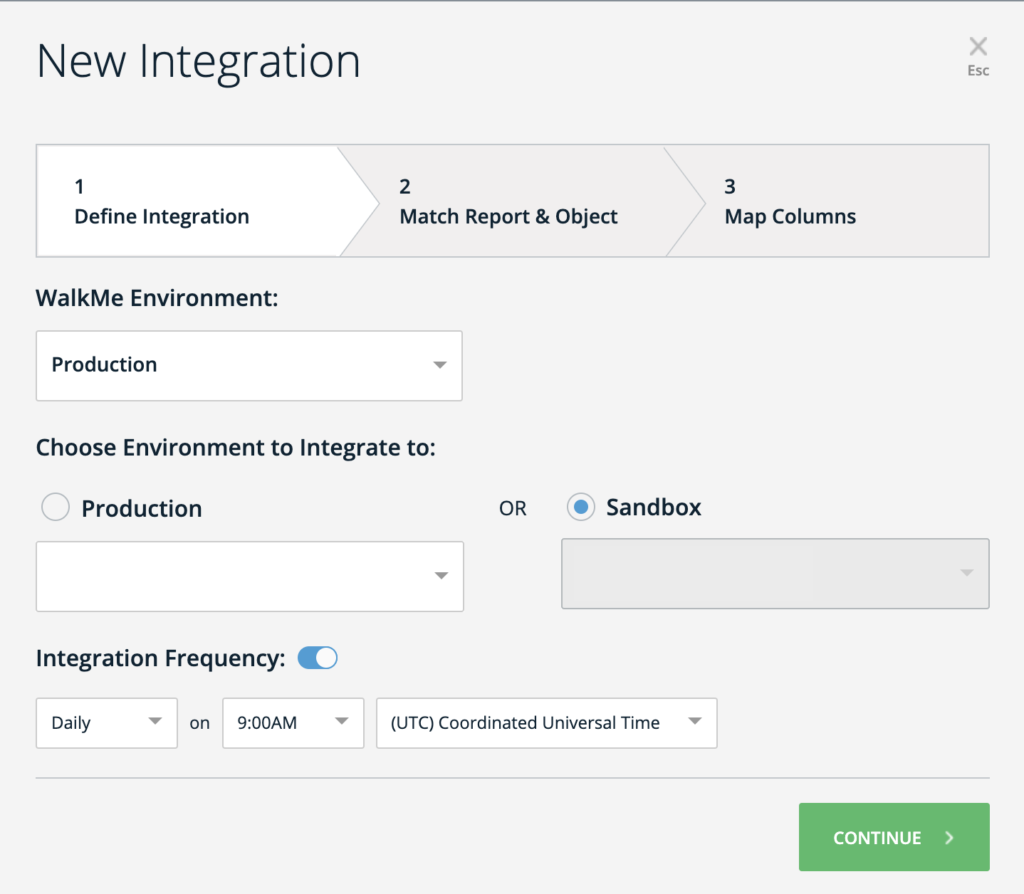
Step 4: Select an Environment in the Integration Wizard
In this screen you will connect your Salesforce environment to WalkMe and be able to choose from which WalkMe environment the report will be extracted from.
You will also be able to view the Salesforce account details and choose between Sandbox and Production environments if both are connected.
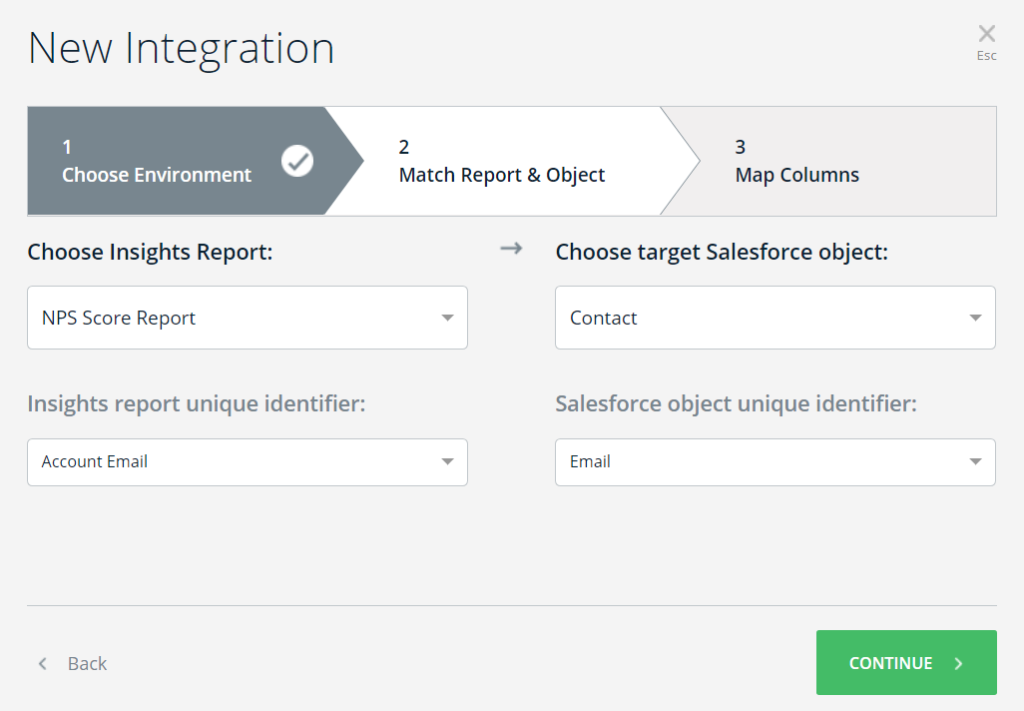
Step 5: Select the Insights Report & the Matching Salesforce Object in Integration Wizard
Choose an Insights report and select the Salesforce object it should sync with.
- Insights Report column: A dropdown list will display your available Insights reports
- Target Salesforce object column: A dropdown list will display the available Salesforce objects pulled from the connected Salesforce environment
Once you choose both columns, select the unique identifiers (keys) of each report and match them up with a Salesforce object identifier (usually email or GUI).
- Insight report unique identifier column: This is the report's key to match to a Salesforce object
- Salesforce object unique identifier column: This is the field of the Salesforce object with which to match the report key
Click Continue once you are ready to proceed.
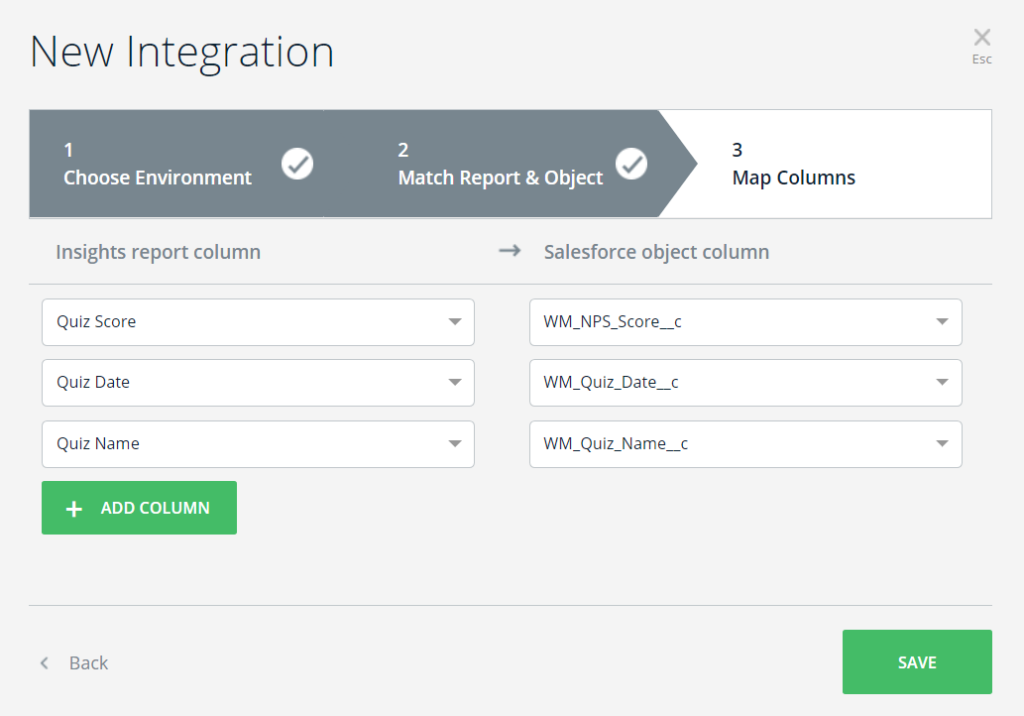
Step 6: Map Fields to Update in Integration Wizard
In this screen you will map which data from the source report will be updated in the Salesforce Object.
- Insights report column: Consists of all the fields found in the report, including the key field selected on screen 2
- Salesforce object column: Consists of all the fields of the selected object that are not already in use in screen 2 and correspond to the keys selected on screen 2
Click + ADD COLUMN to add another mapping of fields to objects.
To delete a row, hover over it and click X.
Click Save when you are finished.
Step 7: Execute your Integration
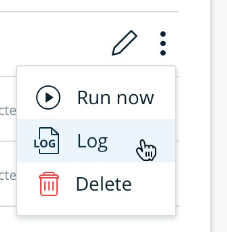
- Hover over the integration you just created and click the options menu

- Click Run Now
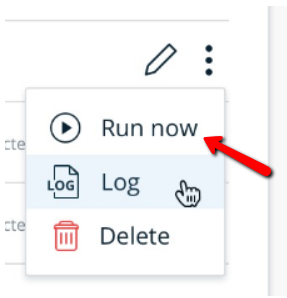
This will execute the integration and will attempt to push any relevant data to the assigned account.
If executed properly, both the log and grid will indicate the integration completed successfully.
Editing an Existing Integration
To edit an existing integration, hover over the integration in Insights and click Edit once the option appears.
The integration wizard will open on screen 3, allowing you to edit the integration mapping.
You can use the Back and Continue buttons to navigate between the screens and then Save once you are finished editing.
Logs
Whenever a sync occurs, a log is produced.
Click on the options menu that appears when you hover over an integration and then select Log to access it.
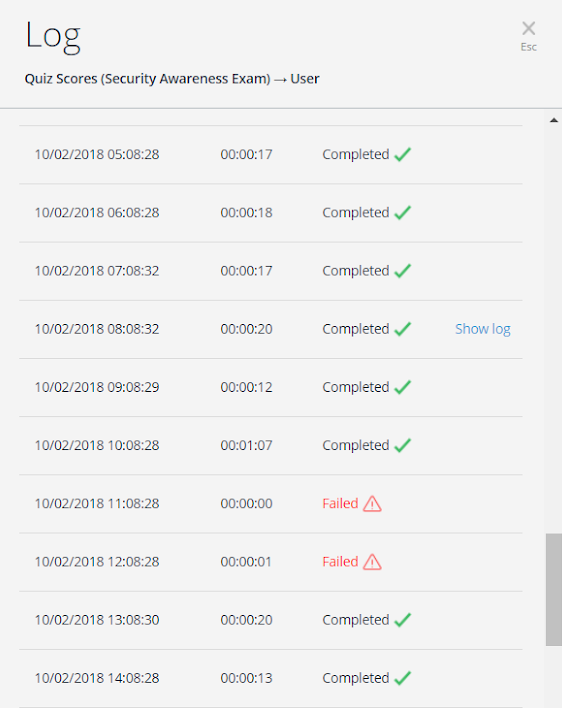
A window will appear where you can view the history of the data pushes made from WalkMe to Salesforce.
The log contains the following information:
- Report name: The name of the Insights report
- Salesforce object: The name of the connected Salesforce object
- Start date: The date and time of the run (UTC time zone)
- Runtime: The duration of the run (End Time minus Start Time)
- Status: The status of the run, Completed or Failed
Hover over a row and click Show log to view the original log with all details.
Use Cases and Examples
Keep track of onboarding
- Users who fail to complete onboarding or fall behind in training usually adopt software more slowly and use it less effectively
- Using the Data Integration Center, valuable onboarding insights will be shown directly in the CRM, triggering weekly discussions to share best practices and streamline the onboarding experience
Provide contextually intelligent survey reactions
- Identify users who respond favorably to NPS surveys and are likely to recommend the product
- Identify users who respond negatively to timely customer-service intervention, or have Gainsight automatically send an email inviting them to share their experiences
Prevent churn and convert leads
- Customer retention is the main success determinant of Customer Success (CS) teams
- WalkMe's Insights monitors usage indicators signs (for example, no software used in 30+ days, session duration average, failure to complete onboarding, etc.), and automatically triggers alerts pointing out likely-to-churn end-users
- Using the Data Integration Center, CS managers can now see these WalkMe alerts and data-points directly in the integrated platform, giving them a better chance to save an at-risk account
Use data for intelligent upselling
- Highly engaged end-users enjoying significant value from a software often signal upselling opportunities
- The Data Integration Center can tell customers' CS teams when end-users frequently use features subject to usage-caps or with available upgrades
- CS teams can also see if end-users have been reading about upgrade plans on the customer's website
- Using this data, CS can generate reports highlighting users who the customer's Sales team should contact to drive upsell opportunities