Brief Overview
Use the Data Integration Center in the Console to export WalkMe data from Insights into Salesforce. Once synced, the data is available for use in Salesforce workflows, reports, and activities. It can also be accessed by other tools that connect to your Salesforce environment

Access
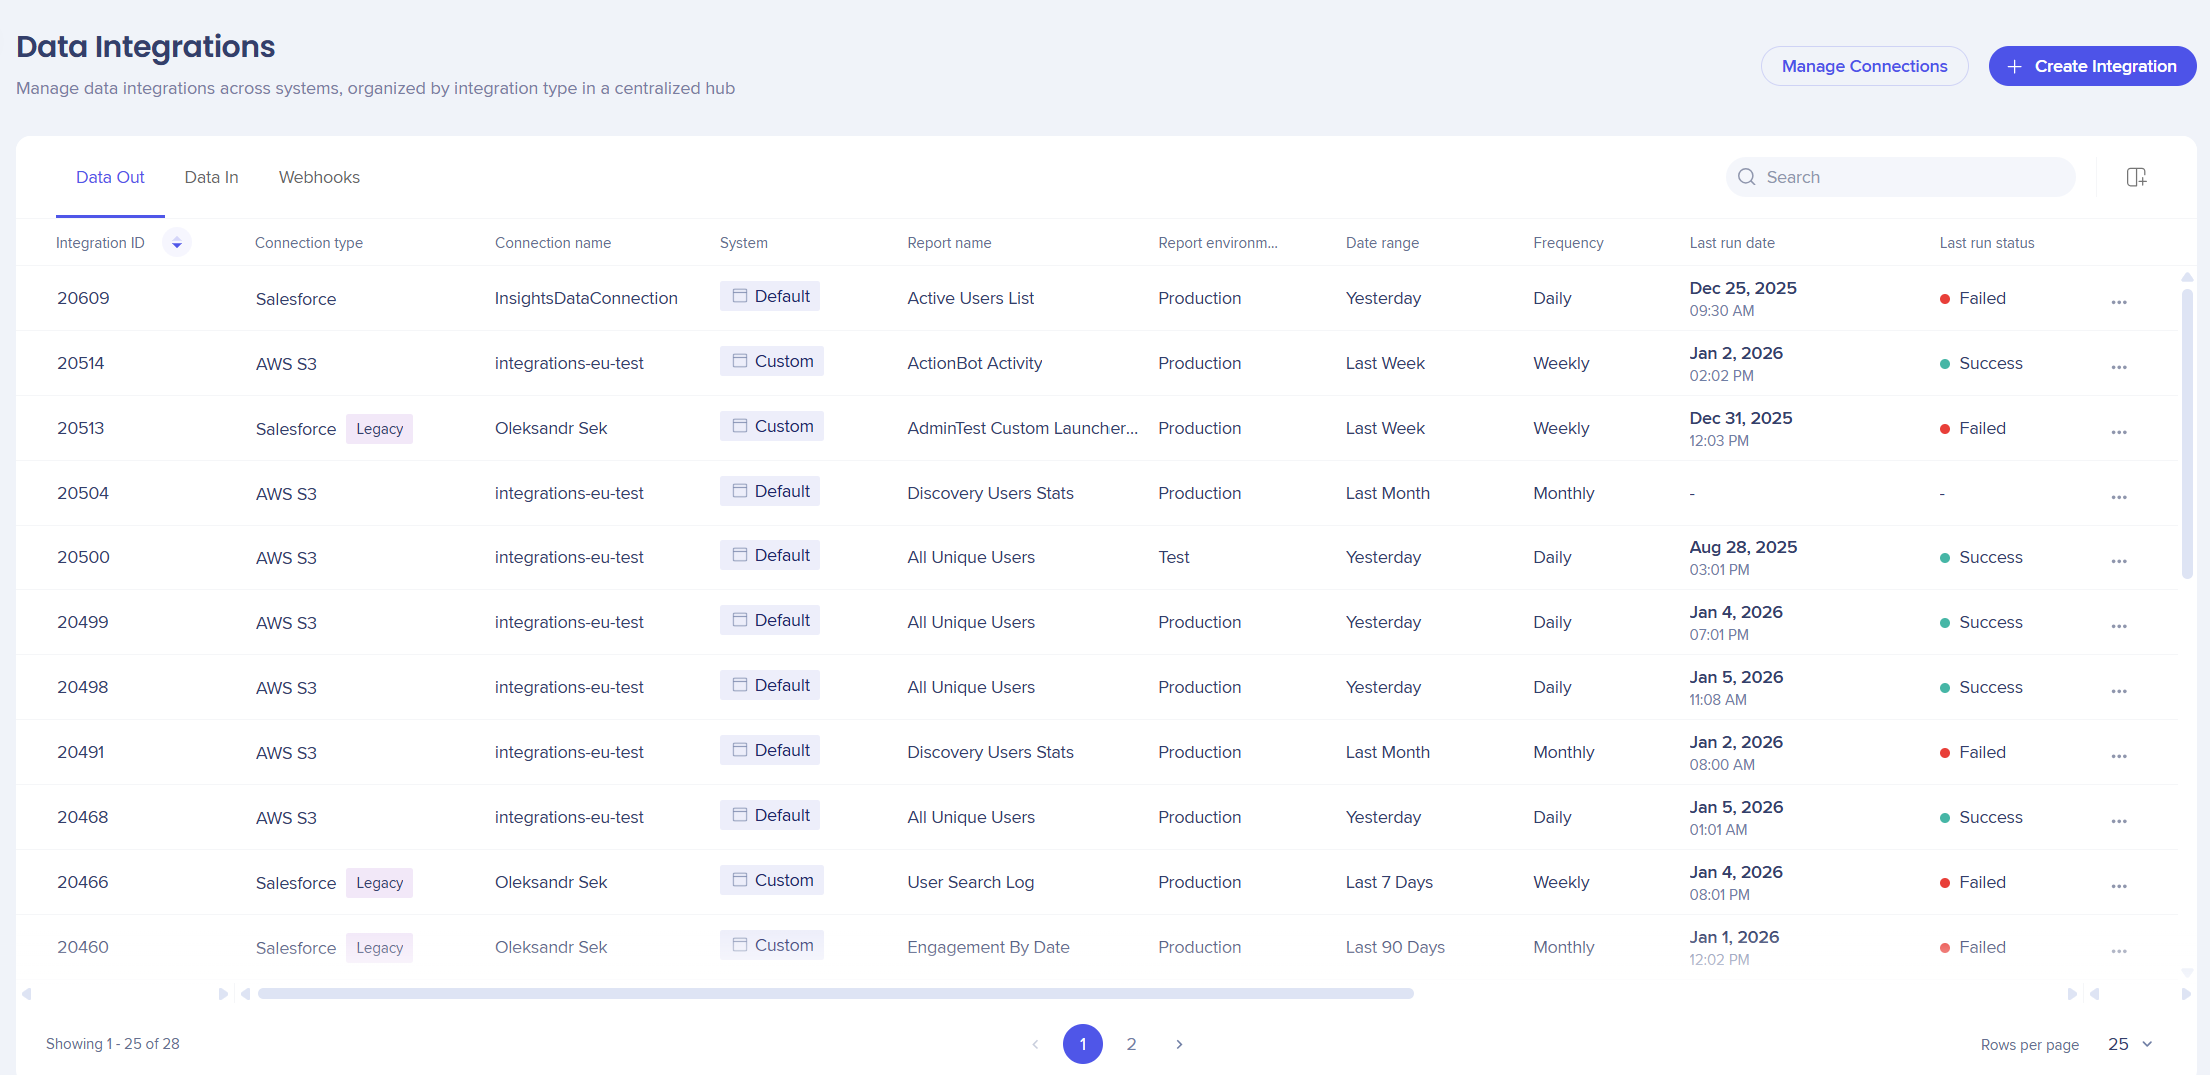
You can access the Salesforce Connections page from the Integration Center app in the WalkMe Admin Center.
Action Integration Center
How It Works
How to set up a Salesforce integration
- Navigate to the Data Integrations page in the console
- Select + Create Integration

Note
Systems are tagged lecacy if they are old or untagged for new
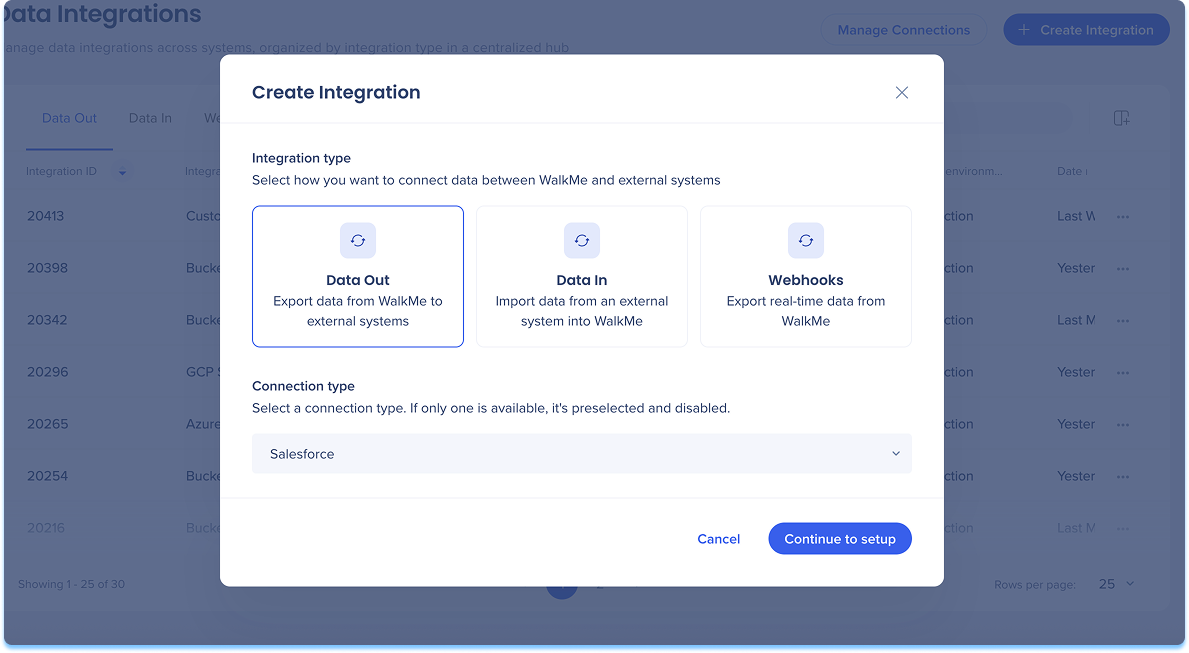
- A modal will open with the option to choose the integration type
- Choose Data Out
- Select Salesforce from the Connection type menu
- Select Continue to Setup
-
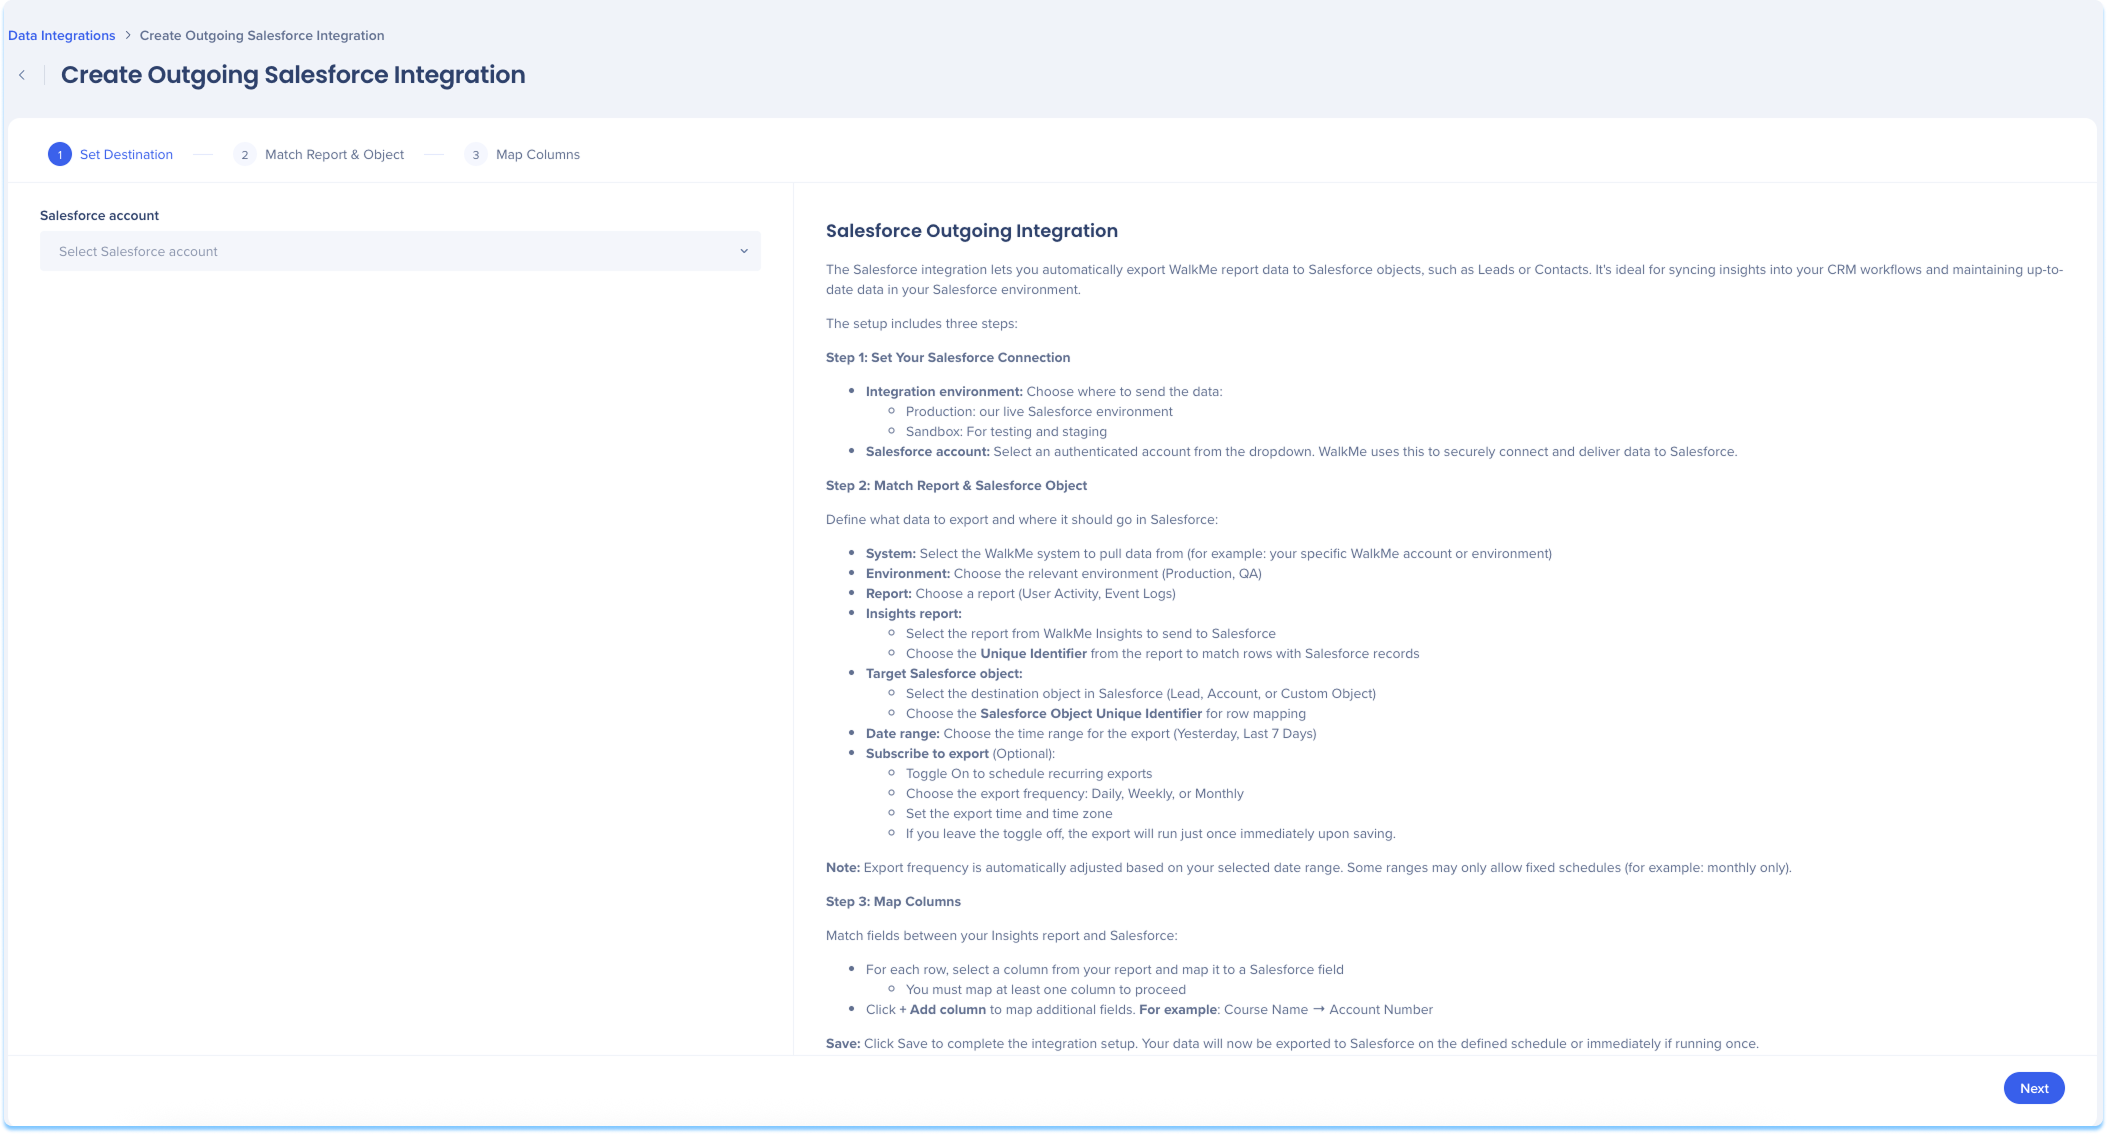
You'll be taken to the Create Outgoing Salesforce Integration page, which includes three steps:
-
Set Destination
-
Match Report & Object
-
Map Columns
On the right side of the page, you can view helpful setup instructions that explain each field.
Set Destination
-
Select the integration environment:
-
Production: Live Salesforce environment
-
Sandbox: Testing and staging
-
Select the Salesforce account you want to use to securely connect and deliver data to Salesforce. A dropdown gives you the option of legacy(old ) or new connection

-
Click Next
You'll see only the environments that are already connected.
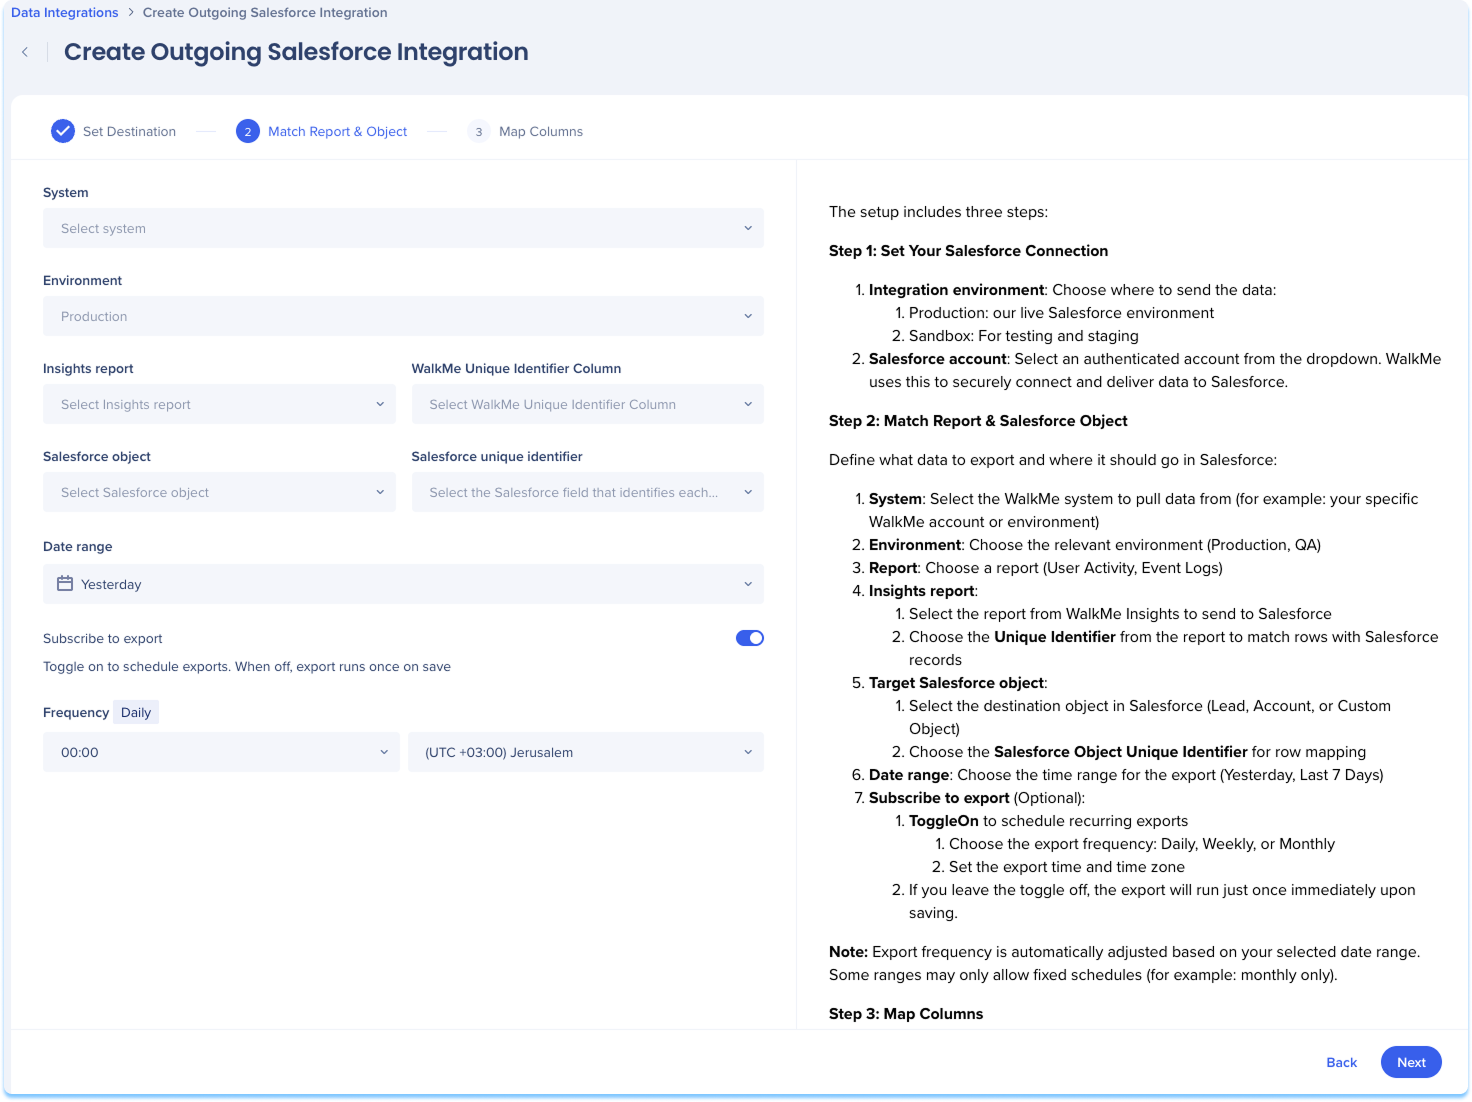
Match Report & Object
Use this step to define what data to export and where it should go in Salesforce:
-
Select the WalkMe system to pull data from
-
For example: Your specific WalkMe account or environment
-
Select the relevant environment (Production, Test)
-
Select the Insights report to send to Salesforce
-
Choose the WalkMe unique identifier from the report to match rows with Salesforce records
-
Select the Salesforce object to receive the data
-
Choose the Salesforce unique identifier for row mapping
-
Set the date range for data export
-
Optional: Toggle on Subscribe to Export to choose a frequency for automatic reports
-
Click Next
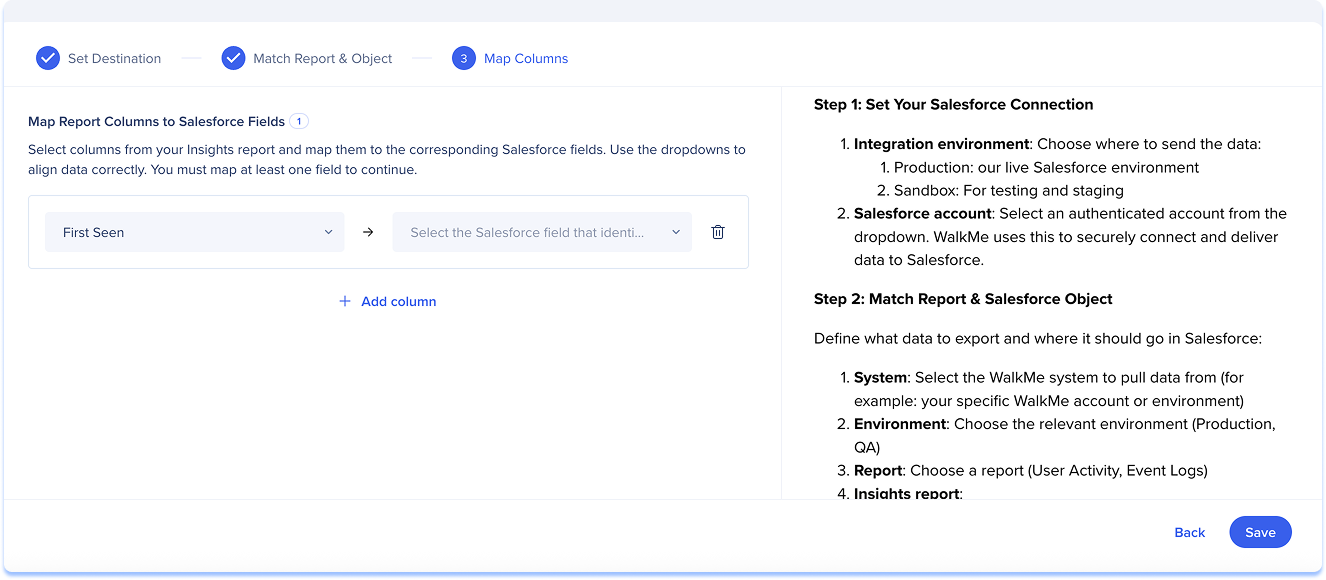
Map Columns
-
Select columns for your Insights report and map them to the corresponding Salesforce fields
-
Click Save