Brief Overview
Integrations in the Console
Incoming CSV Integration can now be accessed through the Console. Learn more.
Use an Incoming CSV Integration to create segmented, personalized experiences by pulling any data from a CSV file into WalkMe.
It is possible to connect any third party software that allows exporting data to a CSV file to WalkMe. The integration pulls attributes, syncs, and populates into WalkMe for content segmentation.
Use Cases
Target WalkMe content based on CRM attributes:
- Show a ShoutOut to "premium users"
- Show a Smart Walk-Thru to employees that are from the sales department
Target WalkMe content based on Customer Support / Success (such as ServiceNow, Zendesk) attributes:
- Show an NPS to all customers that opened more than 2 support tickets
Creating an Incoming Integration
- Open Insights Classic
- Go to the Integrations page
- Select CSV to WalkMe under Incoming Integrations

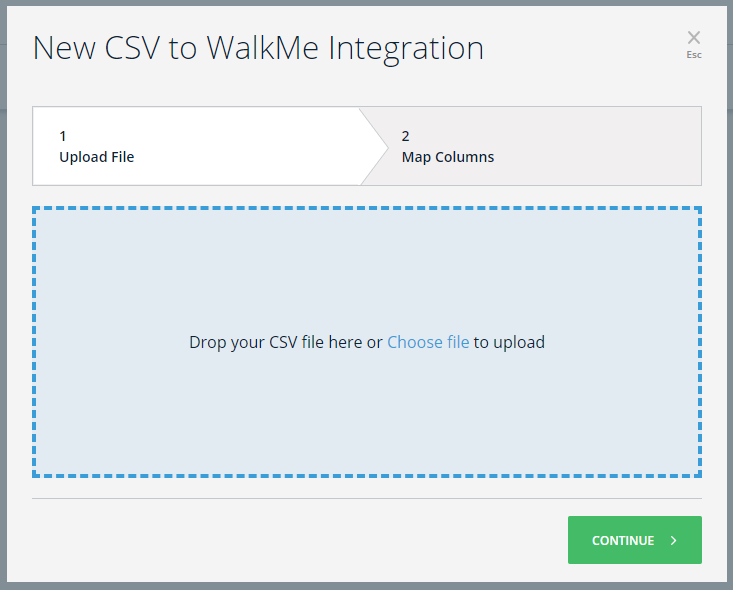
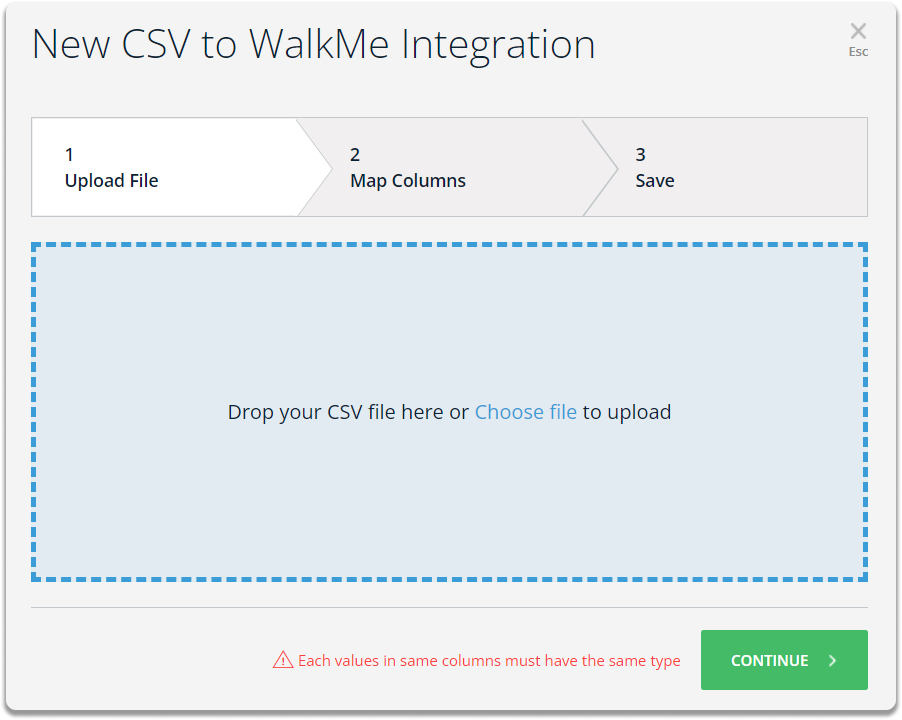
- Upload your CSV file to WalkMe
- Click Continue
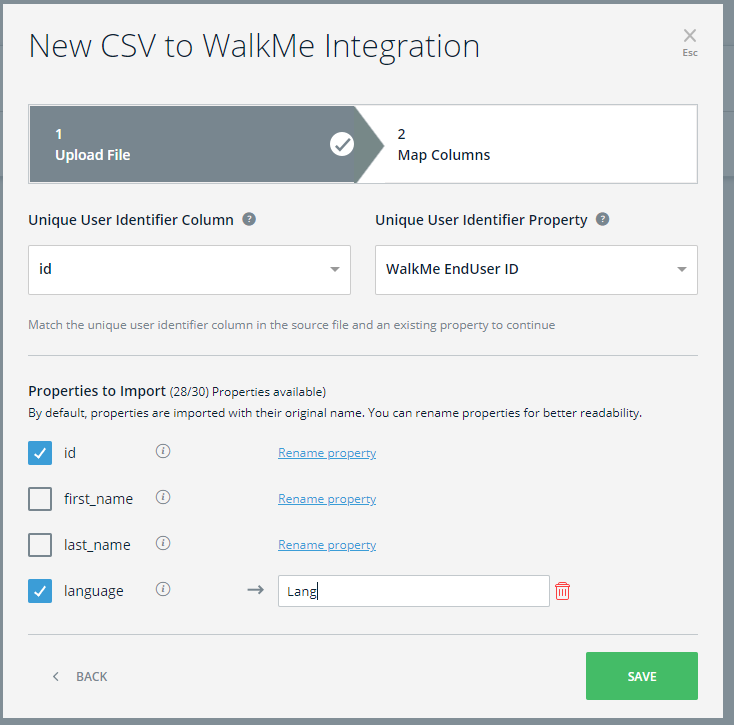
- Map the columns:
- Choose the column in the CSV fields that should be used to match the WalkMe end user identifier
- Choose the columns in the CSV you wish to import into WalkMe
- Click Save
The newly created integration will be available for use in the integrations management table.
The report will be sent in CSV format.
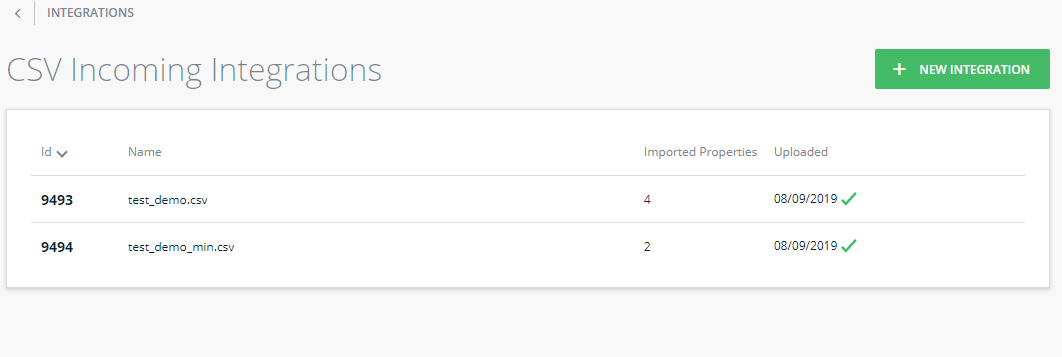
Integrations Management Table
From this table you can modify and delete integrations and see the following properties:
- ID: The integration ID
- Name: The name of the integration
- Imported Properties: Number of successfully imported properties
- Uploaded: The date the CSV was uploaded
- Checkmark or Red danger icon: Indicated whether the last run was successful or not
Segmentation Based on Incoming Integration Fields
After creating a CSV Integration successfully, perform a settings publish in the Editor to use the incoming data. You can then create targeted rules and segmentation for your WalkMe content.
- Select User Attributes → Name of attribute → desired value

Note
- You must enter your attribute name exactly as it was defined when creating the integration during the setup process
- We recommend publishing settings to a test system to remove any cached data from Preview mode to allow immediate testing of the integration in rules
Best Practices
- When completing the integration creation process, before targeting content in the editor, make sure that you have at least one successful integration "run" under Incoming integrations table
- When modifying an integration, changes will be updated immediately
- Less is more - be sensitive to the total number of attributes that you integrate to WalkMe
- A maximum of 100 attributes across all of the integrations is permitted
- After successful integration, you may need to close and reopen the Editor in order to see the updated fields in the segmentation editor
-
CSV File Examples
Every CSV file must contain at least two columns: one for the User ID and another for any additional attributes you wish to assign to users.
For instance, if you're including a column named "role," you must specify which user should receive that role. Conversely, if you only list the User ID, you need to indicate the additional attribute the user should receive.
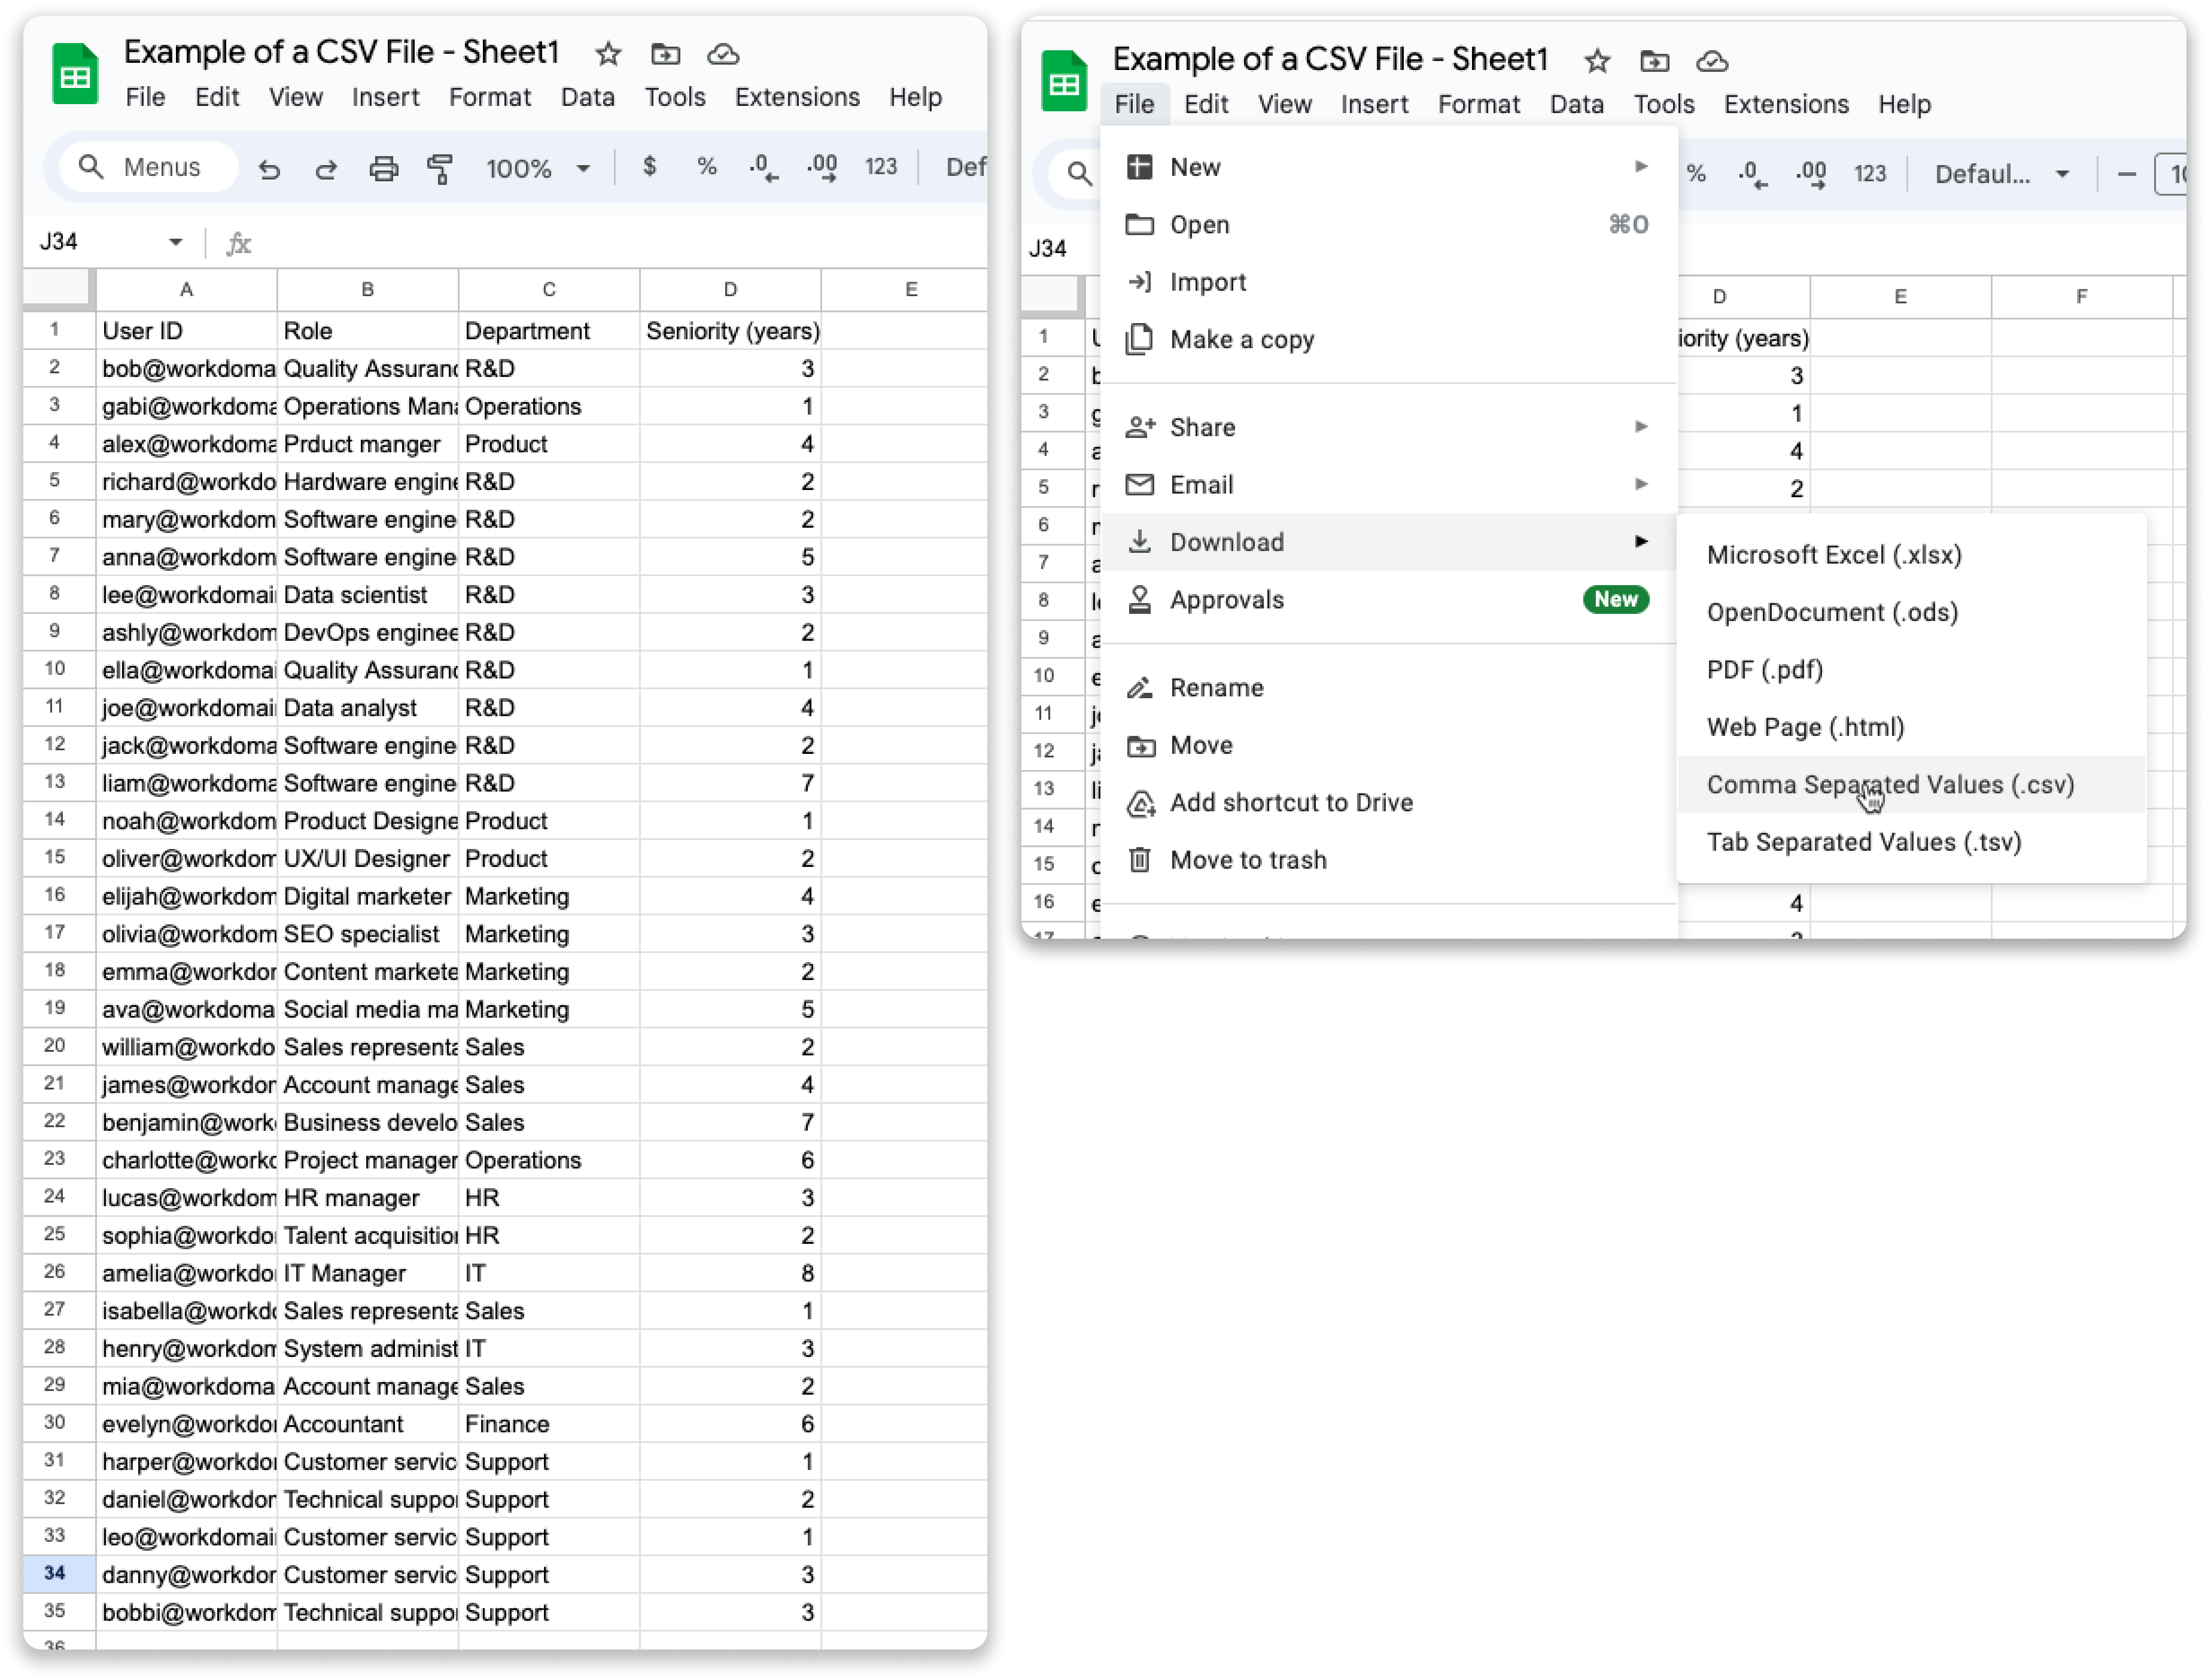
View the examples to understand how CSV files should appear in Google Sheets or Visual Studio Code.
Make CSV file via Google Sheets
Make CSV file via Visual Studio Code
Avoid CSV Error
To successfully import a CSV file, it is important for all columns to have the same data type. If a column has a combination of data types (ex numbers and text), and the first row contains a number, it will be identified as a "Number" data type leading to an error message "Each values in the same columns must have the same type". To avoid this error, the first row of that column should contain text, so that the column will be imported as "text/String" data type.
Technical Notes
- Please note that the integration data can take up to 48 hours to appear in Insights
Insights Data Availability
CSV file limitations:
- Only one sheet allowed
- Column names should not exceed 127 characters
- Data in any cell must be 2047 characters or less
- File should not exceed 1,000 columns
- No limit to the number of rows for the integrated file; however, file size is limited to 30MB
- The following characters are used for formatting and should not be included in the file:
- ∖n
- Note: Only applies to lowercase n
- "
- ,
- After uploading a CSV file, it cannot be downloaded