Brief Overview
This guide covers how to add and manage identity providers in WalkMe. For background on how IDP Integration works, supported protocols and vendors, and prerequisites, refer to the IDP Integration article before getting started.
IDP Integration
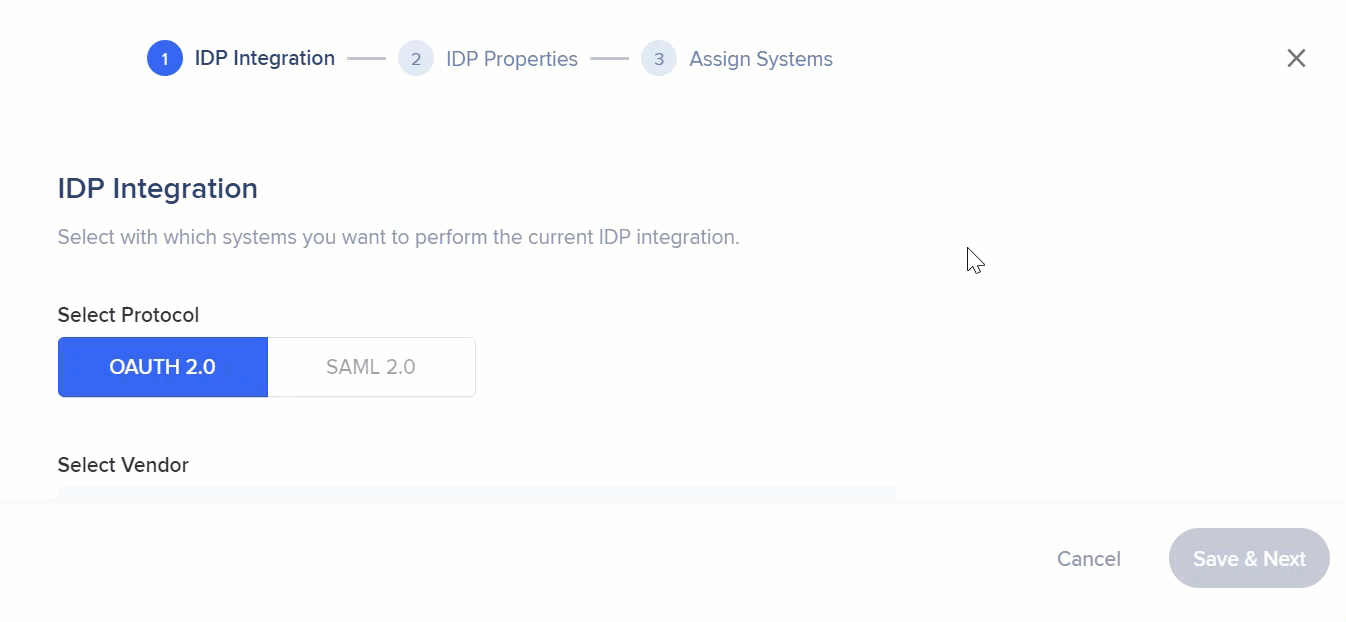
Add an Identity Provider
- Open the IDP Integrations page in the WalkMe Console
- Select + Add Identity Provider
- Select OAuth 2.0 as the protocol type
- Fill in the configuration settings for your IDP vendor:
- IDP vendor: Select a vendor from the list
- IDP name: Type a name for the connection
- Client ID: The public identifier for your application
- Client secret: The secret known only to your application and the authorization server
- IDP provider domain: The domain of your organization
- Seamless login on hidden iframe: Turn on this toggle to switch the hidden login flow from Ajax to iframe — required for identity providers that need redirects

Note
Fields vary depending on the IDP vendor selected.
- For OpenID Connect, fill in the following additional fields:
- IDP Provider Discovery URL
- IDP Provider Scope
- Content Security Policy
- Your IDP Provider
- Use ID Token For Getting End-Users Properties: Turn on to enable
- Select Save & Next
Note
A Sign Out URL is not required.
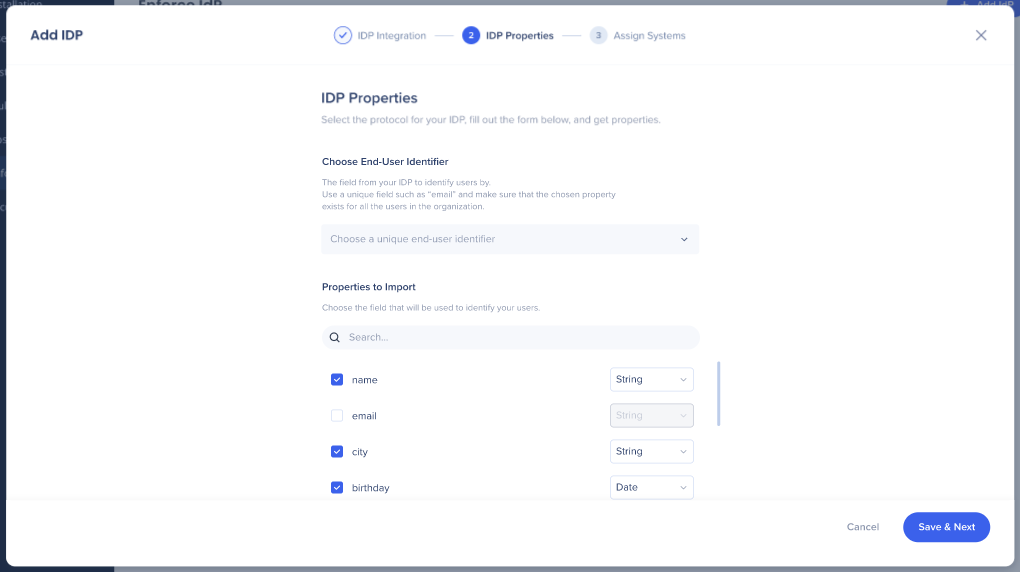
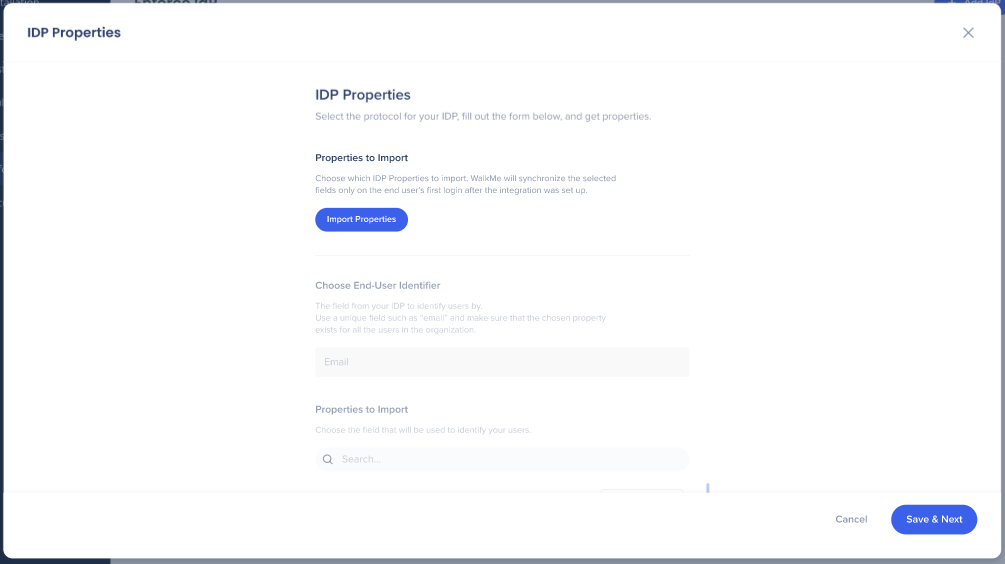
- Choose a unique end-user identifier to identify users by — one identifier is required
- Select the properties you want to import and confirm the correct data type for each:
- String
- Number
- Date
- Select the systems you want to assign the IDP Integration to. For each system, you can separately turn on IDP Integration for specific environments
- Turn on or off Enforce SSO — for details on how this affects user identification, refer to the IDP Integration overview article

- Select Finish
After setup, segment content using imported IDP attributes in Insights and in the WalkMe Editor as an IDP user attribute.
Segmentation
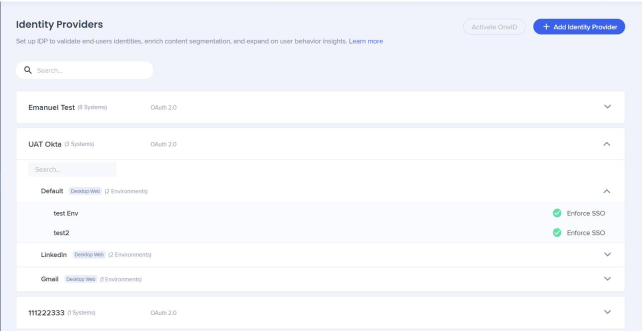
Manage an Identity Provider
To manage an existing identity provider, hover over its row in the IDP Integrations page to reveal the available actions.

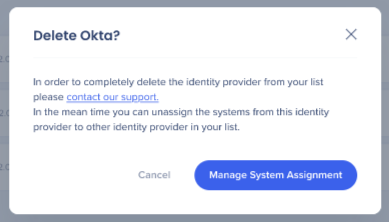
Delete
Select the trash icon to begin the deletion process.
Note
A complete deletion requires WalkMe Support. Before contacting support, unassign the identity provider from all systems using Manage System Assignment first.
Manage System Assignment
- Select the + icon to open the Manage System Assignment screen
- Select or deselect the systems to assign to the identity provider
- Turn on or off Enforce SSO for each system as needed
- Select Save Changes
Note
System assignment is not available for vendors with no imported properties. Import properties first before managing system assignment. After assigning systems, the UUID setting is automatically set to IDP and published.

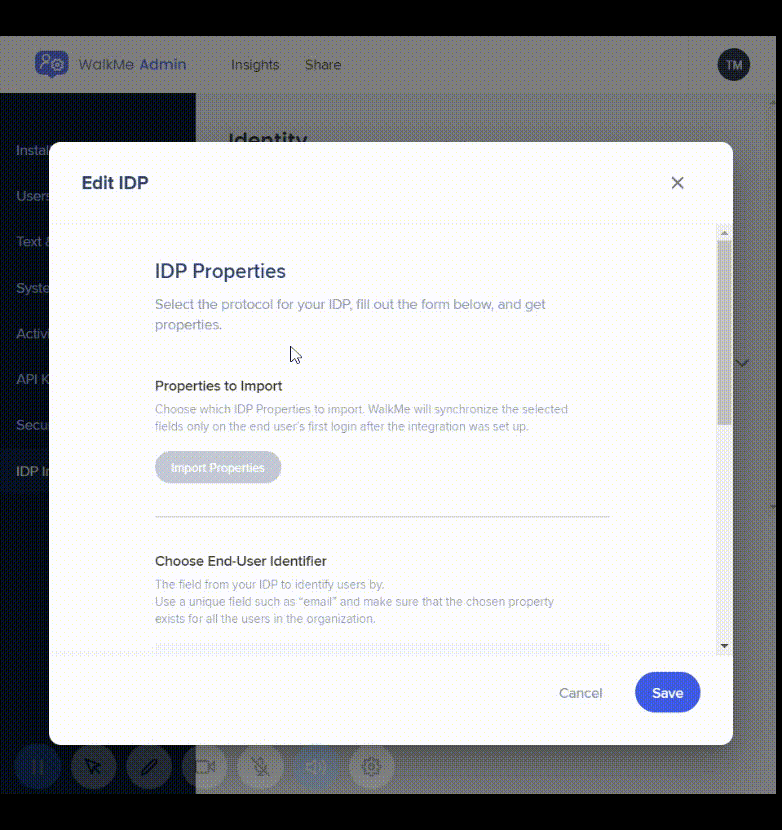
Import Properties
- Select the list icon, then select Import Properties
- Add or edit the attributes to import
These attributes are used for content segmentation and reporting in Insights.
Note
You must authenticate with a user that is assigned to the WalkMe app on the provider side.
Edit
Select the pencil icon to edit the identity provider's configuration settings. All fields from the initial setup are available to edit.
Note
Editing is not available for vendors with no imported properties. Import properties first.

Expand and collapse view
Select the arrow icon to expand or collapse the identity provider row. The expanded view shows all systems assigned to the identity provider and whether Enforce SSO is turned on for each.
Technical Notes
Property data types
The User Identifier field is always converted to String type, regardless of the data type selected.
To confirm a property's data type, hover over the i icon to see the value. If the selected data type doesn't match, an orange ! icon appears — select it to switch to the correct type.
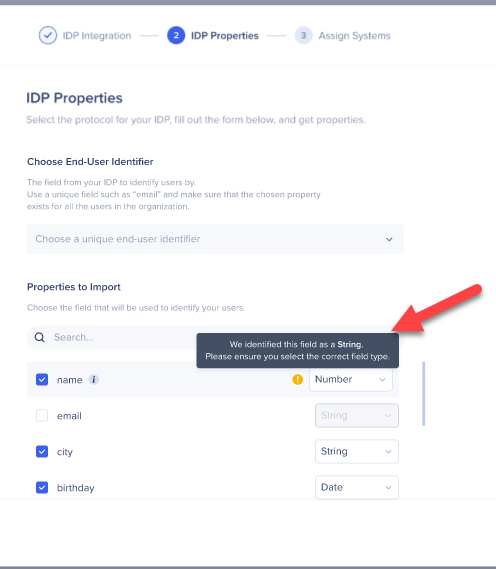
You can rename any selected property, view its original name and value, and revert it at any time.
UUID and system assignment
After assigning systems, the UUID setting for those systems is automatically set to IDP and published. No further action is required. The only way to change the UUID is to unassign the system from the IDP vendor.
Validating users in Insights
To confirm users are being identified correctly and that all requested attributes are collected, go to the Users page in Insights. Users appear in the table only after their session ends, so allow some time after setup before checking.
Insights Active Users Tab
User is not assigned
All users must be assigned to the WalkMe app in your IDP provider. Ask your IT admin to update the access settings for the WalkMe app to include all relevant users.
EUID was not found in the user profile
Either select a different EUID that is available to all users assigned to WalkMe, or add the missing EUID value individually to the affected users in your IDP provider.
Expired Client or Secret Keys
Recreate the key in your IDP provider, then update the new keys in the relevant IDP connection on the IDP Integrations page in the WalkMe Console.
Invalid Client or Secret Keys
Confirm you copied the correct keys from your IDP provider, then paste them into the relevant IDP connection on the IDP Integrations page in the WalkMe Console.