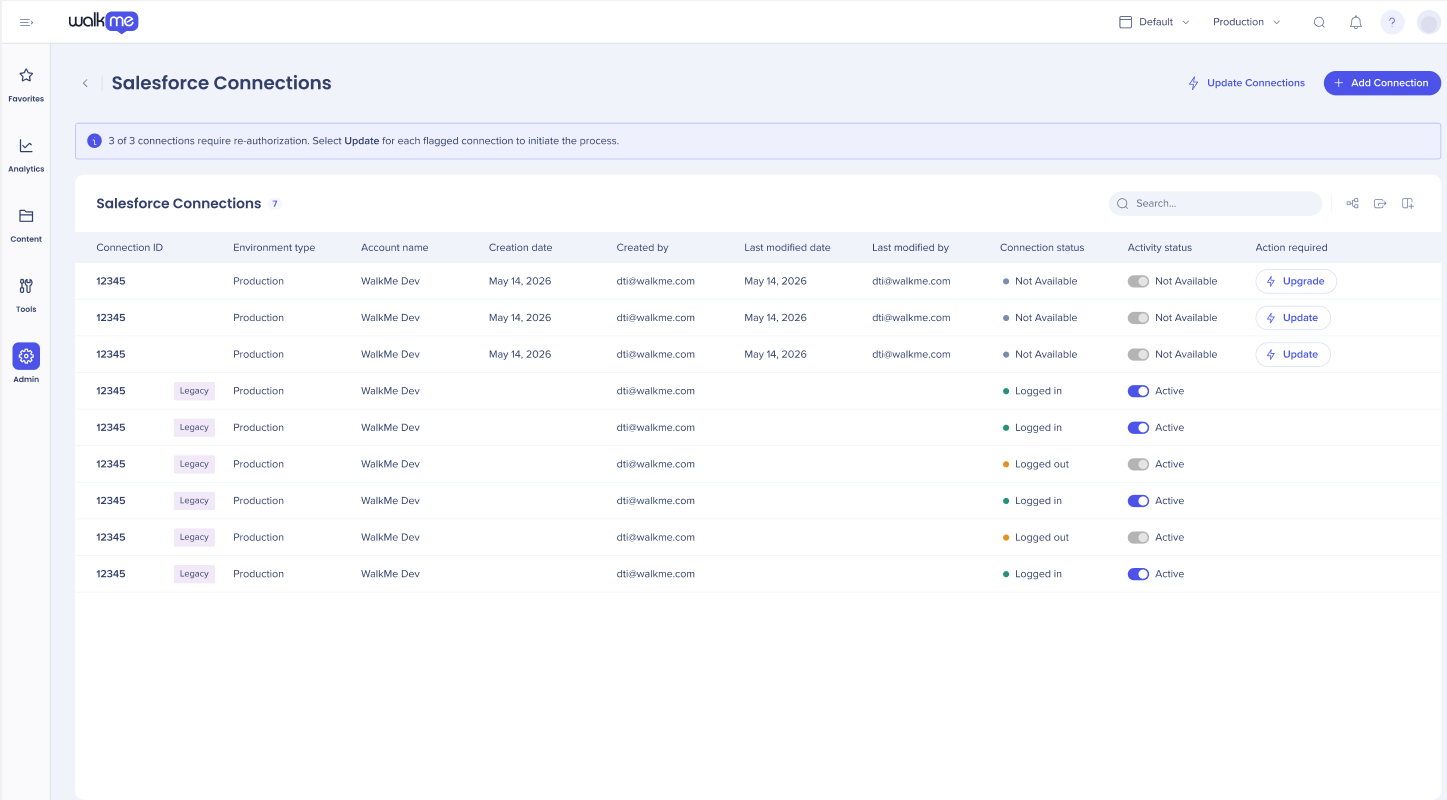
Brief Overview
When a Salesforce account is running on legacy infrastructure, it must be migrated using a third party framework.
WalkMe doesn't perform the OAuth re-authorization on the your behalf so the wiazrd offers an update flow. This flow is fully resumable, progress is saved at every step and offers you the ability to resume from the last saved state.
You will encounter the wizard at multiple entry points. The Integration Center, Insights or through Reports.
How It Works
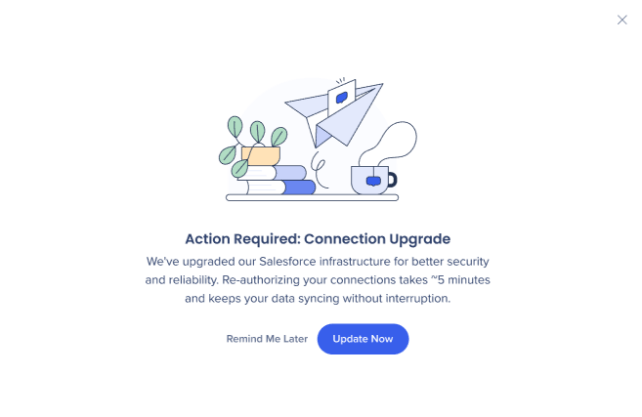
You will be offered the option to update your connections.
If you choose Remind me later the notification will keep displaying each time you will login to any of the entry points until the update process is started.
- Select Update Now to redirect to Update Connections
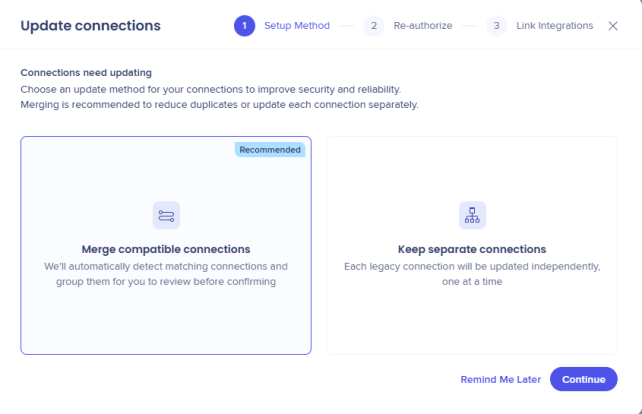
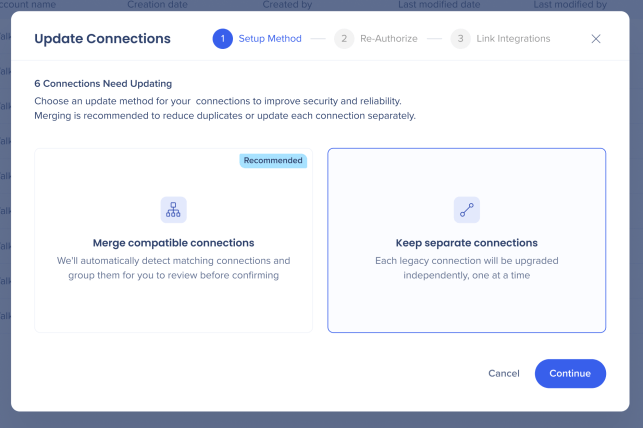
- You have the option to choose to update the connections either by merging them (reducing duplication) or to update them while keeping them separate
Note
Only users with multiple connections that are compatible for merging will be offered the choice of both options.
Notification
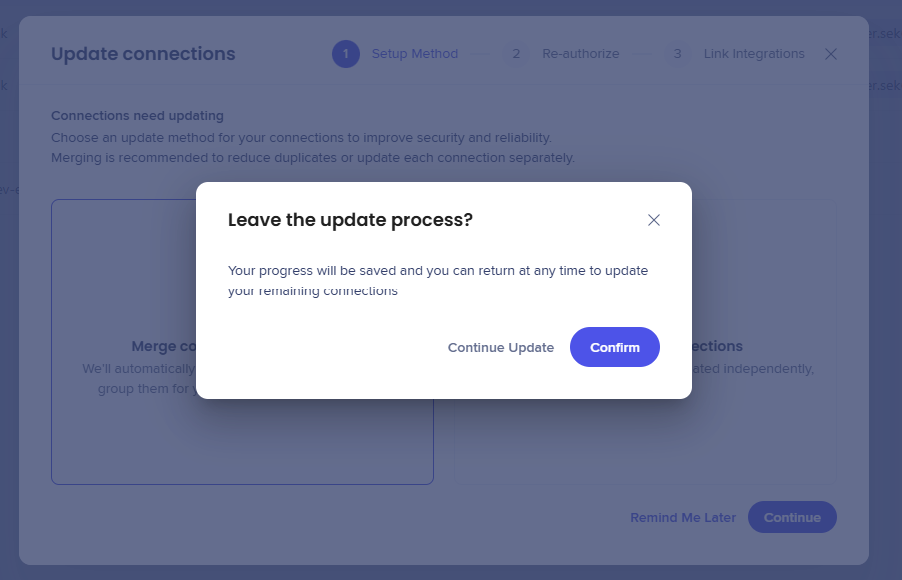
If a user attempts to leave the update process mid-flow, a pop-up will appear asking users to confirm. Once they confirm and exit, an informational banner reminds them they can finish their remaining connections at any time by selecting Update Connections in the header.
Merge compatible connections and update
When you have multiple legacy Salesforce connections sharing the Environment, Account and Login URL, the wizard offers to merge them into a single connection.
Tip
This is the recommended path
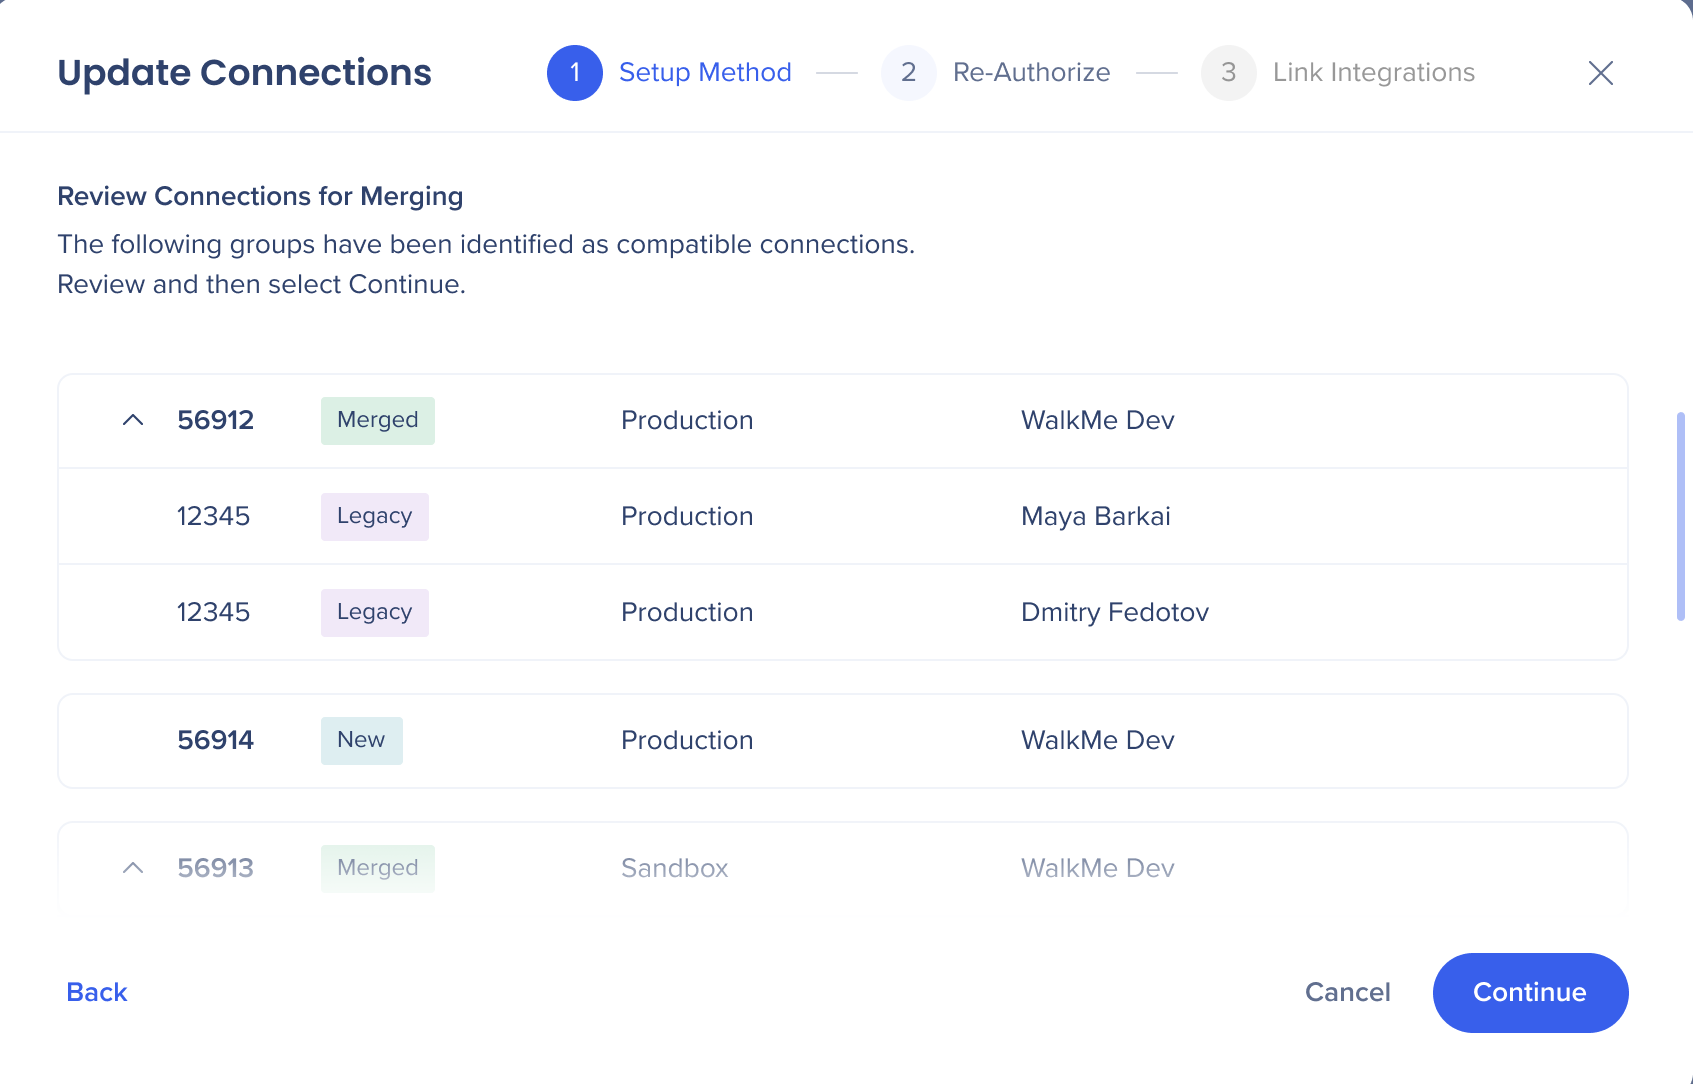
Step 1- Setup Method
- An Update Connections - Review Connections for Merging automatically displays the grouped connections
- Review the groups and select Continue (Recommended)
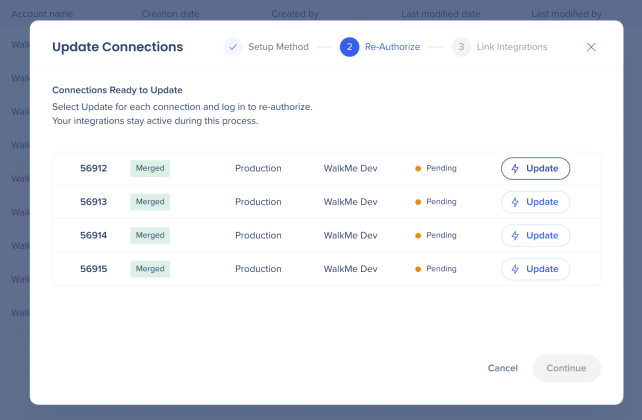
 Step 2 Re- Authorize
- The Re-Authorize step appears and shows the proposed merged groups, each showing connection ID, environment, and account name (which will initially display as Pending)
- Select a row (merged connection) and then Update
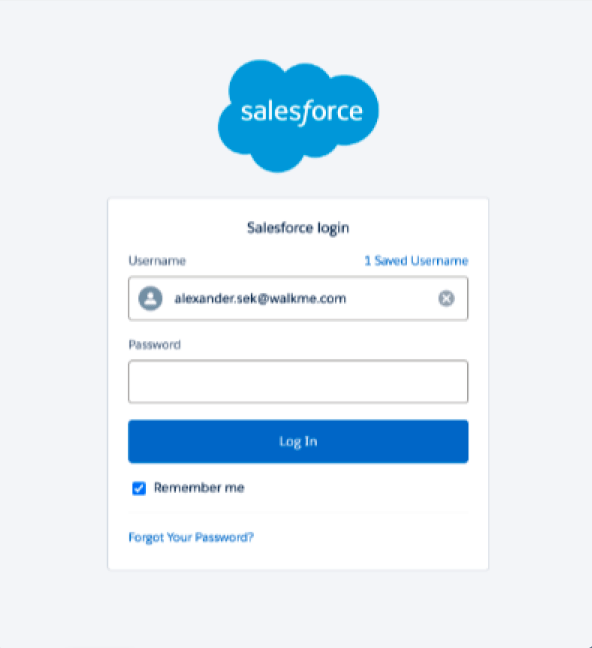
- The Salesforce login appears enter Username and Password
6. A success toaster confirms the update with the name of the migrated connection (for example; Connection<ConnectionID> reauthorized)
- When successefuly authenticated the pop up will close and connection's status changes from Pending to Complete
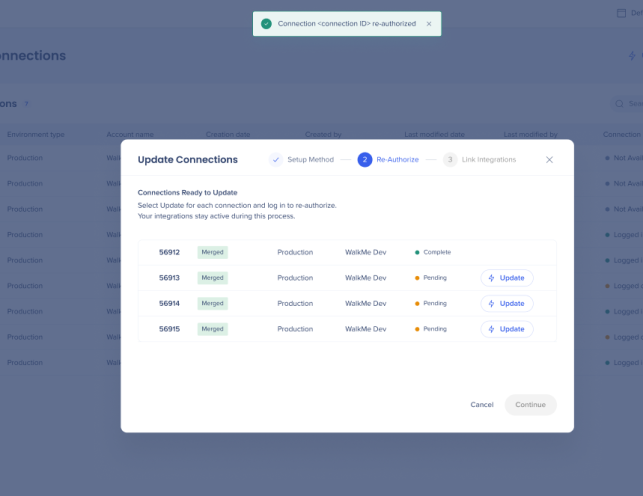
7. Each connection (row) must go through the same process until they all udpated
Note
It is recommended that all connections are updated however you can fully update one connection (minimum) and still proceed to the next step.
8. When all connections are successfully updated select Continue to move to step 3 Link Integrations
Step 3 - Link Integrations
9. Select Link integrations automatically (Recommended) and Continue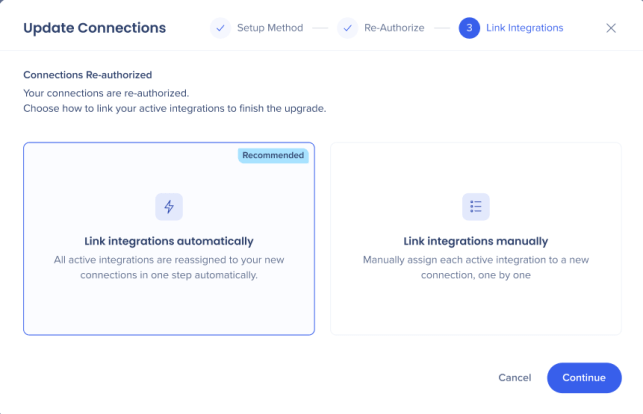
Note
The system automatically maps all existing integrations to the new connection ID without requiring manual user intervention for each integration.
Note
If the user selects Link integrations manually - NOT RECOMMENDED- the user will need to follow the manual mapping flow (details below).
10. Update Complete appears, select Review the Integrations, x or Done & Close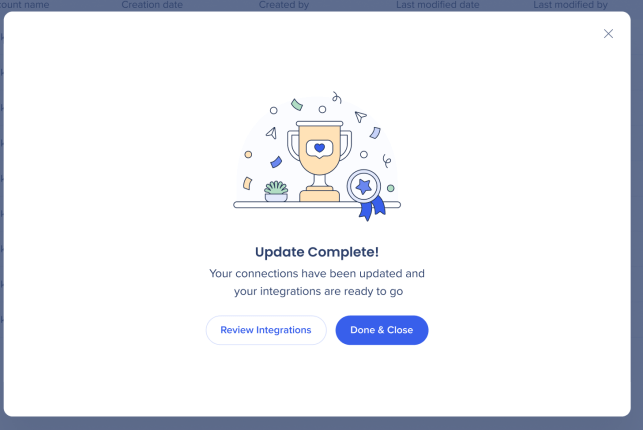
Note
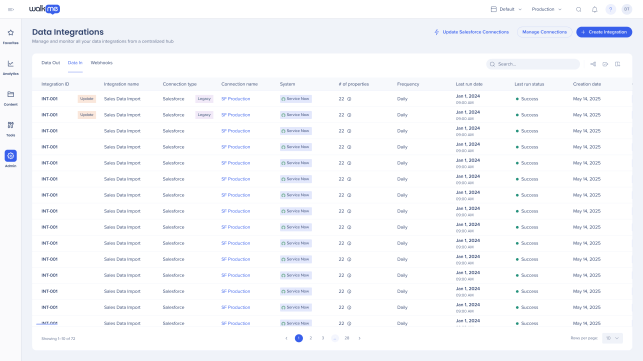
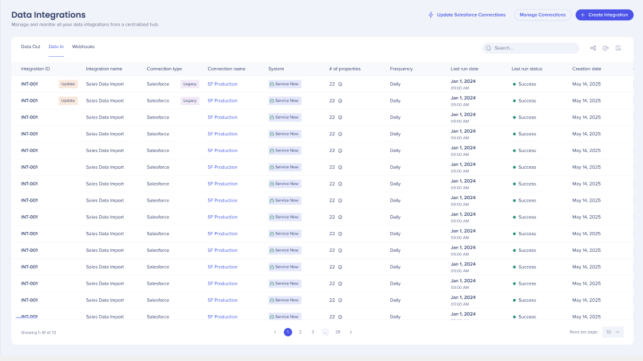
If auto-linking partially fails or linking is manually, a popup displays showing the count of unlinked integrations. Affected integrations are flagged Update in the Data Integrations table.
Keep separate connections
You can choose to update each connection separately although it is not recommended for efficiency and technical reasons.
- From the Update Connections select Keep separate connections and Continue
- Update Connections dispalys step 2 Re-Authorize with all the connections showing a New tag
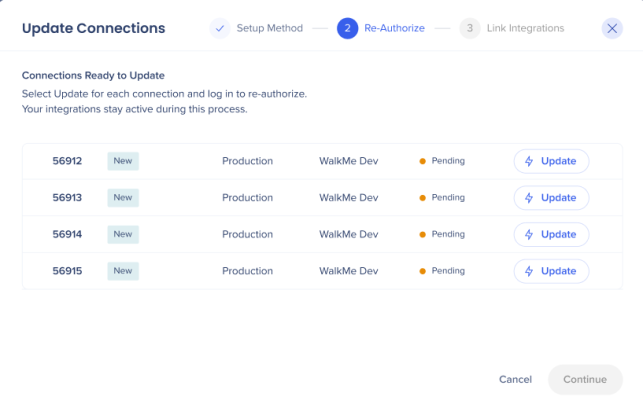
- Select a row and Update
- In the Salesforce login enter Username and Password
Step 2- Re-Authorize
5. A success toaster confirms the update with the name of the connection (for example Connection <connectionID> reauthorized)
6. Each connection (row) must go through the same process until they are all updated
7. When all connections are updated successfully, move to step 3 Link Integrations
8. Update Complete appears, select Review the Integrations, x or Done & Close
Step 3- As for merged connections
Standalone Connections
This flow can be used for:
- Accounts with a single connection
- Connections that are not compatible for the merging option
This update flow only has 2 steps:
Step 1 - Re-Authorize
- Update Connections dispalys Re-Authorize with the connection showing a New tag
- Select a row and Update
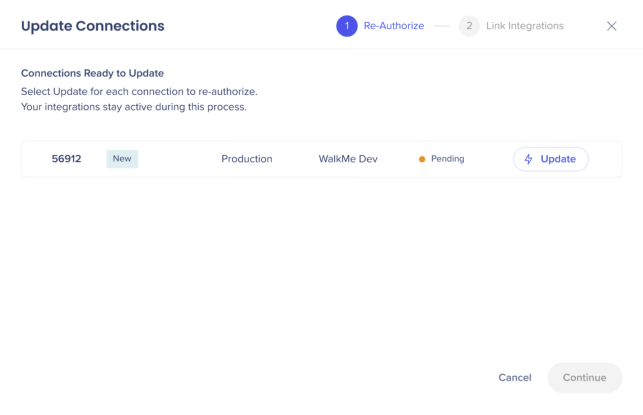
3. Salesforce login appears, enter Username and Password
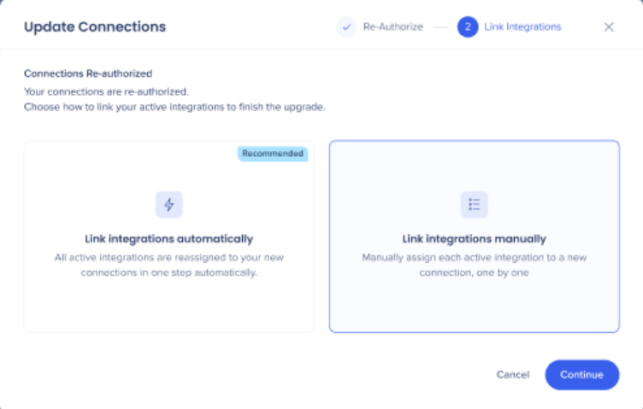
3. A success toaster confirms the update with the name of the connection (for example Connection<connectionID> reauthorized)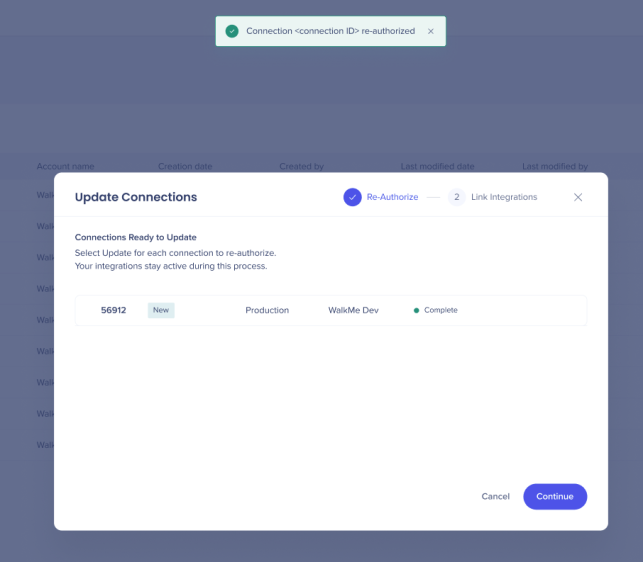 4. When the connection is updated successfully, choose either Link integrations manually (see below) or Link integrations automatically
5. Update Complete! appears, select Review the Integrations, x or Done & Close
Step 2 - Link integrations manually
- As a fallback option the user can select I'll link manually and Continue
- This takes them to the Data Integrations page, where they must select a row and Update to link manually. The Update Connection window re-appears on the next visit if manual linking is not completed
- A success message displays for each completed integration
Note
If auto-linking partially fails, the pop-up re-appears showing the count of unlinked integrations. Affected integrations are flagged Update in the Data Integrations table.
Partial completion
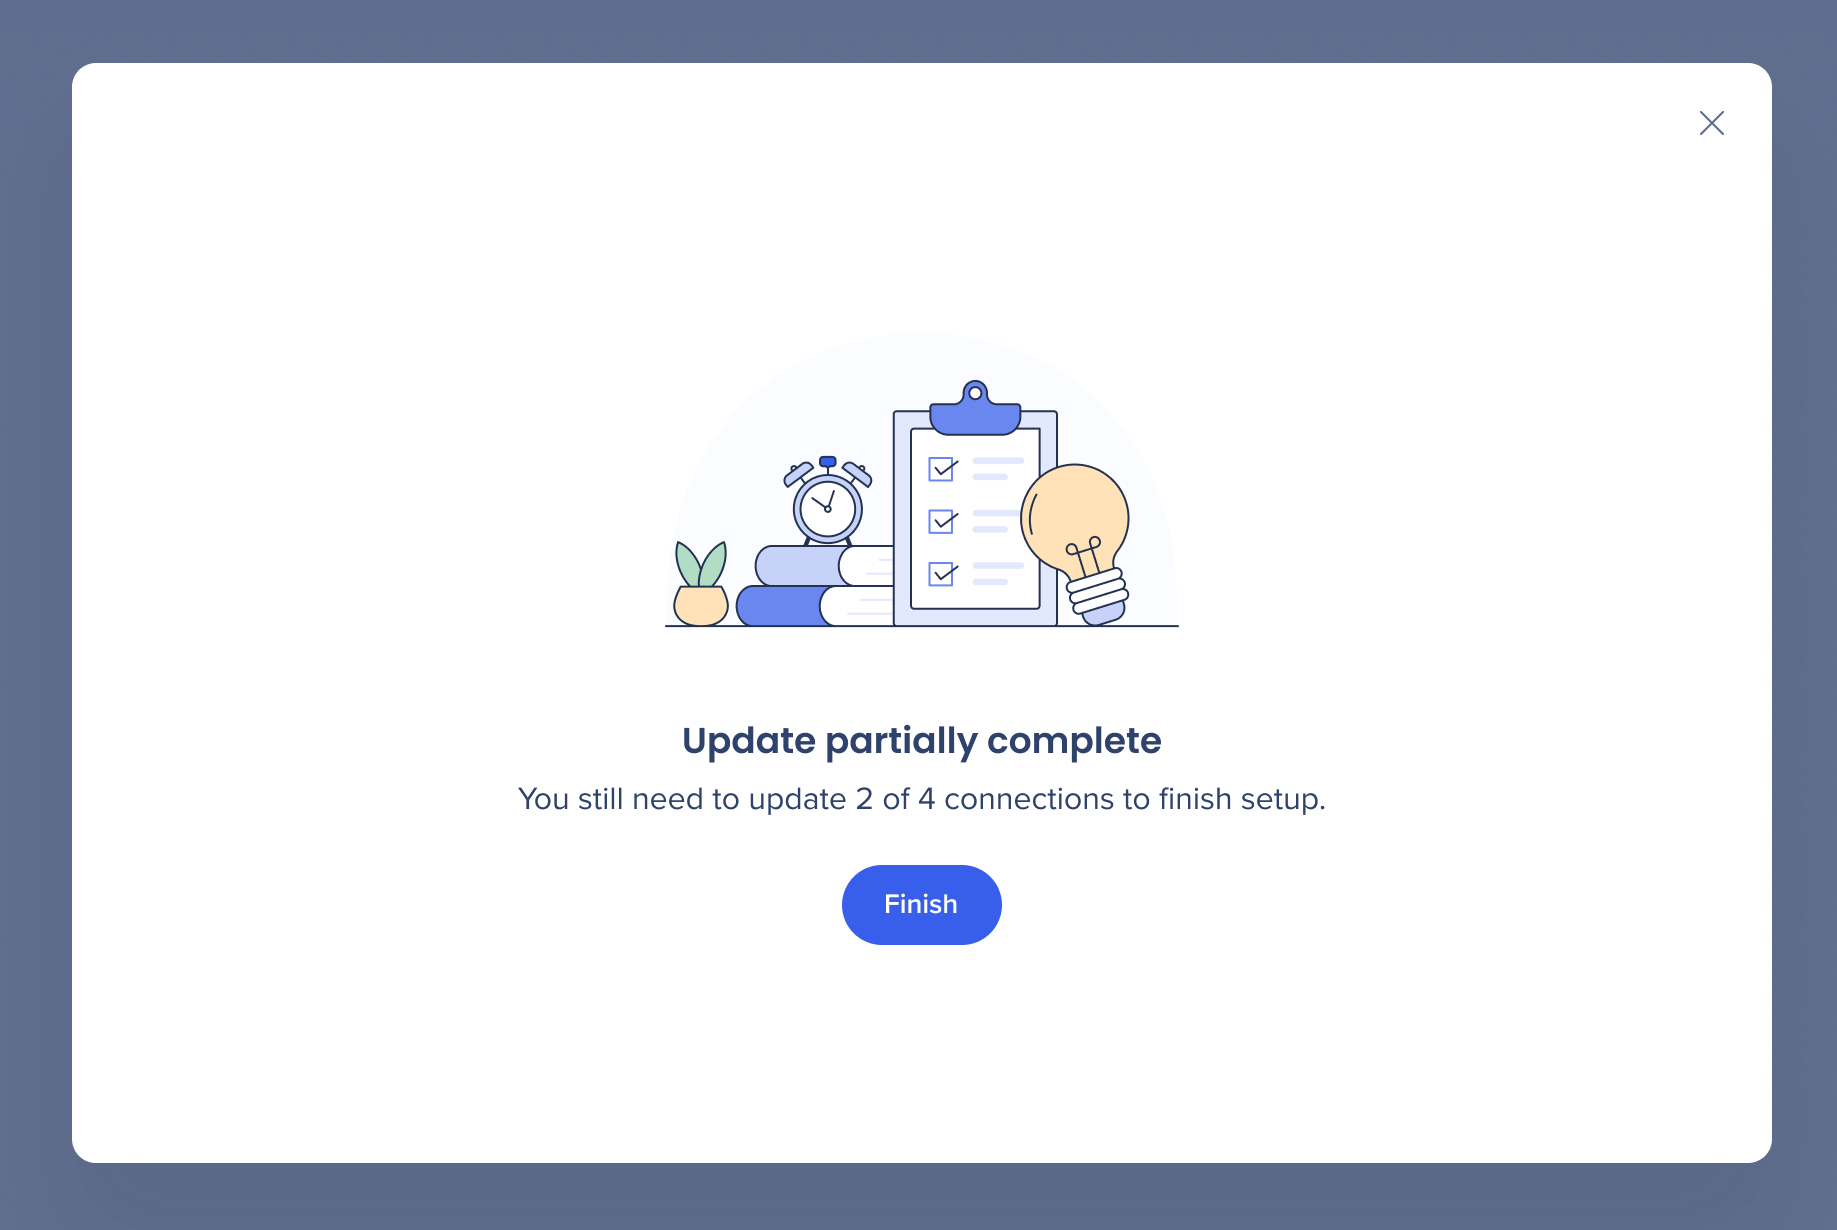
For all flows if at Step 2 all connections are not fully updated and the whole process not successfully completed for all connnections two options are offered dependant on the circumstances.
Finished Flow (Partial Success)
- When the user completes the entire wizard (reaches the Step 3 success pop-up) for at least one connection but leaves others pending or failed
- The wizard closes permanently, and the Update Connection button is not displayed
- Remaining connections must be updated manually from the Salesforce Connections page, and the new connection must be manually updated for each integration in the integration page
Abandoned Mid-Flow (Interrupted Session)
- When the user exits or leaves the wizard before completing all the steps
- The session is saved, allowing the user to return to the wizard at the exact step they left off
- Connections can be updated either by completing the resumed wizard or manually from the connections page