Overview
Smart Walk-Thrus provide step-by-step on-screen guidance through a process using balloons to guide the user. This article will guide you through the basics of building a Smart Walk Thru. For introduction to Smart Walk-Thrus see this article:
Smart Walk-Thrus
Watch this short video from the Digital Adoption Institute to get started:
🎓 Digital Adoption Institute
Create a Smart Walk-Thru
- Open the webpage you want to create your Smart Walk-Thru on
- In the WalkMe Editor, click + Add and select Smart Walk-Thru
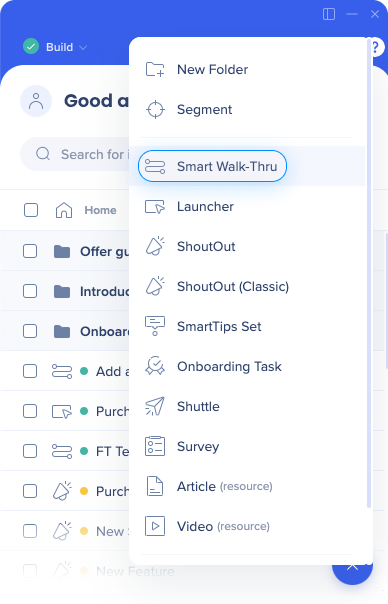
- Give your Smart Walk-Thru a name and click Continue
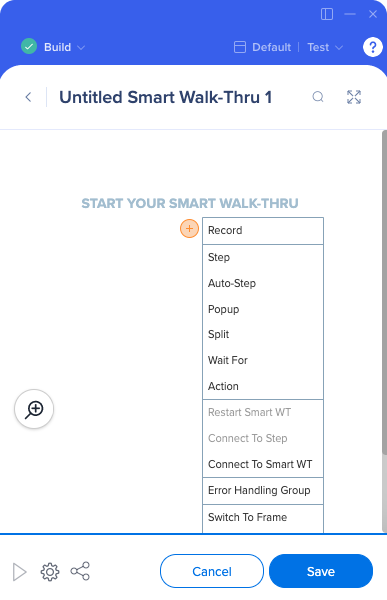
- Hover over the + Add and select Step
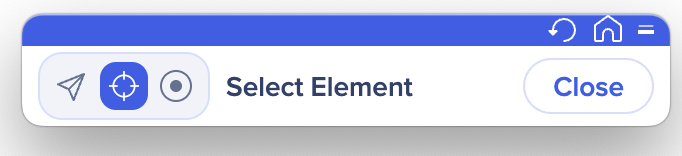
- Select an element on screen for your step: Click on the element highlighted by a blue box
- Configure the step balloon:
- Title and body text (optional): Appear inside the balloon and provides the user with instructions
- Add note: Will appear in the editor and will only be visible to other WalkMe builders
- Triggers: Triggers are the actions that activate the next step. Learn more
- Step position: Move the position of the balloon
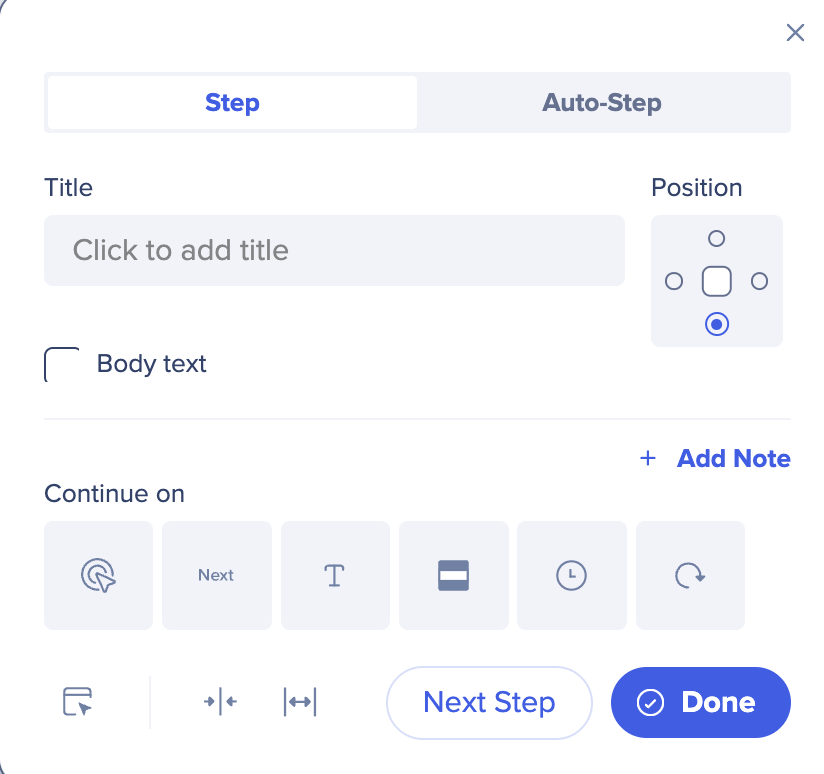
- Continue adding steps: Once the first step has been configured, click Next Step to return to capture mode and capture additional steps
- Click Done
- The WalkMe Editor will now reopen and you will see all the steps you just created
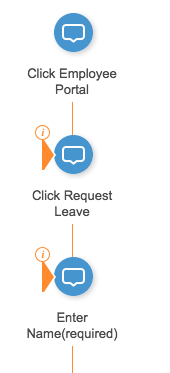
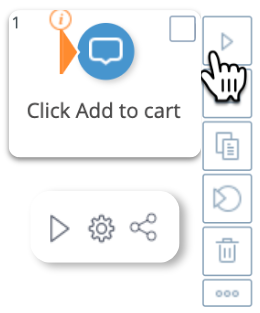
- Steps will appear as blue balloon icons in the step list. When you hover over a balloon, you will be able to play the Smart Walk-Thru starting from that step, view a screenshot, duplicate, delete the step, or add a start point or peer step.
Tip
To quickly build your Smart Walk-Thru steps, press CTRL/CMD to toggle between select element and navigation. This way you can interact with the page to navigate to the next element that you want to add to your Smart Walk-Thru.
Initiators and End Experience
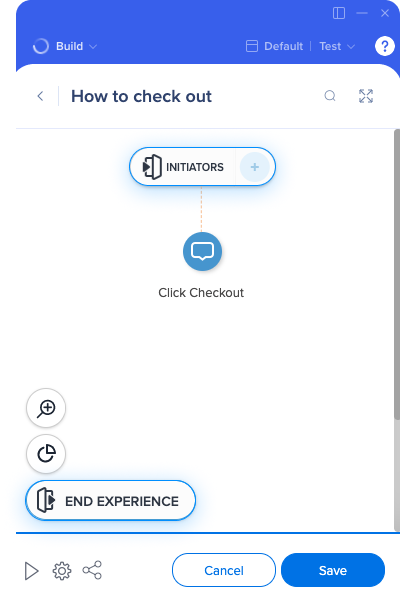
Initiators are how users access the Smart Walk-Thru—whether through launchers, or other Smart Walk-Thrus. The End Experience lets you add a survey so users can tell you what they thought of the experience.
Initiators and End Experience Panel
Add Start Points
Users may be mid-process when they initiate a Smart Walk-Thru. Use start points to ensure the flow begins from the correct step rather than the beginning.
- Any step can be a start point
- Start points are evaluated from the bottom up
- When possible, combine URL rules with on screen element for stronger performance and accuracy
WalkMe automatically pre-fills the rule engine to help you define start points efficiently.
Start Points
Add Goals
Goals help you track whether your Smart Walk-Thru is successful.
There are two types:
- Main goal — tracks whether the user completes the entire process
- Milestones — track progress through key moments in the flow
Use a combination of URLs and element rules to define accurate goals and milestone conditions.

Goals
Customize Smart Walk-Thru Steps
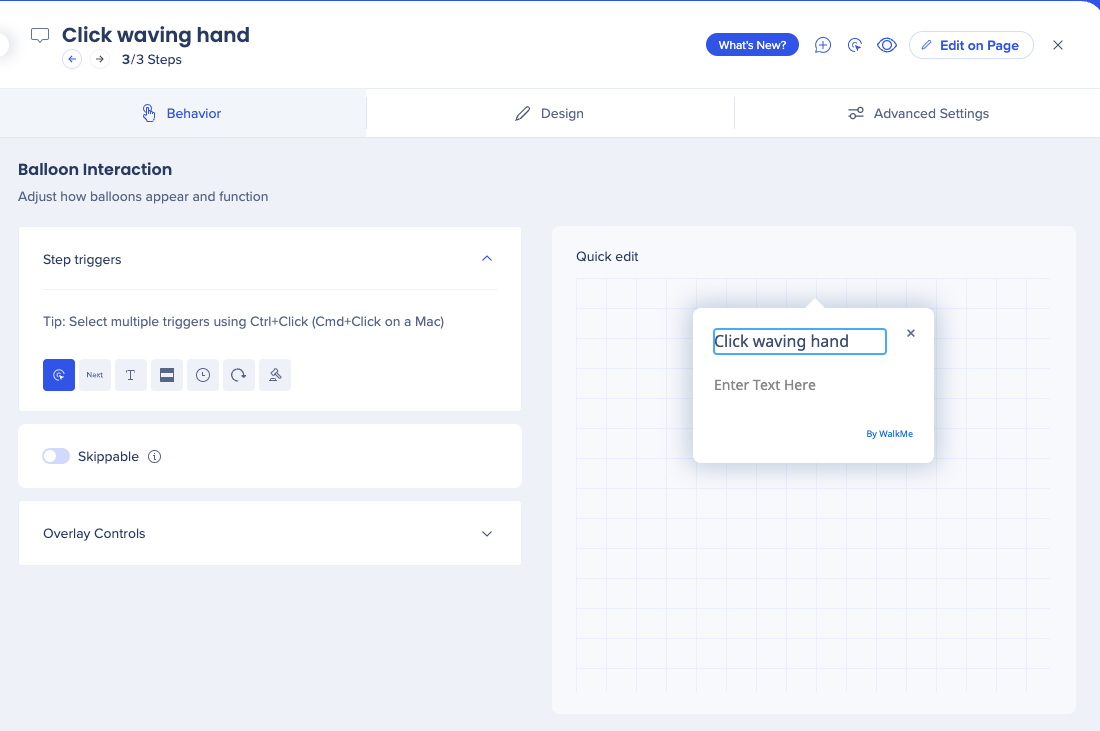
To modify a step or popup step after creating it, click on it to open the step settings.
Step settings
In the Behavior tab, you can select the step triggers and set the position of your balloon on screen (Overlay Controls).
You can use Edit on Page to edit directly on the page.
Design
In the Design tab, you to easily change the look and content of your balloon and see the results instantly.

- Font size
- Bold/Italic/Underline
- Font color
- Text alignment
- Add link: Add a URL hyperlink
- Add bulleted list: Add bullet points to a list of items in the text of the balloon
- Add Smart Walk-Thru link: Creates a link that launches another Smart Walk-Thru
- This link will stop the current Smart Walk-Thru and launch the linked one. In order to link to a Smart Walk-Thru, the linked-to Smart Walk-Thru must have already been created and have a Walk-Thru ID
- Add image
- Adding a new image can be done by uploading an image from your computer, or inserting its URL (in which case, the image must be hosted online before it can be inserted)
-
- Supported file types include JPG, JPEG, PNG, GIF
- The maximum file size is 500KB
- Uploaded images are hosted on a dedicated bucket in Amazon S3
- Image width and height from URL are adjusted automatically to the balloon or ShoutOut size automatically, keeping the original image aspect ratio
- You can adjust the image's width and height if needed by double-clicking on the image to edit
- You can use "Lock Aspect Ratio" to lock the aspect ratio so that it remains in the same ratio when resized
- You can remove the image by clicking on the trashcan icon next to the image URL, or by deleting it using backspace or delete while editing the text in the text editor
- BBCode format: [img]img_URL[/img]
- BBCode format with width and height: [img=widthxheight]img_URL[/img] (e.g., [img=40x24]img_URL[/img]
- Add Video: Enter a video URL into the corresponding video platform
- Videos can be played from any platform as long as they are in MP4 format using an iFrame (see BBCode in the table below). Enter width and height if needed
- Add iFrame: Load a webpage in a frame
- Add Dynamic Text: Add dynamic text, such as a user's actual name, in a balloon
- BBCode: Format the text using BBcode
- From the preview balloon, you can edit the following:
- Title: Edit the main instruction for the user
- Text: Include additional instructions or details for the step if desired
Advanced settings
Settings in this tab help you see if the element you captured is present on the current page and includes settings that can be used to customize the way WalkMe identifies it.
Advanced Settings
Preview and Publish
You can preview a Smart Walk-Thru by clicking the play button in the step flow. You can also preview individual steps by hovering over the step and clicking play.
Previewing WalkMe Content
Note
Smart Walk-Thrus can't play at the same time. If two items of the same type (aside from Smart Walk-Thrus) have the same auto-play conditions, they will appear according to their order in the editor (top to bottom).
Publishing content is done in the main editor list view. You can publish individual or multiple Smart Walk-Thrus.
Publishing