This article walks you through creating and configuring launchers in the Action Bar console app. The setup experience is the same whether your account has AI enabled or not. Launcher types that require AI appear in the panel but are greyed out and unavailable if AI is not enabled for your account.
For an introduction to the Action Bar console app and the launchers table, see:
Click the Create icon from the Action Bar page to open the Create a launcher side panel.
Step 1: Select Location Type
Choose where your launcher should appear. Available launcher types depend on the location type you select here.
Location Type
Description
Available Launcher Types
Single Location
Appears on one specific system
Shows in the WalkMe Editor
Supports element capturing and text from page
All launcher types
Multiple Locations
Appears on multiple systems
Does not appear in the WalkMe Editor
Supports text from page
All launcher types except Tag Verification and Structured Summary
Universal (AI-Enabled only)
Appears on all sites and locations
Does not appear in the WalkMe Editor
All launcher types except Tag Verification and Structured Summary
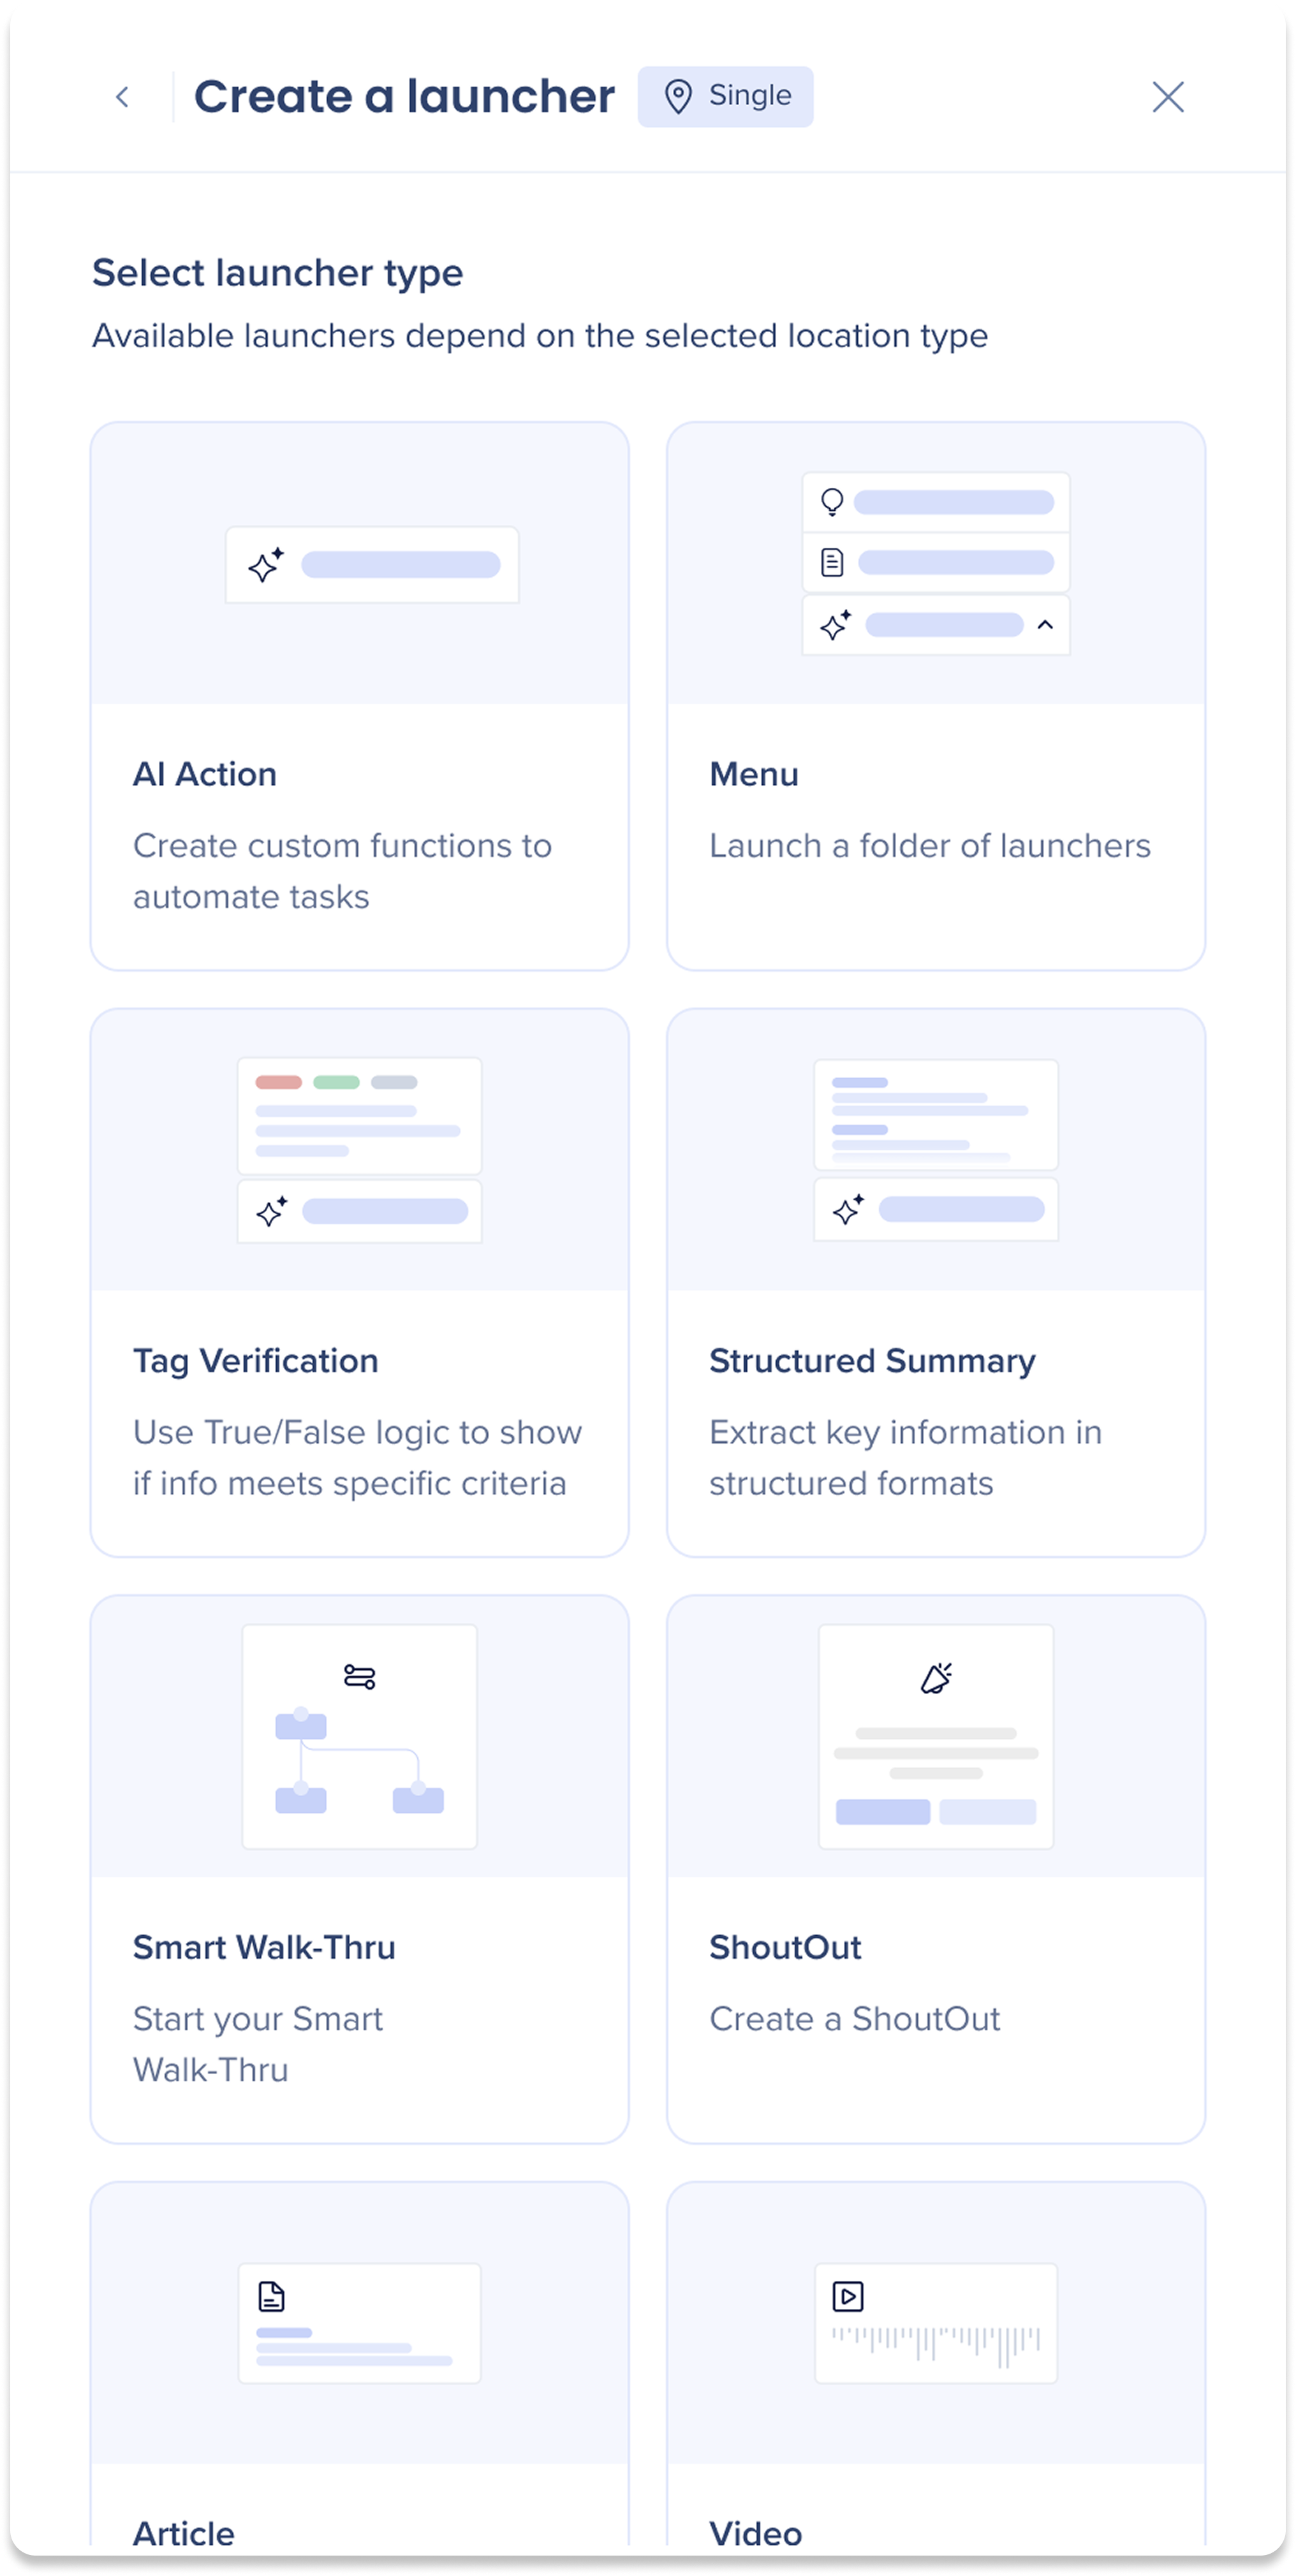
Step 2: Select a Launcher Type
Choose a launcher type to customize for your organization's needs. Available launcher types depend on the location type selected in the previous step.
Anmerkung
Launcher-Typen, die KI erfordern, sind ausgegraut, wenn KI in Ihrem Konto nicht aktiviert ist.
Launcher-Typen, die nicht mit dem im vorherigen Schritt ausgewählten Ortstyp kompatibel sind, sind ebenfalls ausgegraut
Launcher Type
Description
AI Required
Location Type
AI Action
Create custom functions powered by AI that respond to a personalized prompt
Yes
All
Menu
Create a customizable list of launchers and folders to organize tasks and streamline access
No
All
Tag Verification
Use True/False logic to show if information meets specific criteria
Yes
Single only
Structured Summary
Extract and present key information in structured formats
Yes
Single only
Smart Walk-Thru
Trigger a step-by-step Smart Walk-Thru
No
All
ShoutOut
Display a pop-up message or announcement
No
All
Article
Link to a relevant help resource
No
All
Video
Play an embedded or linked video resource
No
All
Survey
Collect user feedback with a survey
No
All
Shuttle
Redirect users to a specific webpage
No
All
Multiple SmartTip Validation
Run a SmartTips set to validate form field inputs
No
All
ActionBot
Launch a bot to automate tasks through conversation
No
All
AI Chat
Get answers from company and public knowledge
Yes
All
Open WalkMe Menu
Launches the central hub for exploring content
No
All
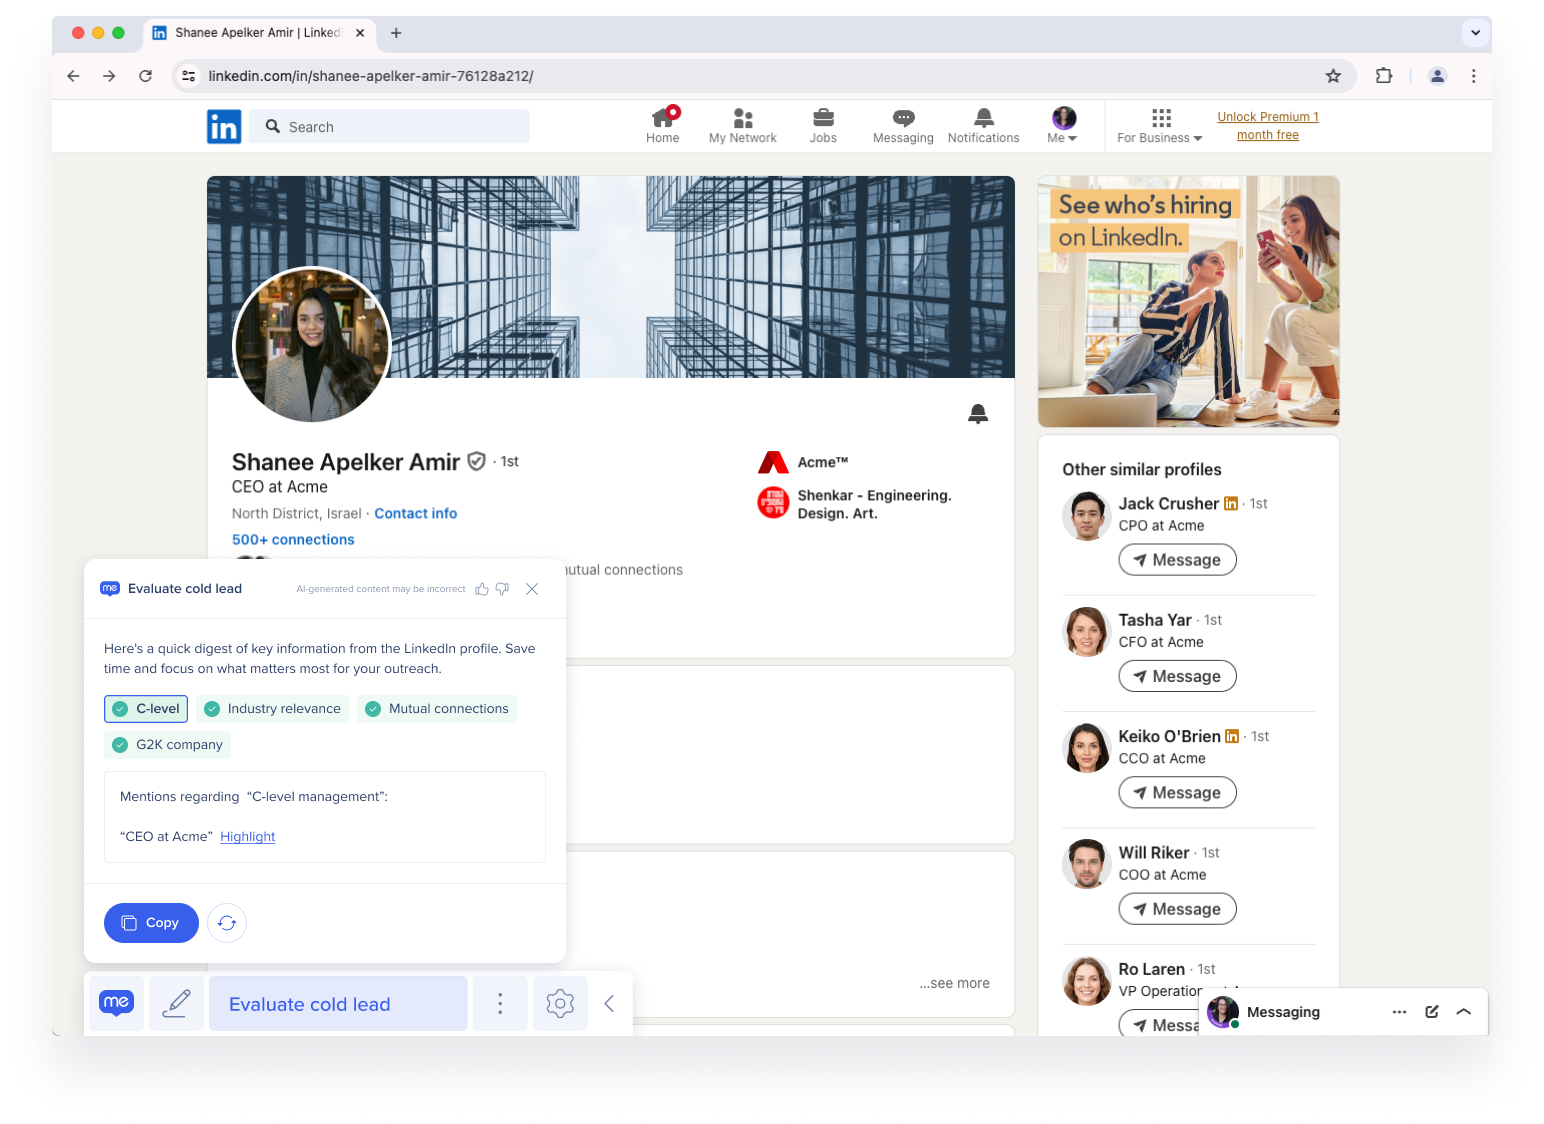
Beispiel für die Zusammenfassung der Tags...
Beispiel für die Zusammenfassung der LinkedIn-Tags
Console Build: In diesem Beispiel hat der Builder eine LinkedIn-Seite erfasst und die folgenden Tags erstellt: C-Level, Branchenrelevanz, Gegenseitige Verbindungen und G2K
KI-Aktion: Die KI prüft, ob diese Tags auf der Seite vorhanden sind, basierend auf den vom Builder festgelegten „wahr“- und „falsch“-Bedingungen
Ergebnis: Alle Tags wurden gefunden und werden daher als grün angezeigt
Die KI bietet zu jedem Tag ein kurzes Zitat von der Seite sowie die Option, seine Position auf der Seite hervorzuheben
Alle Tag-Farben und Bedeutungen
Grün: Wahr
Orange: Falsch
Grau: Unbestimmt
Step 3: Complete launcher settings
The following section provides an overview of the launcher type settings. Each launcher has three settings pages: Appearance, Behavior, and Visibility.
Appearance Settings
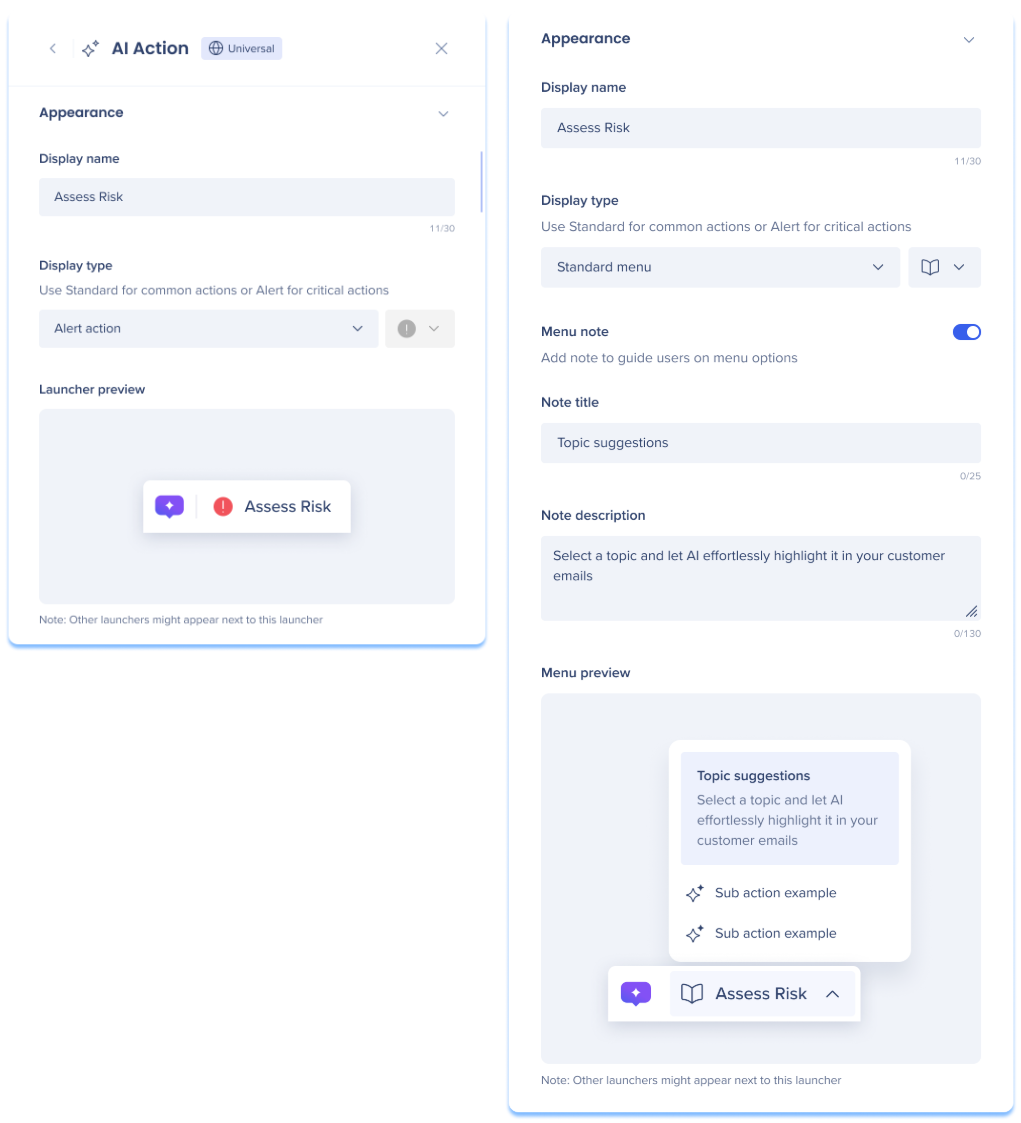
Display name
Enter a name for your launcher that will appear to end-users in the Action Bar.
Display type
Display types control how your launcher appears in the bar, either as a “standard” or “alert” action/menu. Select a display type from the dropdown and an icon if “standard” is selected.
Standard action/menu: Ideal for routine tasks, this option displays actions in the Action Bar with a custom icon
Alert action/menu: Ideal for condition-based critical tasks, the option displays a fixed icon when triggered, or a red alert dot if actions are hidden
Alerts will prioritize the action or menu by placing in first in the Action Bar
Launcher/Menu preview
View how your launcher will appear in the Action Bar.
Anmerkung
Weitere Launcher werden möglicherweise neben diesem angezeigt, wenn zusätzliche Launcher erstellt oder Standard-Launcher aktiviert sind.
Menu note Menu launchers only
Turn on the Menu note toggle to add a note that guide users on menu options. We couldn't load the file.
Note title: Enter a title for your note
Note description: Enter a description for your note
Behavior Settings
WalkMe Item Behavior Settings
Applies to: Smart Walk-Thru, ShoutOut, Article, Video, Survey, Shuttle, Multiple SmartTip Validation, ActionBot, and AI Chat.
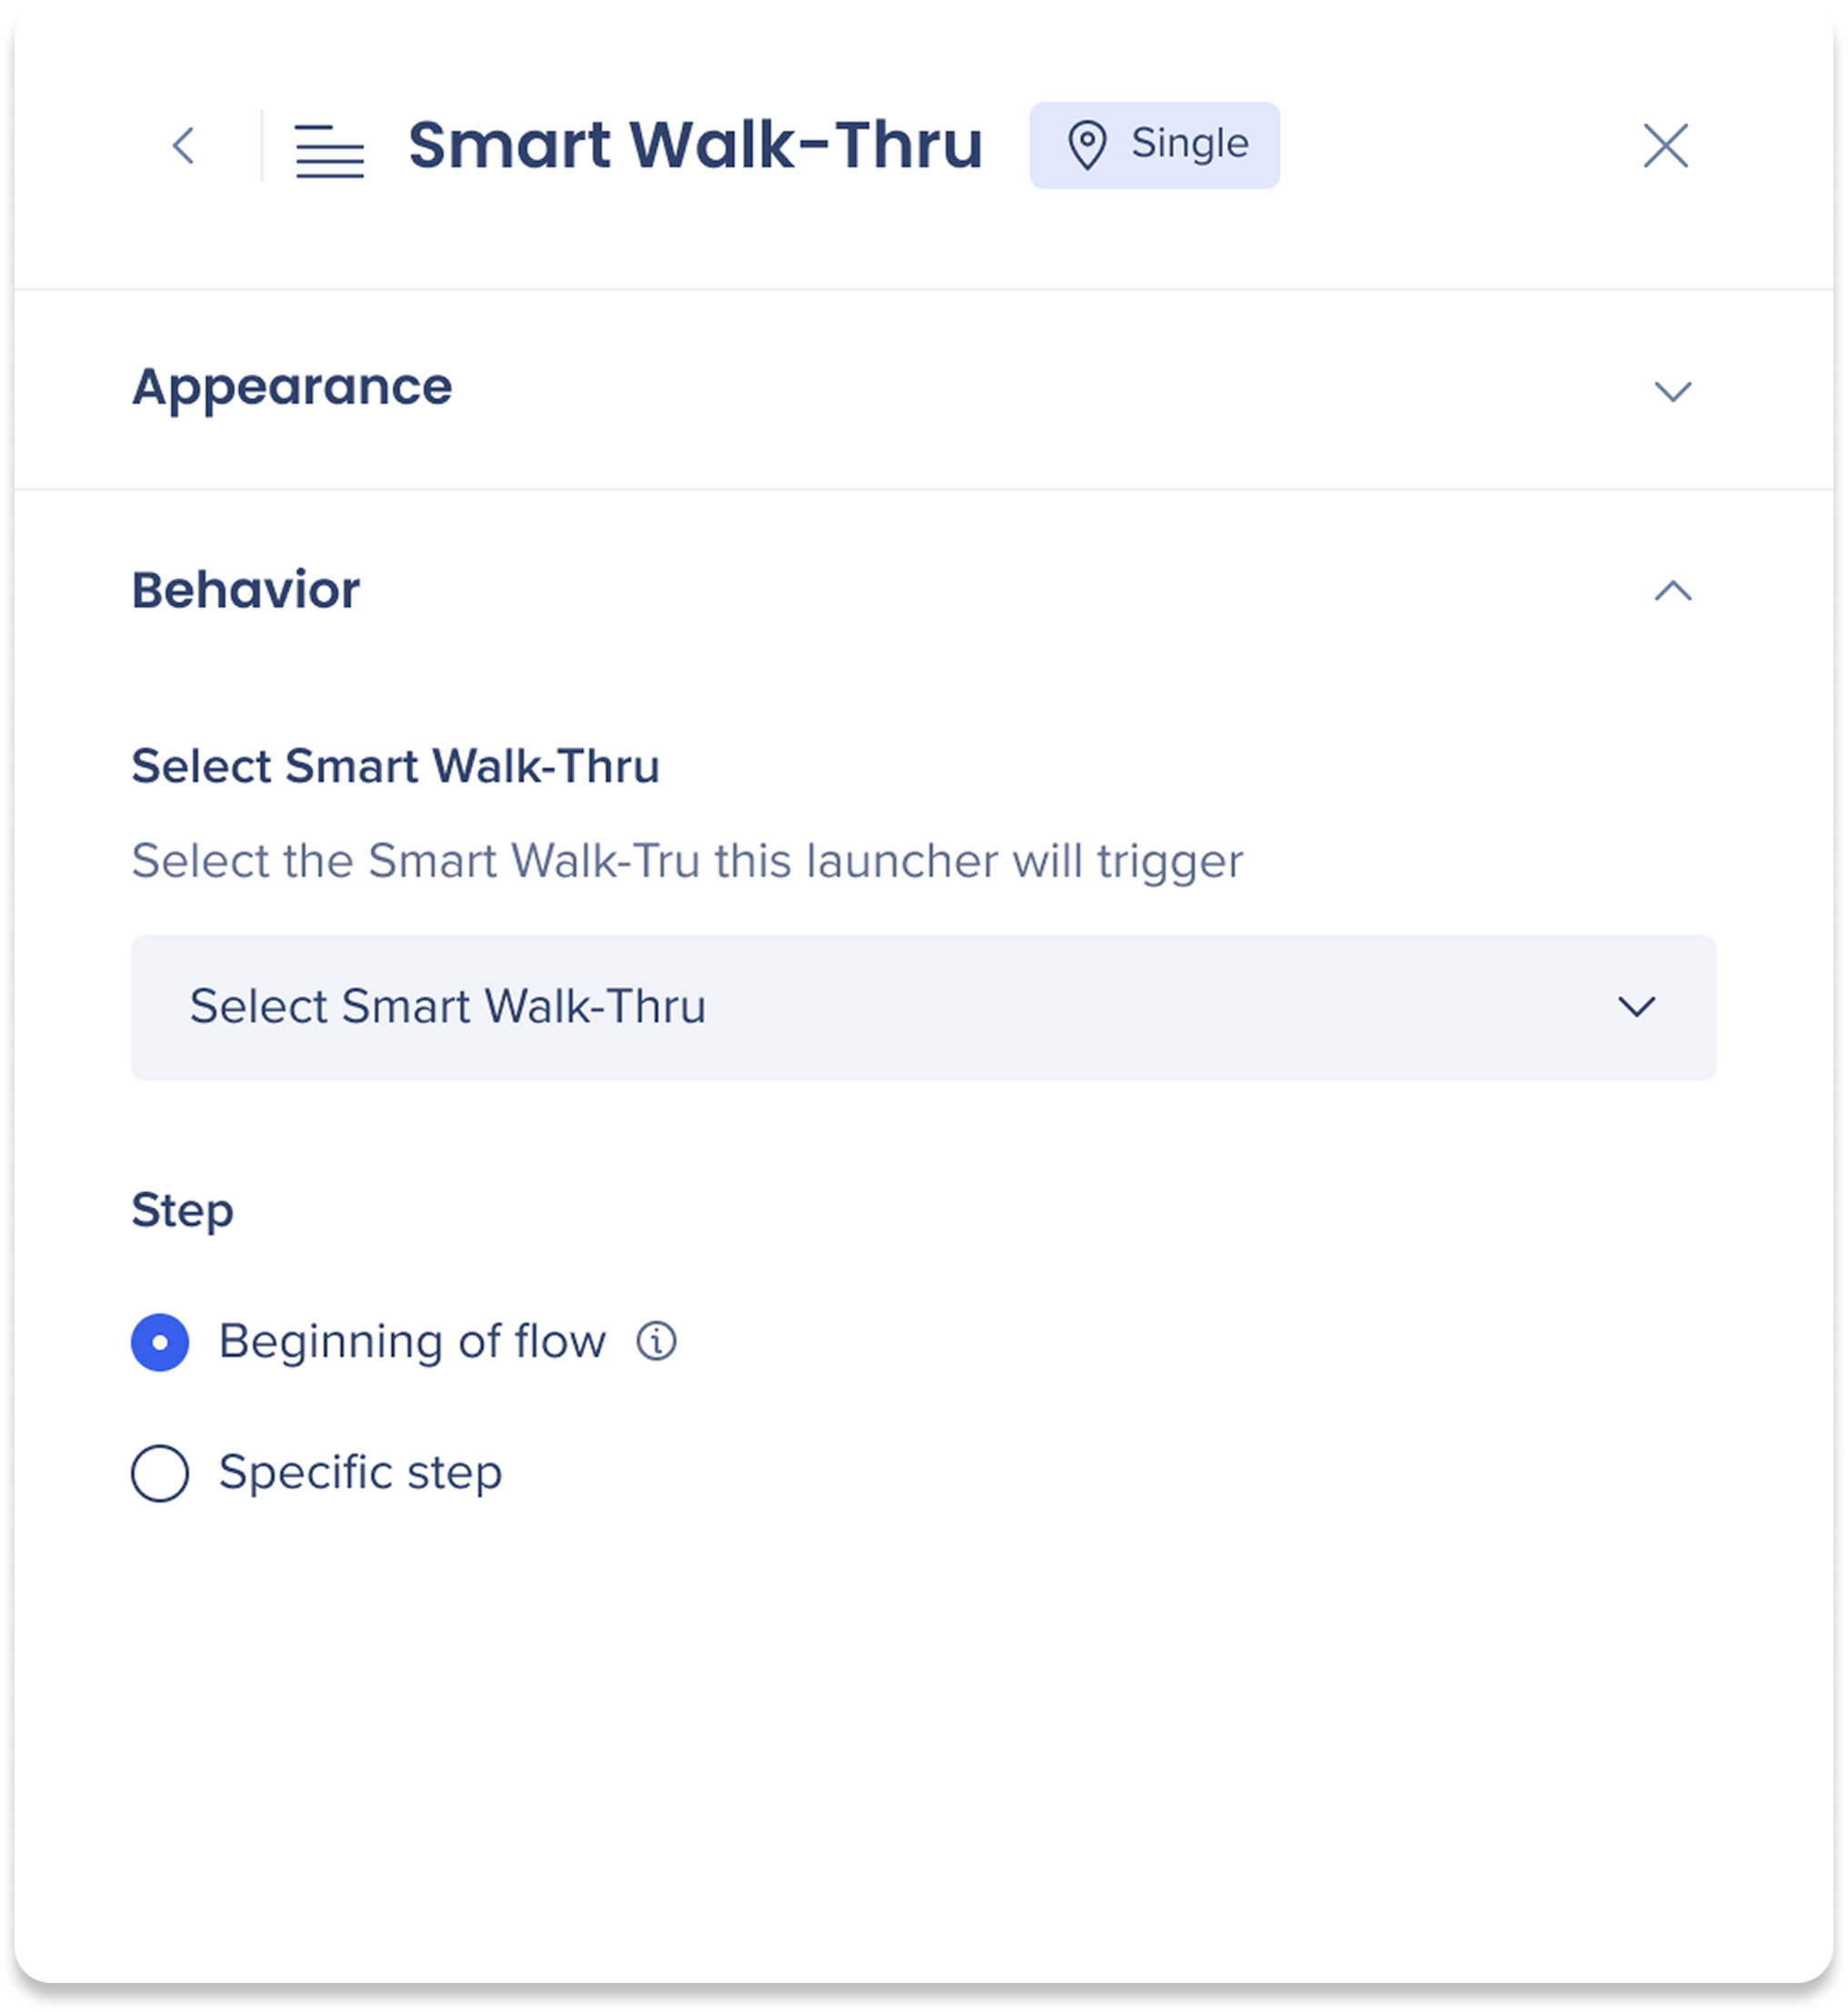
For these launcher types, the behavior settings panel allows you to select the WalkMe item the launcher will trigger. Use the dropdown to select the relevant item from your WalkMe account.
Smart Walk-Thru only: After selecting a Smart Walk-Thru, choose which step the launcher will start from:
Beginning of flow: The Smart Walk-Thru starts from the first step
Specific step: The Smart Walk-Thru starts from a specific step you select
AI Action Behavior Settings
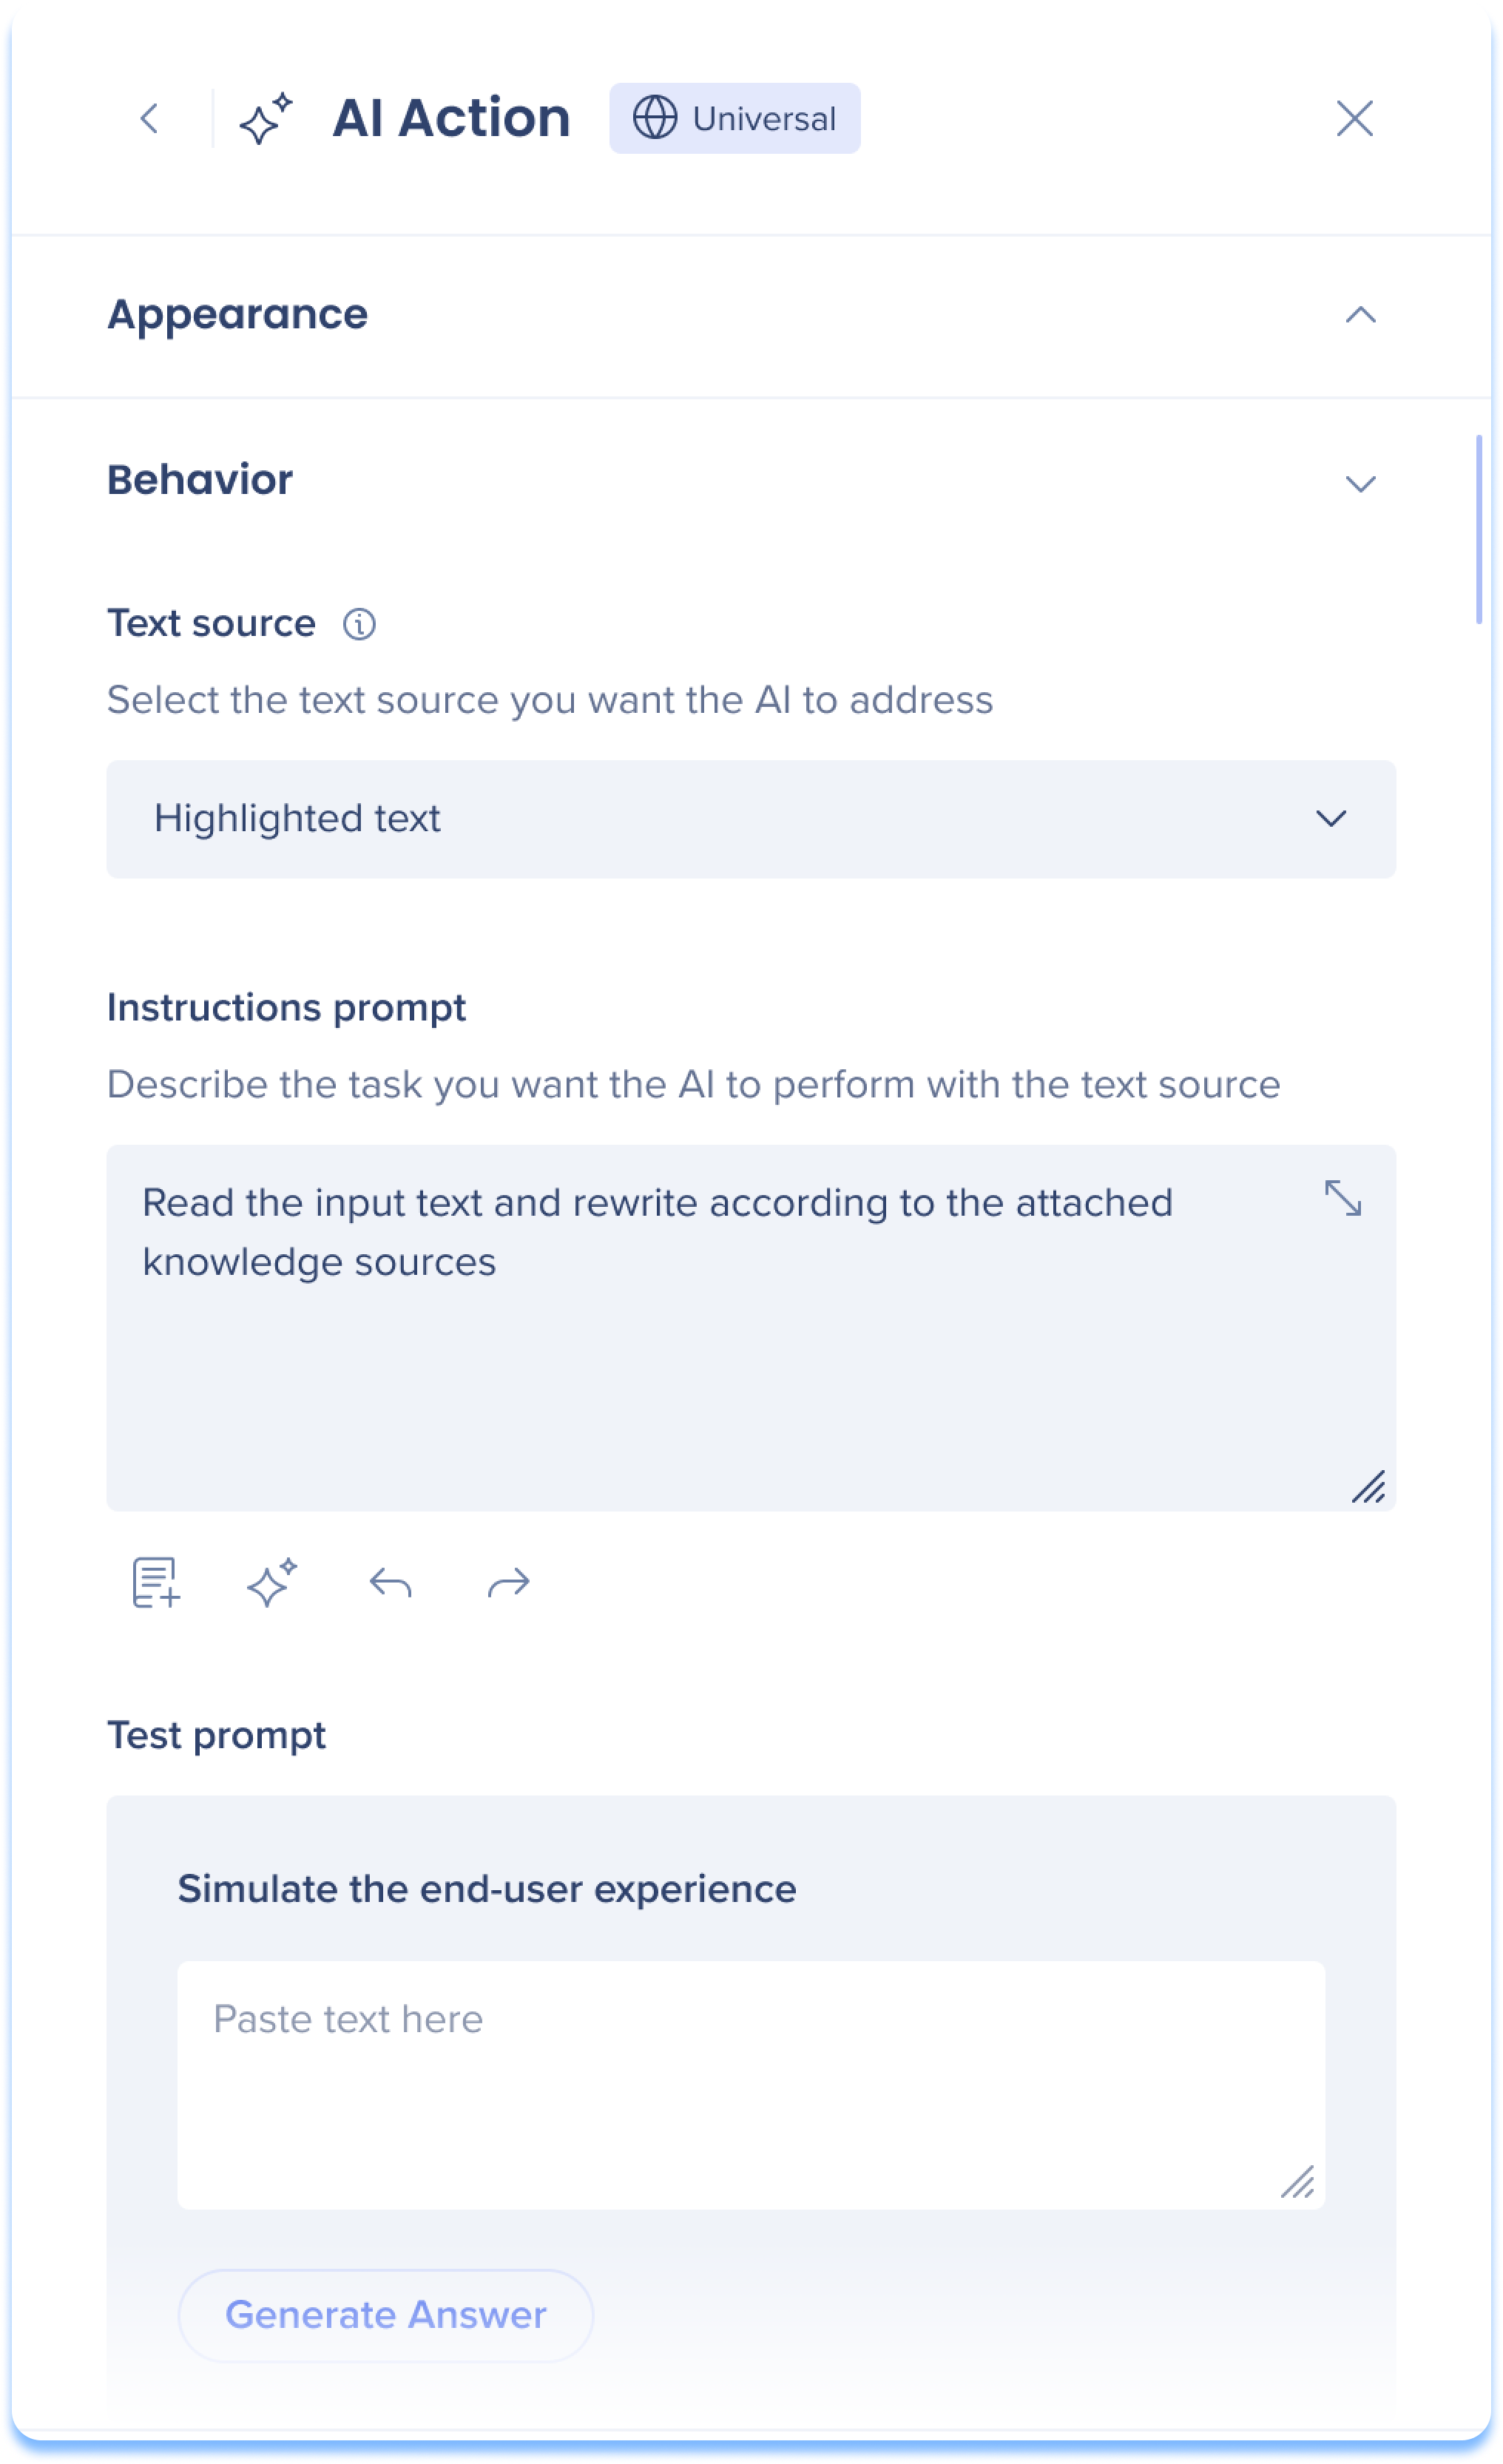
Text source
Select the text source you want the AI to process.
Text on screen: The launcher appears without specific context and performs AI text processing on the entire page, or specific text if highlighted
Element on screen: The launcher appears when a specific element appears on screen and performs AI text processing on the selected text
By default WalkMe captures the full page body element
Recapturing specific elements is supported with single location launchers only
Highlighted text: The launcher appears when text is highlighted by the user and performs AI text processing on the selected text
Instructions prompt
Enter a prompt to instruct the AI what task to perform with the text source.
Eingabeaufforderungstools
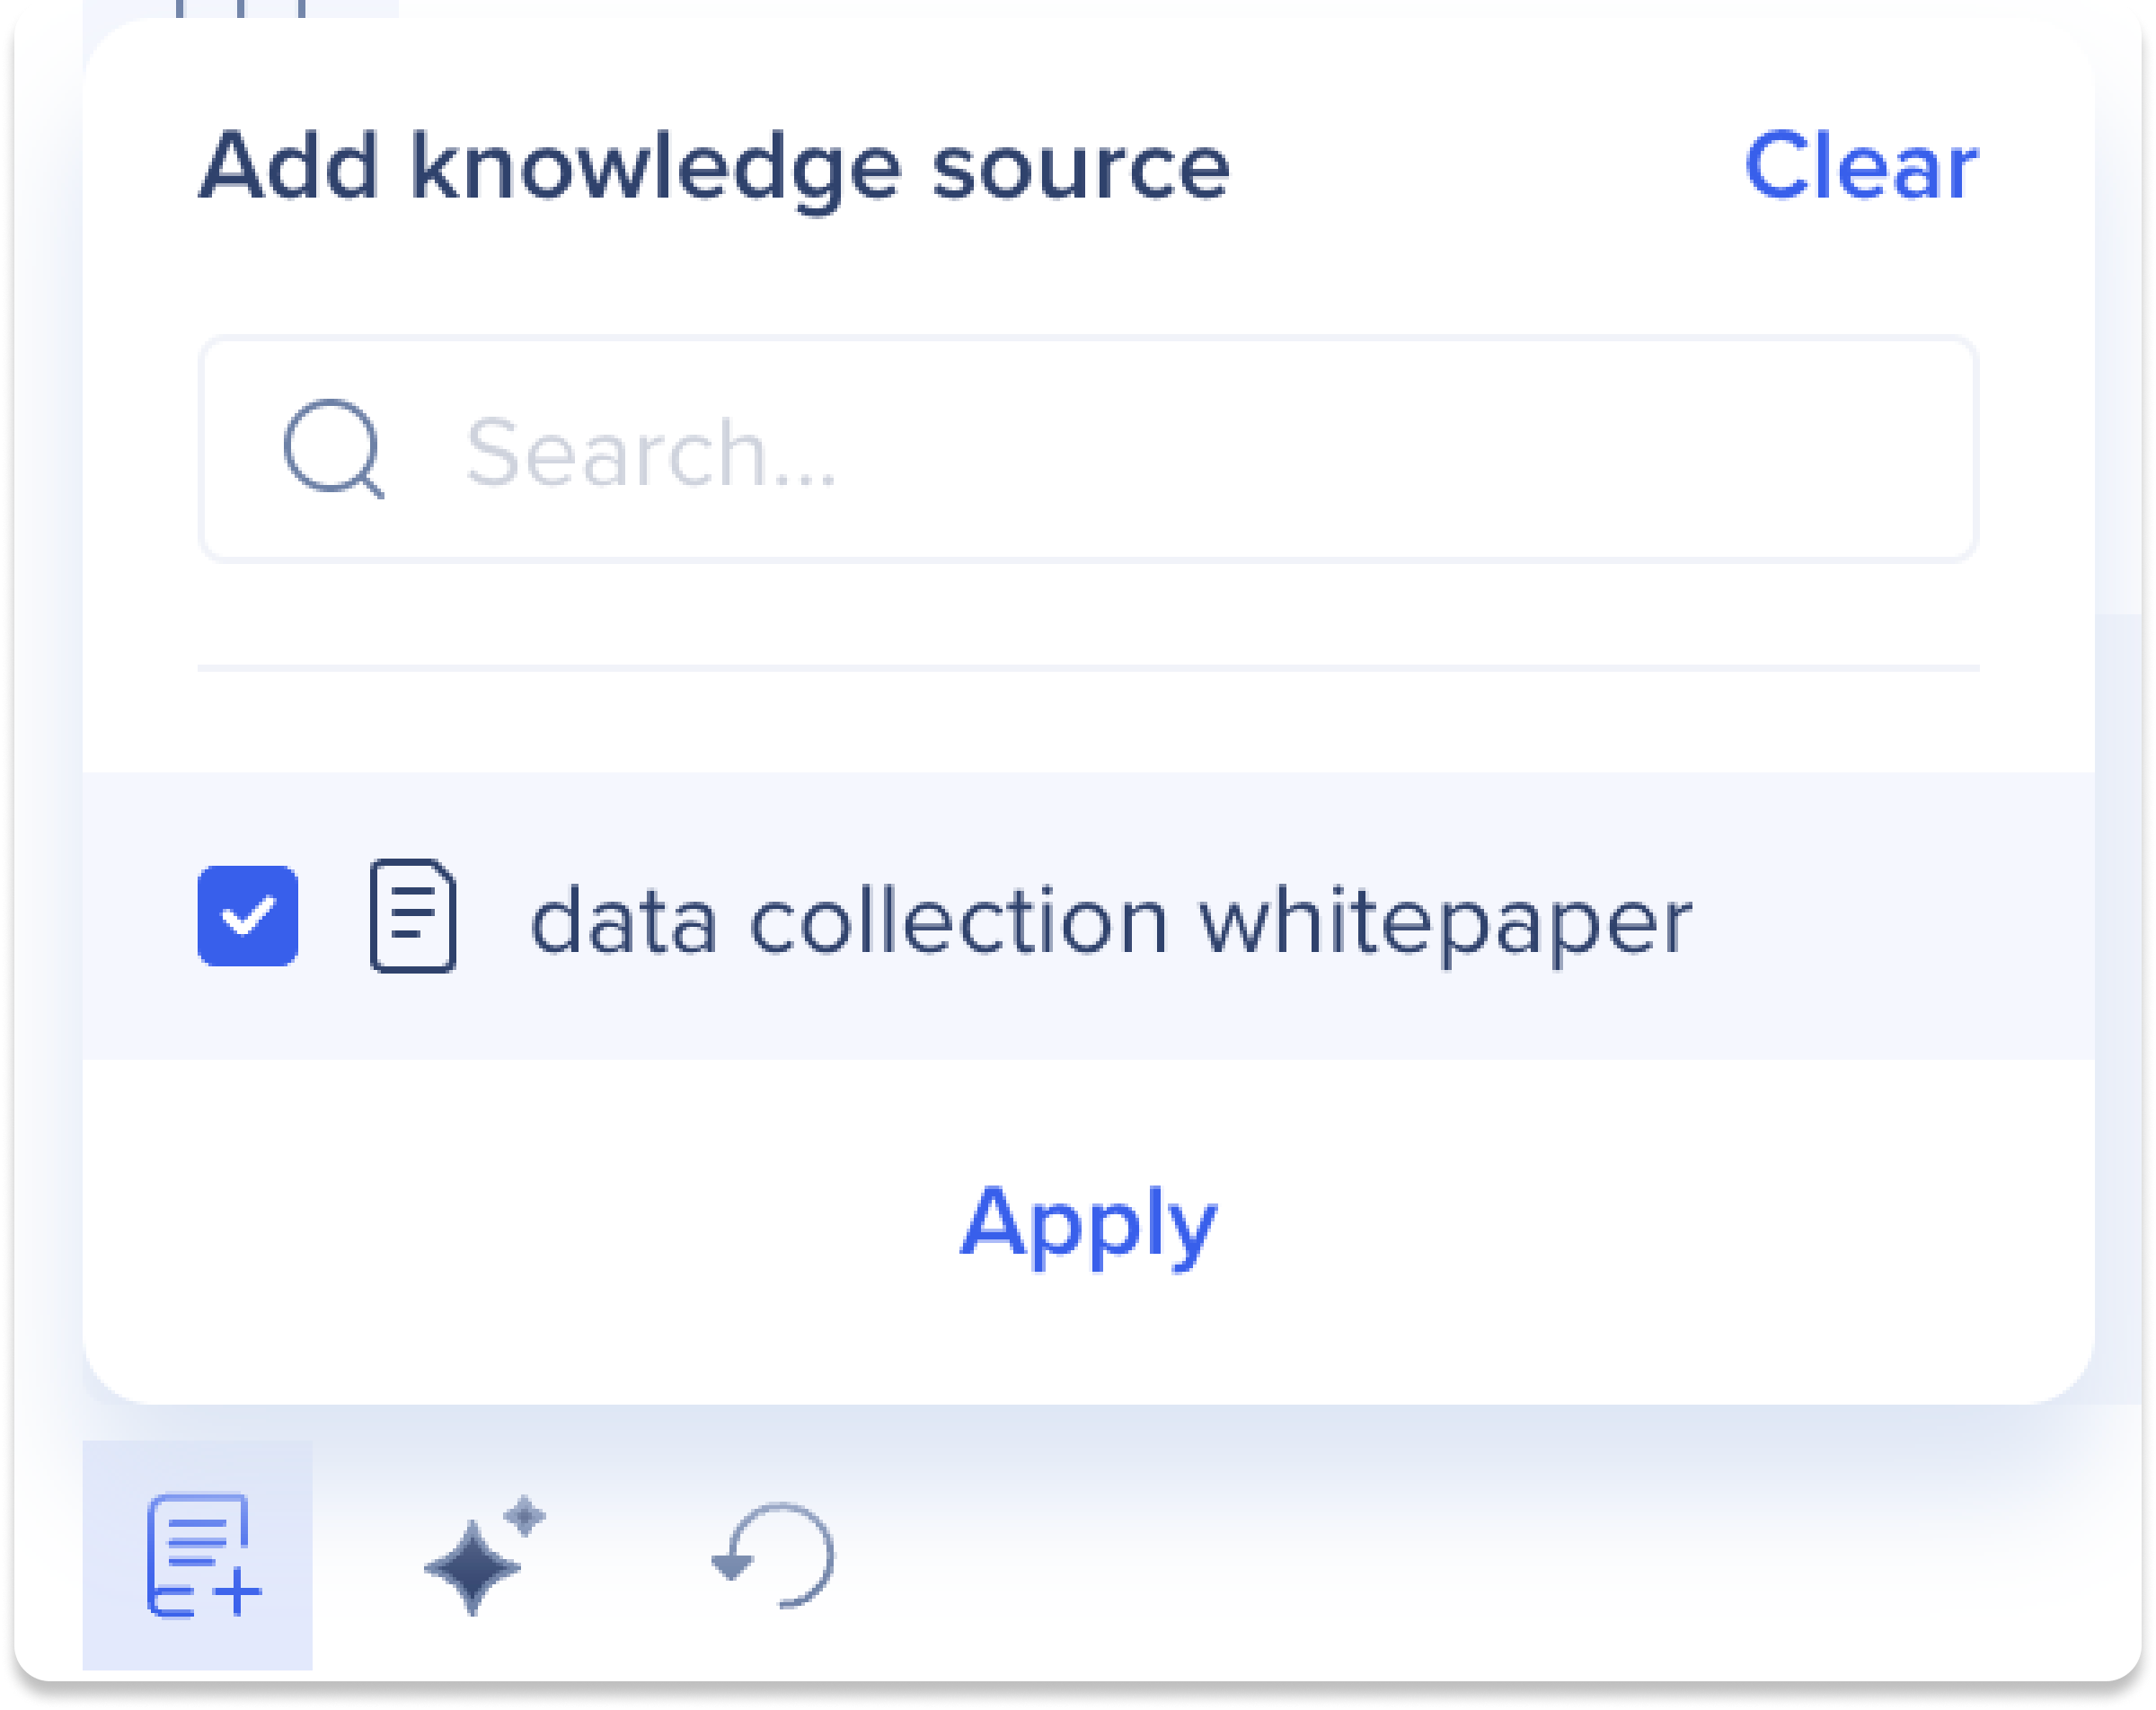
Wissensquelle hinzufügen: Fügen Sie Wissensquellen hinzu, um Endbenutzern zu helfen, Bildschirmtext mit ihren Richtlinien und Dokumentation zu vergleichen, indem sie diese Quellen in Eingabeaufforderungen verwenden.
Meine Eingabeaufforderung verbessern: Verbessern Sie Ihre Eingabeaufforderung mit KI
Rückgängig machen/wiederherstellen: Durch das Rückgängig machen wird die letzte Aktion rückgängig gemacht, während durch das Wiederherstellen eine rückgängig gemachte Aktion wieder hergestellt wird.
Test prompt
Test your launcher by simulating the end-user experience. Enter text as an end-user and click Generate Answer to see the results.
Menu Behavior Settings
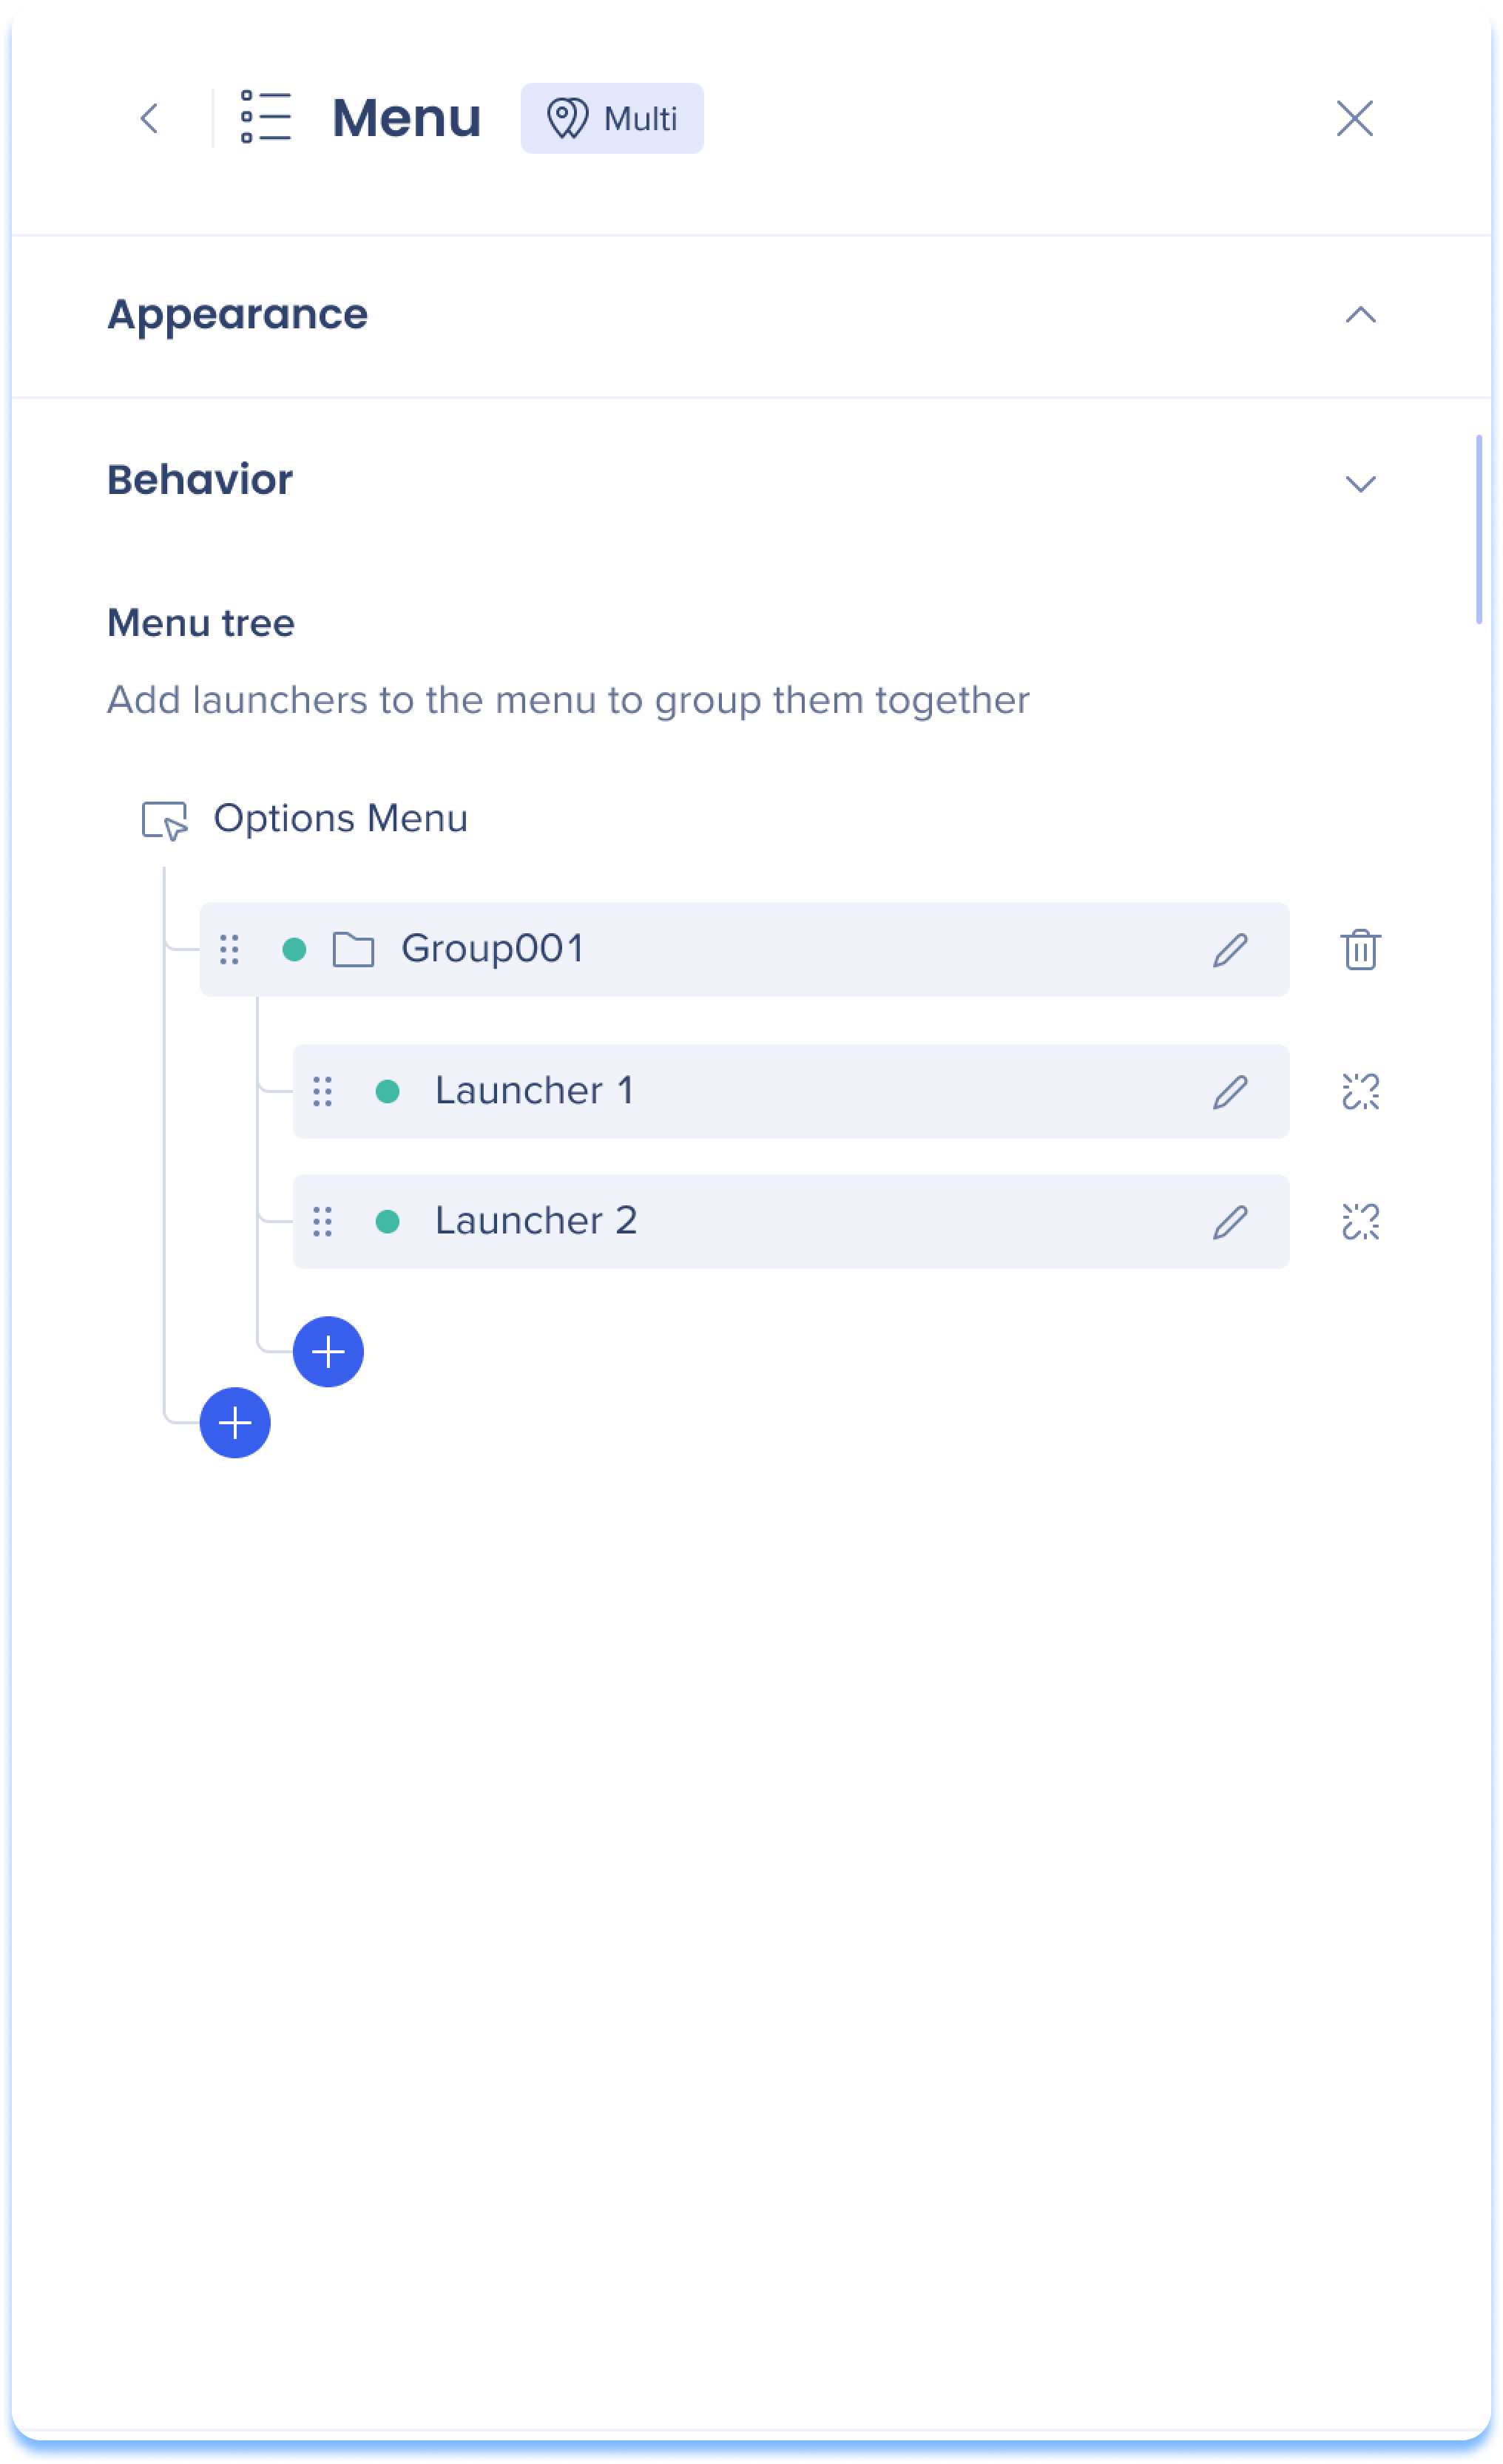
Menu tree
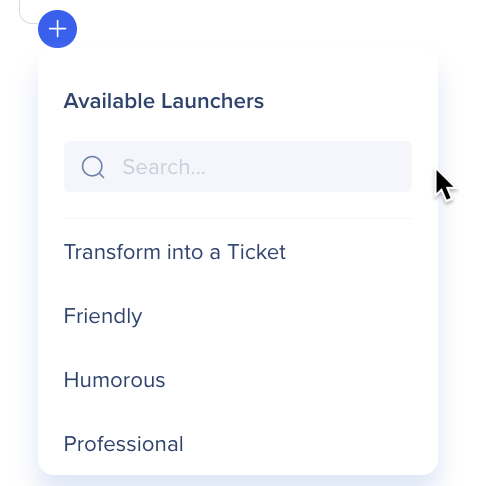
Add launchers to the menu to group them together in folders. Click the Create button to add items to your menu tree.
Add a Folder: Adds an additional folder to your tree that can hold another list of launchers
Select a Launcher: Choose from a list of launchers that you've already made
Create a New Launcher: Opens a modal to create an AI Action launcher from behavior settings
Anmerkung
Sie können nur Launcher desselben Multi- oder Einzelortes auswählen.
Das Hinzufügen oder Aktualisieren von Launchern in Menüs erbt die Orte des übergeordneten Menü-Launchers
Um einen Launcher zu einem veröffentlichten Menü-Launcher hinzuzufügen, muss der Menü-Launcher erneut veröffentlicht werden, um den neuen Launcher zu veröffentlichen.
Das Aufheben der Verknüpfung eines veröffentlichten verschachtelten Launchers konvertiert den Unter-Launcher in einen regulären Launcher und archiviert ihn
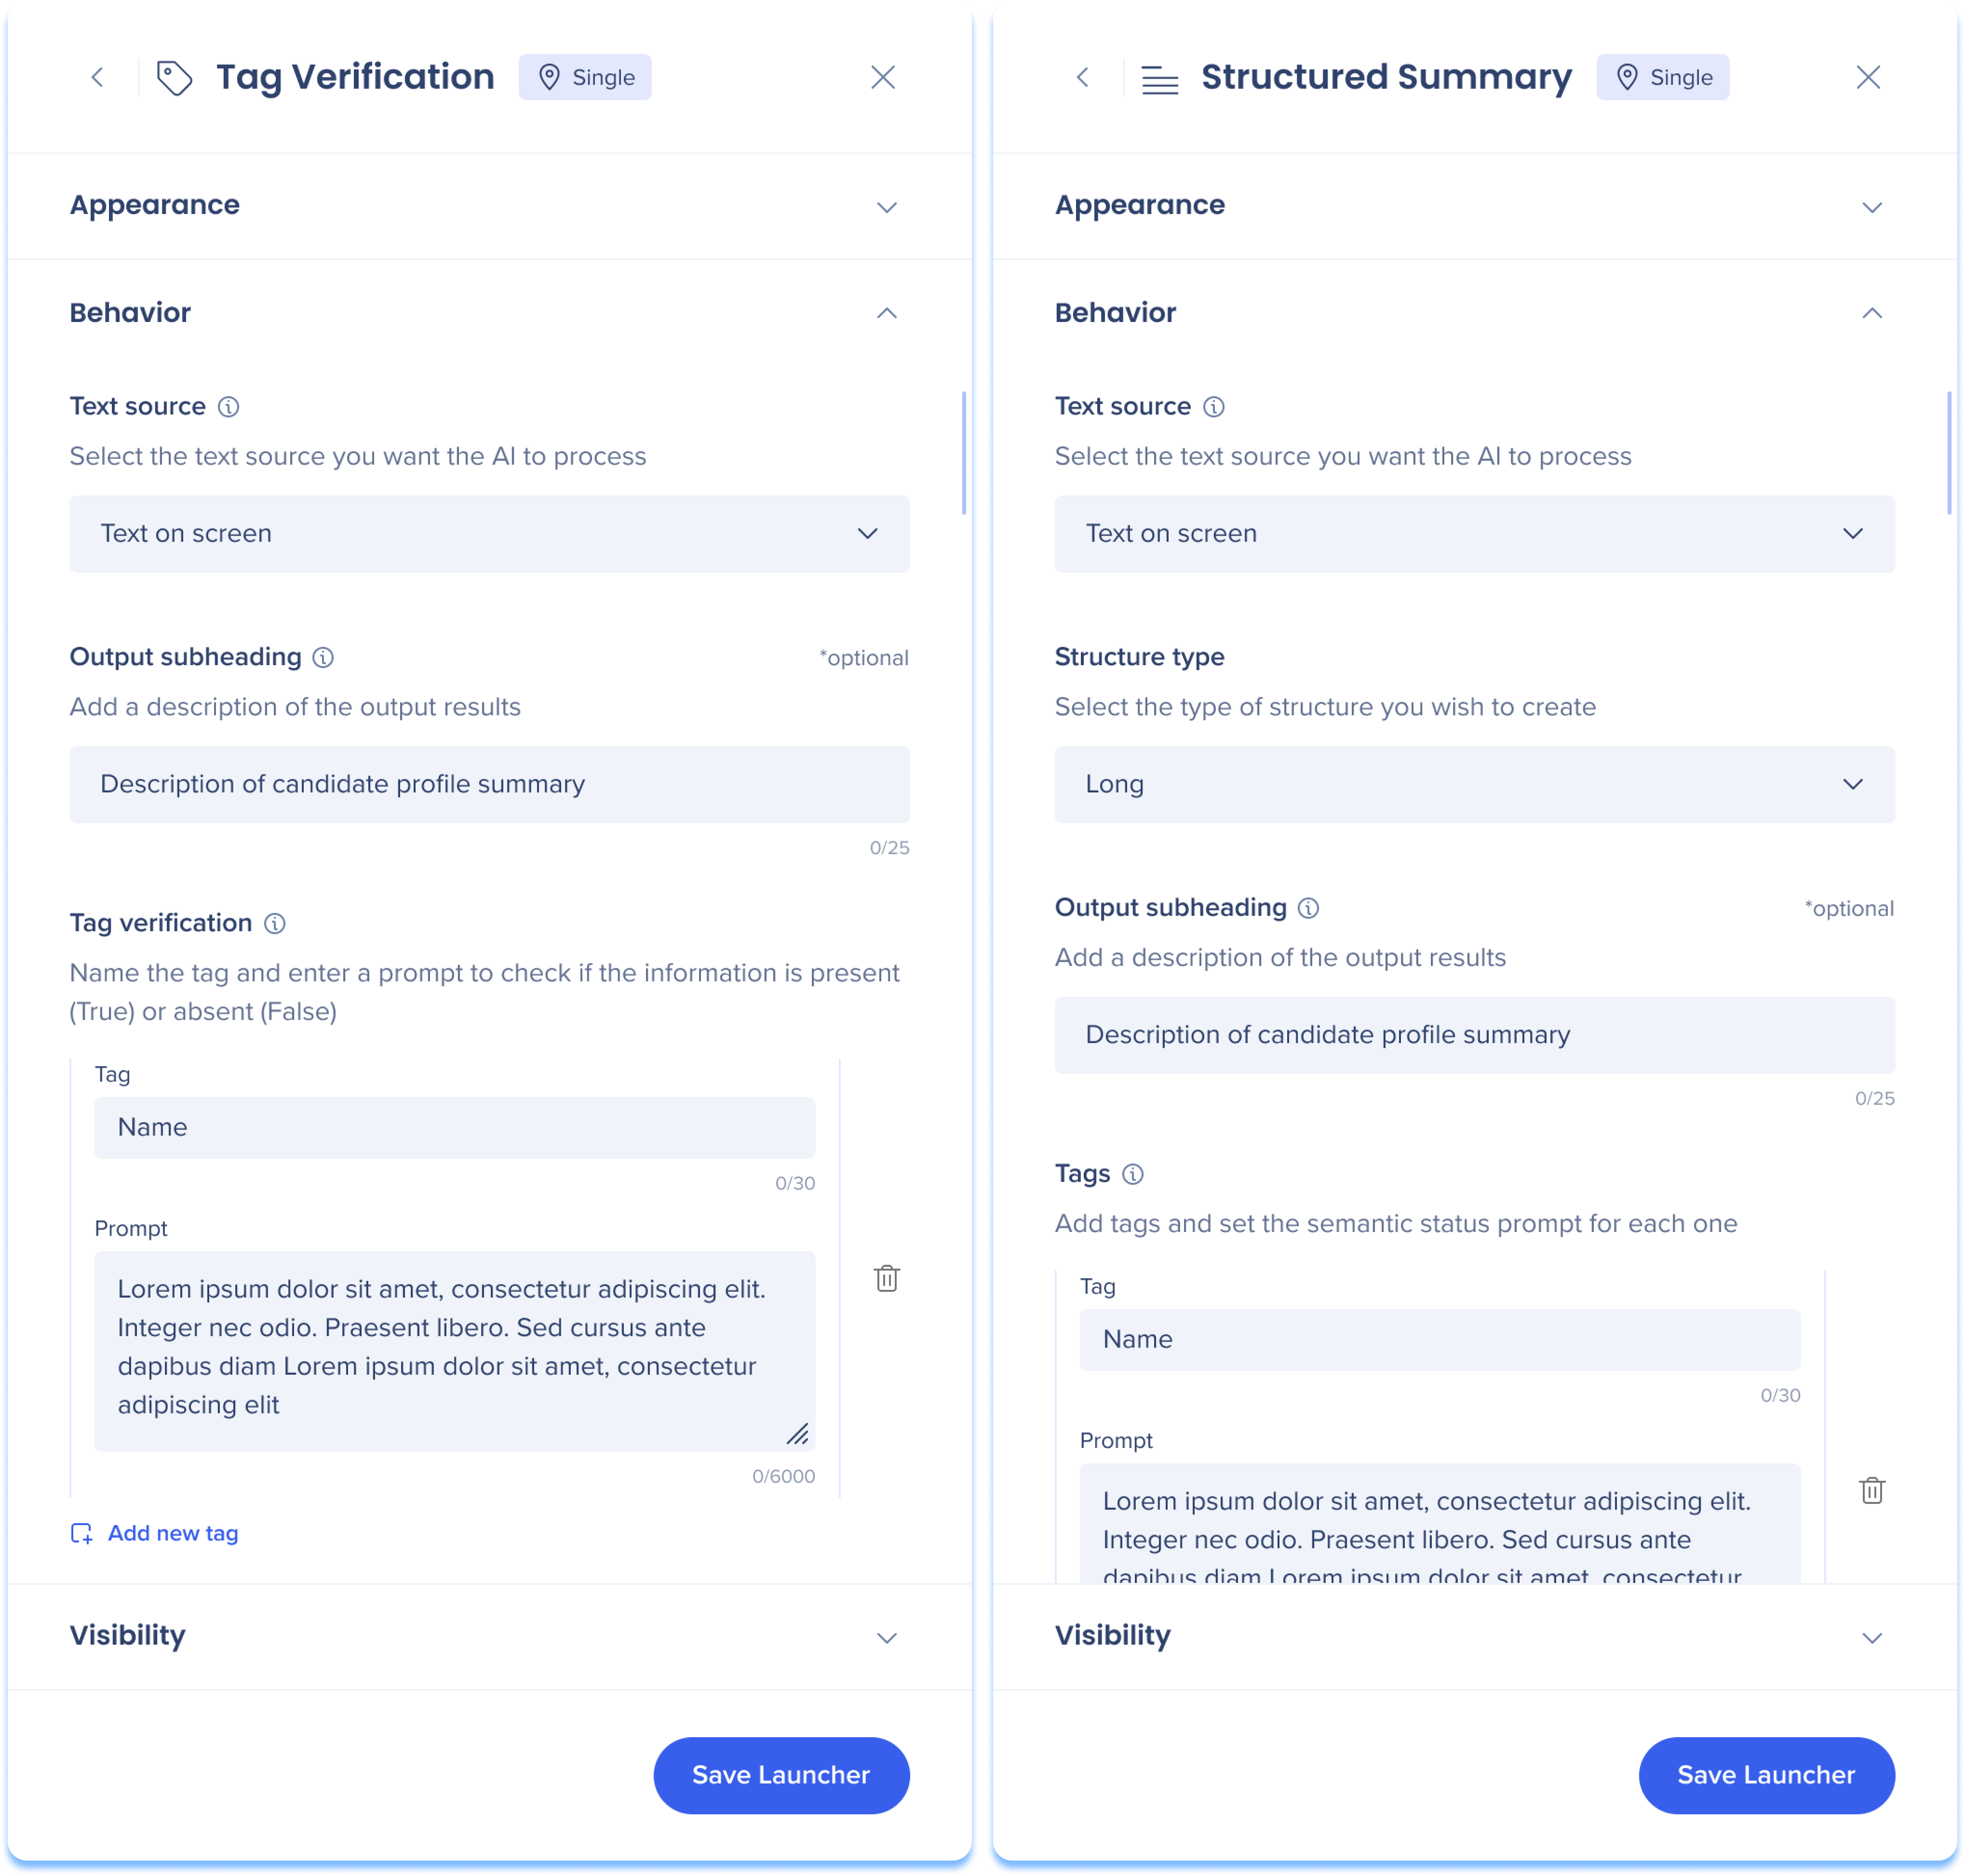
Tag Verification and Structured Summary Behavior Settings
Text source
Select the text source you want the AI to process.
Text on screen: The launcher appears without specific context and performs AI text processing on the entire page, or specific text if highlighted
Element on screen: The launcher appears when a specific element appears on screen and performs AI text processing on the selected text
By default WalkMe captures the full page body element
Recapturing specific elements is supported with single location launchers only
Highlighted text: The launcher appears when text is highlighted by the user and performs AI text processing on the selected text
Output subheading
Add a description of the generated output results. The output subheading will be located below the launcher name.
Tag verification only
Tag verification
Name the tag and enter a prompt to check if the information is present (True) or absent (False).
Tag: Enter tag name
Prompt: Instruct the AI what criteria to scan for to present whether the tag will appear to users as “true” or “false”
Add new tag: Click Add new tag to continue adding more tags
Structured summary only
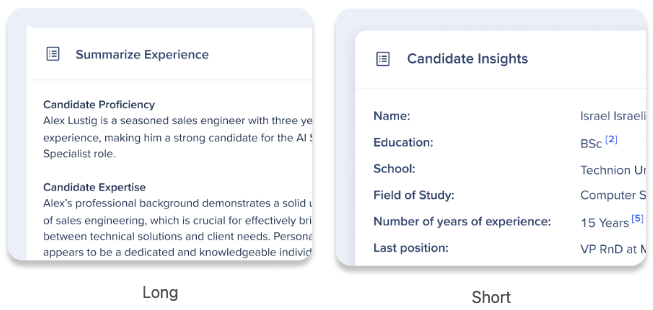
Structure type
Select the type of structure you wish to create:
Long: Add tags of the information you wish to extract from the text to create structured section for the summary, the result will populate the sections
Short: Add tags of the information you wish to extract from the text to populate the list on the left, and the summary results will appear on the right
Tags
Add tags to the title of a section in the summary and enter a prompt to define its content.
Tag: Enter the section name
Prompt: Instruct the AI what specific information should go under this section in the summary
Add new tag: Click Add new tag to continue adding more sections for your summary
Visibility settings
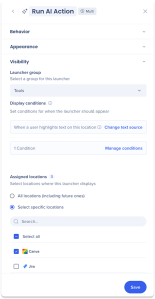
Ensure your launcher appears in the correct location and situation by managing display conditions and locations.
Launcher group
Select the group it belongs to. The group determines how the launcher behaves in the Action Bar:
Suggestions: contextual launchers that can expand or open the Action Bar automatically when triggered
Tools: launchers that are always available and won't automatically open the Action Bar
Which groups you can choose from depends on the Action Bar type:
Action Bar – AI Enabled: group selection is enabled by default, so all groups are available when building a launcher
Action Bar – Default (non-AI): available groups are set by your admin on the Action Bar settings page
Action Bar groups
Display conditions
Launcher display conditions use our condition builder technology from within the Action Bar app. Learn more
Change text source: Edit the text source to control when the launcher should appear
Manage conditions: Add conditions or edit existing ones to control when the launcher should appear
Assigned locations
Review the locations type that defines where this launcher will play.
For multi-location only:
All locations: Includes all of your existing locations configured for Action Bar and automatically applies the launcher to any locations you add in the future
Select specific locations: Choose which locations this launcher will appear
Infomeldung
Die Infomeldung wird angezeigt, wenn die KI-Aktion und der Anzeigetyp „Warnmeldung“ ausgewählt wurden. Um unnötige Unterbrechungen zu vermeiden, empfehlen wir, eine Anzeigebedingung für Warnmeldungen hinzuzufügen. Ohne diese Option wird die Warnmeldung angezeigt, wann immer die Textquelle sichtbar ist oder hervorgehoben wird.



 Click the Create icon from the Action Bar page to open the Create a launcher side panel.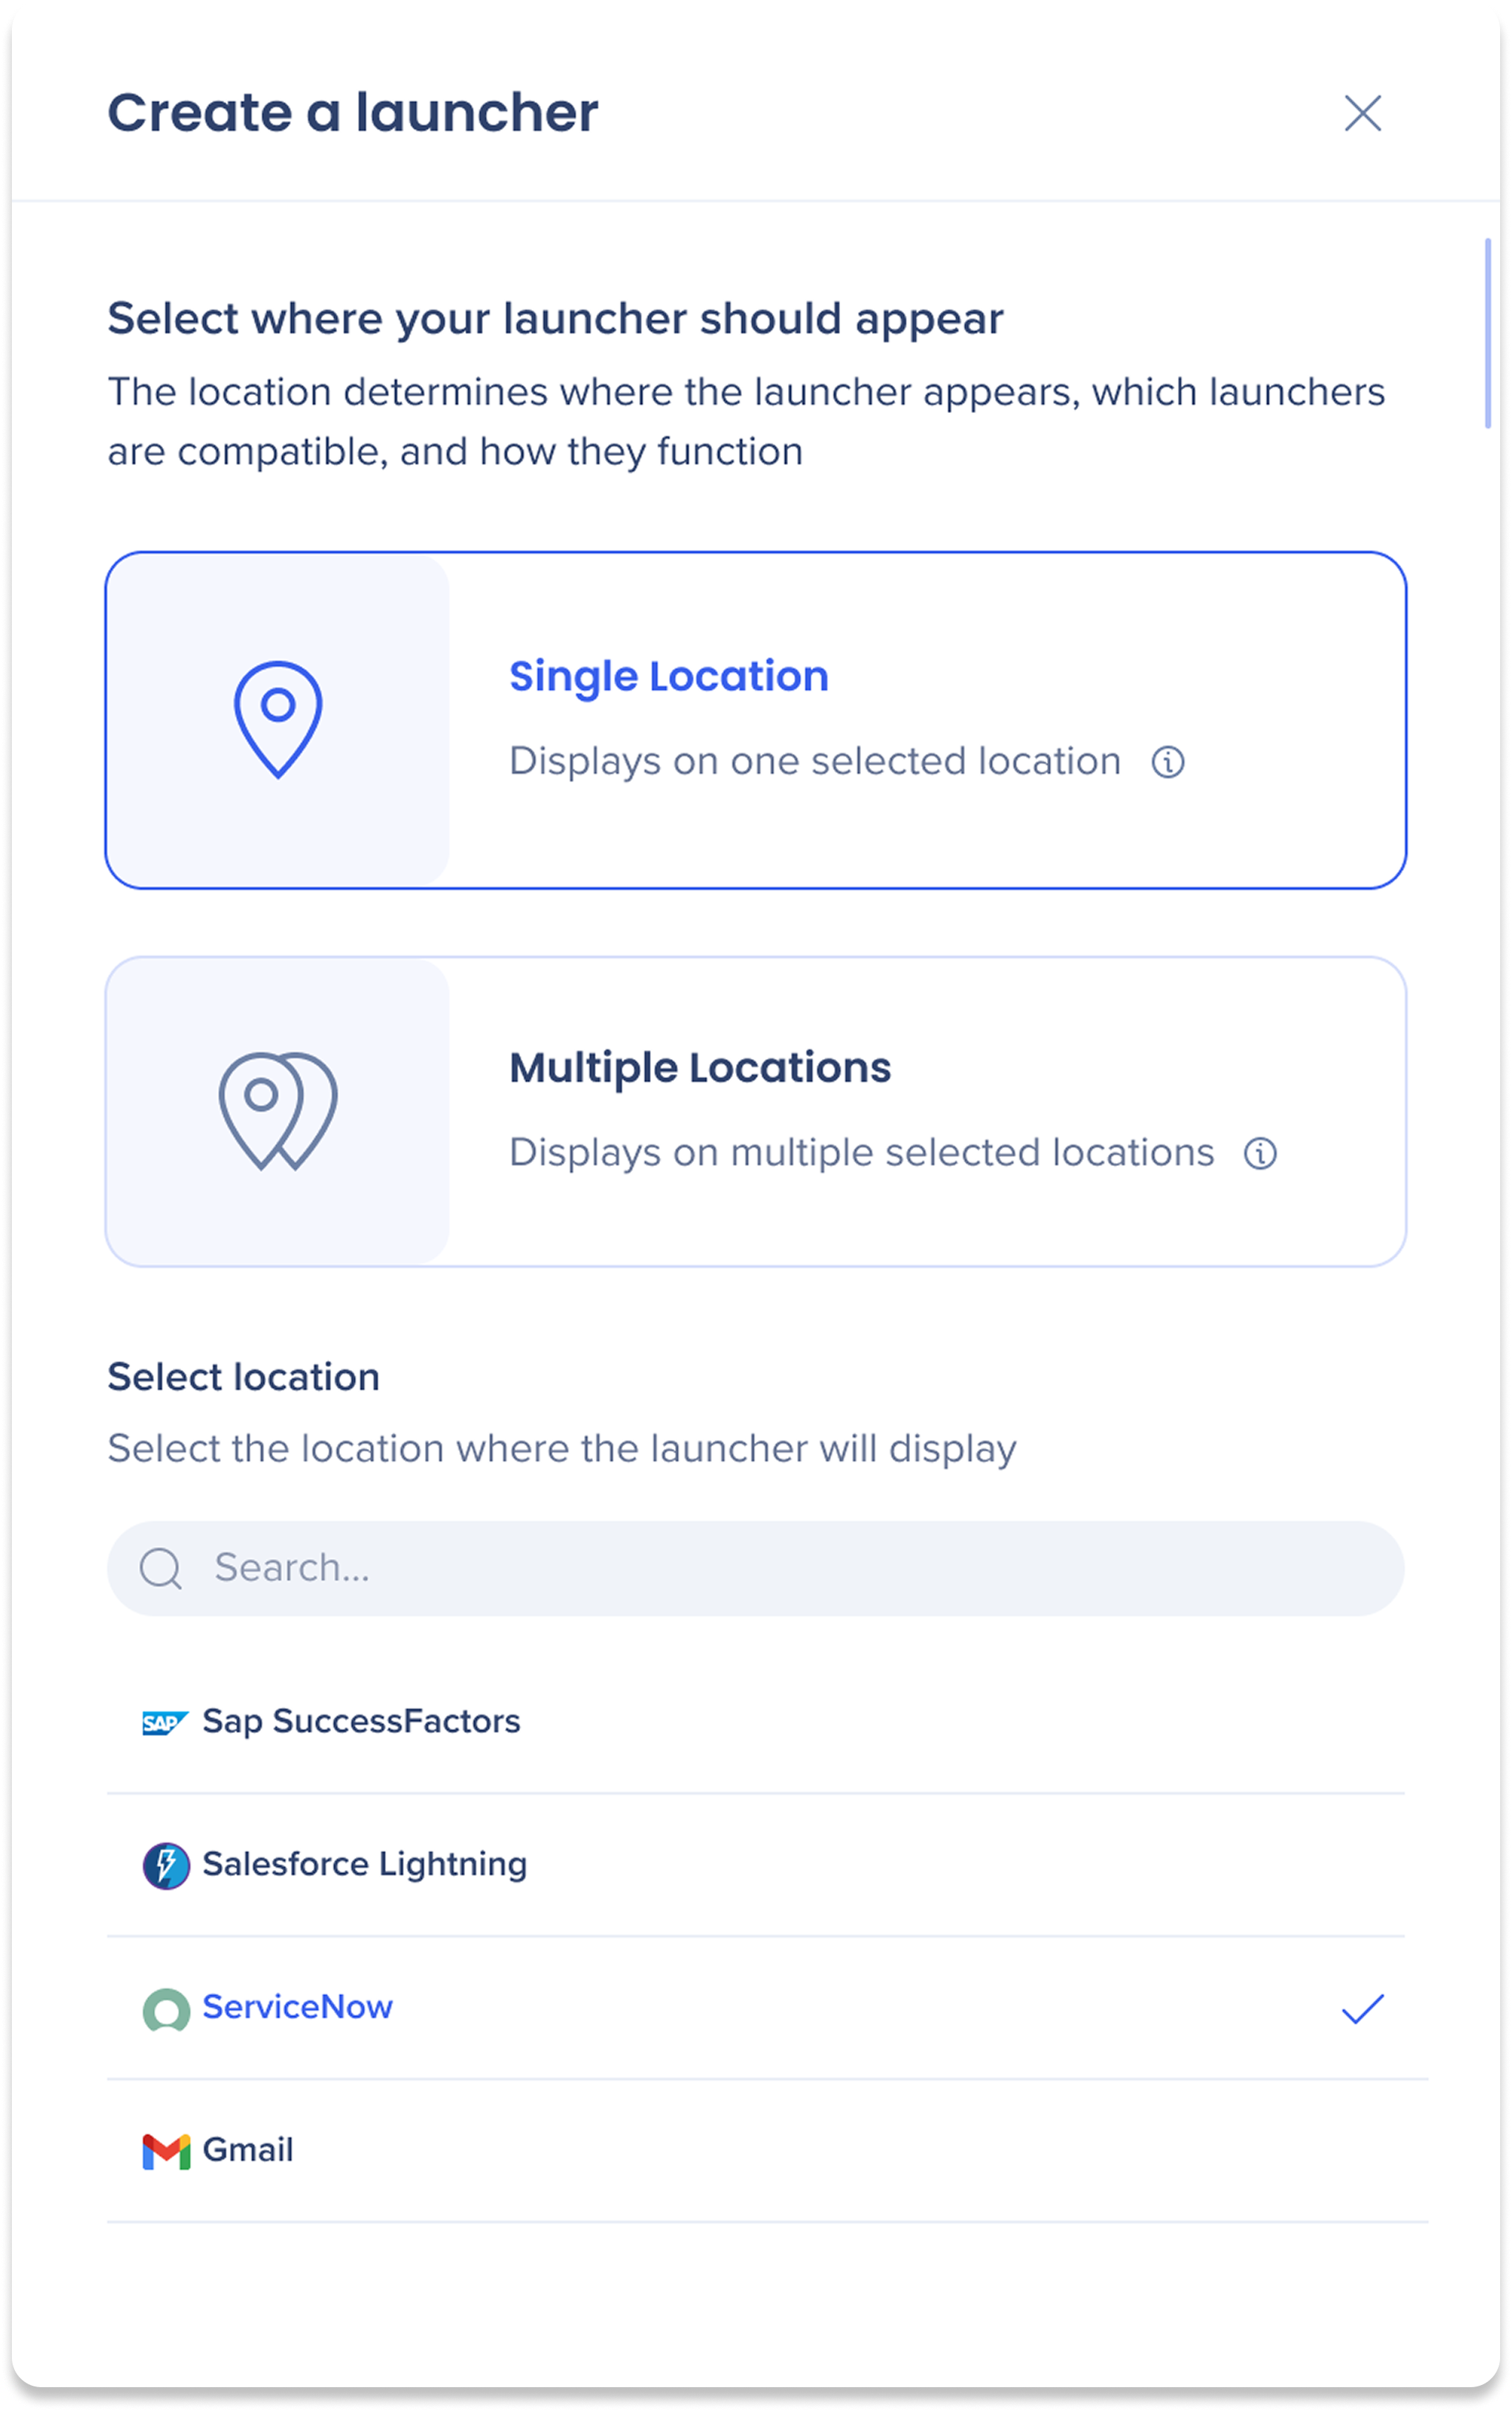
 Text source


 Menu tree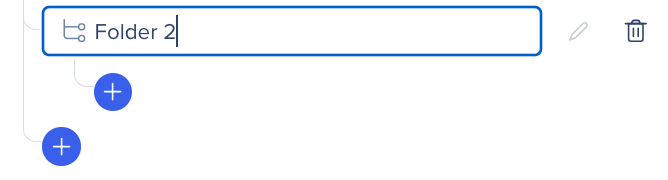
 Text source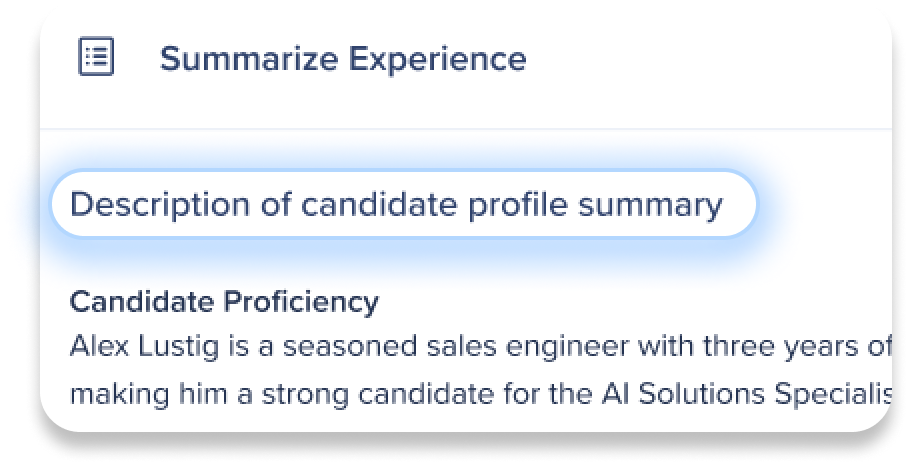
 Ensure your launcher appears in the correct location and situation by managing display conditions and locations.