Mit der Benachrichtigungs-API für Desktop- und Mobilmenüs können Sie Ereignisse in jedem System verwenden (auch wenn es kein WalkMe-Snippet enthält), um eine Benachrichtigung in WalkMe auszulösen und Ihre Benutzer automatisch auf dem Laufenden zu halten. Menübenachrichtigungen mit einem REST-Aufruf an unseren WalkMe-Benachrichtigungs-Webhook auslösen.
Dieser Artikel enthält die Informationen, die für den REST-Aufruf erforderlich sind, der sowohl ein Authentifizierungs-Token als auch eine JSON-Nutzlast erfordert.
Anwendungsfälle
Anzeigen von Warnungen, wenn ein System ausgefallen ist oder Probleme hat (AWS- oder Slack-Server ausgefallen)
Benachrichtigen einer genehmigenden Person, wenn ein neues ServiceNow-Ticket ihre Überprüfung erfordert
Informieren Sie Benutzer, wenn ihr Okta-Passwort abgelaufen ist
Erinnern Sie Benutzer, die ihr Open Enrollment bereits abgeschlossen haben
und mehr!
Jedes System, das eine REST-API aufrufen kann, kann verwendet werden, um Benachrichtigungen im Desktop-Menü oder im mobilen Menü auszulösen.
Bevor Sie beginnen …
Für den Aufruf der API sind einige Berechtigungen und technische Einstellungen erforderlich. Stellen Sie sicher, dass Sie Zugriff haben und Folgendes tun können:
Admin Center-Zugriff für Ihr Desktop-/ Mobilsystem, um das API-Zugriffstoken zu erhalten
Hinweis: Wenn Ihr Unternehmen mehr als ein Desktop-/Mobilsystem hat, müssen Sie separate API-Aufrufe für jedes System tätigen.
Anwendung zum Konfigurieren und Ausführen von Aufrufen (z. B. Zapier oder Postman) an die Benachrichtigungs-API.
Sie müssen eine Anwendung haben, die authentifizierte ausgehende REST-API-Aufrufe tätigen kann. Wenn Sie sich nicht sicher sind, ob Ihr Unternehmen über eine solche Anwendung verfügt, wenden Sie sich an Ihr IT-Team, um Optionen zu besprechen.
Funktionsweise
Folgendes benötigen Sie von WalkMe, um die API zu aktivieren. Nachfolgend erfahren Sie, wie Sie alles erfassen können.
Authentifizierung und Erstellung eines Zugriffstokens
Identifizierung der Benachrichtigung des Kommunikationszentrums und des Zielpublikums
Erstellen der JSON-Nutzlast
Den Aufruf tätigen
Insbesondere finden Sie hier die notwendigen Informationen, um eine JSON-Benachrichtigung mit den folgenden Informationen zu verwenden:
System-ID
Benachrichtigungsvorlage-ID
Endbenutzer-ID oder Zielgruppen-ID
Benachrichtigungsart: Popup oder Push
Benachrichtigungstitel
Beschreibung
Informationen überschreiben
Authentifizierung und Erstellung eines Zugriffstokens
Was ist ein Zugriffstoken?
Ein Zugriffstoken ist eine Anmeldeinformation, das von einer Anwendung zum Zugriff auf eine API verwendet werden kann. Sie informieren die API, dass der Inhaber des Tokens berechtigt ist, auf eine bestimmte Aktion zuzugreifen.
Das Zugriffstoken authentifiziert den API-Aufruf und erteilt der Anwendung die Berechtigung, Daten aus ihrem System an das Menü zu übergeben.
Erstellen von Zugriffstoken
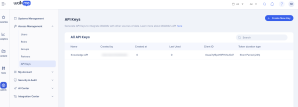
Gehen Sie zur Konsole
Wählen Sie die Kategorie Admin Center
Wählen Sie Zugriffsverwaltung aus
Wählen Sie die Seite API-Schlüssel aus.
Klicken Sie auf Neuen Schlüssel erstellen
Im Bedienfeld „Create new key“:
Benennen Sie den Schlüssel
Tipp: Geben Sie den Zweck des Schlüssels im Namen an, um Ihnen zu helfen, sich später zu erinnern.
Aktivieren Sie Notification API (Benachrichtigungs-API)
Wählen Sie Write (Schreiben) aus dem Dropdown-Menü aus
Klicken Sie auf Create (Erstellen).
Im Bedienfeld „Key Details“:
Kopieren der Client ID und des Client-Secret
Speichern des Client-Secrets
Sie werden das Secret nicht wieder sehen, also speichern Sie es irgendwo zugänglich, Sie werden es bald wieder brauchen.
Authentifizierungs-Token
Für zusätzlichen Support und um das Authentifizierungs-Token zu erhalten: Seite der Entwickler
ComCenter-Benachrichtigung und Zielgruppen-ID
Erstellen Sie eine Benachrichtigungsvorlage
Wechseln Sie zum Kommunikationszentrum und erstellen Sie eine benutzerdefinierte Vorlage (Erstellen einer Meldung) Bei der Meldung, die Sie für die API erstellen, sind einige Dinge zu beachten:
Die Meldung kann nur über eine Schaltfläche verfügen
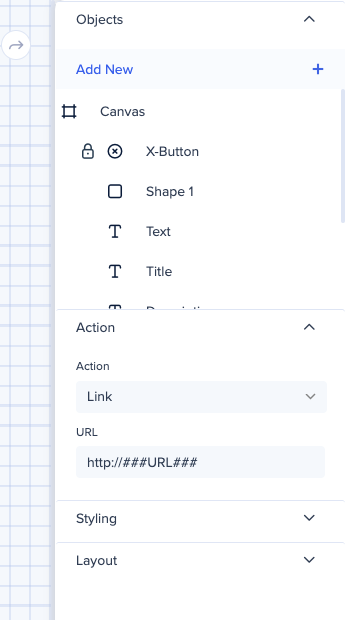
Die Schaltflächenaktion kann nur die Link Action verwenden
Sie können dynamische Links oder WalkMe-Permalinks verwenden.
Sie können die Meldung nicht mehr bearbeiten, nachdem Sie die API konfiguriert haben. Daher müssen Sie überprüfen, ob Sie mit Ihrer Meldung einverstanden sind.
Optional: Ergänzen Sie die Vorlage mit Überschreibungsregeln
Wenn Sie möchten, dass eine Benachrichtigung entweder für den Benutzer oder für das Ereignis personalisiert wird, das ausgelöst wird, können Sie dynamische Werte hinzufügen, die von der API automatisch ausgefüllt werden.
In der Abbildung sehen Sie zwei Beispiele für Werte, die mit dynamischem Text überschrieben werden, der je nach den Werten, die die API auslöst, ersetzt wird.
Dies ist ein Beispiel für eine API-Benachrichtigung mit Salesforce, die ausgelöst wird, wenn ein neuer Lead zugewiesen wurde. Der Vertriebsmitarbeiter wird über den Namen der Verkaufschance und den Link zum Lead in Salesforce informiert.
###OPP_NAME_ATTRIBUTE### wird in Salesforce durch den Namen der Verkaufschance ersetzt.
###URL### wird durch eine tatsächliche URL ersetzt, sodass bei jedem Auslösen der API eine benutzerdefinierte Aktion für jeden Benutzer möglich ist.
Anmerkung
Der Wertname (Beispiel: OPP_NAME_ATTRIBUTE) muss exakt in die JSON kopiert werden, damit er ersetzt werden kann
URLs müssen mit einem der folgenden Begriffe beginnen:
http://
https://
walkme-workstation://{}
mailto:
Kopieren Sie die erforderlichen Werte
Die folgenden Schritte verbinden die Benachrichtigung mit der API.
Kopieren Sie die von Ihnen erstellte Benutzerdefinierte Vorlagen-ID
Klicken Sie auf New Notification (Neue Benachrichtigung)
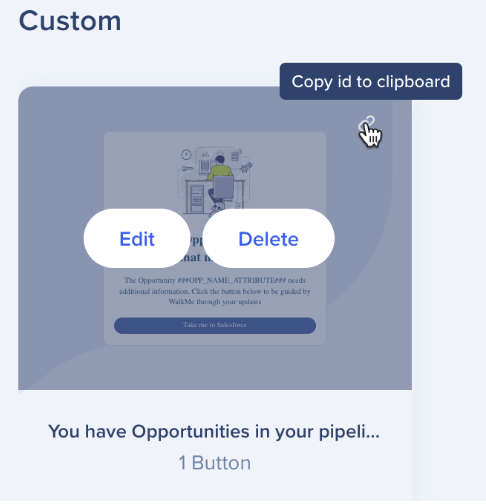
Fahren Sie unter Benutzerdefinierte Vorlagen > mit dem Mauszeiger über die Ecke der Meldung
Klicken Sie auf das Kopieren-Symbol, um die ID in Ihre Zwischenablage zu kopieren.
Beispiel: 75cfcba6-c320-42cb-938e-4c2bd08a43a3
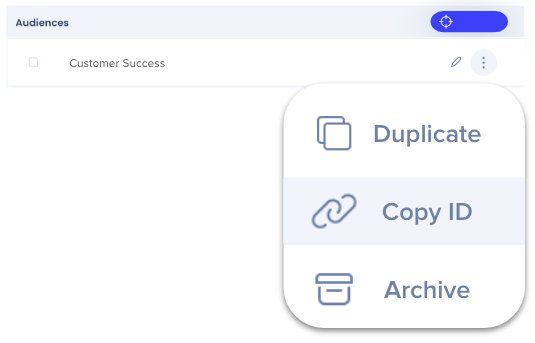
Kopieren Sie die Zielgruppen ID
Endbenutzer-ID vs. Zielgruppe
Eine Zielgruppe ist effizienter, aber Sie können auch bis zu 100 Benutzer basierend auf ihrer Endbenutzer-ID ansprechen. Wir empfehlen die Erstellung einer Zielgruppe, wenn Sie mehr als 10 Endbenutzer-IDs verwenden möchten.
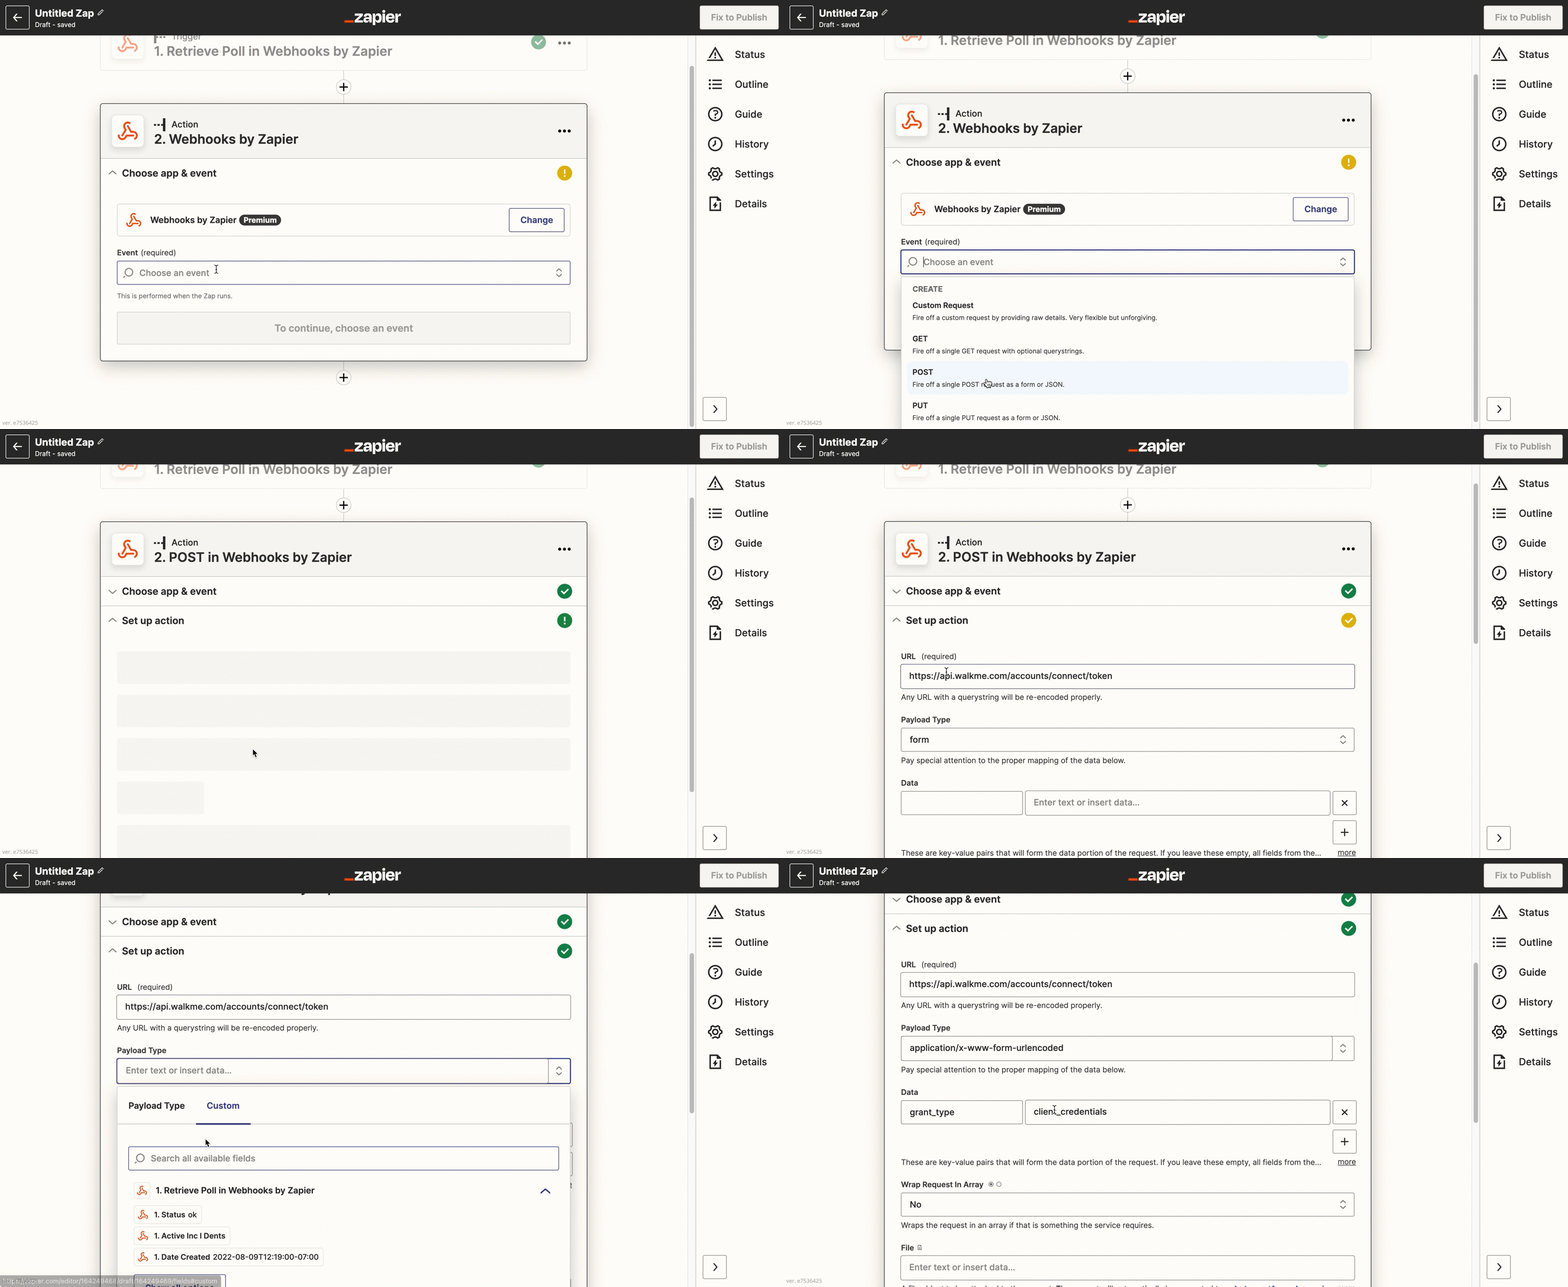
Now it's time to fill in some information on your API connection application. For clarity, we use Zapier to explain, but we are not endorsing this application over any other. Any similar app will work.
The information used below is universally necessary on all applications:
Payload Type = (Content-Type) application/x-www-form-urlencoded
Data = grant_type → client_credentials
Add Basic Authentication
When using basic Auth, the clientID is the username and the client secret is used as the password.
Client ID | Client Secret (copied from Admin Center)
Example
0o234234234UqD5d7 | JVnD346346346436345asfgasgbPt_4T7h2_
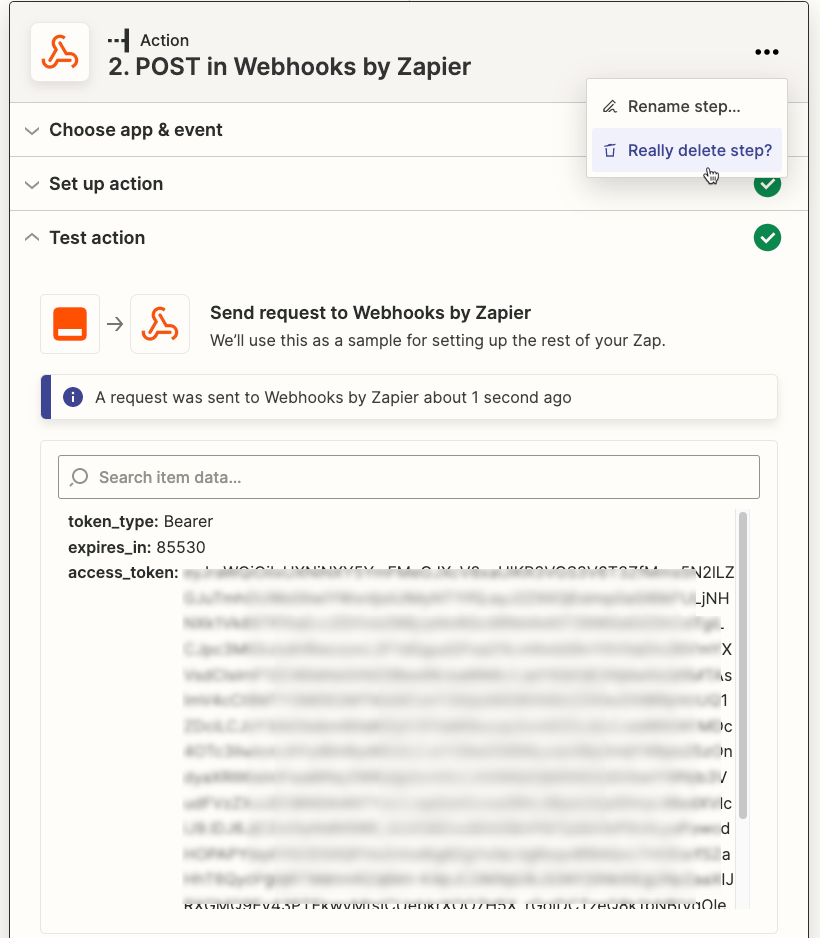
Once you've added this information, you will be given an access token.
Copy your Access Token
If you're using Zapier, you can delete this step after you've copied the token.
Update the JSON code
Now it's time to fill in the blanks and use the JSON code that will call the notification.
{
"notification": {
"systemId": "<the workstation system id>", //Required if you have more than one workstation system
"templateId": "<template id>", //Required
"endUsersIds": ["<end user id 1>","<end user id 2>","<...>"], //You need either end-user ID or audience ID (you can use both), remove the one you aren't using
"audiencesIds": ["<audience id 1>","<audience id 2>","<...>"], //You need either end-user ID or audience ID (you can use both), remove the one you aren't using
"notificationType": "<how notification will display, push v popup>", //Optional, default push, remove if not using
"title": "<notification title as appears in the ComCenter notification table>", //Optional, remove if not using
"runtimeTitle": "<what will appear to end-users in the Workstation list and in the push notification>", //Optional, remove if not using
"runtimeDescription": "<what will appear to end-users i in the Workstation list and in the push message>", //Optional, remove if not using
"startAt": "<start date YYYY-MM-DD hh:mm>", // Optional, default right now, timezone is UTC, you can add a date and no time, default time is 00:00 UTC, remove whatever you are not using
"endAt": "<end date YYYY-MM-DD hh:mm>", // Optional, default 30 days from now, you can add a date and no time, default time is 00:00, remove whatever you are not using
"override": [
{
"key" : "<the placeholder string to replace in the notification template>",
"value" : "<the value to put into the notification instead of the placeholder>"
}
// More comma separated {key:value} pairs can follow
// For example, the value could be a URL that is passed from ServiceNow to open a ticket
]
}
}
Entfernen Sie die Zeilen, die Sie nicht verwenden
Wenn optionale Zeilen vorhanden sind, die Sie nicht ausfüllen, entfernen Sie sie aus Ihrem endgültigen Code, um Fehler zu vermeiden
Endbenutzer- und Zielgruppen-ID
endUsersIds und audiencesIds sind Arrays und müssen in Klammern [] geschrieben werden, und jede Zeichenfolge sollte durch ein Kommagetrennt sein ["<id1>","<id2>","<...>"]
Die Standard-Zeitzone ist UTC
Die Standard-Zeitzone ist UTC, aber wenn Sie die Benachrichtigung gemäß einer anderen Zeitzone senden möchten, können Sie diese dazuzählen oder von UTC subtrahieren. Zum Beispiel würde „2023-05-10T11:30:00+03:00“ um UTC+3 gesendet und die entsprechende Zeit in UTC wäre „08:30:00“ (3 Stunden von der angegebenen Zeit subtrahiert).
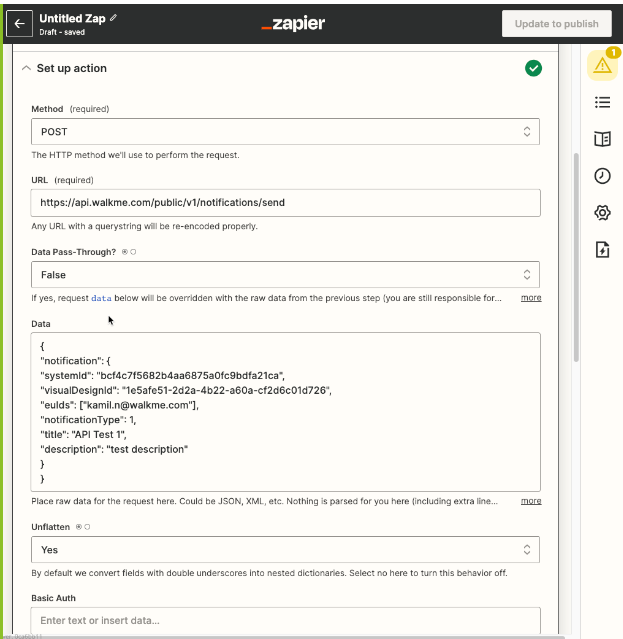
Here is an example of the JSON code with real data with few lines removed to make it simpler.
Now that we have the information we need, let's connect the dots. To make the call (connect the systems to create and publish new notifications in your organization's desktop/mobile menu), you'll need your JSON plus: